

Missing evidence can weaken your storm damage claim. I know this is stressful, so here's a simple way to help. When a storm hits, every detail matters. You can use your smartphone to snap clear photos of cracked windows, bent gutters, or any other signs of damage. In this guide, we explain easy, step-by-step methods to document your property damage. We show you what to look for and how to record it. This way, you can move quickly and get the repairs you need.
Immediate Documentation Steps for Storm Damage Claims
Before you start cleaning up, please take a moment to check for hazards. Make sure there is no exposed wiring, falling debris, or any other dangers. Stay away from damaged areas until you are sure it is safe. Do not make any repairs until you have fully documented the damage and an insurance adjuster has inspected your property.
It is important to record the damage as soon as you can to avoid any disputes later. Use your smartphone to take clear photos and videos. This real-time capture helps you and your insurer see exactly how the storm affected your home.
Here are some key points to document:
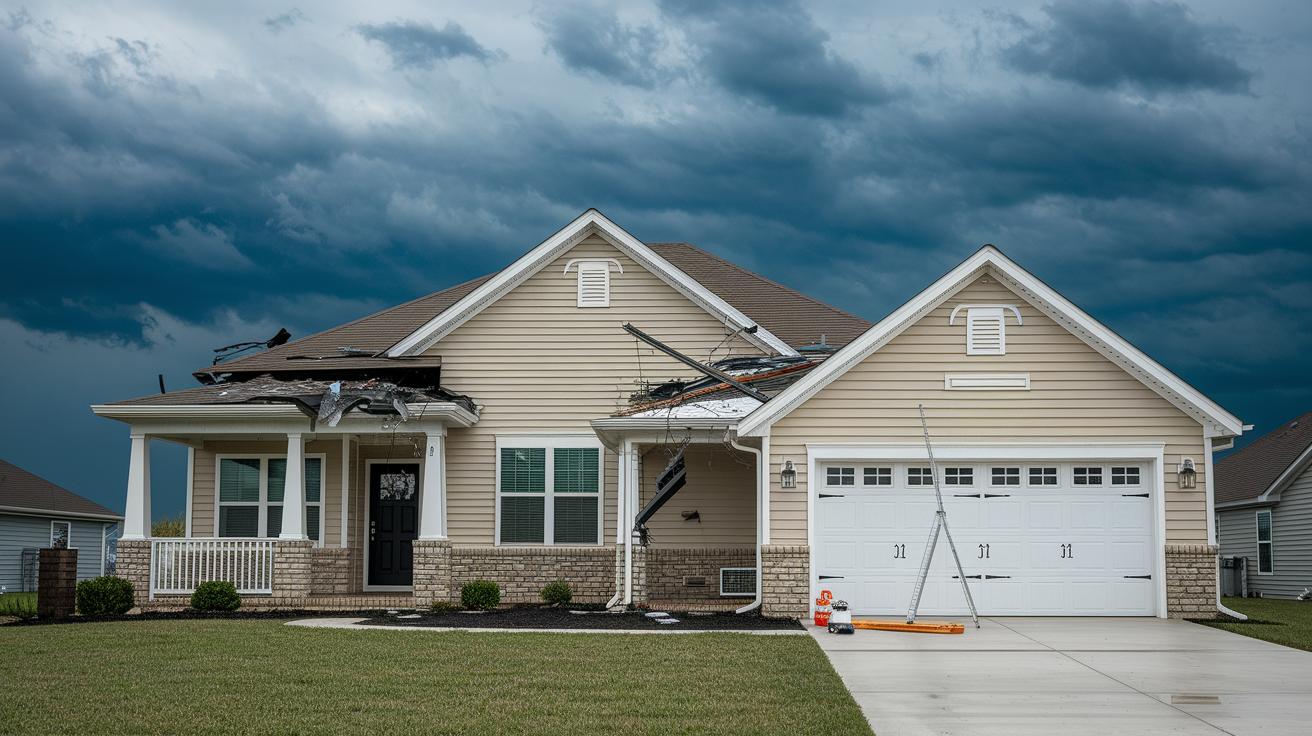
- Roof edges that show missing shingles or bent parts
- Gutters that are damaged by debris or impacts
- Windows with shattered glass or cracks
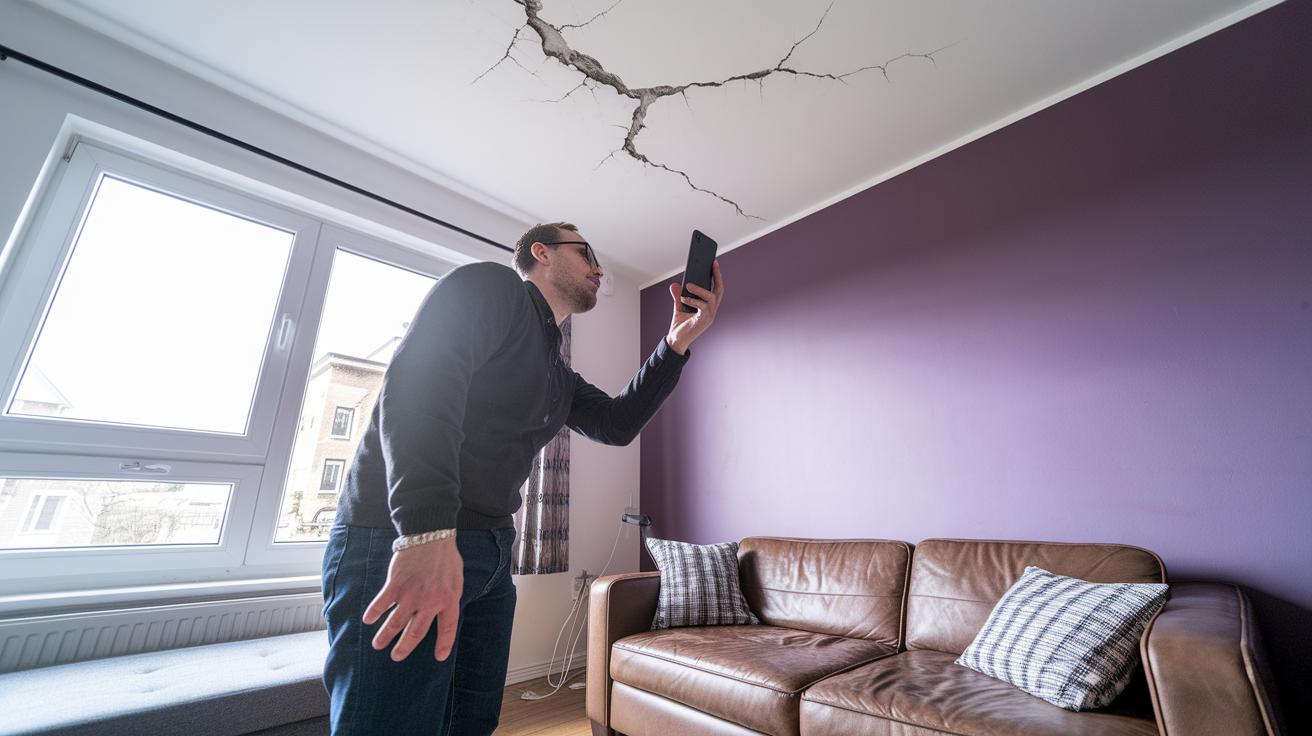
- Cracks in the foundation that signal structural stress
- Stains on ceilings from water leaks
- How your personal property is arranged, especially any items that were moved or damaged
These records form the basis for your insurance claim. They provide clear, visual evidence of the storm's impact so you can support your case for repairs.
Technical Evidence Gathering for Structural Damage in Storm Claims
Storms can hit your home hard. Not only do strong winds send debris flying, but water also seeps in and causes damage. Our experts work quickly to check both wind and water impacts. They look closely at things like a weakened roof or walls that might be hurt by the storm.
Wind Damage Assessment
When we examine wind damage, we start with a careful look at your roof and walls. We check all the shingles and siding for any that are missing, loose, or torn. We note where debris might have hit and measure those spots. This helps us build a clear record that shows wind was a factor in the damage.
Flood Damage Assessment
For flood damage, we inspect every part of your home that might have let water in. We look for watermarks on walls and ceilings and check the floors for signs of buckling or warping. We take pictures of any standing water and note stains that show how water moved through the house. This information helps us track the water’s path and understand the damage it caused.
By combining clear photos and detailed checks, we create a complete report. This thorough record helps insurers understand both the obvious and hidden damage so your claim can be handled accurately.
Organizing and Preserving Evidence for Storm Damage Claims
Keeping your evidence organized makes filing your claim easier. Start by placing your digital files into folders with clear names. Add details like the date, location, and a brief description (metadata) to each file so you know exactly what they show. At the same time, store hard copies such as receipts, lists of damaged items, and contractor estimates in a waterproof binder to protect them from further damage. Keep your original videos and printed photo logs safe so nothing gets accidentally erased. This simple, careful approach builds a strong record that shows every detail of the storm damage to your insurer.
| Method | Description | Pros | Cons |
|---|---|---|---|
| Cloud Backup | Online storage of images and documents | Accessible anywhere; auto-syncs files | Needs Internet and a subscription |
| Local Drive | External hard drive or SSD that is encrypted | Complete control; no recurring fees | May fail or be stolen |
| Physical Binder | Printed photos, receipts, and timelines | Easy to review; no technical knowledge needed | Risk of getting lost or damaged by moisture |
Review both your digital and paper records often. Back up your files in more than one location. This extra step helps ensure nothing is missed before you file your claim, making your documentation as solid as possible.
Building a Comprehensive Checklist for Storm Damage Claims Evidence
A clear checklist helps you catch every detail so nothing gets missed. Use a simple plan to organize notes on outside damage and losses in your home. It’s a good idea to add notes about how things looked before the storm for extra proof.
For the Exterior & Structural section, check for damage you can see. Look at your roof, siding, and windows for signs of problems like leaks, tears, or breaks. These details guide our repair plans.
In the Interior & Contents section, focus on areas where water came in. Note any wet spots, warped floors, or damaged items. Write a list of what you lost and get repair cost quotes from a few contractors. Take photos and include any inspection reports that show what things looked like before the storm. This complete record builds a strong claim.
Finally, in the Communications & Timeline section, write down every conversation with your adjuster. Record the dates, times, and main points from your discussions. This helps keep everything organized in case you need to appeal later.
Collaborating with Adjusters and Expert Witnesses on Storm Damage Claims
Working with adjusters and expert witnesses is essential for building a strong storm damage claim. We know this process can be stressful, so clear and simple evidence is key. Adjusters review your photos, receipts, records, and detailed estimates in person. Their inspection helps catch any missing details, and their guidance shows you how to present your evidence clearly. By teaming up with these professionals, you can rest assured every part of your claim is carefully checked.
Understanding Adjuster Field Reports
Your adjuster walks through the damaged areas and reviews all the evidence you have gathered. They check your records line by line to find any gaps or differences with what they observe. This careful review shows how well your documents match the actual damage. When you present your organized evidence during the inspection, it shows that you are prepared and serious about your claim.
Leveraging Expert Opinion Frameworks
For larger claims, bringing in an independent expert, like a public adjuster or structural engineer, can really strengthen your case. These experts perform their own unbiased inspection and create a detailed report that breaks down the damage and estimates the repair costs. They also check for hidden issues that might not be obvious at first glance. Their clear report and fee details give you the expert backup you need when talking with your insurer.
By combining the adjuster’s findings with an independent expert’s report, you create a strong claim package that covers every detail. This integrated approach reduces the chance of oversights and clearly shows the true extent of the storm damage.
Leveraging Technology for High-Quality Evidence in Storm Damage Claims
High-resolution photos help prove storm damage. Use your smartphone’s best setting to capture clear, detailed images of every crack, stain, or dent. Make sure you use the grid lines on your phone so each picture is balanced. Add details like the date, time, and location (extra information automatically added by some apps) to create a clear timeline for your claim.
For the best results, check the light before taking pictures. Use natural light or a steady artificial light source so colors and damage show accurately. Capture several shots from different angles and record a short video walkthrough that points out key damage areas. Hold your phone steady to prevent blur and take extra pictures for backup. These steps give you a complete record and help prevent issues with your claim later.
For spots that are hard to reach, consider using a drone or a 360° camera. These tools can capture aerial views that show the entire roof and hidden areas like gutters or balconies. They help fill in the gaps left by ground photos, ensuring every part of your home's damage is clearly documented.
Submitting Storm Damage Evidence and Following Up with Insurers
After a storm, gather all your photos, receipts, estimates, and written notes into one complete package. Send everything using your insurer's preferred method, such as their online portal or approved email. Filing promptly helps you meet policy deadlines and manage deductibles that may range from $500 to $2,000.
Keep a simple log of every phone call, email, and meeting with your insurer. Write down the date, time, representative names, and key details from each conversation. Also, save any submission receipts and confirmation numbers so you can refer to them later if needed.
When you receive the initial settlement offer, review it carefully. Compare the Replacement Cost Value (RCV, or the cost to fully replace damaged property) with the Actual Cash Value (ACV, or the value after depreciation). If the offer doesn’t fully cover your losses, use your extra documentation to create a clear counter-offer. Be sure to check appeal deadlines so you have time to submit more evidence or explain any issues.
Final Words
In the action, you captured photos, videos, and notes to document damage inside and out. You built a checklist that covers exterior and interior details, recording essential steps. You also safeguarded your evidence with smart technology and secure archives. This strong evidence collection for storm damage claims sets the stage for a smoother insurance process. Each step brings you closer to restoring your property safely. Stay proactive, and remember that your careful documentation makes all the difference.
FAQ
Q: What does evidence collection for storm damage claims template include?
A: The evidence collection template includes photos, videos, and written notes that document both interior and exterior damage. It also provides a clear format that can serve as a formal letter for storm damage claims.
Q: How does evidence collection for storm damage claims differ in Texas and California?
A: The evidence collection process in Texas and California follows the same steps—perform safety checks and capture detailed damage. Local insurers might have extra requirements, so always consult your provider for specific guidelines.