

Think a small ceiling bulge is just an eyesore? Think again.
A sagging ceiling is a structural warning: drywall soaked with water, wet insulation piling weight, and gravity ready to win.
You need to act fast. Clear the room, cut power at the breaker, stop the leak, and relieve pooled water if it’s holding gallons.
This post walks you step-by-step through stabilizing the ceiling, finding the leak, drying and documenting damage for insurance, and repairing or replacing drywall so the fix lasts.
Immediate Actions to Stabilize a Sagging Ceiling from Water Damage

When water pools above drywall, the ceiling can hold its shape for a while. Then it suddenly lets go. A sagging ceiling isn’t just cosmetic, it’s a structural warning. The drywall has absorbed enough water to lose rigidity, and the weight of trapped water, wet insulation, and gravity are pulling it down. If you see a bulge dropping more than an inch, or if the surface feels soft when you press gently from below, you’re looking at high collapse risk.
Your first job is to protect people and stop the damage from spreading. Don’t stand directly under the bulge. Don’t try to push it back up or tape it in place. The ceiling is holding gallons of water, and it can give way without much warning.
Clear the area, get your household out from under the sag, and prepare to act quickly. Here’s the sequence:
-
Evacuate the area. Move people, pets, and anything you care about out from under the bulge and into another room.
-
Shut off electricity to the affected room at the breaker. Water and wiring don’t mix. Even if the leak seems far from a fixture, moisture can track along framing and reach junction boxes.
-
Stop the water source immediately. If it’s a burst pipe, shut the valve or the main. If it’s a roof leak, tarp the exterior if safe to do so. If you can’t find the source or reach it safely, call a plumber now. Emergency visits typically run $150 to $450, but that beats a collapsed ceiling.
-
Place a sturdy 5 gallon bucket and thick towels directly under the lowest point of the bulge. Ceiling bulges can hold anywhere from 1 to over 10 gallons, depending on the span and how long the leak ran.
-
Relieve pooled water if the bulge is severe. Wear an N95 mask, goggles, and gloves. Use a flat head screwdriver to carefully puncture the drywall at the lowest center point, near a seam if possible. Let the water drain into your bucket. Expect a rush. Swap buckets if you fill the first one.
-
Use a wet/dry vacuum to remove any standing water you can reach. Rental shop vacs cost around $50 per day and pull water faster than gravity alone.
-
Call Fire Flood Rescue if the sag exceeds 1 inch, if you hear creaking, or if you can’t safely stop the source. Structural compromise and hidden damage in the attic or framing require trained eyes and proper equipment. Fire Flood Rescue responds 24/7, often within 60 to 90 minutes, with fully equipped trucks ready to stabilize the damage and begin drying immediately.
Assessing Water Damage Severity in a Stabilized Sagging Ceiling
Once the immediate danger is controlled and the leak is stopped, you need to understand how deep the damage goes. A stain on drywall is one thing. Rot in the framing is another. The difference determines whether you patch and paint or whether you gut and rebuild.
Start by measuring the sag. Use a straight board or string line across the ceiling. If the lowest point drops more than half an inch below the plane, that’s significant. Anything over an inch, or any area that feels spongy or makes noise when you press gently, means the drywall has failed and the framing above may be compromised. Check for these warning signs:
Discoloration spreading beyond the bulge. Brown or yellow rings mean water traveled farther than you see on the surface.
Soft or crumbling texture when you touch the drywall. Wet gypsum loses its structure and won’t hold fasteners.
Visible mold or black spotting. Mold can begin growing within 24 to 48 hours in wet conditions.
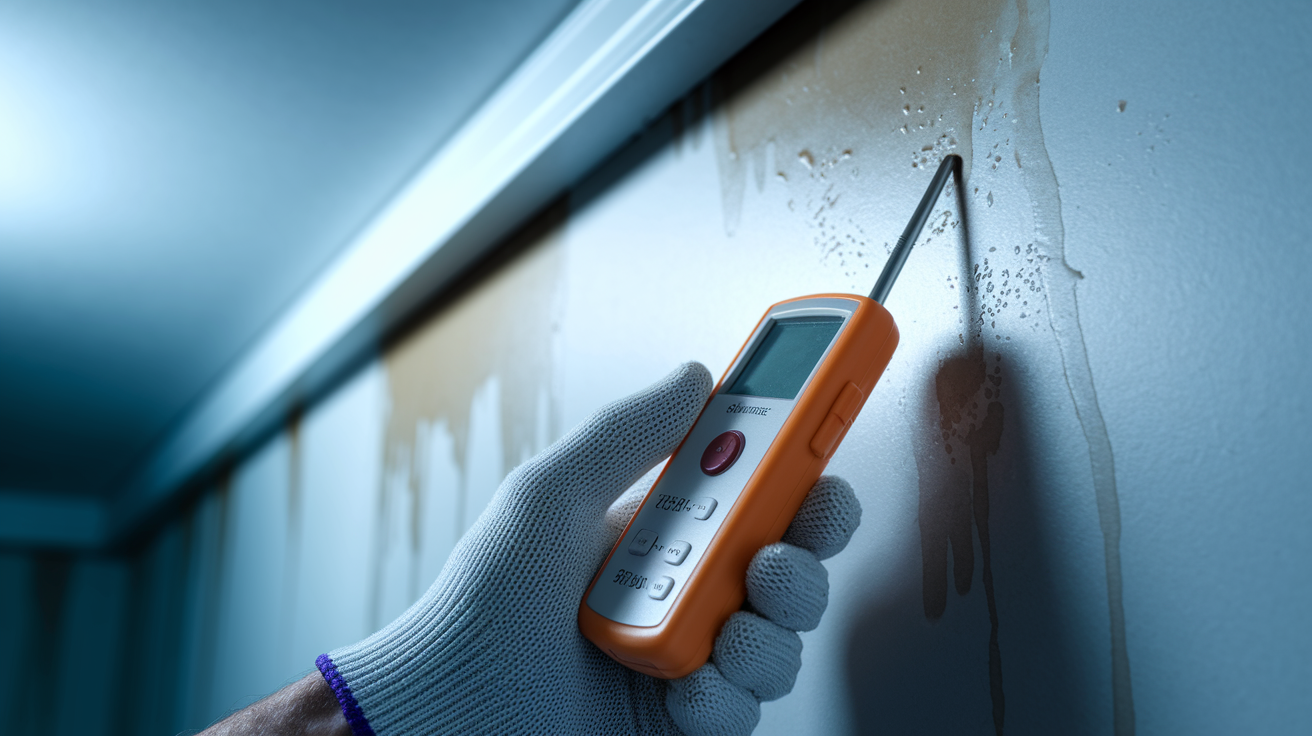
Rotten or dark streaks on ceiling joists (if you can see into the attic). Wood moisture content above 16 percent invites decay. Use a pin type or pinless moisture meter to confirm dryness. Wood framing should read below 16 percent before you close anything up.
Saturated insulation in the attic. Fiberglass or cellulose that has absorbed water will drip, lose R value, and hold moisture against framing for days.
Musty or sour smell. If the air smells off, hidden moisture or early mold growth is likely.
Fire Flood Rescue uses professional grade moisture meters and, in some cases, infrared thermal imaging to find moisture behind surfaces. This approach matters because hidden moisture is one of the biggest causes of repeat damage: warped floors, failing drywall, recurring mold, and odor problems.
Identifying the Long Term Leak Source Behind a Sagging Ceiling

Stopping the water during an emergency is one step. Finding out why it happened in the first place is another. Water doesn’t always drip straight down. It can travel along joists, soak into insulation, and appear ten feet away from the actual breach. That makes tracing the source harder than it looks.
Plumbing leaks tend to show up in patterns. A burst supply line or failed drain pipe will often drip steadily or surge when fixtures are used. If the stain appeared after someone used an upstairs bathroom or ran the washing machine, start there. Check under sinks, around toilet bases, and along visible pipe runs. Look for corrosion, pinhole leaks, or loose fittings. If the plumbing is hidden in walls or above finished ceilings, you may need a plumber with a camera scope to confirm the break.
Roof leaks behave differently. They show up after storms, heavy rain, or wind events. Water enters through damaged shingles, torn flashing, or clogged gutters, then runs down rafters or sheathing until it finds a low spot, often at a seam in the drywall or near a ceiling penetration like a light fixture. If the stain is near an exterior wall, a chimney, or a roof valley, inspect those areas first. Look for missing shingles, cracked caulking, or rusted flashing.
HVAC condensate line clogs are another common culprit, especially in attics with air handlers. If the drip coincides with cooling or heating cycles, check the drain pan and line for blockages. Overflowing tubs or sinks on upper floors can also saturate ceilings below if a drain backup or forgotten faucet runs long enough.
The key is to match the timing, location, and frequency of the staining to the most likely source, then confirm it visually or with help from a pro. Fire Flood Rescue technicians are trained to trace leak sources using a combination of visual inspection, moisture mapping, and testing to pinpoint where water entered, not just where it appeared.
Drying Out a Water Damaged Sagging Ceiling and Surrounding Cavities
Wet drywall and framing won’t repair themselves. You have to pull the moisture out before you can patch, prime, or paint. Drying means more than wiping down the surface. It means removing standing water, eliminating saturated insulation, and running equipment that moves air and drops humidity. Skipping this step or rushing it leads to hidden mold, rot, and repairs that fail within months.
Start by opening access to the affected cavity. If the drywall is still intact but sagging, you may need to cut a small inspection hole to remove soaked insulation and assess moisture levels inside the joist bays. If the ceiling has already been punctured or partially removed, pull out any wet insulation immediately. It will hold water against the framing and slow everything down. Bag it and dispose of it. Insulation that has been soaked can’t be saved.
Best Practices for Effective Drying
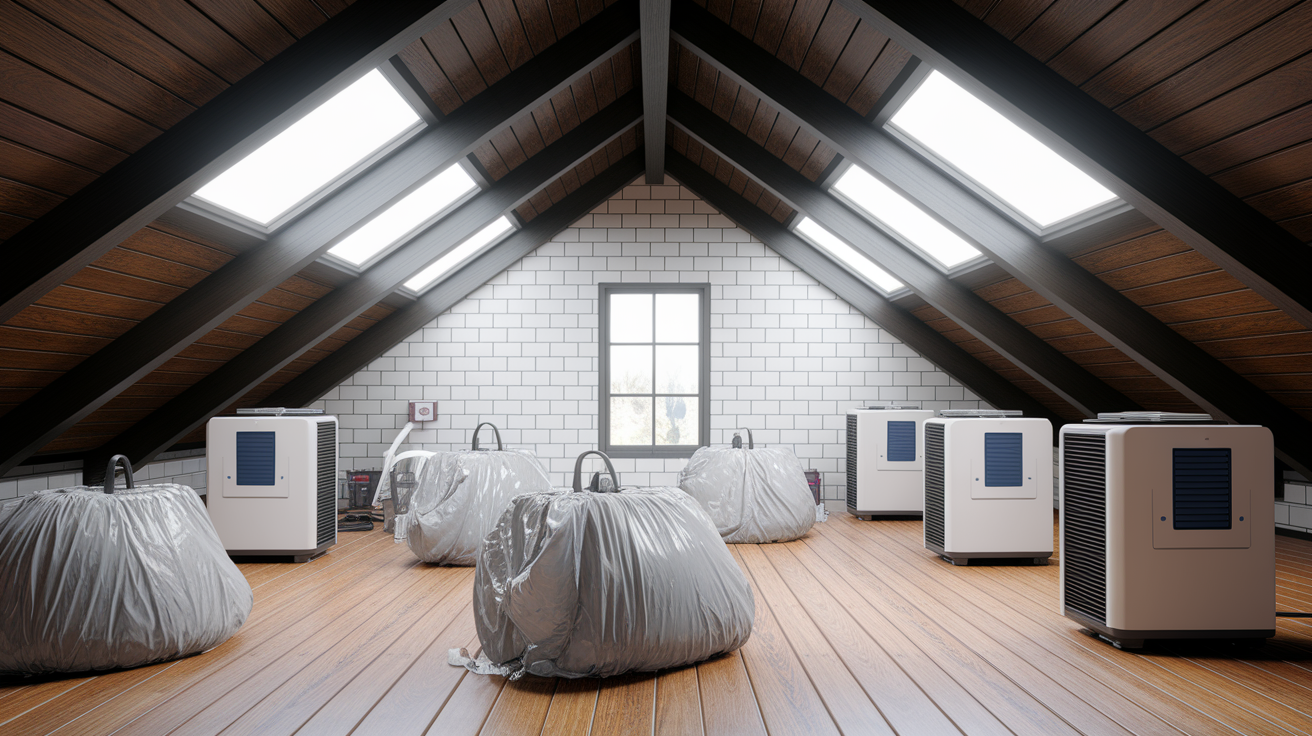
Set up airflow across the wet surfaces. Use at least one or two high capacity box fans aimed at the ceiling and attic opening if accessible. Add a dehumidifier rated for 30 to 70 pints per day, depending on the size of the room and the severity of the wetting. Place it in the center of the space and keep windows and doors closed so the unit can pull moisture from the air efficiently.
If there’s any suspicion of mold spores (musty smell, visible spots, or confirmed growth), add a HEPA air scrubber to filter the air while drying. Fire Flood Rescue uses industrial grade dehumidifiers, air movers, and HEPA filtration equipment to accelerate drying and protect building materials. This equipment matters because professional units dry faster and more thoroughly than hardware store rentals.
Containment matters. If the affected area is large or if mold is present, seal doorways with plastic sheeting and painter’s tape to prevent spores or humid air from spreading to other rooms. Run your drying equipment continuously. Check framing and drywall with a moisture meter twice a day. For moderate wetting, expect 24 to 72 hours of drying time. Heavy saturation, especially in thick insulation or multiple ceiling layers, can require five to seven days.
Don’t begin repairs until the moisture meter confirms wood framing reads below 16 percent moisture content and drywall surfaces approach ambient levels. Closing up wet cavities invites mold, odor, and future structural failure.
Safely Removing Sagging or Wet Ceiling Drywall
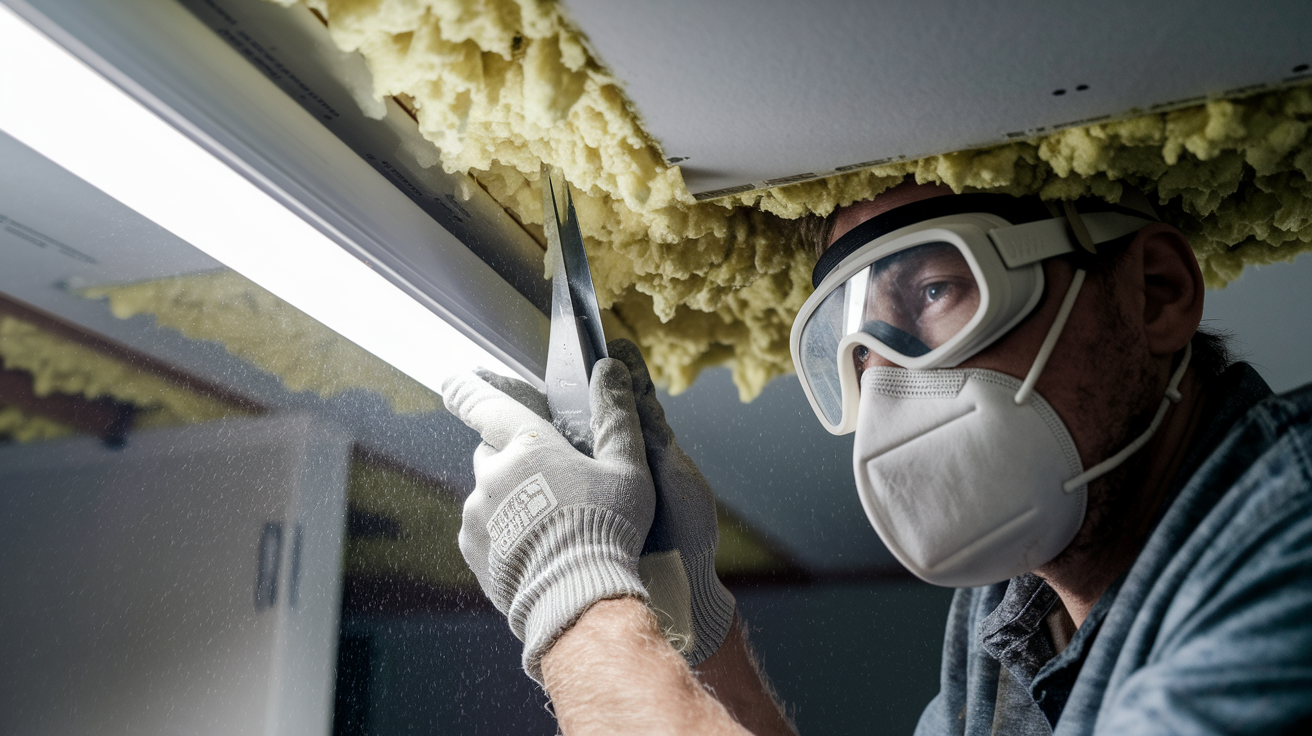
Once the area is dry and you’ve confirmed the extent of damage, you can remove the compromised drywall. This is messy, dusty work. Insulation, drywall dust, and debris will fall. Prep the room by covering floors and furniture with heavy plastic sheeting, and wear full PPE: an N95 or P100 respirator, safety goggles, and work gloves.
If the ceiling is still bulging or holding residual water, relieve that first using the bucket and puncture method described earlier. Don’t try to remove drywall while water is pooled above it. You’ll get soaked, and the added weight makes the material unstable.
After draining, assess how much drywall needs to come out. If the damage is localized to a small area with no mold and the surrounding material is dry and firm, you can cut a patch. For larger areas, or anywhere mold is visible, remove drywall back to the nearest joist on each side so you have clean, solid framing to attach new panels.
Mark your cut lines with a pencil and straightedge. Extend cuts to the center of a joist so the new drywall will have backing to screw into. Use a utility knife to score the face paper, then snap the board along the line. For ceiling work, a drywall saw or reciprocating saw with a short blade works faster, but be careful not to cut into wiring, plumbing, or ductwork hidden above.
Once you’ve scored or cut the perimeter, pry gently with a flat bar to pull the drywall away from the joists. Fasteners may stay embedded in the framing. Pull those out with pliers or back them out with a drill. Here are the steps:
-
Score the perimeter of the damaged section with a utility knife. Extend cuts to the center of ceiling joists so new drywall has backing.
-
Cut through the drywall using a drywall saw or reciprocating saw. Watch for hidden obstacles like wires, pipes, ducts.
-
Pry the damaged panel away from the joists carefully. Use a flat pry bar and work from the edges inward.
-
Remove all screws or nails left in the framing. Pull them out with pliers, or back screws out with a drill.
-
Pull down any remaining wet or damaged insulation from the cavity. Bag and dispose of it immediately.
-
Inspect the framing for rot, mold, or structural damage. Mark any joists that need repair or reinforcement.
-
Vacuum the area to remove dust and small debris. A shop vac with a HEPA filter is ideal.
-
Wipe down exposed framing with a damp cloth. Let it dry fully before installing new drywall.
-
If mold is present on framing, treat with a mold killing cleaner. Let it dry and confirm no active growth remains.
-
Confirm moisture readings are safe. Wood should read below 16 percent on a moisture meter.
Inspecting and Repairing Ceiling Framing and Structural Damage

Removing the drywall gives you a clear view of what’s holding the ceiling up. Ceiling joists or roof trusses span the room and carry the weight of the drywall, insulation, and anything stored in the attic. When water soaks into wood framing, it softens the fibers, invites fungal decay, and reduces load bearing capacity. If more than 20 percent of a joist’s cross section is rotted, dark, spongy, or crumbling, that member has lost structural integrity and must be reinforced or replaced.
The most common repair is called sistering, attaching a new piece of lumber alongside the damaged joist and fastening the two together with screws or nails. For a simple sistering job on a single joist, expect costs in the range of $200 to $1,500 depending on access, length, and whether you hire a carpenter or do it yourself. If multiple joists are compromised, or if there’s evidence of sagging or deflection even after drying, call a structural engineer or licensed contractor before proceeding. Ceiling framing isn’t cosmetic. Mistakes here can lead to collapse.
| Issue | Severity Indicator | Repair Action |
|---|---|---|
| Joist rot or decay | Soft, dark wood; moisture >16%; loss of >20% cross section | Sister new joist alongside damaged member; fasten with 3″ screws every 12″–16″ |
| Mold growth on framing | Black, green, or white spots; musty odor | Clean with mold killing solution; allow to dry; apply encapsulant if needed |
| Deflection or sagging joists | Visible sag >1/4″ over span; creaking under light load | Add blocking or install sistered joist; verify fastener integrity |
| Loose or missing fasteners | Joists pulling away from hangers or top plates; visible gaps | Re-secure with joist hangers, structural screws, or hurricane ties |
Before you install new drywall, confirm that every joist in the repair area is dry, solid, and properly fastened. Add blocking between joists if the new drywall seam will fall between framing members. Blocking gives you a solid nailer and prevents future cracking.
Fire Flood Rescue handles both stabilization and the rebuilding work that follows. Their technicians are trained to identify structural issues during the tearout phase and can coordinate framing repairs or bring in licensed carpenters as needed to ensure the repair holds up long term.
Installing New Drywall After Removing Water Damaged Sections
With the framing dry, solid, and clear of mold, you can hang new drywall. For ceilings, use half inch drywall if your joists are spaced 16 inches on center, or upgrade to five eighths inch drywall if spacing is 24 inches or if you want extra sag resistance and soundproofing. Five eighths inch boards are heavier and harder to maneuver overhead, but they’re worth it in rooms where you’ve seen sagging before.
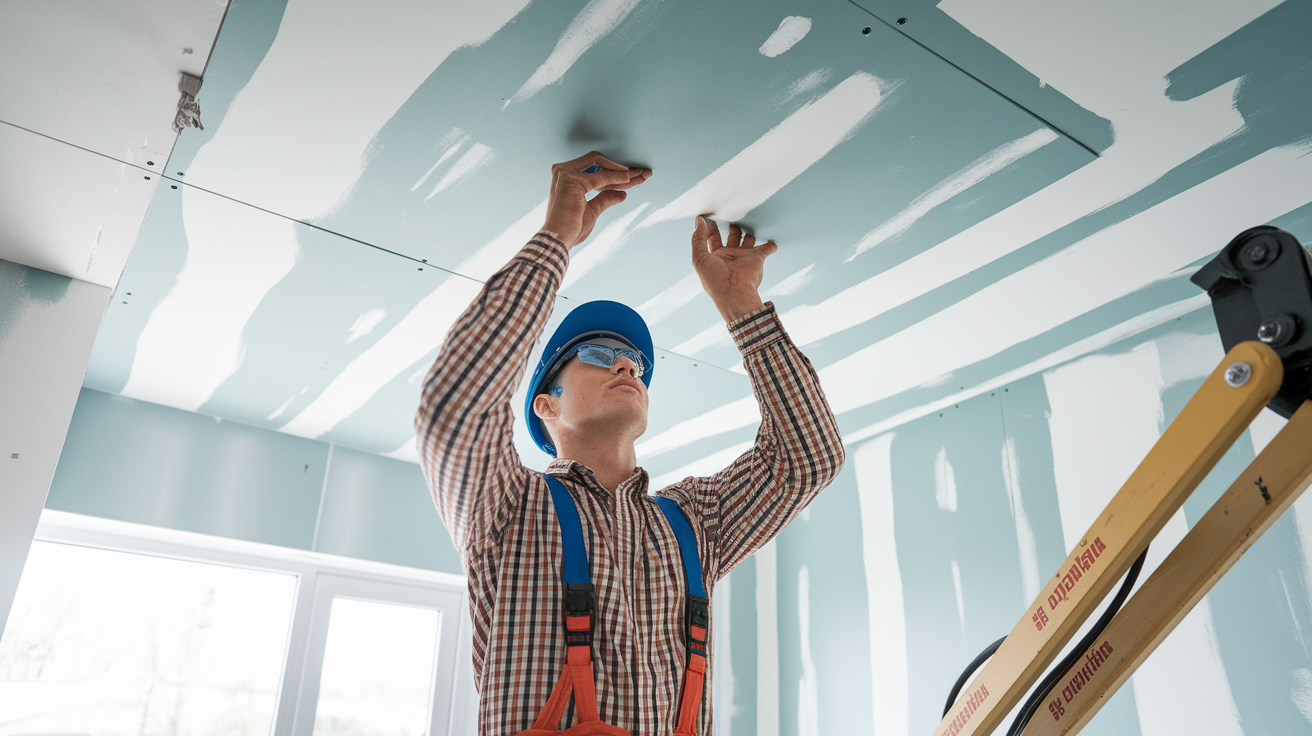
Measure the opening and cut your drywall sheet to size on the ground. Drywall should meet in the center of a joist, leaving room on each side of the seam for screws. Lift the panel into place. Ceiling work almost always requires a helper or a drywall lift if you’re working alone. Position the board so edges land on joist centers, then drive 1 1/4 inch coarse thread drywall screws through the panel into the framing. Screw spacing for ceilings should be every 8 to 12 inches along each joist. Sink screws just below the surface without breaking the face paper. A dimple is good; a torn hole is not.
Once all panels are hung, tape the seams. Apply a thin layer of all purpose joint compound along each seam, press paper or fiberglass mesh tape into the wet mud, then smooth over with a taping knife. Let it dry fully, usually 24 hours in normal conditions. Apply a second coat, feathering the edges wider than the first pass. Let that dry, then apply a third and final coat, sanding lightly between coats with fine grit sandpaper or a sanding sponge. Three coats are standard. Shortcuts here show up as visible ridges and shadows after paint.
Essential tools and materials for an 8 by 8 foot ceiling patch include:
One 4 by 8 foot sheet of half inch or five eighths inch drywall
One pound box of 1 1/4 inch coarse thread drywall screws (approximately 250 count)
One roll of paper drywall tape or fiberglass mesh tape
One gallon of all purpose joint compound (or quick set compound to shorten drying time)
Taping knife (6 inch and 10 inch widths)
Sanding block or pole sander with fine grit paper
Utility knife for scoring and trimming
T square or drywall square for marking straight cuts
Safety glasses and dust mask for sanding
Finishing Repairs: Texture, Priming, and Painting After Water Damage

After the final coat of joint compound has dried and been sanded smooth, wipe down the patched area with a damp cloth to remove dust. Let it dry completely, then apply a stain blocking primer. Water stains can bleed through regular paint, even after multiple coats. A stain blocking primer seals tannins, nicotine, and water marks so they don’t reappear. One quart typically covers a small patch; use a gallon if you’re priming an entire ceiling.
Once the primer is dry, apply ceiling paint. If your ceiling is flat white with no texture, two coats of quality ceiling paint will usually hide the repair. If your ceiling has texture (popcorn, knockdown, orange peel, or skip trowel), you’ll need to match it before painting, or the patch will stand out under angled light.
Techniques for Seamless Texture Matching
Popcorn texture is the most common ceiling finish in older homes. Matching it requires a spray texture hopper or aerosol texture in a can. Practice on scrap drywall first. Hold the hopper or can about two feet from the ceiling and apply in short, overlapping passes. Let the texture dry fully before priming and painting.
For knockdown texture, spray or hand apply joint compound in a stippled pattern, wait a few minutes until it starts to set, then lightly flatten the peaks with a wide taping knife. The timing is critical. Too soon and you smear it; too late and it hardens.
Orange peel and skip trowel finishes can be replicated with thinned joint compound applied by hand or spray gun, but these require practice to match existing patterns. If your ceiling texture is complex or you’re unsure, hire a professional taper or painter to blend the repair. Texture mismatches are hard to hide and often more noticeable than a color difference.
Mold Prevention and Remediation in Sagging Ceiling Repairs

Water damage and mold go together. Mold spores are everywhere in the air, but they only grow when they land on wet organic material like drywall paper, wood framing, insulation, dust. If your ceiling stayed wet for more than 48 hours, assume mold has started.
Small patches of surface mold on framing (less than 10 square feet total) can be cleaned by a homeowner using proper PPE and containment. Larger infestations, mold inside HVAC ducts, or mold on porous materials like insulation require professional remediation.
For minor mold on exposed framing after drywall removal, scrub the affected wood with a solution of water and detergent or a commercial mold killing cleaner. Let it dry, then treat with a mold encapsulant or stain blocking primer to prevent regrowth. Always use an N95 or P100 respirator, goggles, and chemical resistant gloves. Set up containment with plastic sheeting over doorways and run a HEPA air scrubber to capture airborne spores while you work.
Bag moldy insulation and debris in heavy plastic and dispose of it immediately. Don’t let it sit in the house. Professional mold remediation typically costs $500 to $6,000 depending on the extent of growth, access difficulty, and whether HVAC systems or structural cavities are involved.
Fire Flood Rescue uses HEPA air scrubbers and containment systems to reduce airborne particles during mold related repairs. Their technicians are IICRC certified for mold remediation, which means they follow industry protocols for safe removal, cleaning, and verification. Key steps to limit mold risk include:
Dry all wet materials within 24 to 48 hours of water intrusion using fans, dehumidifiers, and removal of saturated insulation.
Maintain indoor humidity below 60 percent during and after repairs.
Inspect hidden cavities like attic spaces and wall voids before closing up drywall.
Use stain blocking primer on all framing and drywall exposed to water, even if no visible mold appears.
If musty odors persist after drying and cleaning, call a mold inspector to test air quality and confirm the source.
Costs, Timeline, and When to Call Fire Flood Rescue for a Sagging Ceiling

Repairing a sagging ceiling from water damage isn’t a flat rate job. Costs depend on how much material failed, whether framing needs reinforcement, if mold is present, and who does the work. A minor stain with no structural damage (cleaned, primed, and repainted by a homeowner) might cost $50 to $500 in materials and supplies. Replacing a 4 by 8 section of drywall, including taping, finishing, and paint, typically runs $200 to $1,000 if you hire a handyman or drywall contractor. Major repairs involving multiple ceiling joists, mold remediation, and full room drywall replacement can range from $1,000 to $5,000 or more.
Professional water damage restoration companies charge differently. They include water extraction, drying equipment rental and monitoring, mold containment, and reconstruction services. Full service restoration for a ceiling collapse or severe water intrusion commonly costs $1,200 to $7,000, though complex jobs with structural repairs and extensive mold work can exceed $10,000 to $15,000. Emergency plumber visits to stop the leak add $150 to $450. Rental equipment (shop vacs, fans, dehumidifiers, HEPA scrubbers) can total $50 to $300 if you DIY the drying phase.
Timeline matters because moisture doesn’t wait. Stopping the leak happens the same day, ideally within the first two hours. Drying takes one to seven days depending on severity and equipment. Framing repairs and new drywall installation usually require one to three days of active work. Taping, finishing, priming, and painting add another one to three days, with waiting time between coats. A straightforward cosmetic repair might be done in a long weekend. A structural rebuild with mold remediation can stretch two weeks or longer if materials, inspections, or insurance delays come into play.
| Repair Type | Estimated Cost | Typical Timeline |
|---|---|---|
| Minor stain repair (clean, prime, paint) | $50–$500 | 1–2 days (plus drying time) |
| Localized drywall replacement (4×8 patch) | $200–$1,000 | 2–5 days (drying + install + finish) |
| Full ceiling replacement with structural repair and mold remediation | $1,000–$15,000+ | 1–3 weeks (depending on extent and insurance) |
Call Fire Flood Rescue immediately if your ceiling sag exceeds one inch, if you see visible mold covering more than 10 square feet, if you smell persistent musty odors even after drying, or if you can’t safely identify and stop the leak source. Structural timber that shows rot, heavy deflection, or loss of more than 20 percent of its cross section requires a licensed contractor or structural engineer.
If water reached electrical fixtures, junction boxes, or insulation around recessed lights, shut off power and call an electrician before you proceed. Fire Flood Rescue responds 24/7, often within 60 to 90 minutes, with fully equipped response trucks. Their technicians are IICRC certified for water, fire, and mold related repair work, and they handle both emergency stabilization and the full reconstruction process.
Insurance claims benefit from professional documentation like photos, moisture readings, detailed scopes, and written reports, especially when hidden damage appears during tearout. Fire Flood Rescue works directly with adjusters, prepares estimates, and supports supplements when hidden damage is discovered. This helps avoid delays, reduces back and forth paperwork, and speeds up the path to approved repairs. Their process is built to turn a chaotic home damage event into a clear, managed repair plan, restoring safety, comfort, and livability as quickly as possible.
Final Words
First, stop the leak, cut power if water reached fixtures, evacuate the area, and drain any bulges. These emergency steps keep people safe and prevent a collapse.
Next, check moisture with a meter, inspect the attic and framing, dry with fans and dehumidifiers, remove wet drywall and insulation, then repair joists and install new drywall before texture and paint. Take photos and logs for insurance.
For a clear plan on how to fix sagging ceiling from water damage, follow these steps or call a pro. Either way, you’ll get the space back to normal.
FAQ
Q: Can a water-damaged ceiling be fixed? Can a sagging ceiling be fixed?
A: A water-damaged or sagging ceiling can usually be fixed if you act fast; we stop the leak, drain bulges, dry and check framing, then repair or replace drywall and joists as needed.
Q: How much to fix a sagging ceiling from water damage?
A: The cost to fix a sagging ceiling from water damage ranges widely—about $200 to $5,000+—depending on drywall replacement, framing or joist repair, mold remediation, and any plumbing or roof work required.
Q: What does ceiling sagging look like?
A: Ceiling sagging looks like a bulge or droop, cracking or peeling paint, brown water stains, soft or creaking drywall, and sometimes visible wet insulation or attic staining that signals risk of collapse.