

Ever notice how wet floors can lead to slips and falls during water cleanup? Hidden puddles and damp surfaces pose a risk even when things seem under control. We know this can add stress to an already challenging situation.
Here are some simple steps to keep you and your team safe while you work on water damage:
- Check floors for damp spots and puddles.
- Fix any leaks to stop more water from getting on the floor.
- Remove excess water quickly using the proper tools.
- Wear the right gear to keep your footing secure.
A few smart moves can protect you and make cleanup safer. We’re here to help you get back to a safe, livable home.
Key Steps to Prevent Slips and Falls During Water Damage Cleanup
Water cleanup can be tough, but we can keep you safe by acting fast. We start by checking for dangers like long-lasting moisture that may lead to mold (mold usually shows up after about 72 hours), flooring rust, or surfaces that peel. Leaks can hide wet spots which make floors slippery and may cost more to fix later. Spotting these early lets you decide quickly to protect everyone.
- Check each floor carefully. Walk around and look for warped surfaces, rust spots, or any obvious damage that reduces grip.
- Stop leaks right away. Closing off active leaks helps cut down on dampness that can cause mold and damage surfaces.
- Remove standing water fast. Getting rid of puddles helps floors dry quicker.
- Use strong drying fans. These machines lower moisture fast, keeping the floors steady.
- Do walk-throughs often. Regular checks catch any new wet areas or changes in surfaces before they become a hazard.
Going through these steps gives you a strong plan against accidents. By inspecting every level, we can tackle risky spots early. Fixing leaks, extracting water, and using drying fans all work together to keep the area safe. Acting quickly helps protect your property and everyone working there.
Equip Proper Gear to Prevent Slips and Falls During Water Damage Cleanup
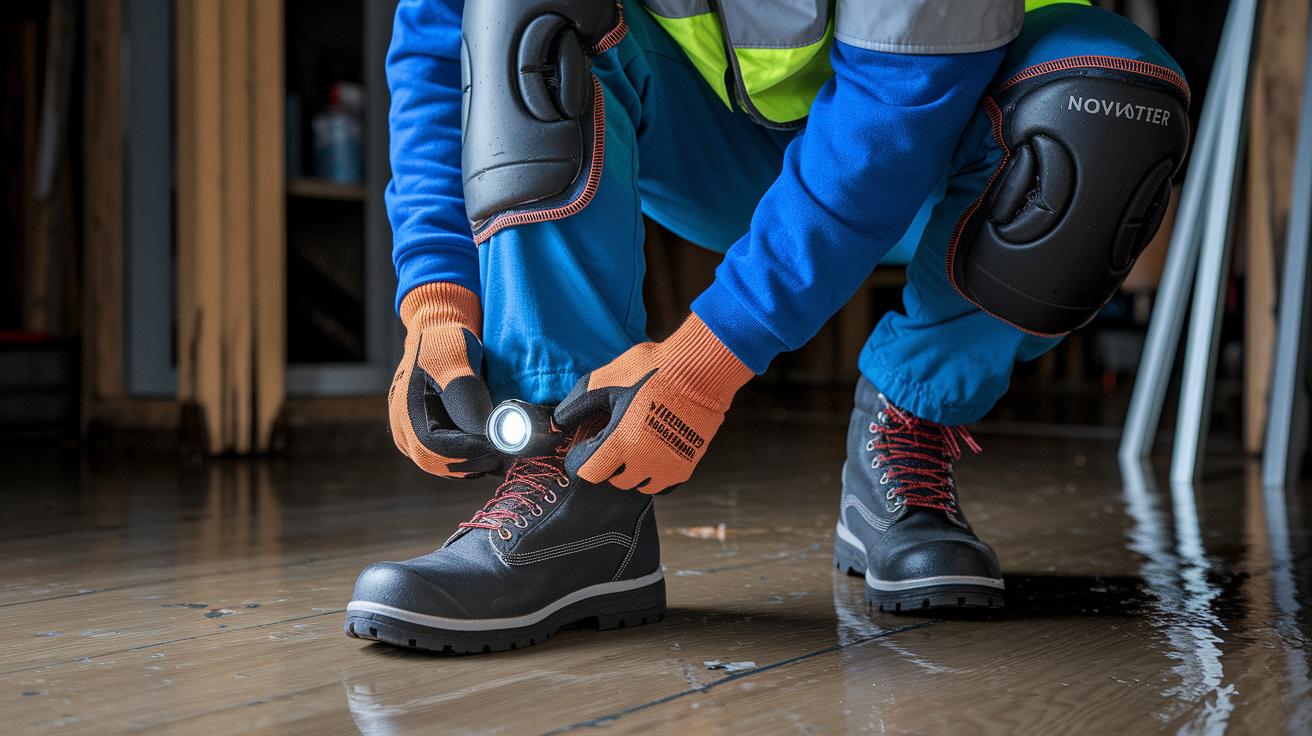
When you’re cleaning up water damage, using the right gear keeps you safe on wet, unstable surfaces. The proper equipment helps you get a firm grip, supports your joints, and boosts your visibility in dim areas where moisture can make things tricky.
Here’s what you need:
- Slip-resistant boots
- Waterproof gloves
- Padded knee pads
- A headlamp (a light tool for dark spots) with at least 300 lumens
- A high-visibility safety vest
- Wrist supports
Before you start working, check your gear carefully:
- Look at your boots to be sure their rubber soles with deep treads and strong heel brakes are in good shape.
- Inspect your gloves and knee pads for any cracks or signs of wear.
- Test your headlamp to make sure it lights up dark corners.
- Confirm that your safety vest stands out against water or debris.
Taking a few minutes to inspect your equipment helps reduce unexpected slips and falls so you can work safely all day.
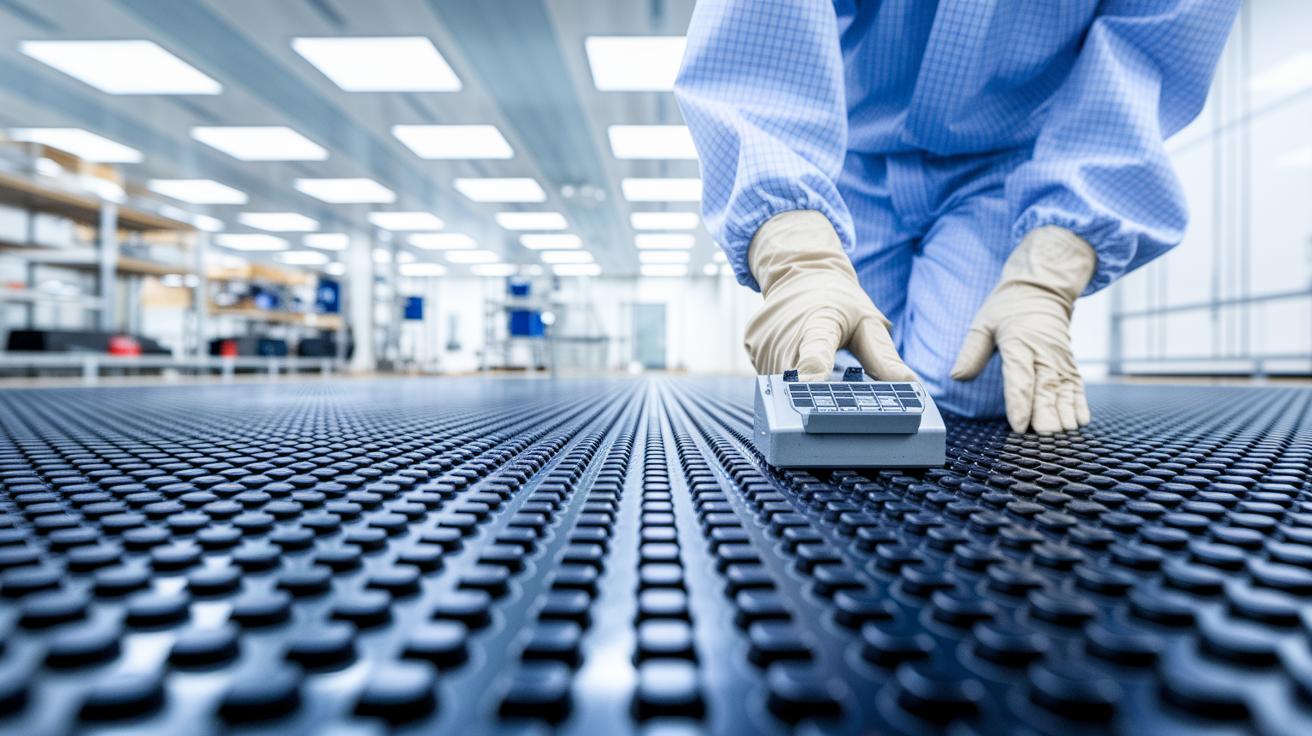
Apply Anti-Slip Surface Treatments to Prevent Slips and Falls During Water Damage Cleanup
When water damage makes floors unexpectedly slick, we add anti-slip treatments to keep you safe. These solutions increase grip in wet, high traffic areas and lower the risk of falls. We sometimes use temporary adhesive mats that soak up moisture and hold you steady as the area dries. For uneven or cracked floors, anti-skid tape sticks on strongly and forms a safe layer in about 30 minutes. If you need a longer-term fix, a quick-dry textured coating creates a lasting non-slip surface in a few hours. Each option fits different needs depending on the damage and cleanup time.
| Treatment | Where to Use | Setting Time |
|---|---|---|
| Adhesive Traction Mats | Crowded hallways | 5 minutes |
| Anti-skid Tape | Uneven floor areas | 30 minutes |
| Textured Coating | Long-term use | 2 hours |
Choosing the right treatment means your cleanup stays safe and effective for everyone involved.
Follow Safe Wet Environment Protocols to Prevent Slips and Falls During Water Damage Cleanup
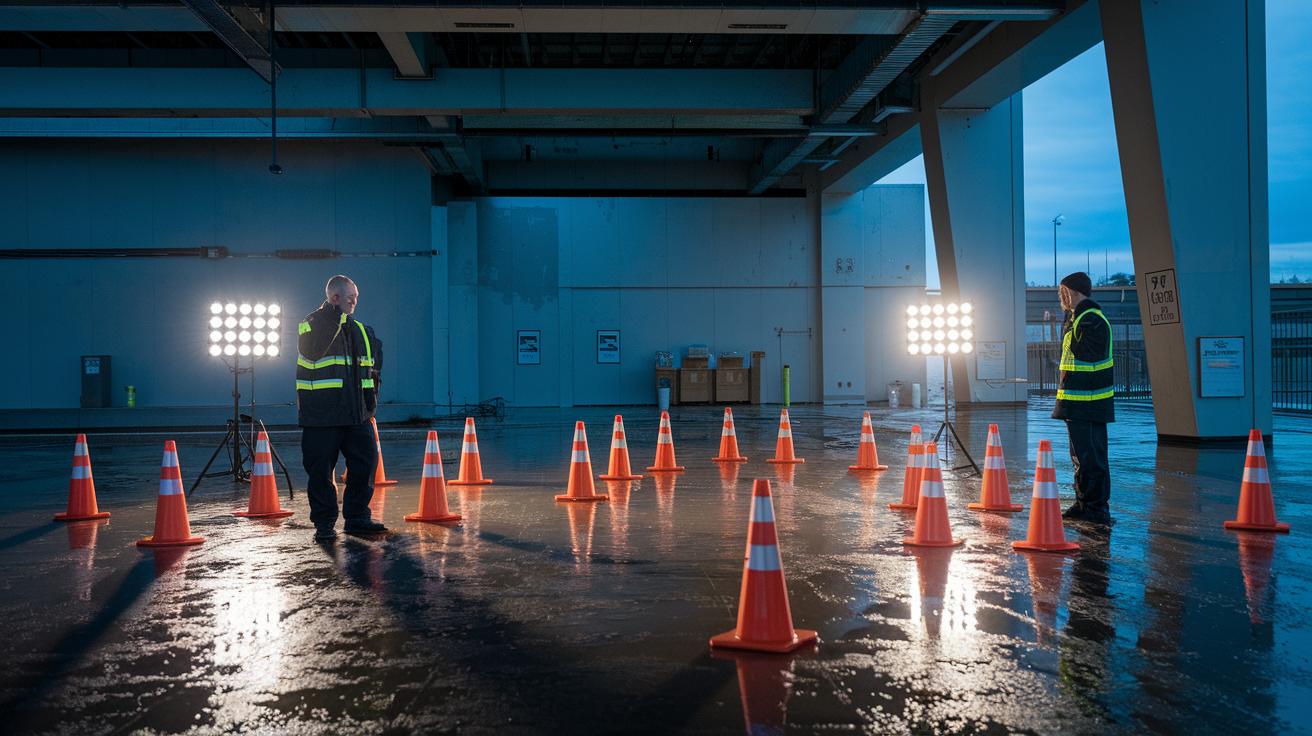
We begin by setting up the work area to keep everyone safe during water cleanup. First, we mark off zones with tape, cones, or barriers to keep water in check. Clear signs and defined paths show you the safest way through the area. Bright LED work lights (powerful lights that help you see in darkness) in darker spots help us spot even small puddles. This organized layout lets every team member know where to work and where to avoid, which cuts down on the risk of slips.
When a spill happens, act right away. Wipe up any water you see using absorbent materials like towels or mops. Doing this quickly limits the spill and keeps surfaces safer. At the first sign of a spill, let someone nearby know so they can watch for more wet spots. Move any equipment that may be holding water, and if needed, use a water extraction machine (a tool that removes standing water) to get rid of the water fast; this tool can reduce pooling by up to 90% in just 15 minutes.
Check the site frequently during the day. Every 30 minutes, walk through the area to see if new puddles have formed from moved equipment or ongoing runoff. Finally, note each zone check on your floor-inspection sheet. This log keeps everyone informed and shows that we are following all safe wet area protocols consistently.
Implement Training and Monitoring to Prevent Slips and Falls During Water Damage Cleanup
We hold regular training sessions to keep our teams prepared for working in wet, risky conditions. Every day, we review safe methods and point out risks during our flood restoration training. Short toolbox talks and hands-on practice keep everyone alert and ready to spot slip hazards quickly.
- Daily briefings – Quick meetings that outline risks and revisit safety steps.
- Hands-on spill-response drills – Practice sessions that help you react quickly to water spills.
- Formal audits using an 8-item checklist – Inspections that cut unchecked risks by 60%.
- Standardized incident reporting – Documents each incident with the date, location, details, and steps taken.
Our managers lead by example. They join the training sessions, check that everyone follows the safety practices, and step in immediately when a risk appears. This clear commitment to reporting incidents and regular audits keeps our work environment safe for everyone.
Conduct Post-Cleanup Safety Inspections to Prevent Slips and Falls During Water Damage Cleanup
After cleanup, a full safety check is essential. This final look helps us spot hidden slip hazards before someone gets hurt. For example, a slip-resistance test shows if the floors need more grip. We also check for warping, rust spots, or loose boards to fix any tripping risks.
- Traction test with a tribometer – Use a tribometer (a tool that measures floor grip) to ensure the flooring is safe.
- Visual floor assessment – Look carefully for signs like warping or rust that might not be obvious.
- Removal of temporary barriers – Clear any barriers or markers from the cleanup to keep paths safe.
- Check lighting and signage – Make sure dark corners have proper lighting and clear safety signs.
- Documentation and stakeholder sign-off – Record your findings and have all responsible parties confirm the area is safe.
Sharing these results quickly and setting up regular floor checks minimizes risks and keeps the area secure for everyone.
Final Words
In the action, we reviewed key steps and smart ways to stay safe during water damage cleanup. We covered floor assessments, immediate leak control, proper gear, anti-slip treatments, safe zone protocols, crew training, and final safety inspections. Each step helps you stay on top of hazards and keeps everyone secure. By following these guidelines on how to prevent slips and falls during water damage cleanup, you can manage risks efficiently. Stay proactive, and remember that every small step builds toward a safer, smoother recovery.
FAQ
How do you prevent slips, trips, and falls in the workplace?
Preventing slips, trips, and falls means identifying hazards early, cleaning spills right away, using anti-slip surfaces, providing proper footwear, and training everyone on safe practices.
What are the main control measures for slips, trips, and falls?
The main control measures involve assessing hazards, securing wet or uneven surfaces, enforcing good housekeeping, ensuring appropriate protective gear, and holding regular safety meetings.
What are the key components or “5 P’s” in falls prevention?
The 5 keys include cleaning up spills immediately, wearing proper protective footwear, demarcating work areas clearly, applying anti-slip treatments, and inspecting floors regularly to reduce risks.
How can you reduce the risk of slipping on a wet surface?
Reducing risks on wet surfaces means mopping up spills right away, applying anti-slip coatings or mats, ensuring proper lighting, and clearly marking areas that might be slippery.
What causes slips and trips injuries, and how can they be minimized?
Slips and trips injuries often result from unnoticed spills, uneven or degraded flooring, and low lighting; these can be minimized by regular floor inspections, prompt cleaning, and using adequate protective gear.
What slip, trip, and fall control measures work best on construction sites?
On construction sites, effective measures include installing non-slip surfaces, enforcing safety footwear rules, holding daily safety talks, maintaining tidy work zones, and checking floors for hidden hazards.
Where can I find detailed slip and fall prevention resources?
Detailed prevention resources, including PDFs and checklists, can be found on safety websites, offering step-by-step guides to implement effective hazard controls in your workplace.