

Think wiping soot with water will clean your wall?
It usually makes things worse.
It pushes soot into the drywall paper and leaves a bigger stain.
Start by removing loose particles with a HEPA vacuum (a filter that traps tiny particles) and a chemical dry sponge, use damp cleaning only when needed, dry completely with fans, then lock any stains in with a shellac or oil-based primer before you repaint.
This step-by-step guide shows the right tools, safety steps, and simple tests so you can clean soot from drywall without causing more damage.
Essential Steps for Cleaning Soot from Drywall Surfaces

Soot cleanup on drywall works best when you remove the loose particles first, then clean what’s left, and finally seal any stains before you repaint. If you start with water or scrub too hard, you’ll push soot deeper into the paper layer and spread the stain. The whole process follows a staged sequence: dry removal of surface soot, controlled wet cleaning only if you need it, a full drying period, then priming and repainting to lock in any leftover discoloration and odor.
Here’s the high level workflow for cleaning soot from drywall:
- Ventilate the space and wear respiratory protection, gloves, and eye protection to keep soot particles out of your lungs and off your skin.
- Dry clean the wall first using a HEPA vacuum with a soft brush, then a chemical sponge to lift soot without water.
- Wet clean stubborn residue with a damp sponge and mild cleaning solution, working in small sections and blotting dry right away.
- Let the drywall dry completely for 24 to 48 hours using fans and ventilation before any primer or paint touches the surface.
- Prime with a stain blocking primer (shellac based or oil based) to seal odors and prevent bleed through, then repaint.
Understanding Soot Residue and How It Behaves on Drywall
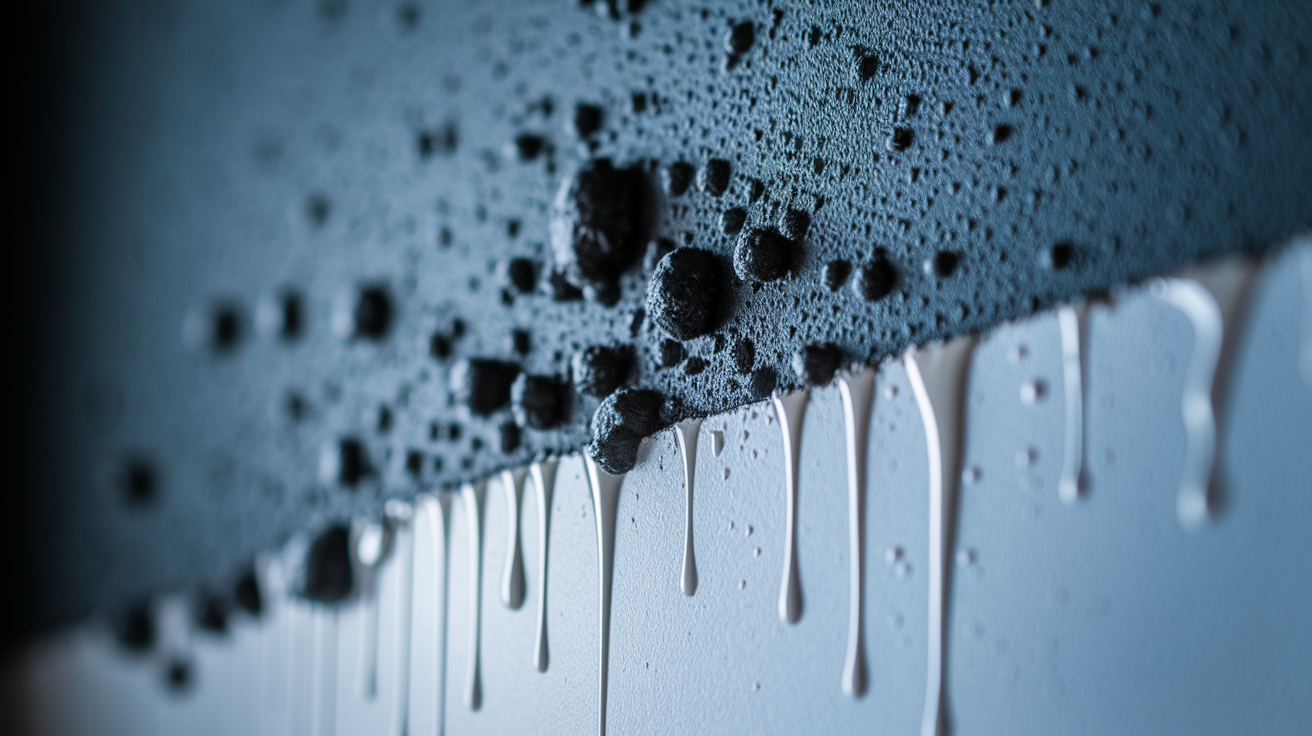
Soot is acidic and often greasy, especially after candle smoke, kitchen fires, or electrical malfunctions. Dry soot lifts off surfaces more easily because the particles sit on top of the drywall paper. Wet or oily soot smears when you touch it and binds to the paper fibers, making it harder to remove without leaving a shadow. If you start cleaning with water or a wet rag, you risk turning dry soot into a stain that spreads across a larger area.
Chemical dry sponges work because they lift soot particles through adhesion rather than pushing them into the wall. Scrubbing with a brush or abrasive pad drives soot deeper into the porous paper layer. Once that happens, the stain becomes nearly impossible to remove without sanding or replacing the drywall. Understanding the difference between soot types helps you pick the right cleaning method:
- Dry soot (paper, wood smoke): lifts easily with a dry sponge and vacuum. Responds well to light wet cleaning.
- Wet soot (plastic, synthetic materials): smears and sticks. Requires degreasing agents and minimal water contact.
- Oily soot (kitchen grease, electrical fires): bonds to paint and paper. Often needs a solvent based cleaner or TSP and heavy duty priming.
- Protein residue (cooking fires): leaves a yellowish film and strong odor. Requires odor sealing primer even after cleaning.
Safety Measures and Protective Gear for Soot Cleanup on Drywall

Soot particles are fine enough to stay airborne for hours and irritate your respiratory system, eyes, and skin. Wear at least an N95 respirator when you’re cleaning light soot. Use a P100 respirator for heavy or widespread contamination. Nitrile or rubber gloves protect your hands from acidic residues and cleaning chemicals, and safety goggles keep particles out of your eyes. Long sleeves and pants reduce skin contact with soot dust.
Ventilation prevents you from breathing concentrated soot particles and helps the wall dry faster after wet cleaning. Open windows and run box fans or portable air movers to create airflow out of the room. If you have a whole house HVAC system, turn it off or close the vents in the affected room to avoid pulling soot into ductwork and spreading it to other areas. Seal doorways with plastic sheeting if the contamination is heavy.
Before you start cleaning, check whether soot traveled through air returns or supply vents. If you smell smoke when the HVAC runs or see soot around registers, the system may need professional duct cleaning and filter replacement. Cleaning the walls without addressing contaminated ductwork will leave odors that return every time the system cycles.
Tools, Materials, and Cleaning Solutions Needed to Remove Soot from Drywall
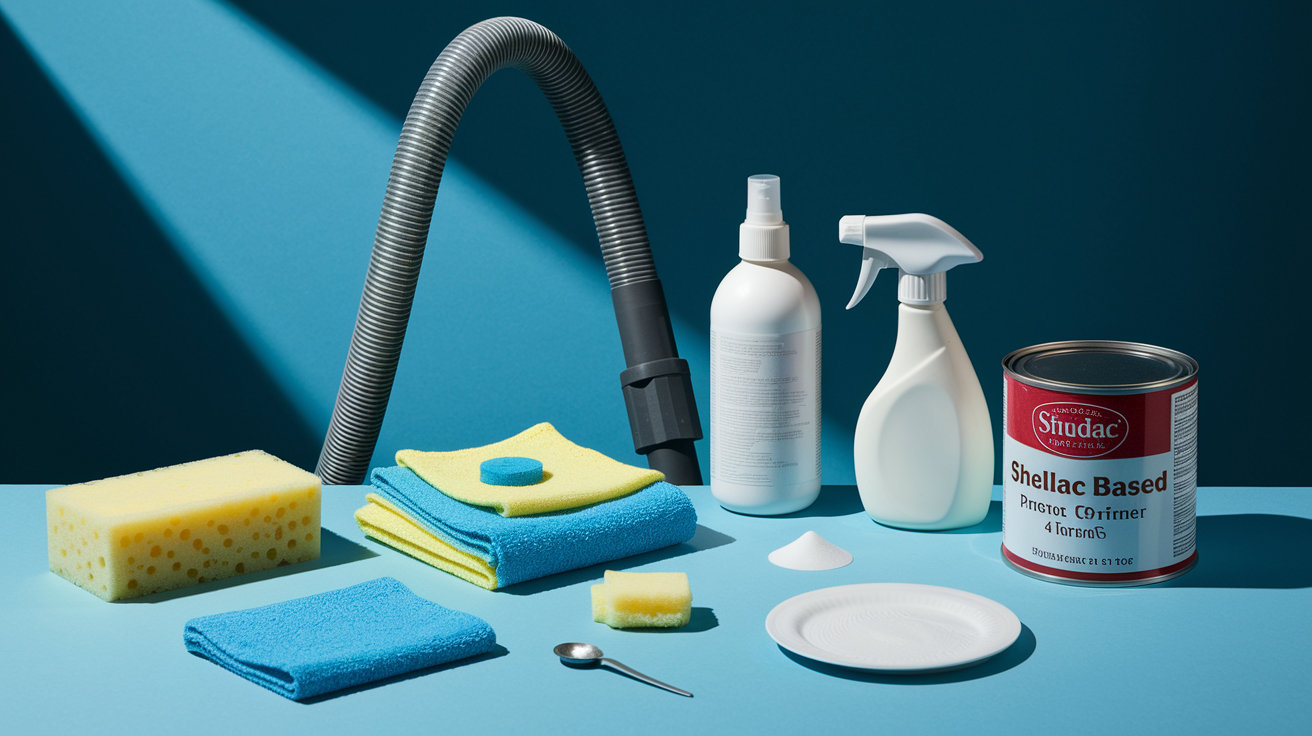
Gather your materials before you begin so you can work through the entire process without stopping. A chemical dry sponge (also called a soot sponge) costs about $5 to $15 each and works for roughly 50 to 100 square feet of light to moderate soot. Buy several if the damage covers multiple walls. A HEPA filtered vacuum with a soft brush attachment runs $80 to $400 depending on whether you use a shop vac or a portable unit designed for fine particles.
For wet cleaning, you’ll need buckets, soft white sponges, microfiber cloths, and a soft bristle nylon brush for textured surfaces. White distilled vinegar costs $2 to $6 per gallon, baking soda runs $1 to $3 per pound, and a box of trisodium phosphate (TSP) or TSP substitute is typically $5 to $12. Stain blocking primer in a shellac or oil base costs $15 to $40 per quart and covers roughly 100 to 200 square feet per coat. Paint prices vary widely, from $25 to $60 or more per gallon depending on quality and finish.
- Chemical dry sponge: lifts surface soot through dry adhesion. Replace when sides become saturated with soot.
- HEPA vacuum with soft brush: removes loose particles without scattering them into the air.
- Mild dish soap solution: 1 to 2 teaspoons per gallon of warm water for initial wet cleaning on light soot.
- Vinegar solution: about 1 cup white vinegar per gallon of water for moderate soot and odor control.
- Baking soda paste: 1 tablespoon baking soda mixed with just enough water to form a paste for spot treatment of greasy deposits.
- TSP or TSP substitute: stronger cleaning for heavy soot. Typical mix is ¼ cup per gallon of warm water (follow manufacturer instructions and use gloves).
Step by Step Dry Cleaning Method for Lifting Soot from Drywall
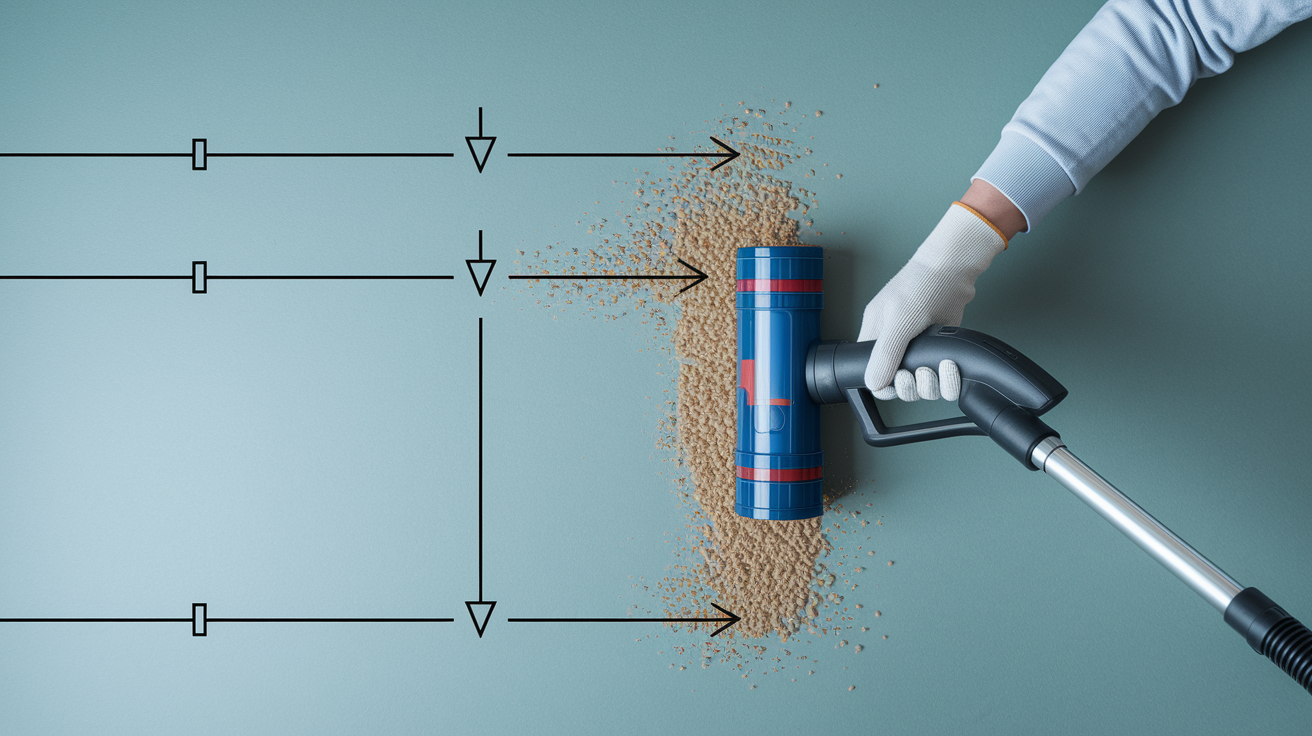
Start by vacuuming the wall with a HEPA filtered vacuum and a soft brush attachment. Use light, slow strokes and let the brush do the work. Pressing hard can smear soot or scratch the paint. Vacuum from top to bottom so loose particles fall into areas you haven’t cleaned yet. Empty the vacuum canister outside to avoid recontaminating your workspace.
After vacuuming, use a chemical dry sponge to lift the remaining soot. Work in straight, downward strokes without scrubbing or circular motion. The sponge will darken as it picks up soot. Once a side is saturated, flip to a clean side or replace the sponge. Two to three passes over the same area is usually enough. If you keep wiping and soot keeps transferring, the wall needs wet cleaning.
- Vacuum the wall with a HEPA vacuum and soft brush, working top to bottom in slow, light strokes.
- Wipe with a chemical dry sponge using straight downward motions. Don’t scrub or press hard.
- Flip or replace the sponge as soon as a side becomes darkened with soot to avoid redepositing particles.
- Perform a second or third pass if soot is still visible, but stop if the sponge no longer picks up residue.
- Assess the wall after dry cleaning. If a gray shadow remains, you’ll need controlled wet cleaning next.
Controlled Wet Cleaning Methods for Stubborn Soot on Drywall
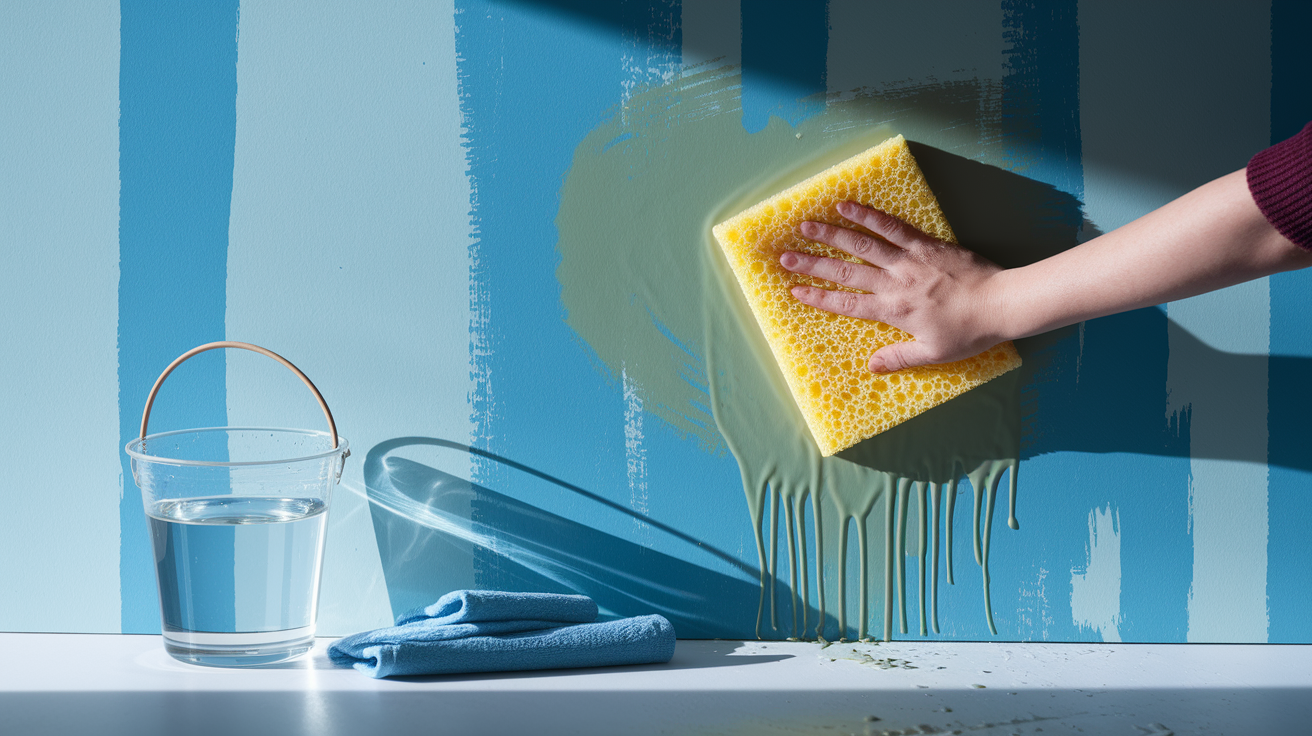
Wet cleaning should only happen after you’ve removed as much soot as possible with dry methods. Water breaks down the paper layer in drywall if you saturate it or scrub too hard, so use a well wrung sponge that feels damp but not dripping. Work in sections about 3 feet by 3 feet, wipe the area, then immediately blot with a dry cloth. Rinse your sponge in the bucket frequently and replace the cleaning water when it turns gray.
Start with the mildest solution and move to stronger options only if the first attempt leaves residue. For light soot, mix 1 to 2 teaspoons of liquid dish soap into a gallon of warm water. For moderate soot or lingering odor, use 1 cup of white vinegar per gallon of water. For heavy or greasy soot, mix ¼ cup of TSP or TSP substitute per gallon of warm water and wear gloves. TSP is a strong degreaser and can irritate skin. After cleaning with any solution, rinse the wall with a sponge dipped in clear water (wrung out well) to remove residue, then blot dry.
Don’t soak the drywall or make repeated wet passes over the same spot. Most walls can handle one or two wet cleaning cycles. More than that risks delaminating the paper layer or spreading the stain. If soot remains after two cycles, move to spot priming rather than continuing to scrub.
| Solution | Mix Ratio | Best Use |
|---|---|---|
| Mild dish soap | 1–2 teaspoons per gallon warm water | Light soot from candles or small fires |
| White vinegar | 1 cup per gallon water | Moderate soot with odor; deodorizing and cleaning |
| Baking soda paste | 1 tablespoon baking soda + small amount of water | Spot treatment for greasy or oily deposits |
| TSP or TSP substitute | ¼ cup per gallon warm water | Heavy soot, grease, or persistent stains (use gloves) |
Techniques for Removing Heavy or Deeply Embedded Soot Stains
When soot embeds into the drywall paper and won’t lift with wet cleaning, you have three options: apply a second round of dry sponging followed by TSP, sand the surface lightly to remove stained fibers, or go straight to stain blocking primer. Oily soot from kitchen fires or electrical malfunctions often leaves a sticky residue that dish soap can’t cut. In those cases, use a single pass of TSP solution applied with a damp sponge, then rinse and blot dry immediately. If the stain remains, sanding will only help if the soot sits on the surface paint layer. Sanding too deep damages the paper.
For greasy deposits, make a paste with 1 tablespoon of baking soda and just enough water to form a thick consistency. Dab the paste onto the stain, let it sit for a minute, then gently wipe it off with a damp cloth. This works for localized grease spots but won’t handle widespread contamination. If you’ve tried dry cleaning, wet cleaning, and spot treatment and the stain persists, the soot has soaked into the gypsum core or the paper is too damaged to save.
- Oily soot (kitchen, electrical fires): use TSP or a commercial degreaser. Avoid prolonged scrubbing and rinse thoroughly.
- Stains that won’t lift after two cleaning cycles: lightly sand the surface with fine grit sandpaper (180–220 grit) to remove stained paint fibers, then vacuum dust and spot prime.
- Soot embedded in texture or popcorn finishes: avoid wet scrubbing. Instead, vacuum carefully and apply shellac primer directly over the texture after the wall is dry.
Priming and Repainting Drywall After Soot Removal

Let the drywall dry completely before priming. 24 to 48 hours depending on airflow and humidity. Use fans and open windows to speed the process. Priming over a damp wall traps moisture and can cause blistering or mold growth. A shellac based primer like BIN blocks heavy smoke stains and odors better than latex or water based options and dries in 1 to 4 hours. Oil based stain blocking primers work nearly as well but take 6 to 24 hours to dry.
One gallon of primer typically covers 300 to 400 square feet. Apply one full coat over the cleaned area. If you still see staining or smell smoke after the first coat dries, apply a second coat. Once the primer cures, repaint with your chosen topcoat. Latex paint works fine over shellac or oil primer. Two coats of paint are usually enough to restore the wall’s appearance.
Check for bleed through after the first coat of primer dries. If you see yellow or gray shadows coming through, the stain is heavier than expected and you’ll need that second primer coat. Persistent odor after priming means soot or smoke residue is trapped behind the drywall in insulation or ductwork, and cleaning the visible surface won’t solve it.
| Primer Type | Strength | Ideal Scenario |
|---|---|---|
| Shellac based (e.g., BIN) | Highest stain and odor blocking; dries fast (1–4 hours) | Heavy smoke stains, persistent odor, water stains |
| Oil based stain blocker | Strong stain blocking; slower dry time (6–24 hours) | Moderate to heavy soot; good alternative if shellac unavailable |
| Water based stain blocker | Light stain blocking; fast dry; easier cleanup | Light soot or isolated spots; not recommended for heavy smoke |
Removing Smoke Odor from Drywall After Soot Cleanup
Cleaning the surface removes visible soot but doesn’t always get rid of smoke odor. Odor molecules settle into porous materials, so even after washing and priming, you may still smell smoke if it penetrated insulation, ductwork, or cavities behind the drywall. Start by improving air quality in the room. Run a HEPA air purifier continuously for several days, place bowls of activated charcoal or baking soda around the space, and wash or replace soft furnishings like curtains and upholstery.
If odor persists after cleaning, priming, and air filtration, the contamination is deeper than DIY methods can reach. Professional restoration companies use ozone generators or thermal fogging to neutralize odors, but these methods require training and can be dangerous if used incorrectly. Don’t run an ozone generator in an occupied space or without sealing the area and following strict safety protocols.
- HEPA air purifiers: run continuously for 3 to 7 days to filter airborne particles and reduce lingering odor.
- Activated charcoal bowls: place several bowls of activated charcoal around the room to absorb odors passively.
- Baking soda placement: leave open boxes or bowls of baking soda on shelves or floors to absorb smells over time.
- Wash soft goods: launder drapes, cushion covers, and any fabric that absorbed smoke. Replace items that can’t be cleaned.
- Professional ozone or thermal fogging: hire restoration pros if odor remains after cleaning, priming, and air filtration. These methods require containment and safety equipment.
When You Should Replace Drywall or Hire Professional Restoration Technicians
Replace drywall when the paper layer is swollen, soft, peeling, or crumbling. If you press on the wall and it feels spongy or your finger leaves a dent, the gypsum core has absorbed water and lost structural integrity. Charring, burn through, or visible holes also mean replacement is necessary. Small damaged areas (a few square feet or less) can be cut out and patched with new drywall, taped, mudded, sanded, primed, and repainted. Larger sections or damage that affects insulation or framing should be handled by a contractor.
You should hire professional restoration when soot contamination covers more than 100 square feet, affects HVAC ductwork or insulation, or produces persistent odor even after cleaning and priming. Restoration companies use air scrubbers, negative pressure containment, industrial degreasers, and thermal imaging to find hidden moisture and contamination. They also document damage for insurance claims and can supplement the claim if they discover problems behind the walls.
- Paper layer is bubbled, torn, or crumbling: cut out the damaged section and install a new drywall patch.
- Soot spread through HVAC or into attic insulation: hire pros to clean ductwork, replace insulation, and deodorize the entire system.
- Persistent strong smoke odor after cleaning and priming: indicates contamination behind walls or in cavities. Requires professional assessment and remediation.
- Structural damage, charred framing, or compromised fire rated assemblies: hire licensed contractors to assess safety and rebuild to code.
Final Words
Start by ventilating the room, using basic protection, and keeping soot from spreading.
Work top to bottom: dry-lift soot first, then use controlled wet cleaning only where needed.
Always let materials dry fully before priming so stains and odors don’t come back.
Document what you find and check behind surfaces for hidden damage.
This step-by-step path for how to clean soot from drywall keeps you safe and gets the job ready for repair.
You’ll be back to normal soon.
FAQ
Q: How do you get soot off drywall?
A: Getting soot off drywall starts with dry lifting (HEPA vacuum and chemical sponge), then controlled wet cleaning only if needed, followed by complete drying and priming before repainting.
Q: Can soot damage walls if left uncleaned?
A: Soot left uncleaned can damage walls because it’s acidic and greasy, staining paint, breaking down drywall paper, trapping odors, and increasing the chance you’ll need repairs or replacement.
Q: What is the best cleaner for black soot on walls?
A: The best cleaner for black soot on walls is a dry-clean first approach — chemical sponge for lift, then a mild detergent or TSP alternative for stubborn residue, then dry and prime.
Q: Does vinegar remove soot from walls?
A: Vinegar can remove light soot after dry lifting, but it may smear oily soot; use it as a mild wet-clean step, rinse or blot, dry fully, and prime if staining remains.