

Think a window well can’t flood your basement? Think again.
Water that sits in a well pushes on the window frame, finds tiny gaps, and brings damp, mold, and ruined floors.
Basement window well drainage matters because it keeps that water moving away before it soaks drywall, warps trim, or freezes and cracks the foundation.
In it, we show simple, proven fixes like gravel and filter fabric, a sloped perforated drain, plus covers or a sump when the site requires, so you stop the leak and get the repair done right.
Understanding the Core Problem: How Basement Window Well Drainage Prevents Flooding

Basement window well drainage captures and routes water away from window wells before it can get into your basement. Most systems use a 6 to 12 inch layer of 3/4″ washed gravel, a 4″ perforated drain pipe with a filter sock, and a rigid cover that keeps rain and debris out. The drain pipe connects to a footing drain, storm sewer, drywell, or sump basin. You need a slope of 1% to 2%, about 1/8″ to 1/4″ fall per foot, to move water safely away from the foundation.
Without a working drain, window wells turn into concrete bathtubs. Water pools against the basement window, finds gaps in the frame or caulking, and seeps inside. Standing water creates hydrostatic pressure against the foundation, forcing moisture through cracks you can’t even see. Once inside, that water spreads across floors, soaks into drywall, and creates the damp conditions mold needs.
The system works when all parts are intact. When gravel clogs, pipes crush, or covers go missing, water has nowhere to go. The result? Leaks around the window frame, damp smells, warped trim, and sometimes visible mold on walls or ceilings below grade.
The biggest risks from failed drainage:
- Water leaks through window frames and foundation cracks
- Mold growth on walls, floors, and organic materials stored near windows
- Structural stress from continuous hydrostatic pressure
- Damage to carpets, drywall, and baseboards in finished basements
- Ice expansion damage during freeze/thaw cycles in winter
How to Identify and Troubleshoot Window Well Drainage Problems

Early Warning Signs and Minor Issues
Early symptoms show up as small changes you might not connect to the drainage system right away. You notice a damp smell near the basement window after heavy rain, or a faint musty odor that wasn’t there before. Small puddles form inside the well and vanish within a few hours, which points to a drain that’s working slowly, not freely. You may also see a buildup of leaves, grass clippings, or silty sediment sitting on top of the gravel, blocking water from reaching the drain below.
| Symptom | Likely Cause | Severity | Action Needed |
|---|---|---|---|
| Faint damp smell near window after rain | Minor seepage or surface moisture | Low | Check for debris; inspect cover and grading |
| Thin layer of silt or leaves on gravel | Missing or damaged cover | Low | Clear debris; install or repair cover |
| Water drains within 2–6 hours after storm | Slow percolation through compacted gravel | Moderate | Remove and rinse gravel; check pipe slope |
| Visible moisture on window frame or sill | Standing water pressing against seal | Moderate | Clear drain; reseal window with hydraulic cement |
When debris builds up to more than 1/2 inch thick, it creates a mat that blocks water from filtering down through the gravel. Rain sits on the surface instead of draining. If you catch it here, clearing the debris by hand and hosing off the gravel usually restores flow.
Major Failures and How to Fix Them
Standing water that remains for days, or reappears even when it hasn’t rained, signals a deeper problem. The drain pipe may be crushed, clogged below the surface, or sloped incorrectly so water can’t move. Corrugated plastic pipe is especially prone to collapsing under soil weight or root pressure. If the pipe has flattened, water backs up and has nowhere to go. Insufficient slope, anything less than 1/8″ per foot, means gravity can’t pull the water along, so it sits in the pipe or trickles out slowly.
High groundwater can also overwhelm a properly built system if the water table rises above the bottom of the well. In that case, water seeps up through the gravel from below, not down from the surface. You’ll see standing water even in dry weather, and the gravel will feel wet several inches down.
Here’s how to address major drainage failures:
- Excavate around the drain pipe to inspect for crushing, kinks, or disconnected joints. Replace collapsed corrugated pipe with rigid 4″ Schedule 40 PVC.
- Check the slope with a 4 foot level. Reset the pipe to achieve at least 1/8″ drop per foot toward the outlet.
- Snake or jet the pipe from the well outlet to clear roots, silt, or debris lodged inside. Repeat from the outlet end if accessible.
- If groundwater is the source, add a sump pump and basin at the low point of the drainage run so rising water triggers automatic discharge.
When the problem is below the surface and you can’t see the pipe or the outlet, hiring a waterproofing contractor with an inspection camera saves time. They can locate the blockage, confirm slope, and verify the connection to the footing drain or storm line without guessing.
Components That Make a Basement Window Well Drainage System Work
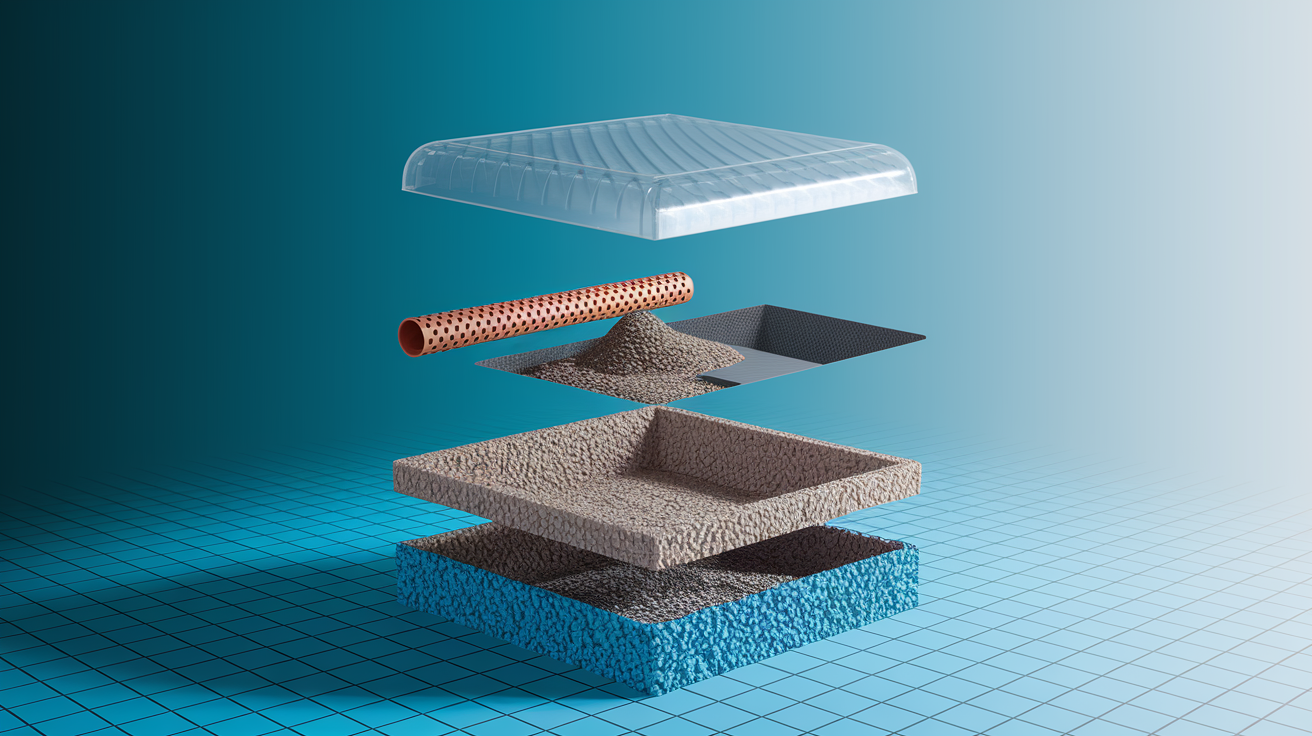
A functional window well drainage system relies on layers that filter, capture, and move water in sequence. Each layer has a specific job. Skip any one of them and you’ll usually have clogs, slow drainage, or complete failure within a year or two.
The bottom layer is non-woven geotextile fabric, typically rated at 6 oz per square yard or similar. This fabric separates the native soil from the gravel above it, preventing fine particles from washing into the gravel and clogging the pore spaces where water flows. Lay the fabric so it lines the excavated pit and extends up the sides, then fold the edges over the top of the gravel once the drain is in place. Without fabric, silt migrates into the gravel during every rain. Within a season the gravel turns into dense mud.
On top of the fabric goes the gravel bed and drain pipe. These two components work together to collect and route water to the outlet. Both need to be sized and installed correctly to handle the flow from heavy storms.
Gravel Layer and Fabric
The gravel layer provides the pore space where water collects before entering the drain pipe. Use 3/4″ washed gravel, sometimes called drainage stone or clear stone, placed in a layer 6 to 12 inches deep at the bottom of the window well. Washed gravel is free of fines (dust and small particles) that would clog the voids. The 3/4″ size creates enough open space for water to move freely while remaining stable underfoot.
Spread the gravel evenly across the geotextile fabric, then set the drain pipe on top of the gravel bed before adding more gravel around and over the pipe. The pipe should sit roughly in the middle of the gravel depth so water can reach it from all sides. Don’t pack gravel tightly. Loose placement preserves the voids. After the pipe is in place, fold the fabric edges over the top layer of gravel to complete the filter envelope.
Perforated Drain Pipe Options
The drain pipe is almost always 4 inches in diameter to provide enough capacity for sudden heavy rain. You have two main choices: rigid perforated PVC (Schedule 40 or SDR 35) and flexible corrugated polyethylene pipe (commonly sold as ADS). Rigid PVC lasts decades, resists crushing, and maintains a consistent inside diameter for better flow. Corrugated pipe is lighter, easier to bend around obstacles, and cheaper. But it can collapse under soil pressure and the corrugations create friction that slows flow.
Both types come with perforations (small holes or slots) to let water enter from the gravel. Always use pipe that comes with a filter sock (a fabric sleeve) already installed, or add one yourself. The sock keeps gravel and soil particles from entering the pipe and forming clogs inside. Run the pipe at a slope of 1% to 2%, about 1/8″ to 1/4″ drop per foot, from the well toward the outlet. Check slope with a 4 foot level as you lay the pipe. Shim or adjust the gravel bed to maintain the grade.
Window Well Covers and Load Ratings
A cover keeps rain, snow, and debris out of the well in the first place, which reduces the load on the drainage system and prevents organic material from decomposing into sludge on top of the gravel. Rigid polycarbonate covers are the most common choice for residential wells. These clear or translucent panels let light through to the basement window, resist UV degradation, and are rated to support 250 to 400 pounds. Enough for a person to step on safely.
Steel grates and mesh covers offer higher load ratings and better ventilation, but they don’t keep out rain or small debris like seeds and mulch. Avoid thin plastic “bubble” covers sold at hardware stores. They turn brittle in sunlight, crack under snow load, and create a humid space that encourages weed growth against the window. Secure any cover with brackets or pins so wind can’t lift it. Size it to overlap the well edges by at least 2 inches on all sides for full protection.
Planning a Basement Window Well Drainage System for Your Property

Before you dig or buy materials, walk the property and confirm where the water can go. Gravity drainage requires a continuous downhill slope from the bottom of the window well to a safe outlet. Ideally a perimeter footing drain, storm sewer, or a drywell at least 10 feet from the foundation. If your lot is flat or the basement sits below the grade of any available outlet, you’ll need a sump pump to lift the water and discharge it.
Check the soil type by digging a small test hole near the window well. Sandy or gravelly soil drains quickly and rarely holds standing water. Clay soil, common on Long Island’s north shore and similar regions, drains slowly and can hold water against the foundation for days after a storm. Clay means you’ll need a more robust system. Thicker gravel, confirmed pipe slope, and possibly a sump pump to handle water that can’t soak into the ground. Measure the distance from the window sill down to the existing grade. The bottom of the window well excavation must sit at least 6 inches below the sill to leave room for the gravel and drain pipe. Most prefabricated window wells are 36 to 48 inches wide, so plan to excavate at least that width plus an extra 6 to 12 inches beyond each wall to accommodate the drain pipe and gravel envelope.
Key planning steps:
- Locate existing footing drains, storm lines, or sump pits on your property and confirm the depth and direction of each
- Measure slope from the window well to the nearest outlet using a long level or string line. Calculate whether 1/8″ per foot is achievable
- Identify any underground utilities (call 811 for locates) before digging trenches for drain pipe
- Confirm local code requirements for storm sewer tie ins or drywell setbacks
- Decide whether you will connect to an existing system or install a new outlet such as a drywell or sump basin
- Sketch a simple plan showing well location, trench route, pipe slope, and outlet point so you can estimate material quantities
Step by Step Basement Window Well Drainage Installation

Installing a window well drainage system takes most DIY homeowners between 3 and 8 hours if materials are on hand and the trench is straightforward. Professional crews often finish in 1 to 4 hours, but you can do it yourself if you’re comfortable digging, handling pipe, and working to a grade.
Excavation and Base Preparation
Start by removing the existing window well if one is installed, or mark the perimeter of the new well location. Dig down to at least 6 inches below the window sill and extend the excavation 6 to 12 inches beyond the well walls on all sides. The bottom of the hole should be level or sloped gently toward the planned drain outlet. Remove roots, rocks, and debris. Tamp the soil lightly with a hand tamper to create a firm base, but don’t compact it so hard that water can’t percolate.
Dig a trench from the low corner of the well excavation toward the outlet. The trench needs to be wide enough to hold 4″ pipe plus a few inches of gravel on each side, typically 10 to 12 inches wide. Dig the trench with a consistent downhill slope of 1/8″ to 1/4″ per foot. Use a long level or a string line with a line level to check grade as you go.
Installing Fabric and Gravel Layers
Unroll non-woven geotextile fabric across the bottom and up the sides of the excavation. Overlap seams by at least 6 inches and let the fabric drape over the edge of the hole. Press the fabric into corners and smooth out wrinkles.
Pour 3/4″ washed gravel onto the fabric to a depth of 3 to 4 inches. Spread it evenly with a rake. This first layer creates the bed for the drain pipe. Don’t pour all the gravel at once. You need to set the pipe on the first layer, then add more gravel around it.
Laying and Connecting the Perforated Drain Pipe
Place the 4″ perforated pipe on top of the gravel bed. If the pipe has a filter sock, confirm it’s in place and not torn. Orient the perforations downward or to the sides (not straight up), so water enters from the gravel, not from above. Run the pipe from the well toward the outlet, maintaining the 1/8″ to 1/4″ per foot slope. Check with a level every few feet and adjust the gravel bed underneath to hold the grade.
At the outlet end, connect the pipe to the footing drain, storm line, or sump basin using a mechanical coupler, wye fitting, or watertight connector appropriate for your pipe type. If tying into an existing perforated drain, cut a section out and insert a tee or wye so the new pipe feeds into the main line. Seal joints with PVC primer and cement if using rigid PVC, or use stainless hose clamps and rubber couplers for corrugated pipe.
Backfilling and Achieving Proper Grade
Cover the pipe with another 3 to 6 inches of 3/4″ washed gravel so the total gravel depth in the well is 6 to 12 inches. Fold the edges of the geotextile fabric over the top of the gravel to complete the filter envelope. This keeps soil from washing down into the gravel when you backfill.
Backfill around the well with the excavated soil in 6 inch layers, tamping each layer lightly. Slope the final grade away from the well at a minimum of 1/4″ per foot for the first 6 feet. Install the window well unit (metal or plastic), seal the joint where it meets the foundation with hydraulic cement or a waterproof membrane, and attach the cover securely.
Here’s the complete installation sequence:
- Excavate well area to 6 inches below window sill and trench to outlet.
- Tamp the bottom lightly and check that trench slopes 1/8″ to 1/4″ per foot.
- Line excavation and trench with geotextile fabric, overlapping seams by 6 inches.
- Spread first 3 to 4 inches of 3/4″ washed gravel on fabric.
- Lay 4″ perforated pipe with filter sock on gravel bed, maintaining slope.
- Connect pipe to outlet using appropriate fittings. Seal joints.
- Cover pipe with 3 to 6 more inches of gravel. Fold fabric edges over top.
- Backfill in layers, tamping lightly. Slope final grade away from well.
Connecting Window Well Drainage to Footing Drains, Drywells, or Sump Pumps

The drain pipe must discharge somewhere that moves water safely away from the foundation. The most common and reliable outlet is the perimeter footing drain (also called foundation drain tile), which already collects groundwater from around the basement and routes it to a sump pump or to daylight. If your home has a footing drain, you can usually tie into it with a tee or wye fitting. Cut the existing drain pipe, insert the fitting, and connect your 4″ window well drain. This integrates the window well into the whole house drainage system so water collected in the well flows to the same outlet as water collected around the footings.
Where no footing drain exists, or where code and slope permit, you can run the drain pipe to a drywell. A drywell is a gravel filled pit dug at least 10 feet from the foundation. Line the pit with fabric, fill it with clean stone, and terminate the drain pipe in the center. Water disperses into the surrounding soil. Drywells work well in sandy or gravelly soils but can fail in clay, where water has nowhere to go and the pit fills and stays full.
If gravity drainage isn’t possible (your lot is flat, the basement is below grade, or the water table is high), install a sump pump and basin. Dig a separate pit near the low point of the drainage run, install a sump liner (typically 18 to 24 inches in diameter), and route the drain pipe into the top of the liner. Install a 1/3 HP or 1/2 HP submersible sump pump with a float switch. The pump activates when water fills the basin and discharges through a dedicated line that runs to daylight or a storm sewer. Sump pump installations, including basin, pump, check valve, and electrical work with GFCI protection, typically cost $600 to $2,000 installed.
Common outlet types and their uses:
- Footing drain/perimeter drain: best choice if already present. Integrates with whole house system. Requires tee or wye connection.
- Storm sewer: permitted in many areas. Requires permit and inspection. Ensures water leaves property. May need backflow preventer.
- Drywell (10+ feet from home): works in sandy/gravelly soil. Not suitable for clay. Must be sized to handle peak flow.
- Sump pump basin: necessary when gravity discharge is not possible. Adds mechanical component requiring power and maintenance. Reliable when properly sized.
Maintaining Basement Window Well Drainage Systems Year Round
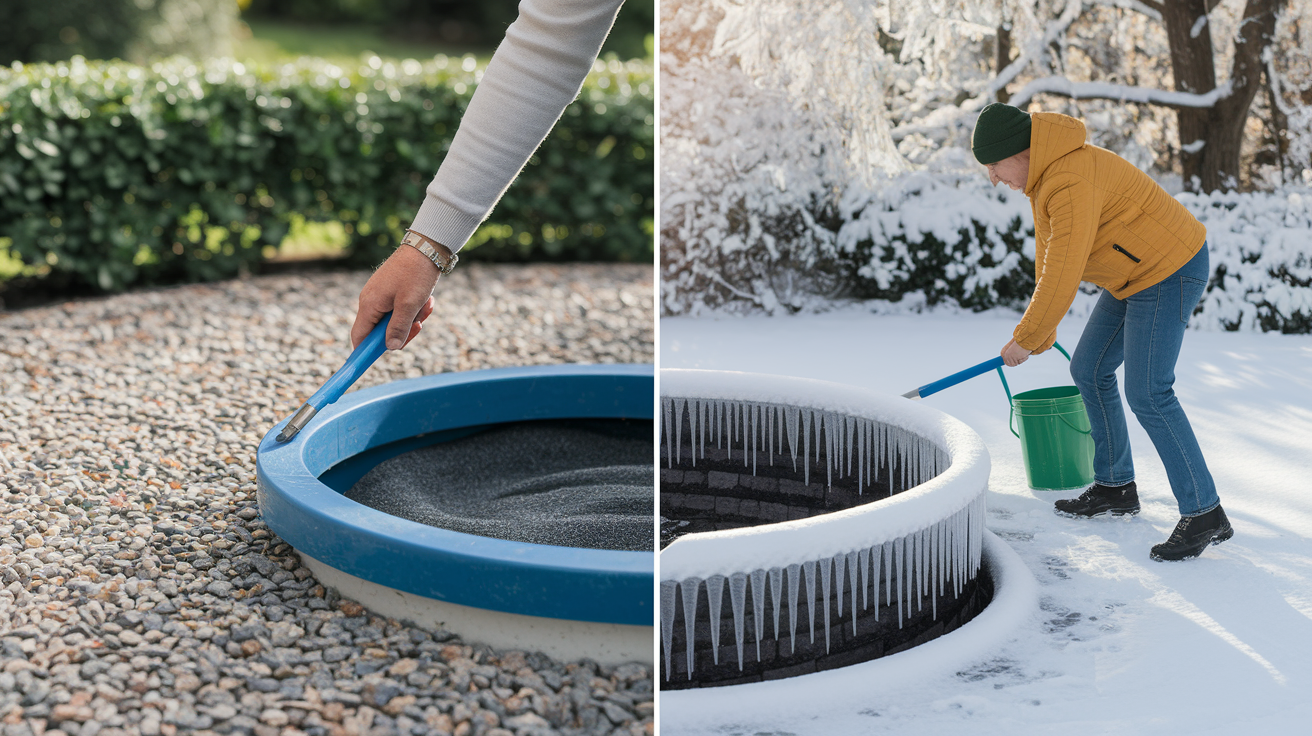
Drainage systems work quietly most of the time, which makes it easy to forget they’re there. But neglect leads to clogs, and clogs lead to flooding. A simple inspection and cleaning routine prevents most problems and catches small issues before they become expensive repairs.
Check the window well cover and the gravel surface every 3 to 6 months. Pull off any leaves, sticks, or mulch that have blown in. If you see a layer of organic debris thicker than 1/2 inch sitting on the gravel, scoop it out by hand and hose off the gravel. That mat of leaves and grass clippings blocks water from soaking through, even when the drain below is clear. After heavy storms or high winds, do a quick visual check. Standing water that drains within an hour or two is normal. Water that sits for six hours or more means something is slowing the flow, and you should clear debris and test the drain.
Once a year, flush the drain pipe. Remove the cover and pour a bucket of water into the well while watching the outlet (if accessible). Water should flow steadily and exit within a few seconds to a minute, depending on pipe length. If water backs up or drains very slowly, use a plumber’s snake or a garden hose with a jet nozzle to clear the pipe from the well end. In winter, ice can block the drain or build up inside the well. Insulated or vented covers reduce ice formation by allowing some air circulation, and a thin layer of coarse gravel on top of the main gravel bed helps prevent surface freezing.
Simple year round maintenance checklist:
- Inspect cover and gravel surface every 3 to 6 months. Remove visible debris
- Clear any organic mat greater than 1/2 inch thick. Rinse gravel if silty
- Flush drain pipe with water once per year to confirm flow
- Check that cover is secure and undamaged after winter. Replace cracked or brittle covers
- Inspect around window frame for cracks or gaps in sealant. Apply hydraulic cement as needed
Cost, Materials, and Comparing DIY vs Professional Window Well Drainage Installation

A single window well drainage system installed by a homeowner typically costs $100 to $400 in materials. That includes geotextile fabric, 3/4″ washed gravel (usually 1/2 to 1 cubic yard per well), 10 to 20 feet of 4″ perforated pipe with filter sock, fittings to connect to the outlet, and a rigid polycarbonate cover. Costs rise if you need to add a sump pump and basin, rent a trenching tool, or buy a new window well unit.
Professional installation runs $300 to $1,200 for a straightforward drain connection to an existing footing drain or drywell. Complex jobs (deep excavation, long trench runs, tie ins to municipal storm sewers, or installations on properties with high groundwater) commonly cost $800 to $3,000 or more. Professionals complete the work faster (usually 1 to 4 hours on site) and bring tools, experience, and liability insurance. They also confirm pipe slope with a laser level, inspect existing drains with cameras, and pull permits when required.
| Factor | DIY | Professional |
|---|---|---|
| Cost | $100–$400 materials only | $300–$3,000+ installed |
| Time | 3–8 hours per well | 1–4 hours on site |
| Difficulty | Moderate; requires trenching, grade setting, and physical labor | Low for homeowner; contractor handles all excavation and connections |
| Risk | Incorrect slope or poor connections can cause system failure and water damage | Lower risk; contractor provides warranty and ensures code compliance |
Hiring a contractor makes sense when you’re dealing with clay soil, high water tables, multiple wells, or when the outlet requires a long trench or a tie in to a municipal storm line. Mistakes in slope or connection can result in standing water, repeat flooding, and damage claims that exceed the cost of professional installation. If you’re confident in your ability to dig, grade, and seal, and the job is a simple gravity drain to an accessible footing drain or drywell, DIY saves money and gives you control over materials and timing.
Choosing Materials and Products for a Durable Window Well Drainage System
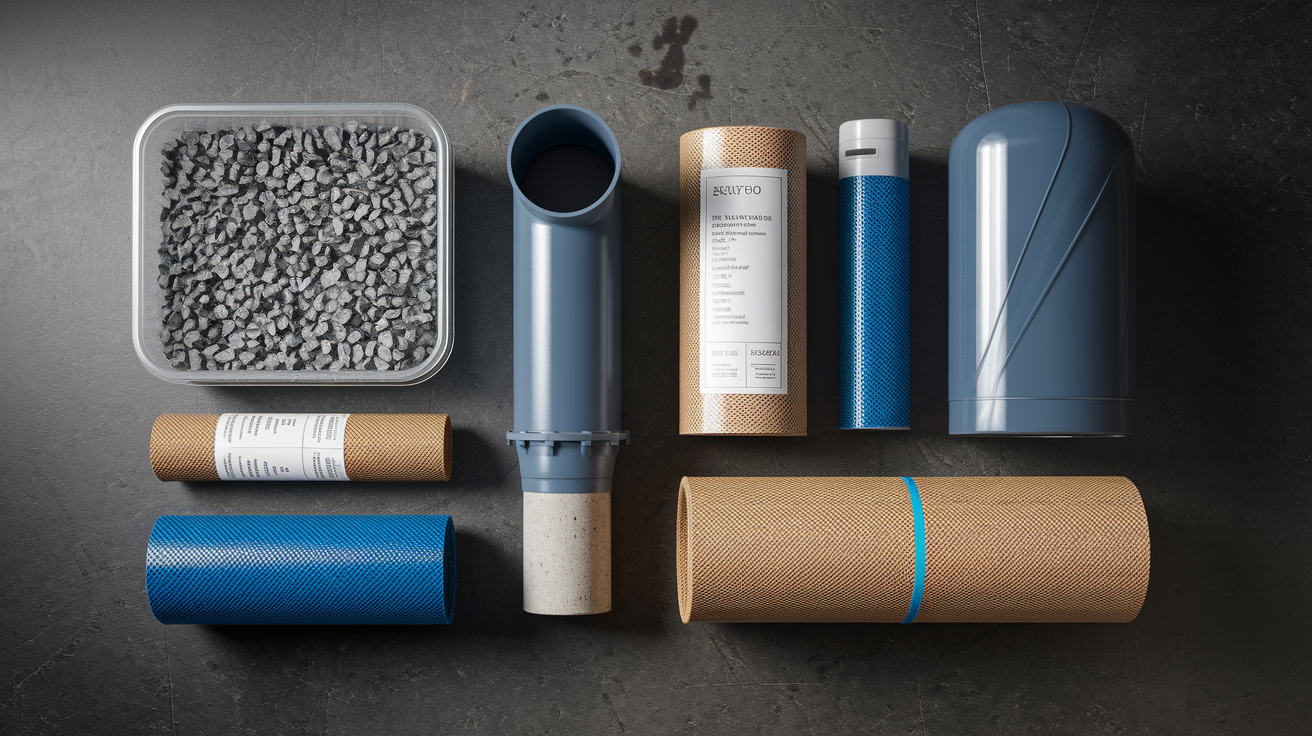
Cheap materials fail early. A window well drain built with the right components can last 20 to 30 years with minimal maintenance. A system built with the wrong gravel, flimsy pipe, or no fabric can clog within a single season.
For gravel, always specify 3/4″ washed stone. Avoid pea gravel (too small, clogs easily), river rock (rounded, unstable and slow draining), or crushed stone with fines (dust migrates and blocks pores). Washed stone has angular edges that lock together while leaving large voids for water flow. For pipe, Schedule 40 PVC is the longest lasting choice. It won’t crush, rot, or collapse, and the smooth interior walls move water faster than corrugated surfaces. If you use corrugated pipe for cost or flexibility, inspect it annually and replace sections that show flattening or kinks.
Geotextile fabric must be non-woven and rated for drainage applications. A 6 oz per square yard fabric is common and effective. Woven fabrics and landscape cloth sold for weed suppression do not filter soil particles as well and can clog quickly. Window well covers should be UV stabilized polycarbonate rated for at least 250 pounds, or galvanized steel grates if you need higher load capacity and don’t mind debris entry. Avoid hardware store plastic bubble covers. They crack in cold weather and turn opaque after a year in the sun.
Recommended material specifications:
- 3/4″ washed angular gravel, 6 to 12 inches deep at well bottom
- Non-woven geotextile fabric, 6 oz/yd² or equivalent, for soil separation
- 4″ perforated Schedule 40 PVC pipe for maximum durability and flow
- Filter sock on all perforated pipe to prevent internal clogging
- Polycarbonate window well cover, UV stabilized, rated 250 to 400 lbs
- Hydraulic cement or polyurethane sealant for foundation to well joints
Final Words
Stop standing water, clear gravel, and check the slope—those moves keep a window well from turning into a leak. This post showed why drainage matters, how to spot clogs and seepage, and what parts make a system work.
We walked through planning, a step-by-step install, outlet options like sump or drywell, and routine care so problems don’t return.
Take small steps now—inspect covers every 3–6 months, flush the drain, and document what you find. With basic care and the right parts, basement window well drainage will keep water out and give you one less thing to worry about.
FAQ
Q: Does a basement window well need a drain?
A: A basement window well generally needs a drain to move water away, stop standing water, leaks, mold, and hydrostatic pressure. Tie it to perimeter tile, storm line, drywell, or a sump basin.
Q: Why is my basement window well filling with water?
A: A basement window well fills with water when gravel or the drain is clogged or missing, slope is insufficient, heavy rain or high groundwater overwhelms it, or a damaged cover lets runoff and debris in.
Q: How to drain a basement window well?
A: To drain a basement window well, clear debris, add 6–12 inches of 3/4″ washed gravel over geotextile, then install or clear a 4″ perforated pipe sloped 1%–2% to an outlet or to a sump.
Q: What is the best drainage for a window well?
A: The best drainage for a window well is a 4″ perforated pipe with a filter sock, 6–12 inches of 3/4″ washed gravel wrapped in geotextile, and a 1%–2% slope to a drain, drywell, or sump.