

You can’t just paint over smoke smell and hope it goes away. Paint’s porous at the molecular level, which means smoke molecules pass right through and keep releasing odor into your room. That’s why you need an actual sealing primer, not regular paint. The right primer traps smoke molecules permanently by creating a barrier they can’t penetrate. We’ll show you which formulas work, how to match them to your contamination level, and what application steps actually seal the odor for good.
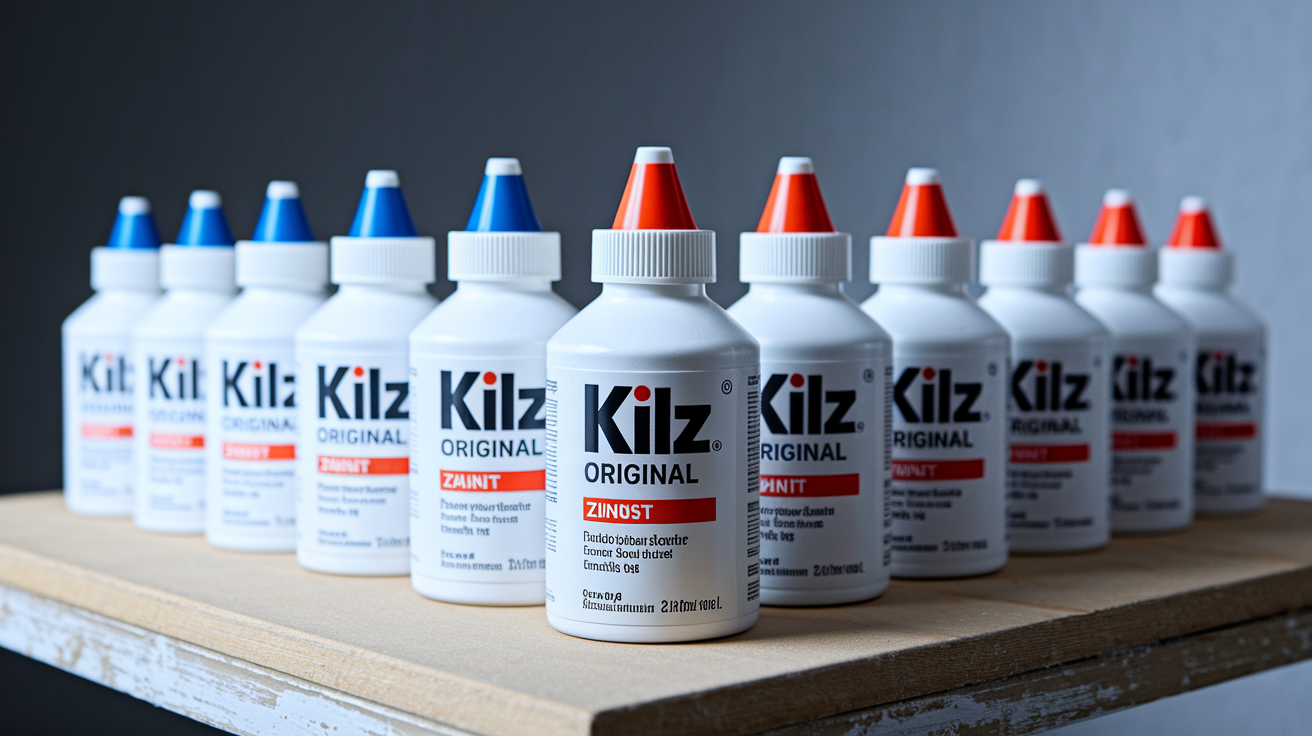
Top Smoke Odor Sealing Primers: Product Effectiveness and Selection
| Product Name | Base Type | Effectiveness Rating | Price Range | Best For |
|---|---|---|---|---|
| KILZ Original | Oil-based | Heavy-duty/Severe | $25-$35/gallon | Tobacco residue, nicotine stains |
| KILZ Restoration | Water-based | Heavy-duty/Severe | $30-$40/gallon | Fire restoration, pet odors |
| Zinsser Odor Killing Primer | Water-based | Medium to Heavy | $28-$38/gallon | Cigarette smell, smoke damage |
| KILZ Original Low Odor | Oil-based | Heavy-duty/Severe | $28-$38/gallon | Sensitive spaces needing ventilation control |
| Shellac-based options | Shellac | Maximum/Severe | $35-$50/gallon | Extreme contamination, soot coverage |
Regular paint doesn’t work because smoke molecules pass right through. Paint’s porous at the molecular level, which means odor keeps moving through the finish and releasing into your room. Odor blocking primers trap those molecules permanently by creating a sealed barrier they can’t penetrate.
Oil-based KILZ Original’s been the professional standard for over 40 years when you’re dealing with tobacco residue and heavy nicotine stains. Real estate investors choose it for rental turnovers because it handles cigarette smoke that’s soaked deep into drywall and plaster. The formula physically seals the surface and traps odor molecules before they reach your topcoat.
For severe contamination from fire damage or years of chain smoking, you need maximum blocking power. KILZ Restoration and Zinsser Odor Killing Primer both offer water-based formulas that match traditional oil performance while being easier to work with. Shellac-based options work when you’re dealing with extreme cases, like fire damage with heavy soot or rooms that have been smoked in for decades. Check product labels at your local store or kilz.com for detailed guidance on matching primer strength to your contamination level.
Choosing the Right Primer Formula: Base Types and Topcoat Compatibility

Shellac Base Primers
Shellac-based primers deliver maximum odor blocking chemistry for severe contamination. The shellac formula creates the tightest seal against smoke molecules, making it the go-to choice when nothing else has worked. You’ll need serious ventilation because shellac primers release strong fumes during application and drying, but that aggressive formula is exactly what traps stubborn odor molecules permanently.
VOC levels in shellac primers run higher than water-based options, so plan for open windows and fans. Shellac dries fast though, usually within 45 minutes, which means you can topcoat quickly. Both latex paint and acrylic finishes stick well to shellac primers once they’re fully cured. The chemistry creates a hard surface that grips topcoats securely, whether you’re using flat wall paint or semi-gloss trim enamel.
Oil-Based Coating Primers
Oil-based primers work best at sealing porous materials where smoke’s penetrated deep into wood paneling, unsealed drywall, or bare plaster walls. The oil chemistry soaks into the surface slightly before hardening, which means it seals from within the material, not just on top. This makes oil-based coating the right choice for old houses where tobacco smoke’s been absorbed into the structure over years.
Low-odor oil formulas like KILZ Original Low Odor give you the sealing power of traditional oil while producing fewer fumes. This matters when you’re working in occupied homes or spaces where ventilation is limited. VOC levels in modern low-odor oils are significantly lower than old-school formulas, though still higher than water-based options. Plan for moderate ventilation and don’t trap yourself in small rooms during application. Latex paint, acrylic finish, and oil-based topcoats all work over oil primers after the recommended dry time.
Water-Based Formula Primers
Water-based primers have improved dramatically. KILZ Restoration and Zinsser Odor Killing Primer both seal smoke odor as effectively as oil and shellac formulas, but clean up with soap and water. You can work in spaces without major ventilation concerns, and you won’t leave the house smelling like solvent for days.
The modern chemistry in water-based formulas creates a flexible seal that handles temperature changes better than rigid oil primers. This matters on surfaces that expand and contract, like ceilings and exterior-facing walls. Water-based primers work with any topcoat, from latex paint to oil enamel to clear polyurethane. They’re the universal choice when you need compatibility across different rooms or don’t know what finish you’ll use yet.
| Base Type | Odor Blocking Power | VOC Level | Compatible Topcoats | Best Surface Types |
|---|---|---|---|---|
| Shellac | Maximum | High | All paints and clear finishes | Extreme contamination, all surfaces |
| Oil-based | Heavy-duty | Moderate to High | All paints and finishes | Porous materials, wood, plaster |
| Water-based | Heavy-duty | Low | All paints and finishes | Drywall, concrete, most surfaces |
Topcoat adhesion depends partly on surface texture. Smooth finishes like painted drywall take any primer formula well. Textured surfaces like popcorn ceilings or heavily textured walls may need extra attention with oil-based primers to make sure you get complete coverage in the valleys. Modern water-based primers have excellent adhesion to glossy surfaces including enamel paints, varnished wood paneling, and even ceramic tile without sanding first.
You can tint most primers with up to one fluid ounce of universal colorant per gallon. This helps when you’re topcoating with a color that doesn’t hide well, like yellow or red. When working with concrete under flooring or on basement walls, water-based primers handle the slightly alkaline surface better than oil. For plaster walls, any formula works, but oil-based primers help stabilize old, chalky plaster. Always pre-test in an inconspicuous area when using specialty finishes like lacquer or catalyzed polyurethane, particularly over exotic woods or glossy paneling.
Surface Preparation Before Applying Smoke Sealing Primer

Preparation determines whether your primer actually works. Smoke residue, nicotine film, and soot sit on the surface and block primer adhesion. If you prime over contamination without cleaning first, you’re sealing dirt to the wall, and the primer won’t bond properly.
Here’s the preparation sequence:
- Remove loose debris and wipe down all surfaces to get rid of soot and ash deposits
- Wash walls, ceilings, and trim with TSP solution (trisodium phosphate) mixed according to package directions, scrubbing in circular motions
- Pay extra attention to nicotine stains, which show up as yellow-brown discoloration and feel slightly sticky or greasy
- Use a degreasing cleaner on areas with heavy residue, particularly around light switches and door frames where hands have touched
- Rinse all surfaces with clean water to remove TSP residue, then let everything dry completely (24 hours minimum)
- Inspect porous materials like unsealed wood or bare drywall to confirm they’re dry to the touch and no moisture remains
Heavy contamination needs more aggressive cleaning than light residue. If you’re dealing with years of chain smoking, you may need to wash surfaces twice. Wood paneling often holds more contamination than drywall because the grain absorbs smoke oils. Plaster walls, especially old lime plaster, can be fragile when wet, so use less water and more careful scrubbing. Concrete for subfloors requires the same TSP wash because smoke odor soaks into concrete just like it does into drywall. Textured surfaces need extra scrubbing time to reach into the valleys where residue hides.
Step-by-Step Application Methods and Professional Techniques

Choose your application method based on how much area you’re covering and what surfaces you’re treating. Spray works fastest for whole rooms. Roller handles large flat areas efficiently. Brush gives you control for detail work and smaller spaces.
Spray Application for Large Areas
Set your airless sprayer to a 0.017 inch tip and 2000 to 2500 psi pressure. These settings atomize the primer properly without creating too much overspray. Hold the spray gun 10 to 12 inches from the surface and keep consistent distance as you move. Overlap each pass by about 30 percent to avoid thin spots.
For aerosol cans, shake for two full minutes and test spray on cardboard first. Keep the can 10 to 12 inches away and use smooth, even strokes. Aerosol works well for small projects, closets, or touching up areas you missed with roller or brush.
Professional contractors always pre-test spray patterns in an inconspicuous area first, usually behind a door or in a closet. They use overlapping spray patterns on high ceilings and work in sections to keep wet edges. In enclosed spaces, they spray in one direction first, then cross-spray perpendicular for complete coverage.
Roller Technique for Walls and Ceilings
Use a 3/8 inch nap roller for smooth drywall, a 1/2 inch nap for lightly textured surfaces, and a 3/4 inch nap for heavy texture. Pour primer into a roller tray, load the roller evenly, and roll off excess so you don’t drip.
For wall priming, start in a corner and work across in three foot sections. Apply primer in overlapping vertical strokes, then smooth horizontally without reloading. This spreads primer evenly and avoids roller marks.
Ceiling treatment requires more care. Work in three foot squares, rolling away from yourself first, then toward yourself, then perpendicular to blend. Keep the roller loaded but not dripping.
Professionals apply primer in “W” patterns on porous materials and textured surfaces. Roll a W shape about three feet wide, then fill it in with parallel strokes. This technique makes sure you get better coverage because it works primer into the surface texture before smoothing.
Brush Coverage for Detail Work
Use a 2 inch angled brush for trim, corners, and cutting in around ceilings and baseboards. A 3 inch flat brush handles larger areas like door frames and wood paneling. Load the brush about one third up the bristles, tap off excess, and apply with smooth strokes following the grain on wood.
Brush application gives you direct control for spot treatment areas where smoke damage is concentrated, like walls near ashtrays or above radiators.
Professional contractors use brush application to inspect the surface while they work. They treat all visible surfaces systematically, checking for missed spots, staining, or areas needing extra attention. Brushing lets you feel the surface condition and adjust coverage as you go.
Temperature and humidity affect how primer performs. Apply when it’s between 40°F and 90°F with relative humidity below 85 percent. Cold primer doesn’t flow well and dries too slowly. High humidity extends dry time and can cause adhesion problems.
Plan your recoat window based on the product label. Most primers are ready for a second coat within 45 minutes to an hour. For heavy contamination, that second coat matters. Don’t skip it just because the first coat looks good.
Success factors include addressing concrete under flooring before installing new carpet or laminate, and treating entire rooms, not just walls. Professionals prime ceilings, walls, trim, closets, and inside cabinets in one session so nothing gets missed.
Dry Time, Recoat Windows, and Coverage Rates

Timing affects whether your fire restoration or renovation stays on schedule. Rush the dry time and you’ll trap solvent under your topcoat, which causes adhesion failure and peeling later.
| Application Method | Touch Dry | Recoat Time | Full Cure |
|---|---|---|---|
| Brush | 25 minutes | 45 minutes | 7 days |
| Roller | 25-30 minutes | 45 minutes to 1 hour | 7 days |
| Spray | 30 minutes | 1 hour | 7 days |
Most primers dry to touch quickly, but that doesn’t mean they’re ready for topcoat. Touch dry means you won’t leave fingerprints. Recoat time means the primer’s hardened enough to accept another coat without lifting or wrinkling. Full cure takes a full week for maximum adhesion and hardness.
Coverage rate runs about 300 to 400 square feet per gallon on sealed surfaces like painted drywall. Porous materials like bare wood, unsealed concrete, or textured plaster may cut that to 200 to 250 square feet per gallon because they absorb more primer. Calculate your square footage by multiplying wall length times height, then adding all walls together. Don’t forget the ceiling if you’re priming it.
For areas with smoke penetration deep into the material, plan on two coats minimum. Your first coat seals the surface. The second coat makes sure you get complete coverage and blocks any remaining odor molecules. Temperature conditions and humidity factors change dry time significantly. In cold rooms near 40°F, double your dry time expectations. High humidity slows drying even more, so run a dehumidifier if you’re working in damp conditions.
Safety, Cleanup, and Storage Guide
Safety during application protects your lungs and skin. Proper cleanup and storage extend primer shelf life and prevent environmental problems.
Safety Precautions During Application
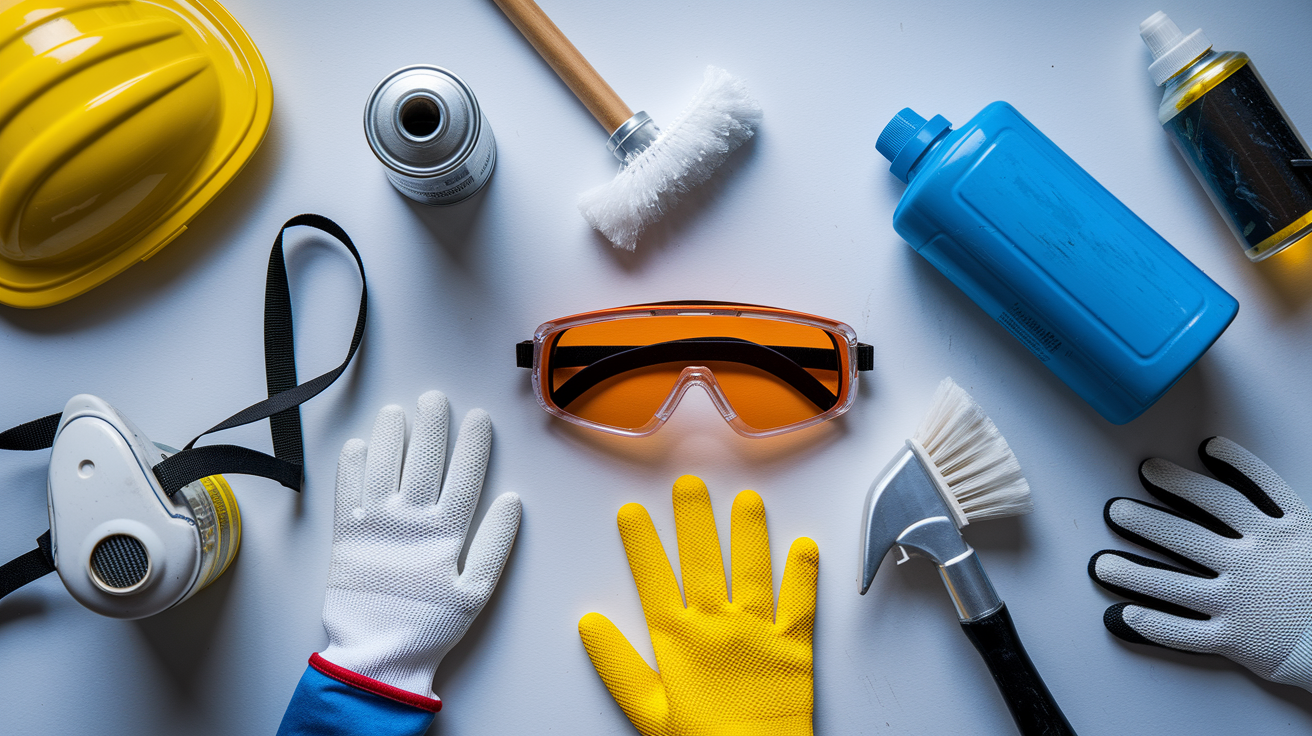
Wear a respirator mask rated for organic vapors (not just a dust mask) when using oil-based coating or shellac primers. Put on nitrile gloves, safety goggles, and long sleeves to keep primer off your skin. Open windows and run fans to create cross ventilation in enclosed spaces, especially basements and small rooms.
Check VOC levels on the product label. Oil primers and shellac require more ventilation than water-based formulas. Control fumes by sealing off rooms you’re not working in and pointing fans outward to push contaminated air outside. Take breaks outside when working on high ceilings or in musty basement areas where air circulation is poor.
Product safety differences matter. Water-based formulas produce minimal fumes and won’t make you dizzy if you’re working in a bathroom or closet with limited airflow. Oil-based coatings require real ventilation, not just cracking a window. Professional contractors doing application in their own rentals still suit up with respirators for oil primers because the solvent exposure adds up over hours. Environmental impact is lower with water-based primers. Less VOC release means less air pollution and easier disposal.
Cleanup Procedures and Storage Guidelines
Water-based formulas clean up with warm water and liquid detergent. Rinse brushes and rollers under running water until the water runs clear, work detergent into the bristles or nap, rinse again, then shake out excess water and let them dry. Clean spray equipment immediately by running warm water through until it comes out clear.
Oil-based coating requires mineral spirits or xylene for cleanup. Pour solvent into a container, work the brush or roller through it, wipe on newspaper, then repeat with fresh solvent. Once tools are clean, wash with soap and water to remove solvent residue. Disposal guidelines for contaminated solvent vary by location. Never pour it down the drain. Many areas have household hazardous waste collection for paint solvents.
Proper disposal and storage steps:
Wrap used rags and brushes from oil primers in water, then seal in a metal can to prevent spontaneous combustion. Store opened containers with the lid hammered tight, turned upside down to create a seal, at temperatures between 40°F and 90°F. Keep unopened containers in a climate controlled space, not in an unheated garage where freezing and thawing breaks down the formula.
Check expiration dates or manufacture dates. Most primers last two to three years unopened, one year after opening. Environmental impact includes proper disposal of empty cans through municipal recycling programs that accept paint containers.
Product limitations for humid interior areas include not using primers in bathrooms with constant moisture or on surfaces that get regular water contact like shower walls. Primers seal odor but aren’t waterproof membranes. In areas with high humidity, run a dehumidifier before priming and maintain good ventilation afterward to prevent moisture from getting trapped under the primer layer.
Common Problems: Odor Breakthrough and Stain Bleedthrough

Problems happen when shortcuts get taken or contamination is worse than it looked. Knowing what goes wrong helps you prevent it.
Common mistakes that cause failure include inadequate surface preparation. Skipping the TSP wash or not scrubbing hard enough leaves a film that blocks primer adhesion. Skipping concrete under flooring means smoke soaks into concrete slabs and subfloors, then releases odor up through new carpet or laminate. Single coat on heavy contamination might look good but won’t seal severe nicotine stains or years of tobacco residue.
Missing enclosed spaces like closets, cabinets, or the areas behind radiators where smoke concentrates is another problem. Insufficient dry time before topcoating rushes the recoat window, traps solvents and prevents proper adhesion.
Odor breakthrough happens when you don’t seal every surface. Smoke penetrates walls, ceilings, and even into wall cavities through electrical outlets. Take a full room coverage approach: prime walls, ceiling, trim, inside closets, and cabinet interiors. If you’re smelling smoke after priming, you missed something. Check behind outlet covers, inside HVAC vents, and under baseboards where the previous owner might have had furniture blocking the wall.
Stain bleedthrough from nicotine stains occurs when the primer coat’s too thin or the contamination’s too heavy for one coat. Yellow-brown stains appearing through your topcoat mean the primer didn’t fully seal. The fix is to apply a second primer coat over the stained area, let it cure fully, then topcoat again. For severe staining, switch to a stronger primer formula. If you used water-based and it’s bleeding through, go to oil-based or shellac.
Poor adhesion and peeling prevention start with proper prep. If primer’s peeling, it means the surface wasn’t clean or the primer dried too fast in hot conditions. Scrape off the peeling sections, clean again, and reprime with better ventilation to slow the dry time. For property flipping and tenant damage scenarios, don’t try to save money by skipping steps. Repainting over failed primer costs more than doing it right the first time.
Specific Odor Types: Cigarette Smell, Pet Odors, and Kitchen Grease

Different odors need different approaches because they come from different sources and penetrate surfaces differently.
Cigarette Smell and Tobacco Residue
Cigarette smoke creates sticky nicotine stains that bond to surfaces. The tar in tobacco smoke forms a film that holds odor molecules against walls and ceilings. Prime everything. Ceiling treatment matters as much as walls because smoke rises and concentrates on ceilings. The residue in textured ceilings hides deep in the texture valleys.
Use oil-based primer or KILZ Restoration for wall priming when you’re dealing with years of chain smoking. The tobacco residue layer needs aggressive sealing. If the walls feel slightly greasy after cleaning, that’s nicotine film, and it requires a primer that physically encapsulates it.
Pet Odors and Mildew Smell
Pet urine soaks into porous materials like wood subfloors and baseboards. The odor’s from uric acid crystals that stay active until sealed. Prime the subfloor before installing new flooring, and prime baseboards even if they look clean.
Musty basement smells come from mildew and dampness. Treat the moisture source first. Fix leaks, run a dehumidifier, improve ventilation, then prime. Water-based primers like KILZ Restoration handle pet odors well, but remember to skip ammonia cleaners during surface prep because ammonia can react with uric acid and make the smell worse.
Kitchen Grease and Food Odors
Kitchen walls near stoves accumulate grease film from cooking. The grease holds food odors and blocks primer adhesion. Degreasing walls with a strong cleaner (TSP or a commercial degreaser) is critical before priming. If you don’t cut the grease, primer won’t stick and odors will come back.
Oil-based primers work better on greasy surfaces because they have solvents that penetrate and encapsulate oily residue. Water-based primers may bead up on heavy grease even after cleaning.
Match your primer selection to odor severity. Light cigarette smell from a tenant who smoked occasionally? Water-based primer in one coat works. Heavy smoke damage from a house fire? You need oil-based or shellac with two coats minimum. Medium contamination from a chain smoker who lived there for years? Start with KILZ Original or Restoration and plan for two coats, checking after the first whether odor’s still detectable.
Final Words
Blocking smoke and other stubborn odors comes down to choosing the right smoke odor sealing primer and preparing the surface completely before you start.
Skip the TSP wash or miss the concrete under your flooring, and you’ll smell it later through fresh paint.
Apply two coats in problem areas. Seal everything, walls, ceilings, trim, and subfloors. Give it proper dry time before topcoating.
Done right, your home won’t smell like the damage ever happened. You’ll paint over a solid barrier, not over active odors waiting to come back.
FAQ
What is the best primer to seal smoke smell?
The best primer to seal smoke smell is KILZ Original, an oil-based primer trusted by professionals for over 40 years to block heavy-duty odors and nicotine stains. For severe contamination, shellac-based primers offer maximum sealing power, while water-based KILZ Restoration matches traditional oil performance with easier cleanup.
What is the best primer for a smoker’s house?
The best primer for a smoker’s house is oil-based KILZ Original, recommended by real estate professionals specifically for blocking cigarette smoke odor and sealing tobacco residue. This primer creates a permanent barrier that prevents nicotine stains and odors from bleeding through fresh paint on walls and ceilings.
Does odor blocking primer work against smoked in house?
Odor blocking primer works against smoked in house by creating a chemical barrier that seals existing odors into the surface. Regular paint alone fails because smoke penetrates fresh coatings without a primer barrier, but proper primer application permanently locks odors and prevents breakthrough on walls, ceilings, and subfloors.
Which KILZ is best for smoke smell?
KILZ Original is best for smoke smell because it provides maximum odor-blocking power for severe cigarette and fire damage using oil-based chemistry. KILZ Restoration offers comparable performance in a water-based formula with lower fumes, while KILZ Original Low Odor works well in solvent-sensitive spaces requiring oil-based sealing.
How long does smoke odor sealing primer take to dry?
Smoke odor sealing primer takes 25 to 30 minutes to dry to touch and allows recoating in 45 minutes to 1 hour depending on application method. Full adhesion and hardness develop over 7 days, though topcoat application can proceed after the recoat window in proper temperature conditions.
Can you use water-based primer to seal smoke odors?
You can use water-based primer to seal smoke odors because modern formulas like KILZ Restoration and Zinsser Odor Killing Primer match oil and shellac performance. Water-based formulas offer lower fumes, easier cleanup with soap and water, and universal topcoat compatibility while permanently sealing cigarette smoke and fire damage odors.
Do you need to clean walls before applying smoke sealing primer?
You need to clean walls before applying smoke sealing primer because contamination, nicotine stains, and soot coverage prevent proper adhesion. Scrub all surfaces with TSP solution or low-suds cleaner, allow complete drying, and remove loose debris to ensure the primer creates an effective odor-blocking barrier.
How many coats of primer for smoke damage?
How many coats of primer for smoke damage depends on contamination severity, with one coat handling light residue and two coats required for severe problem odor areas. Apply the second coat after the 45-minute to 1-hour recoat window, covering all surfaces including walls, ceilings, and concrete subfloors for comprehensive sealing.
What surfaces need smoke odor primer?
Surfaces that need smoke odor primer include all walls, ceilings, wood paneling, plaster walls, textured surfaces, and concrete subfloors where smoke penetration occurred. Comprehensive treatment requires covering everything beyond just carpet replacement, as odors saturate porous materials throughout enclosed spaces and require full room coverage.
Can you spray smoke odor sealing primer?
You can spray smoke odor sealing primer using airless equipment with a 0.017 inch tip at 2000 to 2500 psi or aerosol cans held 10 to 12 inches from surfaces. Spray application covers large square footage efficiently on high ceilings and provides better penetration into textured surfaces and porous materials.