

You know that damp, musty smell when you open your crawlspace access? That’s not just unpleasant. It’s a warning. Crawlspace moisture feeds mold, rots floor joists, wrecks insulation, and pushes contaminated air into the rooms where you live. Most homeowners ignore it until floors start sagging or energy bills spike. But once you understand what causes moisture buildup, how to spot it early, and which fixes actually work, you can stop the damage before it spreads into expensive structural repairs.
Recognizing Moisture Warning Signs Early
Crawlspace moisture doesn’t sneak up quietly. It announces itself through warning signs that get worse if you don’t act.
The smell hits you first. That musty, damp odor that won’t go away no matter how much you clean? It’s telling you excess humidity is feeding biological growth on wood and insulation below your floors. When you spot visible mold on baseboards or walls in rooms above the crawlspace, moisture’s already migrating into your living space. And if you or your family deal with allergy or breathing issues that feel worse at home but better when you’re out, contaminated air rising from below could be the culprit.
Physical signs you can see yourself:
- Floors that warp, sag, or squeak because moisture’s weakening the joists underneath
- Doors and windows sticking or refusing to close right from structural movement
- Water stains on foundation walls pointing to where moisture’s getting in
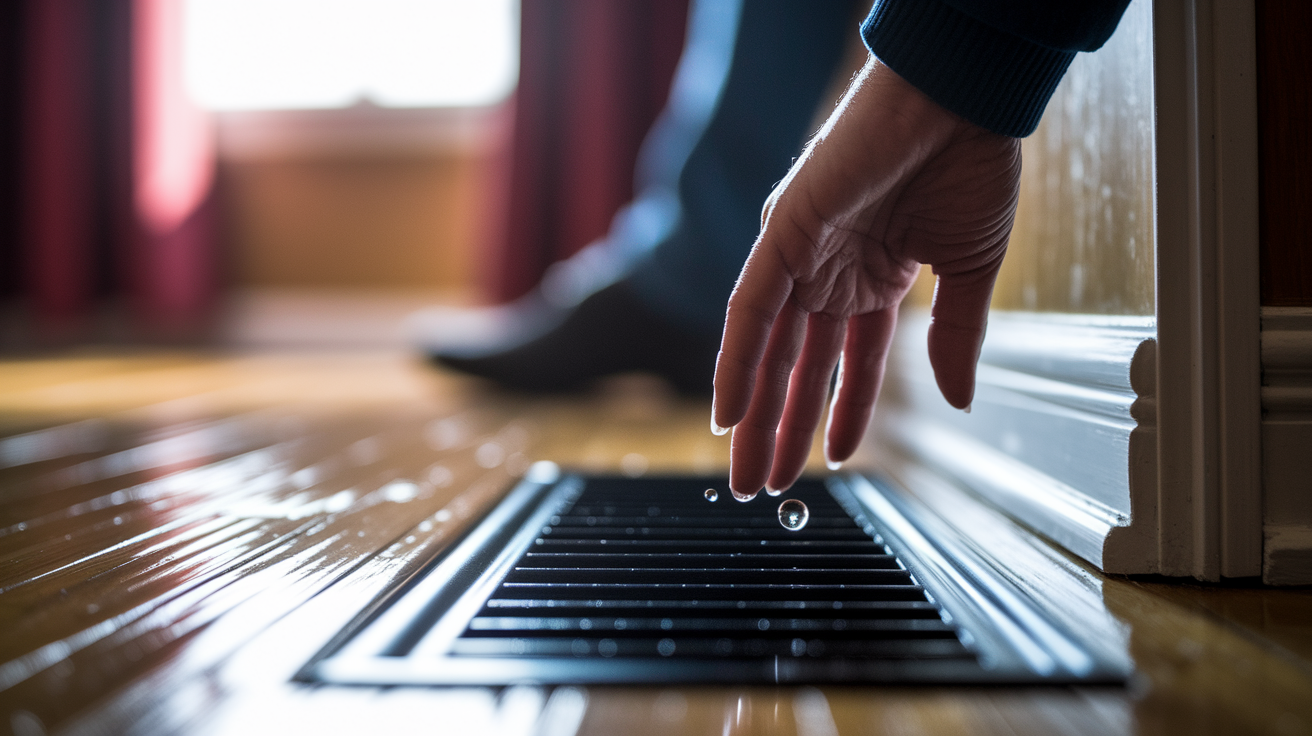
- Condensation dripping off pipes or ductwork
- White powdery stuff (efflorescence) on concrete from moisture evaporating
- Standing water or puddles showing up after storms
- Insulation that’s wet or falling down from absorbing too much humidity
- Paint peeling on interior walls near the floor
These signs often get worse after heavy rain, during humid summers, or they might stick around constantly depending on how bad things are. When you’re seeing multiple signs at once, you need an inspection now. Musty smell plus floor changes plus visible condensation means moisture’s moved past surface problems into structural territory.
Understanding What Causes Moisture Under Your Home
Crawlspaces sit in a vulnerable spot. They’re partially underground, they’re not heated, and they touch soil directly. Usually it’s not just one thing causing problems but several factors working together.
Bulk water issues need fixing immediately. Plumbing leaks under your home saturate insulation and subflooring gradually over months, bumping up crawlspace humidity without any obvious flooding. A slow drip from a supply line or drain fitting does more long term damage than most people expect. Whether it’s drainage problems or plumbing leaks, bulk water requires immediate repair to stop structural damage from spreading through wood members.
Ground moisture sneaks in through two ways most folks don’t expect. Moisture evaporates continuously from uncovered soil and porous foundation walls even when the dirt looks bone dry. This vapor transmission happens 24/7 no matter what the weather’s doing. The second surprise? Outdoor air ventilation. Warm humid air comes in through crawlspace vents, then cools when it hits the crawlspace’s lower temperature. That cooling raises relative humidity dramatically. Air that’s 60% RH at 90°F becomes 95% RH when it cools to 75°F inside the crawlspace, creating perfect conditions for biological growth despite “ventilating” the space.
Seasonal factors make these baseline problems worse. High water tables push groundwater up through hydrostatic pressure. Clay soil holds moisture way longer than sandy soil, keeping the ground under your home saturated weeks after the rain stops. Groundwater enters through foundation cracks, unsealed vents, or soil that’s graded wrong and slopes toward your foundation instead of away from it.
Health Risks From Crawl Space Humidity and Mold
Up to 50% of the air you’re breathing inside your home comes from the crawlspace below. This “stack effect” pulls air upward through floor penetrations, making crawlspace moisture control critical for indoor air quality throughout your living spaces.
Mold and mildew love damp crawlspaces and release fungal spores continuously into your air supply. These spores cause persistent coughing, wheezing, allergy flare ups, sinus irritation, headaches, and fatigue that cleaning and air filters can’t eliminate because the source below keeps producing contamination. Long term mold exposure can contribute to chronic respiratory conditions that get worse gradually over years of living above an untreated moisture problem.
Kids, seniors, and anyone with asthma face particularly harmful effects from mold exposure. Their respiratory systems react more severely to the same contamination levels that cause mild symptoms in healthy adults.
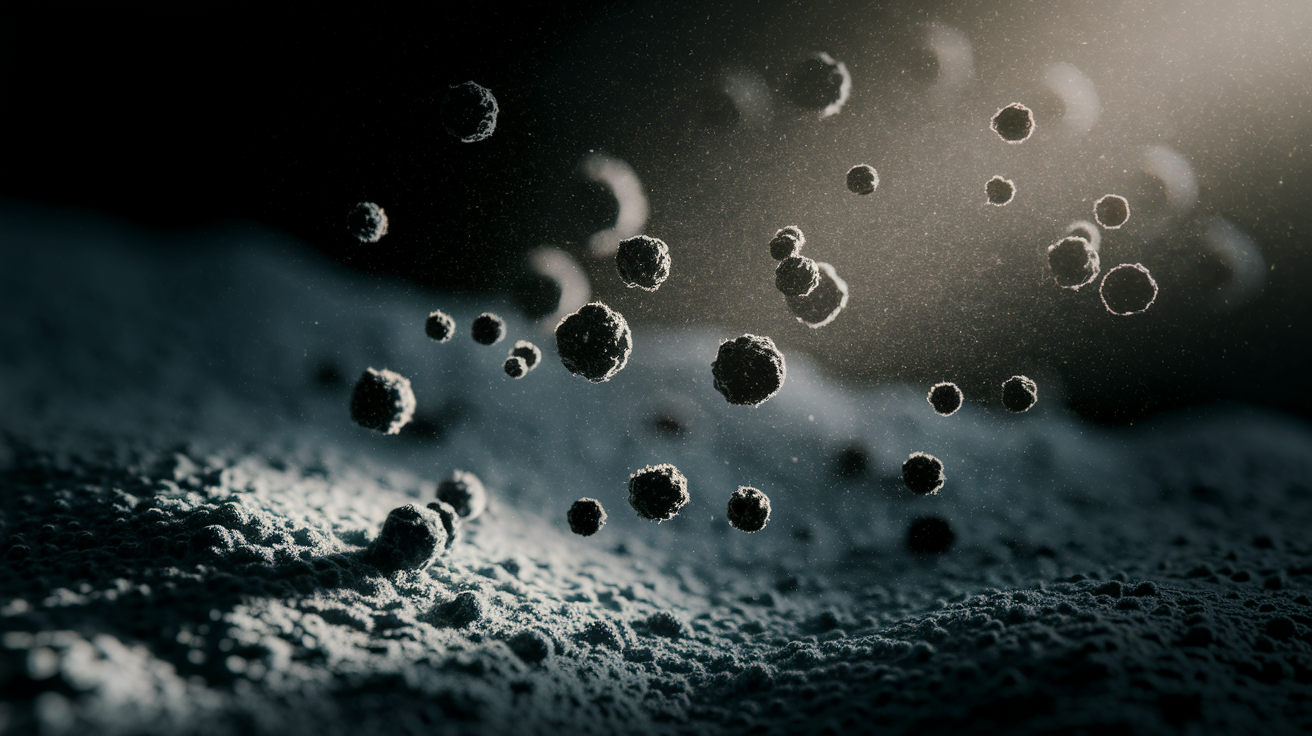
Dust mites thrive above 60% relative humidity and colonize damp insulation and wood surfaces fast. These microscopic pests release allergens triggering sneezing, runny nose, and itchy eyes that stick around despite bedroom cleaning because the crawlspace keeps reintroducing allergens into your air supply. Pest infestations add another layer. Termites and rodents attracted to moist environments bring bacteria and allergens through droppings and nesting materials that become airborne and circulate through your HVAC system.
Structural Damage and Foundation Issues From Moisture
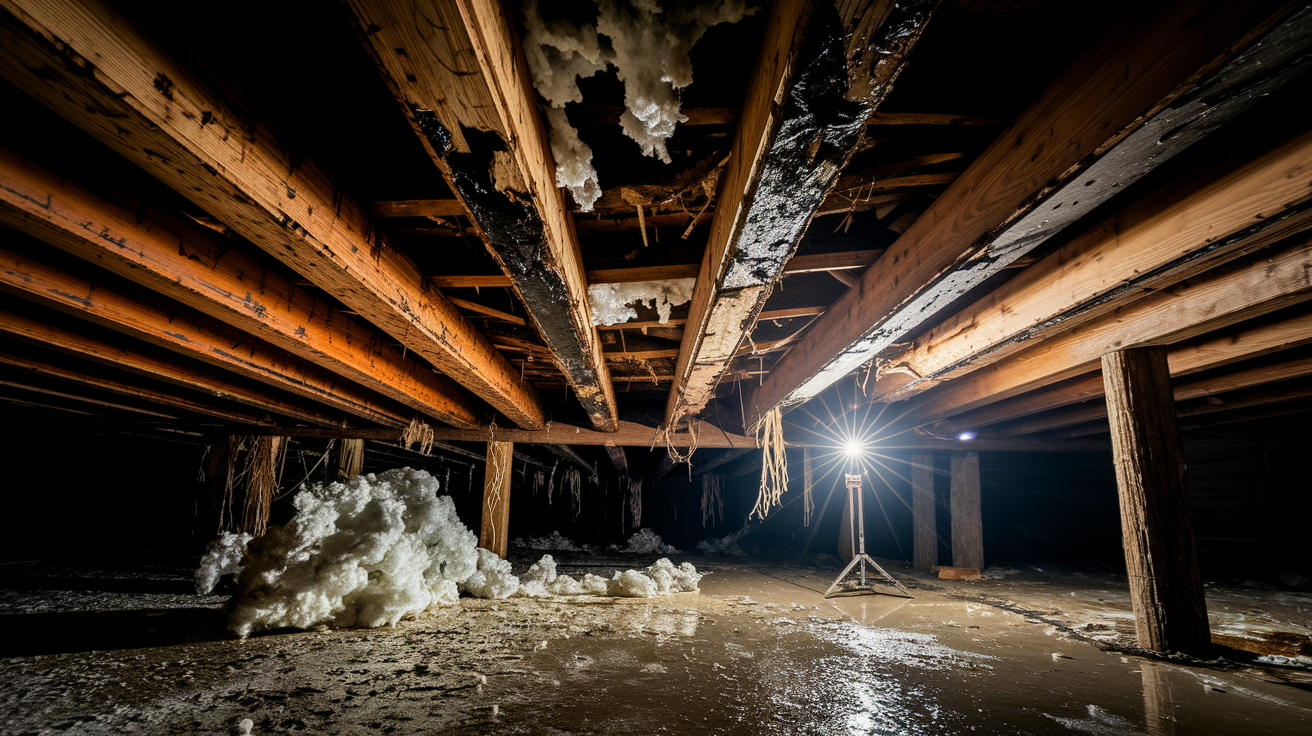
Wood rot attacks floor joists and subflooring when moisture content hits 25% or higher. This biological decay weakens structural members gradually, causing floors to sag, feel bouncy underfoot, or develop squeaks that show loose connections. Dark or warped wood visible during crawlspace inspection means long term moisture exposure needing immediate attention before failure occurs. The decay progresses invisibly inside wood members before surface damage becomes obvious.
Humidity damages insulation severely. Fiberglass batts absorb moisture, get heavy, and eventually fall away from floor joists entirely. Wet insulation loses its temperature regulation capability even before falling, forcing your HVAC system to work harder maintaining comfortable temperatures upstairs. This reduced efficiency shows up as increased energy bills that climb 10 to 20% compared to a dry, properly insulated crawlspace. The fallen insulation creates cold spots in winter and hot spots in summer as conditioned air escapes through unprotected floor sections.
Moisture attracts destructive pests that make structural damage worse. Termites consume damp structural wood actively, creating hollow galleries that weaken load bearing capacity. Rodents nest in moist crawlspaces year round, chewing through vapor barriers, electrical wiring, and ductwork while contaminating insulation with urine and droppings. Both pest types bring additional health hazards while speeding up the structural deterioration moisture started.
Measuring Moisture Levels and Conducting Inspections
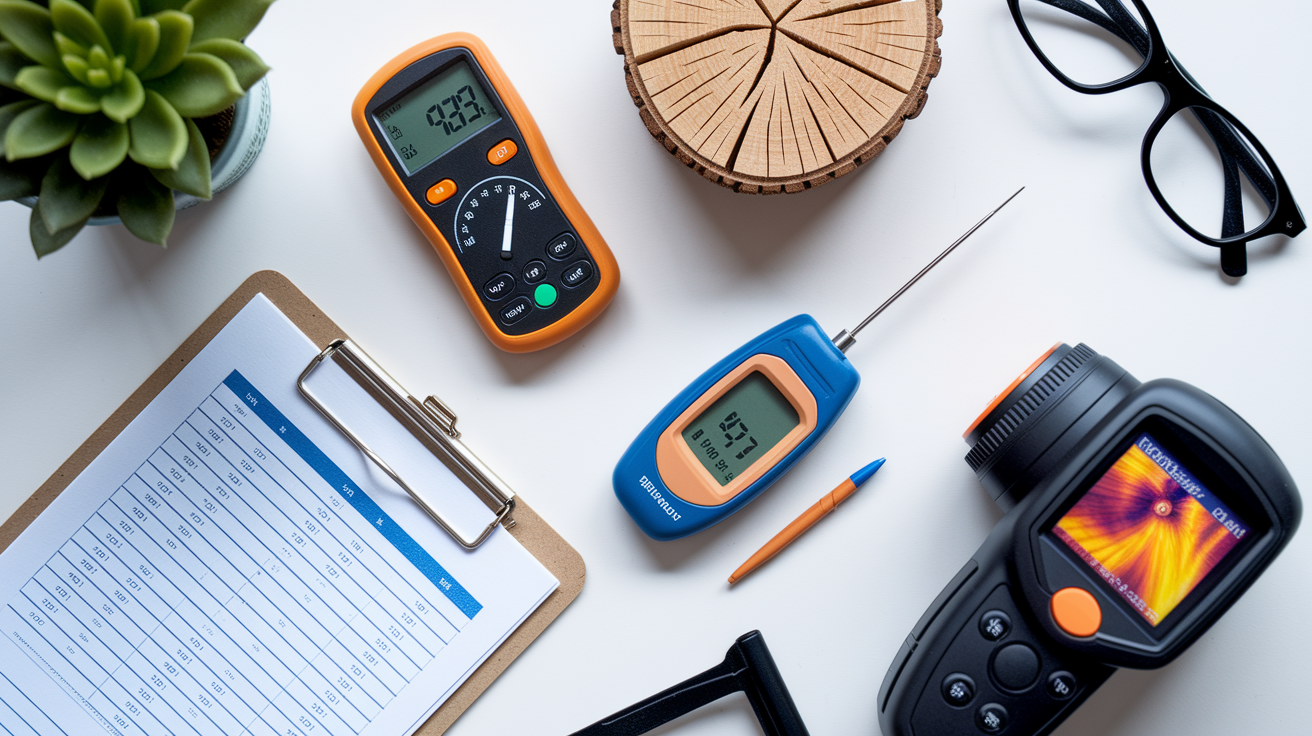
Accurate moisture assessment requires measuring both relative humidity using hygrometers and material moisture content using pin type or pinless moisture meters. 60% relative humidity is generally the upper limit for indoor comfort and effective mold prevention. Mold can begin growing at 60% RH but needs 70% or higher to sustain active growth across surfaces. These measurements tell different stories. Air humidity shows current conditions while material moisture content reveals accumulated exposure over time.
DIY monitoring makes tracking conditions practical. Digital thermo hygrometers with remote sensors let you track crawl space relative humidity from inside your home without entering the space every month. Place the remote sensor in the center of the crawlspace away from vents or obvious moisture sources for representative readings. Visible indicators during inspection include condensation on pipes or plastic sheeting, damp or darkened wood, and biological growth on organic materials.
| Measurement Tool | What It Measures | Target Range |
|---|---|---|
| Hygrometer | Relative humidity in air | Below 60% RH (under 70% minimum) |
| Moisture Meter | Wood moisture content | Below 19% (under 25% requires intervention) |
| Visual Inspection | Physical signs of moisture damage | No condensation, staining, or growth |
| Thermal Imaging Camera | Temperature variations indicating moisture | Consistent temperatures without cold spots |
Professional inspection becomes necessary when DIY monitoring shows persistent high humidity, when visible damage appears, or when you’re unsure about readings. Contractors use infrared cameras to detect hidden leaks or temperature variations you can’t see with visual inspection. They provide comprehensive moisture assessments identifying all contributing factors like bulk water sources, vapor transmission rates, ventilation impacts, and drainage deficiencies, then recommend prioritized solutions addressing root causes rather than symptoms.
Exterior Drainage and Grading Solutions

Controlling moisture before it enters the crawlspace through proper drainage and grading is the most effective prevention strategy you’ve got. Bulk water from drainage problems requires immediate repair to prevent structural damage that spreads quickly once water gets into foundation materials.
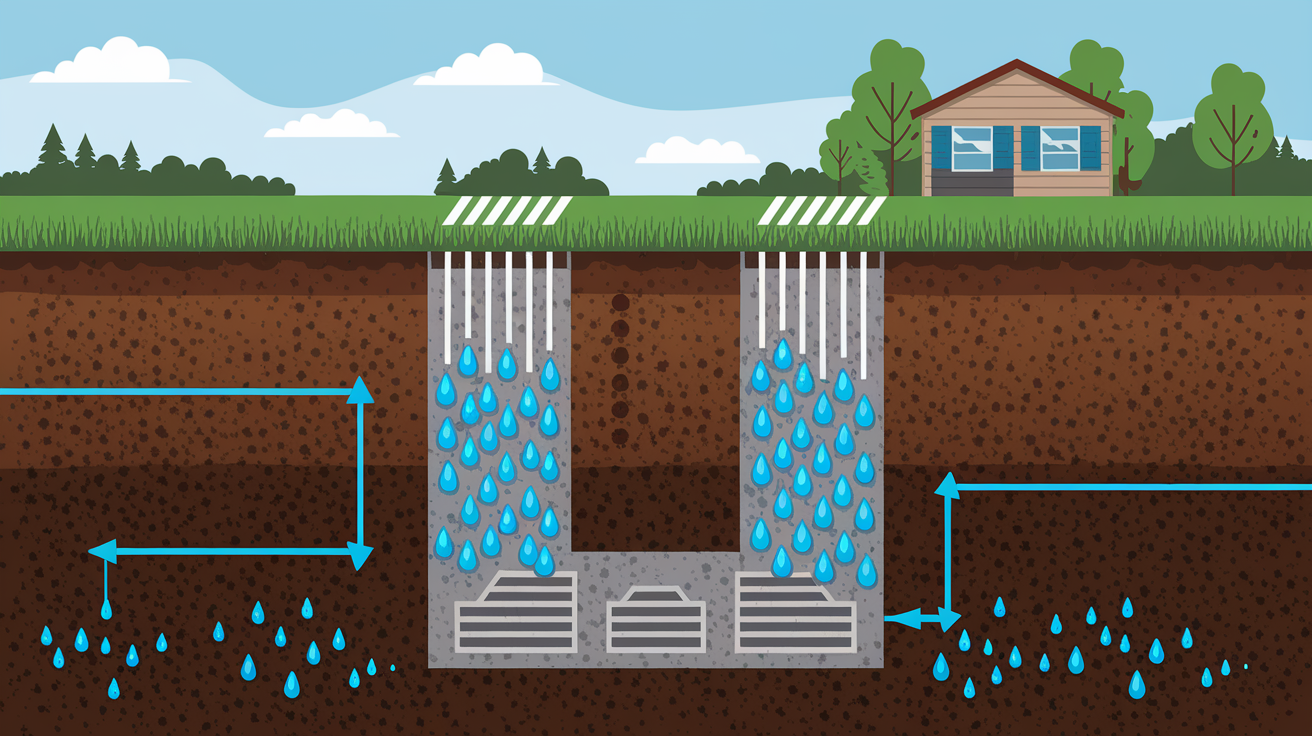
Grading problems create chronic moisture issues. Soil sloping toward your foundation instead of away allows water to pool against foundation walls during every rain event. That pooled water eventually finds entry through porous concrete, foundation cracks, or gaps around penetrations. Groundwater enters through foundation cracks, unsealed vents, or poorly graded soil that stays saturated against foundation walls for days after storms end.
Exterior drainage solutions that stop water from reaching your foundation:
- Proper grading creating slope away from foundation with minimum 6 inches vertical drop over 10 feet horizontal distance
- Gutter systems collecting all roof runoff with regular cleaning twice yearly minimum
- Downspout extensions directing collected water at least 6 to 8 feet away from foundation perimeter
- French drains intercepting groundwater flow before it reaches the foundation, installed around foundation perimeter at footing depth
- Foundation waterproofing membranes blocking moisture penetration through porous concrete
- Exterior drainage systems preventing standing water near the foundation after heavy rainfall
Sump pump installation becomes necessary for properties with high water tables or seasonal flooding risk. These systems collect groundwater in a basin before it rises high enough to enter the crawlspace, then pump it away from the foundation through discharge lines. Water stains on foundation walls or visible puddles showing up after heavy rainfall mean drainage intervention is needed immediately. Waiting allows progressive damage as each storm adds to accumulated moisture in structural materials.
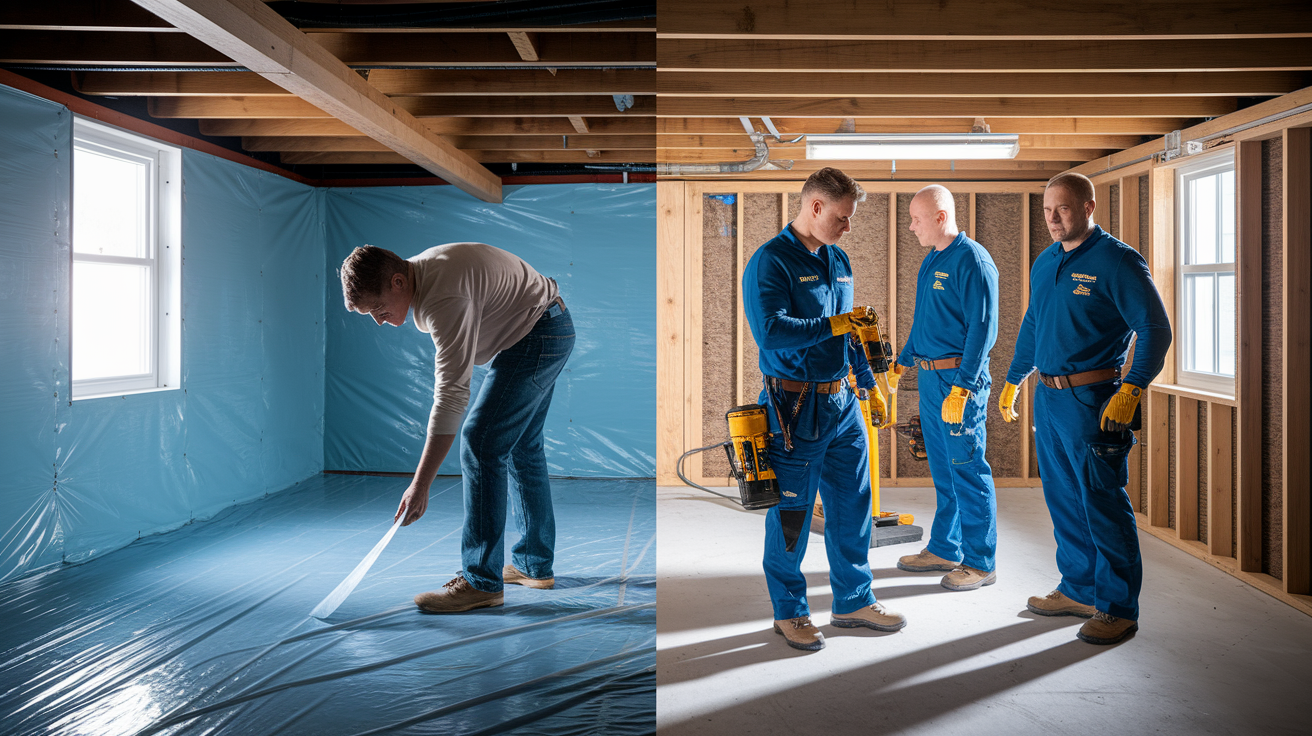
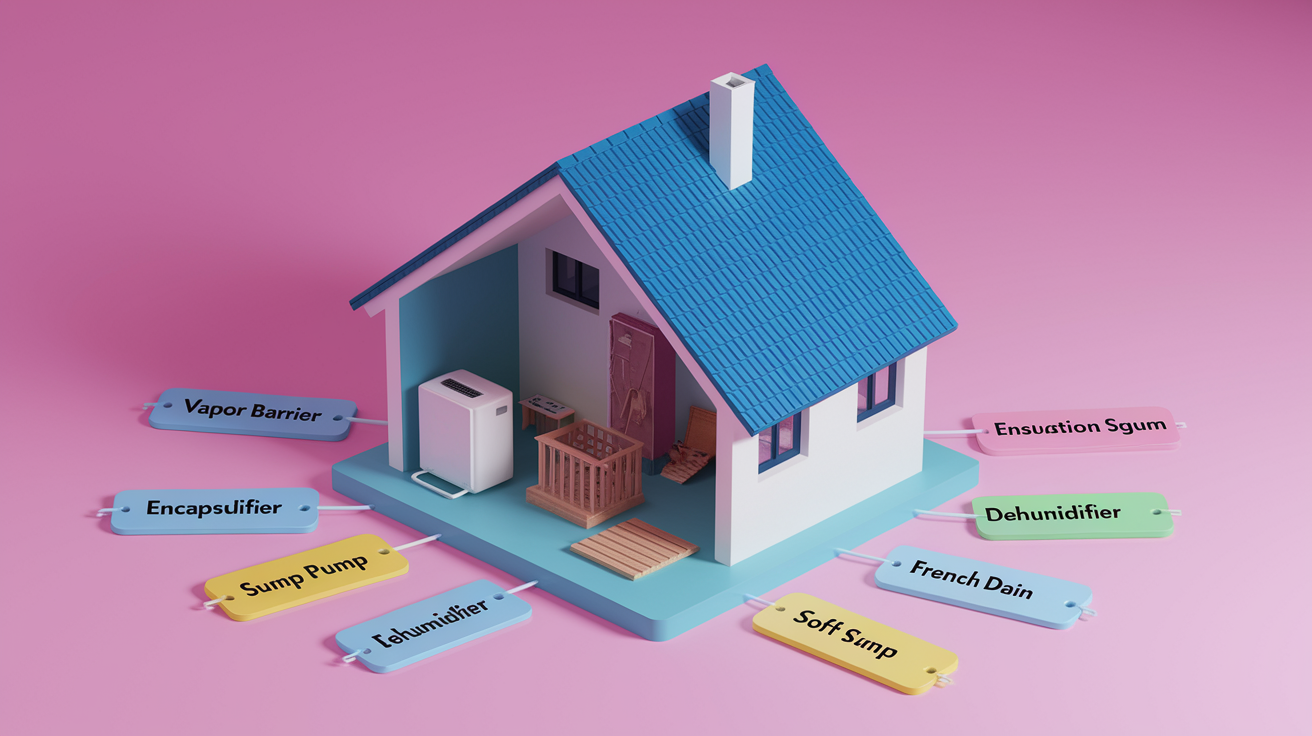
Vapor Barriers and Complete Encapsulation Systems
Moisture continuously evaporates from exposed dirt floors and porous foundation walls even when soil looks completely dry during inspection. Vapor barriers block this vapor transmission from soil into the crawlspace air where it raises humidity and condenses on cooler surfaces.
Standalone vapor barrier installation provides basic ground moisture control. Proper barriers use heavy polyethylene sheeting with minimum 6 mil thickness, though 10 to 20 mil thickness lasts longer and resists punctures better during installation and maintenance access. Installation requires covering the entire floor surface, extending material up foundation walls 6 to 12 inches and securing it there, overlapping all seams by 12 inches or more and sealing with contractor grade tape, sealing carefully around piers and pipe penetrations, and securing edges to prevent wind displacement or pest damage.
Basic vapor barrier installation costs can run under $1.50 per square foot for existing homes. This intervention is recommended when wood moisture content reaches 25% or when relative humidity stays consistently above 70% despite adequate ventilation.
Complete encapsulation represents the comprehensive long term solution combining vapor barriers with additional moisture control elements. This system installs heavy duty vapor barriers across floors and extends them up walls to create a continuous moisture barrier, closes and seals all foundation vents permanently to eliminate outdoor air entry that paradoxically raises humidity, adds wall insulation (R10 to R11 typical) to moderate temperatures, and installs dedicated crawlspace dehumidifiers maintaining optimal humidity levels year round regardless of outdoor conditions.
Benefits of complete encapsulation systems:
- Blocks ground vapor transmission completely rather than partially
- Prevents mold and mildew growth by eliminating moisture sources and controlling humidity
- Improves indoor air quality throughout your home by stopping contamination at its source
- Protects structural wood and insulation from moisture damage indefinitely
- Reduces energy costs by 10 to 20% through improved thermal boundary and reduced air leakage
- Maintains steadier temperatures year round making homes feel less drafty and smell fresher
High quality encapsulation systems can last 20 years or more with proper installation and minimal maintenance. They increase home value measurably through improved air quality, comfort, and structural protection that buyers recognize during inspection. Closed crawl spaces with proper encapsulation maintain mid 60°F temperatures in Climate Zones 3 to 4 per IRC Section R409 requirements. Homes with encapsulation feel noticeably less drafty, smell fresher without musty odors, and maintain more comfortable conditions throughout the year. For comprehensive moisture solutions or if you’re dealing with existing water damage needing professional attention, Water Damage Restoration Services can assess the full scope and coordinate repairs.
Dehumidifiers and Understanding Ventilation
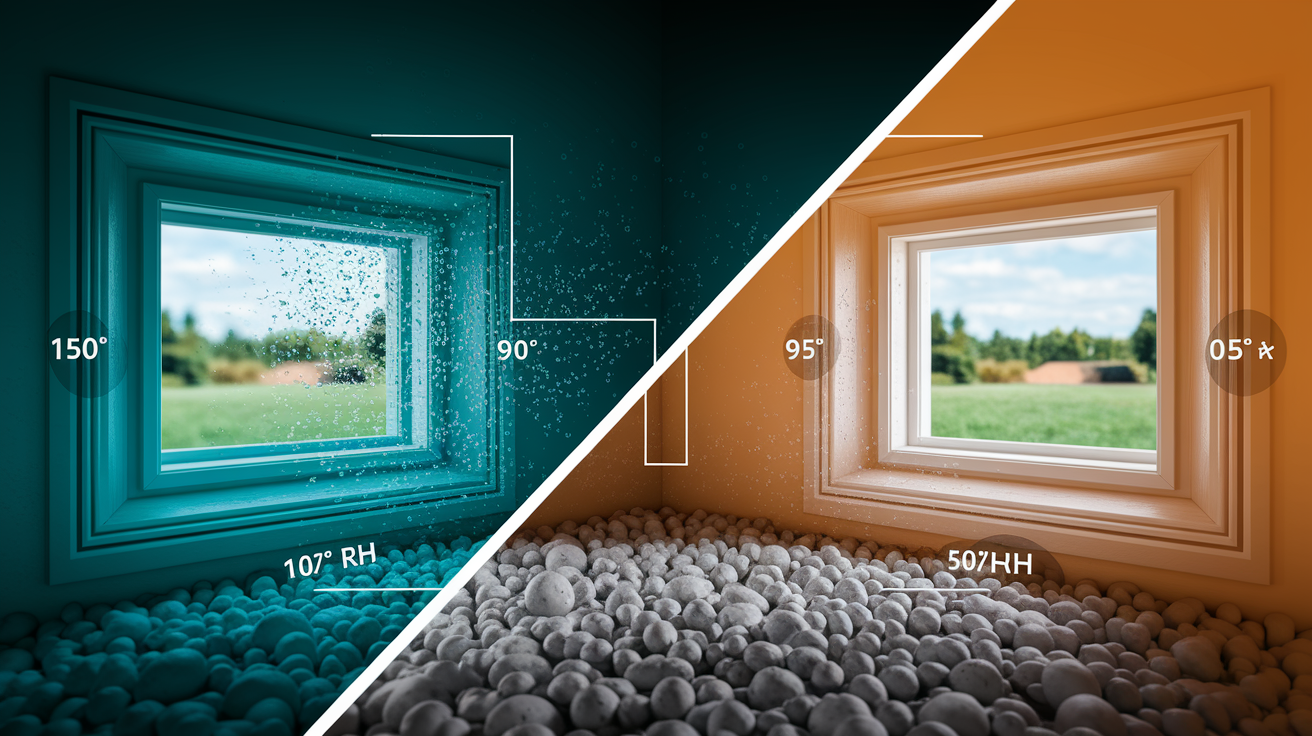
Outdoor air entering through crawlspace vents creates a counterintuitive problem. Warm humid air cools as it enters the crawlspace’s lower temperature environment, and cooling air raises its relative humidity even though absolute moisture content stays the same. That 60% RH air at 90°F becomes 95% RH when it cools to 75°F inside your crawlspace. High enough to sustain active mold growth and condense on cool surfaces. Vented crawl spaces shouldn’t be built in hot humid climates like the Southeast where this ventilation paradox causes chronic moisture problems rather than solving them.
Modern building science favors closed, conditioned crawl spaces over vented ones in most climate zones.
Dehumidifiers work best when combined with vapor barriers and sealed vents rather than used alone. A dehumidifier can’t compensate for bulk water intrusion from plumbing leaks or drainage problems, and it can’t overcome continuous ground vapor transmission from exposed soil. These units control humidity after you eliminate active moisture sources. They maintain dry conditions rather than create them initially. Dehumidifiers alone don’t work without first removing moisture sources through proper drainage, vapor barriers, and vent sealing.
Properly installed closed crawlspaces with complete vapor barriers rarely need long term dehumidification except as extra insurance. Standalone dehumidifiers running in vented crawlspaces without addressing root causes waste energy while providing only temporary symptom relief that stops when the unit fails or fills its reservoir.
DIY Moisture Fixes Versus Professional Solutions
You can handle certain crawlspace moisture tasks safely and effectively. Installing basic vapor barriers in accessible crawlspaces with adequate clearance makes sense for DIY work. Extending downspouts away from the foundation, improving soil grading near foundation walls, monitoring humidity levels with purchased hygrometers, cleaning gutters twice yearly, and sealing minor foundation cracks with hydraulic cement or polyurethane sealant represent appropriate DIY moisture control.
Professional contractors become necessary for specific situations. Standing water or active flooding requires immediate professional assessment and pumping equipment homeowners don’t own. Mold growth covering large areas presents health hazards requiring proper containment and protective equipment during removal. Dark or warped structural wood indicating long term moisture exposure needs professional evaluation for safety and load bearing capacity. Damaged insulation from condensation signals underlying problems requiring drainage improvements or coordinated dehumidification that professionals diagnose accurately. Complex drainage problems involving French drains or exterior excavation, full encapsulation systems with sealed vents and coordinated components, and foundation waterproofing installations all require professional expertise and specialized materials.
| Situation | DIY or Professional | Reason |
|---|---|---|
| Simple vapor barrier installation | DIY | Straightforward installation in accessible space |
| Active mold growth over large area | Professional | Health hazard requiring proper containment and remediation protocol |
| Extending downspouts | DIY | Basic exterior work with readily available materials |
| Structural wood damage | Professional | Safety concern requiring expertise to assess load bearing capacity |
| Full encapsulation system | Professional | Complex coordinated system requiring specialized installation and sealing |
Professionals use specialized tools including infrared cameras revealing hidden moisture patterns, commercial grade dehumidifiers sized appropriately for space volume, and professional waterproofing materials lasting decades longer than consumer products. They provide warranties on completed work, typically 1 to 5 years for encapsulation systems and longer for structural repairs. For contractors experienced in comprehensive home damage and restoration including structural repairs and coordinated moisture solutions, Fire and Smoke Damage Repair services handle complex restoration projects requiring multiple coordinated trades.
Cost Ranges for Moisture Remediation and Prevention
Crawlspace moisture remediation costs vary widely based on problem severity, total crawlspace square footage, geographic location and local labor rates, and the complexity of solutions required to address all contributing factors.
Common solution cost ranges:
- Basic vapor barrier installation running $1.50 to 3.00 per square foot for straightforward installations
- Full encapsulation system costing $5,000 to 15,000 for average sized homes depending on access and complications
- Crawlspace dehumidifier units costing $1,200 to 2,500 installed including electrical connections and condensate drainage
- Sump pump installation ranging $800 to 3,000 depending on system complexity and discharge line routing
- Exterior drainage and French drain systems costing $2,000 to 10,000 depending on linear footage required
- Foundation waterproofing running $3,000 to 8,000 for exterior membrane application and drainage board
- Grading improvements and downspout extensions costing $500 to 2,500 for typical residential properties
- Professional mold remediation ranging $1,500 to 5,000 depending on contamination extent and required containment
Encapsulation costs under $1.50 per square foot are possible for the most basic vapor barrier installations in existing homes with good access and no complications. Comprehensive systems protecting your home long term typically cost more because they include vapor barriers, vent sealing, insulation, and dehumidification working together. Systems lasting 20 years or more and reducing energy costs by 10 to 20% provide measurable return on investment through lower utility bills and avoided structural repairs that cost significantly more than prevention.
Get multiple quotes from licensed contractors, verify each contractor’s credentials and current insurance coverage, ask specifically about warranties on materials and labor, and consider financing options for larger projects if paying the full amount upfront strains your budget.
Preventing Future Crawl Space Moisture Issues
Ongoing prevention and monitoring cost far less and take less time than reactive repairs after damage develops. Small problems caught early stay small problems rather than becoming structural emergencies.
Preventive maintenance practices that keep crawlspaces dry:
- Monitor crawlspace humidity with remote hygrometers monthly, checking readings and targeting levels below 60% RH consistently
- Inspect crawlspace seasonally for new warning signs including condensation, staining, odors, or biological growth, especially after heavy rain events
- Clean gutters and downspouts twice yearly minimum, more often if trees overhang your roof
- Maintain proper grading around foundation perimeter, adding soil where settling creates low spots against walls
- Check for plumbing leaks under your home regularly by looking for water stains, listening for dripping, and monitoring water bills for unexplained increases
- Inspect vapor barriers annually for tears, displacement, or damage from pest activity or maintenance access
- Schedule professional crawlspace inspections every 2 to 3 years to catch hidden issues before they become visible problems
Seasonal monitoring matters particularly during humid summer months when outdoor dew points stay high for weeks and during spring when heavy rainfall saturates soil around foundations. Small problems caught during routine inspection like a torn section of vapor barrier, a downspout that disconnected, or a new crack in foundation concrete prevent expensive structural damage when addressed immediately. Maintaining crawlspace moisture control systems extends their lifespan and effectiveness. Change dehumidifier filters quarterly, ensure sealed vents stay closed and gasketed properly, verify sump pumps activate when tested monthly, and check that drainage systems flow freely without debris blockages.
Climate and Regional Moisture Considerations
Hot humid climates like the Southeast face particularly severe crawlspace moisture problems year round. High outdoor humidity combined with warm temperatures means ventilating crawlspaces with outdoor air worsens the problem rather than improving it. Vented crawl spaces shouldn’t be built in these regions according to current building science research. The warm humid air cools inside the crawlspace, raising relative humidity to levels supporting continuous mold growth and wood decay that never dries out seasonally.
Climate zone considerations affect which moisture control strategies work best and what building codes require. Closed crawl spaces with R10 to R11 wall insulation maintain mid 60°F temperatures in Climate Zones 3 to 4, providing enough warmth to prevent condensation while avoiding frozen pipe risks. Floor insulation versus wall insulation decisions depend on climate zone. Floor insulation is potentially warranted in Climate Zone 4 and colder regions where keeping crawlspace temperatures closer to outdoor temperatures makes sense. IRC Section R409 addresses closed crawlspace construction requirements that vary by region based on freezing risk, humidity patterns, and local building practices.
Regional factors compound these climate patterns. High water tables in coastal and low lying areas require more aggressive drainage solutions and waterproofing because groundwater sits closer to crawlspace floor level year round. Seasonal flooding risks in some regions make sump pump systems necessary rather than optional. Building codes reflect these regional moisture challenges. The 1968 North Carolina residential code previously allowed closed insulated crawl spaces decades before other regions recognized their benefits, because humid southeastern conditions made vented crawlspaces problematic even then.
Final Words
Crawlspace moisture problems won’t fix themselves, and waiting just makes repairs more expensive.
Start by checking your crawlspace for warning signs. Measure humidity levels. Stop bulk water from getting in through better drainage and grading.
If you’re dealing with standing water, mold growth, or structural damage, bring in professionals who can assess everything and coordinate the fix from start to finish.
Once you’re dry, keep it that way. Monitor humidity. Maintain your systems. A closed, encapsulated crawlspace protects your home, your air quality, and your peace of mind for years.
FAQ
Q: Why is there so much moisture in my crawl space?
A: Crawl space moisture typically comes from multiple sources working together including groundwater seeping through foundation cracks, moisture evaporating continuously from bare dirt floors, plumbing leaks saturating materials over time, and humid outdoor air entering through vents and cooling down which raises relative humidity levels significantly.
Q: Will homeowners insurance cover water in a crawl space?
A: Homeowners insurance coverage for crawl space water depends on the cause. Sudden events like burst pipes typically qualify for coverage, while gradual moisture problems from poor drainage, condensation, or ground seepage are usually excluded as maintenance issues homeowners are expected to prevent.
Q: How much does it cost to fix moisture in a crawl space?
A: Crawl space moisture repair costs vary widely based on problem severity. Basic vapor barrier installation runs $1.50 to $3.00 per square foot, while comprehensive encapsulation systems average $5,000 to $15,000 for typical homes, plus additional costs for drainage improvements, dehumidifiers, or waterproofing.
Q: Will a crawl space dry out on its own?
A: A crawl space will not dry out on its own because moisture continuously evaporates from exposed soil and enters through foundation materials even when dirt appears dry. Without intervention like vapor barriers, proper drainage, sealed vents, or dehumidification, humidity levels remain elevated and problems worsen.
Q: What are the first warning signs of crawl space moisture problems?
A: The first warning signs of crawl space moisture include persistent musty or damp smells that cleaning cannot eliminate, visible mold spots on baseboards or walls in rooms above the crawl space, warped or sagging floors, doors and windows that stick, and recurring allergy symptoms that worsen at home.
Q: Can I install a crawl space vapor barrier myself?
A: You can install a basic crawl space vapor barrier yourself in accessible crawl spaces using heavy polyethylene sheeting. Cover the entire floor surface, extend material 6 to 12 inches up foundation walls, overlap seams by 12 inches and seal with tape, then secure edges to prevent shifting.
Q: How does crawl space moisture affect indoor air quality?
A: Crawl space moisture affects indoor air quality significantly because up to 50% of home air originates from the crawl space. Mold and mildew release fungal spores causing persistent coughing, wheezing, allergy flare-ups, sinus irritation, headaches, and fatigue, particularly affecting children, seniors, and asthma sufferers.
Q: What humidity level should I maintain in my crawl space?
A: You should maintain crawl space humidity below 60% relative humidity for comfort and mold prevention. Mold can begin growing at 60% humidity and sustains active growth at 70% or higher. Use digital hygrometers with remote sensors to track levels monthly.
Q: Does encapsulation really reduce energy costs?
A: Encapsulation reduces energy costs by 10 to 20% when properly installed by sealing air leaks, protecting insulation from moisture damage, and allowing HVAC systems to work more efficiently. Homes with encapsulation maintain steadier temperatures year-round and feel less drafty.
Q: Should crawl spaces be vented or closed in humid climates?
A: Crawl spaces should be closed rather than vented in hot-humid climates like the Southeast. Outdoor air entering through vents cools inside the crawl space, paradoxically raising relative humidity from 60% at 90°F to 95% when cooled to 75°F, worsening moisture problems instead of improving them.
Q: When do I need professional help for crawl space moisture?
A: You need professional help for crawl space moisture when dealing with standing water or active flooding, large areas of mold growth, dark or warped structural wood, damaged insulation from condensation, complex drainage problems, or when installing full encapsulation systems requiring specialized tools and expertise.
Q: How long does a crawl space encapsulation system last?
A: A crawl space encapsulation system lasts 20 years or more when using high-quality materials and proper installation. Longevity depends on material thickness, installation quality, ongoing maintenance like dehumidifier filter changes, and protecting the vapor barrier from tears or displacement during inspections.