

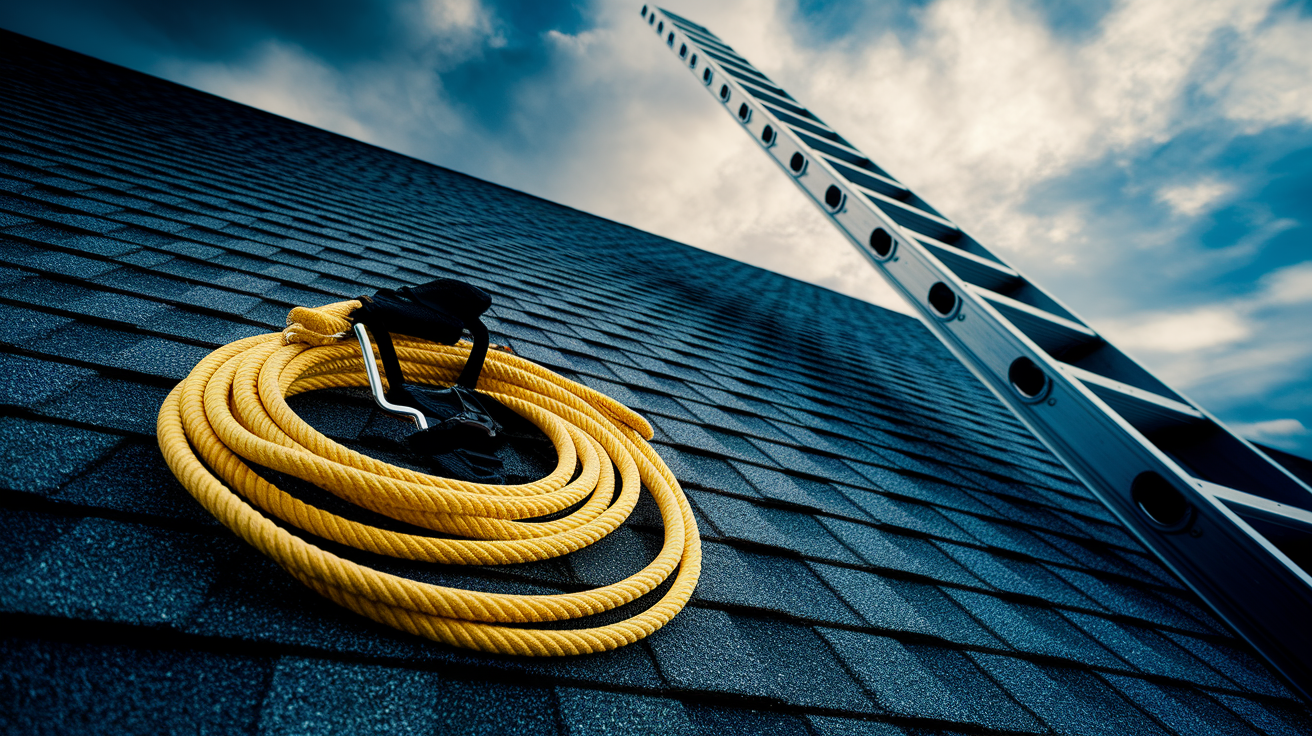
Most tarps rip loose in the first strong wind not because they’re cheap, but because people secure them wrong. A blue tarp flapping in the breeze means water’s pouring into your home again, undoing the quick fix you risked your safety to install. The right tie down method keeps your roof protected until repairs happen, while the wrong one fails exactly when the next storm hits. We’ll walk through board and fastener systems, rope anchoring, and weighted methods so you know which technique matches your damage and how long that tarp needs to hold.
Essential Techniques for Emergency Roof Protection

When storm damage leaves your roof vulnerable, the right tie-down method determines whether your tarp holds through the next weather event or fails when you need it most. Board and fastener systems provide maximum security for severe damage and extended coverage periods. Rope and strap anchoring works well when you need solid protection without adding more fastener holes to your roof. Weighted and clip methods offer quick installation for minor damage that needs short-term coverage.
Board-and-Fastener Sandwich Method
The sandwich technique creates the strongest hold for damaged roofs facing weeks or months of exposure. Start by positioning your tarp with at least three feet of overhang beyond the damaged section on all sides. Wrap the tarp edge around a 2×4 board along one side, then place a second 2×4 on top of the wrapped section. Drive 2.5 to 3 inch exterior grade screws through both boards every 8 to 12 inches, clamping the tarp securely between them.
The critical detail most people miss: never position these boards perfectly horizontal. Angle them so one end sits slightly lower than the other, creating a drainage path that prevents water dams. Water needs somewhere to go, and a horizontal board becomes a catch point that pools water, adds weight, and eventually causes failure.
Work around the entire perimeter, creating multiple anchor points. Each board section should overlap the next by at least 6 inches for continuous protection. The sandwich method distributes pressure across the entire board length instead of concentrating stress at individual screw points. This prevents the tarp from tearing even in sustained high winds.
Rope and Strap Anchor Systems
Rope securing works when you want reliable protection without driving additional fasteners into your damaged roof. Thread ½ inch diameter nylon rope through the tarp grommets along one edge, securing it with figure eight knots at each grommet to prevent slippage. Run the rope over the roof peak to the opposite side, creating multiple lines spaced 3 to 4 feet apart across the damaged area.
Anchor each rope line to stable fixtures on the far side of the roof. Chimneys, plumbing vent stacks, and sturdy roof edges work as primary tie off points. If your roof lacks built in anchor options, screw temporary eye bolts into solid roof framing, not just surface shingles. Each rope should create even tension without slack, but avoid over tightening that stresses the grommets.
Nylon rope handles weather exposure better than natural fiber alternatives. It doesn’t rot when wet, maintains strength through temperature changes, and resists UV degradation for several months. Check rope tension after the first 24 hours because initial settling often creates slight looseness that needs adjustment.
The rope method requires at least four separate anchor points for a standard residential damage area. More complex damage patterns need additional lines. Every rope creates another failure point if wind gets underneath the tarp edge, so proper tensioning across all lines matters as much as individual anchor strength.
Weighted and Clip Securing Methods
Tarp clips provide quick installation when you need protection without penetrating your roof surface. These grippers clamp onto the tarp fabric, usually at grommet locations, with attachment points for bungee cords or ropes. Position clips every 2 to 3 feet along the tarp perimeter, then run heavy duty bungee cords from clips to gutters, roof vents, or other secure points.
Sandbags and heavy objects secure tarp edges when damage is minimal and weather conditions are relatively calm. Each sandbag should weigh at least 20 pounds, positioned every 3 feet along the perimeter. On windy days, double that weight. The problem with weight only methods is that strong winds can lift an entire weighted edge if the bags aren’t heavy enough or spaced too far apart.
Combining clips with bungee cords creates redundancy. If one bungee fails, others maintain tension. If a clip releases, the bungee stretches instead of immediately releasing the tarp. This combination approach works well for damage areas under 100 square feet where you need protection for two to four weeks maximum.
Use board and fastener methods when damage is severe, coverage will extend beyond one month, or your area faces regular high winds. Choose rope systems for medium damage where you want solid protection without additional roof penetrations. Reserve weighted and clip methods for minor damage with short term coverage needs, and always add extra securing if weather forecasts show storms approaching.
Critical Safety Protocols Before Starting Roof Work
Roofing work causes more serious falls and injuries than almost any other home maintenance task. Wet or damaged roof surfaces multiply the danger.
- Position your ladder on stable, level ground at a 4 to 1 angle (one foot out for every four feet up) and have someone hold it steady throughout your climb
- Maintain three points of contact at all times when climbing: two hands and one foot, or two feet and one hand
- Never work on a roof during rain, active lightning, or winds exceeding 20 mph because wet surfaces become skating rinks and gusts can knock you off balance
- Always work with a partner who can hold equipment, assist with tarp placement, and call for help if something goes wrong
- Wear work boots or shoes with deep tread grip, never smooth soled shoes or sneakers that slip on roof surfaces
- Use a proper safety harness with roof anchor on any pitch steeper than 4/12, securing the anchor to solid roof framing before stepping onto damaged areas
- Inspect roof stability before putting your full weight on damaged sections by checking for soft spots, sagging, or visible deck failure from below in the attic
- Keep a charged phone within reach and make sure someone knows you’re working on the roof with an expected completion time
Wet roofs are slippery roofs. Even a light mist creates enough moisture to compromise traction on shingles. Hidden damage beneath standing water is worse because you can’t see soft deck boards or missing sheathing that might not support your weight. Water also adds significant weight to damaged sections, increasing collapse risk on already compromised structures.
Loose and broken shingles shift under your feet, creating unexpected tripping hazards as you move across the roof surface. Protruding nails become puncture risks. Sections of damaged decking might feel solid until you transfer your full weight onto them. Before walking on any damaged area, inspect it carefully from below in your attic space, looking for daylight, sagging, or separated framing that indicates structural failure.
Professional help is mandatory when:
Structural damage is visible with sagging roof deck, separated framing members, or interior ceiling collapse. Roof pitch exceeds 6/12 slope, which becomes dangerously steep for anyone without professional fall protection equipment. Multiple damaged sections cover more than 200 square feet or span different roof planes. Weather forecasts show severe conditions arriving within 24 hours, requiring immediate installation you’re not equipped to handle safely. You lack proper safety equipment including harness, secure anchor points, stable ladder, and appropriate footwear for roof work.
Required Materials and Tool Preparation

Gather everything before you climb onto your roof. Making multiple trips up and down a ladder while carrying tools creates unnecessary fall risk and wastes time when weather might be moving in.
Your roof work will go faster and safer when backup supplies are ready. Bring 25 percent more fasteners than you calculate needing because screws get dropped, nails bend, and securing often requires more anchor points than initial estimates. Add 10 feet of extra rope length for unexpected anchor point adjustments. Include a second utility knife blade because the first one will dull cutting through heavy tarp material.
Fastening materials:
2×4 boards in 8 foot lengths, two boards per anchor section plus extras for corners. Exterior grade screws, 2.5 to 3 inches long, one pound box minimum. Galvanized nails for temporary securing while positioning boards. Cap nails with plastic washers if attaching directly through tarp to roof surface.
Securing systems:
Nylon rope, ½ inch diameter minimum, 100 feet for typical residential damage. Heavy duty bungee cords in 24 to 36 inch lengths, pack of 8 to 12. Ratchet straps as rope alternatives, two 15 foot straps minimum. Commercial tarp clips, 12 to 20 depending on perimeter length. Sandbags or weight bags, 20 to 30 pounds each, 8 to 12 bags for perimeter securing.
Basic tools:
Hammer for driving nails and general positioning work. Cordless drill with Phillips and square drive bits for deck screws. Utility knife with fresh blade for cutting tarp and trimming excess material. Measuring tape, 25 foot minimum for damage assessment and tarp sizing. Stable extension ladder rated for your weight plus tool load. Work gloves with grip coating to prevent hand fatigue and blisters. Safety harness with roof anchor if pitch exceeds 4/12 slope. Staple gun for temporary tarp edge securing during positioning.
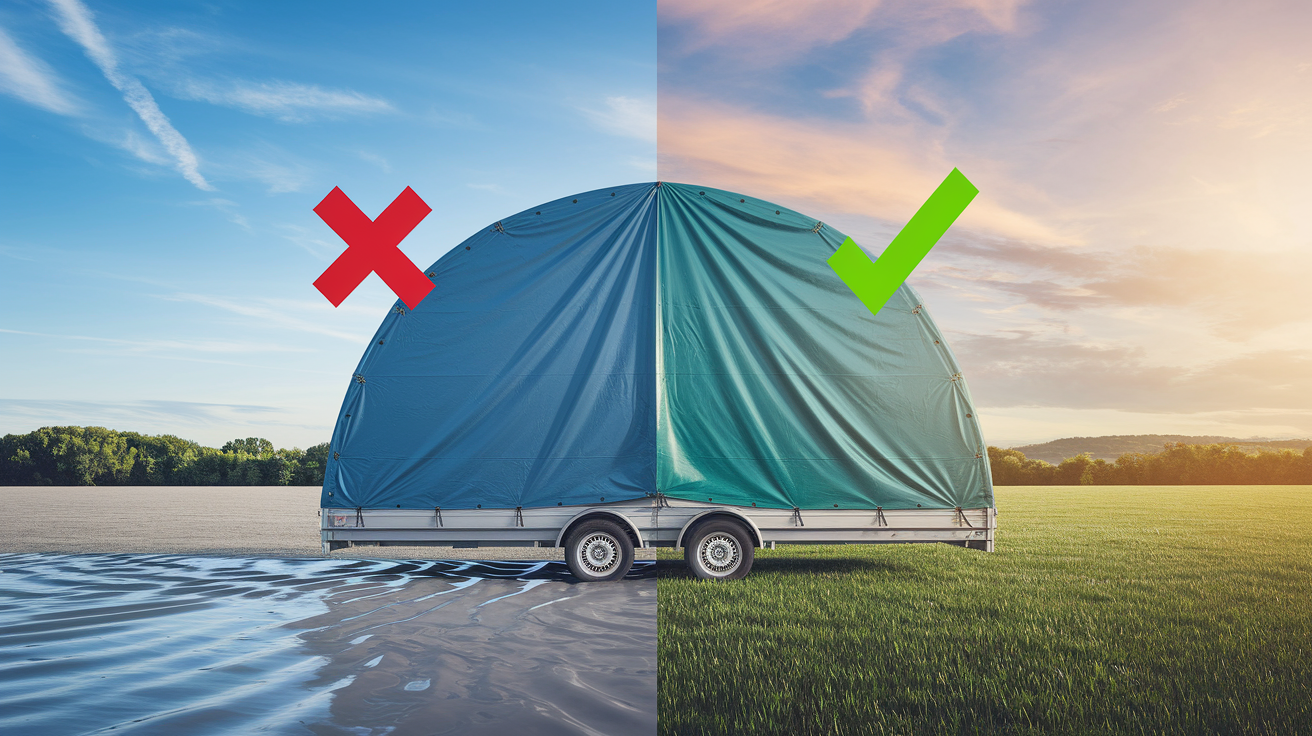
Tarp selection makes the difference between coverage that lasts until repairs happen and coverage that fails in the first storm. Vinyl tarps in 6 to 12 mil thickness handle severe weather and multi month coverage periods. They resist tearing, stand up to UV exposure better than alternatives, and maintain waterproof integrity through temperature extremes. Canvas tarps work for 2 to 4 month installations where breathability prevents condensation buildup under the tarp, important in humid climates or when covering ventilation areas. Poly tarps are lightweight, quick to install, and adequate for emergency 2 to 4 week coverage until professional repair, but they degrade rapidly in direct sun and tear more easily than vinyl.
| Tarp Material | Thickness | Water Resistance | Durability | Best Use Duration |
|---|---|---|---|---|
| Vinyl | 6-12 mil | Excellent, fully waterproof | High, resists tearing and UV | 3-6 months |
| Canvas | 10-12 oz per sq yd | Good, breathable protection | Moderate, UV resistant | 2-4 months |
| Poly | 5-8 mil | Good short-term | Low, degrades in sun | 2-4 weeks |
Preparing the Roof Surface Before Tarp Placement

Take photographs of your roof damage from multiple angles before you touch anything. Your insurance company needs documentation showing the full extent of damage, including wide shots that capture the damaged area in relation to the entire roof and close up images of specific problem spots like missing shingles, punctures, or cracked flashing. Photograph from ground level, from ladder height, and from the roof surface if it’s safe to access. If debris completely obscures the damage, take “before debris removal” photos first, then document again after clearing.
Clear all debris using a roofing shovel or stiff push broom, working carefully to avoid causing additional damage to already compromised shingles. Remove broken shingle pieces, tree branches, leaves, twigs, and any other materials that accumulated during the storm. Collect debris in buckets or contractor bags rather than sweeping it off the roof edge, which creates gutter clogs and dumps material onto the ground near your foundation. Pay special attention around the damaged area because debris left underneath your tarp creates pressure points that can puncture the material from below.
Surface drying is critical before tarp placement. Moisture prevents proper tarp adhesion if you’re using adhesive methods, creates slippery conditions that make positioning dangerous, and promotes mold growth in the enclosed space between tarp and roof deck. Use old towels or a shop vacuum to remove standing water. Let the surface air dry for at least 30 minutes in sunny conditions, longer in shade or humid weather. You’re not aiming for perfect dryness, just eliminating standing water and obvious dampness that would cause problems.
Inspect for loose or unstable materials that could compromise your tarp installation. Check partially detached shingles that might pull completely free when you place the tarp, creating new openings. Look for loose flashing around chimneys or vents that could shift and create gaps. Test the deck surface around damaged areas by pressing firmly to identify soft spots indicating water saturated or rotted sheathing. Remove or secure protruding nails that could puncture your tarp. Any nail heads sticking up more than a quarter inch need to be either pulled out or hammered flush with the surface.
Proper Tarp Sizing, Placement, and Tensioning
Measure your damaged area from edge to edge, then add a minimum of 3 to 4 feet in all directions for proper overlap. A hole that measures 4 feet by 6 feet needs a tarp at least 10 feet by 14 feet. Account for roof pitch because steeper slopes need more material to achieve the same coverage, roughly 10 percent more tarp for every 2/12 increase in pitch. Always round up to the next standard tarp size rather than trying to minimize coverage, because undersized tarps leave damage exposed at the edges where wind and water find their way underneath.
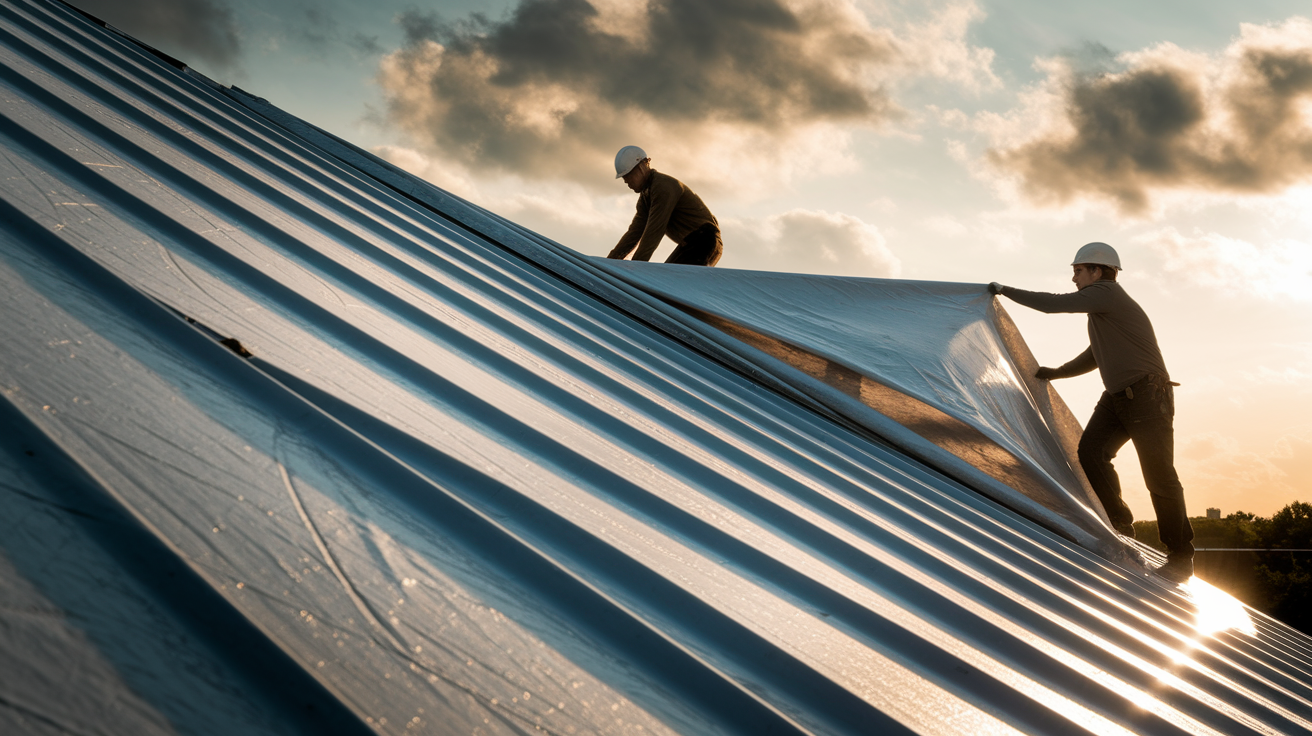
Proper placement starts at the roof ridge and works downward on pitched roofs. Position yourself safely with your partner, unfurling the tarp slowly while preventing it from sliding down the slope before you secure the upper edge. One person should hold the top edge at the ridge while the other guides the bottom edge into position over the damaged area. Don’t try to place large tarps alone because wind catches them like sails, and repositioning after they’ve settled wrong wastes time and energy you’ll need for securing.
The wrap around ridge method provides maximum water protection when damage crosses the ridge line or comes within 6 feet of the peak. Extend your tarp over the ridge to the opposite roof slope, letting it drape down at least 2 feet on the far side. This creates a continuous surface where water rolls off in both directions without ever finding a horizontal edge it can slip beneath. Secure the far side edge with boards or weights, creating a weather tight seal that handles driving rain from any direction.
Tensioning eliminates wrinkles, folds, and loose areas that catch wind and create lift. Start at the center of your tarp and work outward toward the edges, pulling the material taut but not stretched. Vinyl and poly tarps should lie flat with no significant slack, while canvas can maintain a slight looseness without causing problems. Use your hands to smooth sections as you secure them, or use a clean push broom to work out stubborn wrinkles on large installations. Check for depressions or valleys where water might pool, adjusting tension until the entire surface sheds water toward the edges.
Corner and edge reinforcement prevents the most common tarp failures. Every corner needs double securing, whether that’s two separate board sections meeting at the corner, crossed rope lines, or a board section plus additional weight. Edges must lay flat against the roof surface with no gaps exceeding one inch, which means adding intermediate anchor points every 3 to 4 feet along the perimeter on tarps larger than 12 by 12 feet. Large tarps spanning 20 feet or more need anchor points every 2 to 3 feet because the additional surface area creates more wind resistance and greater lift forces at unsecured sections.
Specialized Situations: Chimneys, Vents, and Roof Features
Roof features like chimneys, plumbing vents, and skylights complicate tarp installation because they create obstructions in your coverage area and potential leak points if not handled correctly.
Working Around Chimneys
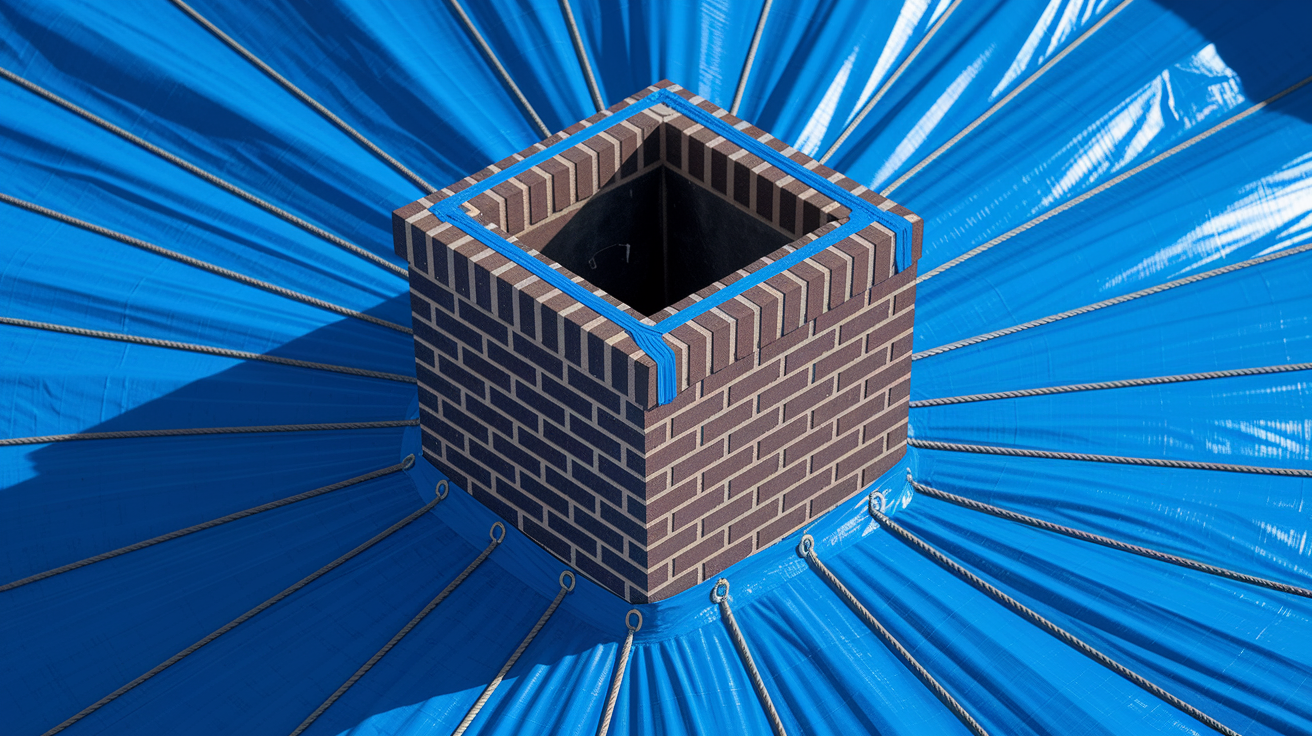
Decide whether to cut an opening or run the tarp around the chimney base depending on where damage sits relative to the structure. Damage upslope from the chimney often works better with the tarp running around the base, tucked against the chimney on the uphill side and secured normally on the downslope side. Damage that surrounds the chimney requires cutting a hole sized 2 inches larger than the chimney dimensions, giving yourself working room for sealing.
Cut openings using a sharp utility knife, working from the tarp underside to prevent fraying on the weather exposed upper surface. Make straight cuts rather than trying to follow the exact chimney shape, because simple geometric cuts weaken the tarp less than complex curves. Seal all cut edges with quality waterproof tape, the kind rated for outdoor UV exposure and temperature extremes, not basic duct tape that fails in weeks.
Adhere tape to chimney flashing rather than rough brick or masonry surfaces whenever possible. Flashing provides a smooth, clean surface where tape bonds properly and maintains its seal through weather cycles. Rough masonry surfaces prevent proper adhesion and create gaps where water infiltrates. Use the chimney as a primary anchor point for rope systems on steep roofs, wrapping rope completely around the structure and securing with tension knots that won’t slip.
Covering Vents and Skylights
Cut openings for plumbing vents and other roof penetrations only when damage is within 3 feet of the feature, otherwise run the tarp over them completely. Covering vents temporarily won’t cause problems for the few weeks or months your tarp remains in place, though you should avoid covering ridge vents or other primary attic ventilation on long term installations lasting over 60 days.
Create waterproof seals around plumbing vents by cutting a hole 1 inch larger than the vent diameter, then using flexible rubber boot fittings or quality waterproof tape to seal the gap between tarp and vent pipe. The seal doesn’t need to be permanent repair quality, just weather tight enough to prevent water from running down the vent pipe and into your attic space.
Never cover skylights that provide emergency egress from upper floors or attic spaces. Fire codes require these openings to remain accessible. Work around skylights by running your tarp to the uphill side and carefully sealing the edge where tarp meets skylight curb using tape and weighted boards that won’t crack the skylight surface.
Flat Roof Considerations
Flat and low slope roofs present drainage challenges because water doesn’t naturally run off surfaces with less than 2/12 pitch. Prevent pooling by creating strategic tarp angles using raised supports at the center line, letting water drain to the perimeter edges. Simple 2×4 boards placed on edge under the tarp centerline create enough slope for drainage without requiring complex framework.
Anchor points are different on flat roofs. You won’t have a ridge line to secure to, which means using parapet walls, HVAC equipment bases, vent stacks, roof scuppers, or other fixed structures around the roof perimeter. Install temporary eye bolt anchors into roof blocking if your flat roof lacks built in attachment points, spacing them every 4 feet around your tarp perimeter.
Weighted perimeter securing often works better than fastener penetration on flat commercial roofs with membrane surfaces. Drive fasteners through membrane roofing and you create permanent leak points that need repair even after your tarp comes off. Use sandbags or water filled barrier tubes weighing 30 pounds or more, positioned every 2 feet around the tarp edge to prevent wind from working underneath.
Check all penetration seals carefully during your post installation inspection because these represent your highest risk leak points where water will find any gap and work its way through.
Common Installation Errors and How to Avoid Them
Small mistakes during tarp installation create failures that allow water infiltration and cause additional damage you could have prevented with proper technique.
Every error listed here has caused tarp failure that turned manageable roof damage into interior water damage affecting ceilings, walls, and insulation. Prevention is easier than fixing water damage that spreads through your home while you’re waiting for permanent repairs.
Insufficient overlap leaving damaged area exposed at edges because you measured damage dimensions without adding 3 to 4 feet overhang on all sides. Horizontal board placement creating water dams instead of drainage paths when you failed to angle boards for downslope flow. Inadequate anchoring at corners where wind first lifts tarp edges because you used single attachment points instead of double securing every corner. Leaving wrinkles and folds that collect pooling water and add stress weight because you didn’t tension and smooth the tarp before final securing.
Over tightening grommets causing tears at stress points that expand in wind because you pulled rope or straps too tight instead of firm but not strained tension. Under sizing tarp for actual damage extent by miscalculating overlap needs or trying to save money with a smaller tarp that won’t provide complete coverage. Poor debris clearance leaving sharp objects, broken shingles, or protruding nails that puncture tarp from below during the first windstorm.
Working alone on large installations without help to position and hold tarp, which leads to poor placement and dangerous roof work. Ignoring weather forecasts and installing just hours before storm arrival, which creates rushed work and dangerous conditions on already damaged surfaces. Using damaged materials including tarps with existing holes, frayed rope, or weakened boards that will fail under the first stress test.
Post-Installation Inspection and Maintenance Checks
Immediate post installation inspection catches small issues before they become major failures, and most tarp problems show up at predictable stress points you can reinforce now.
Edge security with no gaps exceeding 1 inch between tarp and roof surface along the entire perimeter. Corner reinforcement with double anchoring using boards, weights, or rope at all four corners plus any additional corners on irregular damage shapes. Grommet integrity with no visible tearing, stress damage, or pulled threads around any fastener point.
Anchor point stability by manually testing each rope, strap, board section, or fastener connection with firm pull pressure. Water drainage paths confirmed with no horizontal sections that dam flow, checking that all boards angle downward. Wrinkle and pooling areas eliminated across entire tarp surface, with particular attention to center sections on large tarps. Clearance around roof features with proper sealing at all chimney, vent, and skylight penetrations. Backup attachment verification that secondary securing methods like bungee cords, weights, or rope systems are properly engaged.
Recommended inspection frequency depends on weather activity and tarp age. Check your installation daily when active weather moves through your area, even if it’s just a visual inspection from ground level using binoculars to spot obvious problems. Weekly inspections work for calm weather periods when no storms are forecast. Inspect immediately after any storm event with sustained winds above 25 mph or heavy rainfall lasting more than an hour. Give extra attention to tarps installed over 30 days ago because material degradation accelerates after the first month of UV exposure.
Watch for warning signs that indicate your tarp needs reinforcement or replacement soon. Visible tears or holes larger than a quarter require immediate patching with additional tarp material or complete replacement. Edges lifting more than 2 inches from the roof surface in calm conditions show that anchoring has failed and wind will make it worse. Grommet failures with torn fabric around attachment points mean you need to add new grommets or switch to board and sandwich securing methods.
Rope or strap fraying indicates material fatigue that will progress to breaking, requiring replacement before failure occurs. Water stains appearing on interior ceilings beneath your tarped area prove water is getting through despite your coverage. Material degradation from UV exposure shows as surface cracking, color fading to white or gray, or brittleness when you flex the tarp edge.
Duration Limits and When to Pursue Permanent Repairs

Tarp longevity depends on material type and weather exposure, with specific limits that shouldn’t be exceeded even if the tarp looks intact. Vinyl tarps last 3 to 6 months maximum in moderate climates with mixed sun and clouds, but only 2 to 3 months in intense sun exposure like southern desert regions. Poly tarps degrade quickly, lasting 3 to 6 weeks before UV damage creates brittleness and tearing risk. Canvas tarps provide 4 to 8 months coverage with proper UV resistant treatment, making them the best choice when contractor scheduling pushes repairs into a second season.
Degradation signs requiring immediate replacement appear gradually then accelerate. Brittleness or cracking material that doesn’t flex smoothly means UV damage has compromised the tarp structure. Color fading from original blue, silver, or green to washed out white or gray indicates the protective coating has broken down. Visible tears or thinning areas show where material is separating. Loss of waterproof coating becomes obvious when water no longer beads on the surface. Grommet failures with torn fabric around attachment points mean stress has exceeded material strength.
Insurance policy requirements mandate “reasonable efforts” to prevent additional damage beyond the original storm event. Most policies require temporary protection within 24 to 72 hours of discovering damage, though the exact timeframe varies by carrier and policy type. Insurance companies will not cover secondary damage that results from your failure to tarp after being aware of roof damage. If water leaks through your damaged roof during the second rainstorm because you didn’t install temporary protection after the first storm, that additional damage isn’t covered.
Document your temporary protection efforts thoroughly. Photograph the installed tarp from multiple angles showing complete coverage of damaged areas. Save all material receipts including tarps, boards, fasteners, and rope as proof of mitigation expenses. Record the installation date and create a written log of subsequent inspections with dates and findings. Note weather events during the coverage period including storms, high winds, and heavy rain that your tarp protected against. Maintain this documentation file with your insurance claim paperwork because it demonstrates you took reasonable steps to prevent additional damage.
Seasonal considerations affect when permanent repairs can happen. Contractor availability peaks in spring and fall when weather is moderate and homeowners are thinking about maintenance, creating 2 to 4 week scheduling delays for non-emergency work. Winter installations are often impossible in northern climates where freezing temperatures prevent proper shingle adhesion and ice makes roof work too dangerous. Summer heat creates ideal repair conditions with long days and quick drying materials, though southern regions face afternoon thunderstorms that interrupt work. Hurricane season creates massive contractor backlogs in affected regions, with repair schedules extending 3 to 6 months after major storms.
Contact roofing contractors within one week of damage for repair scheduling even while your tarp is still protecting the structure. Obtain multiple quotes during the tarp coverage period so you’re ready to proceed when weather and contractor availability align. Prioritize completing permanent repairs before your tarp shows failure signs, not after it’s already leaking. Understand that insurance claim processing timelines don’t extend the acceptable duration for temporary tarp coverage. Your policy requires permanent repairs “as soon as reasonably possible,” which insurance adjusters interpret as 30 to 90 days in most situations, not the 6 to 12 months it might take to settle a complex claim.
Cost Breakdown and Time Investment for DIY Installation

Material costs for DIY tarp installation vary by securing method and damage size. A board and fastener system for typical residential damage covering 10 by 15 feet runs $75 to $150 total, including a heavy duty vinyl tarp ($40 to $70), lumber for perimeter boards ($25 to $40), exterior screws ($8 to $12), and basic hardware. Rope and strap systems cost slightly less at $50 to $100, covering quality tarp ($35 to $60), nylon rope ($15 to $25), and attachment hardware ($10 to $15). Clip systems run $60 to $120 for tarp ($35 to $60), commercial grade tarp clips ($20 to $40), and heavy duty bungee cords ($15 to $25). These estimates assume you already own basic tools like drill, hammer, and ladder. Costs scale up significantly for large damage areas, roughly doubling for every additional 150 square feet of coverage needed.
Time investment from preparation through final inspection depends on damage size and installation complexity. Small damage areas measuring 10 by 10 feet require 2 to 3 hours with a helper for board and fastener method, including roof preparation, tarp positioning, securing, and inspection. Medium damage spanning 20 by 20 feet takes 4 to 6 hours for the same process because perimeter securing requires more anchor points and material handling becomes more difficult. Large or complex installations covering multiple roof sections or working around chimneys and skylights can require a full day. These time estimates assume ideal conditions with dry weather, moderate temperatures, and calm winds. Expect times to double when working in light rain, strong winds, or temperature extremes that make materials harder to handle.
Professional installation fees reflect the equipment, expertise, and liability that emergency tarp services bring to dangerous roof work. Emergency tarp services typically charge $300 to $800 for standard residential installation including all materials and labor for damage areas up to 200 square feet. After hours service, weekend response, or severe weather conditions add $100 to $300 premium charges. Storm damaged areas with contractor shortages see prices 50 to 100 percent higher than normal rates. Professional service justifies the expense when serious safety concerns exist, when damage exceeds DIY capability, or when insurance policies cover emergency mitigation expenses and you’d rather not risk the roof work yourself.
| Installation Method | Material Cost Range | Time Required | Difficulty Level |
|---|---|---|---|
| Board-and-Fastener | $75-150 | 3-6 hours | Moderate-High |
| Rope/Strap System | $50-100 | 2-4 hours | Moderate |
| Clip/Weight System | $60-120 | 1-3 hours | Low-Moderate |
| Professional Service | $300-800 | 1-2 hours | N/A |
Recognizing When Professional Roofing Services Are Necessary
No amount of money saved on DIY tarp installation justifies serious injury or death from roofing falls, which rank among the most common and severe home improvement accidents each year.
Structural damage indicators require immediate professional assessment rather than DIY attempts. Visible sagging in the roof deck shows that supporting members have failed or are failing under load. Multiple damaged areas spanning more than 30 percent of your total roof area indicate widespread failure beyond simple storm damage. Damage to load bearing structures including rafters, trusses, or ridge beams requires engineering evaluation before anyone should walk on that roof. Water intrusion into living spaces that’s actively running down walls or dripping from light fixtures means the damage extends through your entire roof assembly. Compromised roof framing visible from attic spaces, where you can see separated joints, cracked members, or displaced structural components, proves the damage is too severe for temporary tarping alone.
Insurance policy considerations often mandate professional involvement. Some policies explicitly require professional assessment and documentation before approving coverage for major damage claims. Improper DIY attempts that cause additional damage can void coverage for subsequent problems, leaving you paying for mistakes that professional installation would have prevented. Professional documentation including photos, measurements, and written assessments carries more weight in the claims process than homeowner provided information. Many policies cover professional emergency tarping costs under “emergency mitigation” provisions, meaning you might pay nothing out of pocket for professional service if you file the claim properly.
Professional service is necessary rather than optional when extensive structural damage exists with potential collapse risk that makes roof access unsafe for anyone without specialized equipment and training. Steep roof pitch exceeds 6/12 slope or roof height rises above two stories, creating fall distances that cause severe injury or death. Damage covers multiple roof sections or exceeds 200 square feet, requiring professional equipment, crew size, and materials beyond DIY capability.
Commercial buildings or multi family structures need coverage, which involve different building codes, liability concerns, and usually require licensed contractors. Lack of proper safety equipment including fall protection harness, secure anchor points, commercial grade ladder, and appropriate footwear makes the work unsafe. Severe weather including high winds or thunderstorms approaches within 24 hours, requiring immediate installation that untrained homeowners can’t safely rush.
Physical limitations, mobility issues, balance concerns, or health conditions make roof work dangerous regardless of damage severity. Hazardous materials like asbestos roofing shingles are present, requiring special handling and disposal that DIY workers aren’t equipped or legally permitted to manage. Uncertainty exists about structural stability or extent of hidden damage, which needs professional evaluation before anyone should access the roof.
Final Words
The right roof tarp tie down methods protect your home from further water damage while you plan permanent repairs. Board sandwich systems handle severe damage and long-term coverage. Rope anchors work well when you want to avoid extra penetrations. Weighted clips suit minor damage and short-term protection.
Safety always comes first. If your roof pitch is steep, the damage is extensive, or weather’s moving in fast, call a professional.
Get that tarp up, check it after storms, and schedule your permanent fix while the temporary cover does its job.
FAQ
What’s the best way to hold a tarp down on a roof?
The best way to hold a tarp down on a roof is using the board-and-fastener sandwich method, where you place the tarp edge between two 2×4 boards and screw them together. This prevents tearing, increases wind resistance, and creates multiple secure anchor points around the damaged area’s perimeter.
How do you secure a tarp on a roof without nails?
You can secure a tarp on a roof without nails by using rope and strap anchor systems that run over the roof peak and tie to stable fixtures like chimneys or vents. Another option involves tarp clips that grip the fabric and clamp to roof edges, combined with sandbags or weighted objects on the tarp perimeter.
What is the best way to tie down a tarp?
The best way to tie down a tarp is using nylon rope secured through the tarp’s grommets, running lines over the roof peak to the opposite side, and anchoring to stable fixtures at multiple points. Proper tensioning eliminates slack without over-stressing attachment points, and angling boards downward prevents water dams.
How do you tie down a tarp without creating holes?
You can tie down a tarp without creating holes by using commercial tarp clips that grip the tarp fabric without penetration, securing them with bungee cords to gutters or roof edges. Weighted securing with sandbags placed on the tarp perimeter also works for minor damage and short-term protection.
How long can a tarp stay on a roof?
A tarp can stay on a roof for 3-6 months maximum with vinyl material in moderate climates, 4-8 months with canvas tarps that have UV protection, and only 3-6 weeks with poly tarps before degradation occurs. All timeframes shorten with extreme weather or intense sun exposure requiring earlier replacement.
When should you call a professional instead of installing a tarp yourself?
You should call a professional instead of installing a tarp yourself when dealing with extensive structural damage, steep roof pitch exceeding 6/12 slope, damage covering multiple sections exceeding 200 square feet, or severe weather approaching within 24 hours. Physical limitations, lack of safety equipment, or uncertainty about structural stability also require professional help.
What materials do you need to tarp a roof?
You need materials to tarp a roof including a heavy-duty tarp (vinyl, canvas, or poly depending on duration needed), 2×4 boards for anchoring, exterior-grade screws, nylon rope, tarp clips or bungee cords, and basic tools like a drill, hammer, utility knife, and measuring tape. A stable extension ladder, work gloves, and safety harness complete the requirements.
How do you prepare a roof before installing a tarp?
You prepare a roof before installing a tarp by photographing all damage for insurance documentation, clearing debris including broken shingles and branches with a roofing shovel, drying the surface to prevent mold growth and improve tarp adhesion, and inspecting for loose materials that could compromise tarp security.
What size tarp do you need for roof damage?
You need a tarp size for roof damage that extends at least 3-4 feet beyond the damaged area on all sides, accounting for roof pitch where steeper roofs need more overhang. Always round up to the next standard tarp size rather than minimizing coverage, and ideally hang the tarp over the ridge to both sides.
How do you prevent water pooling on a roof tarp?
You prevent water pooling on a roof tarp by smoothing out all wrinkles and folds before securing, working from center outward while pulling taut but not stretched. Angle boards downward rather than positioning them perfectly horizontal, ensuring no depressions exist where water can collect and add weight.
What are common mistakes when tarping a roof?
Common mistakes when tarping a roof include insufficient overlap leaving edges exposed, horizontal board placement creating water dams, inadequate corner anchoring where wind first lifts edges, leaving wrinkles that collect pooling water, and over-tightening grommets causing tears. Working alone on large installations and ignoring approaching weather forecasts also compromise effectiveness.
How do you work around chimneys when installing a roof tarp?
You work around chimneys when installing a roof tarp by either cutting openings in the tarp or running it around the chimney base, sealing cut edges with waterproof tape adhered to chimney flashing rather than rough masonry. Chimneys also serve as primary anchor points for rope systems on steep roofs.