

Most foundation drainage advice skips the real question: can you actually handle breaking up your basement floor, hauling out literal tons of concrete and soil, and working around a sump pump hole for weeks? Basement drain tile installation stops hydrostatic pressure from pushing groundwater through your foundation, but the process is loud, dusty, and physically brutal. This guide covers what actually happens during interior and exterior installation, realistic cost breakdowns, and whether tackling this yourself makes sense or sets you up for an expensive do-over.
Interior and Exterior Drain Tile Systems: Choosing the Right Approach

98% of basements in the United States will deal with some kind of water damage during their lifetime. The thing causing most basement flooding isn’t dramatic pipe bursts or sewage backups. It’s hydrostatic pressure. When groundwater piles up around your foundation, it creates pressure that pushes water through tiny cracks in floor joints, wall seams, and concrete pores. Over time, this constant pressure widens openings and turns minor seepage into standing water. The problem gets worse during spring thaw and heavy rainfall when saturated soil can’t absorb more moisture.
Basement drain tile installation solves this by capturing water before it enters your living space and redirecting it away from the foundation. These perimeter drainage systems (also called French drains or weeping tile) intercept groundwater at the foundation level and channel it to a controlled discharge point. Two primary installation approaches exist: interior systems installed beneath your basement floor and exterior systems placed outside the foundation wall. The method you choose depends on your home’s age, your budget, and whether you’re dealing with an existing problem or planning ahead.
| Method | Installation Timing | Access Required | Cost Range | Best For | Key Advantage |
|---|---|---|---|---|---|
| Interior | Any time, including winter | Inside basement only | $4,000–$8,000 | Existing homes with finished basements | No landscape disruption |
| Exterior | Construction phase or major renovation | Full perimeter excavation | $8,000–$15,000+ | New construction or foundation work | Stops water before foundation contact |
Interior drain tile systems sit underneath basement floors next to foundation footings, relieving hydrostatic pressure at its source. Installation involves breaking a perimeter strip of concrete, excavating a trench, and installing perforated pipe that collects water and directs it to a sump pump. The pump then discharges water away from your home. This approach works year round regardless of weather, doesn’t require excavating your landscaping, and lets you keep finished basement spaces mostly intact during installation. Interior systems connect directly to sump pumps, giving you the added benefit of a backup system if surface water ever enters through other means.
Exterior drain tile systems prevent water from reaching your foundation walls in the first place. Installed during new construction or when major foundation work is already planned, these systems sit at footing level on the outside of the foundation. They’re often combined with external waterproofing membranes that create a two layer defense against moisture. Water intercepted by exterior tile drains to a daylight discharge point or dry well located well away from the house. This method works best when excavation equipment already has access to the foundation perimeter. Adding it during a landscaping overhaul or foundation repair makes financial sense.
The decision framework comes down to timing and circumstances. Choose interior installation for retrofit situations where you have mature landscaping, buried utilities, or finished basement spaces you want to preserve. Interior systems also make sense when budget matters most or when winter weather prevents exterior excavation. Choose exterior installation during new home construction, when planning foundation repairs that already require excavation, or when you want to combine drainage with foundation waterproofing. Consider your long term maintenance preferences too. Interior systems give you easy access to cleanouts and the sump pump, while exterior systems require less frequent attention once properly installed.
Required Tools and Materials for Drain Tile Projects

Proper materials directly impact how long your drainage system works without problems. Cheap pipe, inadequate gravel, or skipped filter fabric leads to clogs, settling, and eventual system failure that requires tearing everything out and starting over. The difference in material cost between adequate and excellent components typically runs a few hundred dollars. Minor compared to reinstallation labor if something fails.
Choosing between corrugated and rigid pipe affects both durability and flow rates. Corrugated pipe costs less and flexes around obstacles, but the ribbed interior collects sediment over time. Rigid PVC pipe with smooth interior walls maintains better flow and resists clogging, making it worth the additional expense for most applications.
Materials List:
Perforated drainage pipe (4 inch diameter rigid PVC or corrugated with sock, 100+ linear feet depending on basement perimeter). Drainage fabric or filter sock (if pipe doesn’t come pre wrapped, enough to cover all pipe with 6 inch overlap). Crushed stone or drainage gravel for bottom layer (typically 2 to 3 inches deep, calculate based on trench dimensions). Crushed stone for top layer (covering pipe to just below floor level). Sump basin and pump (18 to 24 inch diameter basin, 1/3 to 1/2 HP pump rated for your vertical lift). PVC discharge piping (1.5 or 2 inch diameter, routed from pump to exterior discharge point). Check valve (prevents water from flowing back into basin when pump stops). Cleanout access fittings (install at direction changes and every 40 to 50 feet of straight run). Pipe connectors and fittings (couplings, elbows, adapters for all connections). Concrete patching materials (premixed concrete or mortar for floor restoration, typically several bags).
Tools List:
Concrete saw or jackhammer (rental equipment for cutting and breaking floor sections). Trenching shovel and pointed spade (digging and shaping trench to proper depth and slope). Wheelbarrow or contractors’ buckets (removing hundreds of pounds of concrete and soil from basement). Level and measuring tools (ensuring proper slope throughout pipe run, checking depth). Safety equipment (eye protection, dust masks, hearing protection, work gloves, steel toe boots). Compaction tools (hand tamper or plate compactor for gravel layers). Mixing equipment for concrete (drill with paddle mixer or wheelbarrow and hoe for small batches). Utility marking supplies (chalk line, spray paint, measuring tape for layout before cutting).
Professional grade materials typically offer better warranties and longer service life than big box store economy options. Source drainage fabric and filter wrapped pipe from suppliers that specialize in foundation waterproofing rather than general landscaping products. The fabric weave and pipe perforation size matter. Ask for products designed specifically for foundation drainage applications. Quality sump pumps with cast iron housings and sealed bearings cost more upfront but run reliably for 10+ years instead of requiring replacement every few seasons.
Step by Step Interior Drain Tile Installation Process
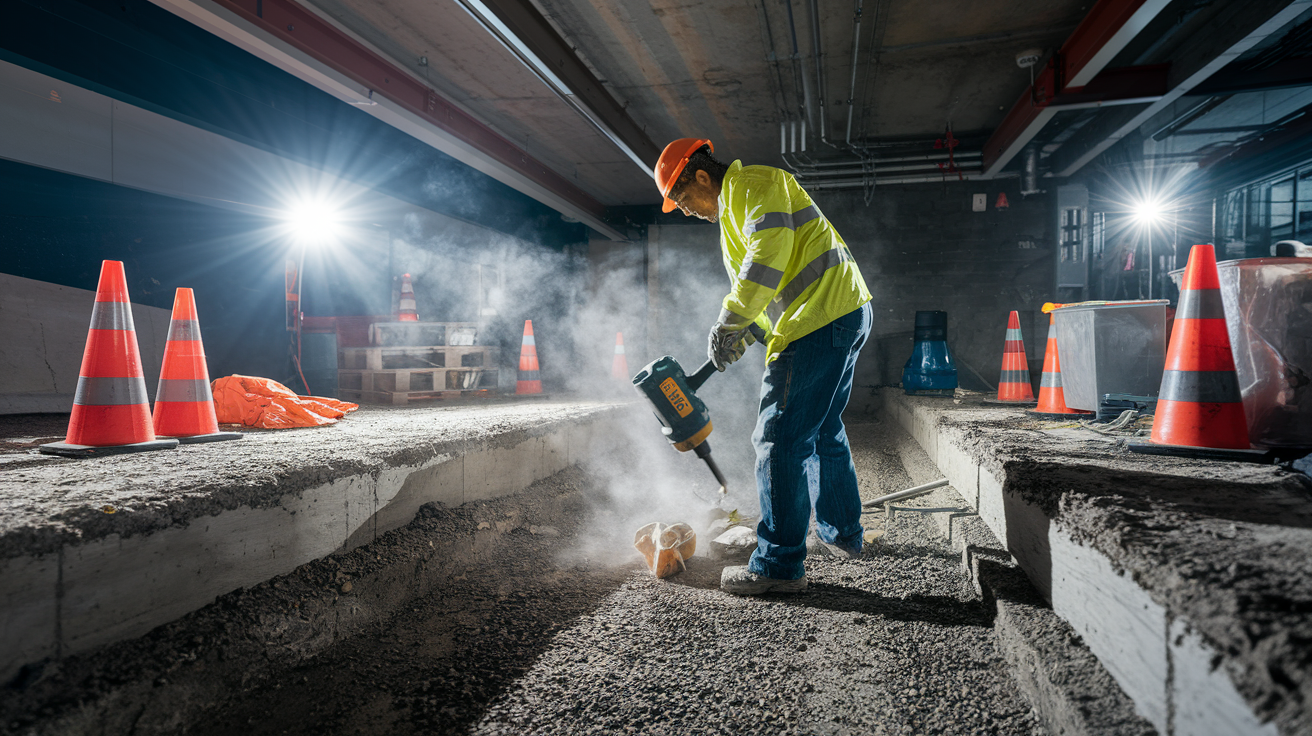
Interior installation requires precise execution and significant physical labor. You’ll remove hundreds of pounds of concrete, excavate tons of soil, and work in tight quarters with heavy equipment. The systematic approach below breaks the project into manageable phases, but understand that dust, noise, and disruption will be substantial throughout.
Installation Steps:
-
Mark perimeter cutting lines 12 to 18 inches from foundation wall. Use chalk line to create straight, parallel guide lines around entire basement perimeter where floor meets wall, measuring carefully to maintain consistent distance from foundation.
-
Cut concrete floor using concrete saw or jackhammer. Score cutting lines with concrete saw to 3 to 4 inch depth, then break out sections with jackhammer, working in manageable 3 to 4 foot segments to keep debris removal practical.
-
Remove concrete sections and expose soil beneath. Break cut sections into pieces small enough to carry up basement stairs (typically 12×12 inches or smaller), clearing work area completely before proceeding to excavation.
-
Excavate trench to proper depth, typically 12 to 18 inches below floor level, reaching foundation footing level. Dig trench along entire perimeter, maintaining consistent depth and removing all soil to create clean working space, pile excavated dirt in central basement area for later removal.
-
Grade trench bottom with slight slope toward sump pit location. Create minimum 1/8 inch per foot slope directing water toward planned sump basin location, check slope accuracy with long level, adjust grade as needed before adding materials.
-
Install gravel base layer 2 to 3 inches deep for stable foundation. Pour and spread crushed stone evenly across trench bottom, compact lightly with hand tamper to create firm base that won’t shift when pipe is placed.
-
Lay perforated pipe with holes facing downward, wrapped in filter fabric. Position pipe on gravel bed with perforations pointing down (allowing water to enter from below), ensure fabric covers all pipe surfaces with overlapping seams, maintain consistent slope throughout run.
-
Connect pipe sections and route toward sump basin. Join pipe segments using appropriate connectors, ensure tight seals at all joints, install cleanout fittings at corners and long straight runs for future maintenance access.
-
Cover pipe with additional gravel layer full to just below floor level. Bury pipe completely with clean crushed stone, filling trench to within 2 to 3 inches of floor surface, compact gravel lightly to prevent future settling while maintaining drainage capacity.
-
Replace concrete and finish floor surface to match existing. Pour concrete mix into trench, screeding level with existing floor, trowel smooth, allow adequate curing time before returning stored items to basement (minimum 72 hours for foot traffic, longer for heavy loads).
Concrete patching techniques determine whether your floor looks like a professional job or permanent repair scars. Mix concrete to proper consistency. Too wet and it will crack, too dry and it won’t bond properly. Use bonding agent on cut edges where new concrete meets old to prevent separation cracks. Trowel the surface to match your existing floor texture, and consider applying epoxy floor coating across the entire basement to blend old and new sections into a uniform appearance. Proper curing requires keeping new concrete damp for several days in dry conditions. Cover patched areas with plastic sheeting and mist occasionally if your basement humidity is low.
Exterior Drain Tile Installation Around Foundation Perimeter

Exterior installation requires excavation along the foundation perimeter, typically done during new construction or when landscape removal is already planned for other foundation work. The advantage of stopping water before it reaches your foundation walls makes this method ideal when timing and access align. You’ll need excavation equipment capable of digging 8 to 10 feet deep, room to pile excavated soil away from the work area, and cooperation from weather since rain turns open trenches into muddy disasters.
Excavation depth requirements depend on your foundation depth and local frost line. Most foundations extend 8 to 10 feet below grade, and your drain tile must sit at footing level to intercept water before it creates hydrostatic pressure. In cold climates, discharge lines must run below the frost line (typically 3 to 4 feet deep) to prevent freeze damage. Expect to move 10 to 15 cubic yards of soil per 100 linear feet of foundation perimeter. Excavated material needs temporary storage away from the work zone where it won’t slide back into open trenches.
Pipe installation at footing level follows the same principles as interior systems but with exterior specific considerations. Place perforated pipe on a 2 to 3 inch gravel bed at the base of the foundation footing. Ensure proper slope away from the structure. Minimum 1/8 inch per foot toward the discharge point. Wrap pipe in filter fabric before placement, overlapping fabric seams by at least 6 inches to prevent soil infiltration. The pipe should sit level with or slightly below the footing bottom, positioned 6 to 12 inches away from the foundation wall to avoid undermining support.
The backfill process happens in stages to prevent settling and maintain drainage capacity. Start by covering the pipe with clean crushed stone, filling 12 to 18 inches above the pipe. This gravel envelope allows water to move freely toward the pipe from any direction. Add a layer of filter fabric over the top of the gravel to separate it from backfill soil and prevent silt from washing down and clogging the stone. Then backfill with excavated soil in 6 to 8 inch lifts, compacting each layer before adding the next. Proper compaction prevents future settling that creates low spots where water pools against your foundation.
Discharge routing determines whether your system actually moves water away from the problem area. Connect the drain tile to a solid pipe that carries collected water to a daylight discharge point, a location downhill from your foundation where water can exit above ground and continue flowing away. If your property doesn’t have natural downhill slope, route to a dry well or subsurface drainage field located at least 10 feet from the foundation. In cold climates, the discharge line must be buried below frost depth or insulated and heat traced where it rises to surface level. Never discharge into sanitary sewer systems. Most jurisdictions prohibit this and you’ll face fines if discovered during inspection.
System Design Requirements: Slope, Discharge, and Code Compliance

Proper system design following code requirements ensures both legal compliance and functional performance. Cut corners on specifications and you’ll have a system that looks complete but doesn’t drain reliably when you need it most.
Slope and Grade Requirements
Minimum slope specifications for drain tile systems typically require 1/8 inch per foot (1% grade) toward the sump pit or discharge outlet. This seemingly modest slope makes a dramatic difference in water movement. Without adequate slope, water pools in low spots instead of draining, creating stagnant sections where sediment settles and eventually clogs the pipe. Maintaining consistent grade throughout the pipe run requires careful measurement during installation. Check slope every 10 feet using a long level and adjust the trench bottom before placing pipe. Consequences of inadequate slope include standing water that breeds mosquitoes in exterior systems, slow drainage that allows water to seep through floor cracks before the system can handle it, and sediment accumulation that reduces pipe capacity over time until the system effectively stops working.
Discharge Location and Routing Standards
Discharge distance requirements in most jurisdictions mandate minimum 10 feet from the foundation, though 20 feet is better if your property allows. Water discharged too close seeps back through soil and reloads the system in an endless cycle. Property line considerations matter too. You can’t discharge onto your neighbor’s yard without permission, and directing concentrated water flow toward adjacent properties creates liability issues. Connection prohibitions prevent adding foundation drainage to sanitary sewer lines in most areas because the volume overwhelms treatment capacity during storms. Daylight discharge works when you have downhill slope, while dry wells or subsurface infiltration beds handle discharge when surface options aren’t available. Freeze protection depth requirements in cold climates mean burying discharge lines below the frost line or using insulated pipe sections where burial depth isn’t possible. Add splash blocks or pipe extensions at the discharge point to prevent erosion from concentrated water flow.
Permits, Inspections, and Code Compliance
Permits are typically required when interior installation involves structural floor alterations or when exterior work affects foundation support, though specific requirements vary by jurisdiction. Call your local building department before starting to verify whether your project needs approval. Common inspection timing requires scheduling before you backfill trenches or replace concrete. Inspectors need to see the installation details before they’re buried. Plan installation phases around inspection availability to avoid delays where open trenches sit exposed to weather. Maintain cleanout access points per code. Most jurisdictions require accessible fittings at direction changes and every 40 to 50 feet of straight run so future maintenance doesn’t require excavation. Keep documentation including permits, inspection certificates, material specifications, and contractor warranties for future property sales.
Code compliance provides benefits beyond avoiding fines. Minimum performance standards ensure your system actually works rather than just looking complete. Documentation protects resale value when buyers see proof of permitted work. Insurance validity depends on code compliant installations in many policies. Coverage for water damage may be denied if you installed unpermitted systems that failed. Most importantly, avoiding costly reinstallation due to code violations discovered during home inspections or insurance claims makes the permit process worthwhile despite the hassle and fees.
Connecting Drain Tile to Sump Pump Systems

Interior systems connect to a sump pump that activates when water reaches a certain level. The sump pit becomes the low point where all drain tile flows converge, and the pump provides the mechanical force to lift water up and out of your basement. Proper integration of these components determines whether your system handles water reliably or fails during the storms when you need it most.
Optimal sump basin placement requires finding the lowest point in your drainage system, typically in a corner or against a wall where drain tile from multiple directions can converge. The basin should sit slightly lower than the drain pipe invert to ensure complete drainage between pump cycles. Avoid placing the pit near finished walls if possible. Sump pump noise and occasional overflow risks make mechanical room locations preferable to finished living areas. Consider access for maintenance when choosing location. You’ll need to reach the pump for testing and eventually replacement.
Basin installation requires proper sizing and preparation. Most residential applications use 18 to 24 inch diameter basins that are 24 to 30 inches deep, providing adequate capacity to prevent rapid pump cycling while accommodating pump dimensions and float switch operation. Dig the pit deep enough that the basin sits on a 4 to 6 inch gravel base for drainage even if the pump fails. The pit should be deeper than the drain tile level to create a collection point where water gathers before the pump activates. Install a secure lid that prevents debris from falling into the basin while allowing access for maintenance. Children and pets can fall into open pits, and the lid also reduces humidity and radon infiltration.
Pump selection depends on your vertical lift requirements and expected water volume. Measure from the pump location to your discharge point elevation. This vertical distance determines the horsepower needed. For typical basement installations with 8 to 10 feet of vertical lift, a 1/3 HP pump handles most situations. Increase to 1/2 HP for lifts above 10 feet or installations that expect high water volume. The pump must activate when water reaches a predetermined level via a float switch, then run until water drops back below the shutoff point. Specify cast iron housing and sealed bearings for reliability. Plastic pumps cost less but fail more frequently.
Key sump pump system components:
Primary pump specifications matched to vertical lift and expected flow volume requirements. Backup pump installation with separate discharge line and independent power source. Battery backup systems for power outages that often coincide with heavy storms. Check valve placement 3 to 4 feet above pump discharge to prevent backflow when pump stops. Discharge line routing with proper slope, freeze protection, and distance from foundation. Alarm systems providing audible notification of pump failure, power loss, or water level.
Discharge line best practices determine whether pumped water actually leaves the problem area. Slope discharge piping at minimum 1/4 inch per foot away from the house to prevent water from running backward when the pump stops. Route the line at least 10 feet from the foundation before allowing water to discharge. Closer discharge points allow water to seep back through soil and reload the sump basin. In cold climates, bury discharge lines below frost depth or use heat tape on above ground sections to prevent ice blockages that cause pump burnout and basement flooding. Never discharge into sanitary sewer lines. This violates code in most areas and overwhelms treatment systems during storms. Never discharge onto neighboring properties without permission or toward foundation walls.
Cost Factors and Budget Planning for Drain Tile Installation

Drain tile installation represents a significant investment with costs varying based on method, basement size, and site conditions. Understanding the breakdown helps you budget accurately and spot quotes that are unrealistically low or padded with unnecessary expenses. Interior systems typically run less expensive than exterior because they require less excavation and no landscape restoration.
Professional crews of five to six technicians typically require two days to complete interior installation. The first day focuses on concrete cutting, removal, and excavation. The second handles pipe installation, backfill, and concrete replacement. Exterior projects take longer due to excavation depth and volume. Expect 3 to 5 days depending on foundation perimeter length and access difficulties.
| Cost Component | Interior System Range | Exterior System Range |
|---|---|---|
| Materials (pipe, gravel, fabric, fittings) | $800–$1,500 | $1,200–$2,500 |
| Labor (crew and time) | $2,000–$4,000 | $4,000–$8,000 |
| Equipment/Tools (rental or owned) | $300–$600 | $800–$2,000 |
| Sump Pump System (basin, pump, discharge) | $500–$1,200 | Not typically included |
| Concrete Restoration or Backfill | $400–$800 | $1,000–$2,500 |
| Total Typical Range | $4,000–$8,000 | $8,000–$15,000+ |
Variables increase costs beyond base estimates. Difficult soil conditions like heavy clay or rocky subsoil slow excavation and increase labor hours. Deep foundations require removing more material and installing longer pipe runs. Extensive concrete removal in finished basements adds costs when you’re working around utilities and trying to preserve floor finishes in adjacent areas. Finished basement complications include protecting walls, relocating utilities temporarily, and containing dust from concrete cutting. Accessibility challenges occur when narrow basement stairs prevent equipment access or when finished ceiling height limits headroom for jackhammer operation. Unexpected utilities discovered during excavation require rerouting or protection measures. High water tables demand more robust pumping during installation and may require upgraded sump systems.
Long term value justifies the initial expense when you consider what drain tile prevents. Foundation and structural repairs from chronic water infiltration cost $10,000 to $30,000 once damage reaches the point of requiring excavation and rebuilding. Water damaged basements lose property value when buyers see evidence of moisture problems or smell musty odors during showings. Reduced insurance claims mean lower premiums and continued coverage. Carriers often non renew policies after repeated water damage claims. Most importantly, improved basement usability transforms unusable storage space into livable area, adding functional square footage without the cost of an addition. For more information on related restoration work, see understanding home restoration timelines.
DIY Installation Feasibility and Professional Recommendations

Some homeowners consider DIY installation to reduce costs, and the potential savings of $2,000 to $4,000 in labor expenses seems attractive at first. The reality involves significant physical labor and specialized knowledge that most people underestimate until they’re standing in a basement full of broken concrete wondering what they’ve started.
The challenges start with concrete cutting using heavy equipment you’ve likely never operated. Concrete saws and jackhammers rent for $100 to $200 per day, but knowing how to control them safely requires practice you don’t want to get on your basement floor. You’ll remove hundreds of pounds of concrete chunks and several tons of soil. Carrying this up basement stairs in buckets tests physical endurance and patience. Proper slope calculation requires precision measurement and understanding of drainage hydraulics. A spirit level and eyeballing don’t cut it when 1/8 inch per foot over 50 feet means hitting your target within half an inch. Working in confined basement spaces with limited headroom and artificial lighting adds difficulty to every step.
Hidden complexity separates functioning systems from expensive failures. Achieving proper drainage pitch throughout the entire pipe run demands constant vigilance and multiple checks during installation. One low spot creates a permanent trap where water pools and sediment accumulates. Avoiding utility conflicts requires identifying electrical, plumbing, gas, and telecommunications lines before cutting. Hit a water line and you’re dealing with flooding before your drainage system even exists. Ensuring adequate sump pump sizing involves calculating basement square footage, local rainfall intensity, and soil drainage characteristics to specify pump capacity. Creating durable connections between pipe sections matters because leaks defeat the entire system purpose but only reveal themselves after burial when fixing them requires excavation.
Mistakes in DIY installations may not be discovered until after burial under soil and concrete, requiring professional drain tile repair at higher cost than proper initial installation. Systems that drain slowly due to inadequate slope seem fine during light rain but fail during the spring thaw when you actually need them. Undersized sump pumps keep up with normal seepage but can’t handle peak flows, allowing water to back up through floor drains. Improper discharge routing moves water 6 feet from the foundation where it seeps back through soil and reloads the system. Forgotten cleanout access points mean future clogs require demolition to clear.
Professional installation makes sense for interior systems where concrete cutting and proper slope are critical, complex layouts involving multiple direction changes or obstacles, finished basements where dust containment and minimizing disruption matter, homes with high water tables demanding precise installation and reliable components, situations requiring permits and inspections that involve code compliance verification, and whenever long term warranties matter for property value and peace of mind. For guidance on selecting qualified contractors, reference hiring the right contractor for water damage restoration.
Pre Installation Site Assessment and Soil Evaluation

Proper assessment before installation prevents costly design errors and ensures system effectiveness. You’re gathering information that determines pipe sizing, slope requirements, discharge location, and whether your drainage plan will actually work for your specific property conditions.
Site Assessment Checklist:
Current water entry points and patterns (where water appears first, frequency, volume). Soil composition and drainage characteristics (clay, sand, loam, mixed composition). Water table depth and seasonal fluctuations (stable year round or rising during spring and fall). Existing grade and slope around foundation (water flows toward or away from house). Utility line locations (buried electrical, gas, water, sewer, telecommunications). Basement floor elevation relative to exterior grade (how far below ground your floor sits). Extent of existing water damage (efflorescence, previous flooding height, structural damage). Frequency and timing of water intrusion events (every rain, only heavy storms, seasonal).
Clay soil creates special challenges that standard installation approaches don’t handle well. Clay doesn’t drain. Water sits on top rather than percolating through like sandy or loamy soils do. When you excavate clay and then backfill around your drain tile, you’ve created a bathtub that holds water against your foundation unless you amend the backfill. Address clay by increasing gravel volume around the pipe to create a larger drainage envelope, amending backfill soil with sand or gravel to improve permeability, and ensuring surface grading directs water away rather than pooling near the foundation. Interior systems work better in heavy clay conditions because they intercept water that has already penetrated rather than trying to manage it in non draining soil outside.
Water table considerations determine whether a basic system handles your conditions or whether you need upgraded capacity. High water tables mean your drain tile sits below the natural groundwater level and fights constant pressure. This requires more robust sump pump systems with higher capacity, possibly dual pumps or pumps with greater horsepower. Exterior systems sometimes work better in high water table situations because they’re positioned at footing level before water reaches maximum pressure. However, extreme water table issues may require both interior and exterior systems working together, along with foundation waterproofing and possible subsurface drainage improvements beyond the immediate foundation perimeter.
Seasonal patterns reveal whether you’re dealing with temporary water intrusion or chronic problems. Spring thaw creates peak loads when snow melt saturates frozen ground that can’t absorb water. Systems must handle maximum flow rates during these weeks even if they sit relatively dry the rest of the year. Heavy rainfall events show whether your problem is surface runoff from inadequate gutters and grading or groundwater intrusion that requires subsurface drainage. Size system capacity for peak conditions, not average annual flow. A system that handles normal spring rain but fails during 100 year storm events isn’t adequate protection for your foundation and basement contents.
Preparing Your Basement Before Installation Begins
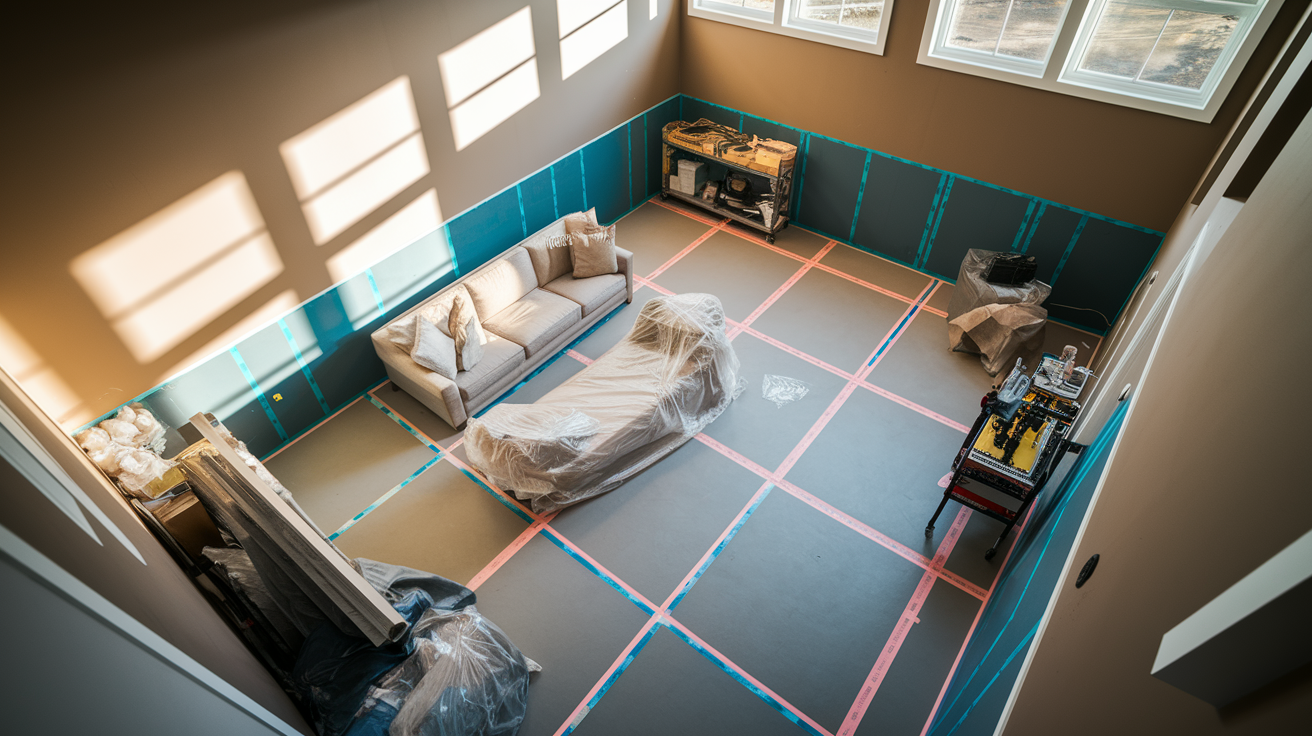
Proper preparation reduces installation time and protects belongings from dust and debris generated during concrete cutting and soil excavation. The work creates conditions similar to a demolition site. Concrete dust coats everything within 20 feet of cutting, and tracked soil spreads across basement floors despite containment efforts.
Concrete cutting and soil removal create significant dust even with water suppression systems on saws. Jackhammering vibrates the entire basement and sends concrete chips flying. Plan for noise levels around 100 decibels, similar to chainsaw or jackhammer operation, that make the basement unusable during active work and disrupt main floor activities.
Preparation Steps:
-
Clear all furniture, stored items, and belongings from basement perimeter, moving everything at least 3 to 4 feet from walls to provide worker access and protect from dust and damage.
-
Identify and mark all utility lines including electrical conduit, plumbing supply and drain lines, gas lines, and HVAC ductwork running through floors or walls in work areas, use colored tape or paint to highlight locations.
-
Shut off power to basement electrical circuits if working near outlets or wiring, especially important when cutting concrete that may contain hidden conduit, prevents shock hazards from damaged wiring.
-
Remove or protect HVAC ductwork in work areas, seal supply and return vents with plastic and tape to prevent dust infiltration throughout house ventilation system.
-
Create dust barriers using 6 mil plastic sheeting to isolate work zone from finished areas, seal plastic to ceiling and walls with tape, create zippered access door, contain dust to minimize whole house cleanup.
-
Establish debris removal path protecting stairways from damage, lay plywood or cardboard runners on stairs and floors between basement and exterior disposal area, removes hundreds of trips carrying concrete and soil.
-
Arrange temporary dehumidification if needed during installation, open trenches can raise basement humidity dramatically, run dehumidifier continuously if installing during humid season.
-
Verify contractor access to water source for concrete cutting dust suppression and mixing, confirm electrical power availability for tools, identify where debris containers will be positioned outside.
Consider temporary living arrangements if dust or noise will be disruptive to daily routines. Installation typically takes two full days of continuous noise and activity. Jackhammering starts early and runs most of the first day. Working from home becomes impossible, and sensitive electronics should be covered or relocated. Elderly occupants, infants, or anyone with respiratory conditions should stay elsewhere during active concrete work despite dust containment efforts. The second day involves less disruptive pipe installation and concrete finishing but still requires contractor access and creates minor dust when mixing replacement concrete.
Integrating Drain Tile with Other Waterproofing Methods
Drain tile addresses hydrostatic pressure and water that reaches foundation level, but complete protection requires multiple integrated approaches working together. Water infiltration happens through several mechanisms simultaneously. Think of it as addressing both the source and the symptoms rather than choosing one or the other.
Exterior waterproofing membrane application during exterior drain tile installation creates dual protection. After excavating to install drain tile, apply waterproof coating or membrane to the foundation wall before backfilling. This blocks water that makes it through the soil from penetrating wall surfaces even if some seepage bypasses the drain tile. The combination prevents both hydrostatic pressure buildup and direct wall penetration. Materials range from rubberized asphalt coatings brushed or sprayed onto walls to dimpled drainage board systems that create an air gap between soil and foundation. The exterior drain tile then captures any water that penetrates this first line of defense.
Interior vapor barriers and wall floor joint sealing prevent moisture transmission through concrete even after the drainage system removes bulk water. Concrete is porous. Water vapor moves through tiny pores even when liquid water is controlled. This causes humidity problems, efflorescence (white mineral deposits), and that characteristic musty basement smell. Applying waterproof coatings to interior foundation walls blocks vapor transmission. Seal wall floor joints with hydraulic cement or specialized caulks designed for below grade moisture exposure. These measures work alongside drain tile by controlling humidity and preventing mineral staining even when trace moisture exists in foundation materials.
Radon mitigation compatibility matters because interior drain tile systems affect sub slab air pressure. Many homes require radon systems that create negative pressure beneath basement floors, pulling radon contaminated air from soil and venting it outside. Interior drain tile provides ready made pathways for air movement beneath floors if not properly integrated. Design drain tile systems to work with sub slab depressurization by sealing the sump basin lid airtight, installing special radon rated lids with pass through fittings for radon collection pipes, and ensuring floor restoration creates an air barrier. Poor integration allows radon to enter through the drainage system rather than being captured and vented.
Capillary break materials prevent water from wicking up through concrete pores even when bulk water is controlled. Place plastic sheeting or specialized capillary break products between gravel layers and concrete when restoring floors after drain tile installation. This thin barrier stops water from moving upward through concrete via capillary action, the same mechanism that draws water up a paper towel. Without this barrier, moisture can migrate from the gravel drainage layer into your finished floor even though the drain tile successfully removes standing water.
Common Installation Mistakes and How to Avoid Them
Many drain tile failures result from preventable installation errors that aren’t discovered until the system faces real water during heavy storms or spring thaw. By then, the mistakes are buried under concrete or soil, making corrections expensive and disruptive.
Common Installation Mistakes and Corrections:
Installing pipe with perforations facing upward instead of downward. Perforations must face down allowing water to enter from below through gravel bed, upward holes collect falling sediment that rapidly clogs the pipe.
Inadequate slope causing water pooling and slow drainage. Maintain minimum 1/8 inch per foot throughout entire run, check grade every 10 feet during installation before covering pipe.
Using insufficient gravel creating poor drainage and pipe settlement. Provide minimum 2 to 3 inches below pipe and 6 to 8 inches above, skimping on gravel to save money guarantees long term problems.
Omitting filter fabric allowing soil infiltration and clogs. Wrap all pipe in non woven geotextile fabric with overlapping seams, acts as filter preventing soil particles from entering drainage system.
Undersized sump basin unable to handle peak water volume. Install 18 to 24 inch diameter basins deep enough for adequate capacity and float switch operation, small basins cause rapid pump cycling and premature failure.
Improper discharge location too close to foundation. Route discharge minimum 10 feet away, closer discharge allows water to seep back through soil and reload the system.
Failed connections between pipe sections causing leaks. Use proper connectors with secure fits, tape joints if necessary, test connections before burial by running water through system.
Inadequate cleanout access points preventing future maintenance. Install cleanouts at every corner and every 40 to 50 feet of straight run, future clogs will require these access points.
Slope requirements deserve special attention because they’re invisible once the system is buried but determine whether water drains effectively.
Final Words
Basement drain tile installation solves hydrostatic pressure problems that affect nearly every home eventually.
Whether you choose interior or exterior systems depends on your timing, budget, and site conditions. Both approaches work when designed correctly and installed with attention to slope, discharge routing, and proper materials.
Start with a thorough site assessment. Plan for permits and inspections. Use qualified contractors who understand foundation water management.
A well-installed drain tile system protects your home’s structure, keeps your basement dry and usable, and gives you confidence during heavy rain seasons.
FAQ
How much does it cost to install drain tile in a basement?
Basement drain tile installation typically costs between $3,000 and $8,000 for interior systems and $8,000 to $15,000 for exterior systems. The total price depends on basement size, soil conditions, concrete removal extent, and sump pump system requirements.
How should drain tile be installed?
Drain tile should be installed by excavating a trench along the foundation perimeter, laying a gravel base, placing perforated pipe with holes facing downward wrapped in filter fabric, covering with additional gravel, and connecting to a sump pump or exterior discharge point.
Do you put gravel under drain tile?
Yes, gravel goes under drain tile to create a stable base and allow smooth water flow. A 2-3 inch layer of crushed stone sits beneath the pipe, and another gravel layer covers the pipe to help with filtration and prevent clogs.
How deep should drain tile be buried?
Drain tile should be buried 12-18 inches below the basement floor level for interior systems, reaching down to the foundation footing. Exterior systems are typically installed 8-10 feet deep, depending on foundation depth and local frost line requirements.
Can I install drain tile myself or should I hire a professional?
DIY drain tile installation is possible but requires heavy equipment, concrete cutting skills, proper slope calculation, and significant physical labor. Professional installation is recommended because mistakes often aren’t discovered until buried, requiring costly reinstallation and potentially allowing continued water damage.
How long does drain tile installation take?
Interior drain tile installation typically takes two days with a professional crew of five to six technicians. The timeline can extend if soil conditions are difficult, concrete is exceptionally thick, or the basement layout is complex with multiple obstacles.
What is the difference between interior and exterior drain tile systems?
Interior drain tile systems sit beneath basement floors next to foundation footings and connect to sump pumps, while exterior systems are placed outside the foundation during construction or renovations to prevent water from reaching foundation walls. Interior works for existing homes, exterior prevents water before foundation contact.
How often does drain tile need maintenance?
Drain tile systems need sump pump testing monthly, visual discharge inspection quarterly, clean-out flushing annually, and professional inspection every 3-5 years. Systems typically last 20-30+ years with proper maintenance including sediment checks and timely pump replacement.
Will drain tile solve all basement water problems?
Drain tile addresses hydrostatic pressure and water reaching foundation level but works best as part of comprehensive waterproofing. Complete protection requires proper exterior grading, functional gutters, foundation wall waterproofing, and vapor barriers to control moisture from multiple sources.
Do I need a permit to install drain tile?
Permits are typically required for drain tile installation involving structural floor alterations and foundation work, though requirements vary by jurisdiction. Proper permitting ensures code compliance, protects resale value, maintains insurance validity, and avoids costly reinstallation due to violations.
What are the most common drain tile installation mistakes?
Common drain tile installation mistakes include positioning pipe perforations upward instead of downward, inadequate slope causing water pooling, insufficient gravel creating poor drainage, omitting filter fabric allowing clogs, and improper discharge location too close to the foundation.
How does drain tile work with a sump pump?
Drain tile works with a sump pump by collecting water through perforated pipes and directing it to a sump basin at the system’s lowest point. When water reaches a certain level, the pump activates and discharges water away from the house through PVC piping.
Does drain tile increase home value?
Drain tile increases home value by preventing foundation deterioration worth thousands in repairs, maintaining basement usability, and providing documented water management systems that give buyers confidence. Professional installation with warranties adds credibility during real estate transactions.