

Think a fresh bead of caulk will stop basement egress window leaks for good?
Think again.
Caulk hides the symptom but not the soil pressure, clogged wells, or failing membranes that force water past the sill.
If you’re tired of damp trim, brown stains, or musty smells, this guide gives the real fix.
We’ll walk through the exterior-first steps that work—waterproof membrane up the wall, a 4-inch perforated drain in clean gravel, proper grading, sealed frame joints, and a tight well cover—so you can stop leaks permanently.
Key Waterproofing Solutions for Keeping Egress Windows Dry

Water gets into basement egress windows through failed seals where the frame meets foundation, clogged or missing window well drains, and bad waterproof membranes. Check for puddles or drips right under the window, mold on trim or drywall, brown or yellow wall stains, and paint that’s starting to fade near the sill. If paint’s bubbling or flaking where window meets wall, water’s already behind it.
Quick fixes mean clearing out contaminated gravel, re-caulking visible gaps with exterior grade polyurethane sealant, and putting up heavy duty covers to stop rain and debris. Long term prevention takes a 4 inch perforated drain pipe at the bottom of the well, sloped 1 to 2 percent toward daylight or a sump, backfill with clean three quarter inch crushed stone, waterproof membrane over the foundation wall at least 2 to 3 feet above grade, and regrading soil so it slopes away from the house.
Six critical waterproofing parts that work together:
Self adhesive or liquid applied waterproof membrane from below the sill to 2 to 3 feet above grade, covering foundation wall and lapping onto window flange (around 50 square feet per window).
Four inch perforated drain pipe running along the well base and tied to footing drain or sump pump, buried in gravel.
Three quarter inch clean crushed stone backfilled around drain pipe and behind well liner, 6 to 12 inches deep, so water drains freely and soil doesn’t clog things up.
Exterior grading sloped at least one quarter inch per foot for the first 4 to 6 feet from foundation to push surface water away from the well.
Polyurethane or hybrid polymer sealant at all joints between window frame and foundation opening to block direct water entry.
Heavy duty polycarbonate or steel well cover that seals to the well lip, blocks rain, snow, and leaves, and keeps debris from clogging the drain.
Building Science Forces That Lead to Egress Window Water Intrusion

Water doesn’t just run downhill. It moves through soil under pressure, pushes sideways against foundation walls, and forces its way through tiny cracks in concrete and mortar. Understanding what drives these forces explains why surface fixes like caulking often fail and why real solutions require managing soil saturation and pressure, not just sealing visible gaps.
Hydrostatic pressure builds when soil gets saturated after heavy rain or snowmelt, creating a column of water that pushes against foundation wall with force proportional to how deep the saturation goes. Freeze thaw cycles make it worse. Water expands as it freezes, driving cracks wider each winter and creating new routes for water to get in. Soil expansion and structural shifting also open joints over time, especially around the rigid window frame where it meets the flexible foundation wall.
Five core mechanisms that push water into egress windows:
Hydrostatic pressure builds when saturated soil pushes against foundation wall. Water gets in through cracks, mortar joints, and the seam between window frame and rough opening when pressure beats the seal strength.
Soil saturation cycles mean repeated wetting and drying. Clay heavy soils expand and contract, shifting the foundation slightly and breaking adhesive bonds between sealants and whatever they’re stuck to.
Freeze thaw expansion happens when water trapped in concrete pores freezes, expands, and widens hairline cracks into pathways large enough for bulk water flow. Same cycle damages caulk and membrane adhesives.
Inadequate drainage velocity means when drain systems can’t remove water faster than it accumulates, standing water in the window well increases the effective hydrostatic head and drives infiltration at the lowest point, usually the sill joint or a crack near the frame corner.
Structural settlement and wall movement from normal foundation settling and lateral soil pressure create differential movement between rigid masonry and the window frame, shearing sealant beads and opening gaps that come back even after fresh caulking.
Exterior Waterproofing for Egress Windows: Drainage, Membranes, and Excavation

Exterior waterproofing is the only method that stops water from reaching the foundation wall in the first place. Interior fixes manage symptoms. Exterior membranes, flashing, and perimeter drains stop infiltration at the source by shedding water away from the window opening and removing it before pressure builds.
The basic exterior approach requires excavating soil around the window well, exposing foundation wall from 2 to 3 feet below the window sill down to the footing if possible, repairing cracks and voids in concrete, applying a continuous waterproof membrane, installing perforated drain pipe to carry water away, and backfilling with clean gravel that allows free drainage. Material quantities for a typical single egress window include a 50 square foot roll of membrane, 10 to 30 feet of 4 inch perforated drain pipe depending on distance to the tie in point, and one half to one cubic yard of three quarter inch crushed stone.
Excavation and substrate preparation
Excavate by hand or with a small machine to expose foundation wall at least 2 feet beyond the window well perimeter and down to footing level or at minimum 12 inches below the window sill. Remove all loose soil, old tar coatings, and debris from the concrete surface. Fill active cracks with hydraulic cement, which sets in minutes even when water’s seeping, or inject epoxy for structural cracks wider than one eighth inch. Let repairs cure, then wire brush the wall to create a clean, slightly rough surface for membrane adhesion.
Applying exterior membranes and flashing
Roll out a self adhesive rubberized asphalt or polymer modified bitumen membrane in a single continuous sheet that extends from below the window sill up the foundation wall to at least 2 to 3 feet above final grade. Overlap horizontal seams by 6 inches and vertical seams by 4 inches, pressing firmly to eliminate air pockets. Extend the membrane 6 inches onto the window frame or rough opening flange, sealing the transition with compatible flashing tape or liquid sealant. Membrane thickness should be 40 to 60 mils for typical residential applications. Heavier 60 to 120 mil membranes are used in high water table or commercial projects.
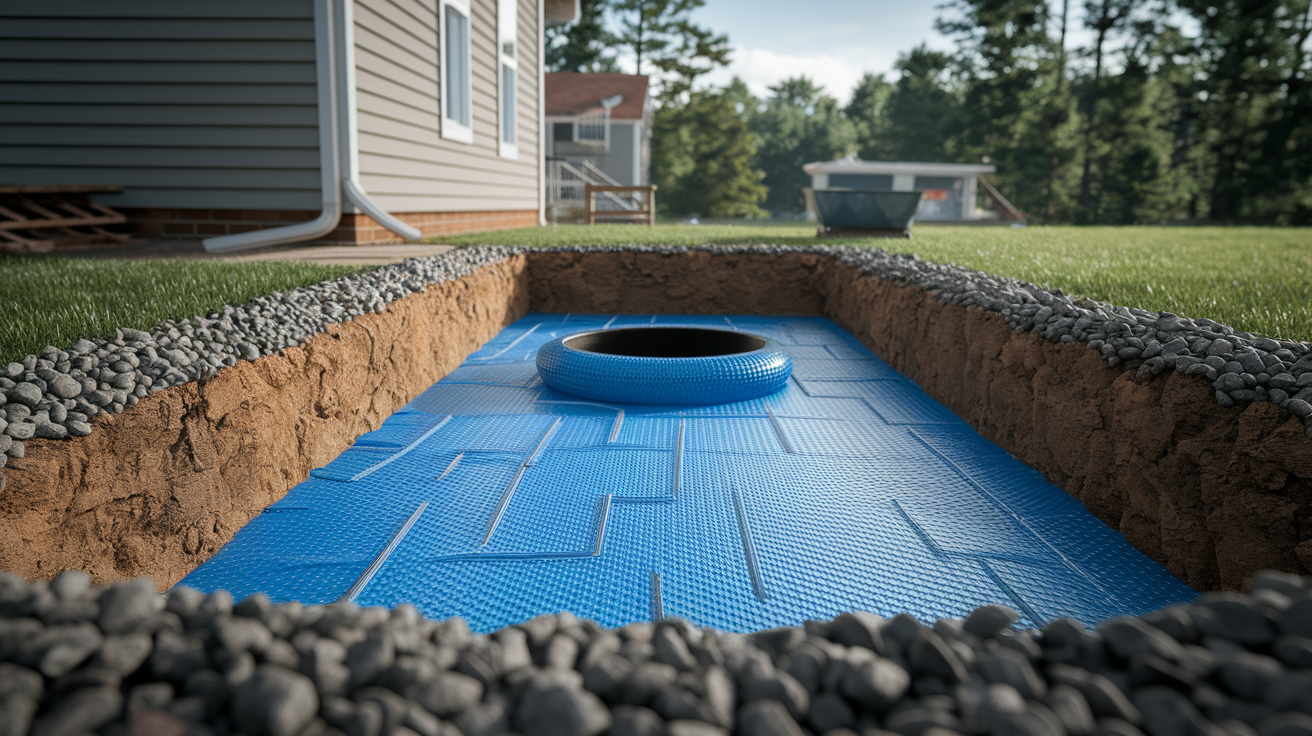
Installing 4″ drain pipe, gravel, and backfill
Lay 4 inch perforated PVC or corrugated HDPE drain pipe at the base of the excavation, sloped one eighth to one quarter inch per foot toward a daylight outlet, existing footing drain, or sump pump discharge line. Surround the pipe with 6 to 12 inches of three quarter inch clean crushed stone to create a free draining envelope. Backfill the remainder of the excavation with the same crushed stone up to within 6 inches of final grade, then cap with native soil sloped away from the foundation. Compact backfill in lifts to prevent settlement.
| Material | Typical Quantity | Purpose |
|---|---|---|
| Self adhesive waterproof membrane (40–60 mil) | 50 sq ft per window | Seal foundation wall and window flange against infiltration |
| 4″ perforated drain pipe (PVC or HDPE) | 10–30 linear feet | Collect and remove groundwater before pressure builds |
| 3/4″ clean crushed stone | 0.5–1 cubic yard | Surround pipe and backfill well to promote drainage |
| Hydraulic cement or epoxy crack filler | 1–5 lb | Seal cracks and voids in foundation before membrane application |
Window Well Design, Covers, Liners, and Drainage Around Egress Windows
A properly designed window well does three jobs. It keeps soil away from window glass, provides a gravel packed drainage zone that intercepts groundwater before it reaches the frame, and supports a cover that blocks rain, snow, and debris. Code typically requires a minimum well area of 9 square feet with at least one dimension of 36 inches. Wells deeper than 44 inches must include a permanently attached ladder or steps.
The well liner (usually corrugated galvanized steel, heavy duty plastic, or masonry block) mounts against the foundation wall and extends several inches above grade to shed surface water away from the opening. At the bottom of the well, install 4 inches of three quarter inch gravel over the perforated drain pipe. Covers range from $60 to $250 for polycarbonate domes that let in light, to $120 to $400 for heavy duty powder coated steel or aluminum grates that bear snow loads and foot traffic. Sealed or gasketed covers prevent leaves and debris from clogging the drain, which is the most common failure mode in existing wells.
Key design features that prevent leaks and maintain code compliance:
Well area at least 9 square feet with minimum horizontal dimension of 36 inches to provide working clearance and drainage volume.
Four inch perforated drain pipe at the base of the well, sloped to an outlet, covered with 6 to 12 inches of clean gravel.
Well liner lip extends at least 3 inches above finished grade and slopes away from the window to shed surface runoff.
Heavy duty cover rated for local snow load, with air vents or sealed gasket to prevent debris entry while allowing ventilation.
Ladder or step system permanently fixed to the well wall when depth exceeds 44 inches, meeting egress window accessibility requirements.
Gravel kept clean and free draining. Remove and wash or replace gravel if it becomes contaminated with soil, leaves, or organic matter.
Interior Waterproofing Methods for Egress Windows
Interior waterproofing manages water after it’s already passed through the foundation wall. It doesn’t prevent infiltration. It redirects water to a controlled drainage system so it doesn’t pool around the window or damage finishes. Use interior methods when exterior excavation is impossible due to pavement, landscaping, or adjacent structures, or when persistent groundwater seepage continues despite exterior membrane repairs.
The core interior strategy is a perimeter French drain. Excavate the basement slab along the foundation wall to expose the footing, install 4 inch perforated drain pipe at footing level, cover it with gravel, and route it to a sump pump basin. The sump pump (typical cost $200 to $1,000 installed) lifts collected water and discharges it outside, away from the foundation. For active leaks at cracks or joints, inject epoxy or apply hydraulic cement from the inside to stop visible flow, then coat the wall with a 40 to 60 mil interior waterproofing membrane or elastomeric masonry coating to manage residual moisture. Interior fixes don’t address hydrostatic pressure, so they work best alongside exterior grading improvements and gutter maintenance.
Interior systems are necessary when:
Exterior access is blocked by permanent structures like driveways, decks, or adjacent buildings, making excavation impractical or prohibitively expensive.
Persistent groundwater seepage continues after exterior membrane and drain repairs, indicating a high water table or subsurface spring that requires active pumping to control.
The egress window was installed without proper flashing or exterior waterproofing, and the homeowner can’t afford full exterior excavation and membrane installation immediately. Interior drainage buys time and prevents ongoing damage while saving for a complete exterior fix.
Condensation has been ruled out and moisture readings confirm active water infiltration through the wall rather than interior humidity condensing on cold glass or frames. Dehumidifiers rated for 30 to 70 pints per day help manage interior humidity but don’t stop leaks.
Step by Step Waterproofing Process for a Basement Egress Window
A complete waterproofing job follows a logical sequence that addresses drainage first, then sealing, then protection from above. Skipping steps or reversing the order leaves weak points that allow water to bypass even high quality materials.
The full installation process from excavation to final backfill:
Inspect the window and well immediately after a heavy rainfall to identify active leak points. Look for dripping at the frame, pooling water in the well, and damp or stained drywall inside.
Excavate soil around the well to expose the foundation wall from 2 to 3 feet below the window sill, extending at least 18 inches beyond the well perimeter on all sides.
Clean the foundation wall with a wire brush, remove loose material, and let the surface dry completely. Apply concrete primer if recommended by the membrane manufacturer.
Fill all cracks wider than one sixteenth inch with hydraulic cement for active leaks or polyurethane crack sealant for stable cracks. Allow curing time per product instructions.
Apply the waterproof membrane in a continuous sheet from below the sill up the foundation wall to at least 2 to 3 feet above final grade, overlapping seams as specified, and extending 6 inches onto the window frame or flange.
Install a sill pan or sub sill flashing beneath the window if the rough opening allows access. This catches any water that bypasses the frame seal and directs it back outside.
Place 4 inch perforated drain pipe at the bottom of the excavation, sloped one eighth to one quarter inch per foot, and connect it to an existing footing drain, daylight outlet, or sump pump line.
Backfill around the pipe with 6 to 12 inches of three quarter inch clean crushed stone, then fill the remainder of the excavation with more stone up to within 6 inches of grade.
Cap the stone backfill with native soil, sloped away from the foundation at least one quarter inch per foot for the first 4 to 6 feet to direct surface water away from the well.
Install a heavy duty polycarbonate or steel window well cover, ensuring it seals tightly to the well lip or includes gaskets to block debris and rain while allowing ventilation.
Professional contractors typically complete a straightforward single window exterior waterproofing job in 1 to 3 days. DIY projects with simple fixes like cleaning gravel, re caulking joints, and installing a new cover take 1 to 2 days for homeowners comfortable with hand tools and basic drainage concepts.
Cost, Labor, and Timeline for Egress Window Waterproofing

Waterproofing costs vary with the scope of work, access difficulty, and whether you hire a contractor or do the labor yourself. Small repairs like re caulking joints and adding a well cover cost under $100 in materials and an afternoon of work. Full exterior excavation, membrane application, drain pipe tie in, and professional labor can exceed $10,000 when multiple windows or extensive foundation repairs are involved.
DIY projects using store bought sealants, membranes, and covers typically cost $50 to $800 in materials for a single window, assuming no major foundation damage. Hiring a contractor to replace a window well and cover runs $150 to $1,200. Installing an interior French drain tied to a sump pump costs $1,000 to $6,000 depending on the basement perimeter length and existing floor conditions. Exterior excavation with membrane, new drain tile, gravel backfill, and restoration of landscaping ranges from $3,000 to over $12,000 for comprehensive projects. Adding a new egress window with well during a waterproofing project costs $1,000 to $5,000 depending on wall type, window size, and finish details.
| Scope | Typical Cost | Typical Time |
|---|---|---|
| DIY minor sealing, gravel cleaning, cover replacement | $50–$800 | 1–2 days |
| Professional window well and cover install/repair | $150–$1,200 | 1 day |
| Interior French drain tied to sump pump | $1,000–$6,000 | 3–7 days |
| Exterior excavation, membrane, drain tile, backfill | $3,000–$12,000+ | 1–2 weeks |
| New egress window installation with well | $1,000–$5,000 | 2–5 days |
Building Code Requirements That Affect Waterproofing Around Egress Windows

Egress windows must meet minimum size and accessibility standards to serve as emergency escape routes. These code requirements directly influence waterproofing design. Well depth determines whether a ladder is required, which affects cover design and drainage layout, and the minimum well area affects gravel volume and drain pipe placement.
Most jurisdictions adopt the International Residential Code or similar standards, which specify a net clear opening of at least 5.7 square feet (approximately 821 square inches), minimum opening height of 24 inches, minimum opening width of 20 inches, and maximum sill height of 44 inches above the finished basement floor. The window well must provide at least 9 square feet of horizontal area with a minimum dimension of 36 inches in any direction. Wells deeper than 44 inches require a permanently attached ladder or steps with treads at least 3 inches deep.
Measurements that must be met to satisfy typical egress and safety codes:
Net clear opening area minimum 5.7 square feet (verify local amendments for bedrooms vs. other habitable spaces).
Opening dimensions at least 24 inches tall and 20 inches wide when fully open.
Sill height maximum 44 inches above the basement floor (lower sills improve accessibility).
Window well area minimum 9 square feet with at least one dimension of 36 inches to allow occupant movement and ladder placement.
Moisture Control, Condensation Prevention, and Thermal Comfort Around Egress Windows
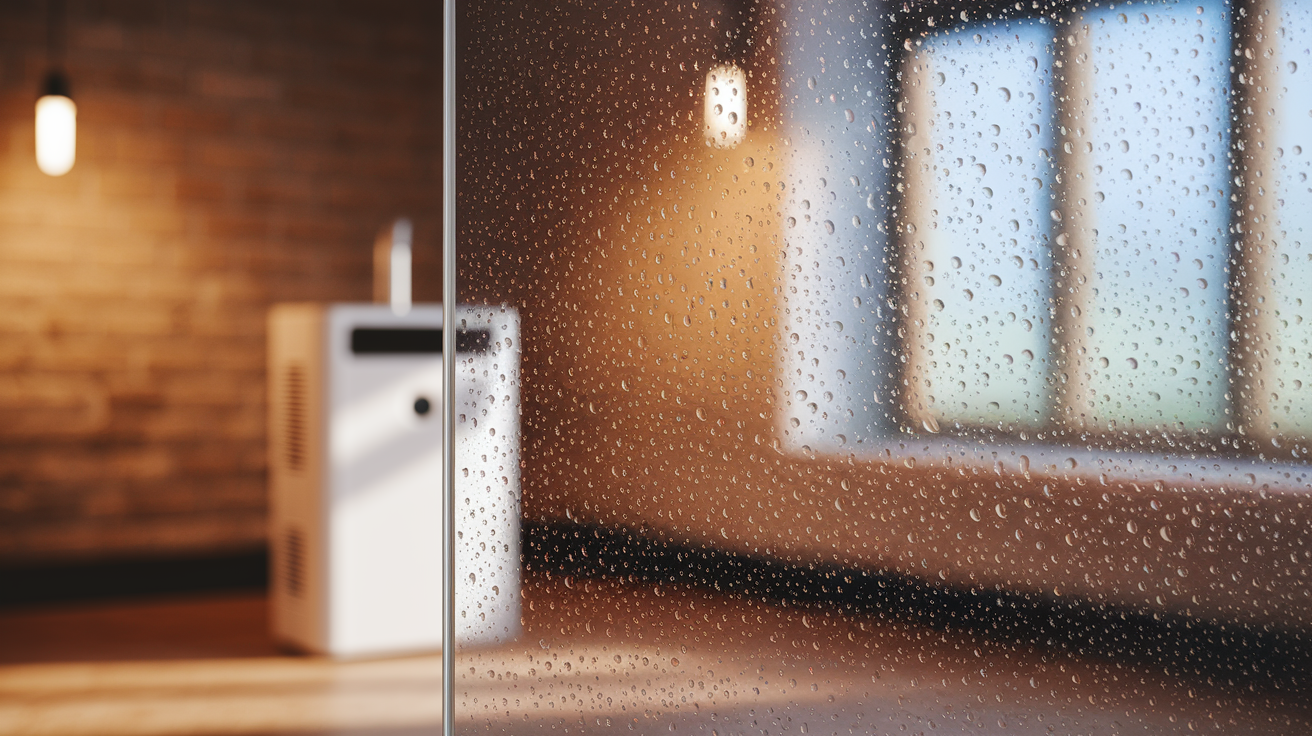
Not all moisture on basement windows is a leak. Condensation forms when warm, humid indoor air contacts cold glass or metal frames, leaving droplets or frost that can drip onto sills and stain trim. Surface water infiltration shows up as active dripping during or after rain, pooling in the well, or damp soil visible around the frame. Condensation appears as fogging between double pane glass or surface moisture with no corresponding soil wetness.
Reduce condensation by lowering indoor humidity with a dehumidifier rated for 30 to 70 pints per day depending on basement size, upgrading to insulated double or triple pane low emissivity glass, and installing window frames with thermal breaks that reduce heat transfer. Seal air leaks around the rough opening with spray foam or backer rod and sealant to prevent warm interior air from reaching cold surfaces. In cold climates, consider insulated well covers or removable storm panels during winter months to add an extra thermal buffer.
Improvement strategies that reduce both condensation and heat loss:
Install double or triple pane low E glass with insulated frames and thermal breaks to raise interior surface temperature and reduce condensation risk.
Run a basement dehumidifier continuously during humid months to keep indoor relative humidity below 50 percent, which minimizes condensation on all cold surfaces.
Seal gaps between the window frame and rough opening with closed cell spray foam or backer rod plus polyurethane sealant to eliminate air leakage and thermal bridging.
Add insulated, gasketed well covers in winter to create a dead air space that moderates temperature swings and reduces frost formation on glass.
Maintenance Practices That Protect Egress Window Waterproofing Long Term
Waterproofing systems degrade slowly. Gravel clogs with sediment, covers crack under snow load, sealant joints shrink and lose adhesion, and drain pipes fill with roots or silt. Regular inspection and minor maintenance every few months prevent small problems from becoming expensive failures.
Inspect window wells, covers, and drains twice each year in spring and fall, and again after any storm that drops more than 2 inches of rain or heavy wet snow. Clear leaves, twigs, and debris from wells monthly during fall when trees drop material faster than covers can shed it. Test the sump pump annually by pouring water into the basin until the float activates, and clean the intake screen to prevent clogging. Re inspect and touch up sealant joints every 3 to 5 years, watching for cracks or gaps wider than one sixteenth inch. Plan to replace polycarbonate well covers every 5 to 10 years as UV exposure makes them brittle, and steel or aluminum covers every 10 to 15 years as coatings wear and rust begins.
Maintenance tasks that extend the life of egress window waterproofing:
Inspect wells and covers in spring and fall, and within 24 hours after heavy rain or snowmelt, looking for standing water, debris buildup, or new cracks in concrete.
Clear leaves, dirt, and organic matter from window wells monthly during fall, and remove snow accumulation from covers after winter storms to prevent overloading and melting into the well.
Test perforated drain pipes and sump pump operation annually by running water into the well and confirming it drains completely within minutes.
Re caulk joints between window frames and foundation every 3 to 5 years using polyurethane or hybrid polymer sealant rated for below grade exposure.
Replace well covers every 5 to 15 years depending on material. Polycarbonate degrades faster under UV, steel lasts longer but may rust.
Monitor interior humidity and dehumidifier performance, emptying catch buckets or checking drain lines weekly during humid months to prevent overflow and ensure condensation stays controlled.
Final Words
When water soaks the window well, act fast: clear debris, check the drain, and re-caulk visible gaps.
This post walked through how leaks start, the building forces that push water in, and practical fixes—from exterior membranes and 4″ perforated drain pipe installs to well covers, sill pans, and interior drains. Follow the step-by-step process, meet code, and keep a simple maintenance routine. Take photos and moisture readings so repairs and costs are clear.
With proper basement egress window waterproofing, you’ll stop the leak and get the space back to normal.
FAQ
Q: How to waterproof a basement egress window?
A: The way to waterproof a basement egress window is to stop water outside and seal the frame: install an exterior membrane, fit a 4″ perforated drain with 3/4″ crushed stone, re-caulk gaps, and add a well cover.
Q: Are egress windows waterproof? Should basement windows be waterproof?
A: Egress windows are not waterproof by default, and basement windows should be protected. Use frame sealing, exterior membranes, window-well drains, clean gravel, and covers to prevent leaks, mold, and rot.
Q: Why put rocks in window wells?
A: You put rocks in window wells to let water flow to the drain and keep soil from clogging it. Use 3/4″ crushed stone for a gravel-packed well so drains stay clear and work reliably.