
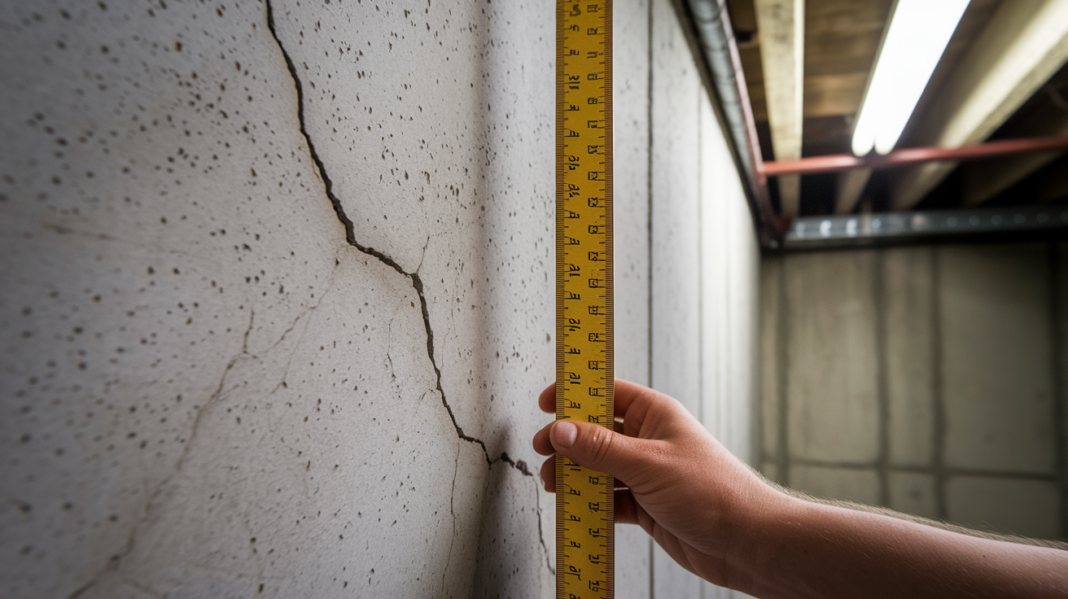

Most foundation cracks start small and stay quiet until one heavy rain turns your basement into a wading pool. By then, that hairline crack you ignored has let gallons of water soak into your walls, and the repair just got a lot more complicated. The good news? Fixing foundation cracks the right way stops leaks before they flood your space, and the materials matter more than the size of the crack. We’ll walk you through epoxy injection, polyurethane foam, hydraulic cement, and waterproofing systems so you know what works, when to use it, and what “done right” looks like.
Assess Your Foundation Crack Type for Proper Repair Selection
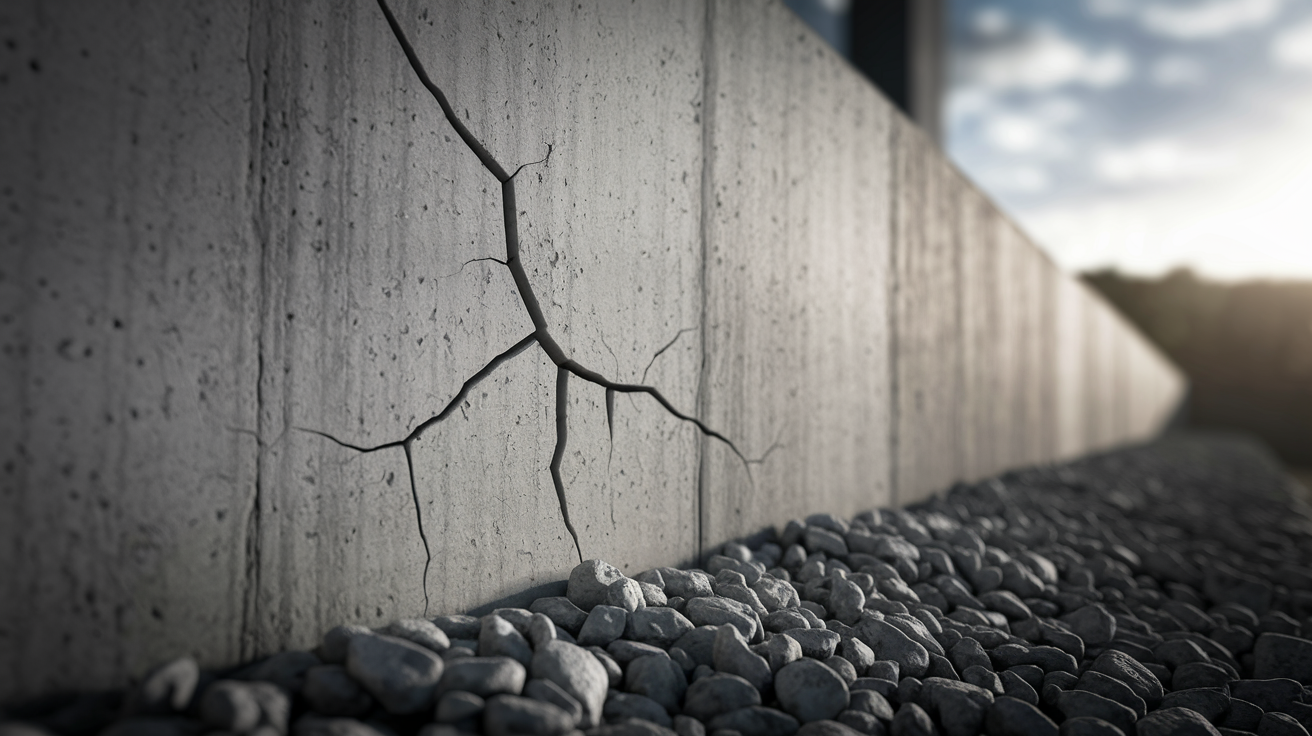
Getting the crack diagnosis right is everything. Different crack patterns mean different problems underneath, and they don’t respond to the same fixes. That hairline crack from normal concrete settling? It’s nothing like a horizontal crack from serious soil pressure.
| Crack Characteristics | Severity Level | Recommended Action |
|---|---|---|
| Hairline vertical cracks less than 1/8 inch | Low | Monitor for 2-3 months; repair with epoxy if stable |
| Vertical cracks 1/8 to 1/2 inch | Moderate | Professional epoxy or polyurethane injection recommended |
| Vertical cracks wider than 1/2 inch | High | Immediate professional evaluation required |
| Horizontal or stair-step cracks any width | Critical | Stop and call foundation specialist immediately |
| Multiple cracks appearing suddenly | High | Structural assessment needed before any repairs |
Grab a ruler and measure the crack at its widest point. Take photos from the exact same spot every month for a few months. If that crack grows even 1/16 inch, you’ve got active movement that needs professional attention before you do anything else.
Epoxy Injection Methods for Foundation Crack Repair

Epoxy injection works for most vertical and hairline cracks in poured concrete. It creates a permanent bond that brings structural integrity back while stopping water from getting through.
Here’s how it works. You start by cleaning the crack and the area around it, getting rid of loose concrete, dirt, anything that’s in the way. Next, you drill injection ports every 10 inches or so along the crack from top to bottom. The crack surface gets sealed with hydraulic cement or epoxy paste so the injectable stuff you’re about to use gets forced deep into the crack instead of just leaking out the front. Then you inject the epoxy resin under pressure, starting at the bottom port and working up. Gravity helps fill everything completely. As each port overflows with resin, you move to the next one above. After the epoxy cures (usually 24 to 72 hours), you grind the surface ports flush and you can paint over the whole thing.
The choice between rigid epoxy and flexible polyurethane matters more than most people think. Flexible resins move with the foundation. Every foundation shifts a little from temperature changes and what’s happening in the soil. Flexibility keeps the seal watertight longer, and you typically get 5 year warranties. Rigid epoxy cures rock hard, which is good for structural bonding but can crack again when the foundation shifts. For cracks that need waterproofing and a little give, flexible polyurethane wins.
Polyurethane Foam Injection for Active Leaking Cracks

Polyurethane foam expands, and that’s what makes it different. When you inject it, the foam reacts with water and expands up to 20 times its original size. It forces itself into every gap and cavity connected to the crack. Great for cracks that branch out or have paths through the concrete you can’t see.
You’d use it when you’ve got active water coming through the crack, when the crack leaks during heavy rain but stays dry otherwise, when you need repairs done during wet seasons and drying out the crack just isn’t happening, or when you can’t get the area completely dry. It also works when the exact crack path is uncertain or when you think the crack connects to other voids in the wall. You can apply it in any weather, any season. When you need to stop water right now instead of waiting for dry conditions, this is what you reach for.
Compared to epoxy, polyurethane handles wet environments better and works when time’s critical. The foam sets fast, sometimes within minutes, and stops active leaks almost immediately. But it’s got limits. The foam can compress over time if you’ve got extreme water pressure, and it costs more than epoxy. For dry, stable cracks, epoxy gives you better long term structural bonding. For actively leaking cracks, polyurethane is the practical pick.
Hydraulic Cement and Concrete Patching for Minor Foundation Cracks
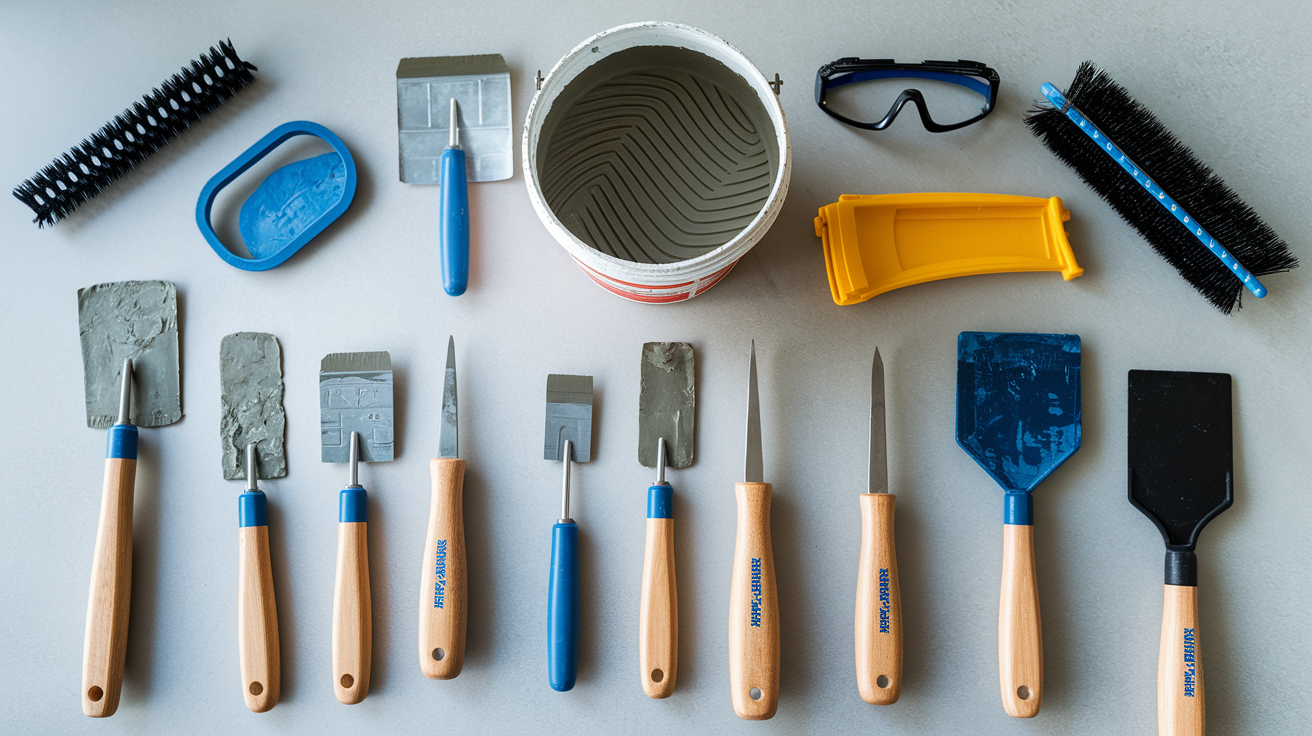
Hydraulic cement sets fast and it’s waterproof. It sets and hardens even when it’s wet, which makes it useful for quick repairs and as backing material in more complete crack repair systems.
You start by routing the crack, which means using a chisel or grinder to widen it into a V shape that’s wider on the inside than the outside. This creates a mechanical lock that keeps the patch in place. After routing, clean everything out. Wire brush and vacuum all the debris, dust, and loose concrete. Mix the hydraulic cement per the package directions (usually just add water) and work fast since it sets in 3 to 5 minutes. If the crack’s deep, apply the cement in layers, pressing hard to get rid of air pockets. Finish the final layer flush with the wall and smooth it while you still can.
Hydraulic cement works best for hairline and small vertical cracks as a DIY temporary fix or as surface backing before injection repairs. Don’t count on it as a permanent solution for structural cracks or ongoing water problems. It doesn’t bond to concrete the way injection resins do. The patch can shrink a bit as it cures, creating new paths for water around the edges. Think of it as a quick stopgap until you can get professional injection repair done, or as the surface seal that holds injectable materials in place during proper repairs.
Interior Waterproofing Systems to Prevent Foundation Leak Recurrence
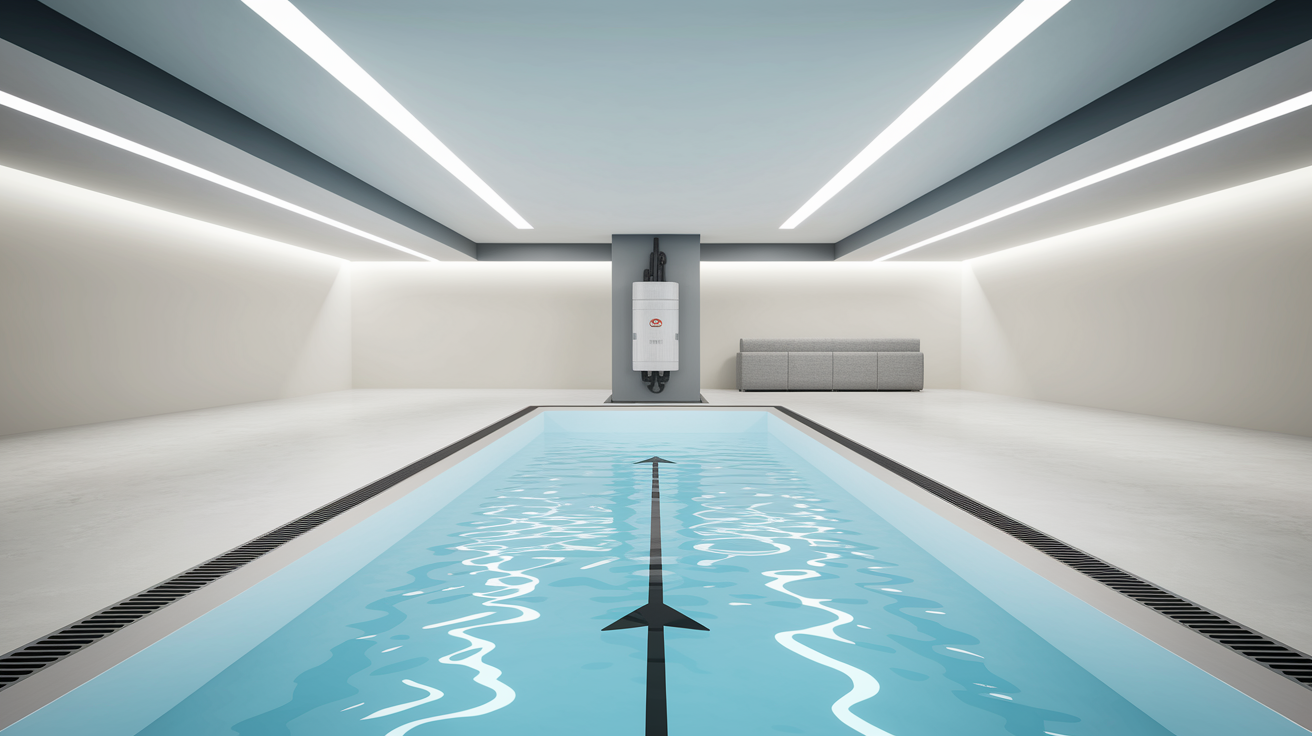
Interior waterproofing addresses the actual root cause, which is water pressure in the soil, instead of just sealing visible cracks. Even after you repair cracks, the water pressure keeps pushing against your walls and can create new cracks over time.
The system needs two things working together: a perimeter drainage channel and a sump pump. You install the drainage channel along the foundation walls at floor level. That means breaking out a 12 inch strip of basement floor next to the wall, creating a trench, and installing perforated pipe surrounded by drainage stone. You leave a thin gap between the floor and wall (covered with a flange) to let water enter. This collected water flows by gravity to a sump basin. The sump pump then pushes the water out through a discharge line that carries it away from the foundation, at least 10 feet from the house.
Installation takes 2 to 4 days for a typical basement and then works continuously. Water that would otherwise build up against your walls gets intercepted at the footer level and removed before it can get into your living space. This prevents future basement flooding even if new cracks show up, and it relieves the water pressure that causes cracks in the first place. The system runs automatically, only firing up the sump pump when water collects in the basin.
| Waterproofing Component | Function |
|---|---|
| Perimeter drainage channel | Collects water at foundation footer level before it can penetrate walls or floor |
| Sump pump | Automatically removes collected water from basement and discharges it away from foundation |
| Discharge line | Carries pumped water at least 10 feet from foundation to prevent recirculation |
| Backup battery system | Keeps sump pump operational during power outages when risk is highest |
Exterior Waterproofing and Crack Repair from Outside Foundation Walls
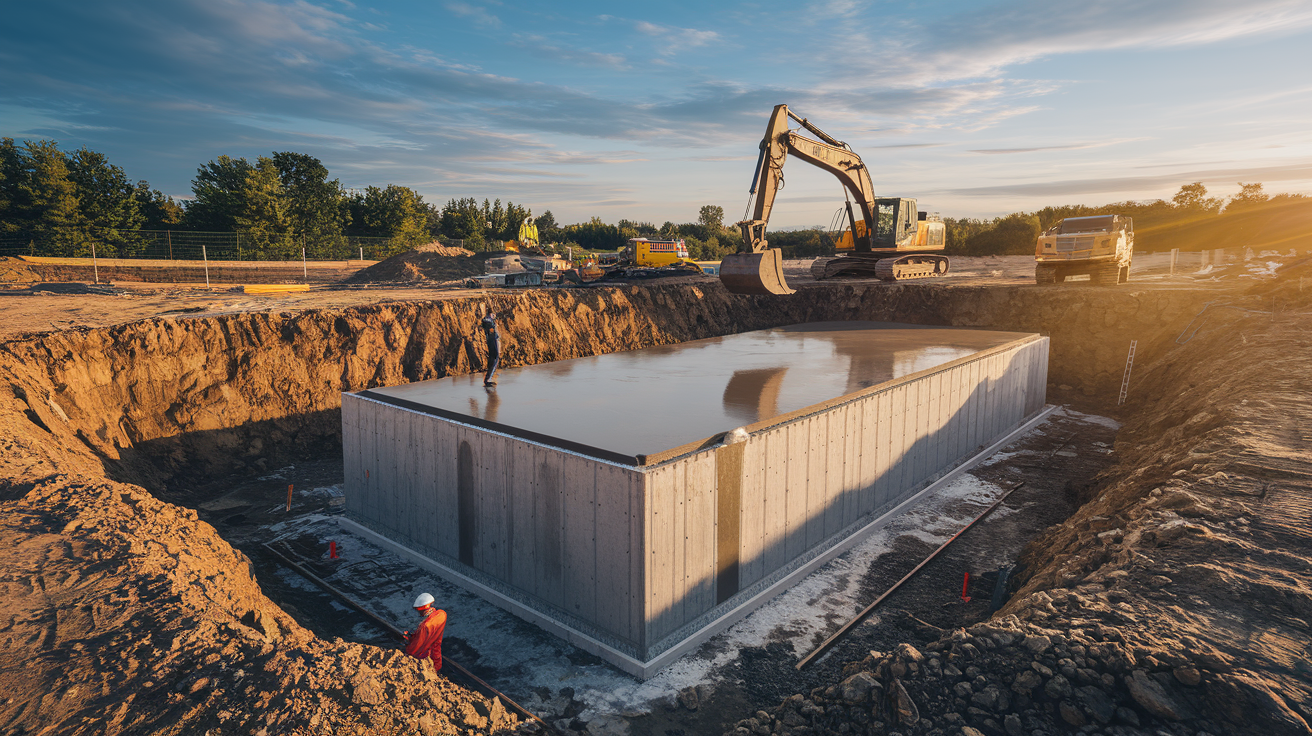
Exterior repair makes sense in specific situations. When cracks are behind pipes, electrical panels, or near chimneys where you can’t get to them from inside. When you’ve got a finished basement and interior work would wreck drywall, flooring, or built-ins. For block foundations where interior injection doesn’t work as well. Or when you need comprehensive exterior waterproofing to handle widespread moisture problems.
The excavation process is the biggest part. Contractors dig down to the footer level (typically 6 to 8 feet deep) along the affected wall, exposing the full height of the concrete. You need heavy equipment. It tears up landscaping. And you’ve got to plan carefully around utilities, HVAC units, decks, or anything else near the foundation. The excavation needs to be wide enough (3 to 4 feet from the wall) so technicians can work safely.
Once the wall’s exposed, you get a multi-layer protection system. Workers clean the foundation with wire brushes and pressure washers, getting rid of all dirt, old coatings, and debris. Cracks get repaired with hydraulic cement, filled and smoothed flush. Next, a thick rubberized asphalt coating goes on the entire excavated surface, extending at least 12 inches beyond any crack on all sides. This coating is your primary waterproof barrier. Finally, a waterproof membrane (spray applied or sheet membrane) gets installed over the asphalt coating, covering the entire excavated foundation surface from footer to grade level. Some systems also add drainage board installation and exterior footer drains before they backfill.
Expect to pay about 3 times what interior methods cost. Excavation labor, equipment rental, and landscape restoration add up. Installation takes 1 to 2 weeks for a single wall and depends on weather since you can’t excavate or apply coatings during rain or freezing temps. Budget for landscape restoration too, including sod, plantings, sidewalks, or patio sections that had to be removed for access.
Common Causes Behind Foundation Cracks and Moisture Problems
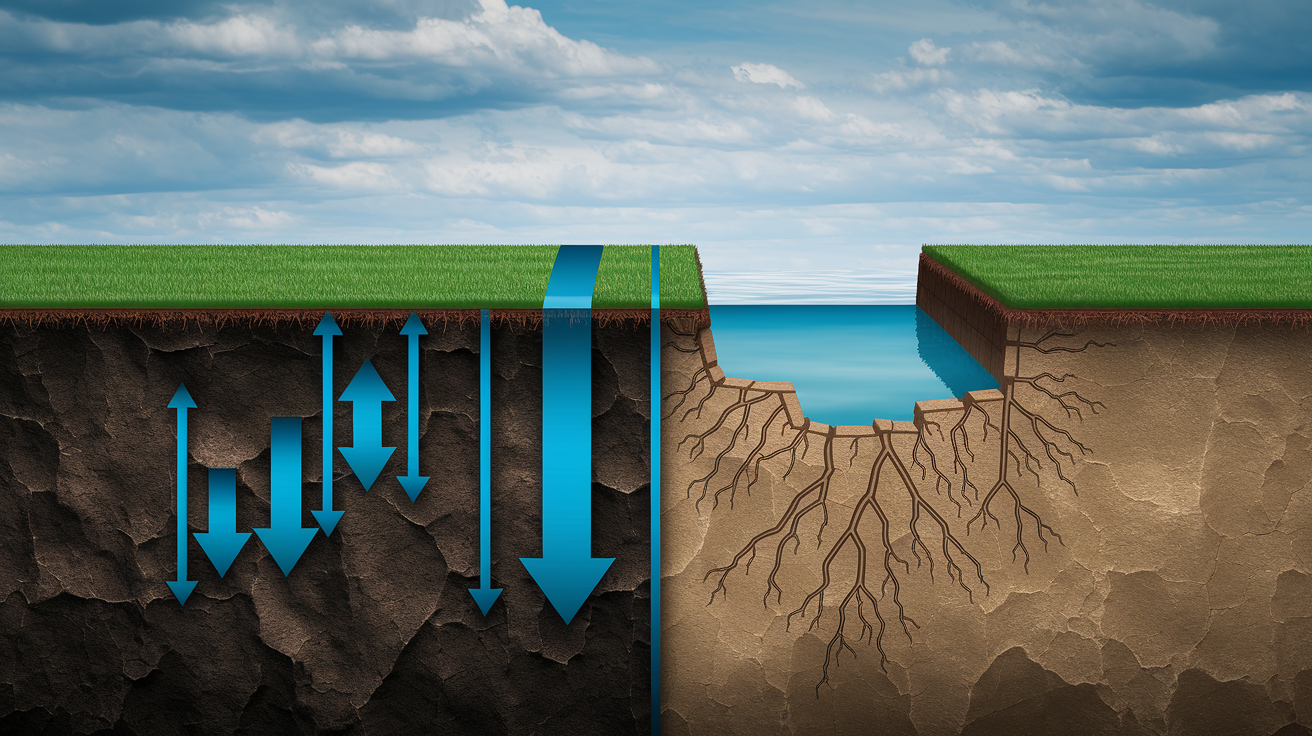
Water pressure in the soil is what drives crack formation and water seepage. When soil around your foundation gets saturated, that water has weight and creates pressure against the walls. The pressure pushes inward on the concrete, looking for weak spots. Over time, this constant pressure causes cracks or widens existing small ones. The same pressure then forces water through those cracks into your basement. Clay soils make it worse because they expand when wet and contract when dry, creating a push-pull cycle that stresses foundation walls year after year.
Environmental stuff speeds up crack development. Freeze-thaw cycles do real damage in cold climates. Water that seeps into small concrete cracks expands when it freezes, widening the crack slightly. When it thaws, more water gets in the now larger crack, and the cycle repeats. Expansive clay soils in many regions swell up to 10% when saturated and shrink when dry, constantly shifting the ground around your foundation. Seasonal wet and dry conditions create similar movement. Water table levels that fluctuate put varying pressure on foundation walls throughout the year. High water table areas see constant pressure against foundation walls.
Then you’ve got the human causes. Poor construction like inadequate concrete mixing, not enough rebar reinforcement, or improper curing during the original foundation pour. Drainage systems that don’t work fail to move water away from the foundation, letting it pool and saturate the soil. Grading that slopes toward the house instead of away from it directs water straight at your foundation walls. Soil compaction problems during building leave loose soil that settles unevenly under the foundation weight, creating uneven settling that cracks concrete. Gutters that dump water next to the foundation instead of 10 feet away concentrate water exactly where you don’t want it.
Preventive Measures to Protect Foundations from Future Cracks and Leaks

Crack repair fixes existing damage, but prevention protects your foundation long term and stops new problems. You can seal every crack you see today, but if the conditions that caused those cracks continue, new ones will show up.
Water management around the foundation is the single most important thing. Water is the enemy. Everything else is just controlling where water goes and how much pressure it creates against your walls.
Gutter cleaning twice a year minimum (spring and fall, more if you’ve got trees overhead) prevents overflow that dumps water directly alongside your foundation instead of into downspouts.
Downspout extensions carrying water at least 10 feet from the foundation stop the concentrated flow from gutters from saturating soil next to basement walls.
Proper grading with soil sloped away from the house (6 inches of drop in the first 10 feet) uses gravity to move surface water away from the foundation before it can soak in.
Landscape drainage improvements like swales (shallow drainage channels), dry creek beds, or regraded planting beds redirect water flow across your yard instead of toward your foundation.
French drain installation where needed on uphill sides intercepts groundwater before it reaches your foundation. Critical on sloped lots or in areas with high water tables.
Regular foundation inspection (twice yearly, inside and outside) catches new cracks while they’re still small, monitors existing repairs, and spots drainage problems before they cause damage.
Structural Reinforcement for Serious Foundation Cracks and Bowing Walls
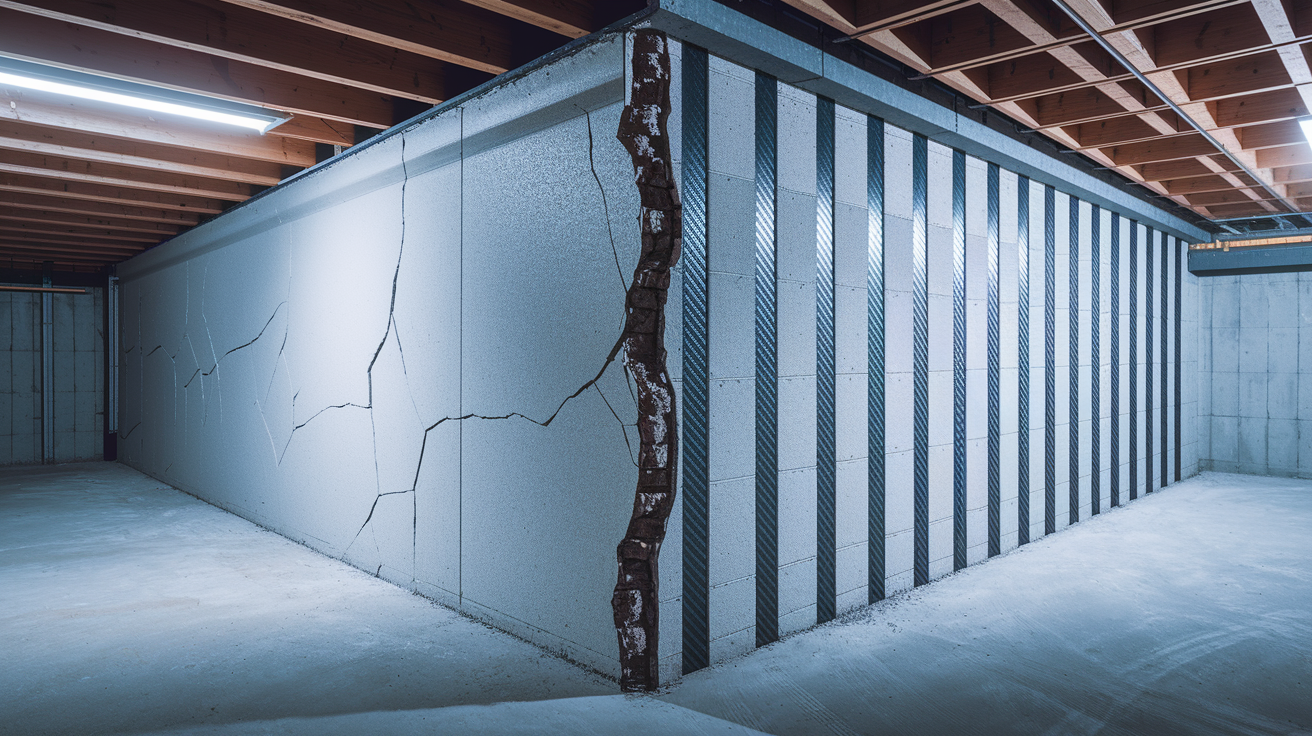
You need to know the difference between cosmetic cracks that need sealing and structural cracks that require wall stabilization before any waterproofing can work. If your foundation wall is bowing inward, leaning, or showing horizontal cracks, sealing the crack alone won’t fix anything because the wall itself is failing.
Carbon Fiber Reinforcement Systems
Carbon fiber straps are what you want for walls bowing or leaning less than 2 inches inward. Installation bonds vertical carbon fiber strips to the interior foundation wall using high strength epoxy. Each strap is typically 4 inches wide and runs from the basement floor to the top of the foundation wall (or to floor joists). You space straps 3 to 4 feet apart along the affected wall. Carbon fiber has tensile strength comparable to steel but it’s thinner, lighter, and doesn’t rust. Once the epoxy cures, the straps prevent further inward movement and stabilize the wall where it is. You can paint over the repair for a finished look. Carbon fiber installations typically carry lifetime structural warranties, meaning the repair is guaranteed to prevent further movement for as long as you own the home.
Wall Anchors and Steel I-Beams for Severe Foundation Movement
For walls displaced more than 2 inches or walls showing active, ongoing movement, you need more aggressive stabilization. Wall anchor systems involve excavating outside the foundation at strategic points and installing earth anchors 10 to 12 feet away from the wall. Steel rods connect through the foundation wall to interior wall plates, creating a tension system that pulls the wall back toward its original position and holds it there permanently. You need both interior and exterior access and it takes 2 to 4 days.
Steel I-beam installation is an interior only option where vertical steel beams get anchored to the basement floor and floor joists above, then hydraulically tightened against the bowing wall to stop further movement and sometimes pull the wall back slightly. I-beams are visible in the basement unless you build walls around them. Both systems need structural engineering assessment before installation to figure out spacing, beam sizing, and whether the wall can be pulled back or just stabilized in place.
Comprehensive Cost Analysis for Foundation Crack Repair and Waterproofing

The national average foundation repair cost is $5,857, but the range runs from $250 for minor crack repairs to $100,000 or more for extensive structural work. That wide spread shows you how much variation there is in crack severity and repair scope.
Here’s how costs break down. DIY materials for minor hairline crack repairs run $50 to $200 for hydraulic cement, caulk, and basic tools. Professional epoxy or polyurethane injection typically ranges $300 to $800 per crack depending on length and depth, with most homes needing repair of 2 to 5 cracks. Full interior waterproofing systems including perimeter drainage and sump pump installation cost $3,000 to $8,000 for an average sized basement. Exterior excavation and waterproofing ranges $8,000 to $15,000 or more, with costs rising significantly for deep foundations or difficult access. Carbon fiber reinforcement for wall stabilization runs $4,000 to $8,000. Wall anchors or steel I-beams for severe bowing cost $10,000 to $15,000 or more.
Accessibility challenges, multiple crack locations, foundation type, structural reinforcement needs, and where you live all push costs higher. A simple vertical crack in an open, unfinished basement costs way less to repair than multiple cracks behind finished walls or in tight crawl spaces. Block foundations often cost more than poured concrete because repair methods are more complex. Homes needing both waterproofing and structural reinforcement obviously cost more than those needing only crack sealing. Labor rates in major cities run higher than rural or suburban markets.
Standard homeowners insurance typically doesn’t cover gradual settling and age related cracks. They consider them maintenance issues rather than sudden covered damage. But policies may cover sudden water damage from covered events like burst pipes or storms, including foundation cracks that result directly from those events. Documentation matters for any potential claims. Take photos of damage immediately, keep records of when cracks appeared, note any sudden changes after storms or plumbing incidents, and get professional inspection reports that establish timeline and cause. Most foundation crack claims get denied, but sudden catastrophic damage sometimes qualifies for coverage of resulting repairs.
| Repair Method | Typical Cost Range | Best For |
|---|---|---|
| DIY hydraulic cement | $50-$200 | Temporary fix for small hairline cracks with no active leaking |
| Professional epoxy injection | $300-$800 per crack | Stable vertical cracks in poured concrete foundations |
| Polyurethane foam injection | $400-$1,000 per crack | Actively leaking cracks or repairs during wet conditions |
| Interior waterproofing system | $3,000-$8,000 | Comprehensive moisture control and pressure relief |
| Exterior waterproofing | $8,000-$15,000+ | Inaccessible interior cracks, finished basements, block foundations |
| Structural reinforcement | $4,000-$15,000+ | Bowing walls, horizontal cracks, ongoing wall movement |
Identifying Warning Signs of Foundation Cracks That Leak
Regular foundation inspection and early detection prevent water damage that turns a $500 crack repair into a $15,000 foundation and mold remediation project. Catching cracks while they’re small and dry beats waiting until water pours through during heavy rain.
Do a basic visual inspection every three months. Check all basement walls and crawl space areas you can get to from the inside, then walk the exterior foundation looking at the concrete visible above grade. Bring a flashlight and get close to the walls. Look at corners and around any penetrations (pipes, vents, old service entries) where cracks often start. Check the same spots each time so you notice changes.
Watch for these specific warning signs:
Water stains on foundation walls, especially horizontal lines showing previous high water marks.
Efflorescence, that white powdery or crusty mineral deposit where water has seeped through concrete and evaporated, leaving minerals behind.
Active seepage during or right after heavy rain, even if it’s just dampness rather than flowing water.
Musty odors in the basement or crawl space indicating moisture even when you don’t see standing water.
Mold growth on walls, particularly along cracks or in corners where moisture builds up.
Doors and windows that suddenly stick or won’t close properly because of foundation shift.
Wall bowing visible as an inward curve when you sight down the wall length from one corner.
Floor cracks that widen or develop sudden height differences between sides.
When to Call Professional Contractors Versus Attempting DIY Foundation Repairs
DIY repairs work in limited situations. Hairline cracks less than 1/8 inch wide that aren’t actively leaking. Stable vertical cracks showing no signs of widening over 3 months of watching them. Situations where you need a temporary measure to reduce water seepage until professional help shows up. Hydraulic cement or concrete crack filler from the hardware store can handle these simple cases if you’re comfortable with basic home repairs.
But you need professional contractors immediately for these: any crack wider than 1/2 inch regardless of location or pattern, horizontal or stair-step crack patterns which signal serious structural movement, active water coming in where you see moisture during rain or notice dampness, any bowing or displacement of foundation walls visible as an inward curve or lean, multiple cracks appearing suddenly within a few weeks or months, or cracks that keep widening after you mark and monitor them for a month. These conditions mean problems beyond simple sealing and require diagnostic equipment, professional materials, and techniques that DIY can’t provide.
When you’re selecting contractors, look for foundation specific experience rather than general handyman services. Ask how many foundation crack repairs they complete yearly. Established companies handle dozens to hundreds. Check warranty offerings. 5 year warranties are typical for injection repairs and lifetime warranties are common for structural reinforcement like carbon fiber. Confirm proper licensing and insurance coverage including liability and workers comp. Get detailed written estimates that specify repair method, materials, timeline, and warranty terms rather than vague price quotes. Ask for references from similar repair projects completed within the past year, and follow up by calling those homeowners about their experience.
Foundation Type Considerations: Block Versus Poured Concrete Repair Strategies
Poured concrete and block foundations develop different crack patterns and need different repair strategies for best results. Understanding your foundation type helps you evaluate what contractors recommend and avoid repair methods that won’t work long term for your specific situation.
Poured Concrete Foundation Repair Approaches
Poured concrete foundations are solid concrete walls formed by pouring wet concrete into forms during construction. They tend to develop vertical or diagonal cracks as the concrete cures and settles or when soil movement creates stress points. These solid walls respond well to injection methods using epoxy or polyurethane because the injectable material can fully penetrate through the wall thickness and bond to concrete on both sides of the crack. Interior only repair approaches work for most poured concrete cracks because the wall structure is uniform, meaning a repair from one side stabilizes the entire wall thickness. Injection repairs typically get you permanent results without exterior excavation, keeping costs lower and installation faster.
Block and Masonry Foundation Special Requirements
Block foundations consist of hollow concrete blocks stacked and mortared together during construction. They create unique challenges because cracks often follow mortar joints in stair-step patterns, climbing along the weakest paths between blocks. Injection methods are less effective with block foundations because the hollow cores mean injectable material can flow into voids without fully sealing the crack path. The material might fill one block cavity but not seal the crack through the next block above or below. Exterior waterproofing is often necessary for permanent solutions on block walls because it seals the entire outside surface regardless of crack pattern.
Encapsulation becomes especially critical for brick or stone foundations in crawl spaces because of porous materials that absorb moisture even without visible cracks. Brick and stone foundations with mortar joints act like sponges, wicking water through the entire wall structure. An encapsulation system installs an inorganic waterproof liner from floor to ceiling, creating a moisture barrier that covers the walls completely. The liner doesn’t attach directly to the foundation wall but instead creates a small gap that allows water to pass through the porous wall and then channel down behind the liner to a perimeter drainage system at the footer level. This approach accepts that water will penetrate the porous foundation material and manages it rather than trying to seal hundreds of mortar joints and porous surfaces. Block foundations showing structural movement may also need additional methods like parging (applying a cement coating to seal the surface) or complete wall stabilization using carbon fiber or steel supports if the wall is bowing or leaning.
Warranties, Guarantees, and Long-Term Maintenance After Foundation Crack Repair
Warranty expectations vary a lot by repair type. Injection repairs using epoxy or polyurethane typically carry 5 to 10 year warranties covering repair failure or water coming through the specific crack that was repaired. Structural reinforcement like carbon fiber straps often comes with lifetime structural warranties that guarantee the repair prevents further wall movement for as long as you own the home. Full waterproofing systems usually offer 10 to 25 year warranties or lifetime coverage on certain components like sump pump liners, though mechanical parts like pump motors typically carry shorter 3 to 5 year warranties.
Warranties typically cover repair failure, meaning if the crack reopens or water seeps through the repaired crack during the warranty period, the contractor comes back to fix it at no charge. They also cover water coming through the specific repaired area. But warranties don’t cover new cracks in different locations (those are separate problems), damage from external factors like plumbing leaks or major landscape changes that alter drainage patterns, and failure to maintain systems like sump pumps or gutters that protect the foundation. Structural warranties usually don’t cover cosmetic crack reopening if the wall remains structurally stable.
Curing times before warranty activation matter because repairs need time to reach full strength. Epoxy injection repairs typically need 24 to 72 hours of curing before the warranty takes effect, though contractors often recommend waiting 7 days before testing with water. Polyurethane foam sets faster, often within hours. Carbon fiber systems require 7 to 10 days for the epoxy bonding to cure fully. Things that may void warranties include painting over repairs before they fully cure, drilling into or damaging the repair area during remodeling, or failing to maintain drainage systems and allowing new water pressure problems to develop.
Follow these maintenance practices to protect your investment:
Annual foundation inspection of both interior and exterior walls to catch new cracks early and verify existing repairs remain intact.
Gutter and downspout maintenance including cleaning twice yearly and making sure extensions remain in place and drain at least 10 feet from the foundation.
Monitor crack width if new cracks appear by marking the ends with pencil, measuring width, and taking photos monthly to detect active movement.
Address grading and drainage issues quickly when you notice water pooling near the foundation, soggy soil alongside basement walls, or erosion that changes yard slope.
Keep repair documentation including contracts, invoices, warranty certificates, and before/after photos for future warranty claims or home sale disclosures.
Final Words
Foundation crack repair to prevent leaks protects your home from water damage and structural problems.
Start by measuring your cracks with a ruler and watching them for a few months. Hairline vertical cracks under 1/8 inch might work as DIY projects with hydraulic cement, but anything wider than 1/2 inch needs professional eyes on it.
Horizontal cracks and stair-step patterns mean you’re past simple fixes.
Most homeowners get the best results with epoxy or polyurethane injection for poured concrete foundations, especially when paired with interior waterproofing systems that handle hydrostatic pressure long-term. Block foundations often need exterior work.
Keep your gutters clean, extend those downspouts at least 10 feet out, and check your foundation yearly. Catch problems early, and you’ll save yourself serious money and stress down the road.
FAQ
Can you seal foundation cracks yourself?
You can seal small foundation cracks yourself if they’re hairline vertical cracks (less than 1/8 inch wide) showing no active water seepage. Use hydraulic cement or epoxy repair kits available at hardware stores. These DIY repairs work as temporary fixes but aren’t recommended for cracks wider than 1/2 inch, horizontal patterns, or structural damage. For lasting protection and warranty coverage, professional injection methods provide better results. Most contractors offer 5 to 10 year warranties on crack repairs, which DIY approaches can’t match.
How am I getting water in my basement when my cement walks aren’t cracked?
Water enters your basement through underground pathways even when visible surfaces look fine. Hydrostatic pressure from saturated soil pushes moisture through tiny foundation cracks, porous concrete, mortar joints in block walls, and floor-wall seams you can’t see from outside. Poor drainage around your foundation, high water tables, and inadequate guttering create pressure that forces water through the smallest openings. The leak source may be hairline cracks behind finished walls, along the footer, or through block wall cores.
Is it better to repair foundation cracks from inside or outside?
Interior foundation crack repair is better for most situations because it costs one-third less than exterior work, installs faster, works in any weather, and avoids landscape disruption. Inside repairs using epoxy or polyurethane injection effectively seal cracks in poured concrete foundations with 5 to 10 year warranties. Choose exterior repair when cracks hide behind pipes or electrical panels, your basement is finished and you want to avoid interior wall damage, or you have block foundations where injection methods work less effectively.
How long do foundation crack repairs last?
Professional foundation crack repairs last 5 to 10 years for standard epoxy or polyurethane injection methods, with some companies offering lifetime warranties on structural carbon fiber reinforcement. Repair longevity depends on using flexible resins that move with seasonal foundation shifts, addressing the underlying water pressure through drainage systems, and maintaining proper grading around your home. Rigid epoxy hardens and may crack again over time, while flexible polyurethane accommodates foundation movement and maintains water-tight seals longer.