

Most homeowners think interior reconstruction just means patching drywall and repainting. It doesn’t. After water damage, reconstruction rebuilds your home from framing to finish, replacing compromised materials and making structural repairs before anything gets covered back up. This process determines whether your home is truly dry, structurally sound, and safe, or whether moisture and damage stay hidden behind fresh paint. Here’s what complete recovery actually involves, step by step.
What Interior Reconstruction Involves and Why Professional Help Matters
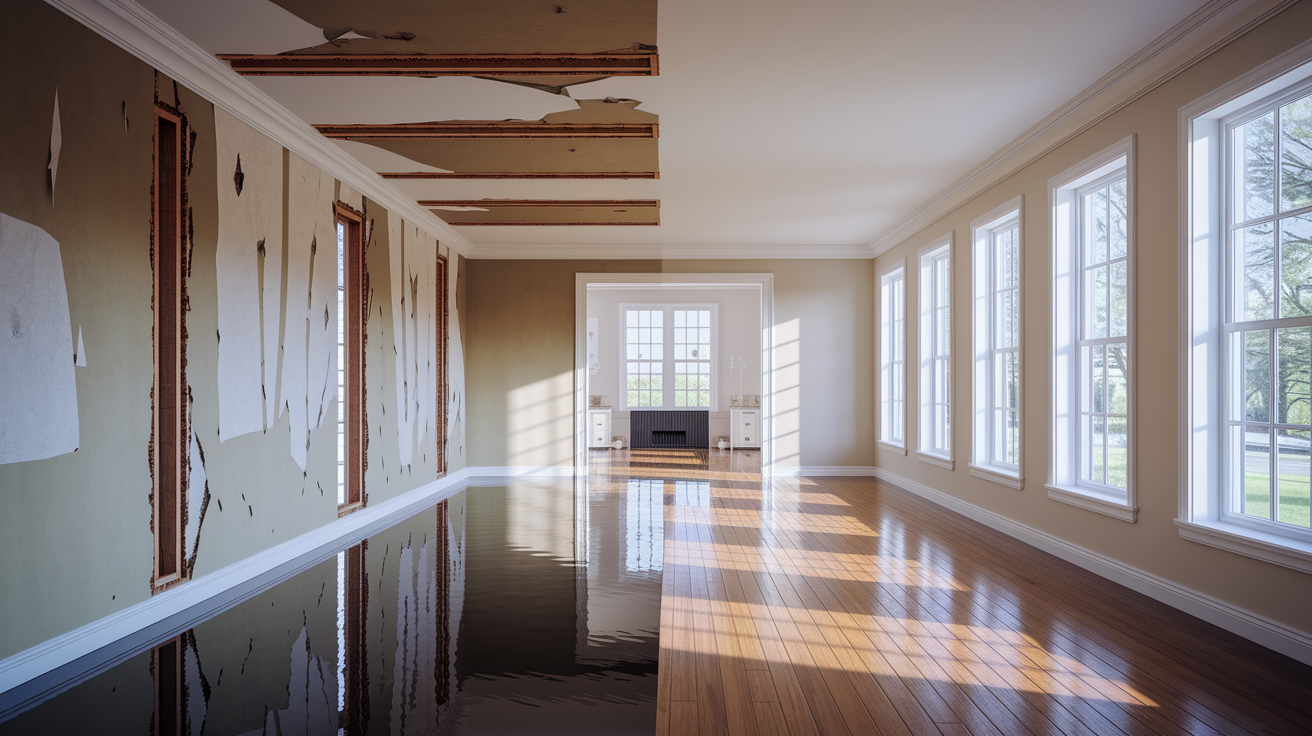
Interior reconstruction after water damage is the final recovery phase. It rebuilds damaged areas to restore structure, function, and appearance after water mitigation and drying are done. This phase transforms stripped down, damaged spaces back into livable rooms by replacing building materials, repairing structural components, reinstalling utilities, and finishing surfaces. The work ranges from replacing a section of water damaged drywall to completely rebuilding multiple rooms from studs to paint.
You need professional contractors because they know how to assess hidden damage in walls and subfloors, figure out whether areas need repair or complete rebuild, make sure all work meets building codes, and manage the complex multi-phase process from emergency response through final completion. They coordinate inspections, handle permits, and deliver quality that protects your home long term.
Emergency Response and Professional Assessment After Water Damage

Contact a restoration specialist right after you notify your insurance company. Water damage hides extensive rot in places that are hard to detect, unlike fire or storm damage. Professional assessment is critical before any reconstruction decisions get made.
Professional contractors conduct thorough inspections using moisture meters and thermal imaging to find hidden damage in walls, subfloors, ceiling cavities, and structural components. They measure moisture levels throughout affected areas, identify materials that can be saved versus those needing replacement, and locate damage you can’t see behind finished surfaces. A moisture meter reading above 15 to 20% in wood framing or above manufacturer specifications in other materials typically means replacement is needed.
The assessment documentation process creates detailed records for insurance purposes. Contractors photograph all damage from multiple angles, document moisture readings in affected areas, create itemized lists of damaged materials, and prepare detailed scope of work estimates that break down each phase of reconstruction. This documentation supports your insurance claim and establishes clear expectations for timeline and cost before work begins.
Based on assessment findings, professionals determine whether restoration or complete reconstruction makes sense. Safety and structural integrity drive this decision. When framing members are compromised, when mold growth is extensive, or when repairs would cost nearly as much as rebuilding, reconstruction becomes the better path.
Structural Drying and Dehumidification in Water Damaged Interiors

Complete structural drying is non-negotiable before rebuilding begins. Moisture trapped behind new drywall, under new flooring, or within wall cavities causes mold growth within 24 to 48 hours and leads to structural failure, rot, and recurring problems that cost far more to fix later. You can’t seal moisture inside walls and expect good results.
Commercial dehumidifiers, air movers, fans, and monitoring devices track moisture levels in walls, floors, and ceilings throughout the drying process. Large capacity dehumidifiers remove moisture from the air while air movers circulate air across wet surfaces and into wall cavities through small holes drilled near the floor. Contractors place moisture meters at multiple locations and check readings daily, making sure materials reach acceptable moisture levels before reconstruction starts. The equipment runs continuously, sometimes 24 hours per day, until readings stabilize.
Typical drying timeframes for common building materials:
Drywall takes 3 to 5 days with proper airflow and dehumidification. Hardwood floors need 7 to 14 days depending on wood species and moisture penetration depth. Concrete slabs require 4 to 6 weeks for complete drying, longer for thick pours. Wall insulation varies by type. Fiberglass dries in 3 to 5 days, closed cell foam retains moisture longer. Carpet and padding are rarely salvageable and typically get removed immediately.
Antimicrobial treatments are applied during the drying phase to affected surfaces. These treatments inhibit microbial growth on wood framing, concrete, and other materials while drying continues, providing protection during the vulnerable period when materials are damp but not yet dry enough for reconstruction to begin.
Mold Remediation Requirements for Interior Reconstruction

Mold remediation becomes necessary when water has been present for 24 to 48 hours or longer, or when visible mold growth appears during demolition. Category 3 water (sewage, flooding) requires antimicrobial treatment regardless of timeline because contamination creates immediate health risks.
The containment process seals off affected areas with plastic barriers and creates negative air pressure using specialized equipment to prevent mold spore spread to unaffected rooms. Contractors seal HVAC vents, doorways, and any openings between remediation zones and clean areas. Negative air machines with HEPA filters pull air from the containment area and exhaust it outside, making sure spores don’t migrate through your home during removal work.
Removal procedures include HEPA vacuuming all surfaces before material removal, careful extraction of mold affected materials to minimize spore release, disposal in sealed bags, antimicrobial application to remaining structural components, and post remediation air quality testing to verify the space is safe for reconstruction. All workers wear protective equipment including respirators during remediation work. Any porous materials with mold growth (drywall, insulation, carpet, ceiling tiles) get removed and replaced rather than cleaned.
Timeline impacts vary based on extent. Minor mold confined to a small area adds 3 to 5 days to your reconstruction schedule, while extensive mold covering large portions of walls or multiple rooms can add 2 to 3 weeks or more when professional remediation, testing, and clearance protocols are required.
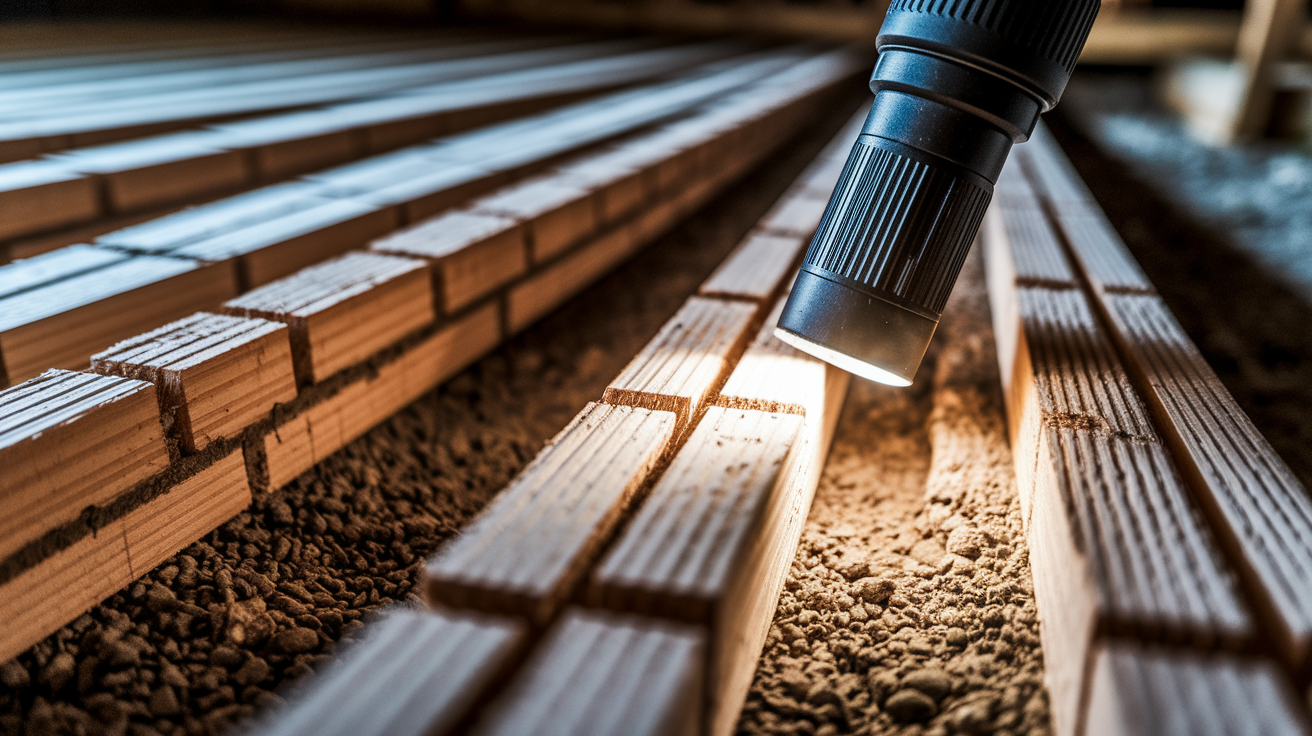
Demolition and Removal of Water Damaged Building Materials

Selective demolition removes only what’s damaged beyond repair while preserving structural elements and salvageable materials. Contractors don’t strip everything to studs unless moisture readings, visible damage, or mold growth requires it. This approach saves money and time by keeping undamaged materials in place.
Common materials needing removal include water wicked drywall, typically cut out 12 to 24 inches above the visible water line because wicking continues upward through the paper facing and gypsum core. Soaked insulation loses R-value and holds moisture against framing, so it gets pulled from wall and ceiling cavities. Damaged flooring (whether carpet, hardwood, laminate, or tile that’s lifted from compromised adhesive) comes up to expose and dry the subfloor. Baseboards and trim that absorbed water get removed because they warp, harbor mold, and won’t sit flush after drying. Cabinetry made from particle board or MDF swells and delaminates when wet and needs replacement, though solid wood cabinets can sometimes be saved.
Content removal and storage happens before demolition work begins. Professionals identify salvageable belongings, move them to unaffected areas or off-site storage, and coordinate professional content cleaning services for items affected by water, smoke, or debris. Modern restoration technology can clean and restore electronics, documents, furniture, and personal items at a fraction of replacement cost. Your restoration company can store cleaned contents and deliver them when reconstruction is complete, timed to your move in date.
Proper debris disposal follows local regulations and environmental requirements for water damaged materials. Some jurisdictions classify water damaged debris as special waste, particularly if mold is present or if the water source was contaminated. Contractors arrange appropriate dumpsters, obtain disposal permits if required, and make sure materials reach approved facilities.
Structural Repairs in Water Damage Reconstruction Projects
Structural damage assessment determines when structural engineers are needed versus when general contractors can handle repairs. Bring in engineers for load bearing wall damage, foundation moisture intrusion or cracking, extensive floor joist damage affecting multiple bays, or any time you’re uncertain about structural integrity. General contractors handle most other repairs (non-structural wall studs, isolated joist damage, and subfloor replacement).
Common structural repairs include replacing damaged floor joists weakened by prolonged moisture exposure, sistering (reinforcing) compromised studs by attaching new lumber alongside damaged members, repairing or replacing subflooring sections that have delaminated or lost strength, addressing foundation moisture intrusion with waterproofing or drainage improvements, and reinforcing weakened framing members that can be salvaged rather than fully replaced. Sistering works when the damage is localized. A new board fastened tight against the old one restores strength without complete replacement.
Building code compliance for structural work determines material specifications, fastener schedules, and connection requirements. Current codes often exceed standards from when your home was built, so repairs must meet today’s requirements even when matching existing construction. Required inspections happen at the rough framing stage before any structural work gets covered. Inspectors verify lumber sizes, proper fastening, adequate support, and code compliant repairs.
Structural repairs must be completed and approved before moving to finish work. You can’t install drywall, run final electrical, or lay flooring until structural components are solid, dry, properly fastened, and inspected. This sequencing protects your investment in finish materials and makes sure nothing gets damaged when structural issues are discovered late.
Plumbing and Electrical Safety After Interior Water Damage

Plumbing and electrical work happens before interior finishing because these systems run through walls and must be inspected before concealment behind drywall. Sequencing is critical. You can’t close walls until utilities are installed, tested, and approved by inspectors.
Plumbing repairs start with identifying pipe damage from freezing, corrosion, or physical stress during the water event. Contractors replace corroded sections rather than patching them because corrosion continues. They address the original leak source (whether a burst supply line, failed appliance connection, or drain backup) and test for proper drainage throughout affected areas. Pressure testing makes sure no hidden leaks remain in supply lines before walls close. Any repairs to drain, waste, and vent systems get tested to verify proper flow and venting.
Electrical safety inspection identifies water exposed wiring, outlets, switches, and fixtures. Water compromises wire insulation, corrodes connections, and creates shock and fire hazards. Contractors replace damaged circuits rather than trying to dry and reuse them. If your electrical panel was submerged or heavily water exposed, it likely needs replacement. Water inside panel boxes corrodes bus bars and breakers. Upgrading panels happens when existing capacity is insufficient or when code requires arc-fault or ground-fault protection that wasn’t present in older systems. Testing all circuits makes sure there’s proper grounding, correct voltage, and functioning ground-fault protection in bathrooms, kitchens, and outdoor circuits. All electrical work must meet current National Electrical Code requirements.
Reputable contractors coordinate all required inspections before proceeding to drywall installation. Rough plumbing inspection verifies drain slopes, proper venting, and supply line pressure testing. Rough electrical inspection confirms wire sizing, circuit protection, box placement, and grounding. Only after inspection approval can you move forward with closing walls.
Drywall Replacement and Interior Wall Reconstruction

Drywall installation begins after structural repairs are complete, utilities are installed and inspected, and all rough work receives approval. Starting drywall before inspections pass means tearing it back out if problems are found. Expensive and time consuming.
The installation process involves measuring and cutting panels to minimize seams and waste, securing sheets to studs with screws spaced per manufacturer specifications, taping seams with paper or fiberglass mesh tape, applying joint compound in multiple coats with drying time between applications, sanding smooth without over sanding and damaging paper, and texture matching when reconstruction adjoins existing walls.
| Drywall Phase | Timeframe | Description |
|---|---|---|
| Measurement and cutting | 1 day | Measure openings, cut panels, plan layout to minimize seams and waste |
| Installation | 1 to 2 days | Hang sheets, secure to framing, cut out for electrical boxes and fixtures |
| Taping | 1 day | Apply tape over seams, first coat of joint compound, corner bead installation |
| Finishing coats | 3 to 4 days | Second and third coats with drying between, feathering edges, sanding smooth |
| Texture and prime | 1 to 2 days | Match existing texture, apply primer to seal new drywall before paint |
Matching existing textures in partial reconstruction projects requires skill and testing. Contractors create sample patches to match knockdown, orange peel, or other textures before texturing large areas. Texture applied too heavy or too light stands out noticeably. Priming new drywall seals the paper facing and joint compound, creating a uniform surface that accepts paint evenly and prevents the joint compound from absorbing paint differently than the drywall paper.
Flooring Repair and Replacement in Water Damaged Interiors

Flooring damage assessment varies by material type. Hardwood can sometimes be dried and refinished if water exposure was brief and the wood didn’t cup or buckle, but prolonged moisture causes permanent warping. Engineered wood with a plywood or MDF core typically needs replacement because the core swells and separates. Tile may need removal if the adhesive or mortar failed, or if the underlying substrate is damaged. Carpet and padding almost always need replacement after water damage. Pad remains damp for weeks and grows mold, while carpet develops odors even after professional cleaning. Vinyl and laminate need replacement if water damaged because moisture causes bubbling, lifting, and permanent staining.
Subfloor preparation makes sure there’s complete dryness, typically 12% moisture content or lower in wood subfloors. Contractors replace damaged sections that have delaminated, softened, or lost structural integrity. They level uneven areas with floor leveling compound where height differences exceed acceptable tolerances for your chosen flooring. Installing moisture barriers becomes important in basements or anywhere ground moisture could wick upward, particularly before installing wood or laminate products sensitive to moisture.
Material selection considerations include matching existing floors in partial replacements, which often requires ordering the same product if still available or finding close matches in wood species, plank width, and finish. Upgrading to more water resistant options makes sense in areas prone to moisture (luxury vinyl plank in basements, tile in bathrooms and laundries). Balance cost with durability. Cheap materials might save money now but may need earlier replacement.
Flooring installation typically happens as one of the final steps after walls are painted, trim is installed, and all other trades have finished to avoid damage from foot traffic, dropped tools, and rolling equipment across new floors. The exception is floors sometimes go in before kitchen cabinets to create a continuous surface, though this uses more material and risks damage during cabinet installation.
Baseboards, Trim, and Interior Finish Carpentry Work
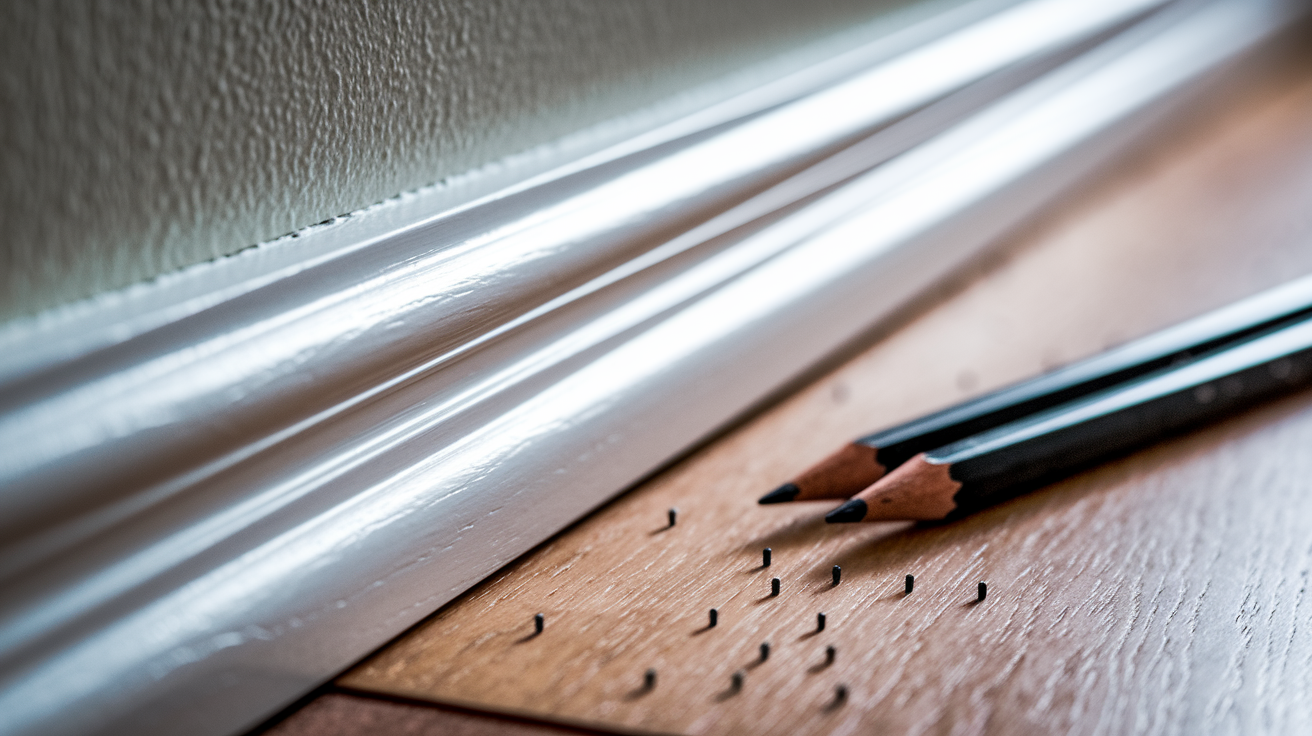
Baseboards and trim are typically replaced rather than saved in water damage scenarios because they absorb moisture through end grain and edges, harbor mold in the space behind them against walls, and warp when wet, making them impossible to reinstall flat and tight. Even dried out trim often won’t sit flush after moisture exposure.
Trim installation includes baseboard replacement along all walls in affected rooms, door and window casing around openings, crown molding if your home originally had it and if budget allows replacement, tight joints at corners with proper coping or mitering techniques, and caulking gaps between trim and walls for a finished appearance. Proper reveals (the slight space between door jambs and casing edges) give professional results rather than trim sitting tight against jambs.
Finish carpentry details separate adequate work from quality results. Matching existing profiles and styles maintains consistency. You want new baseboards to match the style throughout your home unless you’re updating everything. Using quality materials that resist future moisture, like primed MDF or finger-jointed pine with good paint coverage, provides better long term performance than cheap pine that splits and warps. Proper priming and painting with attention to all surfaces, including the back of baseboards, seals the wood. Making sure there are seamless transitions between repaired and existing areas means careful measurement, clean cuts, and attention to joint placement so they’re not immediately noticeable.
Final touches return the space to pre-loss condition or better. This includes installing outlet and switch covers, door stops, closet rods, towel bars, and any other details that make rooms fully functional and finished.
Paint and Final Finishing for Water Damage Reconstruction
Paint preparation makes sure you get professional results. Contractors prime new drywall with a quality primer sealer that seals the paper facing and joint compound, creating a uniform surface. They caulk trim to wall joints with paintable caulk to eliminate gaps. Filling nail holes in trim with wood filler or spackle and sanding smooth gets rid of imperfections. All surfaces must be clean, dry, and smooth before paint application begins.
Paint application involves using odor sealing primers on surfaces affected by water or smoke to prevent odors from bleeding through new paint, applying multiple finish coats (typically two coats minimum) for even coverage and durability, color matching existing walls in partial reconstruction by bringing paint chips to match or having the paint store scan existing paint for color formulas, using quality paint that resists moisture and mildew particularly in bathrooms and kitchens, and making sure there’s even coverage and consistent sheen throughout with proper rolling technique and adequate material.
Final finishing details complete the work. Touch-ups address any drips, missed spots, or areas where paint coverage is thin. Removing painter’s tape carefully when paint is dry to the touch but not fully cured creates clean lines without pulling paint. Cleaning surfaces removes dust and debris from cutting in and rolling. Hardware reinstallation includes outlet covers, switch plates, door handles, cabinet pulls, and anything else removed for painting. The final walk-through inspection with the homeowner identifies any issues before the contractor leaves.
Painting is typically the final major step before homeowners can move belongings back into reconstructed spaces. Furniture, boxes, and normal use should wait until paint fully cures, usually 2 to 3 days, to avoid marking fresh paint or damaging the finish.
Cabinet and Kitchen Restoration in Water Damage Projects
Cabinet salvageability depends on construction materials. Solid wood cabinets may be salvageable if dried quickly, though water staining often remains visible on unfinished interior surfaces. Particle board and MDF cabinets typically need replacement when water damaged because these materials swell irreversibly when wet, losing structural integrity and creating wavy, bubbled surfaces that won’t accept new finish.
Cabinet restoration for salvageable units includes removing doors and drawers to allow air circulation and thorough drying of cabinet boxes, addressing water stains with appropriate cleaners or light sanding if stains are surface level, refinishing or repainting to refresh appearance and seal wood against future moisture, and replacing damaged components like drawer boxes, shelves, or sections of face frames that didn’t survive water exposure. Hinges and drawer slides exposed to water often need replacement due to rust and binding.
Cabinet replacement involves custom ordering matching styles, colors, and configurations, which extends timelines significantly. Installation timing typically happens after flooring but before countertops so cabinets sit on finished floors and countertops can be templated to exact cabinet positions. Coordinating with plumbers makes sure sink base cabinets allow proper access for supply lines, drain connections, and shut-off valves. Proper fit and function means level installation, doors and drawers that operate smoothly, and secure mounting to wall studs.
Countertop considerations include material selection, template timing after cabinets are installed and level, and typical lead times of 1 to 3 weeks for custom fabrication of stone or quartz counters. Custom cabinet orders often take 4 to 8 weeks depending on manufacturer and finish complexity.
Bathroom Reconstruction Specifics After Water Damage
Bathrooms require special attention because they’re high moisture environments with concentrated plumbing and strict building code requirements for waterproofing, ventilation, and fixture installation. Cutting corners in bathroom reconstruction leads to recurring water damage, mold problems, and costly repairs.
Waterproofing requirements include cement board or waterproof drywall installation instead of standard drywall in wet areas, shower pan or liner systems that create watertight enclosures beneath tile with proper slope to the drain, proper tile backer installation that extends to appropriate heights above tubs and showers, waterproof membranes applied over joints and seams in wet areas before tile installation, and sealed penetrations around pipes, fixtures, and valve bodies to prevent water intrusion into wall cavities.
Bathroom-specific work includes toilet reinstallation with new wax rings and supply lines, fixture installation including tubs, showers, sinks, and faucets with proper mounting and connections, tile work on floors and walls with attention to layout, cuts around fixtures, and consistent grout lines, grout and caulk application with proper curing time and mildew resistant products, vanity installation with level mounting and secure attachment, and making sure there’s proper ventilation with code compliant exhaust fans that vent to exterior, not into attics or crawl spaces.
Bathroom work requires specialized expertise and coordination of multiple trades. Plumbers for rough in and fixture connections, tile setters for waterproofing and tile installation, electricians for GFCI outlets, lighting, and fan installation, and finish carpenters for vanities and trim. Each trade must complete work in sequence without disrupting previous work.
Insurance Claims and Documentation for Interior Reconstruction
Notify your insurance company immediately after discovering water damage. Document all damage with photos and videos before any emergency work begins, capturing the water source, standing water, visible damage to walls and floors, damaged belongings, and overall scope. This initial documentation supports your claim and establishes damage extent before mitigation.
Working with insurance adjusters involves scheduling inspections within days of initial notification, providing access to all damaged areas including attics, crawl spaces, and behind walls when needed, understanding your coverage limits and exclusions for different water sources, reviewing estimates from your contractor and the adjuster’s estimate for discrepancies in scope or pricing, and negotiating scope of work discrepancies when the adjuster’s estimate doesn’t match your contractor’s assessment.
Essential documentation to maintain throughout reconstruction:
Initial damage photos and videos from multiple angles and locations. Daily moisture readings during the drying phase showing progress toward acceptable levels. Scope of work documents detailing every phase and material specification. Itemized estimates showing costs for labor, materials, permits, and other expenses. Change orders for any additional work discovered during demolition or reconstruction. Receipts for all completed work, material purchases, and permit fees.
Common coverage issues affect final claim amounts. Flood damage typically requires separate flood insurance policies. Standard homeowner policies exclude flood damage from rising water. Gradual damage limitations mean insurance may not cover water damage that accumulated over weeks or months from unnoticed leaks. Depreciation versus replacement cost coverage determines whether you receive actual cash value (depreciated) or full replacement cost. Replacement cost policies pay more but often require you to complete repairs before receiving full reimbursement. Coverage caps on certain materials or repairs may limit claim amounts below actual reconstruction costs.
Maintain separate documentation files organized chronologically, with physical copies and digital backups. Communicate regularly with both contractors and adjusters, getting everything in writing. Follow up on pending approvals rather than assuming silence means agreement.
Cost Estimates and Budget Planning for Interior Reconstruction
Costs vary significantly based on damage extent, your geographic location, material choices, and whether reconstruction includes upgrades beyond basic restoration. Square footage affected, severity of structural damage, and finish selections all impact final costs substantially.
| Damage Level | Cost Range | Typical Scope |
|---|---|---|
| Minor Repairs | $3,000 to $8,000 | Limited drywall replacement, minor flooring repairs, repainting specific areas, minimal structural work |
| Moderate Repairs | $10,000 to $30,000 | Multiple room drywall replacement, flooring restoration, bathroom or kitchen work, some structural repairs |
| Major Reconstruction | $35,000 to $100,000+ | Complete structural repairs, whole-house drywall, complete flooring replacement, multiple bathrooms, kitchen, extensive mold remediation |
Cost factors include square footage affected (larger areas cost more for materials and labor), material quality selections from basic builder grade to premium finishes, structural repair extent when framing, subfloors, or foundations need work, permit and inspection fees required by your municipality, labor rates in your area which vary significantly by region and local demand, and timeline acceleration needs if you’re paying premium rates for expedited work.
Budget planning strategies help manage costs. Get multiple estimates from licensed contractors to understand pricing ranges and what different contractors include. Understand what’s included versus excluded in estimates. Does the price cover permits, dumpster rental, clean-up, and final inspection fees, or are those additional charges. Plan for contingencies by setting aside 10 to 20% of the estimated cost as a buffer for unexpected discoveries during demolition. Prioritize essential repairs versus upgrades. Complete all structural, waterproofing, and safety work first, then make decisions about upgraded finishes based on remaining budget.
Financing options exist if insurance doesn’t cover full costs. Home equity lines of credit, personal loans, or contractor financing programs may help bridge gaps between insurance payments and actual costs.
Timeline Expectations for Water Damage Interior Reconstruction
Timelines vary based on damage extent, material availability, permit processing times, contractor scheduling, and whether work proceeds without complications. Understanding realistic timeframes helps with planning temporary living arrangements and managing expectations.
Minor repairs take 1 to 2 weeks for limited drywall replacement in one or two rooms, small flooring repairs covering under 200 square feet, and repainting specific areas. Minimal structural work, quick drying materials, and straightforward scope keep these projects short.
Moderate repairs require 2 to 4 weeks for partial structural repairs like subfloor replacement or joist sistering, drywall replacement in multiple rooms throughout the house, and flooring restoration when damage affects several rooms or includes bathrooms requiring tile work.
Major reconstruction takes 1 to 3 months for severe flooding requiring complete structural repairs to framing and foundations, complete drywall installation throughout the home, complete flooring replacement in all living areas, kitchen and bathroom reconstruction, and mold remediation when growth is extensive and requires containment protocols.
Factors extending timelines include specialty material lead times when you order custom cabinets, unique tile, or specific hardwood species, mold remediation requirements adding days or weeks for containment, treatment, and clearance testing, structural engineering assessments that require analysis and stamped drawings before work proceeds, permit delays when building departments are backlogged or require plan revisions, insurance approval wait times for scope or payment authorization, and discovery of additional hidden damage during demolition that wasn’t visible during initial assessment.
Factors accelerating timelines include quick emergency response that minimizes secondary damage and shortens drying time, overlapping work phases when multiple trades work simultaneously in different areas, readily available materials that don’t require special orders or long lead times, pre-approved contractor relationships with building inspectors who can schedule inspections quickly, and clear insurance authorization upfront that eliminates waiting for approval at each phase.
Realistic expectations prioritize quality over speed. Rushing reconstruction leads to moisture problems, poor finish quality, and code violations. The goal is efficient progress with attention to proper sequencing and thorough work at each phase.
Choosing Licensed Contractors for Interior Reconstruction Work
Hiring licensed, insured, and experienced contractors specializing in water damage reconstruction protects your investment and makes sure you get quality results. General contractors without water damage experience may miss hidden moisture, skip critical waterproofing steps, or fail to recognize when mold remediation is necessary.
Contractor qualifications to verify include proper licensing for your state (requirements vary, but most states require general contractor licenses for projects over certain dollar amounts), general liability insurance that covers property damage and accidents during work, workers compensation insurance protecting you from liability if workers are injured on your property, IICRC certification for water damage restoration showing training in proper mitigation and reconstruction techniques, references from recent similar projects you can contact to verify quality and professionalism, and established local presence with a physical business address rather than just a cell phone number.
Essential questions to ask potential contractors:
How many years of experience do you have specifically with water damage reconstruction projects? Can you provide a detailed timeline estimate with specific phases and completion dates? Do you use subcontractors, and if so, who handles coordination and quality control? What are your communication protocols, how often will I receive progress updates? What warranty do you offer on workmanship, and what does it cover? What is your payment schedule, how much upfront and how are milestone payments structured? How do you handle change orders when additional work is discovered during demolition?
Red flags to avoid include requests for large upfront payments exceeding 10 to 15% of total cost, no physical business address or only a P.O. box, lack of insurance documentation or expired policies, pressure tactics demanding immediate decisions or claiming limited time pricing, prices significantly below other estimates suggesting cut corners or incomplete scope, and reluctance to provide references or permit previous clients to discuss their experience.
The value of choosing contractors who handle project management, coordinate all trades, and maintain clear communication throughout reconstruction can’t be overstated. You need one point of contact who manages plumbers, electricians, drywall installers, painters, and flooring contractors rather than juggling multiple separate contractors yourself. For comprehensive water damage restoration services, experienced contractors streamline the entire process from emergency mitigation through final reconstruction.
Permits and Inspections During Interior Reconstruction
Permits are required for structural work affecting load bearing components, electrical system changes including new circuits or panel upgrades, plumbing modifications to supply or drain lines, and extensive reconstruction beyond simple cosmetic repairs like painting or carpet replacement. Requirements vary by jurisdiction. Some municipalities require permits for any work over certain dollar amounts.
The permit process involves application submission with detailed plans showing scope of work, materials specifications, and sometimes engineer stamped drawings for structural work, fee payment based on project value or specific flat rates for different work types, approval wait times often ranging 1 to 2 weeks though complex projects or busy building departments may take longer, and posted permits displayed at the job site showing approval and inspection requirements.
Required inspections happen at various stages throughout reconstruction. Rough framing inspection verifies structural repairs, lumber sizing, proper fastening, and load bearing support before anything gets covered. Rough plumbing and electrical inspection confirms proper installation, code compliance, and safety before drywall installation. Insulation inspection in some jurisdictions verifies proper R-values and installation techniques. Final inspection before occupancy approval checks all completed work, verifies everything meets code, and issues an occupancy certificate or final approval allowing you to move back in.
Reputable contractors handle all permit applications and schedule inspections, with costs included in project estimates. All work must pass inspection before proceeding to the next phase. You can’t install drywall before rough inspections pass, and you can’t occupy the home before final inspection approval. Failed inspections require corrections and re-inspection, potentially delaying completion.
Living Arrangements and Habitability During Reconstruction
Living arrangements depend on damage extent, which areas are affected, and safety considerations. You may be able to remain in your home during some reconstruction projects, while others require temporary relocation for your safety and to allow contractors efficient access.
Staying is possible when damage is confined to specific rooms that can be isolated from living areas, working HVAC keeps unaffected areas comfortable, you have at least one functioning bathroom and kitchen, electrical systems in occupied areas are safe and code compliant, dust and debris can be contained to work zones through plastic barriers and negative air pressure, and you have reasonable tolerance for construction disruption including noise, foot traffic, and restricted access to affected areas.
Temporary relocation becomes necessary when extensive damage affects multiple rooms throughout the home making isolation impossible, no functioning kitchen or bathroom exists during major reconstruction, structural safety is compromised requiring shoring or temporary supports, major mold remediation with containment protocols affects living areas and creates air quality concerns, and toxic material abatement like asbestos or lead paint requires complete home evacuation.
Plan for relocation costs including temporary housing, storage for belongings removed from the home, meals out when you don’t have kitchen access, and transportation between temporary housing and your normal work or school locations. Review insurance coverage for additional living expenses, which many policies include to cover reasonable costs during necessary displacement. Coordinate move out and move in timing with contractors so you’re not vacating unnecessarily early or waiting in temporary housing after work completes.
Preventing Future Water Damage After Interior Reconstruction
Reconstruction creates opportunities to address root causes and add protective measures that prevent future water damage incidents. Installing prevention features during reconstruction costs less than adding them later and provides long term protection for your investment.
Waterproofing upgrades include improved bathroom waterproofing systems with full-coverage membranes behind tile and upgraded shower pans, basement waterproofing if applicable with interior or exterior drainage systems and vapor barriers, water resistant materials in high moisture areas like mold resistant drywall and cement board, proper vapor barriers on exterior walls preventing moisture intrusion from outside, and upgraded flashing around windows and doors eliminating common leak points.
System improvements provide active protection and early warning. Better ventilation in bathrooms and kitchens with properly sized exhaust fans vented to exterior reduces moisture buildup. Leak detection systems or water alarms near water heaters, washing machines, and under sinks provide early warning before small leaks become major damage. Automatic shut-off valves triggered by sensors or timers prevent catastrophic flooding from burst pipes or forgotten running water. Improved drainage around your foundation with proper grading and downspout extensions keeps water away from basement walls. Regular maintenance access points for plumbing inspection allow you to check for hidden leaks in walls or under floors.
Ongoing maintenance practices to prevent water damage include inspecting your roof twice yearly for damaged shingles, failed flashing, and clogged valleys, cleaning gutters and downspouts every spring and fall to maintain proper drainage, replacing appliance hoses every 5 years even if they look fine (burst washing machine hoses cause frequent flooding), scheduling annual HVAC maintenance including condensate drain cleaning and drip pan inspection, and monitoring moisture prone areas like basements, crawl spaces, and areas under sinks for signs of dampness or musty odors.
Long term value of prevention investments becomes clear when you avoid recurring water damage problems, maintain property value with proper systems and materials, reduce insurance claims that can increase premiums, and protect your family’s health by preventing mold growth. For comprehensive guidance on preventing water damage, review proven home water damage prevention tips that protect your home year round.
Final Walkthrough and Project Completion for Interior Reconstruction
The final walkthrough verifies all work is complete, identifies any punch list items requiring attention, and makes sure quality standards are met before final payment and project closeout. Schedule the walkthrough when contractors indicate substantial completion, allowing daylight inspection of all work areas.
Check during walkthrough: all surfaces properly finished with no visible defects, paint coverage and quality including even color, consistent sheen, and no drips or thin spots, flooring transitions and installation with properly seated planks, secure tile, and flush transitions between rooms, trim and caulking completed with tight joints and smooth caulk lines, fixtures and hardware installed and functioning including faucets, lights, outlets, and appliances, doors and windows operating properly with smooth action and proper latching, and cleanliness of work areas with dust removed and debris cleared.
Completion documentation includes final
Final Words
Interior reconstruction after water damage brings your home from crisis back to comfortable. The process connects emergency response through structural repairs to the finished surfaces you see every day.
Working with experienced contractors means one team handles assessment, drying, demolition, rebuilding, and final finishing without gaps or handoff confusion.
Your home can look right, feel safe, and function reliably again. The right reconstruction approach fixes what’s damaged, prevents what’s next, and gives you a space worth coming home to.
FAQ
How to repair water damaged interior walls?
To repair water damaged interior walls, you first complete structural drying using dehumidifiers and air movers, then remove damaged drywall and insulation, repair any structural framing issues, install new drywall with proper taping and finishing, and finally paint to match existing surfaces.
Is interior water damage covered by insurance?
Interior water damage coverage depends on your individual policy terms and the cause of damage. Sudden events like burst pipes are typically covered, while gradual damage accumulated over time and flood damage often require separate policies or may not be covered at all.
What does a restoration company do after a flood?
A restoration company after a flood conducts professional damage assessment using moisture meters and thermal imaging, performs water extraction and structural drying, removes damaged materials, coordinates mold remediation if needed, completes structural repairs, rebuilds interior finishes, and manages the entire reconstruction process from emergency response through final completion.
What not to do after water damage?
After water damage, do not delay calling restoration professionals, avoid using electrical outlets near moisture, don’t paint over water stains without proper drying and sealing, never close up walls before complete moisture removal, and don’t attempt structural repairs without proper assessment of hidden damage and code compliance requirements.
How long does interior reconstruction take after water damage?
Interior reconstruction timelines vary by damage extent. Minor repairs with limited drywall replacement take 1 to 2 weeks, moderate repairs affecting several rooms require 2 to 4 weeks, and major reconstruction involving complete structural repairs and full interior rebuilding takes 1 to 3 months depending on complexity.
When should you replace drywall after water damage?
You should replace drywall after water damage when moisture has wicked up the wall, typically removing sections 12 to 24 inches above the water line, when mold is present, when structural integrity is compromised, or when drywall has been saturated for more than 48 hours even after drying.
Can hardwood floors be saved after water damage?
Hardwood floors can sometimes be saved after water damage if dried quickly using professional equipment, the water was clean (not contaminated), and the wood hasn’t warped or cupped significantly. Engineered wood and floors exposed to water for extended periods typically require replacement rather than restoration.
What comes first during reconstruction, plumbing or drywall?
Plumbing comes first during reconstruction, along with electrical work, because utilities must be installed and inspected before drywall installation. All systems that run through walls need completion and approval before closing walls with new drywall to ensure code compliance and prevent costly rework.
Do I need permits for water damage reconstruction?
You need permits for water damage reconstruction when work involves structural repairs, electrical system changes, plumbing modifications, or extensive rebuilding beyond cosmetic repairs. Reputable restoration contractors handle all permit applications, schedule required inspections, and include permit costs in project estimates.
How much does interior reconstruction cost after water damage?
Interior reconstruction costs vary significantly based on damage extent. Minor repairs typically range $3,000 to $8,000, moderate repairs affecting multiple rooms cost $10,000 to $30,000, and major reconstruction requiring complete structural work ranges $35,000 to $100,000 or more depending on square footage and material selections.