

Here’s your intro paragraph:
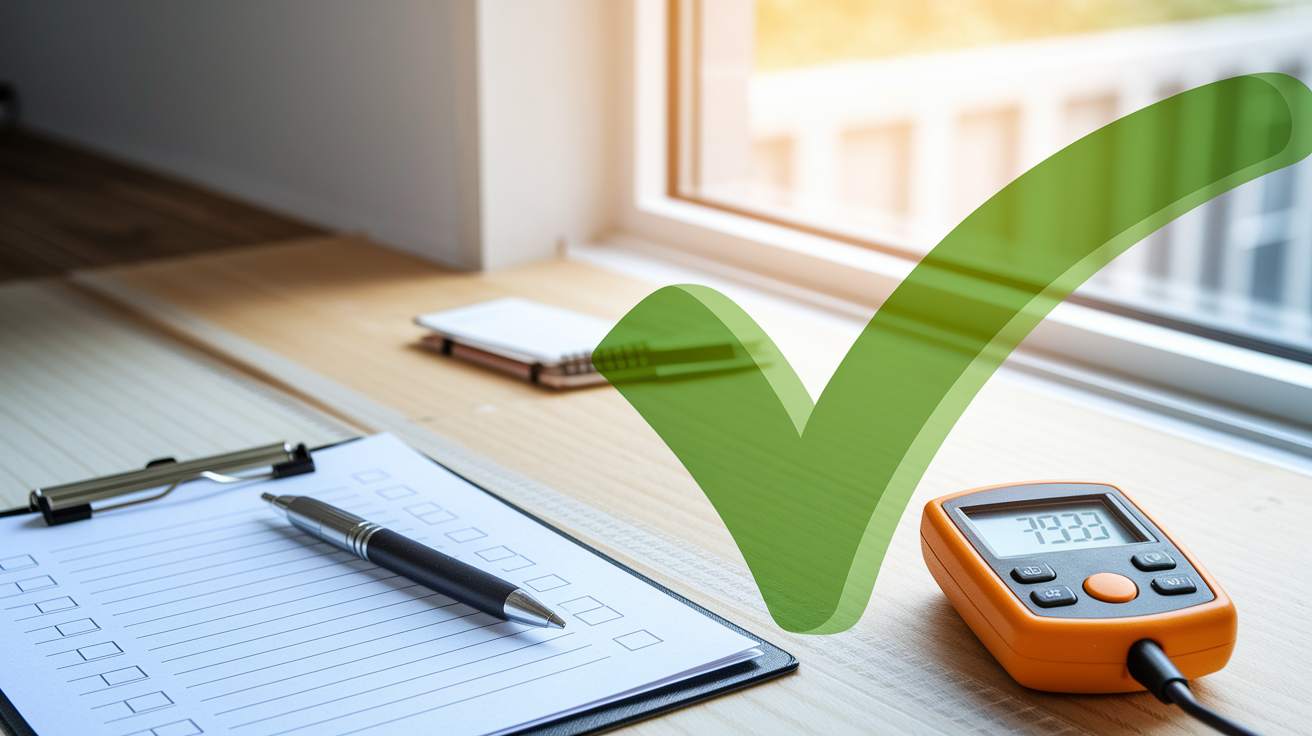
Most homeowners think mold appears weeks after water damage. Wrong. Active mold growth starts within 24 to 48 hours after water hits drywall, carpet, or wood. That narrow window means yesterday’s burst pipe becomes today’s health risk if you wait. Mold remediation is about moving fast to find hidden moisture, remove contaminated materials, and stop spores from spreading through your home. This guide walks through what professional remediation actually involves, when DIY drying isn’t enough, and how to protect your family from respiratory problems that mold exposure causes.
What Mold Remediation After Water Damage Actually Involves

Mold remediation after water damage is the full process of finding, removing, and preventing mold that shows up when moisture gets into your home. The clock starts immediately. Mold spores go from dormant to active growth within 24 to 48 hours after water exposure. Quick action stops small moisture issues from becoming widespread mold that spreads through walls, floors, and your HVAC system.
Initial Inspection and Moisture Assessment
Professional remediation starts with a complete inspection using specialized detection gear. Technicians use moisture meters to measure water content in building materials, pinpointing exact moisture levels in drywall, wood framing, and subfloors. Thermal imaging cameras show hidden water behind walls and in ceiling cavities by picking up temperature differences from evaporation. Hygrometers measure relative humidity in affected rooms, confirming whether conditions support mold growth.
Moisture mapping documents every wet area throughout your home, creating a scope that guides the whole remediation process. Inspectors check wall cavities by drilling small test holes when needed, examine crawl spaces and attics, and trace how moisture has traveled. This assessment determines whether water moved beyond the visible damage zone into structural cavities where mold grows unseen.
Standing Water Extraction
Water removal happens first, using equipment matched to the water type and volume. Submersible pumps handle deep standing water from flooding. Truck mounted extraction units remove water from carpets and padding. Wet vacuums pull moisture from hard surfaces and tight spaces.
The water source type determines extraction protocols. Clean water from burst supply lines requires standard extraction. Gray water from appliance discharge needs sanitization during removal. Black water from sewage backup demands full protective equipment, separate extraction tools, and immediate material disposal. Technicians contain extraction areas to stop contaminated water from spreading during removal.
Structural Drying and Dehumidification
Drying out your home’s structure takes precise equipment and constant monitoring. High velocity air movers create airflow across wet surfaces, speeding up evaporation from floors, walls, and contents. Commercial dehumidifiers pull moisture from the air, preventing it from condensing back onto surfaces or migrating to other rooms.
Professionals use psychrometric calculations to determine optimal temperature, humidity, and airflow settings for your specific materials and conditions. Different materials dry at different rates. Drywall might take three days, while hardwood subfloors could need a week. Technicians take daily moisture readings, tracking progress until readings show materials have returned to normal dry standards, typically below 15% moisture content for wood and under 1% for drywall.
Containment and Air Filtration
Physical containment prevents mold spores from spreading during remediation. Technicians seal affected areas using heavy plastic sheeting over doorways and vents, creating a controlled work zone. Negative air pressure systems use fans to pull air from the contained area through HEPA filters before exhausting it outside, making sure airborne spores don’t escape into clean areas.
HEPA filtered air scrubbers run continuously inside containment zones, capturing microscopic mold spores as they become airborne during cleaning and removal. These machines cycle room air through filters rated to trap 99.97% of particles 0.3 microns or larger. Containment stays in place throughout the project until final cleaning confirms no spores remain.
Cleaning, Removal, and Disposal
Salvageable materials get thorough antimicrobial treatment. Technicians apply EPA registered fungicides to wood framing, concrete, and other non porous surfaces where mold has grown. These treatments kill active mold and help prevent regrowth after moisture is controlled.
Contaminated porous materials that can’t be effectively cleaned get removed and disposed of. That means pulling out water damaged drywall, removing wet insulation, and tearing up moldy carpet and padding. Removed materials go into heavy duty disposal bags, sealed immediately to prevent spore release. Technicians establish designated exit routes and disposal zones to avoid carrying contaminated materials through clean areas. All removed materials are transported directly to disposal facilities following local regulations.
Restoration and Reconstruction
Final restoration brings your home back to pre damage condition. This phase includes replacing removed drywall, installing new insulation, laying fresh subfloors where needed, and repainting affected walls and ceilings. Trim work, baseboards, and door casings get reinstalled. For more information about this finishing work, check out our guide on water related home repairs.
Restoration complexity varies based on how much material required removal. A small bathroom leak might need one wall section replaced. A basement flood could require complete reconstruction of finished spaces, including framing repairs, electrical work, and flooring installation.
Understanding when to tackle water damage yourself versus calling professionals depends on several factors. Small affected areas under 10 square feet with Category 1 clean water from a known source can sometimes be handled with prompt drying if you’ve got proper equipment and no health risks. Professional services become necessary when affected areas exceed 10 square feet, Category 2 or 3 water is involved, structural materials show damage, or anyone in your household has respiratory conditions or compromised immunity. Certified technicians have specialized training, professional grade equipment, and experience identifying hidden moisture that homeowners typically miss. Health risks from improper mold handling and the high likelihood of incomplete drying that causes recurring problems usually make professional remediation the safer, more cost effective choice.
Timeline and Temperature Conditions That Trigger Mold Growth

Mold spores exist everywhere, floating dormant in the air until they find the right conditions to activate. When water damage introduces moisture, those dormant spores land on wet surfaces and begin growing within 24 to 48 hours. This narrow window explains why immediate response matters. After two days, what started as controllable moisture becomes active mold colonization that spreads fast.
Temperature plays a supporting role. Most mold species thrive between 77 degrees Fahrenheit and 86 degrees Fahrenheit, a range that matches typical indoor conditions in homes during warmer months. Even in winter, interior heated spaces often fall within this range. Mold doesn’t need extreme heat. It just needs sustained moisture in a temperature range that doesn’t freeze or cook it, which describes most residential environments year round.
The combination of moisture, temperature, and organic food sources creates ideal conditions. Mold feeds on cellulose materials common in homes: the paper facing on drywall, wood framing, carpet backing, ceiling tiles, and fabrics. Poor ventilation after water damage prevents moisture from evaporating, keeping materials wet longer and extending the window for mold to establish. Hidden moisture trapped in wall cavities or beneath flooring creates persistent damp conditions that support continuous growth even after visible surfaces dry.
Building materials and areas most vulnerable to rapid mold colonization after water exposure:
Drywall and drywall paper backing (mold grows on both sides when wet). Carpet and carpet padding (absorbs water quickly, dries slowly). Wood framing and subfloors (moisture penetrates grain, supporting deep growth). Insulation materials (fiberglass and cellulose trap moisture). Ceiling tiles (porous composition absorbs water readily). Textiles including curtains, upholstery, and bedding (fabric fibers hold moisture).
Health Risks and Safety Concerns From Water Damage Mold

Mold exposure triggers immediate health responses in most people. Respiratory problems show up first: coughing, sneezing, wheezing, and throat irritation caused by inhaling airborne spores. Allergic reactions develop quickly, producing symptoms similar to seasonal allergies including runny nose, itchy eyes, and skin rashes. People with asthma experience worsened symptoms, with mold spores triggering attacks and increasing the frequency of breathing difficulties.
Two mold species deserve special attention after water damage. Stachybotrys chartarum, commonly called black mold, produces mycotoxins that cause severe respiratory problems and neurological symptoms in some individuals. Aspergillus species release spores that can cause lung infections in people with weakened immune systems. Both species grow readily on water damaged cellulose materials, appearing dark green or black and often producing a musty odor.
Children, elderly individuals, and anyone with compromised immune systems face elevated risks from any mold exposure. Children’s developing respiratory systems make them more vulnerable to long term effects. Elderly individuals often have reduced immune function and pre existing respiratory conditions that mold exposure worsens. People undergoing chemotherapy, living with HIV/AIDS, or taking immunosuppressant medications can develop serious fungal infections from mold that healthy individuals would tolerate.
Anyone attempting mold remediation work needs proper protective equipment. N95 respirators or better filter airborne spores before they reach your lungs. Disposable nitrile gloves prevent skin contact with mold and contaminated materials. Eye protection stops spores from entering through mucous membranes. Disposable coveralls keep spores off your clothing and skin. Safety protocols include containing work areas, wetting materials before removal to reduce airborne spores, and sealing contaminated materials immediately in heavy plastic bags. Cutting corners on protective equipment or containment procedures exposes you to health hazards and spreads contamination throughout your home.
Identifying Hidden Moisture and Water Intrusion Sources

Visible water damage shows you where the problem started, but moisture migrates. Water follows gravity, spreading down through floor assemblies. It wicks horizontally through porous materials like drywall and insulation. Capillary action pulls moisture up through concrete foundations. Within hours of a water event, moisture has traveled beyond the obvious wet spot into wall cavities, subfloor layers, and insulation voids where you can’t see it.
Professional detection methods reveal this hidden moisture before mold establishes. Moisture meters with penetrating probes measure water content inside materials without causing significant damage. Readings above 15% in wood or 1% in drywall indicate elevated moisture that supports mold growth. Thermal imaging cameras detect temperature differences caused by evaporating moisture, highlighting wet areas behind walls and in ceilings as cooler zones. Moisture mapping involves taking systematic readings throughout affected areas and adjacent spaces, creating a documented picture of how far water traveled.
The consequences of missing hidden moisture show up weeks later. Mold grows inside wall cavities, feeding on drywall backing and wood framing. Musty odors develop but the source remains concealed. By the time visible mold appears on interior walls or ceilings, extensive colonization has already occurred in the hidden spaces behind. This secondary damage costs significantly more to remediate than addressing the hidden moisture immediately.
Common hidden moisture locations after water damage:
Wall cavities between studs where water runs down from above. Under flooring and within floor assemblies, especially near water sources. Attic spaces where roof leaks or HVAC condensation goes unnoticed. Crawl spaces beneath homes with poor vapor barriers. Behind and under kitchen and bathroom cabinets. Inside HVAC ductwork where condensation accumulates. Ceiling voids above affected rooms where water spreads before soaking through. Beneath and behind appliances where slow leaks go undetected.
Different Water Categories and Their Mold Remediation Requirements

Water damage falls into three categories that determine how remediation must proceed. Category 1 involves clean water from sanitary sources: burst supply pipes, failed water heater tanks, or appliance supply line breaks. This water doesn’t contain contamination when it enters your home. Remediation focuses on extraction and drying, with mold risk increasing the longer materials stay wet. If addressed within 24 to 48 hours, Category 1 water damage often requires minimal material removal.
Category 2 gray water contains some contamination from sources like washing machine discharge, dishwasher overflow, or toilet overflow containing only urine. This water carries bacteria, chemicals, or organic matter that requires sanitization during remediation. Porous materials like carpet and padding typically need removal because effective sanitization isn’t possible. Drywall often stays if only the bottom section got wet and drying happens quickly, but complete removal becomes necessary if wicking spread moisture high up the wall.
Category 3 black water is grossly contaminated and poses serious health hazards. Sources include sewage backup from blocked drain lines, toilet overflow containing feces, flooding from rivers or streams, and any standing water that has sat for more than 48 hours regardless of original source. Black water contains harmful bacteria, viruses, parasites, and toxic chemicals. All porous materials exposed to Category 3 water require removal and disposal. This means all affected carpet, padding, drywall, insulation, and often wood framing if contamination penetrated the material.
Material salvageability depends on both water category and how long materials stayed wet. Carpet exposed to Category 1 water and dried within 24 hours might be salvageable. The same carpet exposed to Category 2 water typically requires disposal. Any porous material touched by Category 3 water gets removed immediately, with no attempt at salvage. Drywall exposed to black water must be cut out at least 12 inches above visible water lines because wicking and contamination spread higher than the visible stain. Insulation in walls and floors affected by contaminated water requires complete removal because effective cleaning isn’t possible and contamination spreads through the material.
Treating Porous Versus Non Porous Materials After Water Damage

Material porosity determines whether remediation can save it or must remove it. Porous materials contain microscopic spaces that absorb and hold water, creating conditions where mold grows deep within the material where cleaning can’t reach.
Porous materials present the biggest challenges after water damage. Drywall absorbs water throughout its gypsum core and paper facing. Once wet, the paper backing provides an ideal food source for mold that grows within hours. Standard drywall that stays wet more than 48 hours or gets exposed to contaminated water typically requires removal. Insulation whether fiberglass batts or blown cellulose loses R value when wet and cannot be effectively dried or cleaned. Carpet and padding trap water, dry slowly, and develop odors from microbial growth within the backing and pad. Upholstered furniture with fabric covering and foam padding cannot be thoroughly cleaned internally. Ceiling tiles absorb water quickly and lose structural integrity, sagging and staining even after drying.
Non porous materials resist water absorption and can usually be cleaned and salvaged. Metal surfaces including ductwork, structural steel, and appliances can be wiped clean and treated with antimicrobials. Glass and hard plastics don’t absorb water and clean easily with standard disinfectants. Semi porous materials fall in between. Wood framing absorbs surface moisture but can be dried and treated if addressed quickly. Solid wood flooring can sometimes be saved if water extraction and drying happen within 24 hours. Concrete absorbs water slowly through its porous structure but can be dried and sealed. Tile and grout require cleaning and sanitizing, with grout sometimes needing sealing to prevent moisture retention.
| Material Type | Porosity Level | Treatment Approach |
|---|---|---|
| Drywall | Highly Porous | Remove if wet over 48 hours or contaminated; clean water exposure under 24 hours may be salvageable with fast drying |
| Carpet and Padding | Highly Porous | Remove padding in most cases; carpet salvageable only with Category 1 water and immediate extraction |
| Insulation | Highly Porous | Remove and replace; cannot be effectively dried or cleaned |
| Wood Framing | Semi Porous | Dry thoroughly, monitor moisture levels, apply antimicrobial treatment; replace if decay present |
| Concrete | Semi Porous | Extract surface water, dry with air movers and dehumidifiers, apply penetrating sealer |
| Metal Surfaces | Non Porous | Clean with detergent, dry completely, treat with antimicrobial, address any rust |
| Tile and Grout | Semi Porous (grout) | Clean tile, scrub and sanitize grout, seal grout lines, replace if damaged |
Antimicrobial Treatment and Sanitization Methods

Surface antimicrobial applications kill active mold growth and help prevent regrowth on salvageable materials. EPA registered fungicides get applied to cleaned surfaces including wood framing, concrete, and other materials that will remain in the structure. These chemical treatments penetrate porous surfaces to kill mold at the root level. Application happens after physical cleaning removes surface growth and contamination. Technicians spray or wipe antimicrobials onto all affected surfaces, making sure complete coverage on every area where moisture was detected. The treatment needs dwell time to work, typically 10 to 15 minutes before drying.
Air treatment technologies work alongside surface cleaning. HEPA filtration systems capture airborne mold spores as they circulate through the machine. HEPA filters trap 99.97% of particles 0.3 microns or larger, which includes mold spores, bacteria, and most airborne contaminants. Air scrubbers fitted with HEPA filters run continuously during remediation, pulling contaminated air through filters and returning clean air to the work area. Hydroxyl generators offer another approach, producing hydroxyl radicals that neutralize mold spores, bacteria, and viruses in air and on surfaces. These units replicate natural atmospheric cleaning processes without creating harmful byproducts, allowing operation in occupied spaces unlike ozone generators that require evacuation.
Killing surface mold addresses current growth, but preventing regrowth requires controlling moisture. Antimicrobial treatments provide a limited protection window, typically effective for a few weeks to months depending on conditions. If moisture returns or humidity stays elevated, mold will grow again even on treated surfaces. Thorough application matters. Missed spots become recontamination sources, with surviving mold spreading back across treated areas. Professionals make sure complete coverage by systematically treating every surface in the affected zone, including structural members hidden behind removed drywall.
Odor elimination confirms effective sanitization. Musty, earthy smells indicate active microbial growth releasing volatile organic compounds as metabolic byproducts. These odors persist until the source mold is killed or removed. Surface cleaning and antimicrobial treatment reduce odor by eliminating active growth. Air filtration captures odor causing particles. Hydroxyl generators break down odor compounds at the molecular level. Persistent odors after treatment indicate hidden moisture or missed contamination requiring further investigation and treatment.
Post Remediation Verification and Clearance Testing
Visual inspection confirms all visible mold has been removed and affected materials have been properly addressed. Professionals examine every surface in the remediation area, looking for any remaining discoloration, growth, or water staining. They check that all contaminated materials were removed as documented in the scope. Structural members get inspected to verify cleaning and treatment. Adjacent areas beyond the original containment zone get checked for any cross contamination that occurred during the project. Technicians document findings with photographs showing completed work and clean surfaces.
Moisture verification uses the same equipment that identified the original problem to confirm conditions have returned to normal. Moisture meters check material moisture content in wood framing, subfloors, and any remaining drywall. Readings should match dry standard levels typically below 15% moisture content for wood and under 1% for drywall. Hygrometers measure relative humidity in affected rooms, confirming levels have dropped to normal ranges between 30% and 50%. Elevated moisture at this stage indicates incomplete drying that could allow mold to regrow. Additional drying time becomes necessary until readings confirm proper dry conditions.
Air quality testing provides scientific verification when needed. Spore count testing isn’t required for every project, but becomes valuable in certain situations: when occupants have health concerns, the affected area was extensive, or verification is needed for insurance claims or property transactions. Testing involves collecting air samples from remediated areas and comparing spore counts and species to outdoor baseline samples and unaffected interior areas. Results showing indoor spore levels at or below outdoor levels with no unusual species present confirm successful remediation. Elevated indoor counts or presence of moisture indicator species signal incomplete remediation requiring additional work. Testing must be performed by qualified professionals following proper protocols to get accurate results.
Cost Factors and Insurance Considerations for Mold Remediation
Several variables determine remediation costs. Square footage of affected areas drives labor and material expenses, with larger projects requiring more equipment, longer timelines, and more extensive material replacement. Water category significantly impacts cost. Category 1 clean water projects cost less because less material requires disposal and sanitization needs are minimal. Category 3 black water projects cost substantially more due to extensive material removal, disposal requirements, and intensive sanitization protocols. Material removal scope affects total cost. Projects requiring only drying and cleaning cost less than those needing complete gut and rebuild of affected spaces. Complexity increases costs when water has affected finished basements, multiple stories, or areas with difficult access.
General cost ranges vary by project scale. Small single room projects affecting under 10 square feet with minimal material damage typically run $500 to $1,500, primarily for inspection, drying, and antimicrobial treatment. Medium projects involving multiple rooms or one significantly affected area with some material removal range from $2,000 to $6,000, including extraction, drying, disposal, and basic restoration. Large scale whole house or severely contaminated projects cost $10,000 to $30,000 or more, requiring extensive demolition, disposal, structural drying, and complete reconstruction. Emergency response services outside normal business hours typically add 20% to 40% to base costs but provide immediate water extraction that prevents damage from spreading.
Insurance coverage depends on your policy and the cause of water damage. Most homeowner policies cover mold remediation when it results from sudden and accidental water damage, like burst pipes, appliance malfunctions, or storm damage to roofing. Coverage typically includes assessment, containment, removal, and restoration to pre loss condition. Mold resulting from long term leaks, maintenance issues, or gradual seepage usually gets excluded because policies don’t cover damage from lack of maintenance. Flood damage requires separate flood insurance. Standard policies exclude flooding from external water sources. Check your policy’s mold coverage limits. Many carriers cap mold remediation coverage at $10,000 to $25,000 regardless of actual costs.
Documentation requirements for insurance claims start immediately. Take extensive photos and videos of all water damage and affected areas before any cleanup begins. Keep copies of all moisture readings and inspection reports from professionals. Obtain detailed written scope of work estimates from licensed remediation contractors. Save every receipt for equipment rentals, materials purchased, and services provided. Understand your policy’s exclusions and coverage limits before assuming costs will be covered. For information on working with adjusters and documenting claims, see our insurance claims assistance page.
Steps to maximize insurance claim success:
Notify your insurance carrier immediately after discovering water damage, ideally within 24 hours. Document everything with thorough photos, videos, and written notes before any cleanup begins. Obtain multiple professional assessments and scope estimates from licensed contractors. Keep detailed records of all receipts, invoices, and correspondence with contractors and adjusters. Understand your policy’s specific exclusions, coverage limits, and deductibles before work begins. Consider hiring a public adjuster if your claim is denied or the settlement offer seems inadequate.
Common Water Damage Scenarios That Lead to Mold Growth

Understanding the typical situations that create mold problems helps you recognize when immediate action becomes necessary. Each scenario presents different challenges related to water source contamination, materials affected, and likelihood of hidden moisture spreading beyond the obvious damage.
Every water damage event carries mold risk, but some create worse conditions than others. Category 3 sewage backup introduces contamination that makes everything it touches dangerous. Slow roof leaks allow moisture to saturate insulation and framing for weeks before you notice ceiling stains. Basement flooding affects below grade spaces with limited ventilation where drying happens slowly. Recognizing the specific risks of each scenario helps you respond appropriately.
| Water Damage Scenario | Common Affected Areas | Mold Risk Level | Typical Timeline |
|---|---|---|---|
| Burst Supply Pipes | Immediate vicinity, walls, floors, adjacent rooms if water spreads | Moderate if addressed within 24 to 48 hours; High after 48 hours | Active water flow until shut off; damage accumulates quickly |
| Roof Leaks | Attic insulation, ceiling drywall, wall cavities, sometimes down to lower floors | High due to hidden moisture in concealed spaces | Often develops over weeks or months before visible interior damage appears |
| Basement Flooding | Concrete walls and floors, finished basement materials, utilities, stored contents | Very High due to slow drying, poor ventilation, and often contaminated water | Immediate impact during flood event; mold establishes within 48 hours |
| Sewage Backup | Basement or lower floor drains, flooring, walls, any contents in contact | Extreme due to contamination and rapid bacterial growth | Immediate contamination requiring prompt professional remediation |
| Appliance Malfunctions | Laundry room, kitchen, surrounding floors and cabinets, wall base | Moderate to High depending on water volume and detection speed | Can develop slowly from small leaks or suddenly from catastrophic failure |
| HVAC Condensation | Around air handler units, inside ductwork, ceiling below units, nearby walls | Moderate but persistent due to ongoing moisture if not corrected | Develops gradually; often detected late when mold odor or visible growth appears |
| Crawl Space Moisture | Floor joists, subfloors above, insulation, foundation walls | High due to persistent humidity and poor ventilation | Chronic condition developing over months or years |
| Storm Water Intrusion | Basement windows, foundation cracks, lower floors, surrounding soil | High due to volume, contamination, and saturated materials | Immediate during storm event; damage worsens rapidly without extraction |
Prevention Strategies to Avoid Mold After Future Water Events
Preventing water damage entirely isn’t always possible, but you can reduce mold risk when water problems occur. These strategies focus on early detection, rapid moisture control, and maintaining conditions that don’t support mold growth.
Moisture control fundamentals create conditions where mold struggles to grow. Keep indoor humidity below 60%, ideally between 30% and 50%, especially during humid months. Use dehumidifiers in naturally damp areas like basements and crawl spaces. Make sure bathrooms and kitchens have working exhaust fans that vent outside, not into attics. Run these fans during showers and cooking, continuing for 15 to 20 minutes after to remove moisture. Address small leaks immediately. A dripping faucet or weeping pipe joint seems minor but provides constant moisture that supports mold growth.
Rapid response minimizes damage when water events occur. Know where your main water shut off valve is located and how to operate it. Keep contact information for licensed restoration services readily available. Have basic emergency supplies on hand: wet/dry vacuum, fans, tarps, and moisture barriers. Act within hours, not days. Extract standing water, move contents out of wet areas, and start drying immediately even if professional services are hours away.
Ten specific prevention actions to reduce water damage and mold risk:
Install water leak detectors near water heaters, washing machines, and under sinks; smart detectors send phone alerts when moisture is detected. Inspect your roof annually for damaged or missing shingles, deteriorated flashing, and blocked valleys that channel water improperly. Maintain gutters and downspouts by cleaning them twice yearly and making sure downspouts direct water at least 6 feet away from the foundation. Insulate pipes in cold areas including crawl spaces, attics, and exterior walls to prevent freeze related bursts. Service HVAC systems annually, checking condensate drain lines for clogs and drain pans for cracks that allow water accumulation. Use exhaust fans during and after showers, running them for 20 minutes post shower to remove humidity. Check appliance supply hoses and drain lines yearly, replacing washing machine hoses every 5 years and inspecting dishwasher connections for leaks. Install a sump pump with battery backup in basements prone to groundwater seepage, testing operation every few months. Grade soil away from your foundation with at least a 6 inch drop over 10 feet to prevent water from pooling against basement walls. Keep indoor humidity between 30% and 50% using dehumidifiers and monitoring with a hygrometer, especially in basements and during humid seasons.
When to Call Professional Mold Remediation Specialists
Certain water damage situations require professional expertise from the start. Affected areas larger than 10 square feet exceed what homeowners can effectively handle with consumer equipment. Category 2 gray water or Category 3 black water introduces contamination requiring specialized training, protective equipment, and disposal protocols that aren’t appropriate for DIY attempts. Visible mold growth indicates established colonization that has likely spread beyond visible surfaces. Structural materials affected by water including wall cavities, subfloors, or framing require professional moisture assessment to detect hidden damage. If anyone in your household has respiratory conditions, asthma, or compromised immunity, professional remediation protects them from exposure risks during the process.
Look for specific qualifications when selecting remediation professionals. IICRC certification demonstrates standardized training in water damage restoration and mold remediation techniques. Verify proper state licensing where required and confirm the company carries general liability insurance and workers’ compensation coverage. Ask about documented training in EPA guidelines and industry standards for mold remediation. Confirm they have specialized equipment including industrial dehumidifiers, air movers, HEPA filtration systems, moisture detection tools, and containment supplies. Request references from recent similar projects.
DIY remediation attempts carry real risks when done inadequately. Incomplete drying leaves hidden moisture that causes mold growth weeks later, often more extensive than the original problem. Improper disposal of contaminated materials spreads spores throughout your home during removal. Failing to establish containment allows cross contamination into previously clean areas. Personal health exposure during removal without proper respiratory protection, skin protection, and containment causes allergic reactions and respiratory problems. These mistakes often cost more to correct than hiring professionals initially.
Professional assessment provides value even when damage seems minor. Professionals detect hidden moisture your eyes can’t see using specialized equipment. They identify the full scope of affected materials before mold becomes visible. Early professional moisture mapping prevents secondary damage that becomes significantly more expensive to address later. An assessment typically costs $200 to $500 but can save thousands by identifying problems early and creating an accurate remediation plan. For immediate response to water damage situations, visit our FireFloodRescue emergency services page to connect with certified technicians available 24/7.
Final Words
Mold remediation after water damage isn’t something you can put off or half-finish. The 24-48 hour window matters.
Once moisture settles into drywall, insulation, or wood framing, the clock starts. Fast response stops small problems from becoming full-scale remediation projects.
Whether you’re dealing with a burst pipe or basement flooding, the key is stopping the water, drying everything thoroughly, and addressing contaminated materials the right way.
If the affected area is large, the water is contaminated, or you’re seeing visible growth, bring in certified professionals who understand the process from assessment to final air quality clearance.
FAQ
How should you deal with mold after water damage?
To deal with mold after water damage, stop the water source first, then dry affected areas within 24 to 48 hours using fans and dehumidifiers. Remove and dispose of contaminated porous materials like drywall, carpet, and insulation. Clean salvageable surfaces with antimicrobial treatments, and run HEPA air scrubbers to capture airborne spores.
What are the 10 warning signs of mold toxicity?
The 10 warning signs of mold toxicity include persistent coughing, sneezing, trouble breathing, irritated or watery eyes, skin rashes, headaches, fatigue, difficulty concentrating, worsening asthma symptoms, and ongoing sinus congestion. Children, elderly individuals, and those with compromised immune systems experience more severe reactions and need professional assessment immediately.
How long does it take for mold to set in after water damage?
Mold sets in within 24 to 48 hours after water damage when moisture, warmth, and organic materials are present. Dormant mold spores already in your home become active when exposed to wet drywall, wood, carpet, or insulation. This narrow window makes rapid drying and moisture removal critical to preventing colonization.
How likely is mold to come back after remediation?
Mold is unlikely to come back after professional remediation if all moisture sources are eliminated and affected materials are properly dried or removed. Residual moisture, missed water intrusion points, or inadequate drying create conditions for regrowth. Post-remediation moisture testing and maintaining indoor humidity below 60% prevent recurrence.
When should you use professional mold remediation services instead of DIY methods?
You should use professional mold remediation services when affected areas exceed 10 square feet, water damage involves gray or black water, structural materials are compromised, or household members have health vulnerabilities. Professionals have moisture detection equipment, HEPA filtration systems, proper protective gear, and IICRC certification to handle contaminated materials safely.
What equipment is essential for proper mold remediation after water damage?
Essential equipment for mold remediation includes moisture meters and thermal imaging cameras for detection, commercial dehumidifiers and air movers for drying, HEPA-filtered air scrubbers for spore capture, containment barriers to prevent cross-contamination, and antimicrobial treatment solutions. Protective gear like N95 respirators, gloves, eye protection, and disposable coveralls is required during removal work.
Which building materials require removal versus cleaning after water damage?
Porous materials like drywall, carpet, padding, insulation, and ceiling tiles typically require removal after significant water exposure because they absorb moisture and support mold growth. Non-porous materials like metal, glass, and hard plastics can be cleaned and sanitized. Semi-porous materials like wood framing and concrete can often be dried, treated, and salvaged.
How does water category affect mold remediation requirements?
Water category determines remediation complexity and safety protocols. Category 1 clean water from burst pipes allows material salvage if dried quickly. Category 2 gray water from appliance overflow requires sanitization and often material disposal. Category 3 black water from sewage or flooding demands extensive removal of contaminated porous materials and professional handling.
What verification steps confirm mold remediation was successful?
Successful mold remediation is confirmed through visual inspection for remaining growth, moisture meter readings showing material moisture content below 15%, humidity levels between 30 and 50%, and air quality testing measuring acceptable spore counts. Professional clearance testing provides documentation that affected areas are safe for reoccupancy.
How can you prevent mold growth after future water damage events?
You can prevent mold growth by maintaining indoor humidity below 60%, ensuring proper ventilation in bathrooms and kitchens, addressing leaks immediately, and drying wet materials within 24 hours. Install water leak detectors, inspect roofs annually, maintain gutters, service HVAC systems regularly, and keep emergency contacts for restoration services readily available.