

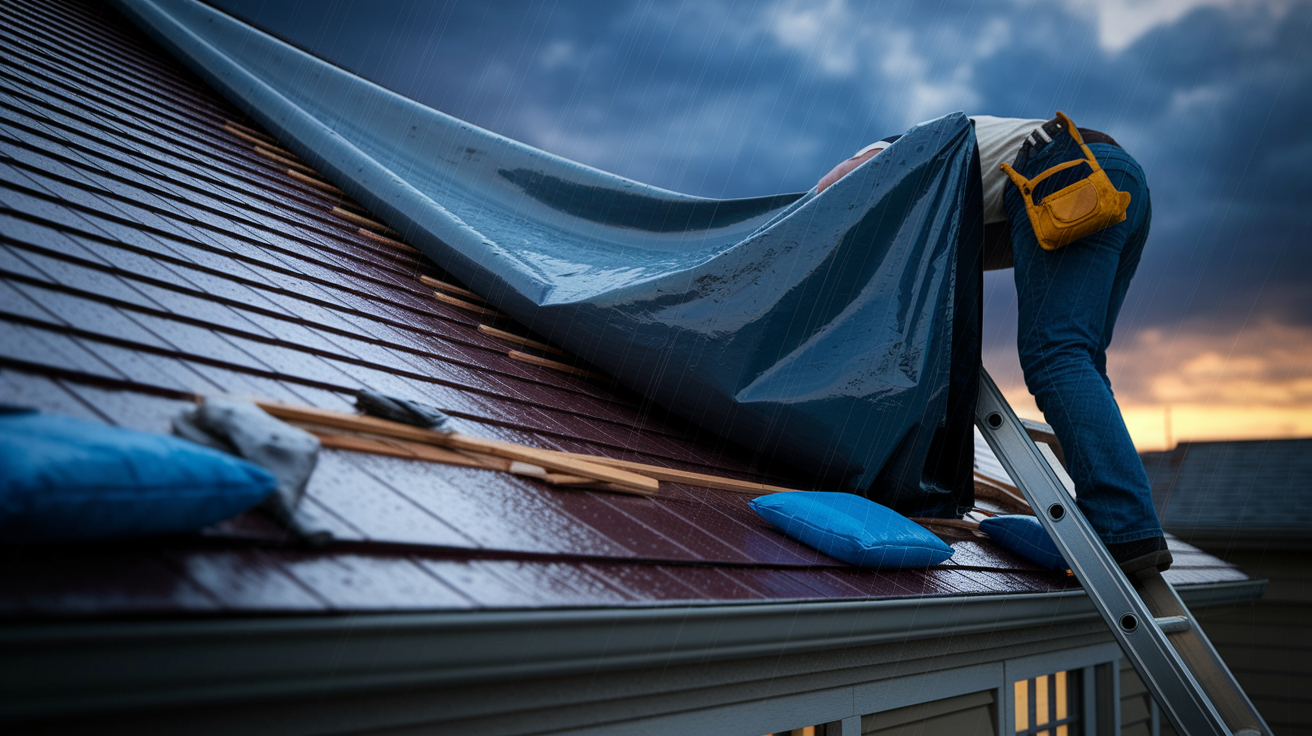
Think a tarp flapped over your roof will keep water out? Not always.
If it stops short or sags, water will find its way underneath.
Every hour water runs in, the deeper it soaks into insulation, framing, and drywall.
So acting fast and installing a tarp the right way matters.
This post walks you through the steps that actually stop leaks, measuring and sizing the tarp, anchoring edges, preventing pools, and doing it safely so you protect your home and avoid costly repairs.
Immediate Actions to Stop a Roof Leak Using a Tarp
When you discover a roof leak during or after a storm, your first goal is stopping water from reaching your home’s interior. Speed matters. Every hour water runs in, the deeper it soaks into insulation, framing, and drywall.
Before you climb, try to locate the entry point from inside. Look for water stains, dripping, or wet spots on the ceiling. Then check from outside using a ladder. Just lean enough to see the damage from the edge. Don’t walk on a wet or damaged roof. Once you know where the water’s getting in, you can plan tarp coverage that actually stops it.
The tarp must extend at least 3 to 4 feet past every edge of the damaged area. If you cover only the hole, water running down the slope will find its way underneath. Pull the tarp tight across the surface so water can’t collect in sagging pockets. Standing water weighs the tarp down, stretches the material, and eventually tears grommets or seeps through seams.
Here’s the sequence to follow:
- Clear loose debris from the roof surface around the damage using a broom or your hands (wear gloves).
- Measure the damaged area and add 3 to 4 feet on all sides to determine minimum tarp size.
- Unroll the tarp on the ground to check for holes or weak grommets before you carry it up.
- Position the tarp so it covers from below the damaged area up and over the roof ridge when possible, letting it drape a few feet down the opposite slope.
- Stretch the tarp flat and smooth out wrinkles. Each fold or crease is a channel for water.
- Anchor the upper edge first, then work downward so gravity helps hold the tarp in place while you secure it.
- Use 5 to 8 sandbags, wood strips with screws, or weighted anchors along every edge to prevent wind lift and keep water from sneaking underneath.
Improper placement is the number one reason tarps fail. If the tarp stops short of the damage perimeter or sags in the middle, you’re just redirecting the leak instead of stopping it.
Step-by-Step Instructions for Proper Roof Tarp Installation
Roof tarp installation is methodical work. Rushing or skipping a step usually means you’ll be back up there adjusting it after the next rain.
Start by removing all loose shingles, nails, and debris from the area you plan to cover. Use a roofing shovel or stiff broom. You want a clean, relatively smooth surface so the tarp can lie flat. Debris left under the tarp will poke holes or create high spots where water pools.
Follow these steps in order:
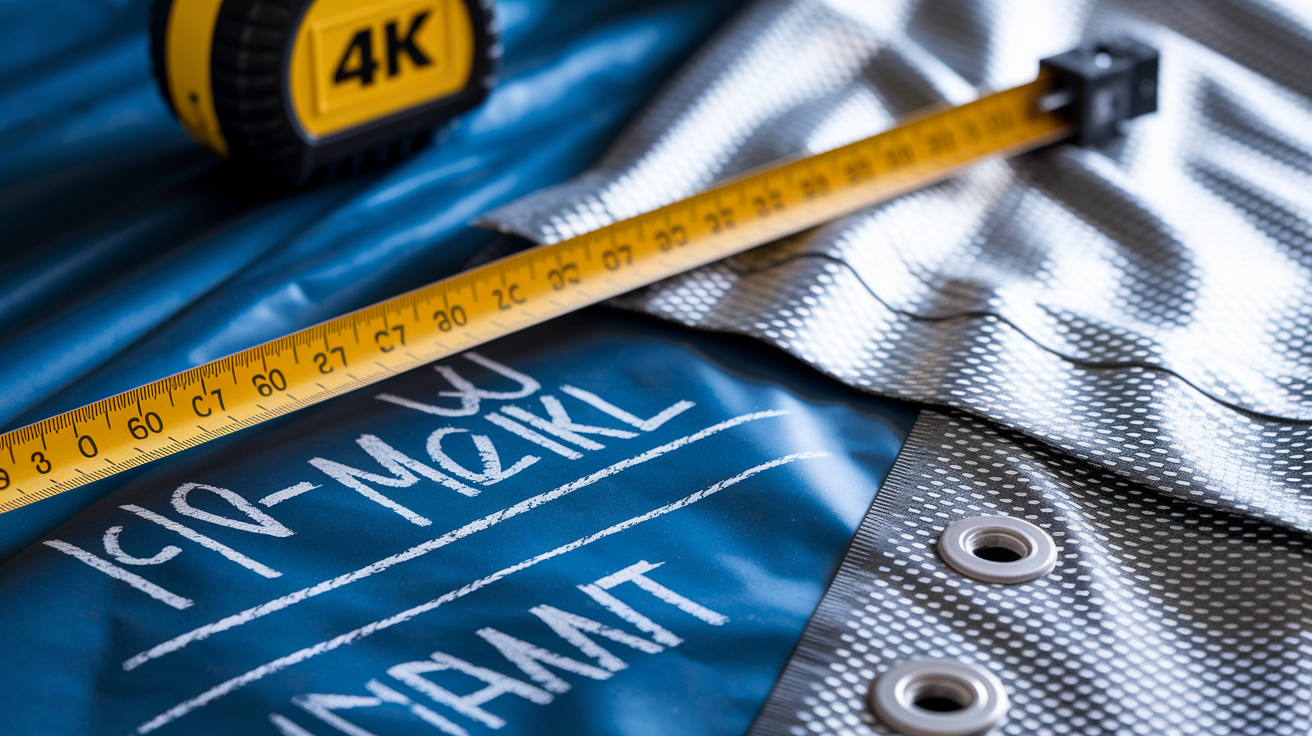
- Measure the damaged section with a tape measure and write down the length and width.
- Add at least 3 feet to each side of those measurements to determine your minimum tarp dimensions.
- Lay the tarp flat on the ground and inspect every grommet and seam for tears or weak spots.
- With a second person, carry the folded tarp up the ladder and position it near the damaged area. Don’t unfold it fully until you’re ready to place it.
- Unfold the tarp so the upper edge extends over the roof ridge if the damage is near the peak, or so it reaches at least 4 feet above the highest point of damage if the roof slope allows.
- Smooth the tarp from the center outward, pressing out air pockets and wrinkles as you go.
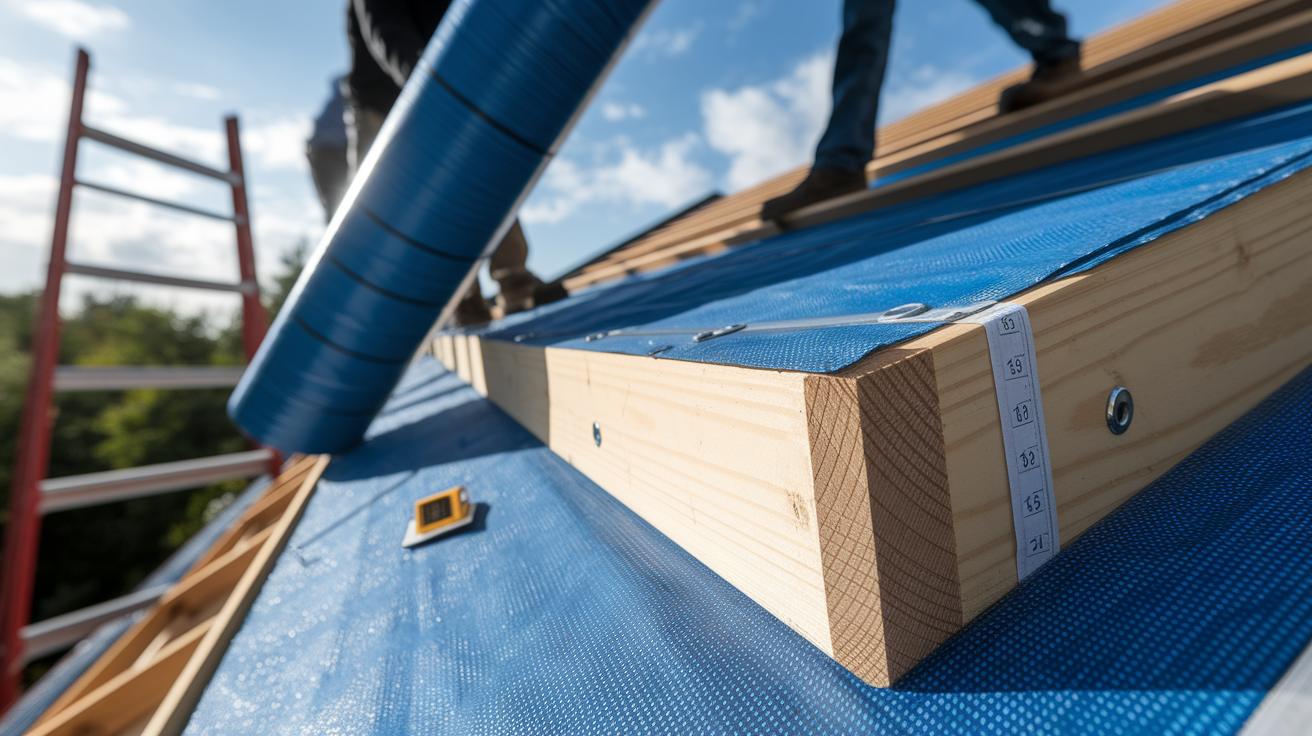
- Wrap the top edge of the tarp around a 2×4 or similar wood strip, then fasten the wood strip to the roof with 2 inch roofing screws spaced every 12 to 18 inches. This distributes pressure and prevents tearing at the grommets.
- Repeat the wood strip method on the left and right edges, pulling the tarp taut before you fasten.
- Secure the lower edge the same way, angling the wood strip slightly so one end sits lower than the other to promote drainage off the tarp.
- Walk the perimeter and tug each section to confirm it’s tight, then add sandbags or additional fasteners at any spot that feels loose or could catch wind.
Once installed, check that water will flow down and off the tarp without hitting a ridge or fold. A wrinkle that holds even a shallow pool will work its way into a sag, then a tear.
Common mistakes at this stage include nailing the tarp directly to the roof without a backing board. Those nails rip through the first strong gust. Another is positioning the lower edge too high, leaving a gap where wind driven rain sneaks in. And many people forget to angle the anchor boards for drainage, so water dams behind a perfectly level strip and leaks underneath anyway.
Choosing the Right Tarp Size and Material
Not all tarps are built to handle roof duty. A thin tarp from the discount bin might cover a woodpile, but it won’t survive wind, sun, and freeze thaw cycles on your roof.
Look for polyethylene tarps rated between 10 and 16 mil thickness. That range offers a balance of tear resistance and flexibility. Thin enough to drape over roof contours, thick enough to resist punctures from rough decking or nail heads. UV resistant coatings extend the tarp’s lifespan when it’s exposed to direct sun all day. High denier weaves (the thread count of the tarp fabric) add strength, especially at stress points like corners and grommets. Blue tarps are the most common and cheapest, but they degrade faster under UV exposure. Heavy duty silver or white tarps with reinforced edges and closer grommet spacing last longer and handle more abuse.
Key qualities to prioritize:
10 to 16 mil thickness for weather resistance and tear strength
UV resistant coating to prevent brittleness and cracking in sunlight
Grommets spaced 18 to 24 inches apart for secure anchoring without excessive tearing
Reinforced hems (double or triple fold) to handle tension from wind and fasteners
Waterproof rating confirmed by the manufacturer. Some “water resistant” tarps will leak under pooling or driving rain.
A 10×20 foot tarp typically costs $30 to $80 for contractor grade polyethylene, while a 20×30 foot heavy duty version runs $75 to $150. Spending an extra $40 now is cheaper than replacing a torn tarp mid storm or dealing with new water damage inside.
Safety Precautions When Working on a Roof

Roofs are already slippery when dry. Add water, loose shingles, or moss, and the risk of falling goes up fast.
Wet roofs are the most dangerous. Water on shingles or metal creates a film you can’t grip. If it’s raining or the roof is still damp from the storm, wait. The tarp can go up as soon as conditions are safe, even if that’s a few hours later. Wind above 15 mph makes handling a large tarp nearly impossible. It acts like a sail and can pull you off balance or off the roof entirely. Check the forecast and plan your work during a calm window.
Use a safety harness if you’re stepping onto the roof surface, and anchor it to a solid roof mounted anchor point or a sturdy chimney. Harnesses won’t prevent a slip, but they’ll stop a fall. If you’re working from a ladder only, position it at a 4 to 1 ratio: for every 4 feet of height, the base should sit 1 foot away from the wall. Extend the ladder at least 3 feet above the roof edge so you have something to hold when you step on and off.
Never tarp a roof alone. A second person stabilizes the ladder, helps manage the tarp in wind, and can call for help if something goes wrong. If your roof is steeper than a 6 in 12 pitch (rises 6 inches for every 12 inches of run), or if you’re uncomfortable with heights, hire a professional. Emergency roof tarping services typically cost $200 to $500 and include the safety equipment and experience to do the job without injury.
Methods for Securing a Roof Tarp to Prevent Wind Lift and Water Intrusion
A tarp that isn’t anchored correctly will flap, tear, or blow off entirely. The goal is to lock down every edge and prevent wind from getting underneath.
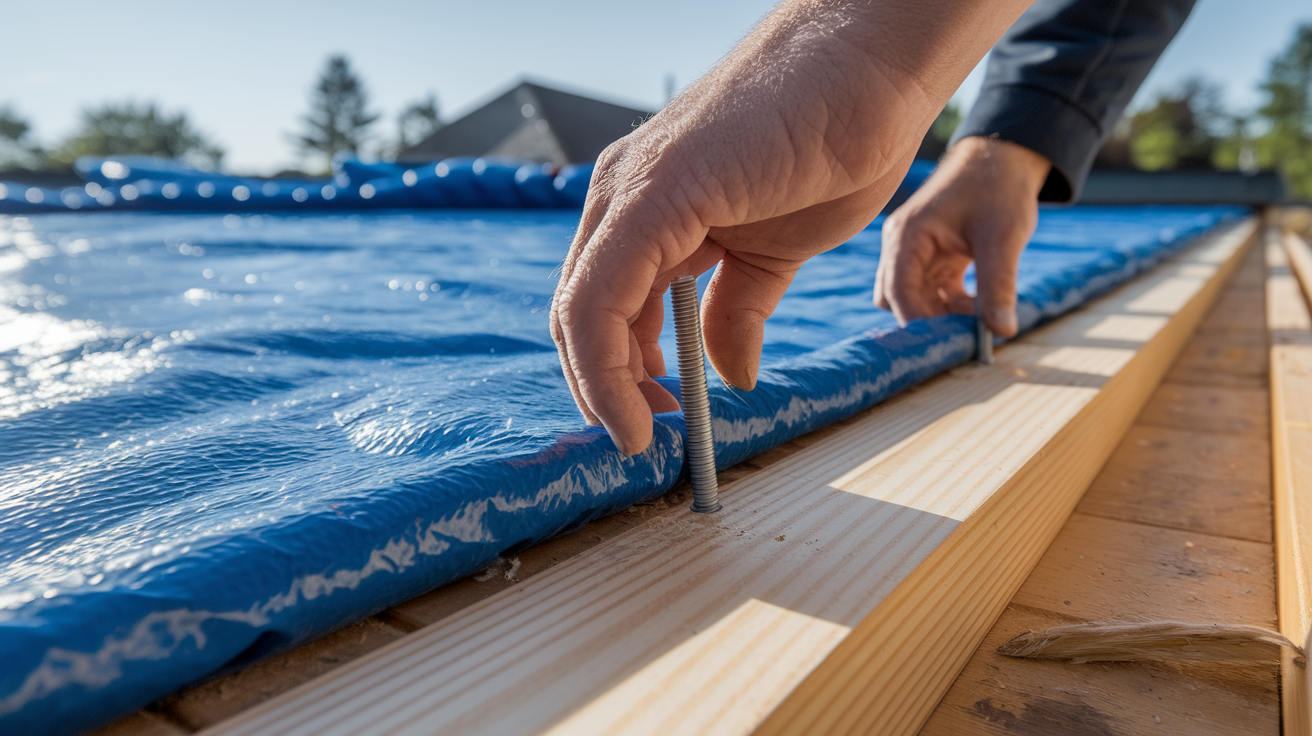
The most reliable method is the wood strip sandwich: wrap the tarp edge around a 2×4, then screw the board into the roof decking through the tarp. This spreads the load across the entire strip instead of concentrating stress at individual grommets. Use exterior grade screws, not nails. Nails pull out under repeated wind flexing. Space screws every 12 to 18 inches along the board. For overlap areas where two tarps meet, create a 6 to 12 inch overlap and secure both layers with a single wood strip running the length of the seam.
Sandbags work for short term coverage, especially along the lower tarp edge where you don’t want to penetrate the roof again. Use heavy duty plastic or burlap sandbags, 40 to 60 pounds each, and space them 2 to 3 feet apart. They won’t stop high wind, but they’ll hold the tarp in light to moderate conditions for a few days.
| Securing Method | Best For | Durability |
|---|---|---|
| 2×4 wood strips with screws | Edges and ridgelines; long term anchorage | High, lasts months if installed correctly |
| Sandbags | Lower edges; temporary use under 2 weeks | Low to moderate, shifts in high wind |
| Roofing nails through grommets | Emergency fast fix only | Low, tears grommets under stress |
| Adhesive roof tarps | Flat or low slope roofs; avoiding new punctures | Moderate, may lift at edges after UV exposure |
| Rope and ground anchors | Securing lower tarp edge on accessible slopes | Moderate, requires tensioning and adjustment |
Incorrectly placed fasteners (driving screws into rotten decking, for example) won’t hold. Before you anchor, probe the wood with a screwdriver to confirm it’s solid. If the decking is soft or spongy, shift your anchor point to a firmer area or add a plywood backer under the 2×4 to spread the load.
Temporary vs. Long-Term Roof Tarp Solutions

A roof tarp is not a roof. It’s a stopgap that buys you time to schedule repairs, file an insurance claim, or wait out the contractor backlog after a major storm.
Temporary tarps (basic polyethylene with standard grommets) are designed for 30 to 90 days of coverage. During that window, expect to inspect the tarp weekly and adjust or replace it if it tears, shifts, or starts to degrade from UV exposure. These tarps are fine if you’re scheduling a roofer within a month and just need to keep rain out until they arrive.
Heavy duty tarps with UV coatings and reinforced edges can last up to a year when properly anchored, but that’s still not a permanent solution. Even the best tarp will break down under sun, freeze thaw cycles, and wind. Water may still find its way under the tarp through small gaps, and any moisture trapped between the tarp and the decking can promote rot and mold growth underneath. Problems you won’t see until the tarp comes off.
Factors that shorten tarp lifespan:
Direct sun exposure causes UV breakdown and brittleness within weeks on low grade tarps
High winds stress grommets and anchor points, leading to tears
Snow load if the tarp sags, snow piles up and the weight can rip the material or pull fasteners loose
Poor anchoring that allows the tarp to flap creates fatigue stress and accelerates wear
The right approach is to treat every tarp as temporary and plan for permanent roof repair beneath it. If you’re past 90 days and still tarped, inspect the decking underneath for hidden moisture and rot before the new shingles go on.
When to Call a Professional Roofer

Some roof damage is too severe, too steep, or too risky for a homeowner to tarp safely. Knowing when to stop and call a roofer prevents injuries and often prevents worse damage.
If you see structural deck damage (sagging plywood, broken rafters, or holes larger than a few square feet) do not climb onto that roof. The decking may not support your weight, and tarping over structural damage without shoring it up first can collapse the weakened section. Widespread shingle loss (more than 30 percent of a slope) or large punctures from falling trees usually mean the underlayment is compromised too. A tarp might slow the leaks, but you’ll need a professional to assess the full extent and whether temporary shoring or emergency repairs are necessary before tarping.
Timing matters as much as damage type. Water begins promoting mold growth in as little as 48 to 72 hours when conditions are warm and humid. If you can’t get the tarp up within a day of the storm and the forecast shows more rain, calling an emergency roofer keeps the timeline short. Many roofers offer same day or next day tarping services for $200 to $600, depending on the size and access difficulty. Worth it if the alternative is continued soaking and interior damage that adds thousands to your repair bill.
Professional roofers also bring the safety equipment, experience, and insurance coverage that homeowners don’t have. If your roof pitch is steeper than 6 in 12, if you’re uncomfortable on ladders, or if the damage is near a roof edge or valley where footing is unstable, let the pros handle it. One fall can cost more than a lifetime of roof repairs.
Common Mistakes That Lead to Continued Leaks

Even a well intentioned tarp job can fail if you miss a key step or make an incorrect assumption about how water moves across a roof.
The most frequent error is using a tarp that’s too small. If the tarp doesn’t extend 3 to 4 feet past the damaged area on every side, water running down the slope will flow under the edge and into the same hole you’re trying to cover.
Other common mistakes include:
Leaving gaps along edges or at overlaps where wind driven rain sneaks in
Failing to secure all four sides. Anchoring just the top and bottom lets wind lift the sides and blow the tarp loose.
Placing anchors into rotten or water damaged decking that won’t hold screws or nails under tension
Nailing directly through grommets without a backing board, which tears the tarp the first time wind pulls on it
Installing the tarp with wrinkles or sags that collect water, adding weight and stress until the material rips
Skipping the ridge over drape when the damage is near the peak, allowing water to work underneath from above
Preventing these issues starts with taking the time to measure correctly, pull the tarp tight, and use proper anchoring techniques. Walk the tarp perimeter after installation and look for loose spots, folds, or gaps. If you see daylight under an edge or feel the tarp move when you tug it, add another anchor point or sandbag. The tarp should look flat, smooth, and immovable. If it flaps in a light breeze, it won’t survive the next storm.
Check the tarp after every significant rain or wind event. A small tear that starts at a grommet can spread across half the tarp in one heavy storm if you don’t catch it early. Repair small tears immediately with tarp repair tape or by adding a patch and a wood strip over the damaged area. If more than 20 percent of the tarp is torn or if anchors are pulling loose, replace the entire tarp before the next weather system arrives.
Final Words
You moved fast: found the leak, picked the right tarp, stretched it tight, and secured the edges so water can’t pool. Those actions slow the damage right away.
Remember safety, keep ladders at a 4:1 ratio, don’t work in high wind, and use wood strips or sandbags to hold edges. Take photos and moisture readings for insurance.
If the decking feels soft or the hole is big, call a pro within 48–72 hours.
These steps give you real roof tarp leak prevention and buy time for a proper repair.
FAQ
Q: Can I put a tarp on my roof to stop leaks?
A: You can put a tarp on your roof to stop leaks temporarily. It should extend 3–4 feet past the damaged area, be pulled tight, and be secured to prevent pooling and wind lift.
Q: How long will a 20 mil tarp last on a roof?
A: A 20 mil tarp typically lasts several months up to about a year, depending on UV exposure, wind, and how well it’s anchored. UV-resistant and heavy-duty tarps last longer.
Q: How long can a tarp stay on the roof?
A: A tarp can stay on a roof short-term, usually 30–90 days for emergency cover. Heavy-duty, well-anchored tarps may last up to a year, but you should schedule permanent repairs.
Q: Why are people putting blue tarps on their roof?
A: People put blue tarps on roofs as temporary emergency cover after storms to stop leaks quickly. Blue tarps are common and easy to find, but they’re not a long-term fix.