

Think you can leave standing water under your house and it will dry itself?
Not true.
Every hour that water sits in a crawl space risks warped joists, mold that can start in 48 to 72 hours, and musty air that spreads through the home.
The first job is simple: get the water out and stop more from coming in.
This post lays out fast, safe emergency steps: pump, dry, and protect, plus proven long-term fixes like perimeter drains, sump pumps, and full encapsulation that actually stop the problem.
Immediate Standing Water Solutions for Crawl Spaces

Standing water in a crawl space needs to come out fast. Every hour it sits under your home, you’re risking structural damage, mold growth, and air quality problems that can affect everyone inside. Mold can start within 48 to 72 hours after water shows up, so speed matters.
The usual suspects? Groundwater pushing in after heavy rain, poor yard grading that sends water straight toward your foundation, clogged or missing gutters, broken plumbing, and slow draining clay soil that holds moisture right next to your home. Whatever caused it, your first job is getting the water out and starting the drying process.
Once the water’s gone, you need to drop the humidity below 50% and keep it there. A crawl space rated dehumidifier and good air movement will stop mold before it takes hold and buy you time to plan permanent fixes.
Here’s the emergency removal process:
-
Shut off power to the crawl space if it’s safe to do so. Never enter standing water with live electrical connections nearby.
-
Wear gloves, eye protection, and a respirator. Crawl space water often contains dirt, debris, and bacteria.
-
Use a submersible pump or wet/dry shop vac. Portable pumps can move hundreds to thousands of gallons per hour depending on the model. Wet vacs work for smaller amounts or tight corners.
-
Remove wet insulation and debris. Saturated fiberglass batts and soaked materials won’t dry and can harbor mold.
-
Set up fans and a dehumidifier. Target relative humidity below 50%. Crawl space rated units range from 30 to 70 pints per day depending on space size.
-
Monitor for visible mold. If you see heavy contamination or the HVAC system connects to the crawl space, call a professional remediation company.
Causes of Crawl Space Water Accumulation and How They Relate to Long-Term Solutions

You can pump out standing water, but it’ll come back unless you fix what caused it. Most crawl space flooding happens because water gets directed toward your home instead of away from it, or because groundwater has nowhere to go once it reaches your foundation.
Poor yard grading is the most common culprit. The soil around your foundation should slope down at least 6 inches over the first 10 feet, so rainwater and snowmelt naturally flow away. When the grade is flat or slopes back toward the house, every storm adds water to your crawl space. Gutters and downspouts also play a big role. If your gutters are clogged or missing extensions, thousands of gallons of roof runoff dump straight down next to your foundation.
Soil type matters too. Clay soil drains slowly and holds water near the foundation for days after a storm. Sandy soil drains faster but can still allow groundwater to rise during heavy rain or snowmelt. A high water table means the soil under your home is already saturated, so any additional rain has nowhere to go except up into your crawl space. Leaking pipes or appliances inside the crawl space add localized water that doesn’t go away on its own.
The most common causes of standing water under your home:
- Poor yard grading. Soil slopes toward foundation instead of away. Needs regrading to achieve 6 inch drop over first 10 feet.
- Inadequate drainage. Clogged gutters, missing downspout extensions, no yard drains to move surface water away from home.
- High water table or prolonged snowmelt. Saturates soil under foundation. Requires interior or exterior drainage system with sump pump.
- Slow draining clay soil. Holds water near foundation longer than sandy soil. Often requires French drain or perimeter drain.
- Leaking plumbing or appliances. Localized water source inside crawl space. Fix leaks first, then dry and prevent return moisture.
Drainage System Solutions for Standing Water Problems

Permanent drainage systems stop groundwater before it becomes standing water. Exterior solutions intercept water outside your foundation and redirect it away. Interior systems collect water that reaches the crawl space and eject it using a sump pump. Both approaches work, and many homes need a combination of the two.
Exterior grading is the first line of defense. The target is a 6 inch drop over the first 10 feet from your foundation. If your yard is flat or slopes the wrong way, regrading costs typically range from $500 to $5,000 depending on how much soil needs to be moved and whether you need retaining walls or drainage swales. For homes where regrading isn’t enough or the water table is high, a French drain intercepts subsurface water before it reaches the foundation. A French drain uses a 4 inch perforated pipe surrounded by 3/4 inch clean gravel, installed in a trench 18 to 24 inches deep with a slope of about 1 percent, roughly 1/8 inch per foot. The pipe collects groundwater and carries it to daylight or a dry well away from the house. Typical costs run $2,000 to $10,000 depending on linear feet and site access.
Comparing French Drain vs Perimeter Drain
French drains work outside the foundation to intercept water before it reaches the crawl space. Perimeter drains work inside the crawl space, collecting water that’s already entered and routing it to a sump pit. Exterior systems prevent water intrusion. Interior systems manage water that gets through. If your water table is high or you’ve got persistent seepage, an interior perimeter drain paired with a sump pump is often the most reliable long term fix.
| Drain Type | Primary Function |
|---|---|
| Exterior French Drain | Intercepts groundwater outside foundation. Diverts water before it reaches crawl space. |
| Interior Perimeter Drain | Collects water inside crawl space perimeter. Channels to sump pit for ejection. |
| Sump Pump System | Automatically activates when water fills pit. Pumps water away from foundation via discharge line. |
| Downspout Extensions | Moves roof runoff 4 to 6 feet minimum from foundation. Prevents surface water pooling near walls. |
Sump Pump Solutions for Crawl Spaces with Standing Water

A sump pump is the core of any interior drainage system. The pump sits in a pit, typically 18 to 24 inches in diameter, where perimeter drains or groundwater naturally collect. When water fills the pit to a set level, a float switch activates the pump and ejects the water through a discharge line that runs away from your foundation. A check valve on the discharge line prevents water from flowing back into the pit after the pump shuts off.
For most crawl spaces, a 1/3 to 1/2 horsepower submersible pump is sufficient. Solids handling pumps are recommended because crawl space water often contains dirt and small debris. Sump pumps typically last 5 to 10 years, so plan for replacement or annual testing. Battery backup systems are worth the extra cost in areas prone to power outages during storms. The backup pump kicks in when the main pump loses power, preventing flooding when you need protection most. Sump pump and pit installation costs typically range from $1,500 to $5,000 depending on whether you’re adding perimeter drainage or just installing the pit and pump.
The discharge line must extend at least 10 feet from the foundation and slope downward so water drains away even when the pump is off. In cold climates, a buried discharge line with a freeze resistant termination prevents winter ice blockages.
Sump pump maintenance checklist:
- Test the float switch twice a year. Pour water into the pit to confirm the pump activates and shuts off correctly.
- Clean the pit annually. Remove debris, dirt, and silt that can clog the pump intake or bind the float.
- Check the discharge line for blockages. Clear any leaves, ice, or debris at the termination point.
- Inspect the check valve. Make sure it opens and closes fully to prevent backflow into the pit.
- Test the battery backup. If installed, confirm the backup pump activates when you disconnect power to the primary pump.
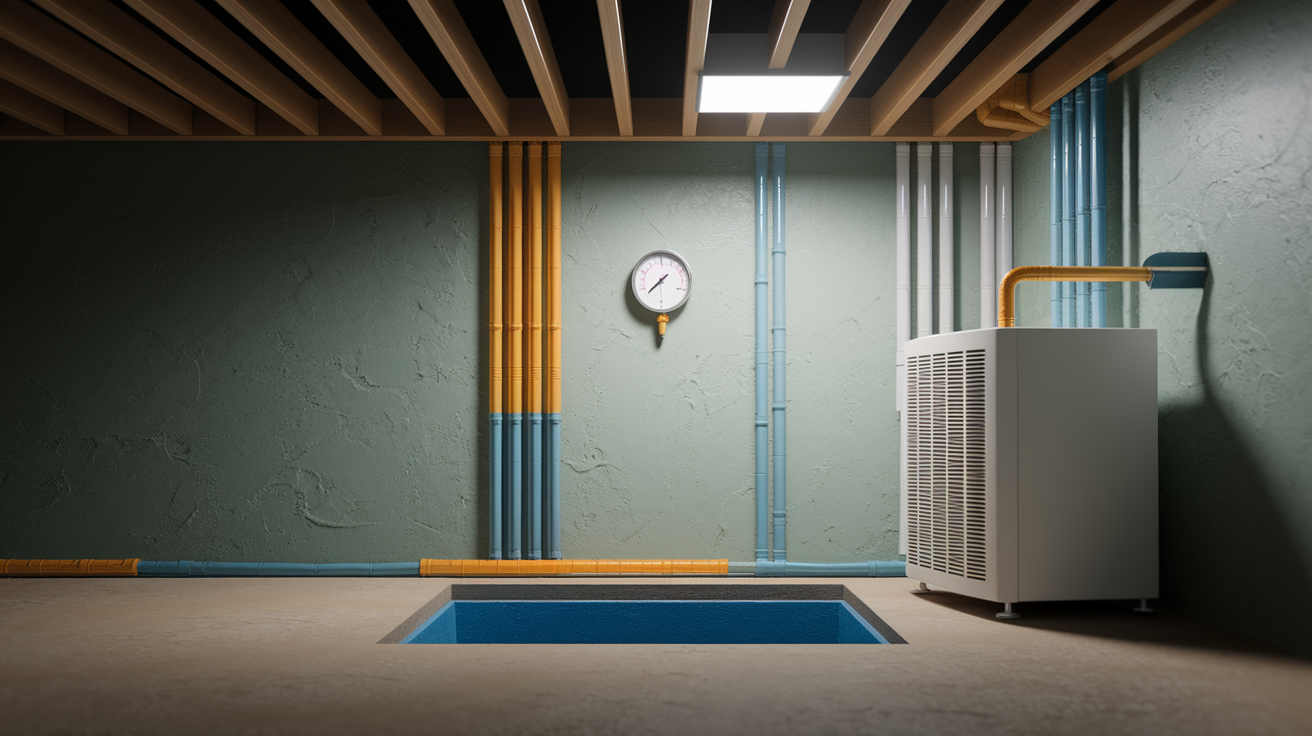
Vapor Barriers and Moisture Control as Core Crawl Space Water Solutions

A vapor barrier is a heavy plastic sheet installed over the crawl space floor and sometimes up the walls to block moisture vapor rising from the soil. Even after you remove standing water and install drainage, soil moisture will continue evaporating into your crawl space unless you seal it off. That moisture raises humidity, encourages mold, and degrades insulation and wood framing over time.
Vapor barriers are rated by thickness in mils. 12 to 20 mil polyethylene is standard for crawl spaces. Seams must overlap and be sealed with 4 inch vapor barrier tape to prevent moisture from migrating through gaps. The barrier should cover the entire floor and extend up foundation walls and piers to create a continuous seal. Material costs run about $0.50 to $2.00 per square foot, but professional installation that includes wall coverage, pier wrapping, and proper sealing typically adds labor costs that bring total vapor barrier projects to $1,000 to $5,000 depending on crawl space size and condition.
A properly installed vapor barrier reduces long term moisture intrusion, lowers humidity, and stops soil odors from entering your home. It’s the foundation of any crawl space moisture control strategy, but it works best when paired with drainage, air sealing, and dehumidification to create a complete system.
Full Encapsulation Solutions for Persistent Crawl Space Moisture

Crawl space encapsulation is the most comprehensive moisture control solution. Instead of just installing a floor vapor barrier, encapsulation seals the entire crawl space (floor, walls, piers, and vents), turning it into a conditioned, dry environment that’s isolated from outside air and soil moisture. Encapsulation is recommended for homes with recurring moisture problems, high humidity, or persistent odors that simpler fixes haven’t solved.
The process starts with a heavy duty vapor barrier, typically 20 mil thickness, that covers the crawl space floor and extends up the foundation walls. All seams are overlapped and taped, and the barrier is mechanically fastened to walls and sealed around piers and posts. Next, all foundation vents are sealed from the inside to stop humid outside air from entering. Closed cell spray foam is applied to the rim joist (the wood framing where the foundation meets the floor structure) and to the interior of foundation walls. This two part spray foam insulates and air seals at the same time, stopping drafts and heat loss while preventing condensation on cold surfaces.
Finally, a crawl space rated dehumidifier is installed to control humidity. The target is 50 to 55 percent relative humidity year round. Units like the Aprilaire E070 are designed to run continuously in sealed crawl spaces and drain automatically into a sump pit or condensate pump. Professional encapsulation projects typically cost $3,000 to $12,000 depending on crawl space size, access difficulty, and whether drainage or sump pump installation is included.
Encapsulation provides long term moisture control, improves indoor air quality by stopping mold and odors, stabilizes indoor temperatures, and reduces energy costs by sealing air leaks and insulating the foundation. It’s the most durable solution for standing water problems that keep coming back.
Encapsulation Components and Their Role in Water Prevention
The vapor barrier isolates your home from soil moisture and prevents water vapor from evaporating into the crawl space. Spray foam insulation on the rim joist and foundation walls stops air infiltration and prevents condensation when warm, humid air contacts cold surfaces. Sealing the vents eliminates the pathway for humid outside air to enter. In summer, that humid air condenses on cool crawl space surfaces and adds moisture instead of removing it. The dehumidifier controls the air inside the sealed crawl space, pulling moisture out of the air and materials so humidity stays in the safe zone where mold and wood rot can’t develop.
Crawl Space Dehumidification as a Long-Term Moisture Solution
A dehumidifier is necessary after encapsulation or in any crawl space where humidity stays above 50 percent even after drainage and vapor barriers are in place. Humid air supports mold growth, wood rot, and pest activity, and it allows moisture to condense on cool surfaces like metal ductwork and cold water pipes. A crawl space rated dehumidifier pulls moisture from the air continuously and drains automatically so you don’t have to empty a reservoir.
Dehumidifiers are sized by how many pints of water they can remove per day. Units range from 30 to 70 pints per day depending on crawl space square footage, regional humidity, and whether the space is sealed or vented. Sealed, encapsulated crawl spaces typically need smaller units because outside air isn’t constantly adding new moisture. Vented crawl spaces in humid climates may need larger units and will cost more to operate because they’re fighting a constant influx of humid air.
Choosing the right dehumidifier:
-
Measure your crawl space square footage. Multiply length by width to get total area. Most manufacturers recommend 1 pint per day per 50 to 100 square feet depending on humidity level.
-
Check whether the unit is crawl space rated. Standard basement dehumidifiers may not operate reliably in the cooler, dirtier conditions of a crawl space.
-
Confirm automatic drainage. The unit should pump or gravity drain condensate into a sump pit, floor drain, or condensate line so you never have to empty a bucket.
-
Set the target humidity between 50 and 55 percent. This range prevents mold and wood rot while avoiding over drying that can crack wood or increase operating cost.
Structural Damage and Mold Risks from Standing Crawl Space Water

Standing water doesn’t just smell bad or raise humidity. It directly attacks the structure of your home and creates health risks for everyone living inside. Mold begins growing on wet wood, insulation, and debris within 48 to 72 hours. Once mold colonizes, it releases spores into the air that circulate through your HVAC system and into living spaces, triggering allergies, asthma, and respiratory irritation.
Water also degrades wood. Floor joists, beams, and subfloors that stay wet will develop wood rot, lose structural strength, and eventually sag or fail. Foundation walls can crack and settle when the soil around them stays saturated, and prolonged moisture accelerates rusting of metal supports and fasteners. Wet or damp insulation loses its insulating value and becomes a breeding ground for mold and pests. Termites and rodents are attracted to damp crawl spaces because the moisture provides the environment they need to survive.
The cost of ignoring standing water escalates quickly. Minor mold remediation runs $500 to $3,000. Major contamination, structural joist replacement, or foundation repairs can reach $5,000 to $25,000 or more depending on the extent of damage. The longer water sits, the more expensive the repair becomes.
Damage and health effects of prolonged crawl space moisture:
- Mold colonization within 48 to 72 hours. Releases airborne spores that degrade indoor air quality and trigger respiratory symptoms.
- Wood rot and joist deterioration. Wet framing loses strength. Sagging floors, bouncy subfloors, and structural failure require costly beam and joist replacement.
- Foundation cracks and settlement. Saturated soil shifts and settles unevenly, causing foundation walls to crack or tilt.
- Degraded insulation. Fiberglass batts absorb water and lose R value. Become heavy, sag, and harbor mold.
- Pest attraction. Termites, carpenter ants, and rodents are drawn to damp wood and humid environments.
- Higher energy bills. Wet insulation and air leaks caused by moisture damage increase heating and cooling costs year round.
Exterior Water Management Solutions to Prevent Future Standing Water
Stopping water before it reaches your crawl space is the most effective long term strategy. Exterior water management focuses on grading, gutters, and drainage systems that keep surface water and groundwater away from your foundation. Even if you install interior drains and a sump pump, fixing exterior problems reduces how much water the interior system has to handle and lowers the risk of future flooding.
Regrading your yard to create a 6 inch drop over the first 10 feet from your foundation ensures that rainwater and snowmelt flow away instead of pooling next to your walls. This often requires adding soil near the foundation and sloping it gradually outward. Avoid piling mulch or soil against siding or brick. The top of the grade should stay below the siding to prevent rot. Clay soils that drain slowly may also need shallow drainage swales or catch basins to move surface water away faster.
Gutters and downspouts must be clean and intact. A 1,000 square foot roof sheds over 600 gallons of water during a 1 inch rainstorm. If that water dumps next to your foundation, it’ll find its way into your crawl space. Extend downspouts at least 4 to 6 feet from the house using flexible extensions, rigid elbows, or underground drain lines that discharge into a swale or storm drain.
Five steps to prevent standing water with exterior fixes:
-
Inspect yard grading twice a year. Check after heavy storms to see where water pools. Add soil and regrade as needed to maintain 6 inch drop over 10 feet.
-
Clean gutters and install gutter guards. Clear debris before spring and fall heavy rain seasons. Guards reduce clogging and maintenance frequency.
-
Extend all downspouts 4 to 6 feet minimum. Use splash blocks, flexible extensions, or buried drain lines. Confirm water discharges away from foundation.
-
Add drainage swales or catch basins in low spots. Shallow graded channels or grated inlets move surface water to street or storm drain before it reaches foundation.
-
Repair foundation cracks and gaps. Seal visible cracks in foundation walls and gaps around utility penetrations to reduce water entry points.
DIY vs Professional Standing Water Solutions: When to Call Experts

Some crawl space water fixes are reasonable DIY projects. Others require specialized tools, safety equipment, or structural knowledge that makes professional help the smarter and safer choice. Knowing the difference protects your home and keeps you from taking on jobs that are beyond typical homeowner skills or equipment.
DIY tasks include cleaning gutters, installing downspout extensions, adding temporary grading with bagged soil, and using a portable pump or wet vac to remove standing water after a storm. You can also handle small crawl space inspections, visual mold checks, and setting up fans and a consumer grade dehumidifier. These jobs require basic tools, minimal risk, and can be completed in a few hours to a day without special training.
Professional help is necessary for digging and installing French drains, excavating for exterior perimeter drains, trenching inside the crawl space for interior drainage systems, installing sump pits and pumps with discharge lines, and performing full crawl space encapsulation with spray foam and mechanical fastening. Structural repairs like replacing rotted joists or beams, foundation crack injection or stabilization, and significant mold remediation also require licensed, insured contractors. Professionals bring the equipment, experience, and liability coverage needed to do these jobs safely and correctly, and most offer warranties on labor and materials that DIY work doesn’t include.
Final Words
If water’s standing, shut off power if it’s safe, stop the source, pump or wet-vac immediately, and start drying with fans and a crawl-space dehumidifier set under 50% RH. Take photos and moisture readings.
This post covered fast removal steps, common causes, drainage and sump-pump fixes, vapor barriers and full encapsulation, dehumidification targets, structural and mold risks, exterior grading, and when to call a pro.
Use these standing water in crawl space solutions to stop more damage and get your space back to normal. Act fast. You’ll be ahead of mold and bigger repairs.
FAQ
Q: How to get standing water out of a crawlspace?
A: Getting standing water out of a crawl space starts by shutting power and wearing PPE, then pump or wet-vac the water, run air movers and a dehumidifier to below 50% RH, and check for leaks; call a pro if heavy water.
Q: Is it normal to have standing water in a crawl space?
A: It is not normal to have standing water in a crawl space; it usually means poor grading, clogged gutters, high groundwater, or leaks and can cause mold in 48–72 hours and structural damage if not fixed.
Q: How much does it cost to fix water in a crawl space?
A: Fixing water in a crawl space can range from a few hundred dollars for pump-out and drying to several thousand for sump, French drain, or repairs; full encapsulation often runs $3,000–$12,000, more with mold or structural work.
Q: Will homeowners insurance cover water in a crawl space?
A: Homeowners insurance may cover sudden, accidental water like a burst pipe, but usually excludes gradual leaks or poor maintenance; document damage with photos, keep receipts, and report promptly to your insurer.