

You can’t always tell what kind of soot you’re dealing with just by looking at it. That soft black dust around your fireplace cleans completely different than the greasy film from a kitchen fire. If you use the wrong method, you’ll spend hours scrubbing with zero progress, or worse, you’ll push oily residue deeper into the brick pores. Match your cleaning approach to what actually burned, and you’ll save yourself frustration and wasted effort.
Best Cleaning Solutions for Brick Soot Removal
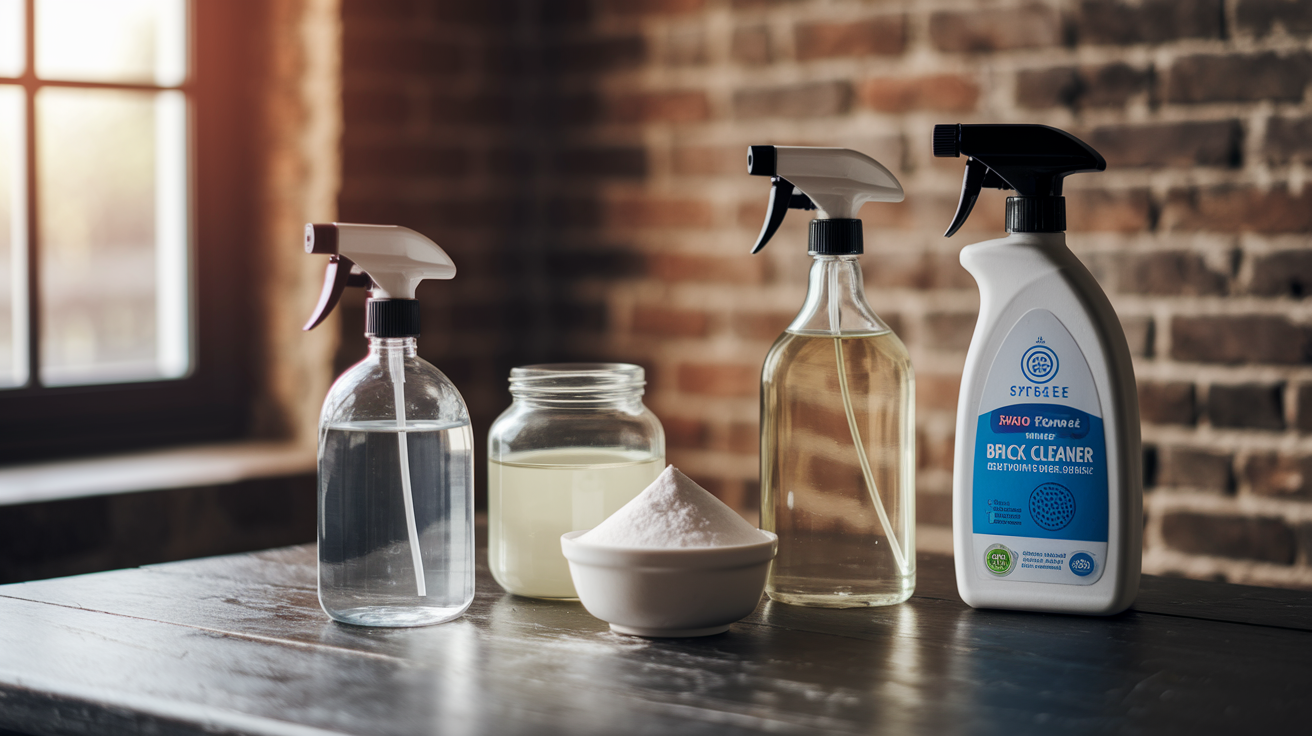
Getting soot off brick means picking the right cleaner for what you’re dealing with. Light candle residue doesn’t need the same firepower as years of fireplace buildup. Your options run from stuff already sitting in your kitchen to commercial products built specifically for masonry. Each works differently. Some break down greasy deposits, others lift powder, and a few handle both.
TSP (Trisodium Phosphate) Solutions
TSP cuts through heavy soot, grease, and stubborn residue when you need serious cleaning power. Mix 1/4 to 1/2 cup of TSP powder per gallon of warm water. Adjust based on how thick the soot is. For really heavy buildup, you can push it to 1/2 cup per gallon, but test that stronger mix first.
TSP creates a highly alkaline solution that breaks the bond between soot particles and brick. That makes it effective on petroleum based soot from house fires or industrial contamination where oily residue clings to porous surfaces.
You’ll need rubber gloves, safety goggles, and good ventilation. It’s caustic enough to irritate skin and eyes. Keep it away from aluminum surfaces and certain paints. Don’t use TSP if you’re on a septic system or if local regulations restrict phosphate disposal. Some areas have banned or limited it due to environmental concerns about phosphate runoff.
Vinegar and Baking Soda Methods
White vinegar and baking soda offer a gentler approach for light to moderate soot. Vinegar is acidic (typically 5% acetic acid) and dissolves dirt. Baking soda is mildly alkaline and works as a gentle abrasive. When you combine them, they fizz and help lift soot particles from brick pores.
Use white vinegar straight or dilute it half and half with water for lighter cleaning. Spray it on, let it sit 5 to 10 minutes, then scrub. For baking soda, mix it with just enough water to form a paste, spread it over soot stains, wait 10 minutes, then scrub with a brush.
This combination works best on wood fire soot that leaves fine powder residue rather than oily deposits. The acid base chemistry loosens particles without harsh fumes or skin hazards. These household items won’t damage mortar joints or fade brick color. You can use them safely indoors without worrying about chemical runoff.
Commercial Brick Cleaners
Products like Brick Anew Brick and Stone Fireplace Cleaner are formulated specifically for masonry. These specialized cleaners penetrate tough soot with balanced pH levels and surfactants designed for porous stone. They work faster than household solutions and often need less scrubbing.
Commercial cleaners typically contain a blend of detergents, solvents, and sometimes mild acids calibrated for brick without causing mortar deterioration. They’re engineered to handle both oily and powdery soot types. Application is straightforward. Spray evenly on affected areas, rub in with gloved hands, let it soak 10 minutes, scrub with a brush, then rinse.
The advantage is predictable performance. You’re not guessing about ratios or effectiveness. Many commercial products are low odor and formulated to minimize runoff concerns. They cost more than DIY mixes but save time on heavily sooted surfaces where multiple treatments might otherwise be needed.
Natural Alternatives
Beyond vinegar and baking soda, several other options handle soot without harsh chemicals. Dish soap (a few drops in warm water) creates a mild degreasing solution for light soot. It’s especially useful for candle soot or cooking residue on brick.
Oxygen bleach (sodium percarbonate) breaks down into hydrogen peroxide and soda ash when mixed with water. It lifts stains and kills mold without chlorine’s harshness. Mix according to package directions, typically 1 to 2 tablespoons per gallon of warm water.
Enzyme cleaners use biological compounds to break down organic materials in soot. They work slower but are non-toxic and biodegradable. Some homeowners mix castile soap with water for a plant based cleaning option that’s safe around pets and children.
These alternatives suit routine maintenance cleaning and situations where chemical sensitivities matter. They won’t always match TSP’s power on severe buildup, but they’re gentle on brick and mortar while still being effective on moderate soot layers.
Matching your cleaning solution to soot severity makes the difference between an easy one session cleaning and a frustrating multi day project. Light dusting from candles responds to simple soap and water. Moderate fireplace soot needs vinegar or a commercial cleaner. Heavy deposits from house fires or years of neglect call for TSP or professional grade products. Start with the mildest effective option and increase strength only if needed.
Complete Step-by-Step Method for Cleaning Soot Off Brick
Safety and Preparation
Before you start scrubbing, make sure your fireplace or heat source has been completely cool for at least 12 hours. Touching hot or warm brick causes burns. Cleaning solutions can create dangerous steam when they contact heated surfaces. Working in a cool space also makes the job more comfortable.
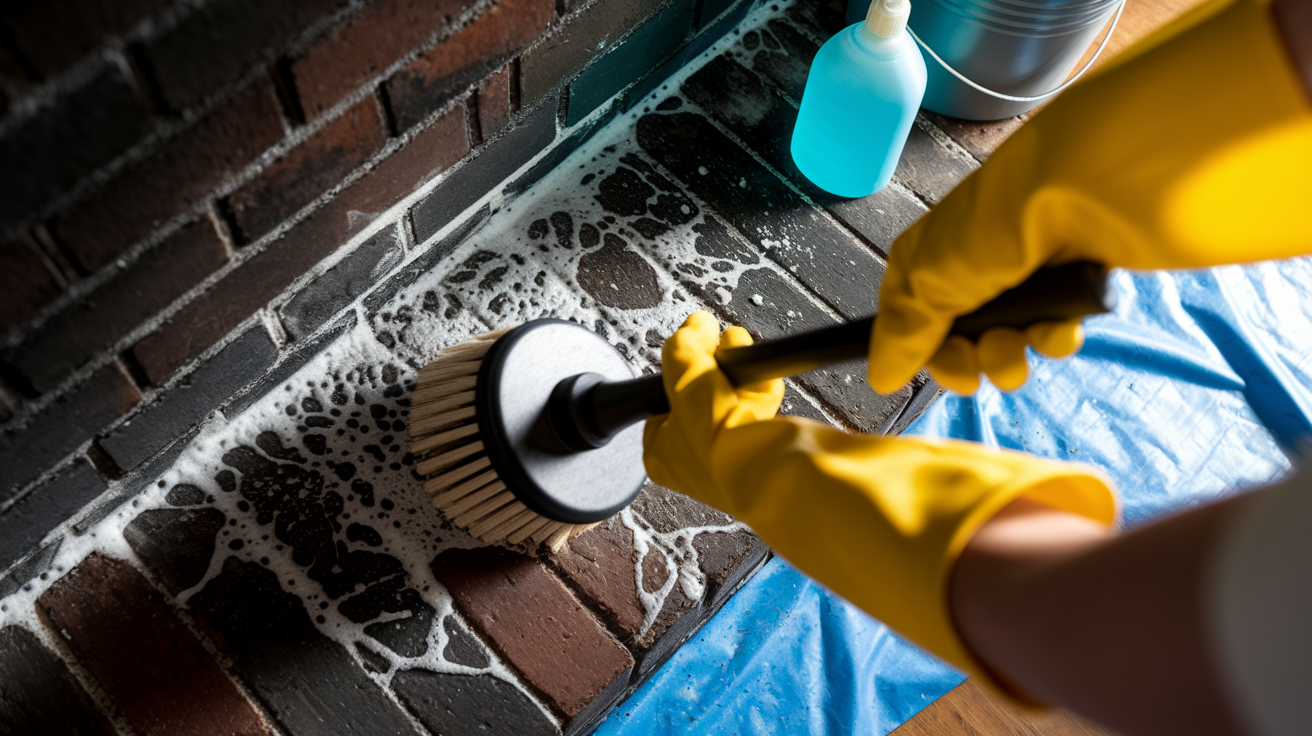
Put on rubber gloves to protect your hands from both soot staining and cleaning chemicals. Wear safety goggles to keep debris and spray from getting in your eyes. Open windows and doors to create cross ventilation, especially important if you’re using TSP or commercial cleaners. Lay down drop cloths, plastic sheeting, or old towels to protect flooring from drips and soot that falls during cleaning.
Move furniture and decorative items away from the work area. Vacuum or sweep loose soot before you wet anything down, since water turns dry soot into a messy paste that spreads.
Essential tools and materials:
- Stiff bristled scrub brush (nylon or natural bristle)
- Soft sponge or microfiber cloth
- Spray bottle
- Bucket for mixing solution
- Old towels for absorption
- Vacuum with brush attachment
- Broom and dustpan
- Ladder or step stool if needed
- Your chosen cleaning solution
- Clean water for rinsing
Select your brush based on brick condition. Older, softer brick needs a softer bristle to avoid surface damage. Newer, harder brick can handle stiffer brushes. Never use wire brushes on brick as they scratch the surface and damage mortar joints. Pay attention to mortar condition as you work. Crumbling or loose mortar should be avoided during aggressive scrubbing, since cleaning can worsen existing damage.
Cleaning process:
-
Remove loose ash and soot with a broom, then vacuum hard to reach crevices and mortar joints.
-
Mix your cleaning solution in a bucket according to product directions or the ratios discussed earlier.
-
Test the solution on a small, inconspicuous area of brick. Wait 10 minutes and check for discoloration or surface damage.
-
Fill a spray bottle with cleaning solution or use a sponge to apply it evenly across all sooted brick surfaces.
-
Rub the solution into the brick with gloved hands or a sponge, working it into pores and crevices.
-
Let the solution soak for 10 minutes. This dwell time lets chemicals break down soot bonds.
-
Scrub the brick with your brush using firm circular motions. Work in sections from top to bottom to prevent dirty solution from running over areas you’ve already cleaned.
-
Rinse each section with a clean, damp sponge and warm water. Wring out the sponge frequently and change rinse water when it becomes dirty.
-
Repeat steps 4 through 8 on stubborn areas or if one treatment doesn’t remove all soot.
-
Dry the brick with old towels or allow it to air dry completely before inspecting results.
Multiple cleaning sessions may be necessary for extra deep layers of dirt and grime, especially if soot has been building up for years. Don’t expect perfection on the first pass for severe cases. Plan on at least two treatments for heavy accumulation.
Stubborn Stain Treatment for Persistent Soot
When standard cleaning leaves behind dark spots or embedded stains, you need a stronger localized treatment. These persistent marks happen when soot penetrates deep into brick pores or when high heat has essentially baked residue onto the surface. A paste or poultice method concentrates cleaning power directly on problem areas without overwetting surrounding brick.
Create a thick paste by mixing baking soda with just enough water to form a consistency like peanut butter. Spread this paste over stubborn stains with a putty knife or your gloved fingers, making a layer about 1/4 inch thick. Let it sit for 10 minutes for moderate stains. For severe discoloration, cover the paste with plastic wrap and leave it overnight. The paste draws out embedded soot as it slowly dries.
After the waiting period, scrub the paste with a small brush, old toothbrush, or detail brush. Work in small circles to lift the loosened soot. Rinse with a warm, damp sponge. Check your progress. If staining remains, reapply the paste and extend the dwell time.
Some stains won’t come out completely even with repeated treatments. This happens when heat has permanently altered the brick surface or when soot has penetrated too deep into aged, very porous brick. Assess whether remaining faint shadows are acceptable or whether you need to consider professional methods like micro abrasive cleaning.
After all cleaning and stain treatment is complete, let the brick dry for at least 24 hours. Inspect under good lighting. Run your hand over the surface to check for residual grittiness or sticky spots that indicate cleaning solution wasn’t fully rinsed. If the brick feels tacky, do another rinse only pass with clean water.
Understanding Soot Types on Brick Surfaces

Soot isn’t just one thing. The black marks on your brick come from different sources, and each type has its own texture, adhesion level, and cleaning challenges. What burned, how hot it burned, and how long smoke contacted your brick all affect the residue you’re dealing with. Understanding these differences helps you pick the right cleaning approach instead of guessing.
Petroleum based fires from materials like diesel fuel, plastics, rubber, or synthetic fabrics create oily, sticky soot. This residue has a greasy feel and smears when you touch it. It clings tight to porous surfaces because the oil component penetrates into brick pores. You’ll often find this type of soot after house fires where modern furnishings burned, or in industrial settings with fuel spills or manufacturing fires. Petroleum soot requires degreasers or alkaline cleaners like TSP that can break down oil bonds. Simple water and scrubbing won’t cut it.
Wood fires, by contrast, leave fine powder residue. This soot is dry, dusty, and can often be brushed off more easily than petroleum soot. It comes from burning logs, construction lumber, paper, and natural materials. While it still stains brick, it doesn’t penetrate as deep because it lacks the oily carrier. Wood fire soot responds better to acidic cleaners like vinegar or even just vigorous scrubbing with water and mild detergent. It’s what you typically see in fireplaces and wood stoves with regular use.
Creosote is a specific tar like substance that builds up in chimneys and fireplaces from incomplete wood combustion. It’s dark brown to black, sticky, and highly flammable. Creosote forms in stages, from light flaky deposits to thick, hardened glazed layers. It requires specialized chimney cleaning and sometimes chemical creosote removers. Don’t confuse creosote with regular soot. It needs different treatment and can be a fire hazard if ignored.
Common soot sources in homes:
- Fireplace and wood stove use
- Candles, especially scented candles and those burned continuously
- Cooking grease and smoke, particularly from frying or grilling
- Tobacco smoke (rare as a primary source on brick but contributes to buildup)
- House fires or isolated fire events
- Improperly vented heating equipment
Knowing what created your soot helps you choose between gentle DIY cleaning and stronger methods. Light candle soot comes off with mild soap. Years of wood burning might need commercial cleaners or vinegar treatments. Petroleum based fire damage often requires professional assessment and techniques beyond standard homeowner methods. For severe smoke damage situations, professional evaluation ensures both visible soot and hidden odor issues get addressed properly.
Brick Type Considerations for Soot Cleaning
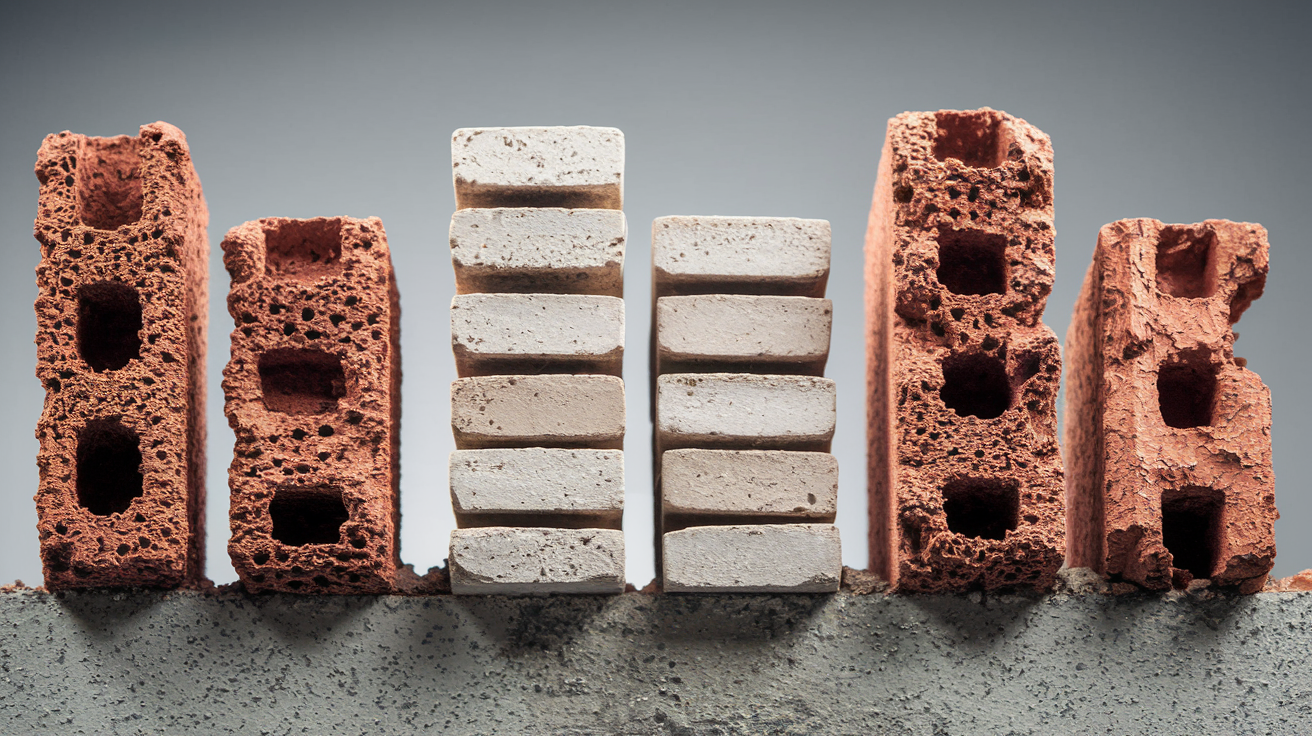
Not all brick responds the same way to cleaning. Brick porosity affects how deep soot penetrates and how much moisture the surface can absorb during cleaning. Some brick has a tight, relatively smooth surface. Other brick, especially older styles or softer varieties, is highly porous with visible pits and texture. Porous brick lets soot, water, and cleaning solutions soak deeper, which means both staining and water damage risks increase.
Interior fireplace brick usually has different characteristics than exterior chimney brick. Interior brick often stays drier and develops different wear patterns. It might be sealed or painted. Exterior brick faces weather, freeze thaw cycles, and moisture that can make it more fragile or cause existing mortar deterioration. Liquid cleaning products can penetrate porous masonry and mortar, leading to material breakdown over time. Water that soaks in can cause efflorescence (white salt deposits), spalling (flaking), or mortar weakening, especially in cold climates where trapped moisture freezes.
Aged brick and old mortar joints require extra caution. Historic brick might be softer or more fragile than modern materials. Mortar joints in older structures can be lime based rather than modern Portland cement, and lime mortar is more vulnerable to erosion from aggressive scrubbing or harsh chemicals. If your brick is decades old and mortar crumbles when you press it, limit moisture exposure and avoid high pressure methods.
New brick and fresh mortar are generally more durable but can still absorb water and chemicals. Even though they’re stronger, it’s still smart to use the gentlest effective cleaning method. Chemical peelers work better on smooth surfaces but can be challenging to remove from brick pores once they harden.
Before cleaning the entire surface, always test your chosen cleaning solution on an inconspicuous spot. Pick an area behind furniture, in a corner, or on the side of the chimney that doesn’t face the main room. Apply the cleaner, scrub gently, rinse, and wait 24 hours. Check for discoloration, surface softening, or unexpected reactions. This test step takes only a few minutes but can save you from damaging visible areas.
Limit how much liquid you use, especially on porous or aged brick. Work in small sections, apply solution sparingly, and rinse promptly. Don’t let cleaning solutions sit for extended periods beyond recommended dwell times. Avoid saturating brick to the point where liquid runs down the surface or pools at the base.
Pressure Washing Brick: When and How to Use This Method

Pressure washing can remove soot from brick, but it’s risky if done wrong. Brick is particularly susceptible to water absorption and subsequent damage from high pressure water. Using too much pressure or the wrong technique drives water deep into porous masonry and mortar joints, leading to long term problems like efflorescence, mold growth inside walls, and mortar erosion. Approach pressure washing as a last resort method for exterior brick and skip it entirely for interior surfaces.
If you do pressure wash brick, use low to moderate pressure settings. Stay between 500 and 1,000 PSI for most residential brick cleaning. Heavy duty commercial settings might go to 1,500 PSI, but only with proper training and the right equipment. Use a wide angle nozzle (25 to 40 degrees) that spreads the water stream over a larger area instead of concentrating force in one spot. Hold the nozzle at least 12 to 18 inches from the brick surface. Test pressure and distance on a hidden area first. Keep the wand moving in steady, even passes rather than focusing spray in one spot, which can gouge mortar or etch brick.
Add a cleaning solution designed for pressure washers if soot is greasy or heavy. Pre treat stubborn areas with a brush and cleaner, let it dwell, then rinse with the pressure washer at low setting. This two step approach reduces the pressure needed.
Situations when pressure washing should be avoided:
- Interior fireplace walls or indoor brick surfaces
- Brick with old, crumbling, or lime based mortar joints
- Painted or sealed brick (pressure can strip protective coatings)
- Porous or aged brick prone to water absorption
- Cold weather when trapped moisture could freeze and cause spalling
- Historic or antique brick that may not withstand water force
- Areas near windows, doors, or other openings where water can enter the structure
Water damage from pressure washing often doesn’t show up immediately. Moisture trapped inside brick or behind mortar joints can cause efflorescence weeks or months later when salts migrate to the surface as the brick dries. Repeated saturation weakens mortar and leads to joint failure, requiring expensive repointing work. In cold climates, water that doesn’t fully dry before freezing can cause cracking and spalling.
Residential pressure washing requires awareness. Dirty water full of soot, chemicals, and loosened debris runs off into landscaping, storm drains, or foundations. Use containment barriers if possible, and be aware of local regulations about wastewater disposal, especially if you’ve added chemicals to the wash water.
Preventing Future Soot Buildup on Brick
Repeated deep cleaning wears on both you and your brick. Prevention strategies reduce how often you’ll need to scrub soot and keep your fireplace or brick surfaces looking cleaner longer. Small maintenance steps and protective measures make future cleaning faster when it is needed.
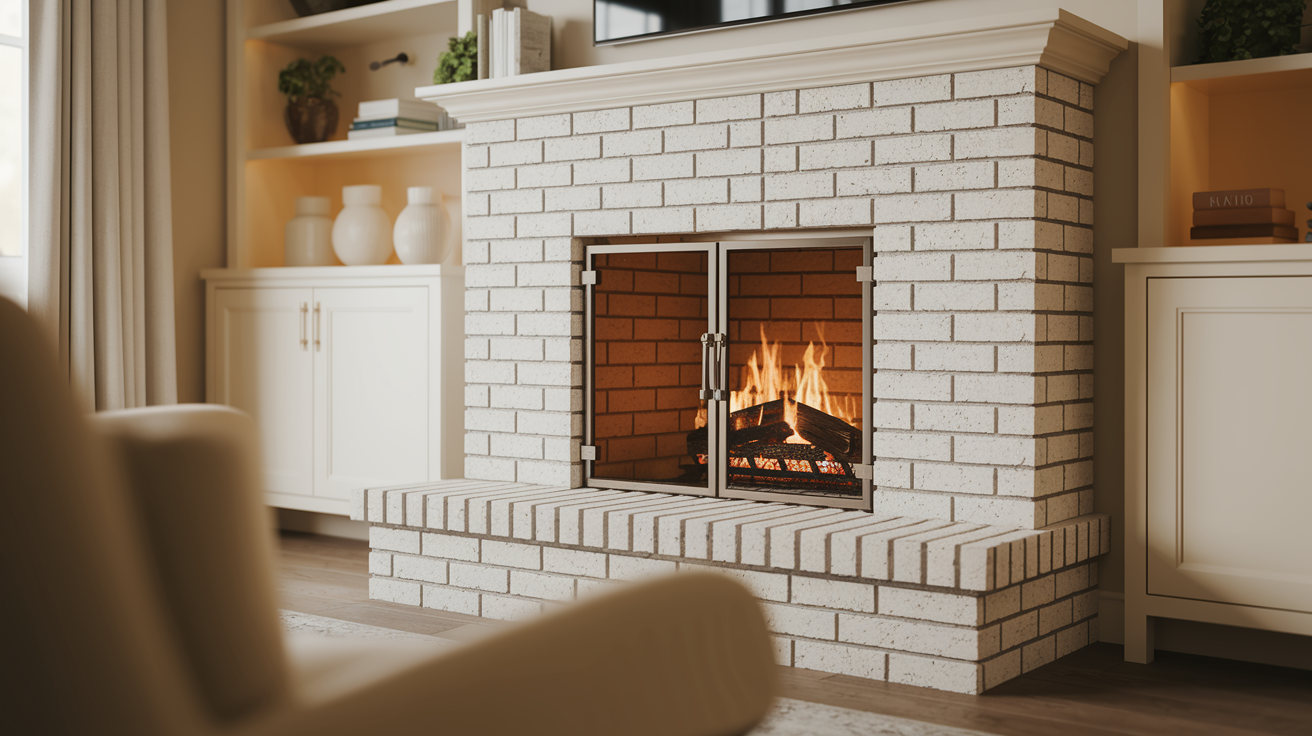
Installing fireplace doors or a mesh screen creates a physical barrier between flames and your brick surround. Fireplace doors prevent shooting flames and embers from escaping while also blocking much of the smoke and soot from depositing on outer bricks. Glass doors need cleaning themselves, but wiping glass is faster than scrubbing brick. Mesh screens provide some protection while maintaining better airflow for the fire.
Brick sealants and protective coatings act as a barrier between the brick surface and soot particles. High quality masonry sealers penetrate slightly into the brick, creating a water and stain resistant layer that makes it harder for soot to stick. When soot does accumulate, it sits on the sealer rather than in brick pores, so it wipes off more easily. Clear sealers maintain the natural brick appearance. Applied properly, a sealer can last several years before needing reapplication. Some homeowners paint fireplace brick with heat resistant paint. Paint also acts as a barrier, though it changes the appearance and requires more surface preparation than a clear sealer.
Maintenance practices to minimize soot:
- Burn only dry, seasoned hardwood with moisture content below 20%
- Avoid burning treated lumber, trash, wrapping paper, or materials that create excess smoke
- Keep a hot, efficient fire rather than smoldering, smoky fires
- Schedule annual chimney inspections and cleanings to remove creosote before it becomes severe
- Clean light soot deposits monthly during active burning season before they become thick layers
- Use proper fire building techniques with adequate airflow
- Keep damper open fully when burning to ensure good draft
Regular light cleaning prevents buildup from becoming severe. Wipe down fireplace brick every few weeks during burning season with a dry cloth or soft brush. This removes fresh soot before it bonds to the surface. When you catch it early, often a simple wipe down is enough, and you can skip deep chemical cleaning for years.
Protective treatments and regular maintenance work together. Even with a sealer, you’ll still need periodic cleaning, but the effort required drops significantly. An unsealed, neglected fireplace might need aggressive TSP scrubbing every year. A sealed fireplace with regular light cleaning might go several years before needing more than a quick wash with mild soap.
Professional Soot Removal Services: When to Call Experts

DIY methods handle most routine fireplace and candle soot in homes, but some situations call for professional restoration services. Knowing when your soot problem exceeds DIY capabilities saves you time, prevents damage from ineffective attempts, and ensures safety when hazardous materials are involved. Wood beams and masonry surfaces like concrete and brick can frequently be cleaned if structurally sound after fires, but that assessment and cleaning often requires professional equipment and expertise.
Professional cleaning makes sense when the soot covers large areas, when it resulted from a house fire rather than normal fireplace use, or when DIY attempts have failed. Professionals bring industrial grade equipment, specialized chemicals, and techniques not available to homeowners.
Situations requiring professional soot removal:
- Extensive fire damage affecting multiple rooms or large exterior areas
- Structural concerns such as damaged brick, compromised mortar, or hidden fire damage
- Presence of hazardous materials like asbestos in older homes or toxic residues from burned synthetics
- Historical or antique brick requiring preservation appropriate methods
- Commercial properties, rental units, or buildings where liability and code compliance matter
- Inaccessible areas like tall chimneys, high exterior walls, or confined spaces
- Multiple failed DIY cleaning attempts that didn’t remove soot or caused new problems
- Insurance claims requiring documentation, estimates, and certified restoration work
Professional services use methods beyond standard scrubbing and chemical application. Sponge Blasting with micro abrasive Sponge Media is a dry cleaning option that eliminates liquid runoff concerns while achieving production rates exceeding 100 square feet per nozzle hour for soot removal. This technique works well for industrial applications and large residential projects. Professionals also have access to HEPA filtration systems, containment setups, chemical neutralizers, and protective coatings applied after cleaning.
Professional assessment includes more than just soot visibility. Technicians check for smoke odor embedded in porous materials, hidden soot in HVAC systems or wall cavities, and structural issues masked by surface deposits. They can determine whether brick is salvageable or if sections need replacement. For fire damage restoration, comprehensive evaluation covers everything from initial stabilization through final finish work.
Cost for professional soot removal varies widely based on square footage, soot severity, brick type, and access difficulty. Expect basic fireplace cleaning to start around a few hundred dollars for straightforward jobs. Whole house or commercial fire restoration runs into thousands or tens of thousands depending on scope. Get multiple estimates and ask about methods, timeline, and what’s included.
Typical professional projects follow a pattern. Assessment and testing, containment setup to prevent spreading soot during cleaning, methodical cleaning using appropriate techniques for your specific soot and brick type, disposal of contaminated materials, and final inspection. Timeline depends on severity but can range from a single day for a fireplace to weeks for major fire restoration. Professionals coordinate with insurance adjusters when claims are involved and provide documentation throughout the process.
Final Words
The right cleaning solution and method make all the difference when tackling soot removal from brick.
Match your approach to the soot type and brick condition you’re dealing with. Light dusting responds well to simple vinegar and baking soda, while heavy creosote buildup needs stronger solutions like TSP or commercial cleaners.
Test first. Work carefully. Protect the mortar.
Most homeowners can handle routine fireplace cleaning with the step-by-step methods covered here. But when you’re facing widespread smoke damage, structural concerns, or stains that won’t budge after multiple attempts, that’s when professional help makes sense.
Either way, you’re protecting your home and keeping those brick surfaces looking clean and functional.
FAQ
What cleans soot off brick?
TSP (trisodium phosphate), vinegar and baking soda mixtures, commercial brick cleaners, and dish soap solutions all clean soot off brick surfaces. The best choice depends on soot severity, with TSP handling heavy buildup and vinegar working well for lighter deposits on most masonry surfaces.
How do you remove black soot off brick?
You remove black soot off brick by applying your chosen cleaning solution, letting it soak for 10 minutes, scrubbing in circular motions with a stiff brush, and rinsing with warm water and a sponge. Stubborn stains may need baking soda paste left on overnight before scrubbing.
Does Dawn dish soap remove soot?
Dawn dish soap removes light to moderate soot when mixed with warm water and applied with a scrub brush. It works as a biodegradable degreaser option for fresh soot deposits but may need multiple applications or stronger solutions like TSP for heavy, set-in carbon buildup.
Does TSP remove soot from brick?
TSP removes soot from brick effectively by cutting through heavy grease, carbon buildup, and creosote when mixed with water. This strong alkaline compound requires rubber gloves, goggles, and proper ventilation during use, but handles severe fire residue that lighter cleaners can’t tackle.
When should you call professionals instead of cleaning soot yourself?
You should call professionals for extensive fire damage, structural concerns, inaccessible chimney areas, historical brick restoration, failed DIY attempts, or when insurance claims require documentation. Professional services use industrial equipment like micro-abrasive sponge blasting that exceeds 100 square feet per hour without liquid runoff.
How do you prevent soot buildup on brick after cleaning?
You prevent soot buildup by installing fireplace doors to block flying embers, applying brick sealant as a protective barrier, burning only dry seasoned wood, maintaining proper ventilation, and scheduling annual chimney inspections. Regular light cleaning beats waiting for heavy deposits that penetrate deep into porous surfaces.
What’s the difference between oily soot and powdery soot on brick?
Oily soot from petroleum-based fires like plastics or diesel fuel adheres stubbornly and needs degreasers, while powdery soot from wood fires sits lighter on surfaces and responds well to vinegar or baking soda solutions. Matching your cleaning method to the soot type saves time and prevents brick damage.
Can pressure washing damage brick when removing soot?
Pressure washing can damage brick by forcing water deep into porous masonry, weakening mortar joints, causing efflorescence, and breaking down older bricks. Avoid pressure washing on interior walls, aged mortar, painted surfaces, or during cold weather when freeze-thaw cycles accelerate deterioration.
How long should a fireplace cool before cleaning soot off brick?
A fireplace should cool for at least 12 hours before cleaning soot to ensure safe handling and comfortable working conditions. Starting too early risks burns from residual heat in brick and ash, making protective equipment uncomfortable and reducing cleaning effectiveness on warm surfaces.
What tools do you need for cleaning soot off brick?
You need a stiff scrub brush, sponge, spray bottle, bucket, microfiber cloth, old towels, vacuum, broom and dustpan, your chosen cleaning solution, rubber gloves, and safety goggles. For high areas, add a stable ladder, and protect floors with drop cloths or plastic sheeting before starting work.