

You’re staring up at a wet spot spreading across your ceiling right now, aren’t you? Water dripping from above isn’t just messy. It’s a signal that something’s actively breaking down in your home, and the clock’s running. The good news is that most ceiling leaks follow predictable patterns, and if you act fast, you can stop the damage before it spreads into walls, insulation, or floors. This guide walks you through the emergency response, finding the real source, drying it right, and repairing it so it blends back into your ceiling like nothing happened.
Emergency Response: Stopping Active Ceiling Leaks
When you spot water dripping from your ceiling, the next few minutes matter.
-
Shut off electricity to the affected area immediately. Flip the breaker for that room and any rooms directly above to prevent electrocution from water contacting wiring or fixtures.
-
Place buckets or containers beneath active drips. Protect your flooring and catch as much water as possible to reduce damage spread.
-
Carefully puncture bulging ceiling sections at the lowest point. Use a screwdriver to create a controlled drainage point if you see water pooling behind the ceiling. This prevents sudden collapse and gives you control over where the water goes.
-
Shut off the main water supply if you suspect plumbing issues. If the leak seems connected to pipes, toilets, or water heaters, stop the water flow at the source until you can identify the problem.
-
Move furniture and valuables away from the leak area. Protect belongings from water damage and clear the space for repair work.
-
Photograph and video all damage thoroughly. Document every stain, drip point, and affected area for insurance claims before you start any cleanup.
-
Call emergency services if needed. Severe leaks with structural concerns or signs of ceiling collapse require immediate professional attention.
Major pipe bursts with significant flooding demand emergency plumber calls right away. But if you’ve contained a smaller leak with buckets and the main shutoff, you can typically schedule a regular service call during business hours without risking further damage.
Identifying Leak Sources and Common Causes Behind Ceiling Water Damage

Finding the actual source of your ceiling leak matters more than patching the visible damage.
Start by inspecting the ceiling for water stains, discoloration, and brown spots that show where water’s coming through. Then trace the water path backward to its highest point, since water travels along joists, pipes, and structural members before it drips down. Check the spaces directly above the damage, including upstairs bathrooms, plumbing fixtures, and attic areas. Water can travel several feet horizontally before appearing on your ceiling, so the leak source often sits far from the stain. Look for moisture along joists and framing by feeling for dampness or using your phone’s flashlight to spot wet areas that reflect light differently.
Common causes break down into five main categories.
Roof damage includes missing or damaged shingles, flashing failure around chimneys and vent pipes, extreme weather and storm damage, and ice dams in winter climates that force water under shingles.
Plumbing issues cover burst pipes from freezing or age, leaking supply lines to fixtures, faulty pipe fittings and connections, and water heater failures or overflow.
HVAC problems involve clogged condensate drain lines that overflow, malfunctioning AC units leaking internally, and damaged or disconnected ductwork allowing condensation buildup.
Bathroom related leaks stem from failed seals around bathtubs and shower pans, deteriorated toilet wax rings, damaged grout and caulking letting water through tile, and overflowing fixtures from clogs or valve failures.
Condensation issues develop from poor attic ventilation trapping moisture, excessive indoor humidity creating condensation on cold surfaces, and dryer vent condensation problems when vents terminate in attics.
The visible ceiling damage location rarely matches the actual leak source exactly. Water follows the path of least resistance, running along structural members, pipes, and electrical lines before finding a weak point to drip through. You might see a stain near a light fixture, but the actual leak could be three feet away at a plumbing stack or roof penetration. Check thoroughly above the stain and work outward in a grid pattern.
Seasonal causes require different repair approaches. Ice dams form when heat escapes through your roof, melting snow that refreezes at the cold eave edge and backs water under shingles. Storm damage from high winds can lift shingles and tear flashing, creating immediate leak points that won’t appear until the next rain.
Drying and Preparing the Ceiling After Stopping the Leak
Thorough drying prevents mold growth and structural deterioration that turn a manageable repair into a major restoration.
Repairs on wet materials will fail. Drywall stays soft, joint compound won’t bond properly, and paint peels off damp surfaces within weeks. More important, moisture trapped behind ceiling materials creates ideal conditions for mold growth within 24 to 48 hours. Addressing early signs like soft protrusions, stained spots, and peeling paint prevents the damage from spreading into structural members and insulation.
Drying techniques include positioning fans to maximize airflow across wet areas, angling them to create circulation rather than just blowing at one spot. Use dehumidifiers in enclosed rooms to pull moisture from the air and materials. Open ceiling sections by removing damaged drywall to allow airflow behind the surface. Protect floors and furniture with tarps since water will continue dripping and debris will fall during drying. Monitor moisture levels by touch and appearance, checking daily until materials feel completely dry. Check framing and insulation above the ceiling for hidden moisture.
Minor leaks from small drips can air dry on their own if you catch them fast and the saturation’s limited. But large leaks require removing ceiling sections to increase airflow and prevent microbial growth behind drywall where you can’t see it developing. If water soaked through insulation or pooled on top of the ceiling, you need section removal and probably professional dehumidification equipment.
Expect 24 to 72 hours of drying time depending on how saturated the materials got. Touching the area should feel completely dry, not cool or slightly damp. Wood framing should look its normal color, not dark from moisture. Insulation should feel fluffy, not matted or heavy.
Removing Damaged Ceiling Materials Safely

Assess the damage severity first to determine if you need partial or complete section removal.
Start by protecting your work area. Lay tarps across floors and move furniture clear since debris and remaining water will fall when you cut into the ceiling.
Wear safety gear including gloves, safety goggles, and a mask rated for dust and potential mold spores before starting any cutting or scraping.
Use a utility knife to score cut lines, marking straight lines to the nearest joists on both sides of the damage for clean removal and easier patching.
Employ a keyhole saw for drywall removal. This pointed saw punches through the ceiling and cuts controlled sections better than trying to rip or tear materials down.
Check insulation condition by pulling back insulation above the damaged area and removing any that’s wet, compressed, or shows signs of mold growth since it won’t dry properly.
Dispose of damaged materials properly by bagging moldy or heavily water damaged materials in contractor bags and removing them from your home immediately to prevent spore spread.
Peeling or bulging areas can sometimes be scraped off without cutting out entire sections. If the drywall stayed mostly firm and only the paint or paper facing is damaged, use a putty knife to scrape loose material and feather the edges. But if the drywall feels soft, spongy, or crumbles when you press it, cut that section back to solid material.
Mold appears as black, green, or brown fuzzy growth or staining. Clean small amounts (less than 10 square feet) with a mixture of water and detergent or use a commercial mold remover. Scrub the affected framing and let it dry completely. Larger mold contamination or growth inside wall cavities requires professional assessment since disturbing it releases spores throughout your home.
Step by Step Ceiling Repair After Water Damage
The repair sequence moves from structural support through finished surface for lasting results.
Installing Structural Support and New Drywall
Cut the damaged drywall back to the nearest joists on both sides so you have solid framing to attach new material. Add 2×4 support pieces along the joists between the existing drywall edges to create backing for the patch. Screw these supports to the joists with 3 inch construction screws, positioning them so half the 2×4 sits behind the existing drywall and half extends into the opening.
Measure the opening and cut replacement drywall about 2 inches wider and longer than the hole. This gives you material to trim for an exact fit. Use a utility knife to score the face paper, snap the piece along the score line, then cut the back paper. Test fit the patch and trim as needed until it sits flush with the surrounding ceiling.
Secure the patch with drywall screws driven into the joists and support backing. Space screws every 7 to 8 inches around all edges and every 12 inches across the center of the patch. Drive screws slightly below the surface but don’t break the paper facing. The small dimples you create will fill with joint compound.
Applying Joint Compound and Finishing
Apply joint compound in thin coats rather than trying to fill everything at once. Your first coat covers the screw dimples and fills the seams where the patch meets the existing ceiling. Feather the edges by pressing the compound out beyond the repair area so the transition gradually disappears into the surrounding surface.
Let each coat dry completely, which takes about 24 hours depending on temperature and humidity. Add a second coat that extends slightly wider than the first, feathering further out. A third coat might be needed for larger repairs to build up a perfectly smooth transition.
After the final coat dries fully, sand smooth with fine grit sandpaper (150 to 220 grit). Sand lightly to avoid creating depressions in the soft compound. Wipe away dust with a damp cloth and inspect the surface from different angles to catch any ridges or bumps that need touch up.
Match your existing ceiling texture before priming. Smooth ceilings need no texture work. Knockdown texture requires spraying texture material and lightly flattening the peaks with a trowel. Popcorn texture gets sprayed on and left to dry without further work. Practice your texture technique on scrap material first since matching existing texture takes some trial and adjustment.
Priming and Painting the Repaired Ceiling Area

Primer seals repaired drywall and prevents future stains from bleeding through the finish paint.
Use a stain blocking primer specifically designed for water damage. Regular primer won’t stop tannins and staining from old water marks from eventually showing through your paint. Apply primer with a roller, covering the entire repaired area plus a few inches beyond to ensure complete sealing. Let it dry according to the product directions, usually 1 to 2 hours.
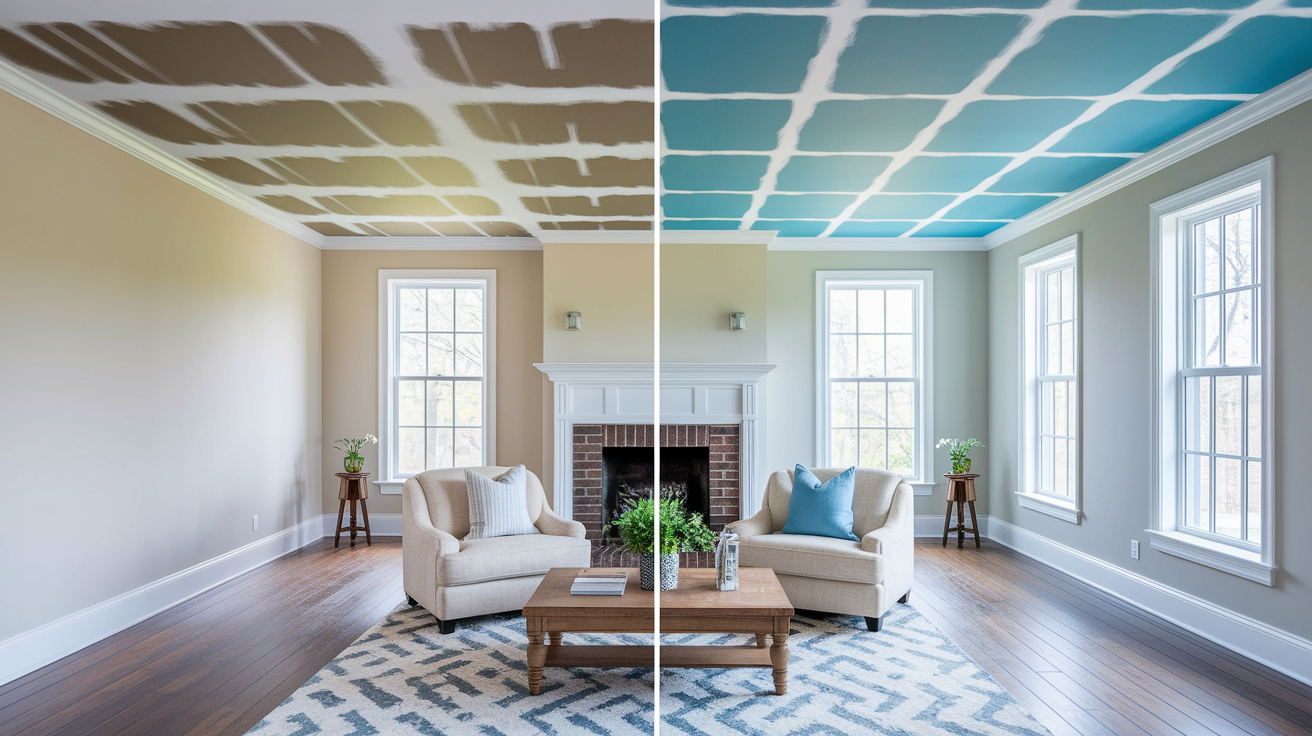
Paint matching presents a real challenge because aged paint rarely matches perfectly even when you use the same color from the original can. Paint changes color over time from sunlight exposure, smoke, dust, and normal aging. What looked bright white five years ago might now read as cream or gray white. If you try to patch paint just the repair, you’ll often see a distinct difference between the new paint and the surrounding ceiling.
Consider repainting the entire ceiling for uniform appearance. Yes, it adds work and cost, but the result looks professional rather than showing an obvious patch. If the repair sits in a corner or area where slight color variation won’t be noticeable, spot painting works fine.
Painting best practices for ceiling repairs start with opening windows for ventilation since primer and paint fumes concentrate in enclosed spaces. Use quality ceiling paint formulated to minimize drips and provide good coverage. Apply two coats for even coverage, letting the first coat dry completely before adding the second. Use proper roller technique with light, even pressure to avoid lap marks where wet paint overlaps dry. Allow adequate drying time between coats, typically 2 to 4 hours depending on humidity and temperature.
Repair Costs and What Affects Your Final Bill

Costs vary widely based on the leak source, damage extent, and whether repairs are DIY or professional.
Small repairs you handle yourself cost mainly materials plus your time. Larger damage or repairs requiring specialized skills push costs up significantly when you hire licensed contractors. Getting the work done right the first time usually costs less than attempting DIY repairs that fail and then calling professionals to fix both the original problem and your repair attempt.
| Repair Type | Typical Cost Range | Factors |
|---|---|---|
| Minor drywall patching | $150 – $400 | Materials and small area, simple texture match |
| Moderate ceiling section replacement | $400 – $1,200 | Drywall, texture, paint for 25-50 sq ft area |
| Extensive damage repair | $1,200 – $3,500 | Structural work, insulation, large areas, multiple rooms |
| Plumbing leak repair | $200 – $1,000 | Depends on pipe location, access difficulty, extent |
| Roof leak repair | $300 – $1,500 | Roof type, leak location, shingle availability |
| Mold remediation | $500 – $3,000 | Contamination extent, location accessibility, testing |
| Complete professional restoration | $2,000 – $8,000+ | Water mitigation, structural repairs, full finishing |
Cost factors that affect your final bill include square footage of damaged ceiling, ceiling height and accessibility (vaulted ceilings cost more), structural repairs needed beyond drywall, mold presence requiring remediation, material matching requirements for older homes, and labor rates in your specific region which vary significantly between rural areas and major cities.
Get multiple written quotes from licensed contractors to ensure competitive pricing and clear scope. Detailed quotes should break down materials, labor, and any additional work discovered during repairs rather than giving one lump sum. This transparency helps you compare apples to apples and understand exactly what you’re paying for.
Insurance Claims and Ceiling Leak Damage Coverage

Homeowners insurance typically covers sudden and accidental water damage like burst pipes or storm damage, but not gradual damage from neglected maintenance.
Steps for filing a claim start with documenting damage immediately. Take comprehensive photos and videos showing all affected areas, stains, sagging, and moisture damage from multiple angles.
Contact your insurance company within 24 to 48 hours of discovering the leak since many policies require prompt reporting.
Prevent further damage with temporary fixes like tarps and buckets because insurers require you to mitigate losses.
Keep all receipts for emergency repairs, materials purchased, and temporary accommodations if needed.
Meet with the insurance adjuster and provide full access to damaged areas so they can assess the extent accurately.
Obtain detailed repair estimates from multiple licensed contractors with itemized costs broken down by labor, materials, and specific repairs.
Provide the adjuster with contractor estimates and all documentation of the damage progression.
Understand your deductible amount and coverage limits before proceeding with repairs so you know your out of pocket costs.
Common coverage exclusions catch many homeowners by surprise. Flooding from external water sources requires separate flood insurance that standard homeowners policies don’t include. Long term leaks from deferred maintenance get denied because insurance covers accidents, not neglect. Mold growth beyond the initial 72 hour period often has limited coverage or exclusions. Damage from normal wear and tear, aging roofs past their expected lifespan, or failing to maintain plumbing systems typically doesn’t qualify for coverage.
Home warranty coverage differs from homeowners insurance and might apply to appliance related leaks like water heater failures or dishwasher overflows. Check your warranty terms since they typically cover mechanical breakdowns but exclude damage to surrounding structures.
DIY Repairs vs. Hiring Professional Contractors

Weigh your skill level, time availability, and damage extent against potential cost savings.
| Repair Scenario | DIY Appropriate? | Professional Recommended |
|---|---|---|
| Small water stain with no structural damage | Yes, simple patching and painting | Not necessary unless you want perfect results |
| Moderate drywall replacement under 10 sq ft | Maybe, requires basic drywall skills | Consider if you lack experience or time |
| Extensive damage over 25 sq ft | No, too large for most DIYers | Yes, professional efficiency and quality matter |
| Active plumbing leak | No, requires proper diagnosis | Yes, licensed plumber needed |
| Roof leak identification and repair | No, safety and expertise required | Yes, roofer for proper weatherproofing |
| Mold contamination beyond surface level | No, health risks and containment needed | Yes, remediation specialist required |
Different professionals handle different leak aspects. Call a plumber first for leaks from upstairs bathrooms, visible pipe leaks, or water heater issues. Contact a roofer if the leak happened after rain or storms to inspect for missing shingles, damaged flashing, or compromised roof penetrations. Hire a handyman or general contractor after the leak source is fixed to repair drywall, replace damaged insulation or framing, and refinish ceiling surfaces with proper texture and paint.
Verify contractor credentials before hiring anyone. Check that they carry current licensing required in your state for their trade. Confirm they have liability insurance and workers compensation coverage so you’re protected if someone gets hurt or property gets damaged during the work. Read reviews on multiple platforms to spot patterns in quality and customer service. Get at least three written estimates that detail the scope, materials, labor costs, and timeline. Ask about warranties on the work performed, which should cover both materials and workmanship for at least one year. Confirm they’ll follow local building codes and pull permits if required for structural or plumbing work.
Timeline expectations differ significantly. Professional contractors often complete ceiling repairs in 3 to 5 days depending on drying time and damage extent. DIY repairs stretch over several weekends as you work around your schedule, learn techniques, and wait for materials and coats to dry.
Mold Risks and Remediation After Ceiling Water Damage
Mold can begin growing within 24 to 48 hours of water exposure, making fast drying critical for prevention.
Health risks from mold exposure include respiratory issues like coughing and wheezing, allergic reactions including sneezing and rashes, and particular dangers for children, elderly people, and anyone with compromised immune systems or existing respiratory conditions. Mold releases spores into the air that you breathe, and some mold types produce mycotoxins that cause more severe reactions. The musty odor often indicates mold growth even before you see visible growth.
Mold prevention strategies start with drying affected areas completely within 24 to 72 hours before mold can establish colonies. Remove wet insulation and porous materials like ceiling tiles that stay damp and can’t be effectively dried. Use dehumidifiers to maintain indoor humidity below 50 percent during and after drying. Apply antimicrobial treatments to affected framing and structural materials after they dry. Install UV lights in prone areas like HVAC systems to prohibit future mold growth. Ensure proper ventilation after repairs by running fans and opening windows regularly.
DIY mold cleanup works for small surface areas under 10 square feet where you can see the full extent of growth. Clean these areas with a detergent solution (dish soap and water) or commercial mold removers, scrubbing thoroughly and letting surfaces dry completely. Wear gloves, goggles, and an N95 mask during cleaning to protect yourself from spore exposure.
Professional remediation becomes necessary for extensive growth, hidden mold behind walls or above ceilings where you can’t access it easily, or contamination of HVAC systems that would spread spores throughout your home. Professionals use containment barriers, negative air pressure, specialized cleaning agents, and proper disposal procedures that prevent cross contamination. They also identify and address the moisture source that allowed mold growth so it doesn’t return.
Air quality testing confirms that mold spore levels are safe after remediation. While testing isn’t always required, it provides documentation for insurance claims and peace of mind that the remediation worked completely. Tests measure spore counts inside your home compared to outdoor baseline levels to determine if indoor contamination exists.
Preventing Future Ceiling Leaks and Water Damage
Prevention is more cost effective than repairs, protecting both your home and your budget long term.
Schedule annual roof inspections and post storm checks. Have a roofer examine shingles, flashing, and seals every year, and call for inspection after major storms with high winds or hail that could damage roofing materials.
Clean gutters and downspouts at least twice yearly. Remove leaves and debris in spring and fall to prevent overflow that backs up under roof edges or saturates walls.
Inspect and maintain plumbing fixtures regularly. Check under sinks, around toilets, and near water heaters for small leaks, corrosion, or moisture that indicates developing problems.
Address small leaks immediately before they worsen. A drip you ignore today becomes a flood tomorrow when the fitting finally fails completely.
Insulate pipes in unheated areas to prevent freezing and bursts. Wrap exposed pipes in basements, crawl spaces, and exterior walls with foam insulation before winter.
Clear HVAC condensate lines with a wet/dry vacuum. Suction from the drain outlet removes clogs before they cause overflow into ceiling spaces.
Maintain indoor humidity at 30 to 50 percent with hygrometer monitoring. Use dehumidifiers in summer and humidifiers in winter to prevent condensation on cold surfaces.
Apply waterproof sealant around windows and doors. Caulk gaps and cracks where water could penetrate during storms.
Install water leak detection devices near water heaters and in basements. These alarms alert you to leaks before significant damage occurs.
Check bathroom caulking and grout annually for deterioration. Recaulk tubs and showers when you notice gaps or cracking that could let water through tile and into ceiling cavities below.
Seasonal maintenance tasks prevent specific leak causes. Spring roof inspections after winter damage identify lifted shingles and ice dam damage before spring rains. Summer AC condensate line checks prevent overflow from increased air conditioning use. Fall gutter cleaning before leaves accumulate stops the most common cause of overflow. Winter pipe insulation checks protect against the freeze thaw cycle that bursts pipes.
The long term value of preventive maintenance protects your property value and avoids major repair expenses. Spending a few hundred dollars annually on inspections and basic maintenance prevents thousand dollar emergency repairs and the stress of dealing with active leaks and water damage.
Final Words
Water leak in ceiling repair moves through clear phases: stop the water, dry everything thoroughly, remove damaged materials, rebuild the structure, and finish it right.
Most ceiling leak repairs succeed when you address the source first, then handle the visible damage. Rushed repairs over wet materials always fail.
If the damage extends beyond a small patch, or if you’re seeing signs of mold or structural issues, call professionals who can assess what’s hidden and coordinate the full repair sequence.
Your ceiling can look normal again. It just takes the right order, enough drying time, and attention to matching textures and paint at the end.
FAQ
What to do if water leaks through your ceiling?
When water leaks through your ceiling, immediately shut off electricity to the affected area to prevent electrocution, place buckets under active drips, and identify the water source by checking upstairs plumbing or your roof.
How much would it cost to fix a water damaged ceiling?
Water damaged ceiling repair costs typically range from $150-$400 for minor patching, $400-$1,200 for moderate section replacement, and $1,200-$3,500 for extensive damage including structural work and insulation replacement.
Is ceiling water damage covered by insurance?
Ceiling water damage is typically covered by homeowners insurance when caused by sudden accidents like burst pipes or storm damage, but not for gradual damage from neglected maintenance or long-term leaks.
Can a wet drywall ceiling be saved?
A wet drywall ceiling can be saved if dried thoroughly within 24-72 hours and shows no sagging, crumbling, or mold growth, but severely saturated or bulging sections require complete replacement to prevent collapse.
How long does it take to dry a water damaged ceiling?
Drying a water damaged ceiling typically takes 24-72 hours depending on saturation level, with fans, dehumidifiers, and proper airflow required for thorough drying before repairs can begin safely.
When should I call a professional for ceiling leak repairs?
Call a professional for ceiling leak repairs when damage exceeds 25 square feet, involves active plumbing or roof leaks, shows mold growth beyond surface level, or requires structural repairs you can’t safely complete.
What causes brown spots on ceilings after water damage?
Brown spots on ceilings after water damage are caused by dissolved minerals, rust, or tannins from building materials mixing with water, requiring stain-blocking primer before painting to prevent bleed-through.
How do I prevent mold after a ceiling leak?
Prevent mold after a ceiling leak by drying affected areas completely within 24-48 hours, removing wet insulation, using dehumidifiers to maintain humidity below 50%, and ensuring proper ventilation throughout the repair process.
Should I puncture a bulging wet ceiling?
Puncture a bulging wet ceiling carefully at its lowest point with a screwdriver to allow controlled drainage, preventing sudden collapse that could cause injury or additional damage to your home and belongings.
What professionals fix different types of ceiling leaks?
Licensed plumbers fix pipe-related ceiling leaks, roofers handle storm damage and shingle issues, and general contractors or handymen repair drywall and finish work after the leak source is properly fixed.