

You can’t just slap sealant on wet basement walls and call it fixed. If you don’t figure out where the water’s coming from and why it’s getting in, you’ll waste money covering up problems that keep getting worse behind your fresh coating. Real waterproofing means identifying the actual source, preparing surfaces the right way, and using products that match your specific moisture situation. Here’s how to seal basement walls so water actually stays out.
Diagnosing Water Problems and Preparing for Basement Wall Sealing

You can’t fix what you haven’t diagnosed correctly. Figuring out where water’s coming in and why it’s getting in tells you what sealing approach will actually work. Seal your walls when the real problem is bad drainage outside or water pressure from below, and you’re just delaying damage without fixing anything.
Look for water stains running down walls, efflorescence (the white powdery stuff on concrete), mold in corners, peeling paint. Less obvious signs include musty smells even when walls look dry, warped or buckled sections, rusting metal supports or rotting beams, chipped or cracked concrete. Water doesn’t always show up where it’s actually entering. It runs downhill inside foundation walls before you see it on the interior surface.
How to inspect systematically:
-
Check for active leaks when it rains. Walk your basement during heavy rain or right after to see where water shows up first and whether it’s dripping, seeping through, or pooling.
-
Look at wall floor joints for seepage. The cove joint where walls meet floors is a common entry point, especially in block foundations where water travels through those hollow cores.
-
Inspect cracks and gaps. Note the size, location, and direction of each one. Vertical cracks usually mean settling, horizontal cracks suggest pressure problems, and stair step cracks in block walls point to foundation movement.
-
Look for efflorescence patterns. That white powder marks where water evaporates and leaves mineral deposits behind, showing you the water’s path through the concrete.
-
Do the aluminum foil test. Tape a 1 foot square of foil to the wall for 24 hours. If the wall facing side is damp when you pull it off, water’s penetrating from outside. If the room facing side is damp, you’ve got a condensation problem.
-
Test moisture levels in multiple spots. Check different heights on the wall and several locations across the basement to map out the moisture pattern.
What you discover during inspection determines what you actually need to fix. Hydrostatic pressure from groundwater pushes against foundation walls, especially after heavy rain or in areas with high water tables. This pressure forces water through any opening it can find. Exterior drainage failures are common culprits. Clogged gutters overflow and pour water directly against the house, bad grading directs water toward the foundation instead of away from it, and missing downspout extensions dump roof water right at the foundation. Structural issues create pathways: settlement cracks from soil movement, foundation cracks from aging concrete, gaps at wall floor joints. Condensation from high humidity is a separate interior moisture source that won’t respond to exterior waterproofing at all.
What to do immediately based on what you find:
Clear gutters completely and extend downspouts 4 to 6 feet from the house so roof water drains away from the foundation. Check that your yard slopes away from the foundation. Water should flow away, not toward the house. Note crack sizes and locations to figure out the right repair methods (hairline cracks need different treatment than structural cracks). Determine if water is active pressure requiring drainage systems or moisture vapor that sealing can handle. Identify whether DIY sealing will be enough for your situation or if you need professional drainage systems, foundation repair, or exterior waterproofing. Document the moisture pattern with photos showing where water appears, when it appears, and how much accumulates.
Complete Step by Step Guide to Sealing Basement Walls
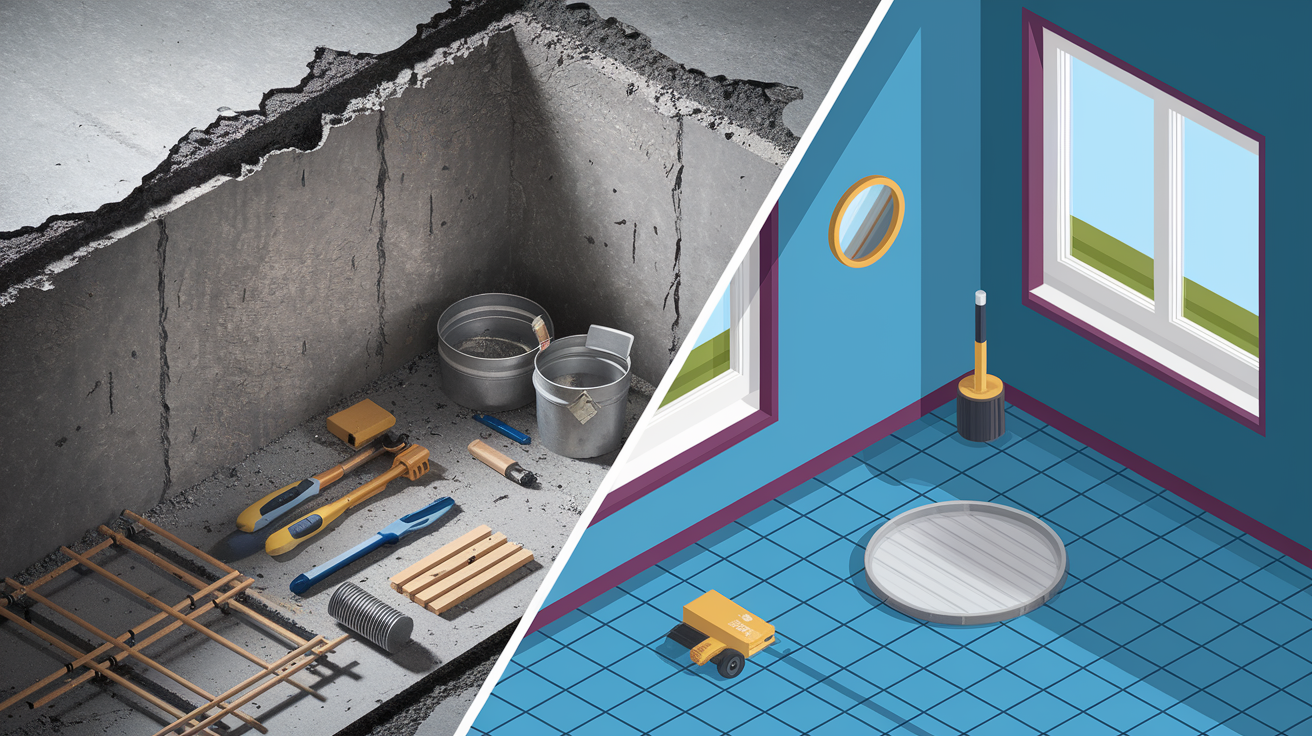
This process assumes no active water intrusion requiring drainage systems. It’s appropriate for preventative sealing or addressing minor to moderate moisture issues on interior basement walls.
Phase 1: Workspace Preparation
-
Clear the workspace and protect floors. Move furniture, storage boxes, and anything within 4 feet of the walls. Lay plastic sheeting on floors to catch drips and debris during cleaning and repair.
-
Get proper ventilation going. Open doors and windows or set up fans to create airflow. Chemical products release fumes, and proper ventilation prevents buildup while helping surfaces dry faster.
-
Gather all your tools and materials. You’ll need a wire brush or sandblaster for removing old coatings, muriatic acid (mix 1 part acid to 4 parts water), protective equipment including chemical resistant gloves, safety goggles, and respirator mask, mixing bucket, hydraulic cement, masonry caulk designed for concrete, putty knife, trowel, 3/4 inch nap roller, high quality nylon bristle brush, and your chosen waterproof sealer or coating.
Phase 2: Surface Preparation
-
Remove all old paint, coatings, and loose material. Use a wire brush or sandblaster until bare concrete is exposed. Waterproofing products won’t bond to painted or coated surfaces. Scrub hard until you’re down to clean concrete.
-
Clean walls thoroughly and treat efflorescence. Scrub the entire surface with a wire brush to remove dirt, dust, and mineral deposits. Mix your muriatic acid solution (1 part acid to 4 parts water, and always add acid to water, never water to acid). Apply the solution to efflorescence covered areas, let it sit for a few minutes, then rinse thoroughly with clean water. The acid dissolves mineral deposits that would prevent sealer adhesion.
-
Allow complete drying for 24 to 48 hours. Damp concrete won’t accept most sealers properly. Run fans and dehumidifiers if needed to speed drying, especially in humid conditions.
Phase 3: Crack and Gap Repair
-
Fill hairline cracks (less than 1/4 inch). Use masonry caulk designed for concrete. Cut the tube tip to create a 1/16 inch opening, then run a steady bead along each crack, pressing firmly to make sure the caulk fills the entire gap.
-
Repair larger cracks (1/4 inch to 1/2 inch) with hydraulic cement. First, chisel the crack into a V shape to widen it slightly. This gives the cement something to grip. Dampen the crack surface with water (wet the concrete but don’t leave standing water). Mix small batches of hydraulic cement according to manufacturer instructions. It sets in 3 to 5 minutes, so work fast.
-
Apply hydraulic cement quickly and firmly. Press the mixed cement into the crack with a putty knife, starting from the bottom and working upward. Push hard to get rid of air pockets. Smooth the surface with a trowel before it sets. If you’re dealing with an active leak, the fast setting hydraulic cement will harden even under water pressure.
-
Seal windows and doors, then allow crack repairs to cure. Apply polyurethane caulking around window frames and door frames to seal any gaps. Let all crack repairs cure completely, typically 24 hours, but check the manufacturer instructions for your specific products.
Phase 4: Sealer Application
-
Choose your waterproofing product. Penetrating silicate based sealers soak into concrete and form a chemical moisture barrier below the surface, allowing the concrete to breathe. Acrylic waterproof coatings create a surface film that blocks water but can trap moisture if applied over damp concrete. Match the product to your moisture situation.
-
Mix waterproofing product thoroughly. Follow manufacturer instructions exactly. Stir from the bottom of the container to make sure pigments and solids are evenly distributed. Pour into a roller tray if using a roller.
-
Apply first coat. Use a 3/4 inch nap roller for large wall areas or a high quality nylon bristle brush for detail work around obstacles. Work in 4 foot sections, maintaining a wet edge to avoid lap marks. Make sure you get even coverage without puddles or missed spots. You should see consistent color and texture across the entire surface.
-
Wait for first coat to dry, then apply second coat. Wait 2 to 4 hours between coats (check manufacturer specifications, some products need longer). Apply the second coat in the opposite direction from the first coat. If you rolled vertically for coat one, roll horizontally for coat two. This makes sure you get complete coverage. Minimum two coats are required for proper waterproofing and hydrostatic pressure protection.
-
Apply optional third coat for maximum protection. In high moisture areas or where groundwater pressure is a concern, a third coat adds extra protection. Again, apply in the opposite direction from the previous coat.
-
Allow final curing period. Typically 24 to 48 hours before the sealer reaches full strength. Don’t return belongings to the basement until curing is complete. Walk the sealed area and inspect for uniform coverage, missed spots, or thin areas that need touch up.
Interior Drainage Solutions for Basement Waterproofing

Sealing walls alone won’t solve problems caused by hydrostatic pressure. When groundwater pushes against foundation walls, it’ll find any weak point: a crack, a cold joint, a porous section of concrete. Drainage systems relieve that pressure before water reaches the walls.
Interior French drain systems get installed at the wall floor joint, also called the cove joint. A contractor cuts a channel in the concrete floor along the perimeter, installs perforated pipe, and covers it with drainage stone. Water that seeps through the wall or up through the floor flows into this channel instead of spreading across your basement. The system directs collected water to a sump basket.
Sump pumps collect water from drainage systems and pump it away from the foundation through discharge pipes that empty at least 10 feet from the house. The pump sits in a sump basket (a hole dug below the basement floor level), and when water reaches a certain level, a float switch activates the pump. Battery backup systems keep the pump running during power outages, which often happen during the storms that cause flooding. For homeowners budgeting drainage solutions, understanding sump pump repair costs helps with long term maintenance planning.
Drainage becomes necessary when you’ve got high water tables that keep the soil around your foundation constantly saturated, seasonal flooding that overwhelms your foundation’s ability to resist water, consistent groundwater seepage that reappears no matter how many times you seal walls, or situations where exterior excavation isn’t doable because of landscaping, driveways, or adjacent structures. Professional drainage system installation typically goes along with interior waterproofing for complete protection rather than treating just the symptoms.
Installing Vapor Barriers on Basement Walls

Vapor barriers are polyethylene sheets or specialized membranes that prevent moisture vapor transmission through walls. They’re often confused with waterproofing, but they serve a different purpose. Think of it this way: waterproofing stops liquid water from coming through your foundation. Vapor barriers stop water vapor (moisture in the air) from passing through walls and condensing inside wall cavities or on cold surfaces.
The installation process involves attaching the barrier material to clean, dry walls using mechanical fasteners or adhesive, depending on the product. Seams between sheets must overlap by at least 6 inches and get sealed with specialized tape. The bottom edge needs special attention. You either run it down to the floor and seal it, or you create a small channel that directs any condensation to your drainage system. The top edge gets sealed against the rim joist. Any penetrations (pipes, electrical boxes, windows) require careful sealing to maintain the vapor barrier’s effectiveness.
Vapor barriers work best in specific situations: unfinished basements where you’re not planning immediate finishing work, before you frame walls and add insulation (trapping moisture inside a finished wall cavity causes mold and rot), and combined with dehumidifiers to control overall basement humidity. They’re appropriate for condensation issues, when moisture in humid air contacts cold concrete and forms water droplets. But vapor barriers won’t stop hydrostatic pressure from groundwater, won’t prevent active leaks through foundation cracks, and can actually trap water if installed over damp walls without addressing the moisture source. If your foil test showed moisture coming from outside, a vapor barrier alone won’t fix it.
Exterior Waterproofing Methods for Foundation Walls

Exterior waterproofing stops water at the source, outside the foundation, rather than managing it after it penetrates. It’s the most permanent solution because it prevents water from ever contacting the interior foundation surface. Instead of waiting for water to seep through and then trying to manage it, you block it before it enters.
The excavation process requires digging down to the footer level around the entire foundation perimeter. Heavy equipment removes soil 4 to 6 feet away from the foundation wall, exposing it completely from top to bottom. This is major work that tears up landscaping, may require temporary removal of decks or patios, and takes 1 to 2 weeks depending on house size and site access.
Once walls are exposed, contractors pressure wash them clean, inspect for structural damage, and repair any cracks or deterioration. Then they apply a rubberized membrane or polymer modified coating that bonds directly to the concrete and creates a waterproof barrier. A drainage board (a dimpled plastic sheet) installs over the membrane to create an air gap and provide a path for water to flow downward. At the bottom, contractors install or repair footer drains, perforated pipes that collect water and direct it away to daylight or a collection system. Finally, they backfill with drainage stone near the foundation and topsoil toward the surface, restoring grade to slope away from the house.
When exterior waterproofing is necessary:
New construction or major renovation when the foundation is already exposed. Recurring interior waterproofing failures where sealed walls continue to leak. Structural damage to the foundation requiring exterior access for repair. Consistently wet basement despite interior drainage systems and wall sealing. Bowing or cracked walls from exterior soil pressure that needs addressing at the source. Finishing your basement for living space and wanting the best long term protection before investing in the interior.
Choosing the Right Waterproofing Products for Your Basement

Several factors determine the right product for your situation. The severity of moisture matters. Mild condensation needs different treatment than active seepage. Wall type makes a difference: poured concrete walls are solid and accept penetrating sealers well, while concrete block walls have hollow cores and mortar joints that may need surface forming products. Whether walls are painted or bare affects product selection, since some sealers require direct contact with concrete. Budget constraints matter too, as products range from $30 per gallon acrylic paints to $80 per gallon epoxy systems.
Product compatibility determines success or failure. Some products require completely bare concrete and won’t bond over any existing coating. Others work over previously painted surfaces if the paint is sound. Some products are breathable, allowing water vapor to pass through while blocking liquid water. Others create vapor barriers that trap moisture. Using a breathable sealer over a non breathable base coat traps water between layers, causing peeling and failure.
| Product Type | Best For | Application Surface | Lifespan |
|---|---|---|---|
| Silicate based sealer | Penetrating protection, breathable barrier, mild to moderate moisture | Bare concrete only | 10 to 15 years |
| Acrylic waterproof paint | Surface coating, minor moisture, easy DIY application | Bare or painted concrete | 5 to 10 years |
| Epoxy coating | High moisture areas, strong durable barrier, finished look | Bare concrete, requires thorough prep | 10 to 20 years |
| Hydraulic cement | Active leaks, crack repair, emergency patches | Damp or dry concrete | Permanent (for crack repair) |
| Polyurethane sealant | Crack filling, joint sealing, flexible applications | Concrete, masonry, around windows | 10 to 20 years |
| Crystalline waterproofing | Extreme moisture, chemical reaction with concrete, professional application | Bare concrete only | Lifetime of structure |
DIY Basement Wall Sealing vs. Professional Waterproofing

Making the right choice between DIY and professional help prevents wasted time and money on solutions that won’t work. DIY makes sense for straightforward preventative work. Professional help becomes necessary when the problem exceeds simple moisture control.
When DIY Basement Wall Sealing Works
DIY basement wall sealing works when moisture issues are minor and localized. A small damp spot that appears after heavy rain, light efflorescence in one area, or preventative sealing before moisture becomes a problem. An unfinished basement with easy wall access makes DIY practical. You can move around freely, you’re not tearing out finished materials, and mistakes don’t damage living space. Visible small cracks (less than 1/4 inch wide) that aren’t structural respond well to DIY repair with masonry caulk or hydraulic cement. If you see no signs of structural damage, no bowing walls, no horizontal cracks, no separation at wall floor joints, DIY sealing is reasonable.
You need time to do the work properly. Surface preparation alone takes a full day for a typical basement. Add crack repair time and multiple coats with drying time between, and you’re looking at 3 to 4 days total. Basic skills matter: comfort using power tools, ability to follow product instructions precisely, and willingness to work safely with chemical products. You’ll be using muriatic acid solutions, working in tight spaces with limited ventilation, and applying products that release strong fumes.
When to Call a Professional Waterproofing Contractor
Call a professional when water problems keep coming back despite your DIY attempts. If you’ve sealed walls twice and water still appears in the same spot, the problem is beyond surface sealing. Structural cracks or bowing walls indicate foundation problems that need engineering assessment and repair, not just cosmetic sealing. Active leaks during rain, water actually flowing or dripping, mean you have hydrostatic pressure that sealing alone won’t fix.
Mold covering more than 10 square feet suggests a serious moisture problem and potential health hazard requiring professional remediation. High water table conditions in your area mean groundwater constantly pushes against your foundation, and you need drainage systems to relieve that pressure. A finished basement requiring tearout to access walls changes the cost calculation. You’re not just sealing walls, you’re removing and replacing drywall, insulation, trim, and flooring. Installation of interior drainage systems, sump pumps, or exterior waterproofing requires equipment and expertise beyond typical DIY capabilities. Understanding the water damage restoration process helps you recognize when you’re dealing with serious water damage situations that need professional intervention. Foundation repair requirements like crack injection, wall stabilization, or underpinning are structural issues that only licensed contractors should handle.
Maintaining Sealed Basement Walls and Preventing Future Problems

Sealed basement walls aren’t “set and forget.” Regular inspection and maintenance prevent small issues from becoming major problems. Catching a hairline crack when it first appears takes 5 minutes and $10 of caulk. Ignoring it until it’s a structural crack costs thousands in foundation repair.
Interior basement waterproofing treatments typically last about 10 years, though actual longevity depends on exterior drainage conditions and soil type. Sandy, well draining soil puts less pressure on foundations than heavy clay that stays saturated. Homes with proper gutters, downspouts, and yard grading see longer sealer life than homes where water constantly pools against the foundation.
A twice yearly inspection routine catches problems early. Spring inspections (after snow melt and spring rain) and fall inspections (before winter freeze thaw cycles) work well. Check the entire foundation for new cracks, especially at wall floor joints and around windows. Look for water intrusion signs: dampness, staining, or efflorescence that wasn’t there before. Examine sealed surfaces for peeling, bubbling, or areas where the coating is wearing thin. Run your hand along walls to feel for temperature changes or dampness that’s not visible.
Preventative maintenance tasks:
Keep gutters and downspouts clear of leaves, debris, and winter ice dams that cause overflow directly against the foundation. Maintain proper yard grading with soil sloped away from the foundation at least 6 inches over 10 feet. Extend downspouts 4 to 6 feet from the house, or connect them to underground drain lines that empty away from the foundation. Run a dehumidifier during humid summer months to control condensation, keeping basement humidity below 50%. Make sure basement ventilation through windows, vents, or mechanical systems exchanges stale air. Address plumbing leaks right away before water accumulates in walls or floors. Monitor for efflorescence return, which signals that water is still finding a way through despite sealing.
Common Basement Wall Sealing Mistakes to Avoid

Waterproofing failures usually result from preparation shortcuts or applying the wrong solution to the problem. The sealer itself might be fine, but poor execution or misdiagnosis guarantees failure.
Common mistakes that cause waterproofing failure:
Sealing over painted or dirty surfaces without proper preparation. Waterproofing products bond to concrete, not to paint or dirt. If you seal over existing coatings, the new sealer bonds to the old paint, which then peels away from the concrete, taking your new waterproofing with it. Complete removal of old coatings is non negotiable.
Skipping efflorescence treatment. Those white mineral deposits create a barrier between concrete and sealer. Products won’t bond properly over efflorescence. The minerals need removal with acid washing and wire brushing before sealer application.
Not allowing adequate drying time between steps. Concrete needs 24 to 48 hours to dry after cleaning and acid treatment. Between sealer coats, you need 2 to 4 hours minimum. Rushing means the next layer doesn’t bond properly and traps moisture between coats.
Using surface sealers to stop active water pressure. If water is actively pushing through your foundation from groundwater pressure, a coating on the interior surface is like putting a band aid on a puncture wound. The pressure will find weak spots and force water through. Active pressure requires drainage systems to relieve it, not just surface sealing.
Rushing hydraulic cement application. Hydraulic cement sets in 3 to 5 minutes. If you mix a large batch, it’ll harden in your mixing bucket before you can apply it. Mix small batches, work quickly, and don’t try to speed the process by adding water to cement that’s starting to set.
Applying only one coat when two minimum are required. A single coat leaves thin spots, pinholes, and incomplete coverage. Two coats applied in opposite directions (vertical then horizontal) make sure every spot gets covered properly. Trying to save money by skipping the second coat guarantees early failure.
Ignoring exterior drainage problems. Sealing interior walls while clogged gutters dump water against your foundation, or while your yard slopes toward the house, means you’re treating symptoms while the cause continues. Fix drainage first, then seal walls.
Treating symptoms without identifying the water source. Seeing dampness on walls and immediately grabbing sealer without testing whether it’s condensation, groundwater seepage, or a leaking pipe means you might be sealing for the wrong problem. The foil test and systematic inspection identify the actual source.
Attempting DIY fixes for structural foundation problems. Horizontal cracks, bowing walls, or major foundation movement require engineering evaluation and proper structural repair. Surface sealing over structural damage is dangerous and won’t work.
Cost and Time Estimates for Sealing Basement Walls

DIY costs are primarily materials: sealers, hydraulic cement, brushes, rollers, safety equipment. Professional costs include labor, equipment, warranty coverage, and often drainage system installation. Understanding the investment helps you budget appropriately and compare DIY versus professional options.
A DIY sealing project for an average basement (800 to 1000 square feet of wall surface) requires roughly $200 to $400 in materials: waterproof sealer ($100 to $200), hydraulic cement ($30 to $50), masonry caulk ($20 to $30), wire brushes and cleaning supplies ($20 to $30), safety equipment if you don’t own it ($30 to $50), and rental of pressure washer or sandblaster if needed ($50 to $100). Your time investment typically spans 2 to 4 days including surface preparation (8 to 10 hours), crack repair (2 to 4 hours), and sealer application with drying time between coats (6 to 8 hours of actual work spread over 2 days).
Professional projects cost more but include expertise, equipment, labor, and warranties. Interior sealing by professionals costs $3 to $9 per square foot depending on wall condition and products used. More complex solutions increase costs significantly: interior drainage systems with sump pump installation run $3,000 to $8,000 depending on basement perimeter length and system complexity, exterior waterproofing with membrane application costs $8,000 to $15,000 for an average home, and full exterior waterproofing with excavation, membrane, drainage board, and footer drain replacement reaches $15,000 to $30,000 for extensive work.
| Project Type | Cost Range | Time Required | Lifespan |
|---|---|---|---|
| DIY interior sealing (materials only) | $200 to $400 | 2 to 4 days | 5 to 10 years |
| Professional interior waterproofing | $2,500 to $7,000 | 1 to 3 days | 10 years (typical warranty) |
| Interior drainage system with sump pump | $3,000 to $8,000 | 2 to 4 days | 20+ years (system), pump replacement every 7 to 10 years |
| Exterior waterproofing with membrane | $8,000 to $15,000 | 1 week | 10 to 15 years |
| Exterior waterproofing with full drainage system | $15,000 to $30,000 | 1 to 2 weeks | 25+ years |
Understanding Different Types of Basement Foundation Walls
Different foundation wall types affect waterproofing approach and product selection. What works perfectly on poured concrete might fail on concrete block walls, and older stone foundations present unique challenges.
Poured concrete walls are solid from outside to inside with no hollow spaces. They develop fewer entry points for water, typically only through cracks or cold joints where different concrete pours meet. They’re generally easier to seal because the surface is relatively smooth and uniform. Penetrating sealers work well on poured concrete because they can soak into the surface and react chemically with the concrete to form moisture barriers. The solid construction means that if you seal a crack properly, water can’t travel through hollow cores to appear somewhere else.
Concrete block walls have hollow cores that create pathways for water to travel inside the wall. Water that enters through one crack or mortar joint can run down inside the hollow blocks and appear at the floor level several feet away from the actual entry point. Mortar joints between blocks are vulnerable. They’re a different material than the blocks themselves, they can crack and shrink, and they’re often the path of least resistance for water. Block walls may require filling the cores with grout or foam before sealing to get rid of internal water pathways. Surface forming sealers (acrylics, epoxies) work better than penetrating sealers on block walls because you need to create a surface barrier that water can’t penetrate, rather than relying on chemical reactions within the concrete.
Older stone foundations present the biggest challenges. The stones are irregular shapes and sizes, creating an uneven surface that’s difficult to seal uniformly. Mortar joints are often wider than in block walls, and the lime based mortar used in old foundations deteriorates over time. These foundations often require professional assessment because the stone construction may be structurally compromised. Repointing (replacing deteriorated mortar) usually comes before sealing. Product compatibility is limited. Many modern sealers don’t bond well to old lime mortar or certain types of stone. Breathable products are essential because trapping moisture in old stone foundations speeds up deterioration.
When Basement Wall Sealing Requires Building Permits
Simple interior sealing and coating work typically doesn’t require permits. You’re applying a paint like product to your own basement walls for maintenance purposes, which falls under normal homeowner maintenance that building departments don’t regulate.
Permits become necessary when work affects structural elements or building systems. Structural foundation repairs, epoxy injection for cracks, carbon fiber reinforcement for bowing walls, underpinning to stabilize settling foundations, require permits and engineering approval in most jurisdictions. Adding sump pump systems requires permits if you’re installing new electrical circuits, cutting through foundation floors, or connecting discharge lines to municipal storm sewers. Modifying drainage that affects property boundaries needs permits: if your solution directs water onto a neighbor’s property or into municipal drainage systems, you need approval. Installing exterior drainage systems that alter lot grading may require permits to make sure water management complies with local stormwater management regulations.
The importance of hiring bonded and insured contractors applies even for work that doesn’t require permits. Bonding protects you if the contractor doesn’t complete work or damages your property. Insurance covers accidents or damage during the work. Check local building codes before starting major waterproofing projects, even if you believe permits aren’t required. Requirements vary significantly by jurisdiction, and assuming you don’t need permits can create problems when you sell the house if the buyer’s home inspector identifies unpermitted work.
Final Words
Sealing basement walls from water starts with accurate diagnosis and choosing the right approach for your situation.
Simple surface sealing handles minor moisture and prevents future issues. Active water pressure and structural problems need drainage systems or exterior waterproofing.
The work itself is straightforward when you prep properly, fill cracks completely, and apply coatings in multiple layers with full drying time between steps.
Keep gutters clear, inspect twice a year, and catch small problems before they spread. When you’re not sure or the water keeps coming back, bring in a professional to assess the foundation and drainage.
A dry basement protects your home and makes the space usable again.
FAQ
How do you stop water from seeping through basement walls?
You stop water from seeping through basement walls by first identifying the source: fixing exterior drainage issues like gutters and grading, repairing foundation cracks with hydraulic cement, sealing walls with waterproof coating, and installing interior drainage systems with sump pumps for persistent groundwater pressure.
Can you waterproof basement walls yourself?
You can waterproof basement walls yourself if moisture issues are minor and localized, walls are accessible, and you’re comfortable with basic prep work like cleaning surfaces, filling cracks, and applying multiple coats of sealer following manufacturer instructions for proper drying times.
Should concrete basement walls be sealed?
Concrete basement walls should be sealed to prevent moisture penetration, protect against efflorescence and mold growth, extend foundation lifespan, and create a dry living space, especially before finishing the basement or if you notice water stains or musty odors.
Can you waterproof basement walls from the inside?
You can waterproof basement walls from the inside using penetrating sealers or surface coatings for minor to moderate moisture issues, but interior sealing won’t solve problems caused by severe hydrostatic pressure, which requires exterior waterproofing or drainage systems.
What are the first signs that basement walls need sealing?
The first signs that basement walls need sealing include white powdery efflorescence on concrete, water stains or streaks, musty odors, peeling paint, visible mold growth, damp or warped drywall, and excessive condensation, with water often appearing away from actual entry points.
How long does basement wall sealing last?
Basement wall sealing typically lasts about 10 years for interior treatments, though lifespan varies based on exterior drainage quality, soil type, water table levels, and product quality, with professional exterior waterproofing systems often carrying 25-year warranties.
What’s the difference between waterproofing and damp proofing basement walls?
The difference between waterproofing and damp proofing is that waterproofing creates a complete barrier against liquid water and hydrostatic pressure using thick membranes or multi-coat systems, while damp proofing only resists moisture vapor with thinner coatings insufficient for active water intrusion.
When should you call a professional instead of DIY sealing?
You should call a professional instead of DIY sealing when you see recurring water problems despite previous attempts, structural cracks or bowing walls, active leaks during rain, mold exceeding 10 square feet, or need drainage system installation beyond simple surface sealing.
Do you need to remove old paint before sealing basement walls?
You need to remove old paint before sealing basement walls because waterproofing products require direct contact with bare concrete to bond properly and form effective moisture barriers, with wire brushes or sandblasters used to strip existing coatings completely.
What causes efflorescence on basement walls?
Efflorescence on basement walls is caused by water moving through concrete, dissolving mineral salts, and depositing them on the surface as white powdery residue when moisture evaporates, indicating active water penetration requiring treatment before sealing.
How many coats of waterproof sealer do basement walls need?
Basement walls need a minimum of two coats of waterproof sealer applied in opposite directions with 2-4 hours drying time between coats, with optional third coats providing maximum protection in high-moisture areas or below-grade walls facing hydrostatic pressure.
Can you seal basement walls with active leaks?
You can seal basement walls with active leaks using fast-setting hydraulic cement to stop immediate water flow under pressure, but permanent solutions require identifying and fixing the water source through improved drainage, foundation repair, or professional waterproofing systems.