

Think a fresh coat of paint will fix smoke-damaged rooms? Think again.
Paint hides stains. It doesn’t stop odor, soot, or wet walls.
After a fire, drywall, floors, trim, and cabinets often hold soot, heat damage, and water.
If you paint or install new finishes too soon, the problem comes back.
This post walks you through the Interior Finish Work After Fire Damage steps that actually work:
inspect for hidden moisture, clean and deodorize properly, confirm dryness with meters, then rebuild so the repairs last and your claim is documented.
Core Interior Finish Restoration Steps After a Fire

Interior finish work covers drywall, flooring, trim, paint, cabinetry, and ceilings. Everything that makes a room look and feel complete. After fire damage, those surfaces are usually covered in soot stains, smoke odor, heat damage, and water from firefighting hoses. You can’t start finishing until every contaminant is gone and every hidden problem is found and fixed.
The sequence matters because soot is acidic and corrodes surfaces within hours. Moisture left in wall cavities will grow mold in 24 to 48 hours. If you paint over smoke residue or install new flooring on damp subfloors, you’re locking in the problem. Restoration pros follow a strict order to prevent failure, recurring odors, and denied insurance claims.
Homeowners worry most about lingering smoke smells, hidden moisture they can’t see, and whether their home will ever feel normal again. The answer depends entirely on whether the restoration follows the proven steps, doesn’t skip deodorization, and verifies dryness with tools instead of guesses.
The six major finish restoration steps:
- Emergency stabilization and board up to stop weather intrusion and unauthorized entry.
- Water extraction within 24 to 48 hours using industrial pumps, air movers, and dehumidifiers.
- Soot and smoke residue removal with HEPA vacuums, chemical sponges, and air scrubbers.
- Odor neutralization using thermal fogging, ozone, or hydroxyl generators as conditions require.
- Cleaning and sanitizing all salvageable surfaces and contents before reconstruction begins.
- Structural repairs and interior finish restoration including drywall, paint, flooring, trim, and cabinetry.
HVAC duct cleaning happens between steps 4 and 5 to prevent odor recirculation once finishes are installed.
Interior Finish Damage Assessment and Planning After a Fire

Inspectors evaluate structural safety, moisture levels, smoke penetration depth, and finish material salvageability before any work begins. Moisture meters check wall cavities and subfloors for hidden water. Thermal imaging can reveal where smoke traveled through gaps in framing. Soot on surfaces may look like dust, but it’s chemically active and continues damaging paint, wood, and metal until it’s removed.
Photographic documentation comes first. Before you touch anything. Wide shots show room conditions. Close ups capture stains, warping, and corrosion. These photos become the foundation of your insurance claim and the project scope. Hard surfaces like tile, glass, and metal can often be cleaned and saved. Porous materials like drywall, insulation, carpet, and upholstered furniture absorb smoke and water deeply, and most need replacement.
Assessment checkpoints before finish work begins:
- Moisture readings inside walls, under flooring, and in ceilings to confirm full dryness.
- Smoke penetration depth in drywall, trim, cabinetry, and flooring materials.
- Structural safety of framing, load bearing walls, and ceiling joists after heat exposure.
- Finish material salvageability based on contamination level, cost to clean, and insurance coverage.
- Odor retention testing to determine whether surfaces still release smoke molecules after cleaning.
A formal scope of work lists every damaged finish, the repair method, and the estimated cost. This scope is used by the insurance adjuster, the project manager, and the trades doing the work. It keeps everyone aligned and prevents surprises when it’s time to close walls or order materials.
Cleaning, Soot Removal, and Odor Control Before Interior Finish Work

Soot must be removed before finish work starts because it’s acidic, sticky, and will bleed through paint if left behind. HEPA vacuums capture the fine particles without redistributing them into the air. Dry chemical sponges lift soot from painted walls and ceilings without smearing. Wet cleaning with specialized agents follows on washable surfaces. Standard household vacuums and cleaning products make the problem worse, spreading soot or locking odor into the finish.
Deodorization targets smoke molecules embedded in surfaces and floating in the air. Hydroxyl generators are safe to run while people are present and work slowly to break down odor compounds. Ozone machines oxidize odors faster but require full evacuation of the home, including pets, because ozone irritates lungs. Thermal fogging uses a heated deodorizer mist that penetrates porous pathways the same way smoke did, neutralizing odor at the source.
HVAC ducts must be cleaned before finish work or the system will recirculate smoke particles and odor every time the fan runs. Air scrubbers with HEPA filters capture airborne contaminants during the cleaning phase and continue running until air quality is verified. Encapsulation primers seal any remaining odor molecules into the substrate so they can’t off gas through new paint.
Essential safety considerations for odor removal procedures:
- Ozone treatment mandates complete evacuation including all occupants and pets for the duration of the process and airing out period.
- Hydroxyl generators may run while occupied, but prolonged direct exposure to the UV light source should be avoided.
- Thermal fogging requires temporary vacating due to visible fog and strong deodorizer concentration.
- Verify air quality and complete ventilation before returning to the home after any deodorization method.
Drywall, Plaster, and Ceiling Restoration After Fire Damage

Drywall absorbs water and smoke quickly. If firefighting hoses soaked a wall or ceiling, the gypsum core stays wet long after the surface feels dry. Moisture meters confirm when the material has returned to normal levels, typically 12 to 15 percent or lower depending on climate. If readings stay high, the drywall must be removed. Smoke stained drywall can sometimes be cleaned and sealed if it wasn’t exposed to heat or water, but full replacement is common in fire affected rooms.
Preparation includes removing damaged sections, clearing debris, and verifying that framing and insulation behind the wall are dry and structurally sound. Any charred wood gets cut back to solid material. Insulation that absorbed water or smoke is pulled and replaced. New drywall is hung, taped, and mudded in multiple coats. Dust control matters. Drywall dust spreads everywhere and can recontaminate cleaned surfaces if the work area isn’t contained.
Finishing steps include sanding joints smooth, priming all new drywall, and sealing smoke stained areas with a shellac or oil based primer before the final paint goes on. Plaster repairs follow a similar sequence but may require bonding agents and longer cure times between coats. Ceilings often show the most smoke damage because heat and smoke rise. Many ceilings need full replacement rather than patching.
| Material | Repair Type | When Recommended |
|---|---|---|
| Drywall | Full replacement | Water saturation, heavy smoke penetration, or heat damage present |
| Plaster | Patch and refinish | Structurally sound with minor smoke staining or isolated cracks |
| Ceilings | Full replacement or resurfacing | Heavy soot accumulation, sagging from water weight, or heat exposure |
| Insulation behind walls | Remove and replace | Any water contact, smoke saturation, or compression from heat |
Paint, Primers, and Surface Restoration After Smoke Damage
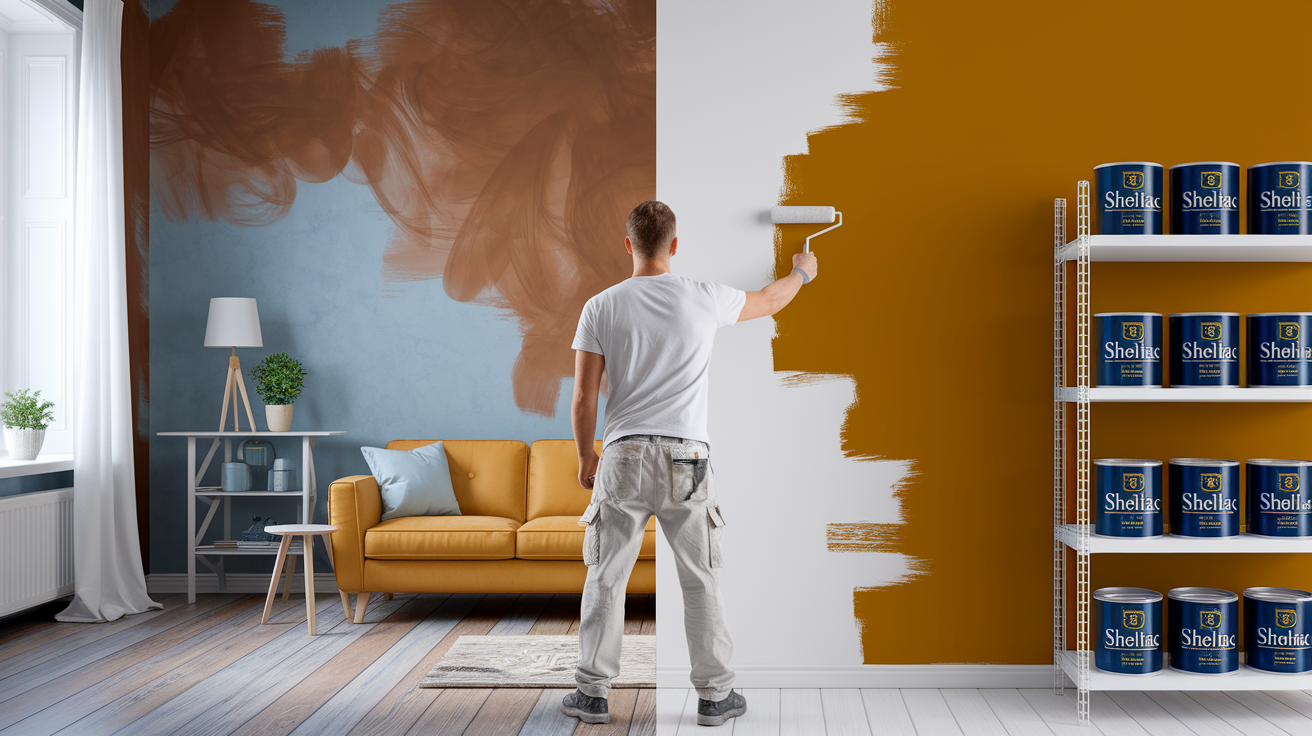
Smoke stains bleed through regular latex paint. You can apply three coats and the yellow or brown discoloration will still show up within days. Shellac based primers and oil based stain blocking primers create a barrier that locks in smoke residue and prevents odor molecules from migrating through the finish. These specialty primers are required on any surface that was exposed to smoke, even if the stain was cleaned off.
Homeowners make two common mistakes. The first is skipping the primer and going straight to paint because the wall looks clean. The second is using a standard primer instead of a smoke blocking formula. Both lead to recurring stains and smells. After the stain blocking primer is applied and fully cured, surfaces can be painted with any finish paint in the color of your choice.
Primer types for smoke and fire damage:
- Shellac based primer blocks heavy smoke stains and odors, dries fast, and requires denatured alcohol for cleanup.
- Oil based stain blocker is effective on soot and moderate smoke, has a longer dry time, and requires mineral spirits for cleanup.
- Specialty odor encapsulating coating seals porous substrates and traps odor causing molecules. It’s used on subfloors, framing, and heavily affected surfaces before drywall installation.
- Latex stain blocker may work on very light smoke exposure but isn’t recommended for structural fire damage.
Once sealed and painted, the surface should release no odor and show no discoloration. If staining reappears, it means the substrate wasn’t fully cleaned or the wrong primer was used.
Flooring, Trim, and Cabinet Restoration After Fire Damage

Firefighting water often damages flooring in layers you can’t see. Hardwood planks can cup, warp, or stain black from moisture. If the wood is solid and the subfloor dried properly, sanding and refinishing may restore the floor. Engineered wood and laminate absorb water in the core and typically can’t be saved. Vinyl flooring can look fine on top but trap moisture and mold underneath the sheet or planks.
Tile and grout can usually be cleaned unless the heat cracked the tiles or the adhesive failed. Grout is porous and holds smoke odor, so it may need sealing or replacement even if it looks intact. Carpet almost always needs replacement after fire and water exposure because the pad underneath holds moisture and smoke contamination that cleaning can’t fully remove.
Trim and baseboards get checked for smoke penetration and water damage. Painted trim can often be cleaned, sealed, and repainted. Stained wood trim may show permanent discoloration and require replacement. Baseboards near the floor usually absorbed the most water and are removed during the drying process. New baseboards go in after the flooring is finished.
Cabinetry depends on construction and contamination level. Solid wood cabinets with a hard finish can be cleaned and deodorized. Particle board or MDF cabinets that absorbed water or heavy smoke usually can’t be saved because they swell, off gas odor indefinitely, and lose structural integrity. Cabinet interiors, especially in kitchens near the fire, often need sealing or lining even if the exteriors look fine. Moisture in floor assemblies is the silent problem. Subfloors, floor joists, and underlayment all need verified dryness before new flooring is installed or you’ll deal with mold, squeaks, and finish failure within months.
HVAC, Air Quality, and Interior Environmental Safety After Fire Damage

HVAC ducts collect soot during a fire and distribute it through the house every time the system runs. Duct cleaning after fire damage isn’t optional. Professionals use negative pressure systems and HEPA filtered vacuums to remove debris without contaminating other areas. Supply and return vents are removed, cleaned, and often replaced if heavily stained. The blower assembly and evaporator coils are cleaned because smoke residue on those components reduces efficiency and releases odor.
Air scrubbers with HEPA filtration run during and after the cleaning phase to capture airborne particles. These machines pull air through multi stage filters that trap smoke particulates and some odor molecules. Deodorization methods target what the filters can’t catch, volatile organic compounds and odor molecules bonded to surfaces. Air quality testing measures particulate counts and sometimes VOC levels to verify the space is safe before final finishes and move in.
Post cleaning clearance checks before interior finish work is finalized:
- Particulate count readings to confirm air quality meets safe indoor standards.
- Visual inspection of HVAC system components including ducts, vents, and blower assembly for remaining soot or debris.
- Odor presence test by walking through the property after deodorization to identify any areas still releasing smoke smell.
Vents and grills are sometimes sealed with plastic during the cleaning and deodorization phases to prevent cross contamination between treated and untreated areas. Once air quality is verified and HVAC cleaning is complete, new filters are installed and the system is safe to run continuously.
Insurance, Documentation, and Cost Planning for Interior Finish Restoration

Insurance adjusters need proof of damage and a detailed scope of work to approve costs for interior finish restoration. Documentation starts the moment the fire is out. Before you touch anything. Take wide shots of every room and close ups of stains, warping, and damaged finishes. Video walk throughs capture details still images might miss. A written room by room inventory with estimated replacement values gives the adjuster a baseline for contents and finishes.
Adjusters determine coverage by comparing the scope of work to the policy limits and exclusions. Replacement cost policies pay the full cost to replace damaged finishes with new materials of similar quality. Actual cash value policies deduct depreciation, which can cut the payout significantly on older flooring, trim, and cabinets. Code upgrade coverage pays the difference when current building standards require more expensive materials or methods than what was originally installed.
Cost driven decisions happen when an item can be cleaned for less than replacement, but replacement makes more sense for long term durability and odor control. For example, cleaning and sealing smoke damaged cabinets might cost sixty percent of replacement, but new cabinets come with a warranty and no odor risk. Adjusters usually approve the more cost effective option if documentation supports it.
Four documentation steps that improve claim approval:
- Notify your insurer within 24 hours and get a claim number and adjuster contact before cleanup begins.
- Photograph all damaged finishes and contents from multiple angles, including close ups showing soot, staining, water lines, and warping.
- Create a written inventory listing each damaged item, the room it was in, and an estimated replacement cost or original purchase information.
- Request and save all invoices for emergency mitigation work such as board up, tarping, water extraction, and temporary power because these are typically reimbursable as mitigation expenses.
Pack out services that move contents to a secure, climate controlled location for cleaning and storage are usually covered when documented properly. The same applies to emergency board up and tarping. Those are mitigation costs, not repairs, and insurers expect to pay them when you act quickly to prevent further damage.
Timeline, Sequencing, and Contractor Coordination for Finish Work

Typical timelines break into three phases. Emergency mitigation, board up, water extraction, and initial stabilization happen within 24 to 72 hours. Active restoration, including cleaning, deodorization, and contents handling, runs one to four weeks for moderate damage. Structural repairs and finish work take four to twelve weeks depending on the size of the rebuild, permit requirements, and material lead times.
Material lead times vary. Standard drywall, paint, and trim are usually available within days. Custom cabinetry, specialty flooring, or tile can take weeks or months to order and deliver. Contractor coordination matters because drywall crews can’t start until framing is repaired, painters can’t work until drywall is finished, and flooring installers need clean, dry subfloors. One delay in the sequence pushes everything back.
Frequent communication prevents most delays. A project manager should provide a schedule with milestones and update it when conditions change. Homeowners need to know when selections are due. Paint colors, flooring samples, cabinet hardware. Waiting on a decision stops progress. Subcontractors rely on clear hand offs. The electrician needs walls open, the drywall crew needs wiring complete and inspected, the painter needs sanding finished and dust cleaned.
Five sequencing essentials to keep finish work moving:
- Complete all demolition and confirm full dryness before ordering finish materials or scheduling installation trades.
- Obtain required permits and schedule inspections early so walls can be closed on time without waiting for the building department.
- Coordinate material delivery dates with installer availability so flooring, cabinets, and trim arrive just before they’re needed, not weeks early.
- Finalize finish selections (paint, stain, hardware, fixtures) at least two weeks before installation to avoid delays waiting on homeowner decisions.
- Schedule a pre drywall walkthrough with the project manager to confirm all in wall work (plumbing, electrical, insulation) is complete and inspected before closing the walls.
Lead times for inspections, especially in jurisdictions that require permits for structural or electrical work, can add days or weeks. Plan for that buffer when setting expectations. The finish work moves quickly once the foundation is right, but rushing the sequence creates failures that cost more time and money to fix later.
Final Words
We pull out water, remove soot, and probe walls for hidden moisture before a single nail or paintbrush goes near your house.
This post walked through assessment, cleaning and deodorization, drywall and ceiling repair, priming and painting, flooring and trim work, HVAC cleaning, insurance documentation, and the typical timeline.
We measure dryness, seal smoke stains, document everything for claims, and coordinate trades so repairs aren’t guesswork.
When it’s time for interior finish work after fire damage, we rebuild carefully so your home feels safe and complete again.
FAQ
Q: How long do toxic fumes last after a fire?
A: Toxic fumes after a fire can linger for hours to weeks depending on fire size, materials burned, ventilation, and cleanup speed. Odors and hazardous gases often persist until ducts and surfaces are cleaned and ventilated.
Q: Can you paint over fire-damaged walls?
A: You can paint over fire-damaged walls only after soot removal, drying, and sealing with a shellac- or oil-based primer to block stains and odor; otherwise paint won’t hide stains or stop smells.
Q: Is anything salvageable after a fire?
A: Some items are salvageable after a fire: hard surfaces, metal fixtures, tile, and many contents can be cleaned and restored. Porous materials like carpets, soft furniture, and insulation often need replacement.
Q: How do professionals clean up after a fire?
A: Professionals clean up after a fire by stabilizing the site, documenting damage, extracting water, removing soot with HEPA vacuums and chemical sponges, deodorizing with hydroxyl/thermal or ozone when needed, and prepping for repairs.