

You can’t just slap paint over a ceiling leak and pretend it never happened. Water damage spreads through insulation, framing, and wiring you can’t see, weakening structure and creating conditions for unwanted moisture related growth. The good news? Most ceiling leak repairs follow a clear sequence any homeowner can understand: stop the water, find the source, dry it completely, remove damaged materials, patch properly, and finish clean. We’ll walk you through each step so you know exactly what needs to happen first and what a solid repair actually looks like.
Immediate Steps to Stop Active Ceiling Water Damage
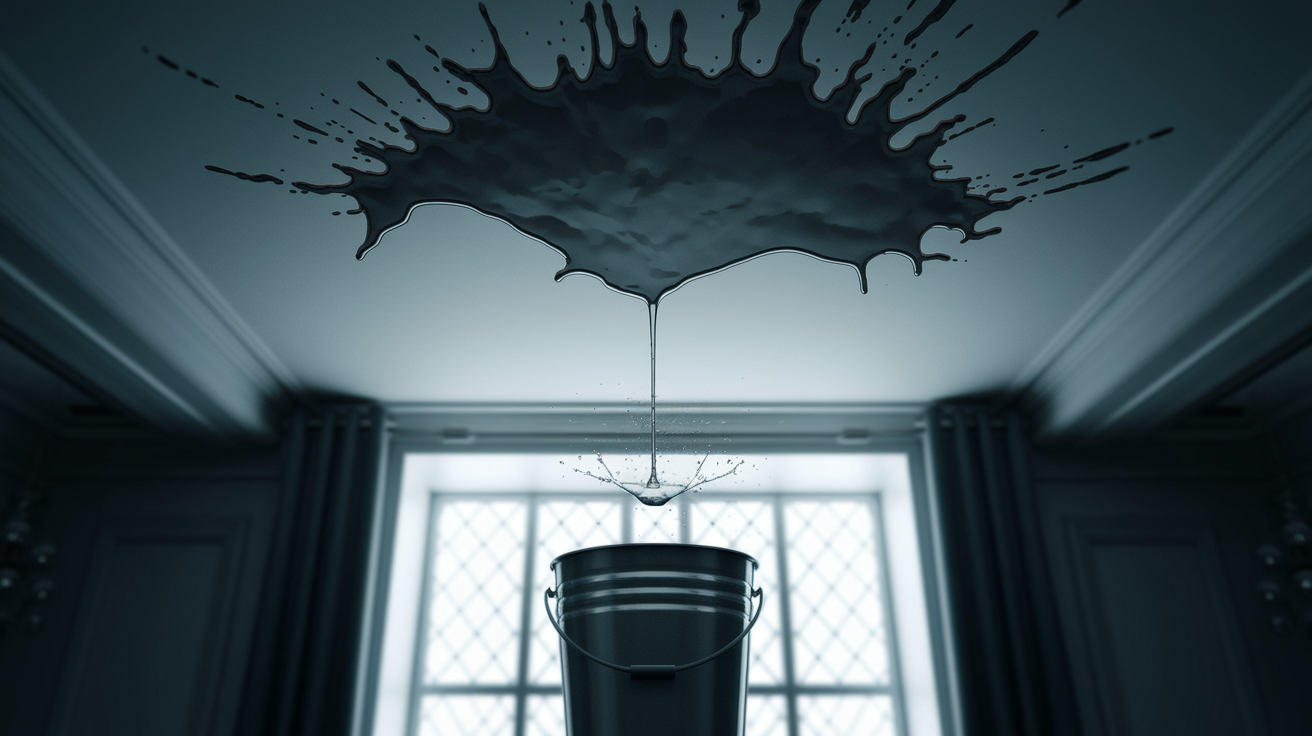
Water dripping from your ceiling or a dark, spreading stain overhead means you need to move right now. Every minute water soaks through your ceiling, it’s spreading into insulation, wiring, and framing you can’t see. The longer it sits, the more it weakens structure and creates conditions for unwanted moisture related growth behind drywall.
Active leaks create electrical hazards if water reaches light fixtures or outlets. The weight of pooling water can cause sudden ceiling collapse, dropping wet debris that could injure anyone below.
- Turn off electricity to affected rooms by flipping the breaker for that area
- Move furniture and valuables away from the leak area to protect them from dripping water and falling debris
- Place buckets and tarps to catch dripping water directly beneath visible leaks
- Create a controlled drainage point with screwdriver at leak center to prevent ceiling collapse. Push the screwdriver or awl into the bulging wet spot (away from framing boards where you can) to let trapped water drain into your bucket instead of spreading through more drywall
- Protect floors with drop cloths around the work area to catch splashes and debris
- Document the damage with photos for insurance from multiple angles showing extent and location
- For roof leaks, secure emergency tarp over damaged exterior area if you can safely access the roof
- Temporarily patch attic leaks with wooden planks or roofing tar if accessible to reduce water entry while arranging permanent repairs
These emergency steps buy you time while you figure out where the water’s actually coming from. Water travels, sometimes several feet along joists or rafters before it finally drips through. What looks like a bathroom leak might actually be roof damage twenty feet away. You need Emergency Water Damage Restoration Services right away if you’re dealing with large amounts of water, spreading stains across multiple ceiling sections, or if the ceiling’s sagging noticeably.
Don’t rely on temporary exterior patches for more than a few days. That tarp on your roof or the roofing tar in your attic stops water temporarily but won’t hold up to weather. These fixes give you breathing room to schedule proper repairs, not solutions you can ignore for weeks.
Locating the Source of Your Ceiling Leak

The wet spot on your ceiling is rarely right below the actual problem. Water follows the path of least resistance, running along pipes, joists, rafters, and even electrical cables before it finally soaks through drywall where you see it.
Inspecting Your Roof and Attic
Start in your attic during daylight if you have access. Look for water stains on the underside of roof decking, wet insulation, or active dripping. Check around roof penetrations first. Chimneys, vent pipes, skylights, and where roof planes meet. Missing or damaged shingles let water in during rain. Cracked flashing around chimneys or vent pipes creates entry points. Ice dams along roof edges force water backward under shingles in cold climates.
Walk your roof exterior carefully if it’s safe and accessible, looking for obvious damage, lifted shingles, or deteriorated flashing. Clogged gutters and soffits cause water to back up and seep under roofing materials instead of draining away properly.
Checking Plumbing Systems
If a bathroom, kitchen, or laundry room sits above the ceiling leak, inspect plumbing first. Check under sinks for dripping supply lines or leaking drain connections. Look at the base of toilets for water or loose wax rings. Run water in showers and tubs while someone watches from below or checks the attic above for active leaks.
Missing or cracked caulk around tub and shower edges lets water seep through, running down inside walls and across ceiling joists. Slow drains sometimes back up just enough to leak at connection points without flooding the bathroom floor. Supply lines can develop pinhole leaks or loose compression fittings that spray small amounts of water when you turn on faucets.
Evaluating HVAC and Condensation Issues
Air conditioning units produce condensation that normally drains away through dedicated pipes. When condensation drains clog or the unit’s drain pan rusts through, water drips into ceiling spaces. Check where your AC handler sits in the attic for standing water or moisture. Ductwork running through unconditioned attic space sometimes develops condensation on the outside during humid weather. Improperly vented dryer exhaust can dump humid air into attic spaces, causing moisture problems that eventually soak through ceilings.
Using Detection Methods
For intermittent leaks you can’t catch actively dripping, try the toilet paper test. Lay single sheets of toilet paper along visible pipes and across ceiling joists in your attic. Wait for the leak to occur (run water fixtures if you suspect plumbing), then check which sheets got wet to narrow your search area.
Sometimes you need to cut a small inspection hole in the ceiling itself to look directly at joists and plumbing above. Cut near the stain but position it where you’ll have ceiling joist access for easy patching later.
Professional moisture detection equipment and thermal imaging locate hidden wet areas that look dry on the surface. When you’ve checked obvious sources and still can’t find the leak, or when water damage keeps spreading despite your temporary fixes, that’s when inspection help makes sense.
Essential Tools and Materials for Ceiling Leak Repairs

Gather everything before you start cutting or patching. Running to the store halfway through a repair leaves wet materials exposed and extends your timeline unnecessarily. Safety equipment comes first because you’re working overhead with sharp tools and potentially breathing dust or handling damaged materials that might contain unwanted moisture related growth.
Protecting yourself, preparing your workspace, and having the right tools organized makes the actual repair work faster and cleaner.
| Category | Items Needed | Purpose |
|---|---|---|
| Safety Equipment | Safety glasses, dust mask or respirator, gloves, sturdy ladder | Protect eyes from falling debris, prevent inhaling dust or spores, maintain stable overhead work position |
| Cutting Tools | Keyhole saw (drywall saw), utility knife, measuring tape, pencil | Remove damaged ceiling sections cleanly and mark cutting lines accurately |
| Drying Equipment | Box fans, dehumidifier, moisture meter (optional) | Dry ceiling cavity thoroughly before patching to prevent growth from moisture |
| Patching Materials | Drywall sheets or pre-cut patches, drywall screws, screw gun or drill | Replace removed damaged sections and secure to ceiling joists |
| Finishing Supplies | Joint compound (mud), drywall tape, putty knives (4-inch and 6-inch), sanding sponge or sandpaper, drop cloths | Smooth and blend patch edges with existing ceiling surface |
| Painting Materials | Oil-based or shellac-based stain-blocking primer, ceiling paint, paint roller and pan, small brush for edges | Seal water stains permanently and match existing ceiling finish |
| Inspection Tools | Flashlight or headlamp, screwdriver or awl | Examine dark spaces and create controlled drainage points |
| Protective Coverings | Plastic sheeting, tarps, buckets, painter’s tape | Protect floors and furniture from water and debris during work |
Don’t cheap out on joint compound or primer. They’re the difference between repairs that last and ones that fail. Basic drywall repair material kits run about $30 to $50 for small patches. Larger repairs requiring full drywall sheets, multiple gallons of compound, and quality stain-blocking primer can reach $100 to $150 in materials.
Use a stable, proper height ladder rated for your weight plus tool load. Never stand on the top two rungs. Keep windows open throughout the repair process for ventilation, especially when using oil-based primers. The fumes are strong but necessary for proper stain blocking.
Assessing Damage, Drying, and Removing Affected Materials
You can’t skip the assessment step, even when you’re eager to patch the hole and move on. Understanding how far moisture spread determines whether you’re fixing a small spot or replacing large ceiling sections. Rushing into repairs before everything’s completely dry guarantees you’ll be redoing this work within months when unwanted growth appears or paint bubbles up again.
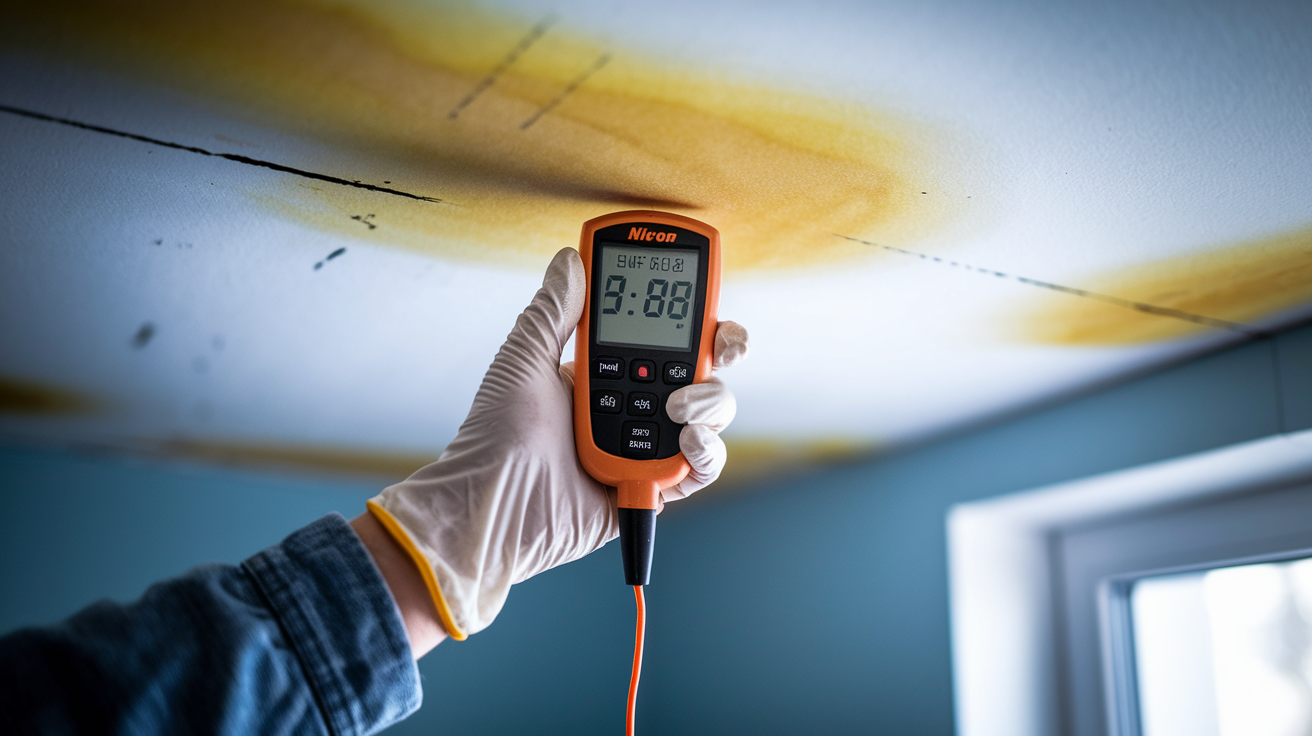
Press gently on stained or discolored ceiling areas to check if the drywall feels soft, spongy, or crumbly. Firm ceiling with just surface staining might need only paint. Soft, sagging, or crumbling sections need complete removal. Use a moisture meter if you have one to check readings in surrounding areas that look fine. Readings above 16 percent moisture content mean those areas need drying time too. Sometimes the visible damage is minor but moisture wicked into insulation and framing well beyond the stain.
Surface drying means the face of your drywall feels dry to touch. Structural drying means the cavity behind the drywall, the insulation packed in there, and the framing lumber all dried out completely. That takes proper airflow and time.
Small leaks from brief events might dry naturally in 24 to 48 hours if you catch them fast and there’s good ventilation. Major leaks that soaked through insulation need help. You need to open up the ceiling, pull out wet insulation immediately because it stays damp and encourages unwanted moisture related growth, then position box fans to blow air through the cavity. Set up a dehumidifier in the room if the space is enclosed.
Check moisture levels daily. Minor water intrusion dries in 24 to 72 hours with good airflow, but extensive soaking needs 5 to 7 days of fans and dehumidifiers running. Complete drying shows moisture meter readings below 15 percent, no musty smell when you get close to opened sections, and firm texture when pressing on exposed materials.
Keep airflow going and monitor humidity levels throughout drying. Stopping fans too early because the surface looks dry leaves moisture trapped deeper in the structure. That trapped moisture creates unwanted growth you won’t see until it spreads enough to smell or stain through fresh paint weeks later.
Mark your cut lines back to the nearest ceiling joists on each side of damaged areas so you have solid framing to attach your patch. For really wet sections, mark back to completely dry material, even if that means removing more than the visible stain.
Wear your safety glasses and dust mask. Use your keyhole saw to cut along the lines carefully. Cut shallow so you don’t damage wiring or pipes that might run through the ceiling space. Pull down cut sections along with any wet insulation stuck to the back. Look up into the cavity with your flashlight for signs of structural damage, hidden plumbing problems, or electrical issues this leak exposed.
If you’ve got a drop ceiling with suspended tiles instead of drywall, this whole process is simpler. Just lift out water stained or sagging tiles and replace them with new ones once everything’s dry. Check the grid system above for rust or damage too.
Bag up damaged materials for disposal promptly so they’re not sitting around releasing moisture back into your space. Any musty smell after you think drying’s complete means you missed moisture somewhere or unwanted growth already started. Open more ceiling to find the source, or that smell will never leave no matter how much you paint.
Patching and Repairing Ceiling Drywall
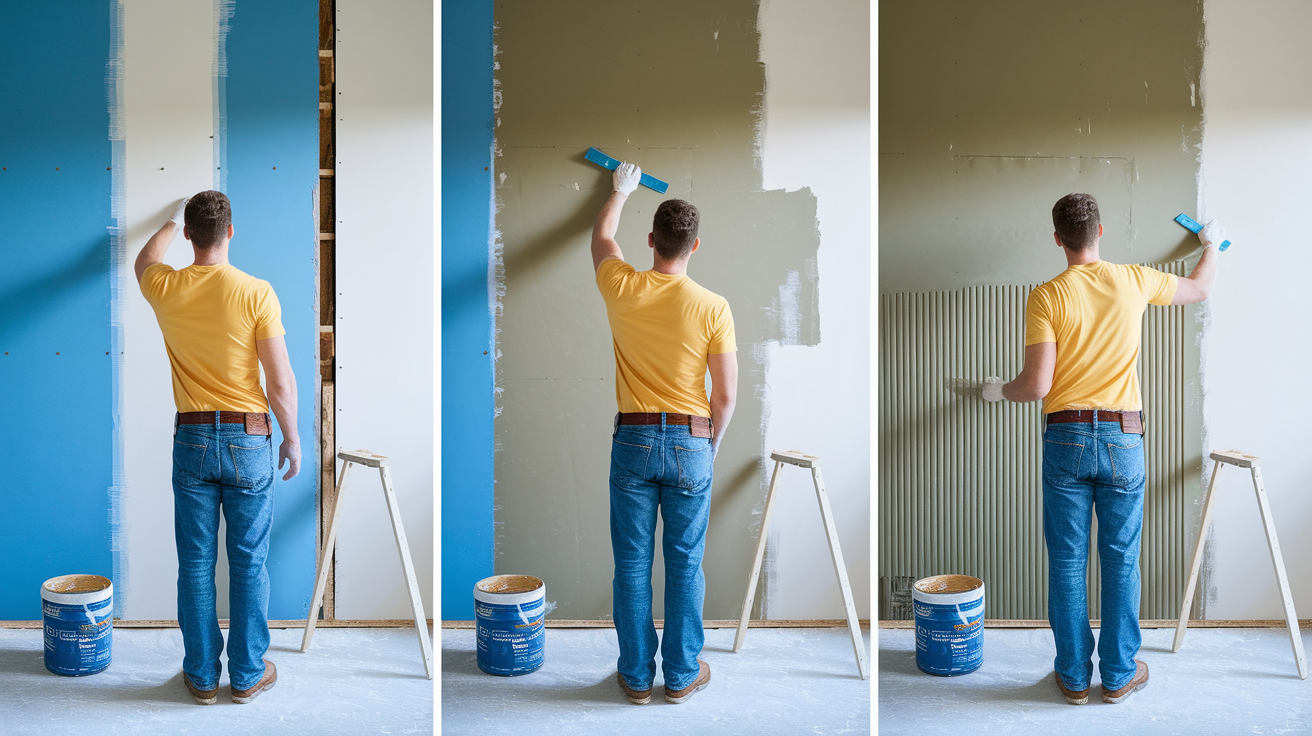
Measure your opening and cut replacement drywall pieces that fit snugly between exposed joists. For holes larger than a few inches, your patches need backing support. Cut the new piece about the same size as the opening. If ceiling joists are exposed on both sides, screw the patch directly to them. If you’re patching between joists, attach backer boards (small strips of wood or drywall) behind the edges of the opening first, then screw your patch to those. Drive drywall screws just below the surface without breaking the paper face, every 6 to 8 inches around the patch edge.
The joint compound process takes multiple applications and can’t be rushed. Spread a thin first coat over all seams and screw dimples using your 4 inch putty knife. Press joint tape into the compound at seams, then smooth another thin layer over the tape. Feather the edges outward so they blend gradually rather than creating ridges. Let this first coat dry completely overnight.
Apply your second coat with the 6 inch knife, spreading compound 2 to 3 inches wider on each side than your first coat. Feathering these edges creates the smooth transition you want. Wait for complete drying again, usually overnight. Lightly sand any high spots or ridges using your sanding sponge with gentle circular motions.
Third coat goes on even wider with a light touch, just filling any remaining low spots and smoothing transitions. Let it dry fully, then do your final sanding. Wipe away dust with a damp cloth before priming.
Applying Joint Compound and Finishing
Joint compound (also called mud) hides your patch by creating a smooth surface that blends into surrounding ceiling. Rushing through coats or skipping sanding steps leaves visible edges or bumps that show through paint. Each layer builds on the previous one, spreading wider to feather the patch into existing texture.
- First coat application covering seams and screw heads. Spread thin layer over tape at seams and fill screw dimples, smoothing edges outward
- Drying time requirements between coats. Wait overnight or at least 12 hours for each coat to fully cure before applying the next
- Second coat application with wider coverage. Use 6 inch knife to spread compound 2 to 3 inches beyond first coat edges on all sides
- Sanding technique for smooth transitions. Use fine sanding sponge with light circular motions to remove ridges, avoiding gouging into compound
- Third coat for final smoothing. Apply thin skim coat over any remaining imperfections using light pressure and wider spreading
- Final sanding before priming. Smooth entire repair area gently, wipe dust away with barely damp cloth, let dry before primer
Matching texture on popcorn ceilings, knockdown texture, or other patterns takes practice and the right products. Texture spray in a can works for small repairs on popcorn or orange peel finishes. Test your spray pattern on cardboard first to dial in the right distance and pressure.
For knockdown texture, spray slightly heavier then lightly flatten the peaks with a drywall knife after a few seconds. With large or extensive repairs, feathering your texture into a wider area, or even retexturing the entire ceiling section, gives better results than trying to match a small spot perfectly. Sometimes painting the whole ceiling after repair hides minor texture differences better than spot painting.
Priming and Painting Your Repaired Ceiling
Stain blocking primer isn’t optional when you’re covering water stains. Miss this step and those brown or yellow marks will bleed right back through your paint no matter how many coats you apply.
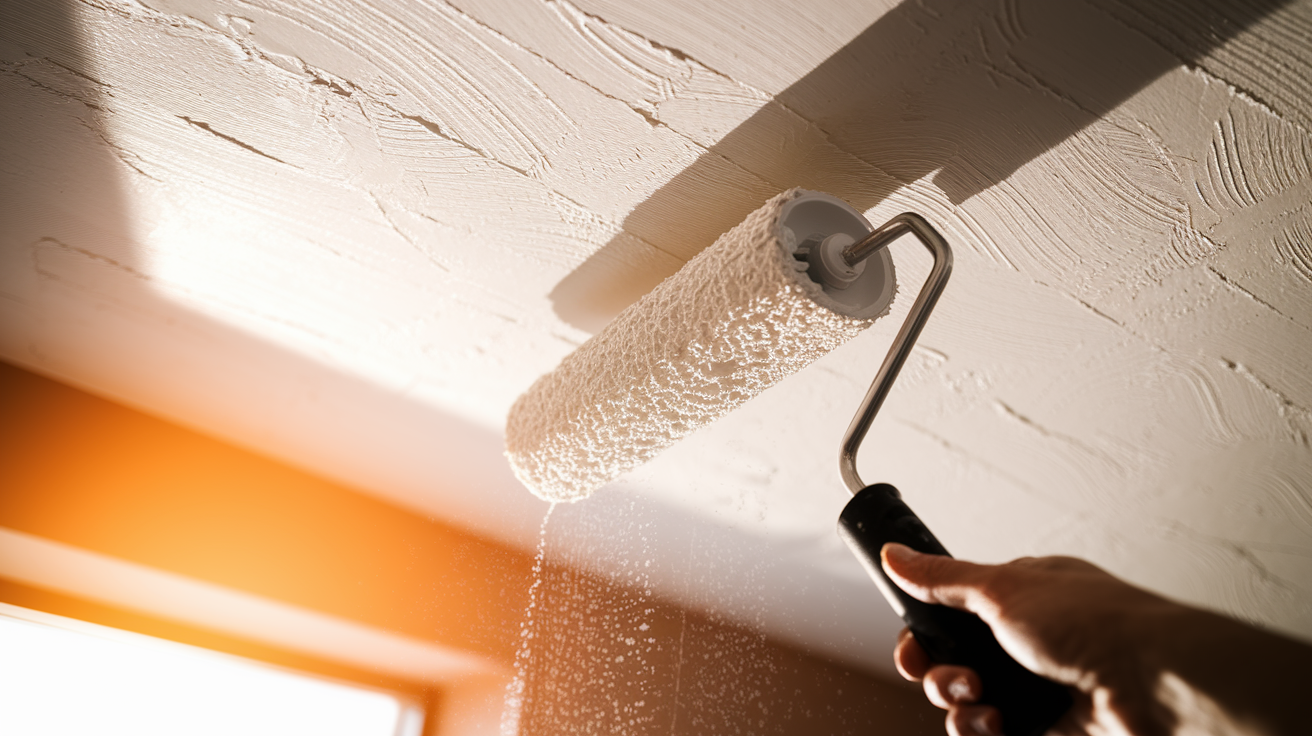
Use oil based or shellac based primer specifically designed for stain blocking. Water based primers don’t create the waterproof barrier you need. The old stain will mix with the new paint and reappear like you never covered it. Apply the primer with a brush around edges and patches, then roll it over the broader repaired area. One coat of proper stain blocking primer seals the damage completely.
Let it dry according to the can directions, usually 2 to 4 hours depending on temperature and humidity. The primer will smell strong, that’s normal for oil based products and why you need good ventilation.
Choose ceiling paint that matches your existing sheen, usually flat or matte finish. Decide whether painting just the repair makes sense or if the whole ceiling needs fresh paint. Small repairs sometimes show as slightly different shades even with matched paint because of age and dirt on surrounding areas. Painting the entire ceiling from corner to corner eliminates any shade variation.
For large repairs or multiple damaged spots, whole ceiling painting is easier than trying to blend several patches perfectly. Cut in edges with your brush where walls meet ceiling, then roll the main area using even overlapping strokes. Roll in one direction first, then cross roll perpendicular for smooth coverage without roller marks. Let the first coat dry completely before deciding if you need a second.
Keep all windows open during priming and painting. Open doors to other rooms to create cross ventilation if possible. Oil based primer fumes build up fast in closed spaces. Plan on 4 to 6 hours of drying time before a second coat of paint if needed. Check the repair in natural daylight once everything’s dry to spot any missed areas or texture differences before calling it finished.
Preventing Future Ceiling Leaks in Your Home

Fixing the damage you’ve got is one thing. Making sure it doesn’t happen again costs way less than another round of ceiling repairs and paint. Small maintenance tasks done regularly catch problems before water ever reaches your ceiling. Think of prevention as buying yourself time and protecting your investment rather than adding annoying chores to your list.
Different prevention tasks align with seasons. Spring’s good for roof inspections after winter weather. Fall means gutter cleaning before leaves clog everything. Year round means paying attention to plumbing sounds and checking for small problems before they grow.
Roof and Exterior Maintenance
Inspect your roof twice a year, spring and fall, looking for damaged, loose, or missing shingles. You don’t have to walk the entire roof. Binoculars from the ground show problems on many roof pitches. Check flashing around chimneys, vent pipes, and where different roof sections meet for cracks, gaps, or rust.
Clean gutters at least twice annually, more often if you have trees overhead. Clogged gutters send water backward under shingles instead of down downspouts. Make sure downspouts direct water several feet away from your foundation, not right against the house.
Inspect chimney flashing and chimney cap condition annually. In cold climates, improve attic insulation and ventilation to prevent ice dams that force water under shingles. Trim tree branches that hang over your roof, they drop debris that clogs gutters and traps moisture against shingles.
Plumbing System Care
Walk around and check exposed supply line connections under sinks every few months. Look for moisture, corrosion, or dripping. Listen for running water sounds when all fixtures are off, that indicates hidden leaks. Check toilets for loose connections where supply lines meet fill valves. Inspect wax rings by watching for water at toilet bases after flushing.
Maintain caulk around tubs and showers, recaulking when you see gaps or cracks. Don’t let caulk failures go months, water sneaks through fast. Monitor water pressure because excessive pressure stresses pipes and connections. If pressure seems too high (fixtures spray hard, banging sounds in pipes), install a pressure regulator or adjust your existing one. Address slow drains promptly before partial clogs become full blockages that cause backups and overflow at connections.
HVAC and Ventilation
Clean or replace your AC condensation drain line annually before cooling season starts. Flush it with vinegar or use condensate pan tablets to prevent algae buildup that clogs drains. Check the condensation pan under your air handler for rust, cracks, or standing water. Inspect ductwork running through attic spaces for condensation forming on the outside, which means insulation around ducts is inadequate.
Maintain proper attic ventilation with adequate soffit and ridge vents so temperature and humidity stay balanced. High attic humidity causes condensation problems on ductwork, plumbing, and roof decking. If humidity runs consistently above 60 percent in your attic space, improve ventilation or add attic fans. Clean dryer vents completely at least once a year to prevent condensation buildup in exhaust pipes.
Create a simple checklist that rotates monthly and seasonally so you’re not trying to remember everything at once. Professional roof inspections every 2 to 3 years catch developing problems your ground level checks might miss. Annual plumbing inspections by a licensed plumber identify small issues before they cause leaks. Catching and fixing minor problems costs a fraction of what major leak damage and repairs run.
When to Call a Professional for Ceiling Leak Repairs

Plenty of ceiling leak repairs fit within normal DIY capabilities if you’re comfortable with basic tools and patient with multi step finishing work. Other situations need professional expertise, specialized equipment, or licensed work to meet building codes and safety standards.
| Situation | DIY Appropriate | Call Professional |
|---|---|---|
| Small isolated leaks | Leak source is obvious, damage limited to small ceiling section, no structural sagging | Can’t locate source, leak returns after repair attempts, spreading stains indicate hidden problems |
| Large affected areas | Rarely appropriate for extensive damage | Damage covers more than 10 square feet, multiple ceiling sections affected, or needs complete ceiling replacement |
| Active roof leaks | Emergency tarping from ground level if safely accessible | Permanent roof repairs, steep pitch work, second-story access, structural roof damage |
| Plumbing failures | Tightening loose visible connections, replacing toilet wax ring (if experienced) | Leaks inside walls, under slab, or requiring pipe replacement and soldering work |
| Structural concerns | Never DIY | Sagging ceiling joists, cracked framing, compromised structural integrity requiring engineering assessment |
| Unwanted moisture related growth presence | Very small surface spots under 10 square feet | Extensive growth, growth inside wall or ceiling cavities, musty smell throughout house, health concerns |
Professional restoration companies use moisture meters, thermal imaging cameras, and borescopes to find hidden water damage your eyes can’t see. They track moisture migration through wall cavities and ceiling spaces to pinpoint leak sources that aren’t obvious from visual inspection alone. This equipment pays for itself when it prevents you from patching the wrong spot three times while the actual leak keeps spreading.
Professionals also document everything thoroughly for insurance claims, take moisture readings before and after drying, and warranty their work. Some repairs require permits and inspections to meet local building codes, particularly anything involving structural changes, electrical work near moisture damage, or extensive plumbing modifications.
Complex repairs need coordination between different trades. The roofer fixes the exterior leak source, the restoration team dries structure and removes damaged materials, the plumber repairs any pipe problems, the electrician checks and repairs wiring affected by moisture, then finish carpenters and painters handle the visible repairs. Professional Water Damage Repair Services coordinate that entire sequence under one contract instead of you scheduling and managing four different contractors yourself.
Licensed contractors carry insurance that covers additional damage if something goes wrong during repairs. Your homeowner policy might not cover your own DIY mistakes. When electrical components got wet, when structural integrity is questionable, or when you see unwanted moisture related growth spreading beyond surface discoloration, professional assessment isn’t optional. It’s about safety and liability protection.
Cost Estimation for Ceiling Leak Repairs

What you’ll spend fixing ceiling leak damage ranges from under $100 for small DIY patches to $5,000 or more for extensive professional restoration. The leak source, damage extent, and whether you’re handling it yourself versus hiring pros creates that huge spread.
DIY material costs stay relatively low for contained damage. You’ll spend $30 to $75 on materials for patching a small area, including drywall, joint compound, primer, paint, and basic supplies. Add $50 to $150 if you need to buy or rent equipment you don’t already own like a quality ladder, fans, or a keyhole saw. Larger repairs needing multiple sheets of drywall, several gallons of compound, and extensive primer and paint run $150 to $300 in materials. That doesn’t include your labor time or potential mistakes that waste materials.
Hidden costs include dehumidifier rental at $30 to $50 per day if you need one, texture spray for matching ceiling patterns at $15 to $30 per can, and possible disposal fees for wet materials at $25 to $100 depending on local waste management rules.
Professional service costs vary dramatically based on what they’re fixing. Simple ceiling patch and paint runs $200 to $500 if the leak source is already handled and damage is minimal. Water damage restoration for medium sized leaks involving drying, material removal, and structural repairs typically costs $1,000 to $3,000. Extensive damage requiring large section ceiling replacement, remediation for unwanted moisture related growth, and coordination with roof or plumbing repairs easily reaches $3,000 to $7,000. Emergency service calls during nights, weekends, or holidays add 50 to 100 percent to standard rates because you’re paying for immediate response.
Several factors push costs higher than basic estimates suggest:
Size of damaged area requiring repair. Costs scale with square footage, but there’s usually a minimum service charge that makes tiny repairs disproportionately expensive through professionals.
Type of ceiling. Plaster costs more to repair than drywall because it requires specialized skills. Textured or popcorn ceilings need matching work that adds time and materials.
Source of leak and complexity of permanent fix. Roof repairs add $300 to $1,500 depending on extent. Plumbing repairs range from $150 for simple connection tightening to $1,000+ for pipe replacement inside walls.
Unwanted moisture related growth presence requiring remediation. Professional removal and containment adds $500 to $4,000 depending on affected area size and contamination level.
Accessibility challenges. High ceilings requiring scaffolding, furniture that needs professional moving, or difficult attic access all increase labor time and costs.
Emergency service timing. After hours emergency response typically costs 1.5 to 2 times regular rates due to immediate mobilization requirements.
Get multiple estimates for professional work and ask what’s included. Some quotes cover only the ceiling repair, leaving you to arrange and pay separately for leak source fixes. Others provide complete restoration from leak repair through finished paint. Understand what you’re comparing before choosing the lowest bid.
Understanding Insurance Coverage for Ceiling Leak Damage

Whether your homeowners insurance covers ceiling leak damage depends heavily on what caused the leak and how well you maintained your property before the problem occurred. Insurance typically covers sudden, accidental events but excludes damage from neglect or gradual deterioration you should have prevented.
Most policies cover ceiling damage from sudden pipe bursts, appliance supply line failures, storm damage that breaches your roof, toilet overflow from internal failures, and other unexpected events. You’re generally covered if a pipe freezes and bursts during extreme cold, if wind tears shingles off during a storm allowing rain inside, or if your water heater’s supply line suddenly ruptures. These qualify as covered perils because they happened without warning despite reasonable home maintenance.
Your insurance also typically covers resulting damage like ceiling repairs, drywall replacement, and necessary remediation for unwanted moisture related growth that stems from covered events. Policies commonly exclude gradual leaks from pipes that deteriorated over time, roof leaks from aging shingles you didn’t replace, damage from repeated small leaks you ignored, condensation problems from poor ventilation, and any water damage from external flooding (that requires separate flood insurance).
If the adjuster determines you knew about the problem or should have discovered it through normal maintenance, they’ll deny the claim as maintenance neglect.
Dwelling coverage pays for repairing your home’s structure, including ceilings, framing, and roof. Personal property coverage handles your damaged belongings like furniture, electronics, or stored items affected by the leak. These are separate coverage limits on your policy. Sometimes ceiling damage is covered but your ruined furniture isn’t, or vice versa, depending on circumstances and what limits you carry.
Document everything thoroughly the moment you discover damage because insurance claims require proof. Take detailed photos and video showing damage extent, water source if identifiable, affected areas throughout the house, and damaged belongings. Photograph from multiple angles and distances so the full scope is clear. If possible, document the actual water source or leak point, even if it means taking photos in your attic or under sinks. Show the insurance adjuster exactly what failed and what it damaged.
Keep receipts for any emergency repairs you make, including tarps, fans, dehumidifiers, or contractor services to stabilize the situation. Note specific dates, times, and circumstances of when you discovered the leak and what immediate steps you took. Maintain records showing your prior maintenance history, like roof inspection reports, plumbing service records, or HVAC maintenance receipts. This evidence proves you properly maintained your property and the damage was sudden rather than neglected. Many restoration companies work directly with insurance providers and understand the documentation they require, which simplifies the claims process significantly.
Photograph damage from multiple angles before any cleanup to establish full extent for adjusters.
Document the water source and leak cause if identifiable to prove it was sudden rather than gradual.
Keep receipts for emergency repairs and materials to support reimbursement claims for stabilization costs.
Maintain records of prior maintenance and repairs to demonstrate proper home care and defend against neglect claims.
Note dates, times, and circumstances of leak discovery to establish timeline for adjuster review.
Review your policy before you need it so you understand your coverage limits, deductible amount, and what documentation your insurer requires. Contact your insurance company immediately when you discover damage, before you make any permanent repairs beyond emergency stabilization. They’ll send an adjuster to assess damage and determine coverage. Some policies require you to use approved contractors or get multiple estimates. Others let you choose your own professionals but require certain documentation standards. Understanding these requirements upfront prevents claim delays or denials over procedural issues.
Final Words
Ceiling water damage stops being overwhelming once you break it down into clear steps.
Stop the active leak first. Find the real source next. Dry everything completely before any patches go up.
When you’re ready to learn how to repair a ceiling leak, remember that proper drying prevents mold and failed repairs down the road. Take your time with joint compound layers and don’t skip the stain-blocking primer.
Some leaks you can handle. Others need a pro with moisture meters and experience tracking hidden water paths.
Either way, you’ve got a plan now. Your ceiling can look right again.
FAQ
What should you do if water leaks through the ceiling?
If water leaks through your ceiling, immediately turn off electricity to affected rooms, move furniture and valuables away, place buckets under the leak, and create a small controlled drainage point at the leak’s center using a screwdriver to prevent ceiling collapse from water buildup.
How do you repair leak damage in a ceiling?
Repairing leak damage in a ceiling involves stopping the water source first, allowing affected areas to dry completely for 24 to 72 hours, removing damaged drywall sections back to dry material, installing drywall patches secured to ceiling joists, applying joint compound in multiple coats, and finishing with stain-blocking primer and ceiling paint.
Does homeowners insurance cover water leaks from the ceiling?
Homeowners insurance typically covers water leaks from ceilings caused by sudden events like pipe bursts, storm damage, or appliance failures, but excludes damage from gradual leaks, maintenance neglect, or flooding, making proper documentation and identifying the leak source critical for claim approval.
Can wet drywall ceiling be saved?
Wet drywall ceiling can be saved if it dried completely within 24 to 48 hours, shows no sagging or structural damage, has no mold growth, and maintains firm texture after drying, though staining may require priming and repainting even when the drywall structure remains sound.
How long does it take for a ceiling to dry after a leak?
A ceiling takes 24 to 72 hours to dry after minor leaks with proper ventilation and fan placement, while major leaks requiring ceiling section removal need 5 to 7 days of airflow through the ceiling cavity, dehumidifier use, and moisture meter verification before starting repairs.
What causes ceiling leaks when there is no visible roof damage?
Ceiling leaks without visible roof damage commonly result from plumbing issues like leaking drains, loose supply lines, or missing caulk in upstairs bathrooms, HVAC condensation from air conditioning units, dryer vent condensation, or water traveling from distant sources along pipes and joists before appearing.
How do you match ceiling texture when repairing water damage?
Matching ceiling texture when repairing water damage requires identifying your specific texture type (popcorn, knockdown, or smooth), using appropriate texture spray products, practicing application technique on cardboard first, and feathering repairs into larger surrounding areas rather than creating sharp lines between old and new texture.
Why must you use stain-blocking primer on water-damaged ceilings?
You must use stain-blocking primer on water-damaged ceilings because water-based primers allow stains to bleed through regardless of coat number, while oil-based or shellac-based stain blockers create a waterproof barrier that permanently seals discoloration and prevents reappearance after painting.
When should you call a professional for ceiling leak repairs?
You should call a professional for ceiling leak repairs when facing large affected areas exceeding four square feet, active roof leaks requiring exterior work, hidden water sources that standard inspection cannot locate, structural damage concerns, mold presence, or situations involving electrical wiring in wet areas.
How much does ceiling leak repair typically cost?
Ceiling leak repair typically costs $150 to $400 for small DIY patch repairs including materials, $500 to $1,500 for professional repairs of moderate damage, and $2,000 to $5,000 for extensive ceiling replacement, with additional costs for mold remediation, structural work, or emergency service timing.
What prevents future ceiling leaks in homes?
Preventing future ceiling leaks requires regular roof and gutter maintenance, seasonal shingle inspections, checking plumbing supply line connections and toilet seals, maintaining caulk around tubs and showers, servicing AC condensation drains, ensuring proper attic ventilation, and addressing small issues before they become major leak sources.
How do you document ceiling water damage for insurance claims?
Documenting ceiling water damage for insurance claims requires photographing damage from multiple angles before cleanup, identifying and recording the water source if possible, keeping receipts for emergency repairs and materials, noting exact dates and circumstances of leak discovery, and maintaining records of prior maintenance.