

Think a brown stain on drywall is just a cosmetic problem? Think again.
Wall studs water damage can hide behind paint and quietly weaken framing.
You might smell a musty odor, press the wall and find it spongy, or see baseboards pulling away.
This post shows how to spot the signs, confirm hidden moisture with simple checks, and walk you through spotting and fixing structural issues in studs so you know when to repair, sister, or replace them.
Act fast. Small leaks become big repairs.
Identifying Water Damage in Wall Studs
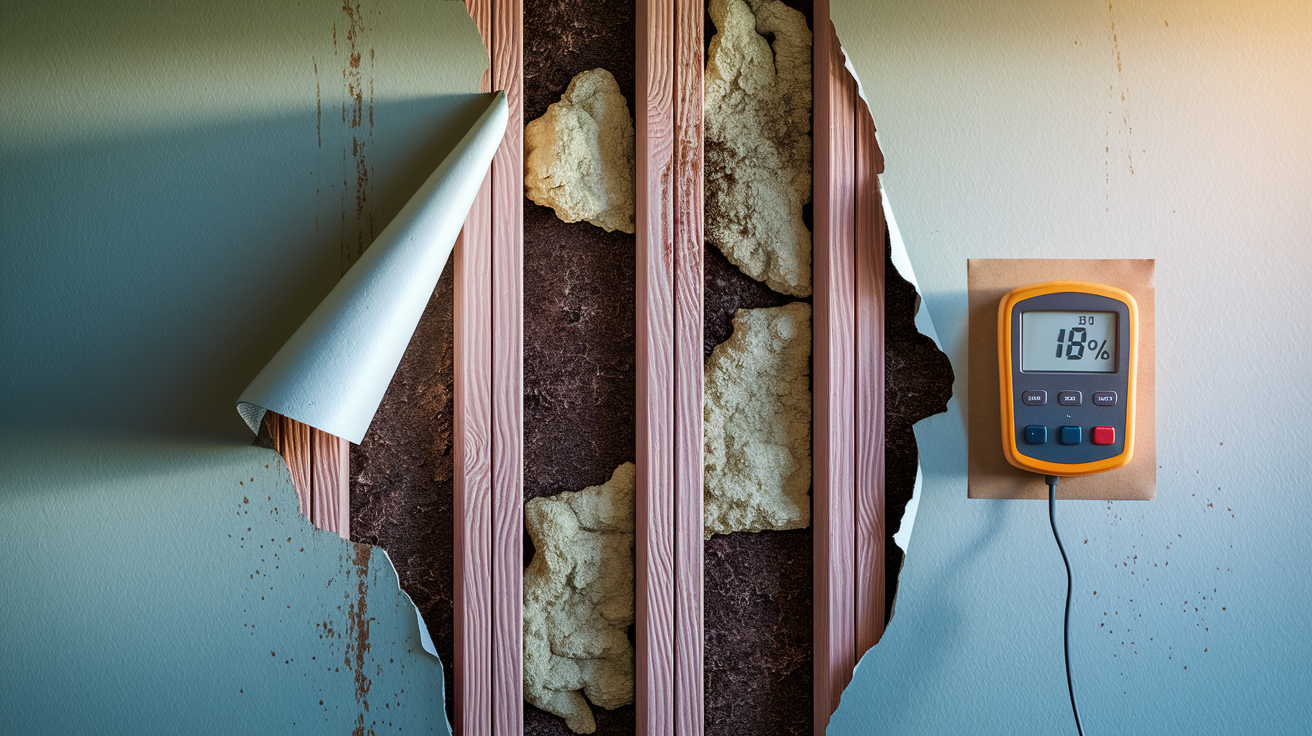
Water damage behind drywall doesn’t show up with a dramatic burst or puddle. Most of the time, you’re catching it weeks or even months after moisture’s already soaked into the studs and started eating away at the wood.
The first thing you’ll see is discoloration on the drywall itself. Brown or yellow stains that bleed outward from wherever the leak started. Paint might bubble or peel in vertical strips that follow where the stud runs. Press the wall gently. If it feels spongy or gives under your hand, moisture’s already saturated the stud behind it. You might also notice baseboards pulling away, warping, or darkening along the bottom edge where they meet the floor.
A musty smell that won’t go away, even after you clean, almost always means moisture’s been sitting in the wall cavity long enough to encourage mold. If the smell gets stronger when you run your hand along a certain section, that’s your starting point for closer inspection.
When you need to confirm what’s happening inside the wall, here are six ways to verify hidden moisture in the studs:
- Moisture meter readings above 16% in wood mean active water intrusion (normal indoor wood stays between 6% and 12%)
- Infrared camera scans showing cool spots or temperature differences along stud lines, which signal wet material holding onto moisture
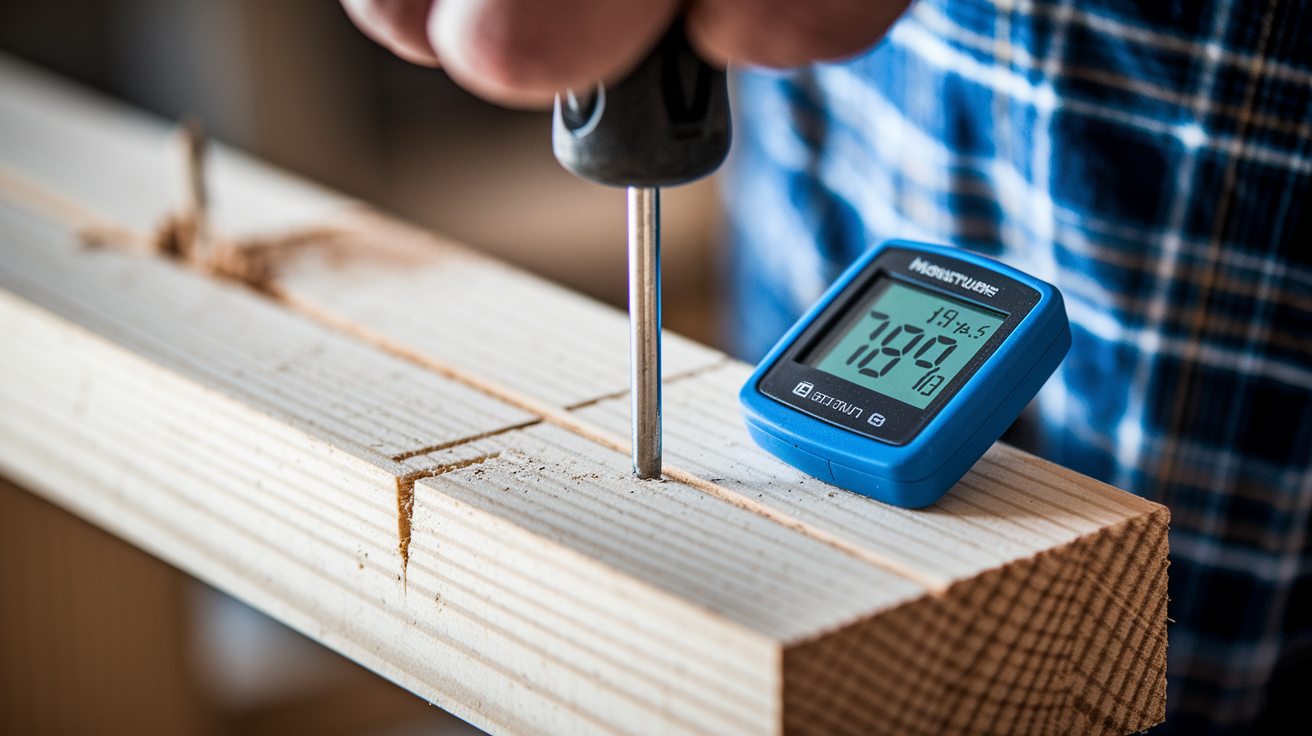
- Probing studs through small inspection holes with a flat screwdriver or awl. Soft or crumbling wood means rot’s started.
- Checking for texture changes in drywall like sagging, rippling, or crumbly paper that tears easily when you touch it
- Looking for visible mold colonies on baseboards, trim, or drywall seams near the suspected stud
- Tracking musty odor patterns by smell testing along the height of the wall to locate where the moisture is concentrated
If a moisture meter consistently reads above 20%, or if you see black streaks running vertically behind removed drywall, the studs are holding too much water and need immediate attention. Any time more than one stud in a load bearing wall shows signs of rot or structural softening, stop and call a licensed contractor or structural engineer before you remove anything.
Common Causes of Water Damage Behind Walls

Most stud damage starts with plumbing. A slow drip from a supply line, a pinhole leak in a drain fitting, or a corroded valve behind a washing machine can run for months before anyone notices. The water travels down inside the wall cavity, soaking insulation and studs from the top of the leak all the way to the bottom plate. By the time drywall shows a stain, the framing may already be soft.
Roof leaks and window failures are just as common, especially in older homes. Water enters through missing shingles, cracked flashing around chimneys, or poorly sealed window frames. Then it follows the path of least resistance down the inside of exterior walls. Gutters that overflow or discharge too close to the foundation can also push water through exterior sheathing, particularly if siding joints are cracked or caulking’s failed. Once moisture gets past the exterior envelope, it saturates the studs from the outside in.
Interior humidity problems contribute more than most homeowners expect. Bathrooms without exhaust fans, kitchens with undersized ventilation, and basements with chronic condensation all create conditions where moisture condenses on wall surfaces and works its way into cavities. Laundry rooms are bad for this too, especially those with dryers vented improperly or not at all. They can pump enough humid air into a space to rot studs over time. If you can see condensation on windows or walls during cold weather, the studs are likely absorbing moisture too.
Assessing Structural Risks of Damaged Studs
Not all water damage to studs requires full replacement, but you need clear criteria to decide whether a stud can be salvaged or must come out. The difference matters because load bearing studs support the weight of the structure above them. Compromised framing can lead to sagging ceilings, cracked drywall, or worse.
Start by measuring moisture content with a pin type meter. If the reading stays above 18% after you’ve stopped the water source and allowed at least 72 hours of drying with fans and a dehumidifier, the wood is holding too much moisture to repair in place. Any reading above 20% means active saturation, and the stud is at high risk for rot and mold colonization.
Next, check these four factors to determine replacement urgency:
- Wood softness level. If you can push a screwdriver into the stud more than a quarter inch with hand pressure, the wood’s lost structural integrity.
- Mold penetration. Surface mold on studs can often be treated, but black or green colonies that run deep into the grain indicate the wood is too far gone.
- Moisture content percentage. Sustained readings above 20% mean replacement, especially in load bearing walls.
- Wall load bearing role. Exterior walls, walls running perpendicular to floor joists above, and walls supporting roof trusses are load bearing. Damage to these studs requires professional evaluation and often temporary shoring before removal.
If rot affects more than 30% of a stud’s cross section, or if decay runs for more than 12 inches vertically, plan to replace the entire stud. Partial repairs using epoxy fillers or wood hardeners work only for shallow surface damage on non load bearing studs where structural strength isn’t critical. Any visible bowing, sagging, or cracking in the framing around a damaged stud is a red flag. Stop work and call a structural contractor or engineer before you proceed.
Repair Methods for Water‑Damaged Wall Studs

Repairing water damaged studs starts the moment you confirm the moisture source is stopped. Until the leak is fixed, any drying or repair work is temporary.
Once the source is under control, the priority shifts to drying the wall cavity as fast as safely possible. Pull off baseboards and cut away drywall at least two feet above the highest moisture mark. Cutting on stud centers gives you clean edges to attach new drywall later. Remove all wet insulation. It won’t dry properly and will hold moisture against the framing. Set up at least one dehumidifier in the room and aim high velocity air movers at 45 degree angles toward the exposed studs. Seal off the room with plastic sheeting if you can to concentrate the drying. Keep the space between 70 and 90 degrees, and recheck moisture levels every 24 hours. Most studs dry to safe levels in 48 to 72 hours, but thicker lumber or poorly ventilated cavities can take longer.
After drying, assess each stud. If the wood is still firm and moisture readings are below 15%, you can treat surface mold with an EPA registered antimicrobial solution and move to rebuilding. If a stud shows localized rot but the damage is small and non structural, you can sister a new stud alongside it. Fasten a full length 2×4 next to the damaged one with construction adhesive and 3 inch screws every 12 inches. The new stud shares the load and restores strength.
When a stud is too compromised to sister, it has to come out entirely. Here’s the step by step replacement process:
- If the stud is load bearing, install temporary support under the header or top plate using adjustable jacks or a horizontal 2×4 shore before you remove anything.
- Cut through the damaged stud near the top and bottom plates using a reciprocating saw, then pry out the pieces.
- Measure and cut a new 2×4 to fit snugly between the plates. The new stud should be the same length as the old one or slightly longer to create a friction fit.
- Slide the new stud into place, tapping it with a hammer if needed, then toenail or screw it to the top and bottom plates with at least two fasteners per connection point.
- Remove temporary shoring once the new stud is secured, then treat all exposed framing with antimicrobial solution before closing the wall.
If multiple studs are damaged, or if the bottom plate itself is rotted, the scope grows quickly. Replacing plates often means cutting into flooring and dealing with fasteners you can’t see. That’s where most DIY repairs stop and professional help starts.
Preventing Future Water Damage to Wall Studs

The best repair is the one you never have to do. Most stud damage is avoidable if you catch leaks early and control humidity before it soaks into the walls.
Start with a quarterly walk through of every plumbing fixture and appliance in the house. Look under sinks for drips, check supply lines to toilets and washing machines for corrosion or bulging, and run your hand along exposed pipes in basements and crawlspaces to feel for dampness. Install water leak detectors behind washing machines, under water heaters, and near sump pumps. They cost $20 to $50 each and will alert you to leaks before drywall gets soaked. Inspect your roof twice a year, especially after heavy storms, and clear gutters and downspouts so water discharges at least six feet away from the foundation.
Inside the house, control humidity with properly sized exhaust fans in every bathroom and above the stove. Bathrooms need at least 1 CFM of ventilation per square foot of floor area, and fans should run for at least 20 minutes after showers. If you see condensation on windows or mirrors that doesn’t clear within an hour, your ventilation isn’t keeping up. Basements and crawlspaces should stay below 50% relative humidity year round. Use a dehumidifier if levels creep higher, and make sure it drains automatically so you don’t have to remember to empty it.
Exterior moisture barriers matter as much as interior ventilation. Check window and door caulking annually and re seal any gaps before water finds its way in. Make sure your home’s grade slopes away from the foundation at least one inch per foot for the first six to ten feet. If you have a vapor barrier in exterior walls, confirm it’s intact during any remodeling work. Tears or gaps let humid indoor air condense on cold sheathing and studs, which leads to the same rot as a direct leak, just slower.
Final Words
You spot a dark stain and the trim feels soft — act fast. This post walked you through spotting visual and hidden signs, common causes, and the tools pros use like moisture meters and infrared scans.
We explained how to judge structural risk, when to dry versus replace, the repair steps, and simple prevention like vapor barriers and better ventilation.
No guesswork. If you suspect wall studs water damage, document what you see and get an inspection. Quick action stops more harm and gets your home back to normal.
FAQ
Q: Do water damaged studs need to be replaced?
A: Water-damaged studs need replacing when they are soft, rotten, moldy, or lose structural strength; mildly damp studs can often be dried and treated, and we confirm with moisture readings before cutting anything out.
Q: Is sheetrock ruined if it gets wet?
A: Sheetrock isn’t always ruined if it gets wet. Surface damp can often dry, but sagging, crumbling, foul-smelling, or moldy drywall usually needs removal and replacement to stop ongoing damage.
Q: How much does it cost to replace all my house studs?
A: The cost to replace all house studs varies by home size, wall count, and extra repairs; expect several thousand to tens of thousands of dollars. Get an on-site estimate and a documented scope for insurance.
Q: How long does it take for drywall to dry after water damage?
A: Drying time for drywall after water damage depends on how wet it is and conditions. Surface drywall may feel dry in 24 to 72 hours, while inside layers can take days to weeks. Verify with moisture meters.