

Think the space under your floors is harmless? Think again.
Water and trapped vapor quietly eat at joists, insulation, and your home’s comfort.
Left unchecked, moisture leads to mold, rot, pests, and costly structural repairs.
A proper crawlspace drainage system—interior perimeter drains, a sump pump, and a solid vapor barrier—intercepts groundwater, channels it away, and keeps the crawlspace controlled.
In this post we explain the signs to watch for, the core components, and why the right installation protects your structure and wallet.
Understanding Moisture Problems That Require Crawlspace Drainage

Moisture gets trapped in crawlspaces for a handful of common reasons. A lot of homes were built with bare dirt floors that constantly release water vapor. Vented crawlspaces made sense back in the day, but they let humid summer air flow in and condense on cooler surfaces like floor joists and ductwork. Poor drainage around the foundation doesn’t help. Neither do leaking pipes or groundwater seeping up through the soil.
The risks start small and grow fast. Mold spreads on wet wood and insulation, releasing spores that drift up into your living areas through floor gaps and ductwork. Termites, snakes, and rodents are drawn to damp, sheltered spaces. Wood floor joists and support beams soften and rot when they stay wet. Soil erosion under support piers can shift and destabilize the whole structure. High crawlspace humidity migrates upward, making your entire house feel muggy and raising cooling costs.
You might see standing water that pools after storms or stays year round. Visible mold growth on floor joists, insulation, or foundation walls. Musty odors that rise into bedrooms and hallways. Soft, discolored, or crumbling wood on beams and supports. Rising indoor humidity levels that won’t come down even when the AC runs.
Installing a crawlspace drainage system when you spot these signs prevents damage from escalating. Water that soaks support piers and floor framing today can cost thousands to repair next year. A drainage system intercepts groundwater before it saturates the soil under your house, keeping structural supports dry and stable.
Core Components of Crawlspace Drainage Systems and How They Work

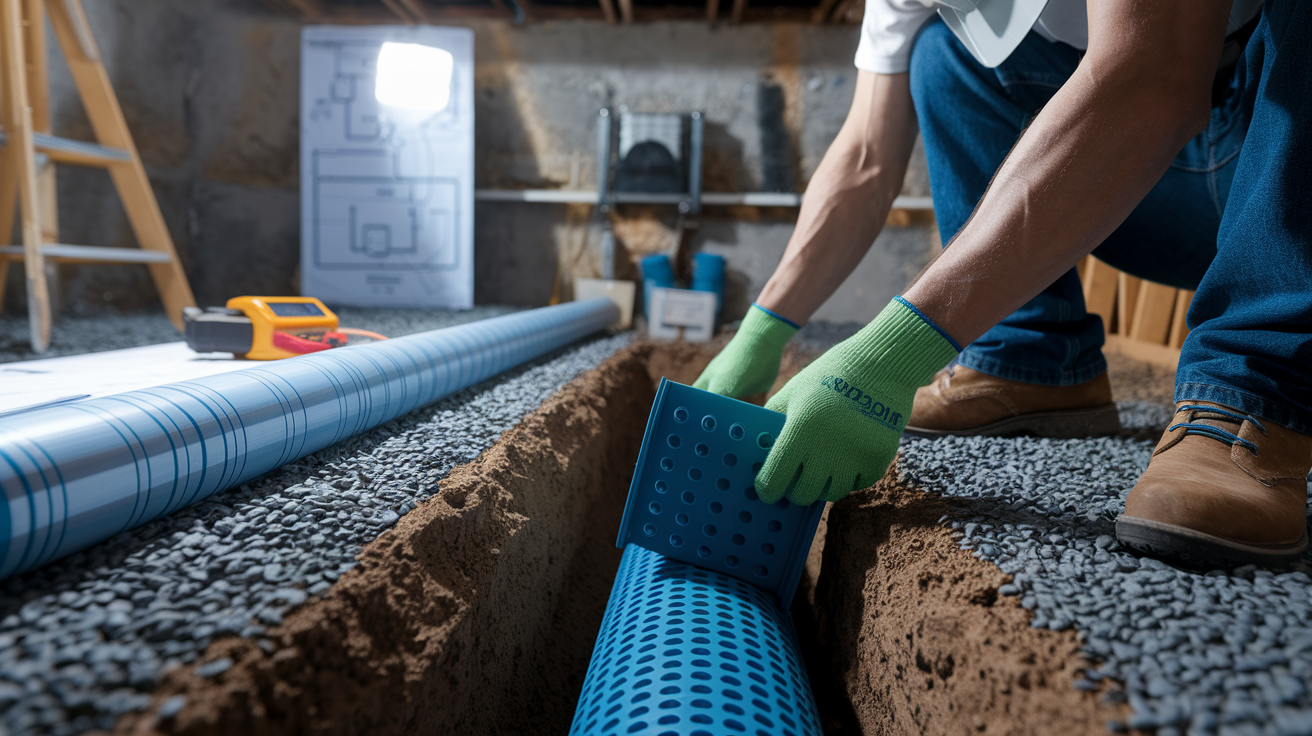
An interior perimeter drain runs along the inside edge of your crawlspace foundation wall. Contractors dig a shallow trench about six inches deep and install a three inch perforated pipe wrapped in a filter sock. The trench is lined with gravel or pea stone so water can flow freely. All the water collected by the perforated pipe flows downhill to a central collection point called a sump basin.
A sump pump system has four parts that work together. The collection system is the network of perforated pipes that gather water from around the perimeter. The sump basin is a round pit dug two to three feet deep, usually in the lowest corner of the crawlspace. The sump pump sits inside the basin and turns on automatically when water reaches a certain level. The outlet drain is a discharge pipe that carries pumped water away from your foundation, often tying into an underground downspout line that exits at least ten feet from the house.
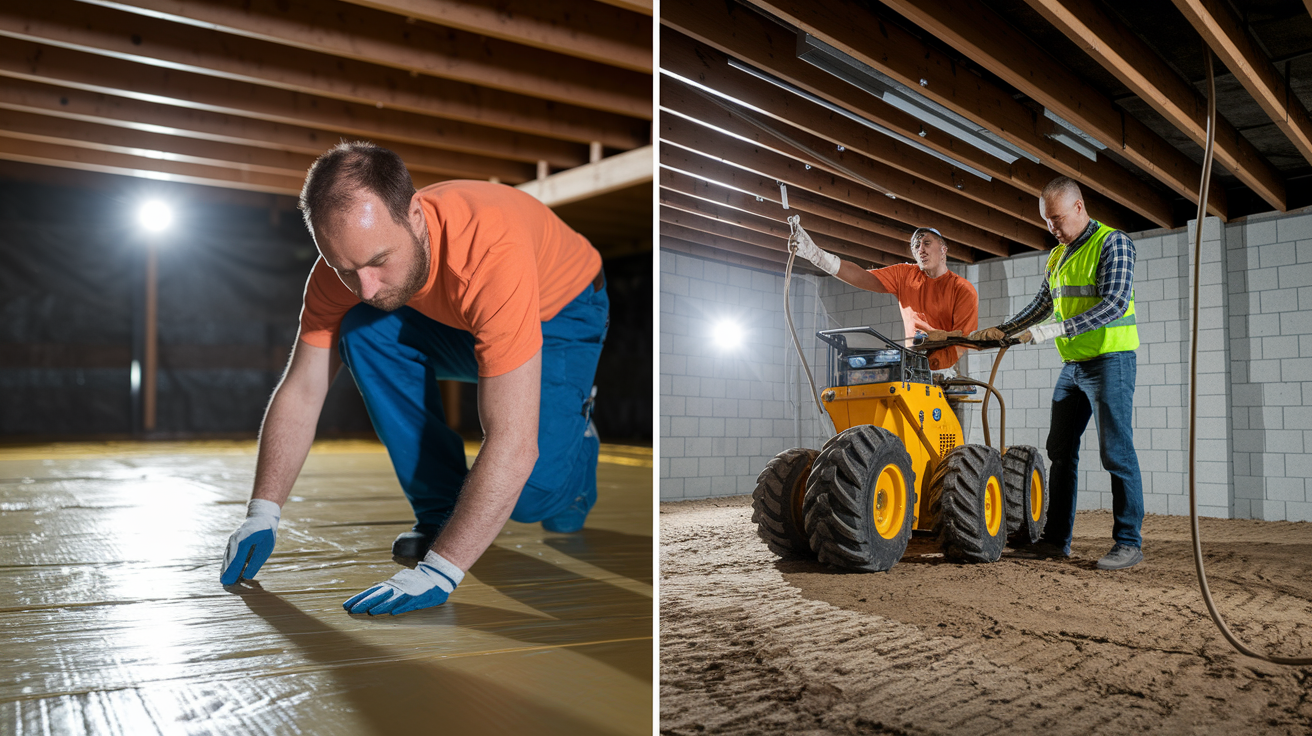
A vapor barrier is a thick plastic membrane laid over the soil to block water vapor rising from the ground. It also reduces the amount of liquid groundwater that seeps up through the dirt. A six mil barrier is the minimum, but ten mil, twelve mil, and twenty mil materials are more durable and puncture resistant. Vapor barriers work best when paired with a drainage system. They stop vapor but not liquid water that flows along the surface or through foundation cracks.
Adding a dehumidifier or full encapsulation makes the system stronger. Encapsulation seals all the crawlspace vents, insulates the foundation walls, and covers every surface with a heavy vapor barrier. A dehumidifier pulls moisture out of the air and drains into the sump basin or a separate discharge line. Together, drainage and encapsulation create a controlled environment that stays dry year round.
| Component | Purpose | Typical Specs |
|---|---|---|
| Interior perimeter drain | Collects groundwater before it saturates soil | 6″ deep trench, 3″ perforated pipe with filter sock |
| Sump basin and pump | Gathers and expels collected water | 2’–3′ deep pit, automatic electric pump |
| Vapor barrier | Blocks water vapor from soil | 6–20 mil plastic membrane, sealed seams |
| Dehumidifier | Reduces airborne humidity | Continuous drain model with auto shut off |
Installation Process for Crawlspace Drainage Systems
Site prep starts with clearing out debris, old insulation, rodent nests, and anything else blocking access to the perimeter. The contractor needs a clean work area to dig trenches and inspect the foundation walls for cracks or active leaks. If the crawlspace is very low, workers may need to excavate additional headroom in certain spots to maneuver tools and materials.
Remove all debris, damaged insulation, and obstructions from the crawlspace floor and perimeter walls. Dig a shallow trench about five to six inches deep along the inside perimeter, keeping the bottom level and just below the soil line. Place three inch perforated drainage pipe wrapped in a filter sock into the trench, maintaining a level run all the way to the sump location. Line the trench with pea stone if the pipe has no sock, if the soil is mostly clay, or if clogging is a concern. Otherwise the sock alone may be sufficient. Excavate a sump pit two to three feet deep in the lowest corner or center point of the crawlspace. Install the sump basin, connect the perforated pipe to the basin inlet, and set the sump pump inside with a check valve on the discharge line. Route the discharge pipe from the pump to an exit point, tying it into an underground downspout drain or running it at least ten feet away from the foundation. Lay the vapor barrier over the soil and up the foundation walls, sealing seams with foundation seal tape and securing edges with foundation pins or adhesive.
Local building codes vary on trench depth, discharge routing, pump electrical requirements, and vapor barrier installation standards. Clay soils and high water tables often require thicker stone bedding and more robust pump capacity. Always verify your design with local experts and pull permits if your jurisdiction requires them. An inspection can catch problems before you close everything up.
Crawlspace Encapsulation and Vapor Barriers in Drainage Solutions

Encapsulation means sealing the crawlspace to stop outside air and ground moisture from entering. Contractors close off all foundation vents with insulated vent covers, insulate the foundation walls instead of the floor joists, and cover every surface with a continuous vapor barrier. The result is a conditioned space that stays dry, stable, and much easier to control with a dehumidifier. Encapsulation solves humidity problems that a drainage system alone can’t fix. It stops vapor intrusion from soil and condensation from outdoor air.
Vapor barrier thickness makes a difference in durability and puncture resistance. Six mil and eight mil barriers are the minimum for code compliance in many areas, but they tear easily during installation and future maintenance. Ten mil and twelve mil barriers hold up better under foot traffic. Twenty mil reinforced barriers are the strongest option and make sense in crawlspaces with sharp rocks, frequent access, or a history of rodent damage. The barrier should cover the floor completely and run at least six inches up the foundation walls, with all seams overlapped and sealed with foundation tape.
Encapsulation eliminates condensation on floor joists and ductwork by controlling air temperature and humidity. It stops soil gases like radon and methane from drifting into living areas. Protects insulation and wooden supports from moisture damage and mold growth. Reduces pest habitat by creating a dry, sealed environment that discourages termites and rodents.
Costs of Crawlspace Drainage Systems and Price Factors

Drainage system costs depend on crawlspace size, soil conditions, how much water you’re managing, and the quality of materials you choose. A basic interior perimeter drain with a sump pump for a small home might start around three thousand dollars. A larger crawlspace with difficult access, clay soils, and extensive excavation can run eight thousand or more. Labor makes up the majority of the cost because digging trenches in a low, tight crawlspace is slow, physical work. Sump pump quality matters too. A cheap pump may last three years, while a commercial grade cast iron model can run for a decade or longer.
Full crawlspace encapsulation typically costs around seventy five hundred dollars on average, though prices vary widely based on square footage, vapor barrier thickness, insulation type, and whether you add a dehumidifier. A fifteen hundred square foot crawlspace with twenty mil reinforced barrier, closed cell foam insulation, and a high capacity dehumidifier can exceed ten thousand dollars. Smaller jobs with minimal prep and standard materials might come in closer to five thousand. Most contractors provide itemized quotes so you can see exactly where the money goes.
| Cost Factor | Impact on Price |
|---|---|
| Crawlspace square footage | Larger spaces require more trench length, pipe, gravel, and vapor barrier |
| Soil type and water table | Clay soils and high water need deeper trenches, thicker stone, and stronger pumps |
| Access and headroom | Low or obstructed crawlspaces slow down labor and may require extra excavation |
| Material quality | Thicker vapor barriers, cast iron pumps, and reinforced pipe cost more but last longer |
| Permits and inspections | Jurisdictions requiring permits add plan review fees and inspection scheduling time |
Comparing Crawlspace Drainage System Options

Interior drainage systems with sump pumps offer the strongest protection because they intercept groundwater before it saturates the soil under your house. The perforated pipe collects water continuously, and the pump removes it automatically, even during heavy storms when exterior solutions can be overwhelmed. Interior systems also work well in tight spaces where exterior excavation isn’t practical. The trade off is that you need reliable electricity to run the pump, and you must maintain the system to prevent clogging or pump failure.
Exterior drainage systems and French drains are installed outside the foundation, usually during new construction or major excavation projects. They divert surface water and shallow groundwater away from the foundation before it reaches the crawlspace. Exterior French drains work best when combined with proper yard grading and downspout extensions. The downside is cost. Excavating around an existing foundation is expensive and disruptive. Exterior drains can clog with soil and tree roots over time, making them harder to service than interior systems.
Passive strategies like regrading your yard, extending downspouts, and cleaning gutters reduce the volume of water that reaches your foundation. These are affordable first steps and sometimes solve minor moisture problems on their own. But passive methods can’t handle high water tables, soil saturation, or homes built in low lying areas. If standing water still appears after you’ve fixed grading and drainage around the house, you need an active system with a sump pump.
Cost varies a lot. Interior systems run moderate to high. Exterior systems are high due to excavation. Passive strategies stay low. Maintenance differs too. Interior pumps need annual testing. Exterior drains are prone to root clogs. Passive methods require seasonal gutter cleaning and grading checks. Effectiveness depends on the problem. Interior systems handle severe water issues. Exterior drains work well for new builds. Passive methods only address minor surface runoff. Longevity matters. Quality interior systems last ten plus years with maintenance. Exterior drains last decades if protected from roots. Passive improvements last indefinitely if maintained.
DIY vs. Professional Crawlspace Drainage Installation
Homeowners with construction experience can handle a few moisture control tasks on their own. Installing a simple vapor barrier over bare soil is straightforward if the crawlspace has decent headroom and no active water. You can also extend downspouts, clean gutters, and make minor grading improvements without special skills. Sealing small foundation cracks with hydraulic cement or polyurethane caulk is another reasonable DIY project if the cracks are accessible and not structural.
Excavation, trenching, sump basin installation, and full encapsulation should be left to licensed contractors. Digging a level trench in a low crawlspace while wearing a respirator is exhausting and risky. Sump pump wiring must meet electrical code, and discharge lines need proper slope and connection points to prevent backflow and foundation undermining. Professional crews carry liability insurance, provide warranties on materials and labor, and know how to handle unexpected problems like buried utilities, contaminated soil, or structural issues that appear once the crawlspace is opened up.
Common DIY mistakes include underestimating trench depth and ending up with standing water because the pipe sits too high. Covering perforated drain tile with dirt instead of gravel causes immediate clogging. Running discharge lines too close to the foundation just recycles the water back into the crawlspace. Forgetting to install a check valve on the pump discharge allows water to flow backward when the pump shuts off. Using undersized pumps that can’t keep up during heavy rain floods the crawlspace despite the new drainage system.
How to Compare Contractor Quotes
Start with the materials list. Make sure every quote specifies vapor barrier thickness, sump pump brand and horsepower, pipe diameter, and whether the system includes a battery backup for the pump. A vague quote that just says “install drainage system” leaves room for cheap shortcuts. Next, compare warranties. The best contractors warranty their labor for at least two years and pass through manufacturer warranties on pumps and dehumidifiers. Check the scope of work too. One quote might include debris removal, vapor barrier sealing, and dehumidifier installation, while another only covers the drain and pump, leaving you to finish the encapsulation separately.
Maintenance Requirements for Crawlspace Drainage Systems

Routine checks keep small problems from turning into system failures. Inspect your crawlspace twice a year, ideally in spring before storm season and in fall after heavy rains. Look for new standing water, damp spots on the vapor barrier, musty odors, and signs of pest activity. Test the sump pump by pouring a bucket of water into the basin and making sure it kicks on and discharges normally. If the pump hesitates, makes grinding noises, or doesn’t turn on at all, replace it before the next storm.
Sump pump discharge lines clog with mud, leaves, and ice. Walk the discharge route outside and check the pop up emitter or exit point to confirm water flows freely. In winter, make sure the line isn’t frozen solid. If you have an underground discharge, use a hose to flush the line once a year. Clean the sump basin itself by removing the pump, scooping out sediment and gravel, and wiping down the float switch. A dirty float can stick and prevent the pump from activating.
Monitor the dehumidifier drain connection and humidity levels with a simple hygrometer. Crawlspace humidity should stay below sixty percent year round. If it creeps higher, the dehumidifier may need a new filter, the drain line could be clogged, or the unit might be undersized for your space. Inspect vapor barrier seams and repair any tears or separations with foundation seal tape. Even a small gap allows water vapor to enter and raises humidity.
Test the sump pump by pouring water into the basin and confirming automatic operation. Clean the sump basin and float switch at least once a year. Flush the discharge line with a hose to remove debris and verify clear flow. Check vapor barrier seams and patch tears with foundation tape. Monitor crawlspace humidity with a hygrometer and service the dehumidifier filter and drain. Remove debris, leaf litter, and dead pests that accumulate around the perimeter.
Exterior Water Management That Supports Crawlspace Drainage
Interior drainage works best when you also control water before it reaches your foundation. Gutters and downspouts are the first line of defense. Clogged gutters overflow and dump thousands of gallons of roof runoff right against your foundation during every storm. Clean gutters in spring and fall, or install gutter guards if you have heavy tree cover. Even perfect interior drainage can’t keep up with concentrated roof water pouring onto the soil next to your house.
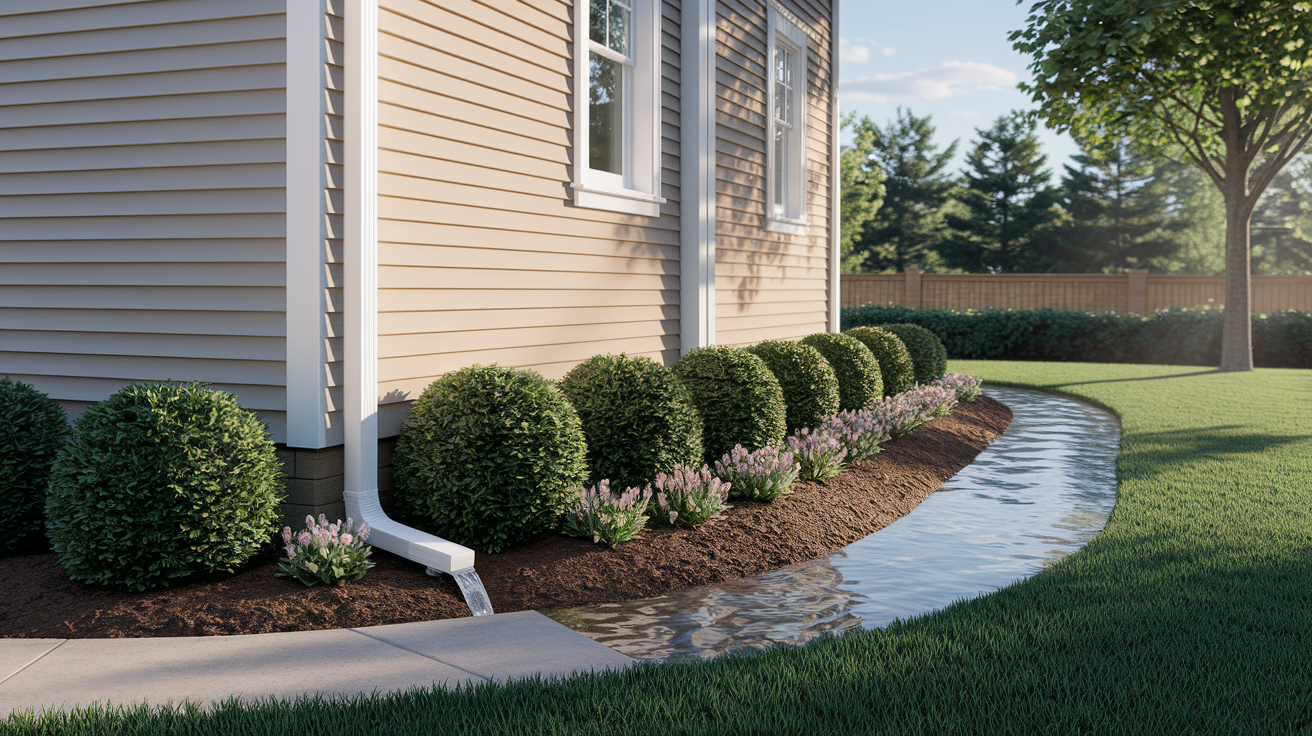
Downspouts must discharge at least ten feet from the foundation to be effective. Short plastic extensions that dump water three feet away just move the problem slightly farther out. The water still soaks into the soil and flows back toward your crawlspace. Rigid PVC extensions work, but underground downspout lines with pop up emitters ten feet or more from the house are cleaner and safer. The emitter opens when water flows and closes when it stops, keeping debris and pests out of the line. Your yard should slope away from the foundation at least six inches over the first ten feet. If it doesn’t, regrading with fill dirt and reseeding creates a natural drainage path that carries surface water away from the house.
Extend all downspouts at least ten feet from the foundation using rigid extensions or underground lines with pop up emitters. Regrade soil around the foundation to slope away at a minimum six inch drop over ten feet. Keep gutters clean and install gutter guards in areas with heavy leaf fall. Avoid planting shrubs and flower beds directly against the foundation. They trap moisture and their roots can crack foundation walls. Install a swale or shallow drainage ditch if your yard naturally channels water toward the house.
Signs of Crawlspace Drainage System Failure and When to Replace Components
Recurring standing water is the clearest sign your drainage system isn’t working. If puddles reappear after storms or the sump basin stays full even when the pump runs, the perforated pipe may be clogged, the pump may be undersized, or the discharge line could be blocked or broken. Musty odors that return after encapsulation suggest the vapor barrier has torn or the dehumidifier isn’t keeping up. A sump pump that cycles on and off rapidly without draining the basin usually means a stuck float switch, a clogged discharge line, or a failing check valve that lets water flow backward.
Sump pumps typically last five to seven years with regular use, though high quality cast iron models can run ten years or longer. If your pump is older than seven years and you’ve had no problems, consider replacing it preemptively before it fails during a storm. Dehumidifiers last eight to ten years on average. Vapor barriers don’t wear out, but they can tear if you have pest activity or if someone crawls around without being careful. Inspect and patch tears promptly, or replace heavily damaged sections.
Before and After Crawlspace Drainage Scenarios
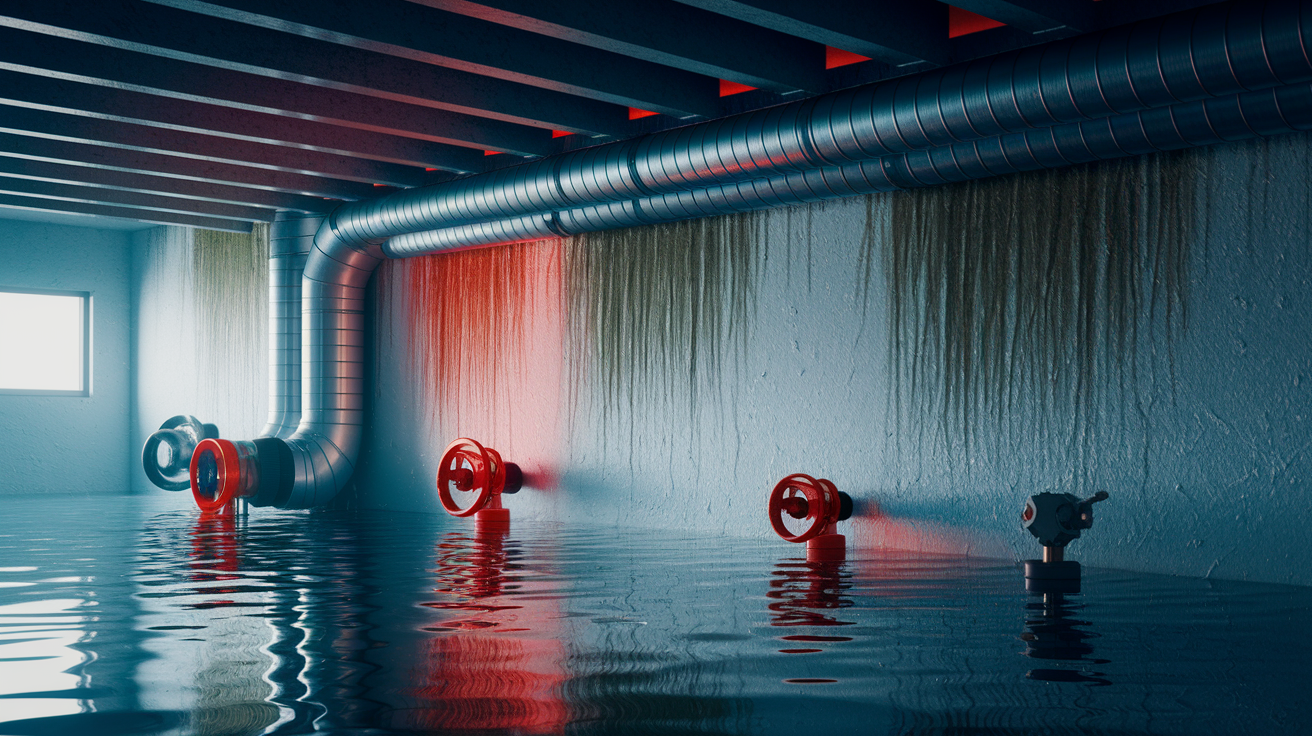
A typical before scenario shows standing water pooling in low corners, visible mold on floor joists and rim boards, a damp smell rising into the first floor, and sagging insulation dripping with condensation. The soil may be eroded around support piers, leaving gaps and unstable footing. Homeowners often describe the crawlspace as unusable and worry about the floor feeling soft or springy overhead.
After installing an interior perimeter drain, sump pump, and sealed vapor barrier with encapsulation, the same crawlspace is dry, odor free, and bright when you shine a flashlight around. The vapor barrier covers every surface, seams are taped, and the dehumidifier hums quietly in the corner. Support piers sit on stable, dry soil. The musty smell is gone from upstairs rooms. Diagrams showing the trench layout, pipe routing to the sump basin, and discharge line path help visualize how water moves from collection to removal. Photos comparing moldy joists before and clean, dry wood after tell the story clearly.
Homeowner Considerations: Permits, Codes, Warranties, and Insurance
Local building codes govern how deep you dig trenches, where discharge lines can exit, and how sump pumps must be wired. Some jurisdictions require a dedicated GFCI protected electrical circuit for the pump. Others mandate battery backup systems or alarm notifications if the pump fails. Permit requirements vary. Rural areas may not require permits for crawlspace work, while cities often do. Pulling a permit adds a few hundred dollars and a week or two for plan review, but it also means an inspector verifies the work meets code before you close it up.
Warranties should cover materials and labor separately. A good contractor warranties labor for two to five years and passes through manufacturer warranties on pumps, dehumidifiers, and vapor barrier materials. Read the fine print to understand what voids the warranty, such as DIY modifications or missed maintenance. Insurance companies increasingly ask about moisture control measures during home sales and policy renewals. Installing a drainage system and encapsulation can improve insurability and may be required to maintain coverage in flood prone areas.
| Requirement | Why It Matters |
|---|---|
| Building permit | Ensures work meets local code for trench depth, discharge routing, and electrical safety |
| Electrical code compliance | Sump pump circuits must be GFCI protected and properly grounded to prevent shock hazards |
| Contractor warranty | Protects you from defective workmanship and material failures for two to five years after installation |
| Insurance disclosure | Some insurers require proof of moisture control before issuing or renewing policies in high risk areas |
Final Words
Facing damp, musty air in the crawlspace? This guide showed when moisture needs attention, what system parts do the work, and the steps for installation and encapsulation.
We covered costs, exterior fixes, maintenance, signs of failure, and when to DIY or hire a pro. We also explained what to document for permits and insurance.
Acting fast protects floors and framing. Properly installed crawlspace drainage systems, paired with a vapor barrier and routine checks, stop repeat problems and make future repairs straightforward. You’ll have a safer, drier home.
FAQ
Q: What is the best drainage system for a crawl space?
A: The best drainage system for a crawl space is an interior perimeter drain paired with a sump pump and a vapor barrier (encapsulation); it stops water at the foundation, prevents mold, and lets you verify dryness.
Q: What are the four types of drainage systems?
A: The four types of drainage systems are interior perimeter drains with sump pumps, exterior perimeter (French) drains, passive surface grading and downspout extensions, and full encapsulation with vapor barrier and dehumidification.
Q: What are the downsides of a French drain?
A: The downsides of a French drain are clogging from silt or roots, ongoing maintenance, possible disruptive exterior excavation, and limited protection alone without a sump pump or encapsulation in high water tables.
Q: How much does it cost to install a crawl space drainage system?
A: The cost to install a crawl space drainage system is usually $2,000–$6,000 for an interior drain with sump; full encapsulation averages around $7,500, depending on access, home size, soil, and permits.