

Skipping clear photos and notes is the costly mistake most homeowners make after a water leak.
That can shrink your payout and slow repairs.
This post walks you step-by-step through what to do right away: stop the water, document the damage, notify your insurer, hire a licensed restorer, and protect evidence so you don’t lose coverage.
Follow these steps to limit mold, speed the claim, and get the repairs covered—no guesswork, just what works.
Stop the Water Immediately
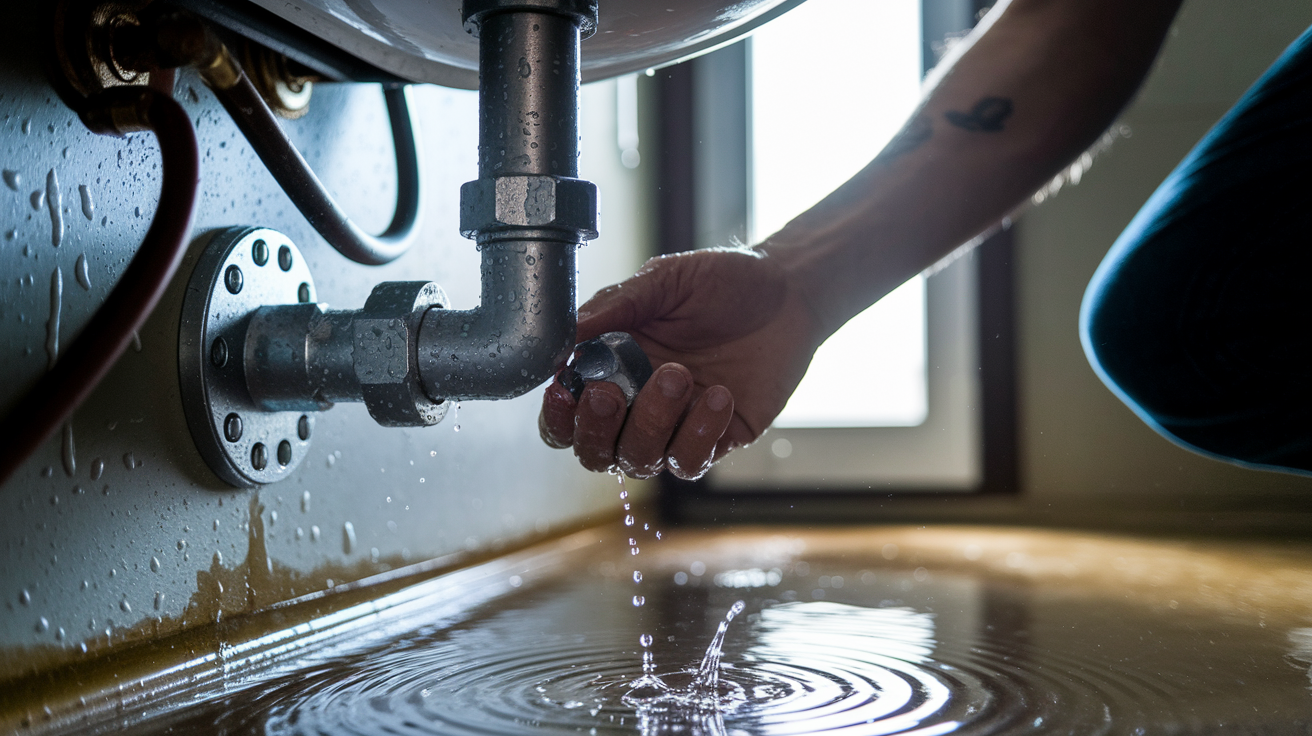
Turn off the water the second you spot a leak. If you know which fixture or appliance is leaking, find the individual shut-off valve. It’s usually a small oval handle or round knob under sinks, behind toilets, or near washing machines. Turn it clockwise by hand. Can’t find the local valve, or is the leak inside a wall or ceiling? Shut off the main water valve for the whole house. Main valves usually need a wrench to turn. Some homes have a round wheel valve, others have a lever style ball valve. Turn the wheel clockwise until it stops, or flip the lever a quarter turn so it sits perpendicular to the pipe.
Speed matters. Mold and mildew can start growing on wet materials in 24 to 48 hours. The longer water runs, the deeper it soaks into drywall, insulation, subfloors, and trim. More damage, more expensive repairs, and more evidence the insurance adjuster will document.
Once the water’s off, check for immediate safety hazards. Water pooling near electrical outlets, appliances, or your breaker box? Shut off electricity to that area at the circuit breaker. If you smell gas or suspect structural instability (sagging ceilings, bulging walls), leave the space and call for professional help. Your safety comes first.
Document Everything Before You Touch Anything
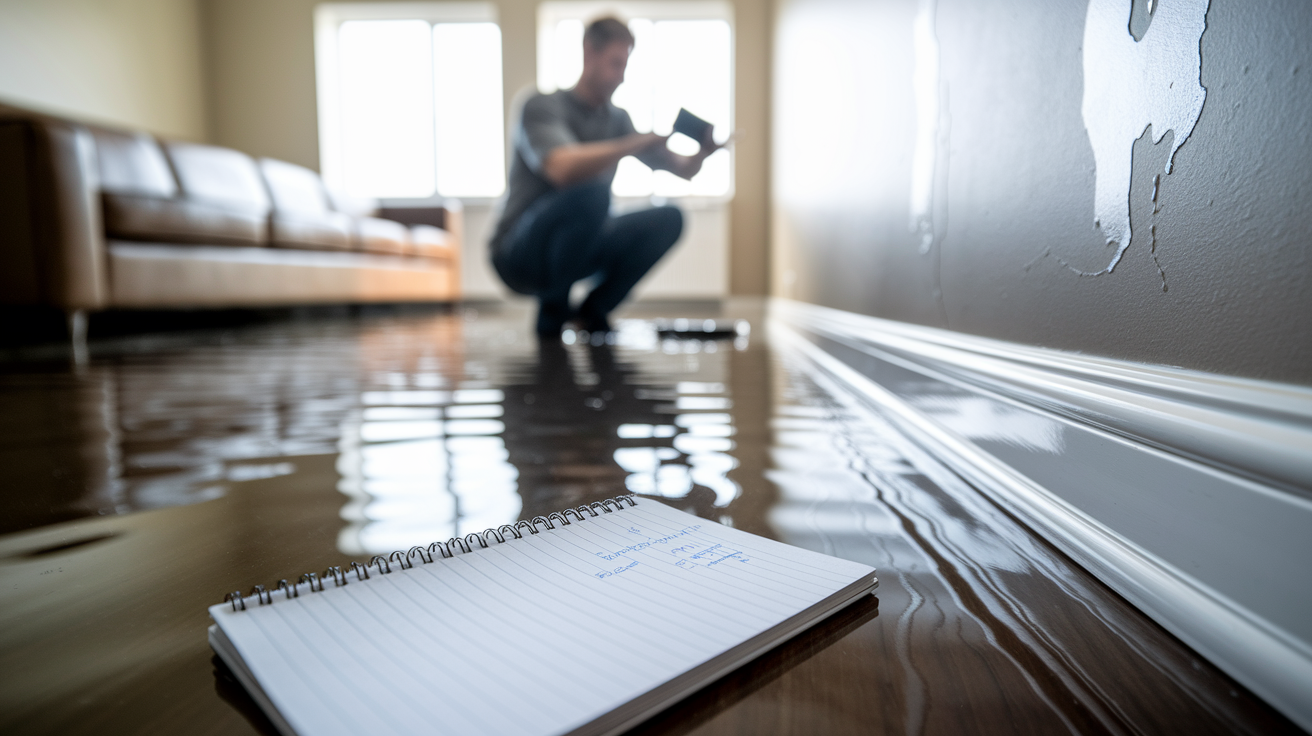
Before you start mopping or moving furniture, pull out your phone and take photos and videos of every wet surface, every damaged item, and the source of the leak if you can see it. Walk through each room. Capture wide shots that show how far the water spread, then close-ups of specific damage: bubbled paint, warped baseboards, soaked carpet, water stains on drywall, wet furniture, and any rusted or corroded pipes or fittings.
Open closets and drawers and photograph wet clothing, shoes, linens, and anything else that absorbed water. If you can see the failed component (a cracked supply line, a burst pipe joint, a leaking roof membrane), photograph it from multiple angles. Include a timestamp if your camera allows it, or note the date and time separately in a document.
This visual record is the foundation of your insurance claim. Adjusters and insurers rely on photos to verify the scope of damage and determine what’s covered. Without clear documentation, you may struggle to prove the full extent of loss, especially for items that had to be discarded quickly or damage that happened behind walls.
Take notes as you go. Write down the date and time you discovered the leak, where the water came from, which rooms were affected, and what immediate actions you took. Shutting off the main valve, moving electronics to dry ground, calling a restoration company. Keep this log with your photos. It becomes part of your claim file and helps you stay organized as the process unfolds.
Notify Your Insurance Company Right Away

Call your insurance company or agent as soon as you have the leak under control and initial documentation complete. Most carriers operate 24/7 claim hotlines, and many let you file online through a web portal or mobile app. Report the loss immediately. Delaying the call can raise questions about how much damage happened before you acted and may complicate coverage.
When you speak to the claims representative, provide clear, factual information: the date and time of the loss, the suspected cause (burst pipe, appliance failure, roof leak), which areas of the home were affected, and what steps you’ve already taken to stop the water and prevent further damage. Mention if you hired a water damage restoration company or if you moved belongings to protect them. The insurer will assign a claim number and schedule an adjuster to inspect your property.
Ask the representative what your policy covers and what it excludes. Confirm whether your policy pays actual cash value (current depreciated value) or replacement cost value (cost to replace with new, like-kind materials), and whether any depreciation will be withheld until you complete repairs and provide proof of payment. Find out if temporary housing or additional living expenses are covered if your home is uninhabitable, and clarify the claims process for those expenses. Some insurers reimburse after the fact, others may pay directly.
Write down the claim number, the name of the representative you spoke with, and the date and time of the call. Save all correspondence. This paper trail protects you if disputes arise later.
Understand What’s Covered and What’s Not
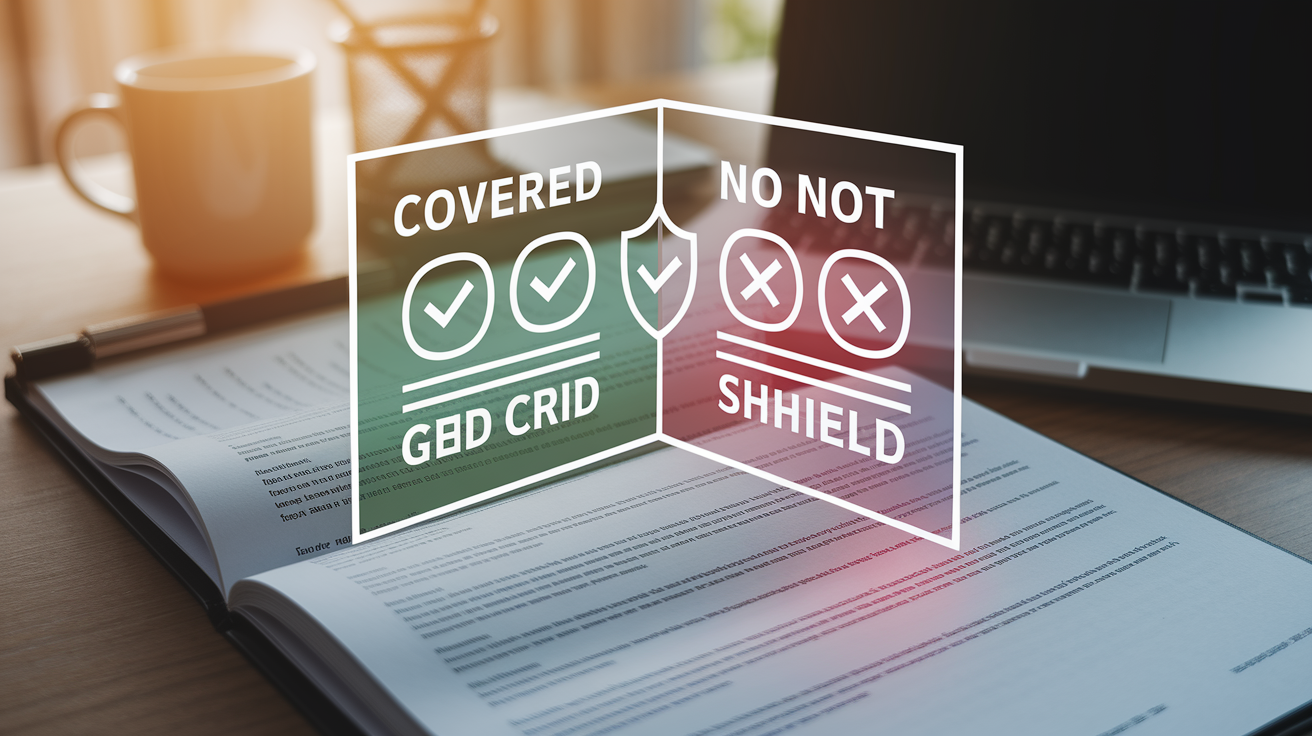
Most homeowner’s insurance policies cover sudden, accidental water damage: a pipe that bursts because it froze overnight, a washing machine hose that splits and floods the laundry room, a roof that leaks during a windstorm, or ice dams that force water under shingles. The policy typically pays to repair or replace damaged building materials (drywall, flooring, cabinets, trim) and to dry out the structure so mold doesn’t take hold.
What policies usually exclude: flood damage from natural disasters (rising rivers, storm surge, heavy rain that overwhelms drainage), gradual or maintenance related leaks (a slow drip under the sink that went unnoticed for months, a roof that deteriorated over decades without repair), sewage backup (often requires a separate endorsement), and damage caused by earth movement like seepage from groundwater or settling. If the leak was caused by your failure to maintain the home (ignoring a known problem, neglecting repairs, leaving the house unheated in winter), the insurer may deny coverage on grounds of negligence.
The appliance or fixture that failed is often not covered under your homeowner’s policy. If your water heater rusts out and floods the basement, the policy may pay to repair the wet drywall, replace soaked carpet, and dry the framing, but it won’t buy you a new water heater. That component is considered a maintenance item. You may have warranty coverage or a product liability claim against the manufacturer, but your home policy won’t replace it.
Check your policy’s declarations page and endorsements to confirm your coverage limits, deductible, and any special conditions. If you live in a flood zone or an area with frequent storms, you may need a separate flood policy through the National Flood Insurance Program or a private flood insurer. If sewage backup is a concern, confirm you have that endorsement. Knowing these details before you file prevents surprises when the adjuster delivers the estimate.
Hire a Licensed Water Damage Restoration Company

Unless the leak is very minor (a small puddle you can towel up in minutes), hire a licensed, insured water damage restoration company to extract standing water, set up drying equipment, and monitor moisture levels in walls, floors, and ceilings. These companies use truck mounted extractors, commercial dehumidifiers, air movers, and moisture meters to dry materials thoroughly, not just on the surface.
Ask for proof of license and insurance before you sign a work order. Request a written estimate that itemizes the scope of work: water extraction, affected square footage, number of air movers and dehumidifiers, estimated drying time, and cost. Compare quotes from at least one other company if time allows, but don’t delay the start of drying just to shop around. Every hour matters in preventing mold growth and further material damage.
The restoration company isn’t the same as the contractor who will rebuild drywall, replace flooring, or repaint. Some restoration firms offer both services, but it’s smart to get separate bids for reconstruction work once drying is complete. Don’t sign contracts for full scale repairs until you know what the insurance adjuster will approve and what your out of pocket costs will be.
Document what the restoration company does. Take photos of the equipment they set up, keep copies of daily moisture readings if they provide them, and save all invoices. If your policy includes a depreciation holdback (money the insurer withholds until repairs are done), you’ll need proof that you paid for this work in order to recover those withheld funds.
Mitigate Further Damage While You Wait for the Adjuster

You have a duty under most policies to prevent additional damage once you discover a loss. This means you can’t just leave wet carpet sitting for a week while you wait for the adjuster. Pull up soaked rugs, move furniture away from wet walls, remove wet insulation if it’s accessible, and run fans to increase airflow. If the roof is leaking, place buckets to catch drips and cover valuables with plastic sheeting. If a window broke and rain is coming in, board it up with plywood or heavy plastic.
Keep receipts for any materials you buy (tarps, plastic sheeting, plywood, cleaning supplies) and take photos of the mitigation work you do. Reasonable mitigation expenses are typically reimbursable under your policy. If you hire a handyman to tarp the roof or board a broken door, save the invoice.
Do not make permanent repairs before the adjuster inspects and documents the damage. If you tear out all the wet drywall and dispose of it before the adjuster sees it, you lose critical evidence of the scope of loss. The adjuster needs to measure, photograph, and assess the damage firsthand. Temporary measures (stopping the leak, drying the space, protecting belongings) are expected and covered. Permanent fixes (patching walls, replacing flooring) should wait until the claim is settled or at least until the adjuster gives you the go-ahead.
Collect and Organize All Required Documentation

Insurers need proof to process claims. Gather every piece of evidence that supports your loss: the photos and videos you took immediately after the leak, an inventory of damaged personal property (furniture, clothing, electronics, appliances) with purchase dates and prices if you have receipts or credit card statements, and estimates from contractors or restoration companies.
If you had to move out temporarily, keep receipts for hotel stays, restaurant meals, and any other additional living expenses your policy covers. If you hired a plumber to diagnose the leak or a roofer to inspect storm damage, save those invoices. If you paid for emergency board up or tarping, include those receipts.
Create a simple spreadsheet or document that lists each damaged item, the room it was in, what it cost when you bought it, and its approximate age. For high value items (jewelry, electronics, antiques), include serial numbers, model numbers, or appraisals if you have them. The more detail you provide, the easier it is for the adjuster to validate your claim and calculate a fair settlement.
Organize everything in a folder (digital or paper) with the claim number on the cover. Make copies of key documents before you submit them. If the insurer requests additional information, you can respond quickly without scrambling to recreate records.
Work With the Insurance Adjuster During the Inspection

The adjuster will visit your home to inspect the damage, take measurements, photograph affected areas, and write a detailed estimate of repair costs. Be present for this visit if possible. Walk the adjuster through each damaged room, point out hidden damage if you’ve discovered it (wet insulation in the attic, moisture inside wall cavities), and share your documentation.
Answer the adjuster’s questions honestly and factually. Describe what happened, when you noticed the leak, and what you did to stop it. Show the source if it’s visible. If you don’t know the answer to a question, say so. Don’t guess or speculate.
The adjuster’s job is to determine what’s covered under your policy and estimate the cost to repair or replace covered damage. The adjuster isn’t your enemy, but the adjuster works for the insurance company. Be polite, cooperative, and clear, but remember that you have the right to question the adjuster’s findings if you believe they’re incomplete or inaccurate.
After the inspection, the adjuster will prepare a written estimate with line items for labor and materials. This estimate forms the basis of your settlement offer. Review it carefully when you receive it. Compare it to contractor bids you collected. If there are discrepancies (missing items, lower unit costs, excluded areas you believe should be covered), ask the adjuster to explain and provide your contractor’s estimates as a counter reference.
Understand Actual Cash Value Versus Replacement Cost

Your policy will settle your claim on either an actual cash value basis or a replacement cost basis. Actual cash value means the insurer pays you the current depreciated value of damaged materials and belongings (what they were worth at the time of loss, accounting for age and wear). Replacement cost means the insurer pays the amount it would cost to replace or repair with new, like-kind materials, without deducting for depreciation.
Most policies initially issue payment at actual cash value, then release the depreciation holdback once you complete repairs and submit proof (typically canceled checks, receipts, or bank statements showing you paid contractors and suppliers). This two stage payment protects the insurer from paying for repairs that never happen, but it means you may need to front some costs or arrange financing to get work started.
For example, if your 15 year old hardwood floor is damaged and the replacement cost is $10,000, the insurer might pay you $6,000 up front (the depreciated value) and hold $4,000 until you install the new floor and prove you spent the money. Once you submit the invoice and proof of payment, the insurer releases the remaining $4,000.
Check your policy to confirm which settlement method applies to the structure and to personal property. Some policies cover the building on a replacement cost basis but personal property on an actual cash value basis. Know what to expect so you can plan your repair budget and avoid surprises.
Navigate Lender Requirements if You Have a Mortgage

If you have a mortgage, the insurance settlement check will often be made payable to both you and your mortgage lender. The lender has a financial interest in the property and wants to ensure repair funds are used to restore the collateral. You’ll need to endorse the check and send it to the lender’s loss draft or insurance claim department for their endorsement before you can deposit it.
The lender may require an inspection before releasing funds, or release funds in stages as work progresses. This process can add weeks to your timeline. Contact your lender as soon as you know a claim check is coming. Ask what their endorsement process looks like, what documents they need, and how long it typically takes. Some lenders move quickly, others require multiple inspections and reviews.
Plan your repair schedule around this delay. If you need cash to pay contractors before the lender releases funds, consider a short term loan, a home equity line of credit, or negotiate a payment schedule with your contractor that aligns with the lender’s draw schedule.
Get Multiple Contractor Bids and Compare Them to the Adjuster’s Estimate
Once you have the adjuster’s written estimate, solicit bids from at least two licensed, insured contractors who specialize in water damage repairs (drywall replacement, flooring installation, cabinetry, trim work, and painting). Share the adjuster’s estimate and ask the contractors to provide their own detailed scope of work and pricing.
Compare the bids line by line. If multiple contractors tell you the adjuster’s estimate is too low (missing items, underestimating labor hours, using outdated material costs), document those discrepancies and present them to your insurer. Attach the contractors’ bids and a cover letter explaining the differences. Your insurer may agree to a supplement (an increase to the original estimate) if the evidence supports it.
Choose a contractor based on reputation, references, proof of license and insurance, and clear communication, not just the lowest bid. Ask to see examples of similar water damage repairs they’ve completed, and call previous customers if possible. A cheap bid that results in poor workmanship or an unfinished job will cost you more in the long run.
Don’t let the contractor talk you into upgrades or changes that go beyond like-kind repairs unless you’re prepared to pay the difference out of pocket. Insurance covers restoring your home to its pre-loss condition, not improving it. If you want to upgrade from laminate countertops to granite, or from builder grade carpet to hardwood, you’ll pay the cost difference yourself.
Submit Proof of Completed Repairs to Recover Depreciation Holdback
If your policy withholds depreciation until repairs are complete, gather proof of payment and completion as soon as the work is done. Submit copies of final invoices, canceled checks, bank statements showing wire transfers or check clearances, and photos of the finished repairs. Some insurers also require a signed completion certificate from the contractor and a final inspection by the adjuster.
Label everything clearly with your claim number and a cover letter that lists each document you’re submitting. Send the package via certified mail or upload it through the insurer’s online portal so you have a record of submission. Follow up within a week if you don’t receive confirmation that your depreciation release is being processed.
This step is often overlooked, which means homeowners leave money on the table. Don’t assume the insurer will automatically send the withheld funds. You must initiate the request and provide the required proof.
Understand Subrogation and Deductible Recovery
If a third party is responsible for the water leak (a plumber who installed a faulty supply line, an appliance manufacturer whose product failed, a roofing contractor whose work let water in), your insurer may pursue subrogation, which means the insurer sues or negotiates with the at fault party to recover the money it paid on your claim. If the insurer is successful, you may be reimbursed for your deductible.
Cooperate with your insurer’s subrogation investigation. Provide the names and contact information for any contractors, plumbers, or product manufacturers involved. Save purchase receipts, warranties, and installation contracts. If you believe a third party is at fault, tell your adjuster during the initial claim interview so the insurer can start the investigation early.
Subrogation can take months or even years to resolve, so don’t count on recovering your deductible immediately. But if the insurer does recover, it’s required by law to reimburse your deductible before keeping the rest.
Know That a Claim May Affect Your Future Insurability
Filing a water damage claim can lead to higher premiums at renewal or, in some cases, non-renewal of your policy. Insurers track claim history through databases like CLUE (Comprehensive Loss Underwriting Exchange), and multiple claims within a few years can label you as a high risk customer.
If your insurer non-renews your policy after a claim, you’re not automatically uninsurable. An independent insurance agent can help you shop for coverage with other carriers. Some insurers specialize in homes with prior claims. Expect to pay higher premiums, and consider whether installing leak detection devices, automatic shut off valves, or other risk mitigation systems might qualify you for discounts with a new carrier.
Weigh the cost of a claim against your deductible and future premium increases before you file. If the damage is minor and the repair cost is only slightly above your deductible, paying out of pocket may be smarter than filing a claim and risking non-renewal or a rate hike.
Consider Legal Help if Your Claim Is Denied or Underpaid
If your insurer denies your claim or offers a settlement you believe is inadequate, consult a public adjuster or an attorney who specializes in insurance disputes. Public adjusters work for you, not the insurer, and can re-inspect the damage, prepare a detailed independent estimate, and negotiate with the insurer on your behalf. They typically charge a percentage of the settlement (often 10 to 15 percent), so weigh that cost against the amount in dispute.
An attorney may be necessary if the insurer denies coverage based on a policy exclusion you believe doesn’t apply, if the insurer is slow walking the claim or refusing to communicate, or if you suspect bad faith (deliberate underpayment or wrongful denial). Many insurance attorneys work on contingency, meaning they only get paid if they recover money for you, but confirm fee arrangements up front.
Before you hire representation, try to resolve the dispute through your insurer’s internal appeals process. Request a written explanation of the denial or low settlement, cite specific policy language that supports your position, and provide additional documentation (contractor estimates, expert opinions, photos) that counter the insurer’s findings. If that fails, escalate to your state’s department of insurance, which can investigate complaints and sometimes mediate disputes.
Legal help is a last resort, but it exists for a reason. If you’re facing significant out of pocket costs because of an unreasonable claim decision, don’t hesitate to protect your rights.
Communicate Clearly and Keep Records of Every Interaction
From the moment you discover the leak until the final check clears, document every phone call, email, text, and letter related to your claim. Note the date, time, person you spoke with, and a summary of what was discussed. Save copies of all written correspondence. If you make a promise (sending documents by a certain date, scheduling a contractor visit), follow through and confirm completion in writing.
When you email your insurer or adjuster, use a clear subject line that includes your claim number and the topic. “Claim #123456, Request for Written Estimate and Payment Timeline” or “Claim #123456, Submission of Contractor Bids and Repair Receipts.” Attach supporting documents as PDFs with descriptive file names: “ContractorBidABCRestoration.pdf” or “PhotosWaterDamageLiving_Room.pdf.”
If you need to request additional living expense reimbursement, send a separate email with the subject line “Claim #123456, ALE Reimbursement Request” and attach all hotel and meal receipts, along with the dates you were displaced. In the body, list the total amount you’re claiming and ask for confirmation of coverage, required documentation, and expected reimbursement timeline.
Clear, organized communication speeds up the claims process and reduces misunderstandings. It also creates a record you can reference if disputes arise or if you need to escalate a stalled claim.
Install Preventive Devices to Avoid Future Claims
After you settle the current claim, take steps to prevent the next one. Install water leak detection sensors near water heaters, washing machines, sump pumps, and under sinks. These battery powered devices sound an alarm when they detect moisture and some connect to smartphone apps that alert you even when you’re away. Automatic shut off valves, installed on the main water line or at individual fixtures, can stop the flow of water when a sensor detects a leak.
Inspect hoses and supply lines annually and replace them every five years or sooner if you see cracks, bulges, or corrosion. Upgrade rubber washing machine hoses to braided stainless steel versions. Insulate pipes in unheated areas (crawl spaces, attics, exterior walls) and maintain heat in the home during winter to prevent freezing. Clean gutters and downspouts twice a year to prevent ice dams and roof leaks. Check caulking around tubs, showers, and sinks and re-seal as needed.
Some insurers offer premium discounts if you install leak detection or automatic shut off systems. Ask your agent whether your carrier has such a program and what documentation they require to qualify for the discount.
Prevention won’t eliminate all risk, but it reduces the likelihood of a major loss and demonstrates to your insurer that you’re a responsible homeowner, which can help when renewal time comes.
Final Words
Leak stopped, standing water removed, air movers and dehumidifiers set to work. Photos and receipts collected and the loss reported so the damage wouldn’t get worse.
Next, professionals check behind walls with moisture meters, contain wet areas, remove unsalvageable materials, and prepare a clear repair scope. Dryness is confirmed before rebuilding. No guesswork.
Good records make a property damage claim after water leak smoother and speed repairs. The home is on track to be safe and restored.
FAQ
Q: Will home insurance pay for water leak damage?
A: The home insurance policy may pay for water leak damage if the leak was sudden and accidental, not from neglect; document damage, stop the leak, and notify your insurer promptly.
Q: What not to say to a home insurance adjuster?
A: You should avoid admitting fault, guessing cause, promising repairs, or saying you delayed mitigation to the insurance adjuster; stick to facts, provide documentation, and say you’ll follow up with estimates.
Q: How long after water damage can you claim on insurance?
A: You can file a claim as soon as you discover water damage, but policies set time limits (commonly one to two years); report promptly and keep photos and receipts to avoid denial.
Q: Who pays for water leak damage?
A: Responsibility depends on cause: an insurer covers sudden accidental leaks, the homeowner covers damage from poor maintenance, and a landlord, neighbor, or contractor may be responsible if their actions caused the leak.