

Skipping a footer drain is one of the biggest construction mistakes homeowners make.
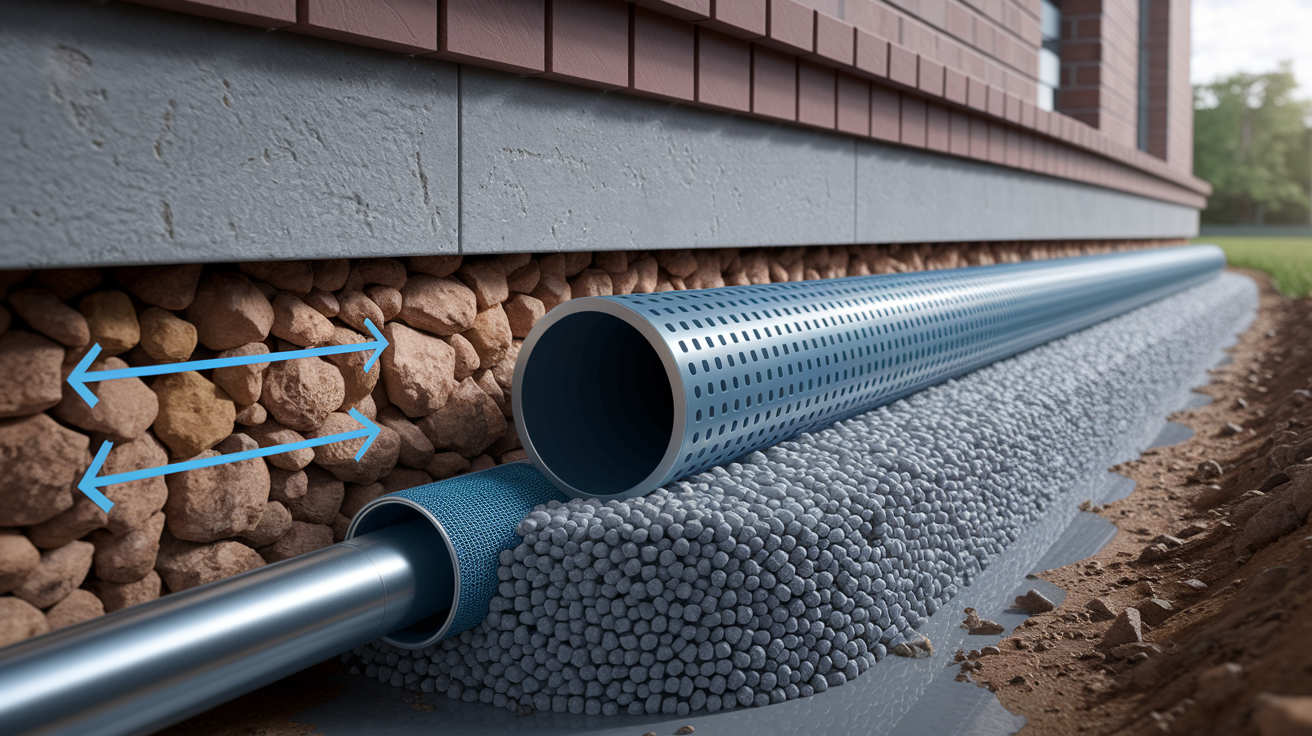
Footer drains sit at the base of your foundation and give groundwater an easy path out instead of pushing through the wall.
They stop hydrostatic pressure (water pushing on walls), the real cause of damp walls, musty smells, mold, and warped floors.
Installed during construction they’ll protect the house for decades, but retrofits mean tearing up landscaping and can cost tens of thousands.
Here’s how exterior vs interior footer drain systems work, what to expect, and how to keep your basement dry for good.
What Foundation Footer Drains Are and Why They Matter
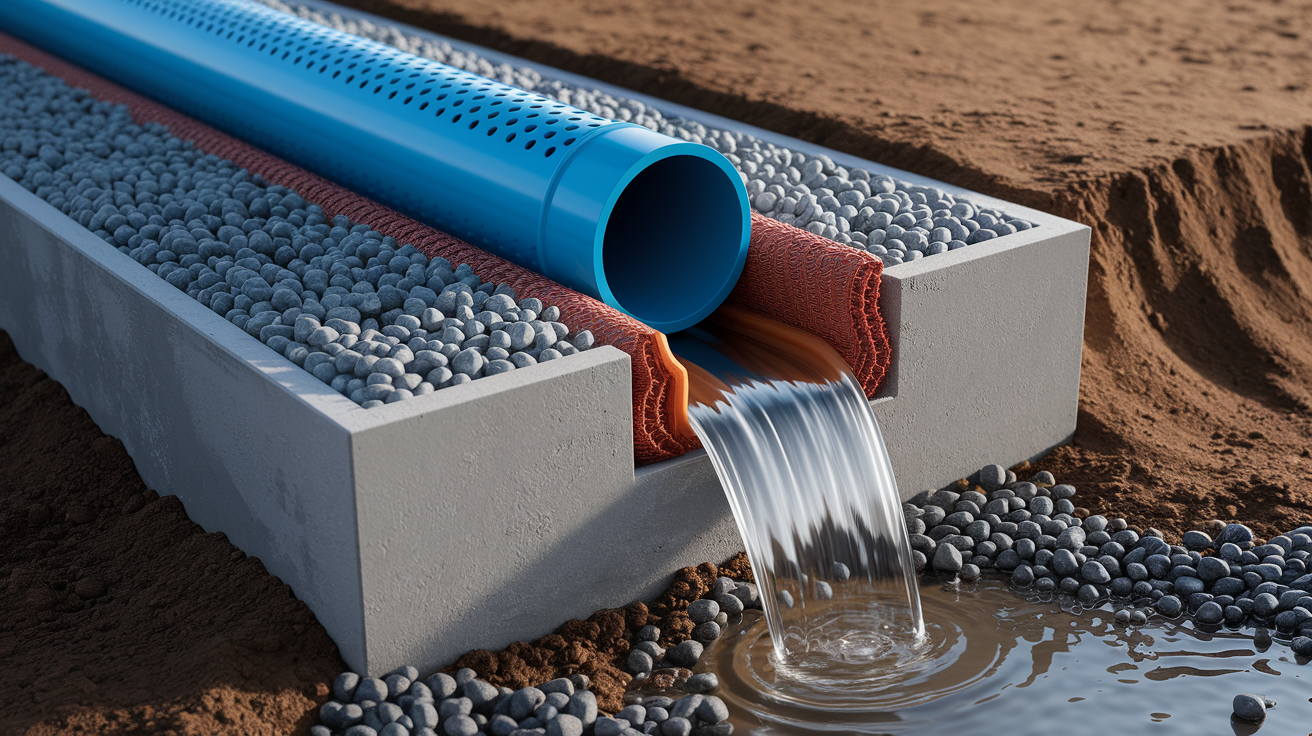
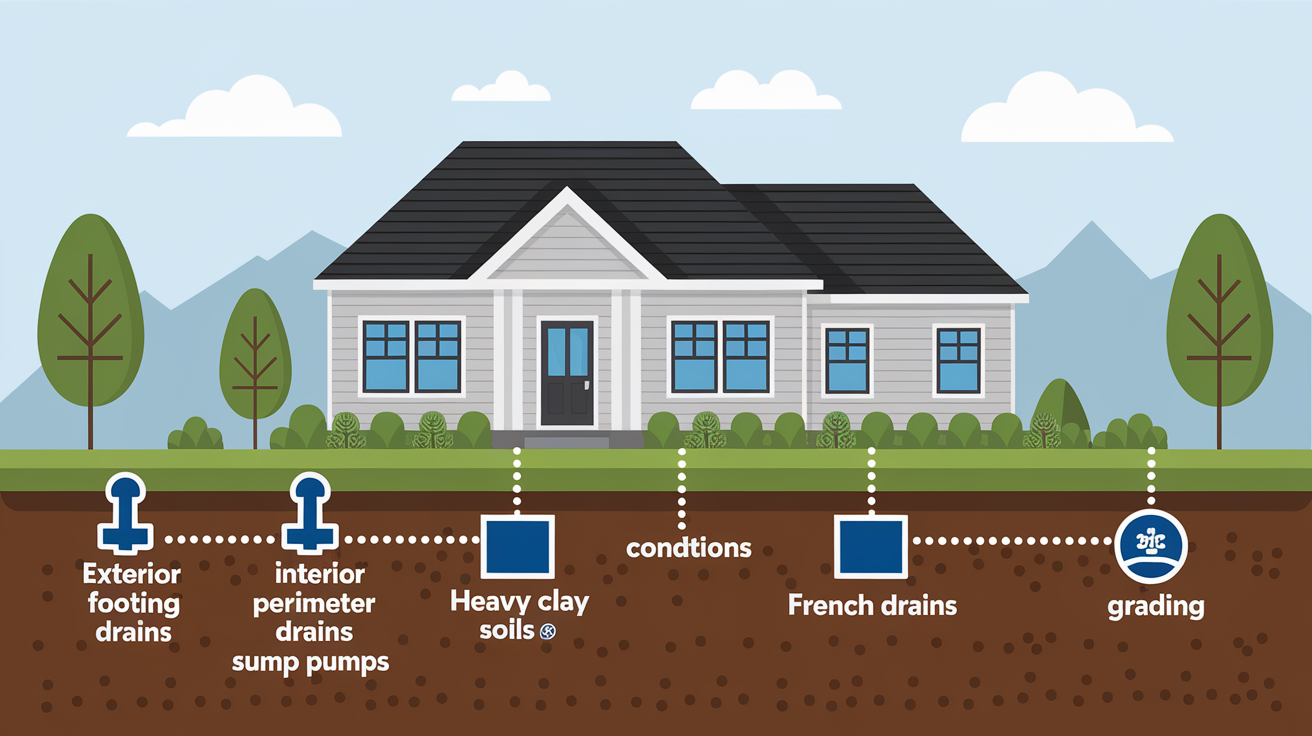
A foundation footer drain is a perforated pipe installed at or below the footing level on the outside of your basement or crawlspace walls. The pipe sits in a gravel filled trench, wrapped in filter fabric or a sock, and carries groundwater away before it can push against your foundation or seep through cracks.
The problem it solves is hydrostatic pressure. When soil around your foundation gets saturated after heavy rain or snowmelt, water builds up and pushes against walls and floors. Over time that pressure forces moisture through porous concrete, through cracks, or up through the slab joints. You end up with damp walls, wet carpets, musty smells, mold growth, and sometimes serious structural issues like settlement or bowing walls.
Footer drains intercept that groundwater at the lowest point, right where your foundation meets the earth, and route it to a safe discharge point downhill, into a storm sewer, or into a sump pit where a pump lifts it away.
Without a working drain system, basements stay wet. Wet basements mean poor indoor air quality because mold spores and moisture vapor rise into living spaces. Chronic dampness also attracts pests, rots wood framing, and ruins stored belongings.
Footer drains are most effective when installed during initial construction, before backfill goes in. Retrofitting them later requires excavating around the entire perimeter, which is disruptive and expensive. One homeowner reported a retrofit cost around $20,000 for a 1,500 square foot basement footprint. That’s why understanding the system early matters, whether you’re building new or buying an existing home.
How Footer Drain Systems Work
The basic concept is gravity and collection. Groundwater moves through soil and collects at the lowest point near your foundation. The perforated pipe gives that water an easy path into the drain instead of through your basement wall.
Water enters the pipe through small holes or slots. Those perforations face down or to the sides, depending on the pipe type and installer preference. A filter fabric sock or a layer of geotextile fabric around the gravel prevents fine soil particles from washing into the pipe and clogging it.
Once inside the pipe, water flows along the sloped trench to an outlet. If your lot has enough slope, the pipe runs to daylight, meaning it opens onto the surface downhill where water spills out harmlessly. If the site is flat or the basement sits below the natural grade, the pipe ties into a sump pit inside the basement. A sump pump then lifts the water up and discharges it through a solid pipe that runs outside, away from the foundation.
The pipe itself is typically 4 inches in diameter. Perforated pipe can be installed nearly level because the outlet pipe, the solid section that carries collected water away, provides the slope and flow. That outlet pipe must slope at least 1/4 inch per foot to keep water moving. Steeper is better.
Around the pipe you place crushed stone or coarse gravel. Stone is porous, so water moves through it quickly and reaches the pipe. A typical exterior trench has about 3 inches of stone under the pipe as bedding, then stone fills the trench to about 8 inches above the top of the footing. Filter fabric wraps the stone in a “burrito” to keep soil out. On top of the fabric, installers add a 6 inch cap of coarse sand to further prevent soil migration, then backfill with native soil graded to slope away from the foundation.
Interior footer drains work similarly but sit inside the basement perimeter. Before the slab is poured, you lay down 8 to 10 inches of crushed stone across the entire floor area. Rigid foam insulation and a puncture resistant vapor barrier go on top of that stone. Then a perforated 4 inch pipe runs along the inside edge where the wall meets the floor. That pipe drains to a sump pit. When groundwater rises through the stone field or seeps in at the wall floor joint, it flows into the pipe and the pump removes it.
Interior systems are easier to retrofit because you don’t have to dig up landscaping or driveways. You cut a trench along the inside perimeter, install the pipe, and tie it to a new sump pit. The trade off is that water still enters the foundation wall from outside. You’re just catching it inside before it floods the floor.
Exterior systems stop water before it touches the foundation, which is better for long term durability and indoor air quality. Interior systems are a practical fallback when exterior work isn’t feasible.
System Types and Configurations
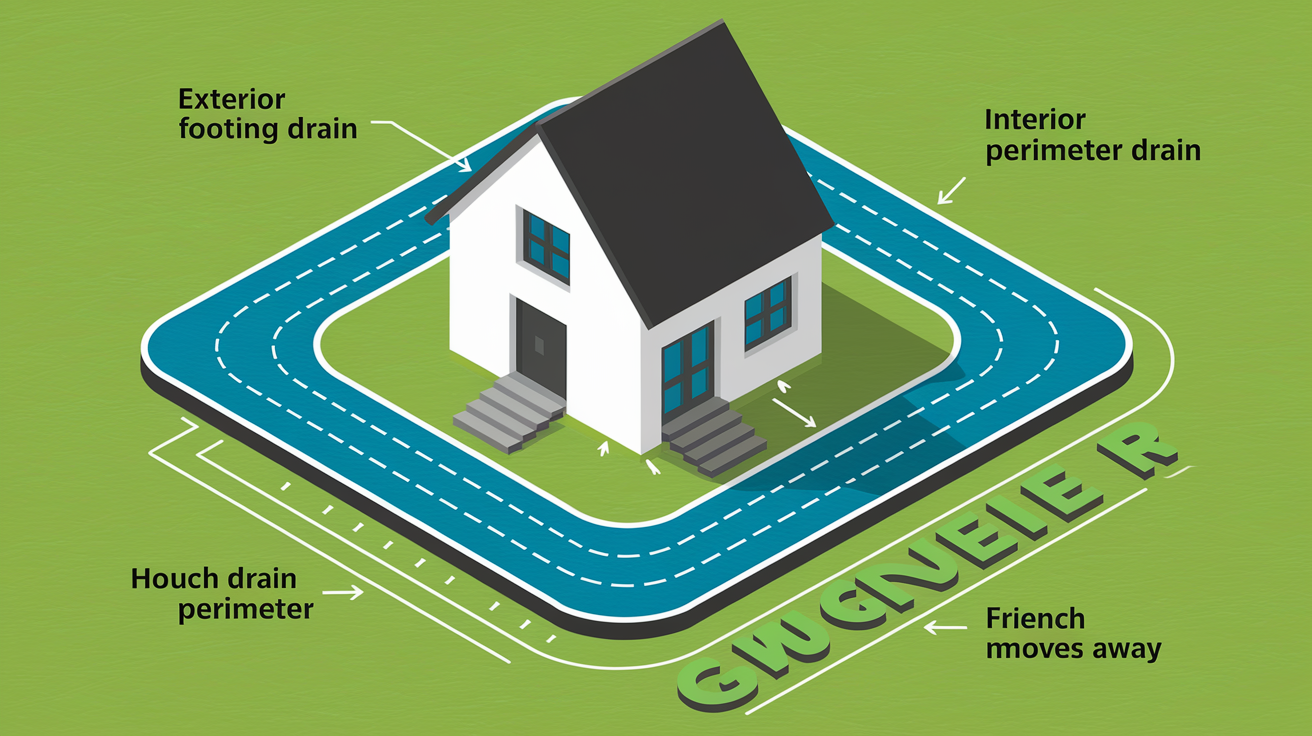
Exterior Footing Drain
This is the most common and most effective type. The perforated pipe sits at the base of the footing on the outside of the foundation wall. During construction, after the footing is poured and the wall is up, you dig or form a trench around the perimeter at footing level.
You unroll wide filter fabric, typically 6 feet wide, along the trench and up the foundation face. Then you place about 3 inches of crushed stone in the bottom of the trench as a base. Lay the 4 inch perforated rigid PVC pipe on that stone bed. Bring crushed stone up around and over the pipe to about 8 inches above the top of the footing. Fold the fabric over the top of the stone. Add a 6 inch layer of coarse sand on top of the fabric, then backfill with soil sloped away from the house.
The pipe runs continuously around the foundation. At corners you use fittings to turn the pipe. Any window wells or other below grade openings tie into the system with solid 4 inch PVC to carry away water that collects in those wells.
The outlet can be a daylight discharge or a line that penetrates the footing near a sump pit. If your foundation perimeter is more than 200 linear feet, either add a second outlet or increase the outlet pipe size from 4 inches to 6 inches to handle the extra volume.
Lifespan for a well installed exterior footing drain is often 40 to 50 years. The main threats are silt infiltration and tree root intrusion. Silt clogs the perforations and the stone. Tree roots grow into the pipe looking for water. Both problems are slower in sandy soils and faster in fine clay soils or where large trees are planted near the foundation.
Interior Perimeter Drain
An interior drain captures water after it has moved through or under the foundation. You install it before pouring the basement slab or, in a retrofit, by breaking out a strip of slab along the walls.
The system starts with a thick layer of crushed stone under the entire slab. 8 to 10 inches is typical. On top of that stone you place rigid extruded polystyrene insulation and a heavy vapor barrier, such as cross laminated polyethylene. Then you form and pour the slab, leaving a gap at the perimeter.
In that gap you install a perforated 4 inch pipe that drains to a sump pit in the lowest corner of the basement. The pit is a plastic or concrete liner sunk into the stone. An automatic sump pump sits in the pit. When water enters and the float or sensor activates, the pump lifts the water through a solid discharge pipe that runs up and out through the rim joist or foundation wall, then away from the house.
You need an airtight sump pit cover. An open pit allows soil gas, including radon, to enter your home, and it also breaks the air barrier, wasting heating and cooling energy.
Because the interior system only catches water that has already entered the foundation zone, it does nothing to reduce hydrostatic pressure on the walls. It prevents flooding, but it doesn’t keep your walls dry. Exterior drains are better for durability, but interior drains are much easier to retrofit and can be very effective in combination with exterior waterproofing.
Interior systems often use proprietary drain channels or baseboard style perforated pipes that sit along the wall floor joint. These can simplify installation and improve collection, but they cost more than plain perforated pipe and gravel.
French Drain (Weeping Drain)
A French drain is a gravel filled trench with a perforated pipe that collects and diverts water. It can be installed anywhere on your property, around the foundation, across a yard, or along a driveway. When installed at footing level around a foundation, it’s effectively the same as a footing drain.
The term “French drain” is often used broadly. It can mean a shallow landscape drain that intercepts surface runoff, or it can mean a deep drain at the footing. For basement protection, you want the drain at or below the footing level so it relieves pressure at the base of the wall.
French drains are often installed as retrofits when the original footing drain has failed or was never installed. You excavate down to the footing, install fabric and gravel, lay the pipe, and backfill. The work is the same as installing an exterior footing drain, just done after the house is built.
Typical lifespan for a French drain is 30 to 40 years, depending on soil type and maintenance. Longevity is shorter than a footing drain installed during construction because retrofit conditions are harder to control. Backfill compaction, fabric placement, and gravel quality can be less consistent when you’re working in a narrow trench next to an existing foundation.
Grading and Surface Drainage
Grading means shaping the soil surface so water flows away from your foundation instead of toward it. Proper grading is the simplest and least expensive form of drainage, and it’s required by code.
You want the ground to slope away from the house at a minimum of 6 inches over the first 10 feet. That slope carries rainwater and snowmelt away from the foundation before it can soak into the soil and create hydrostatic pressure.
Grading works well in moderate climates and on sites with good natural slope. It requires almost no maintenance, just occasional regrading if settling or landscaping changes the surface. But grading alone can fail in areas with heavy rainfall, clay soils that drain slowly, or sites where the water table is high.
When grading isn’t enough, you pair it with a secondary system, either a footer drain or a French drain, to handle subsurface water. Grading manages surface runoff. The drain manages groundwater.
Poor grading creates problems. If soil slopes toward the house, water ponds against the foundation and soaks in. If the slope is too steep right at the wall, water can splash onto siding or erode the soil, exposing the foundation. The goal is a gentle, consistent slope that moves water away without causing erosion or damaging exterior finishes.
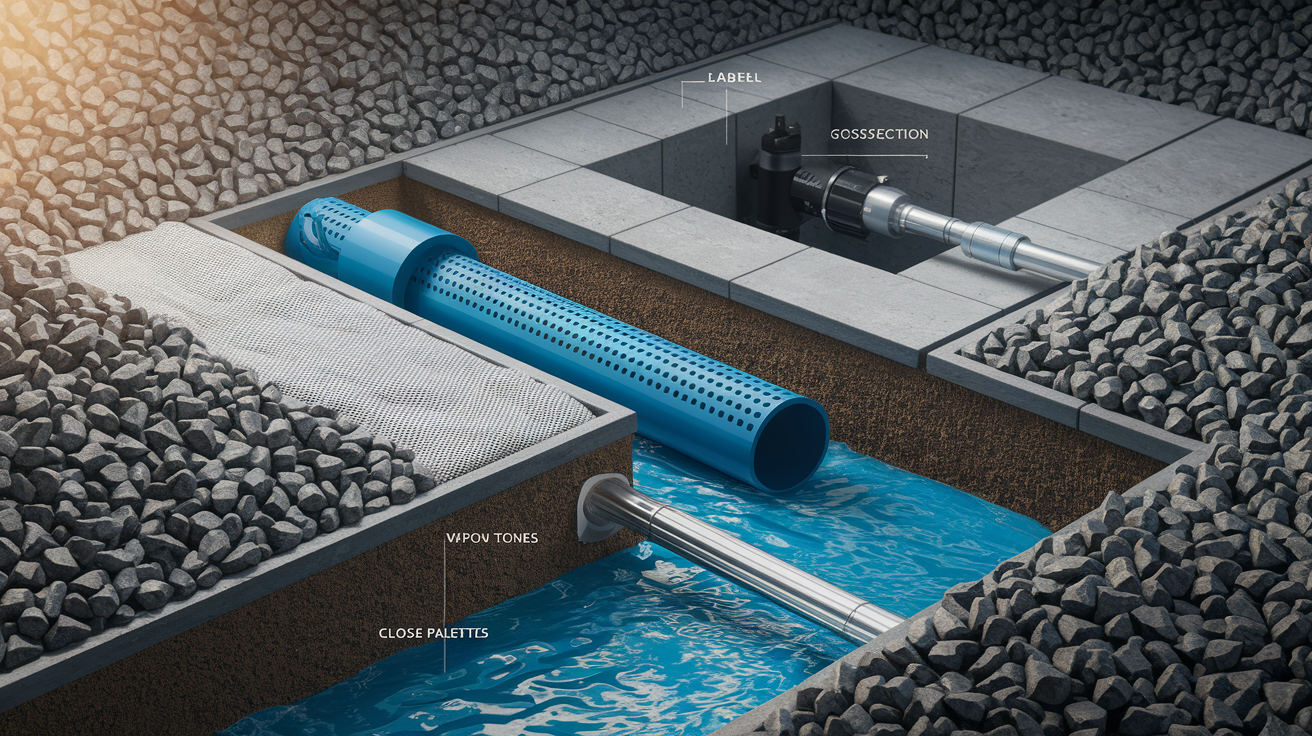
Sump Pump Systems
A sump pit and pump handle water that has been collected by an interior or exterior drain system. The pit is a cylindrical liner, usually 18 to 24 inches in diameter and about 24 to 30 inches deep, sunk into the basement floor at the lowest point. Perforated drain pipes empty into the pit.
When water fills the pit to a certain level, a float switch or pressure sensor activates the pump. The pump lifts the water through a solid discharge pipe that runs out through the foundation wall and away from the house. The outlet should discharge at least 10 to 20 feet from the foundation, onto a slope or into a storm sewer, so the water doesn’t flow back toward the basement.
There are two main types of sump pumps:
Submersible pumps sit down in the water at the bottom of the pit. They’re quieter and more powerful, and they don’t take up space above the pit. The motor is sealed and cooled by the water. Submersibles last about 7 to 10 years with regular use.
Pedestal pumps have the motor mounted on a shaft above the pit. The intake sits in the water, but the motor stays dry. Pedestals are easier to service, last longer, often 15 to 25 years, and cost less. They’re louder and take up more space.
Battery backup is critical. A sump pump only works if it has power. Heavy storms often cause power outages. A battery backup system keeps the pump running when the grid goes down, preventing basement flooding during the very conditions when you need the pump most.
Sump pump systems require routine maintenance. Test the pump every few months by pouring water into the pit to make sure it activates and discharges properly. Clean the inlet screen and check the discharge line for clogs. Replace the backup battery every three to five years.
One concern with sump pits is radon. If soil gas contains radon, an open sump pit becomes a direct pathway into your home. Use an airtight lid with a gasket, and seal any gaps around pipes that enter the pit. If you have a radon problem, you may need a radon mitigation system that vents soil gas from under the slab to the outdoors.
Materials and Components
The effectiveness of a footer drain depends on using the right materials in the right places.
Pipe: Most systems use 4 inch diameter perforated pipe. Rigid PVC is more crush resistant than flexible black corrugated pipe, and it has larger, cleaner holes that clog less easily. Flexible pipe costs less and is easier to work with in tight curves, but the narrow slots fill with silt faster. Installers often prefer rigid PVC for long term reliability.
For long runs, more than 200 linear feet of foundation, or for sump tie ins, step up to 6 inch pipe to increase flow capacity.
Perforated pipe is used in the collection trench. Solid pipe is used for the outlet section that carries water to daylight or the sump. The joint between perforated and solid pipe should be accessible for cleanout if possible.
Gravel and stone: Use clean, crushed stone or coarse gravel with minimal fines. Stone size is typically 3/4 inch to 1.5 inches. The stone creates void space so water can flow freely to the pipe. Avoid rounded river rock. Angular crushed stone packs more loosely and drains better.
Under the pipe, place at least 2 to 3 inches of stone as bedding. Surround and cover the pipe with stone to a depth of 6 to 8 inches above the top of the footing.
Some installers use “clear stone” or “open graded aggregate” with no fines at all. This stone drains faster and clogs more slowly than stone mixed with sand and silt.
Filter fabric (geotextile): Fabric prevents soil from washing into the gravel and clogging the system. Use non woven geotextile fabric rated for drainage applications. It must be permeable enough to let water through but fine enough to stop silt.
The most effective method is to line the entire trench with fabric before placing any stone, then fold the fabric over the top of the stone after the pipe is in place, the “burrito” wrap. This keeps soil out from all sides.
Some systems use a fabric sock that slides over the perforated pipe. Socks are faster to install but provide less protection than a full trench wrap, especially in silty soils.
Sump pit and pump materials: Pits are made from rigid plastic or concrete. Plastic liners are common because they resist corrosion and are easy to install. The pit must have holes or slots near the bottom so water from the stone field can enter.
Pumps are cast iron, stainless steel, or thermoplastic. Cast iron is durable but can rust over time. Stainless and plastic pumps last longer in corrosive conditions. Look for a pump with a solid housing and a reliable float switch. Cheap pumps fail early.
Discharge pipe is typically 1.5 inch or 2 inch PVC, sized to match the pump outlet. The pipe should have a check valve near the pump to prevent backflow when the pump shuts off, and it should be insulated or heat traced if it runs through an area where it might freeze.
Vapor barrier and insulation (interior systems): Under an interior slab, use rigid extruded polystyrene (XPS) foam for insulation. XPS resists moisture and provides thermal break. On top of the foam, lay a heavy vapor barrier, 6 mil polyethylene or, better, a cross laminated membrane like Stego Wrap. The barrier stops moisture vapor and soil gas from entering through the slab.
Seal all seams and penetrations in the barrier with compatible tape or mastic.
When Each System Is Necessary
The system you need depends on site conditions, climate, and how your foundation is built.
Exterior footing drains are necessary in any of these cases:
High water table. If groundwater sits close to or above the bottom of your footing during wet seasons.
Heavy clay soils that drain slowly and hold water against the foundation.
Basements in areas with frequent heavy rain or snowmelt.
Any habitable below grade space. Most building codes require footing drains around basements used for living or storage.
New construction. It’s far easier and cheaper to install a footing drain during the build than to retrofit later.
If your lot slopes well and you’re building on sandy, fast draining soil, you might not need a full perimeter drain. But most builders install one anyway because it’s inexpensive insurance and required by code in most jurisdictions.
Interior perimeter drains and sump pumps are necessary when:
You’re retrofitting an existing basement that has chronic water problems and excavating the exterior is not practical or too expensive.
Your foundation walls are already waterproofed on the outside, but water still enters at the floor joints or through cracks.
The site is very flat or the basement is below the level where you can discharge to daylight.
You have a high water table that pushes water up through the floor during heavy rain.
Interior systems are common retrofits because they can be installed from inside without disturbing landscaping, decks, or driveways. They don’t prevent water from reaching the foundation, but they prevent flooding.
French drains are necessary when:
You need to intercept surface or shallow groundwater away from the foundation, such as along a slope or across a yard.
You’re retrofitting a basement and choose to dig down to the footing from outside.
Grading is always necessary. Every foundation needs proper slope away from the house to manage surface water. Grading is often sufficient on its own in dry climates or on well drained sites, but it should always be combined with gutters and downspout extensions.
Sump pump systems are necessary when:
Your drain system collects water but has no gravity outlet to daylight.
You live in an area with heavy precipitation or rapid snowmelt.
Your basement floor is below the surrounding grade.
Local code requires a sump pump. Some jurisdictions mandate them in all basements.
If you install a sump, always include battery backup. A sump pump is only useful if it works when you need it most, which is during power outages caused by the same storms that flood basements.
Step by Step Installation (Exterior Footing Drain)
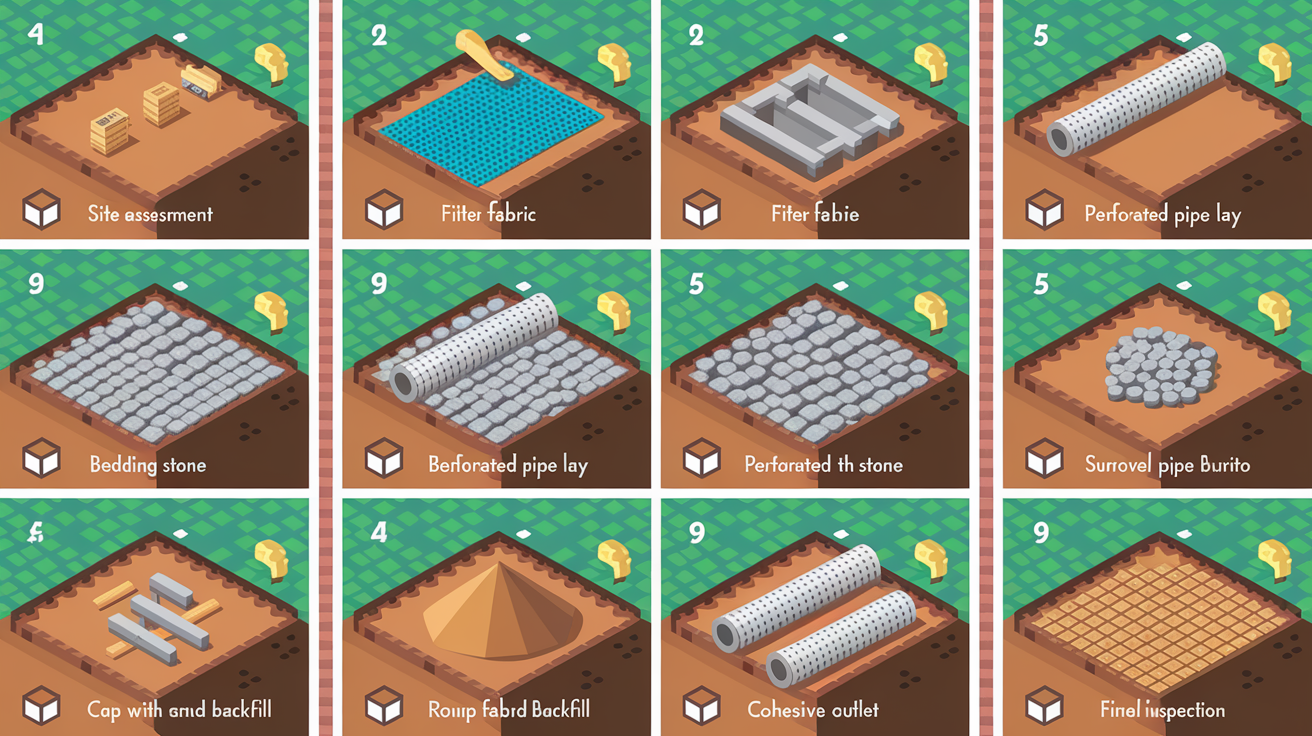
1. Site Assessment and Code Compliance
Before you dig, evaluate your soil type, slope, and water table. Walk your property during and after heavy rain to see where water flows and where it ponds. Check local building codes for minimum drain depth, slope, outlet requirements, and inspection procedures.
Call 811 to have underground utilities marked. Digging into a gas line, electric service, or water main is dangerous and expensive.
Verify your discharge options. Can you run to daylight? Is there a storm sewer connection available? Will you need a sump? Measure distances and calculate slope to confirm your plan will work.
2. Excavation and Trenching
Excavate around the foundation perimeter down to the bottom of the footing, not below it. Digging deeper than the footing undermines its support and can cause settlement or cracking.
Trench width should be about 12 inches to give you room to work and to accommodate the pipe, gravel, and fabric. Dig carefully near the foundation to avoid damaging the waterproofing membrane or the footing itself.
Slope the trench floor at least 1/8 inch per foot toward the outlet. For a perforated collection pipe, level is acceptable because the outlet section provides the drainage slope, but a slight slope in the collection trench helps move water along.
If you encounter large rocks, roots, or other obstructions, remove them. Cut tree roots cleanly with a saw. Don’t tear them. Tearing creates ragged edges that regrow aggressively into the drain.
3. Install Filter Fabric
Unroll non woven geotextile fabric along the bottom and up both sides of the trench. Use fabric wide enough to cover the bottom, wrap up the foundation wall, and fold over the top of the stone later. 6 feet wide is common for a typical footing depth.
Overlap fabric seams by at least 12 inches. Fabric should cover the trench completely with no gaps where soil can enter.
4. Place Bedding Stone
Pour 2 to 3 inches of clean crushed stone into the bottom of the trench on top of the fabric. Level and compact it lightly by hand. This stone provides a stable, free draining base for the pipe.
5. Lay Perforated Pipe
Set 4 inch rigid perforated PVC pipe on the stone bed. The perforations can face down or to the sides. Installer preference varies. Facing down reduces the chance of silt entering from above. Facing to the sides can increase inflow capacity.
Run the pipe continuously around the perimeter. Use 90 degree or 45 degree fittings at corners. Leave no gaps.
Connect any window wells or exterior stairwells to the main drain line with solid 4 inch pipe so water from those areas flows into the system.
At the outlet point, transition from perforated pipe to solid pipe using a coupler or fitting. The solid outlet pipe must slope at least 1/4 inch per foot. Steeper is better, to carry collected water away efficiently.
6. Surround Pipe with Stone
Cover the pipe with crushed stone. Bring the stone level up to about 6 to 8 inches above the top of the footing. The stone layer should completely surround the pipe with at least 3 inches of stone on all sides.
Stone depth varies depending on your footing depth and trench size, but the goal is a continuous gravel envelope that intercepts water before it reaches the foundation wall.
7. Wrap Fabric Over Stone
Fold the filter fabric over the top of the stone, overlapping the edges by 12 inches or more. This completes the “burrito” and prevents soil from washing down into the stone.
Some installers add a second layer of fabric on top for extra protection in silty soils.
8. Cap with Sand and Backfill
Place a 6 inch layer of coarse sand on top of the fabric. Sand fills voids and keeps fine soil particles from working their way into the fabric over time.
Above the sand, backfill with native soil or clean fill. Compact the soil in 6 inch lifts to prevent settling. Slope the final surface away from the foundation at 6 inches over 10 feet to direct surface water away.
Do not backfill with clay or heavy soil directly against the foundation if you can avoid it. A layer of coarser material near the wall helps surface water drain down to the footer drain rather than soaking into the backfill.
9. Route Outlet and Final Inspection
Run the solid outlet pipe to its discharge point, daylight, storm sewer, or sump pit. If discharging to daylight, extend the pipe outlet at least 10 feet from the foundation and secure it so it doesn’t move or get buried. Add a rodent screen over the outlet to keep animals out.
If tying into a sump, penetrate the footing with a 6 inch pipe sleeve and connect the drain line to the sump pit through that sleeve. Seal the penetration to prevent soil from entering.
Test the system by running water into the drain from a hose at the far end of the system. Verify that water flows freely to the outlet and that there are no leaks or blockages.
Schedule a final inspection if required by local code. Many jurisdictions require inspection of the drain system before backfill so the inspector can confirm proper slope, materials, and installation.
Local Codes and Standards

Building codes mandate foundation drainage in most circumstances. The International Residential Code (IRC) provides the baseline requirements, and local amendments may be stricter.
IRC Section 405.1 requires a drain around the perimeter of any foundation that encloses habitable or usable space below grade. The drain must be installed at or below the bottom of the basement floor slab.
IRC Section 405.1 also specifies that drain tile or perforated pipe must be placed on not less than 2 inches of washed gravel or crushed stone, and the pipe must be covered with at least 6 inches of the same material. A geotextile filter fabric is required to prevent soil migration into the gravel.
IRC Section 406.1 requires foundation walls to be damp proofed from the footing to grade. Section 406.2 requires full waterproofing, not just damp proofing, if the foundation is in standing water or if the water table is high.
IRC Section 801.3 requires roof drainage (gutters and downspouts) to be extended at least 5 feet from the foundation in areas with expansive soils. Even where not mandated, downspout extensions are critical to prevent roof runoff from overwhelming the footer drain or saturating soil near the foundation.
IRC Section 404.1.7 governs backfill timing and compaction. Backfill must not be placed until the foundation is sufficiently strong to resist lateral loads, and it must be placed in layers and compacted to prevent future settling.
Minimum slope for a solid drain outlet is 1/4 inch per foot in most jurisdictions. Some local codes require 1/2 inch per foot or steeper for better flow.
Outlet discharge must not create erosion, flooding on neighboring property, or contamination of surface water. Some areas prohibit connection of foundation drains to sanitary sewers. Others require connection to a municipal storm sewer if available. Check local rules.
Permits are often required for footer drain installation or sump pump discharge alterations. Inspections may be required before backfill, after rough in, and at final completion.
If you’re building new or doing major foundation work, follow the IRC and consult your local building department for amendments and permit requirements. If you’re retrofitting an older home, you may not be required to meet current code unless you’re also doing other work that triggers a permit, but meeting current standards is a good idea for durability and resale value.
DIY vs Professional Installation
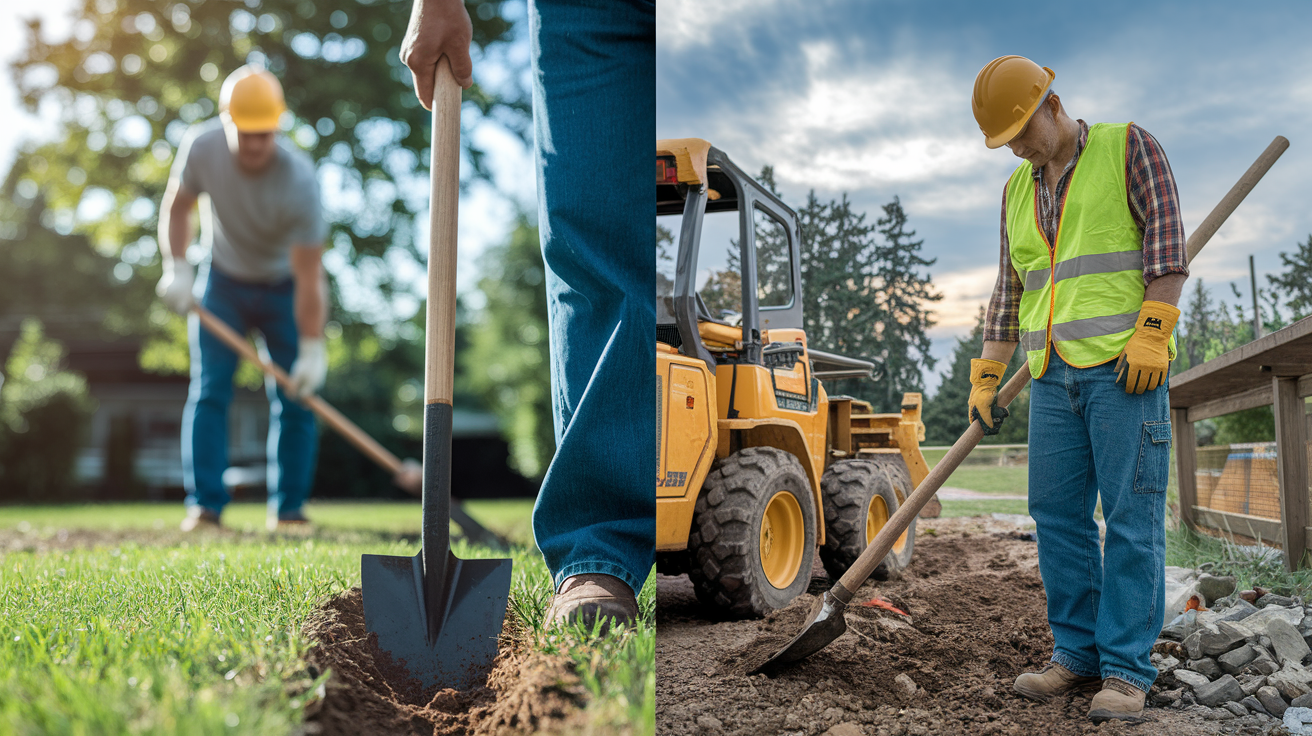
Footer drain installation during new construction is typically handled by the foundation contractor or the site excavation crew. It’s part of the standard foundation scope and done before backfill.
Retrofitting a footer drain is a different story. You’re excavating next to an existing foundation, removing landscaping, possibly cutting through concrete walks or patios, and working around utilities, trees, and structures like decks or HVAC equipment.
When to hire a professional:
You don’t have excavation equipment or experience operating it. Hand digging a trench 3 feet deep around an entire house is slow, exhausting, and often impractical.
The site has underground utilities. Locating services marks approximate positions, but a skilled operator knows how to dig carefully and stop when they encounter a line.
The foundation is deep, the soil is heavy clay, or the site is sloped and unstable. Trenching in difficult conditions requires shoring, proper compaction, and attention to safety.
You’re not sure about slope, outlet options, or system design. A drainage contractor or foundation specialist can assess your site, recommend the right system, and ensure proper installation the first time.
Your jurisdiction requires permits and inspections. Contractors are familiar with local code requirements and inspection procedures.
Professional installation costs vary widely depending on site conditions, depth of excavation, soil type, and accessibility. Anecdotal estimates for a full perimeter retrofit range from $10,000 to $25,000 for a typical basement. If you need to remove and replace a deck, driveway, or mature landscaping, add more.
When DIY might be feasible:
You’re installing a short section of drain, such as along one wall or around a single corner, where water is entering.
The trench depth is shallow, soil is easy to dig, and access is clear.
You have basic construction skills, can rent a mini excavator, and can follow code requirements for slope and materials.
You’re comfortable working with PVC pipe, gravel, and fabric, and you have help for the heavier work.
Even on a DIY project, you should call 811 for utility locates, pull any required permits, and schedule inspections. Mistakes in slope, backfill compaction, or fabric placement can make the system ineffective and waste your time and money.
If you’re unsure, pay for a consultation with a drainage contractor or foundation engineer. A few hundred dollars for professional advice can save you thousands in wasted materials and failed work.
Cost Factors and Budget Planning

Footer drain cost depends on several variables:
Excavation depth and volume: Deeper footings and taller foundation walls require more digging. Heavy clay or rocky soil costs more to excavate than loose sand. If the contractor has to haul away excess soil, that adds to the cost.
System length: A large house has a longer perimeter. More linear feet means more pipe, more gravel, more fabric, and more labor.
Obstructions and access: Mature trees, underground utilities, existing hardscape (patios, walks, driveways), and tight spaces all slow down the work and increase cost. Removing and replacing a concrete patio or a deck can add several thousand dollars.
Outlet distance and type: Running the outlet pipe 100 feet to a daylight discharge or connecting to a storm sewer adds material and labor. If you need to install a sump pit and pump, expect to pay $1,500 to $3,000 for the sump system alone, plus the cost of the drain piping.
Materials quality: Rigid PVC pipe costs more than flexible corrugated pipe but lasts longer. Clean crushed stone costs more than mixed fill. Using high quality geotextile fabric and proper bedding increases upfront cost but reduces long term maintenance and failure risk.
Labor rates: Regional labor costs vary. Urban areas and high cost of living regions have higher rates. Experienced foundation or drainage contractors charge more than general excavation crews, but their work is usually more reliable.
Permits and inspections: Some jurisdictions charge permit fees and require multiple inspections. Factor in the cost of code compliance and any required engineering if your site has special conditions.
A rough ballpark for professional installation of an exterior footing drain retrofit on a 1,500 square foot basement (about 160 linear feet of foundation) ranges from $10,000 to $20,000 in many markets. Smaller sections or simpler sites might be $3,000 to $7,000. New construction installation, done during the foundation pour before backfill, is far less, often $1,500 to $3,000 because access is open and no demolition is required.
Sump pump installation alone, if you already have a pit or are adding one as part of interior work, ranges from $500 to $1,500 for a basic setup, or $2,000 to $4,000 if you add battery backup, a high capacity pump, and a sealed radon resistant pit cover.
Grading work to correct surface drainage is the least expensive option, often $500 to $2,000 for resloping soil and adding swales or berms. But grading alone won’t solve a high water table or hydrostatic pressure problem.
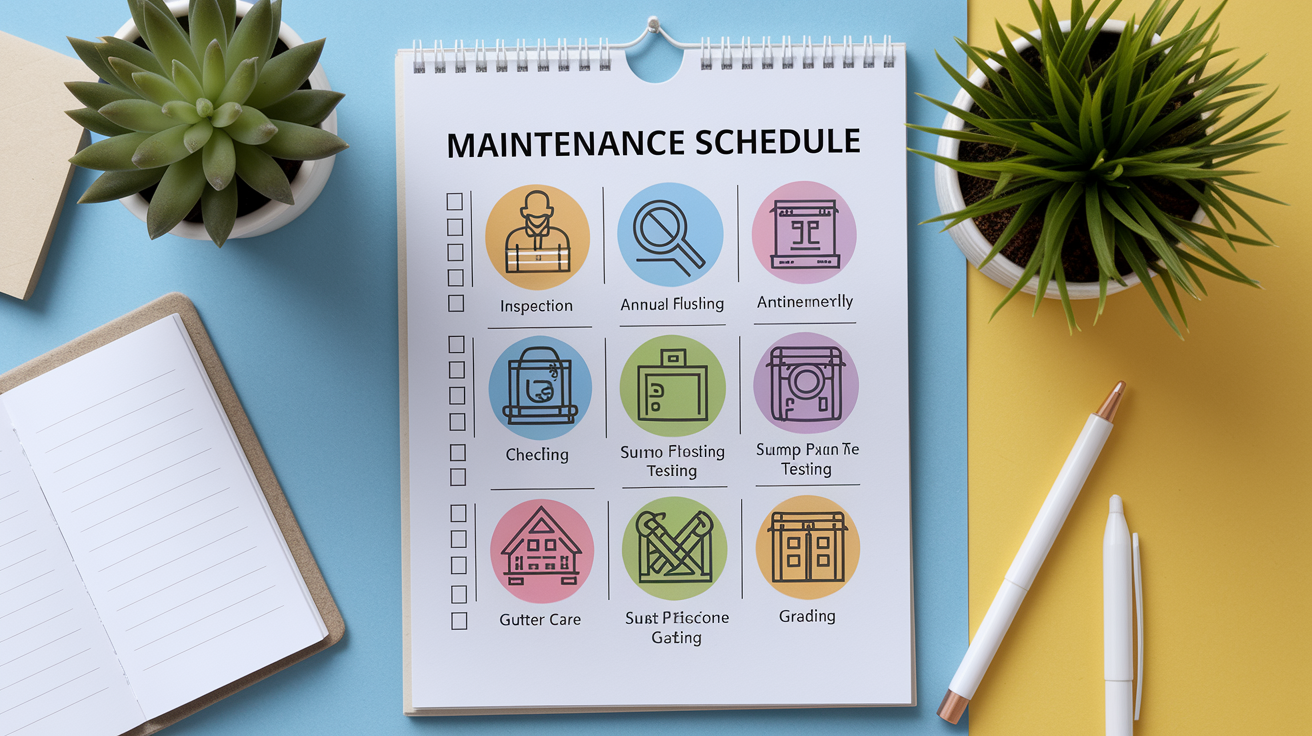
Maintenance Schedule and Procedures
A footer drain requires regular maintenance to stay effective. The two main enemies are silt and tree roots. Both slowly clog the system until water backs up and enters your basement.
Twice per year inspection:
Walk your property before and after the heavy rain season. Look for standing water or wet soil near the foundation, which suggests the drain isn’t handling the load. Water stains or efflorescence on basement walls indicate moisture is getting through. Slow drainage from gutters or downspouts might mean sediment has clogged connections to the footer drain. Visible outlet discharge matters too. If you have a daylight outlet, check during a rain event to confirm water is flowing out.
Annual flushing:
If your system has accessible cleanouts, risers that extend from the drain pipe up to grade, flush the system once per year with a garden hose. Insert the hose into the cleanout and run water for several minutes to push out sediment and small roots.
If you don’t have cleanouts and water isn’t draining well, consider having a plumber or drainage contractor snake or jet the line. High pressure water jetting can clear silt and cut roots.
Sump pump testing (monthly during wet season):
Pour a bucket of water into the sump pit to verify the pump activates and discharges properly. Listen for unusual noises, grinding, rattling, or buzzing, which suggest the pump is failing.
Check the discharge line to make sure it’s clear and water is flowing away from the foundation.
Test the battery backup by disconnecting shore power and triggering the pump. Replace the backup battery every three to five years, even if it seems to work.
Gutter and downspout care (quarterly):
Clean gutters and downspouts to prevent clogs. Clogged gutters overflow and dump water at the foundation, overwhelming the footer drain.
Extend downspouts at least 5 feet from the foundation. 10 feet or more is better. Use solid pipe or flexible extensions so runoff discharges well away from the house.
Never connect downspouts directly into the footer drain unless you have a screened cleanout and you’re committed to frequent maintenance. Leaf litter and debris from gutters will clog the drain pipe.
Grading inspection (annually):
Check that soil around the foundation still slopes away. Settling, landscaping changes, or erosion can create low spots where water ponds. Add soil and regrade as needed to maintain a 6 inch drop over 10 feet.
Long term maintenance (10 to 20 years):
Even well installed systems accumulate silt over decades. At some point you may need to excavate and rebuild sections of the drain, replace clogged pipe, or refresh the gravel and fabric.
Tree roots are a chronic problem near large trees. If roots repeatedly clog the drain, you may need to remove the tree, install root barriers, or reroute the drain away from the tree.
Common Problems and Troubleshooting
Basement Still Wet After Drain Installation
If you installed a footer drain and the basement is still damp, check these issues:
Improper slope: The drain pipe may be level or sloped the wrong direction, so water doesn’t flow to the outlet. You’ll need to excavate and reinstall with correct slope.
Clogged pipe or outlet: Sediment or roots have blocked the drain. Flush or snake the line.
High water table: If ground
Final Words
Stop the water and stabilize the area right away. That’s the action we focused on: quick response, smart drying, and clear documentation.
You saw a step-by-step look at assessing your foundation, planning the drain layout, choosing materials, and handling installation or when to call a pro. We also covered moisture checks behind walls, how to test the system, and what records help with claims.
Follow those steps, keep photos and readings, and you’ll limit hidden damage. With the right approach to basement footer drain systems, you’ll protect your space and get back to normal faster.
FAQ
Q: Do you have a list of approved Internal and External hyperlinks?
A: The list of approved internal and external hyperlinks is something we need to place links correctly; please paste the full list, or tell us to set [Hyperlinks]= na so we proceed without links.
Q: What happens if I don’t provide the hyperlink list?
A: If you don’t provide the hyperlink list, we’ll set [Hyperlinks]= na and draft the outline without links, leaving clear placeholders so you can add URLs later or ask us to insert them.
Q: Can you proceed with [Hyperlinks]= na?
A: We can proceed with [Hyperlinks]= na; we’ll mark recommended link locations and anchor text so adding final URLs later is fast and keeps the outline moving.
Q: How should I format the hyperlinks when I send them?
A: When sending hyperlinks, provide the full URL, preferred anchor text, whether it’s internal or external, and any special attributes like nofollow; a simple numbered list works best for quick insertion.
Q: What qualifies as an internal versus an external link?
A: Internal links point to pages on your own site; external links point to other domains. Label each link so we place it with the right context and site structure in mind.
Q: Are there limits on how many links I can provide?
A: There aren’t strict limits, but prioritize relevance—focus on essential internal pages and a few high-value external sources to avoid clutter and protect reader trust and SEO value.
Q: How will you show placeholders for missing links in the outline?
A: We’ll show placeholders as bracketed anchor text with notes like [INSERT URL] and a tag for internal or external, so you or we can replace them later without confusion.
Q: How quickly can you update the outline after I send the link list?
A: We’ll update the outline usually within one business day after you send the full link list; if it’s urgent, tell us and we’ll prioritize the change.
Q: Who verifies that the links are correct and live?
A: We’ll check that links resolve and match the anchor text, but you should confirm final URLs, permissions, and tracking requirements for any paid or restricted pages before publishing.
Q: What information do you need for affiliate or sponsored links?
A: For affiliate or sponsored links, provide the URL, required disclosure text, preferred anchor text, and any tracking parameters so we place them correctly and keep transparency intact.