

Most homeowners who accept their insurance company’s first settlement offer leave thousands of dollars on the table. The initial check looks reasonable until you realize it covers 40 to 60 percent of what your claim is actually worth. Insurance companies expect negotiation. After you push back with documentation and competing estimates, final settlements usually reach 75 to 95 percent of fair value. Understanding how settlements work, what documentation strengthens your position, and when to negotiate turns an inadequate offer into a fair payout that actually covers your repairs.
How Property Damage Claim Settlements Work: Process and Payout Expectations

A property damage claim settlement is the final agreement between you and your insurance company about how much money you’ll receive for covered losses. Most settlements land between 60 and 85 percent of initial damage estimates, depending on how well you document your loss and how effectively you negotiate. Think of the settlement as the finish line where your insurer writes the check and you accept it as full payment for the damage covered under your policy.
After your adjuster inspects the damage, three payment scenarios typically unfold. You might receive an advance check that gets deducted from your total settlement later. You might get an immediate full settlement if the damage is straightforward and everyone agrees on the value. Or you might receive two to three separate checks, one for your home’s structure, a second for your personal belongings, and sometimes a third for additional living expenses while repairs happen.
Your settlement amount depends on several calculations working together. The adjuster assesses the damage and estimates repair or replacement costs. That figure runs through your policy’s coverage limits (the maximum your policy pays). Then your deductible gets subtracted. Finally, the valuation method matters. Actual cash value settlements account for depreciation and pay less up front, while replacement cost policies pay what it costs to replace damaged items with new ones of similar quality.
First settlement offers typically come in at 40 to 60 percent of what your claim is actually worth. Insurance companies expect negotiation. After you push back with documentation and competing estimates, final settlements usually reach 75 to 95 percent of fair value. If you accept that first offer without review, you’re leaving money on the table, sometimes thousands of dollars for significant damage.
Step-by-Step Property Damage Settlement Process From Filing to Final Payment

Understanding what happens at each stage reduces stress and helps you respond faster when your insurance company needs information.
-
Report damage to insurance company and obtain claim number (Day 0 to 1). Contact your insurer as soon as damage occurs. You’ll receive a claim number that tracks everything from this point forward. Most policies require prompt notification, often within 24 to 72 hours.
-
Document damage with photographs and emergency mitigation (Day 1 to 3). Take photos and videos from multiple angles before making any repairs. Stop ongoing damage if safe to do so. Tarp damaged roofs, extract standing water, board up broken windows. Save all receipts for emergency work.
-
Meet with claim adjuster for property inspection (Day 7 to 14). An adjuster visits your property to assess damage extent and estimate repair costs. Walk them through every damaged area and point out details they might miss. Their inspection report drives your initial settlement offer.
-
Review adjuster’s damage assessment and repair estimates (Day 14 to 21). The adjuster sends a damage assessment and settlement calculation. Compare their estimate against your own contractor quotes. Look for missing items, undervalued repairs, or incorrect depreciation.
-
Address mortgage company endorsement requirements if applicable (Day 21 to 30). If you have a mortgage, your lender gets listed as a co-payee on settlement checks. You’ll need to coordinate with them to release funds, which requires contractor licenses, signed contracts, and sometimes inspections.
-
Negotiate settlement amount if offer is insufficient (Day 21 to 45). Submit your own repair estimates, replacement cost documentation, and evidence supporting higher values. This back and forth continues until you reach agreement or hit an impasse.
-
Sign settlement agreement and release forms (Day 30 to 60). Once you accept an offer, you’ll sign paperwork confirming the settlement amount and releasing the insurer from further liability for this specific damage. Review these documents carefully before signing.
-
Receive payment and complete repairs with licensed contractors (Day 45 to 90). Your settlement check arrives, you hire licensed contractors, and repair work begins. For replacement cost policies, you’ll receive recoverable depreciation after proving you completed repairs.
Standard straightforward claims settle within 30 to 90 days from start to finish. Complex claims involving structural issues, coverage disputes, or extensive damage stretch to 90 to 180 days. Catastrophe claims following hurricanes, wildfires, or widespread storms can take six months or longer due to adjuster backlogs and contractor shortages. Several factors speed up or slow down your settlement timeline. Complete documentation with photos and multiple estimates accelerates the process. Prompt responses to adjuster requests keep things moving. Coverage disputes over what’s included in your policy add weeks or months. Catastrophe backlogs delay adjuster inspections. Mortgage company processing can add two to four weeks to fund release.
Required Documentation and Evidence for Maximizing Your Settlement

Thorough documentation forms the foundation of successful settlements and prevents insurance companies from offering you less than your claim is worth. When adjusters see organized, detailed evidence, they know you understand the process and won’t accept a lowball offer without a fight.
Insufficient documentation ranks as the most common reason policyholders receive inadequate settlement offers. Adjusters perform cursory inspections unless you point out every damage detail with supporting evidence. Here’s what you need:
Date-stamped photographs of all damage from multiple angles showing context and close-up detail. Professional repair estimates from licensed contractors with minimum two to three competing quotes. Insurance policy declarations page showing your coverage limits and deductible. Adjuster’s inspection report and estimate for comparison against your documentation. All correspondence with your insurance company including emails, letters, and notes from phone calls. Emergency repair invoices and receipts for tarping, water extraction, board-up, and temporary fixes. Temporary housing receipts if you had to leave your home during repairs. Expert assessments from engineers, roofing consultants, or structural specialists for complex damage. Building code compliance documentation if repairs require upgrades to meet current standards. Comparable property valuations for total loss claims showing market value of similar properties. Proof of ownership documents including purchase receipts, property deeds, and prior appraisals. Pre-loss condition photos if available from real estate listings, social media, or family albums.
Personal property claims require additional specialized documentation on top of structural damage evidence. Your coverage for belongings typically ranges from 50 to 70 percent of your dwelling coverage amount. A home insured for 100,000 dollars in structure coverage carries 50,000 to 70,000 dollars in coverage for personal belongings.
Personal Property and Contents Documentation Requirements
Personal property settlements follow a two-step payment process. Your insurer pays actual cash value first (current value minus depreciation). Then they pay recoverable depreciation after you prove you replaced the items, typically within 180 to 365 days from your loss date. Submit these documents to maximize your contents claim:
Create a room by room inventory of damaged items with detailed descriptions including brand, model, age, and condition before the loss. Use photos and videos to document the condition and quantity of damaged items before you dispose of them. Research current replacement costs for similar items using online retailers and local stores (use current prices, not what you originally paid). Gather receipts, credit card statements, bank records, or online order confirmations when available for high-value items. Group similar items by category (kitchen items, clothing, electronics, furniture) for efficient claims processing. Submit your cash value list first as required by most insurers before they’ll issue initial payment. Keep copies of all submitted documentation for your records and potential appeals. Track all replacement purchases separately with new receipts for depreciation recovery. Submit proof of replacement within your policy’s required timeframes to receive full replacement cost value.
Understanding Claim Valuation: Actual Cash Value vs Replacement Cost
Actual cash value represents your property’s current market value minus depreciation for age and wear. If your ten year old roof gets damaged, the insurance company calculates what that used roof was worth right before the damage happened, not what a brand new roof costs.
Replacement cost coverage pays the amount needed to replace your damaged property with new items of similar kind and quality. That same ten year old damaged roof gets replaced with a new roof at today’s prices, and your insurance company covers the full replacement expense (minus your deductible).
The two-step payment process for replacement cost policies works like this. Your insurer pays actual cash value first as an initial settlement. This covers the depreciated value right away. After you complete repairs and submit proof of replacement purchase, they pay the recoverable depreciation, the difference between actual cash value and full replacement cost. You must submit replacement proof within a specified timeframe stated in your policy, commonly 180 to 365 days from the loss date. Miss that deadline and you forfeit the depreciation recovery.
Here’s a real calculation showing the financial difference. Your roof needs complete replacement after storm damage. Replacement cost is 15,000 dollars for a new roof. The adjuster calculates 9,000 dollars in depreciation based on the roof’s age and condition. Your initial actual cash value payment is 6,000 dollars (15,000 dollars replacement minus 9,000 dollars depreciation). You hire a contractor and replace the roof. After submitting paid invoices and completion photos, you receive the 9,000 dollars recoverable depreciation. Your total payout reaches the full 15,000 dollars replacement cost.
What Damages Are Covered in Property Settlements and Payout Calculations

Homeowners insurance policies typically divide coverage into three main categories: dwelling and structure coverage, personal property coverage, and additional living expenses. Understanding how each category calculates settlements helps you know what to expect when damage happens.
Settlement calculations differ for each coverage type based on your policy limits and deductible. Your dwelling coverage pays to repair or rebuild your home’s structure. Personal property coverage reimburses you for damaged belongings using either actual cash value or replacement cost depending on your policy. Additional living expenses cover the extra costs of living elsewhere while your home is uninhabitable.
| Coverage Type | What’s Included | Typical Policy Limit | Calculation Method |
|---|---|---|---|
| Dwelling/Structure | House frame, roof, walls, built-in appliances, attached structures | Dwelling coverage amount (e.g., $200,000) | Replacement cost or actual cash value minus deductible |
| Personal Property/Contents | Furniture, clothing, electronics, appliances, personal items | 50 to 70% of dwelling coverage (e.g., $100,000 to $140,000) | Actual cash value initially, then recoverable depreciation after replacement |
| Additional Living Expenses | Hotel, rental housing, restaurant meals, storage, increased commuting | 10 to 30% of dwelling coverage or 12 to 24 months maximum | Difference between normal living costs and actual displacement costs |
| Other Structures | Detached garage, shed, fence, driveway, pool | 10% of dwelling coverage (e.g., $20,000) | Replacement cost or actual cash value minus deductible |
| Loss of Use | Fair rental value if property becomes uninhabitable | Varies by policy, often included in ALE coverage | Market rental rate for similar property during repair period |
Negotiating Your Property Damage Settlement: Proven Tactics and Strategies

Effective negotiation increases settlement amounts by 20 to 40 percent in many cases, putting thousands of extra dollars in your pocket for the same damage.
Never accept the first offer. It’s always a starting point. Initial offers typically land at 40 to 60 percent of fair value. Insurance companies expect you to counter. Accepting immediately signals you don’t know your claim’s worth.
Calculate your own damage valuation independently. Get two to three contractor quotes and research replacement costs yourself. Know your number before negotiations start, but don’t share your minimum acceptable amount with the adjuster.
Ask adjusters to explain in detail how they calculated their offer. Make them walk through every line item. When they offer low numbers, ask “why” and make them justify the valuation with specific facts about materials, labor, and depreciation.
Challenge low offers with documented evidence of higher replacement costs. Submit your contractor estimates, material price quotes, and photos showing damage the adjuster missed. Written evidence carries more weight than verbal complaints.
Remain professional but persistent. Adjusters respect informed policyholders who stay calm and organized. Angry phone calls hurt your leverage. Steady, fact-based pushback gets results.
Request review by supervisor if initial adjuster is unreasonable. When negotiations stall, escalate in writing to the adjuster’s manager. Supervisors have more authority to increase settlements and want to resolve disputes efficiently.
Use competing contractor estimates as leverage. If your quotes run 20 to 30 percent higher than the adjuster’s estimate, that gap strengthens your negotiating position. Three consistent quotes from licensed contractors are hard to dismiss.
Formal written demand letters establish serious intent and create a documentation trail that protects you if negotiations fail and you need to escalate further.
Essential Elements of Effective Demand Letters
Professional demand letters combine respectful tone with firm evidence-based requests. Structure your letter to make the adjuster’s job easy while showing you won’t accept an unfair settlement. Include these six essential elements:
Policy number, claim number, and date of loss. Start with identifying information so your letter gets routed correctly and attached to your claim file immediately.
Detailed description of damage with reference to specific policy coverage. Describe what happened and cite the exact policy sections that cover this damage. Show you’ve read your policy and understand what you’re owed.
Itemized list of all damages with current replacement costs. Break down every damaged component with specific dollar amounts based on contractor quotes and market prices for materials and labor.
Attached supporting documentation. Include contractor estimates, photos with dates, receipts for emergency repairs, and expert assessments. Make your evidence impossible to ignore.
Specific settlement demand amount with calculation justification. State exactly how much you’re requesting and show the math. Walk the adjuster through your valuation step by step.
Reasonable response deadline. Give the insurance company 15 to 30 days to respond. This timeframe shows you’re serious while allowing them enough time to review your documentation.
When rejecting settlement offers, send a written explanation stating why the offer is insufficient, what evidence supports a higher value, and what counter-demand you’re making. Written rejections prevent misunderstandings and create a paper trail if you need to file a complaint or lawsuit later.
Common Reasons for Low Settlement Offers and How to Counter Them
Insurance companies are for-profit businesses with financial incentives to minimize claim payouts. Their business model works when they collect more in premiums than they pay out in claims. Understanding this basic reality helps you recognize when an insurer is protecting profits instead of honoring your policy.
Recognizing these tactics empowers you to respond effectively rather than accepting an inadequate settlement out of frustration or confusion.
Incomplete damage assessment that misses hidden or secondary damage like moisture behind walls or structural issues not visible during initial inspection. Use of depreciated values when replacement cost coverage is owed under your policy terms. Reliance on lower-cost repair methods or inferior materials that don’t match your home’s quality. Incomplete review of policy coverage and applicable endorsements that provide additional coverage beyond base policy limits. Banking on policyholder unfamiliarity with the claims process and hoping you’ll accept the first offer. Quick settlement pressure before the full extent of damage becomes apparent, especially for water damage where mold and structural issues develop over time. Cursory inspections unless policyholders point out every detail with photographic evidence and expert assessments.
Policyholder mistakes also contribute to reduced settlements. Avoiding these common errors can increase your final payout by 15 to 30 percent without changing the actual damage to your property.
Policyholder Mistakes That Lead to Reduced Settlements
Delaying damage reporting beyond policy notification deadlines, which can result in claim denial. Failing to document damage thoroughly with dated photos and detailed videos before cleanup begins. Not obtaining multiple contractor estimates for comparison, leaving you unable to challenge low adjuster valuations. Accepting the first settlement offer without negotiation or independent damage assessment. Providing recorded statements to adjusters without preparation or understanding how your words might limit coverage. Signing releases without understanding what future rights you’re waiving, including rights to supplemental claims. Making permanent repairs before the adjuster inspects and documents original damage. Failing to mitigate ongoing damage by letting water sit, leaving roofs exposed, or allowing mold growth. Missing documentation deadlines for personal property inventories and proof of replacement purchases. Not reviewing your full policy coverage and endorsements to identify all applicable coverage. Making verbal settlement agreements without written confirmation of terms and payment dates. Allowing your claim to exceed statute of limitations periods without filing suit if necessary.
Counter these insurer tactics by maintaining detailed documentation from day one. Read your policy coverage and endorsements carefully so you know what you’re entitled to receive. Get expert opinions from licensed contractors, engineers, or public adjusters when damage is complex or valuations seem low. Insist on written documentation of every agreement, phone call summary, and settlement term before you accept payment.
Working With Claim Adjusters: What to Expect During the Settlement Process
Three types of adjusters might handle your claim, and understanding who works for whom changes how you approach each conversation. Insurance company staff adjusters work directly for your insurer as full-time employees. Independent adjusters are contractors hired by insurance companies to handle claims during busy periods or in areas where the insurer doesn’t maintain local staff. Public adjusters work for you, the policyholder, and charge fees (typically 10 to 15 percent of your settlement) to represent your interests and negotiate on your behalf.
The initial adjuster inspection happens within 7 to 14 days after you file your claim. Prepare for this meeting by documenting all damage with photos before cleanup begins, making a written list of every damaged item and area, gathering contractor estimates if you have time, and being ready to walk the adjuster through your entire property pointing out damage they might miss. Don’t clean up or make permanent repairs before this inspection. The adjuster needs to see original damage conditions to write an accurate estimate.
Communicate effectively with adjusters by being organized, factual, and professional. Answer their questions directly without volunteering unnecessary information. Provide documentation they request promptly. Ask them to explain anything you don’t understand, especially how they calculated depreciation or why they excluded certain items from their estimate. Build rapport by being cooperative while protecting your interests with written documentation of every conversation and agreement.
When negotiations stall or your adjuster stops responding, escalate to their supervisor in writing. Send an email or letter to the adjuster’s manager summarizing the situation, explaining why the current offer is insufficient, attaching your supporting documentation, and requesting supervisor review and response within a specific timeframe. If the supervisor doesn’t resolve the issue, file a complaint with your state’s department of insurance. State regulators investigate unfair claims practices and can pressure insurers to settle claims fairly.
Public adjusters make sense for complex claims over 50,000 dollars where the damage assessment requires specialized expertise, or when you lack time to manage the claim yourself due to work or personal obligations. Their 10 to 15 percent fee comes from your settlement, so run the numbers. If hiring a public adjuster increases your settlement by 20,000 dollars but costs 2,500 dollars in fees, you’re still 17,500 dollars ahead. For straightforward smaller claims where the insurance company’s offer seems reasonable, public adjuster fees might reduce your net recovery.
Mortgage Company and Lienholder Requirements in Damage Settlements

Mortgage lenders have an insurable interest in properties securing their loans. They need to ensure that settlement money actually goes toward repairs rather than other purposes, protecting the collateral value of the property backing their loan. Because of this interest, your mortgage company gets named as a loss payee on your insurance policy and must be listed on settlement checks.
The dual-endorsement check process requires signatures from both you and your mortgage company before funds can be deposited or cashed. Your insurance company issues a check made payable to you and your mortgage lender jointly. You can’t access these funds until your lender reviews the claim, verifies repair plans, and endorses the check releasing money to you or directly to contractors.
Mortgage companies require specific documentation before releasing settlement funds. You’ll need to provide proof your contractor holds valid licenses in your state, a signed contract detailing the scope of work and payment schedule, and sometimes proof of contractor insurance including general liability and workers compensation coverage. Some lenders require an inspection after repairs are completed to verify the work was done properly and the property value is protected. This approval process adds two to four weeks to your settlement timeline in most cases.
Expedite mortgage company fund release by contacting your lender’s insurance claims department as soon as you receive the settlement check, submitting all required contractor documentation at once rather than piecemeal, responding quickly to any additional information requests, and following up weekly if you don’t hear back within the lender’s stated review period. Some mortgage companies allow you to endorse the check and deposit funds into an escrow account they control, releasing payment to contractors as work progresses. Others endorse the check and send funds directly to you for contractor payment.
Additional Living Expenses and Temporary Housing Reimbursement

Additional living expenses represent the difference between your normal living costs and the increased costs you incur because damage forced you out of your home. If you normally spend 800 dollars per month on food and utilities but temporary housing and eating out costs 1,500 dollars per month, your ALE claim is the 700 dollar difference, not the full 1,500 dollars.
ALE coverage typically includes hotel or rental housing costs, restaurant meals above your normal food budget, laundry and dry cleaning if you don’t have access to your washer and dryer, storage fees for furniture and belongings removed from your home during repairs, pet boarding costs if temporary housing doesn’t accept animals, and increased commuting costs if you’re living farther from work or school.
Document every expense with receipts, credit card statements, and hotel invoices. Create a comparison showing your normal monthly living costs versus actual costs during displacement. Submit documentation to your adjuster monthly rather than waiting until repairs are complete. Keep a spreadsheet tracking all ALE expenses by category with dates and amounts. Take photos of receipts in case originals fade. The more organized your documentation, the faster your insurer processes reimbursement.
Coverage limits for ALE appear in your policy as either a percentage of dwelling coverage (typically 10 to 30 percent) or a time limit (commonly 12 to 24 months). Once you hit either limit, coverage stops even if repairs aren’t finished. ALE coverage ends when your home becomes habitable again, not when repairs are 100 percent complete. Your insurer can cut off ALE payments when you can safely move back in, even if finish work like paint touch-ups or trim installation remains.
Emergency Repairs and Damage Mitigation Requirements
Every state imposes a legal duty to mitigate damages and prevent additional loss after the initial damage event. If a storm tears off part of your roof and you leave it open to the elements for two weeks, resulting water damage to your interior won’t be covered because you failed to protect the property. Reasonable mitigation is your responsibility.
Required mitigation actions include tarping damaged roofs to prevent water infiltration, extracting standing water within 24 to 48 hours to prevent mold growth, boarding up broken windows and doors to prevent weather damage and unauthorized entry, shutting off water supply to prevent ongoing leaks, and arranging for temporary power or HVAC if needed for property preservation. These aren’t optional courtesies. They’re policy requirements.
Document every emergency repair with before and after photos showing the damage and your mitigation efforts. Get written estimates before authorizing work when possible. Save all receipts and contractor invoices. Take photos of tarps, water extraction equipment, and boarding materials in place. This documentation proves you acted promptly and spent reasonably on emergency protection, which makes reimbursement straightforward.
Reasonable emergency repairs are covered even before your adjuster inspects the property. Your policy’s duty to mitigate overrides the normal rule about pre-inspection repairs. However, call your insurance company to report the damage and explain what emergency work you need to authorize. Many insurers pre-approve emergency mitigation up to certain dollar amounts (commonly 2,500 to 5,000 dollars) over the phone. Get the adjuster’s name, approval amount, and a confirmation number. This prevents disputes when you submit bills for reimbursement.
Selecting Licensed Contractors and Managing Repair Payments
Verify every contractor’s license through your state’s licensing board website before signing any contract. Check that their license is current, covers the type of work you need, and shows no disciplinary actions or complaints. Ask for proof of general liability insurance and workers compensation coverage. Call the insurance companies listed to verify coverage is active. Check references from recent jobs similar to yours, and drive by completed projects if possible to assess quality.
Insurance company preferred contractors offer advantages and disadvantages. The claims process typically moves smoother because these contractors have established relationships with adjusters and understand how to submit supplement requests for additional damage discovered during repairs. Preferred contractors often provide workmanship guarantees backed by your insurance company. However, you’re never required to use preferred contractors, and independent contractors sometimes provide better quality or customer service. Get estimates from both preferred and independent contractors, then compare scope, materials, timeline, and cost.
Typical payment structures protect both you and your contractor. Most contracts require a deposit of 10 to 30 percent to purchase materials and schedule work. Progress payments follow as work reaches agreed milestones, maybe 30 percent when framing is complete, another 30 percent when rough-ins are done, and final payment after inspection and punch-list completion. Never pay the full amount up front. Retain at least 10 percent until you’ve verified all work is complete and meets code.
Contractor fraud takes several forms. Be alert for anyone pressuring you to sign over your insurance check, offering to waive your deductible (which is insurance fraud), showing up unsolicited after storms offering immediate repairs, lacking proper licenses or insurance, requesting large up-front payments before starting work, or proposing to use inferior materials while billing insurance for premium products. How we help homeowners recover from property damage by coordinating licensed contractors, transparent pricing, and quality work that matches your home’s original condition.
Supplemental Claims and Reopening Settlements for Additional Damage
Hidden damage appears regularly during repair work. Contractors remove drywall and discover mold behind walls. They tear out flooring and find subfloor rot. They open ceilings and see structural damage not visible during the original inspection. These discoveries are normal, especially with water and fire damage where full extent isn’t apparent until demolition begins.
Request claim reopening and supplemental inspections as soon as contractors discover additional damage. Take photos immediately showing the newly discovered damage in context. Have your contractor document findings with detailed notes and measurements. Contact your adjuster right away. Don’t wait until the contractor completes all demolition. Most policies allow supplemental claims within one year from the original loss date, but don’t wait until that deadline approaches.
Work with your contractor to prepare a supplemental estimate detailing the newly discovered damage, required repairs, and cost. The contractor should use the same estimating software and format the insurance company uses (Xactimate is standard in most markets). Submit the supplemental estimate to your adjuster with photos and a letter explaining how this damage relates to the original loss. The adjuster will schedule a reinspection to verify the additional damage and issue a supplemental payment if the damage is covered under your policy.
Understanding Settlement Agreements and Release Forms
Settlement releases are legal agreements where you accept an insurance payment in exchange for waiving future claims related to the specific loss covered by that payment. Once you sign a release and cash the settlement check, you generally cannot reopen that claim for additional payment except under limited circumstances like discovering hidden damage within your policy’s timeframe.
Standard release language includes several key elements. The scope of release specifies exactly what damage and claims you’re releasing, property damage only, or potentially all claims including personal injury if the release is overly broad. Payment confirmation states the exact dollar amount you’re receiving and confirms you’ve received or will receive payment. Claim closure language indicates this settlement resolves all covered damage from the specific loss date and you won’t pursue additional claims for the same incident.
Watch for overly broad releases that might waive rights you want to preserve. Some releases include language waiving all claims arising from the incident, which could prevent you from filing supplemental claims if additional damage appears later. Other releases might waive personal injury claims if you or family members were injured during the same incident that damaged your property. Read every word carefully, especially sections about future claims and scope of release.
Request modifications to release language if necessary. You can strike through sections you disagree with, initial the changes, and return the modified release to your insurer. Common modifications include adding language that preserves your right to file supplemental claims for hidden damage discovered within one year, limiting the release to property damage only and specifically excluding personal injury claims, or adding specific exclusions for damage not yet discovered. Many insurance companies will negotiate release language rather than risk litigation. If your insurer refuses reasonable modifications, consult an attorney before signing.
When to Hire a Property Damage Attorney or Public Adjuster
Professional representation makes sense in specific situations where the potential settlement increase justifies the cost. Consider hiring help when settlement disputes exceed 10,000 dollars and negotiation has stalled, your claim has been denied and you believe coverage applies, your insurance company is acting in bad faith by delaying unreasonably or refusing to investigate thoroughly, or damage assessment requires specialized engineering or construction expertise beyond standard adjuster knowledge.
Public adjusters assess your damage, document the claim, prepare estimates, and negotiate settlements on your behalf. They typically charge 10 to 15 percent of your final settlement as their fee. Public adjusters add value when damage is complex and requires detailed documentation, you lack time to manage the claim process yourself, your initial settlement offer seems unreasonably low but you’re unsure how to prove it, or the claim value exceeds 50,000 dollars making the potential settlement increase worth the fee percentage.
Attorneys specializing in property damage and insurance bad faith handle coverage disputes, unreasonable claim denials, and litigation when insurers refuse to negotiate fairly. Most work on contingency, taking 33 to 40 percent of any settlement or judgment they recover. Attorneys become necessary when your insurer denies coverage you believe is valid under policy language, delays exceed reasonable timeframes without explanation (often 30 to 90 days depending on state law), the insurer refuses to negotiate in good faith or respond to reasonable documentation, or settlement negotiations have failed and litigation is your only remaining option.
Run the cost-benefit analysis before hiring professionals. If your insurance company offers 75,000 dollars and you believe fair value is 85,000 dollars, paying an attorney 40 percent to recover that additional 10,000 dollars leaves you with 6,000 dollars extra (10,000 increase minus 4,000 attorney fee). You’re better off accepting the 75,000 dollar offer. However, if fair value is 120,000 dollars, the attorney’s 40 percent fee on a 45,000 dollar increase is 18,000 dollars, leaving you 27,000 dollars ahead.
Find qualified insurance attorneys through your state bar association’s attorney referral service, searching for lawyers who specialize in insurance coverage disputes and bad faith claims. Check their background for disciplinary actions through the state bar website. Public adjusters require licensing in most states. Verify their license through your state department of insurance and check for complaints or disciplinary history before hiring.
Dispute Resolution Options: Appraisal, Mediation, and Arbitration
Alternative dispute resolution provides faster, less expensive paths than litigation for resolving settlement disagreements. These processes work particularly well for valuation disputes where you and your insurer agree on coverage but disagree on damage cost.
Appraisal is a policy-mandated process specifically for resolving valuation disputes, not coverage disputes. Each party selects an appraiser. You hire yours, your insurance company hires theirs. The two appraisers inspect the damage independently and prepare valuations. If they agree on the value, that becomes the binding settlement amount. If they disagree, they jointly select an umpire (a neutral third appraiser) who reviews both valuations and issues a binding decision. The umpire’s decision stands as the final damage value. You and the insurance company typically split the umpire’s fee. Appraisal can’t resolve whether damage is covered under your policy, only how much covered damage is worth.
Mediation brings you, your insurance company, and a neutral third-party mediator together for facilitated negotiation. The mediator doesn’t decide your case but helps both sides communicate effectively and explore settlement options. Mediation is voluntary and non-binding. You can walk away if you don’t like the mediator’s suggestions. The process works well when communication has broken down but both sides genuinely want to resolve the dispute without litigation. Mediation typically costs 1,000 to 3,000 dollars for a half-day or full-day session, with parties splitting the mediator’s fee. Success rates run 60 to 75 percent for property damage disputes.
Arbitration is similar to a private trial where a neutral arbitrator hears evidence from both sides and issues a binding decision. Some insurance policies require arbitration for disputes, making it mandatory rather than voluntary. Arbitration moves faster than court litigation (typically 6 to 12 months versus 1 to 3 years) and costs less because discovery is limited and procedures are streamlined. However, arbitration decisions are binding with very limited appeal rights. You generally can’t appeal just because you disagree with the outcome. Arbitration makes sense when mediation fails, litigation would be too expensive or time-consuming, or your policy requires it as a condition of coverage.
Property Damage Settlement Sample Scenarios and Expected Payout Ranges
Settlement amounts vary widely based on damage extent, your policy limits and valuation method, your deductible amount, and how effectively you document and negotiate. Understanding typical ranges for common damage scenarios helps set realistic expectations and identify when an offer is unreasonably low.
These scenarios represent common settlement ranges, but your individual circumstances will affect actual payouts. Geographic location, labor costs, material availability, and policy-specific coverage all influence final settlement amounts.
| Damage Scenario | Typical Repair Cost | Average Settlement Range | Coverage Notes |
|---|---|---|---|
| Kitchen water damage from burst pipe | $8,000 to $15,000 | $6,500 to $13,000 | Covers drywall, flooring, cabinets if damaged, but excludes pre-existing pipe deterioration |
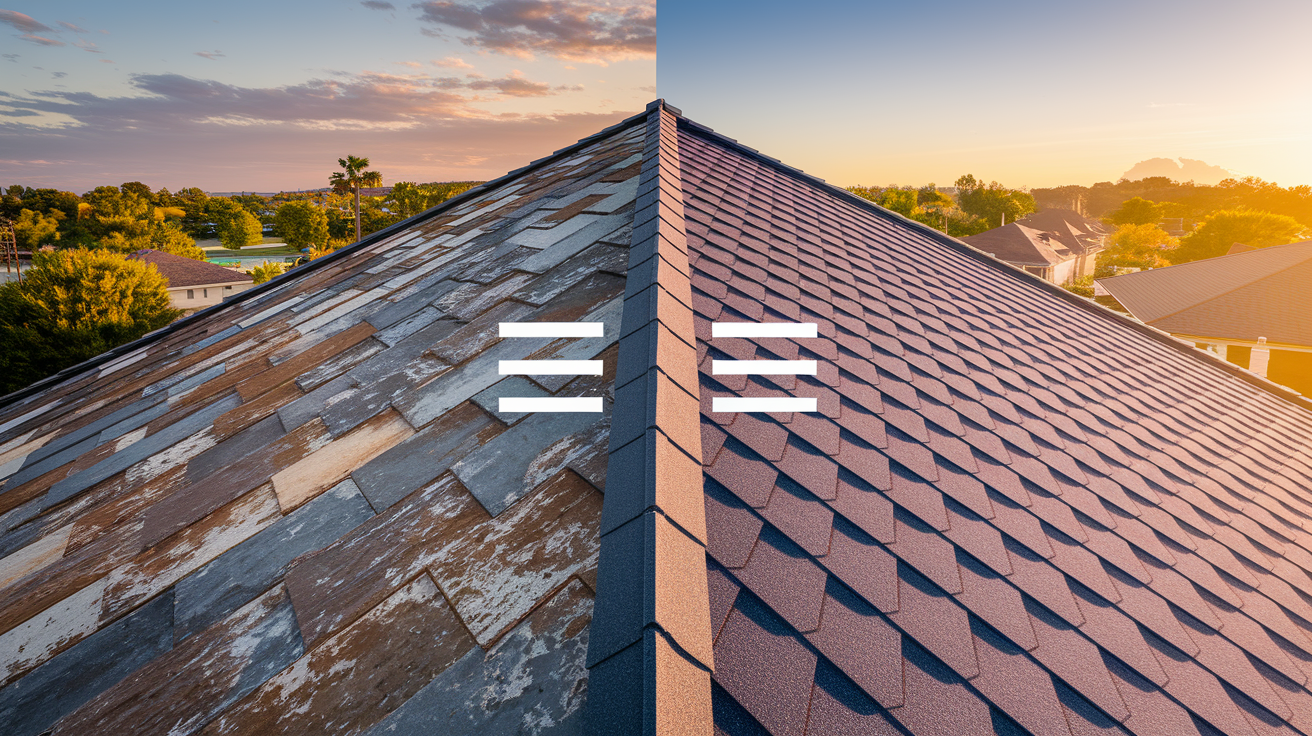
| Roof damage from wind/hail storm | $7,000 to $18,000 | $5,000 to $15,000 | ACV policies pay depreciated value initially; RCV pays full replacement after completion |
Final WordsA property damage claim settlement doesn’t have to feel overwhelming when you understand the process and come prepared. Document everything thoroughly. Get multiple contractor estimates. Never accept the first offer without reviewing the numbers. Ask adjusters to justify their calculations with specific facts. Put all agreements in writing before you sign anything. Most importantly, remember that settlements are negotiations. With solid documentation and persistence, you can push for fair compensation that actually covers your repairs and gets your home back to normal. FAQWhat is the average settlement for property damage?The average settlement for property damage typically ranges from 60 to 85 percent of initial damage estimates, depending on documentation quality and negotiation effectiveness. First settlement offers often start at 40 to 60 percent of fair value, while final negotiated settlements usually reach 75 to 95 percent after proper documentation and discussion. How to settle a property damage claim?To settle a property damage claim, report the damage immediately, document everything with photos and contractor estimates, meet with the adjuster for inspection, review their settlement offer carefully, negotiate with supporting evidence if the offer is low, and sign the settlement agreement only after confirming it covers all damage. The entire process typically takes 30 to 90 days for straightforward claims. What should you not say to a claims adjuster?You should not tell a claims adjuster that you’re unsure about the full extent of damage, accept blame for the loss, provide recorded statements without preparation, or agree to quick settlements before inspecting hidden damage. Never share your minimum acceptable settlement amount, sign releases without careful review, or make verbal agreements without written confirmation. What is a reasonable settlement offer?A reasonable settlement offer covers the full cost to repair or replace damaged property at current market rates, minus your deductible, using replacement cost value rather than depreciated actual cash value when your policy provides replacement cost coverage. The offer should account for all visible and hidden damage, match independent contractor estimates, and include fair compensation for temporary housing if you’re displaced during repairs. Can you reopen a property damage claim after settlement?You can reopen a property damage claim for additional damage discovered within one year of the incident in most cases, provided you haven’t signed a final release that specifically waives supplemental claims. Hidden damage often appears during repair work, such as mold behind walls or structural issues, and requires documented evidence and contractor estimates for the supplemental claim. What percentage do public adjusters charge?Public adjusters typically charge 10 to 15 percent of the final settlement amount and work exclusively for the policyholder rather than the insurance company. They handle damage documentation, estimate preparation, and settlement negotiation, which can increase payouts by 20 to 40 percent in complex cases, though their fees reduce your net recovery. How long does it take to receive a property damage settlement check?You typically receive a property damage settlement check 30 to 90 days after filing for straightforward claims, though complex damage or mortgage company endorsement requirements can extend the timeline to 90 to 180 days. Catastrophe claims may take six months or longer due to high claim volume and adjuster availability. What is the difference between actual cash value and replacement cost?Actual cash value is the current market value of damaged property minus depreciation, while replacement cost is the full amount needed to replace it with new items of similar quality. Replacement cost policies pay actual cash value initially, then issue recoverable depreciation after you provide proof of replacement purchase within the specified timeframe, usually 180 to 365 days. Do I have to use the contractor my insurance company recommends?You do not have to use the contractor your insurance company recommends, though preferred contractors often streamline the claims process and have established communication channels for approving additional repairs discovered during work. Always verify any contractor’s license, insurance coverage, and references before signing contracts, regardless of who recommends them. What happens if you disagree with the insurance adjuster’s estimate?If you disagree with the insurance adjuster’s estimate, obtain independent repair estimates from licensed contractors, document all damage the adjuster missed with photos and detailed descriptions, submit a written counter-demand with supporting evidence, and request supervisor review if negotiations stall. Most policies include an appraisal clause for binding resolution of valuation disputes. How does depreciation affect my property damage settlement?Depreciation reduces your initial settlement to actual cash value by accounting for age and wear of damaged items, which can decrease payouts by 30 to 60 percent compared to replacement cost. If you have replacement cost coverage, you’ll receive the depreciation holdback after completing repairs and submitting proof of replacement purchase within policy deadlines. What documentation do I need for personal property claims?For personal property claims, you need a room-by-room inventory with detailed descriptions, photos or videos documenting condition and quantity, current replacement cost research for similar items, receipts or purchase records when available, and proof of replacement purchases to recover depreciation. Most insurers require the cash value list submission first, even with replacement cost policies. Can insurance companies pay contractors directly?Insurance companies can pay contractors directly if you sign authorization allowing direct payment, which mortgage lenders often require to ensure proper repairs before releasing settlement funds. This arrangement protects the lender’s interest but requires contractors to provide licenses, signed contracts, and inspection verification before receiving payment. What are additional living expenses in a property damage claim?Additional living expenses are the increased costs of temporary housing, meals, and other necessities above your normal living expenses when damage makes your home uninhabitable during repairs. Coverage typically includes hotel or rental costs, restaurant meals exceeding normal food expenses, storage fees, pet boarding, and increased commuting costs. How do mortgage companies affect property damage settlements?Mortgage companies affect property damage settlements by appearing as named payees on settlement checks, requiring dual endorsement before funds release, and controlling payment distribution to ensure proper repairs protect their loan collateral. They require contractor licenses, signed contracts, and repair inspections before releasing funds, which can add two to four weeks to the payment timeline. Popular Articles |