

If you paint over smoke damaged drywall without sealing it first, those stains and smells will bleed right through your fresh paint. It’s like putting a lid on a pot with holes. Smoke residue contains oils and acids that migrate through standard paint, showing up as yellow or brown stains weeks later. Sealing creates a solid barrier that locks contamination in place so it can’t reach the surface. The key is using the right primer and applying it correctly after you’ve cleaned the wall properly.
Assessing Smoke Damage Severity on Drywall

Before you grab cleaning supplies, figure out what you’re dealing with. Assessment determines your approach and keeps you from wasting time on drywall that’s already toast. Trying to seal something too far gone just burns money.
Smoke damage breaks down into six levels:
Surface residue only. Light soot on painted surfaces that wipes away with dry cleaning sponges. The drywall paper and gypsum underneath are fine.
Light staining. Yellowish or gray discoloration that’s gotten through the paint but hasn’t reached the drywall paper yet. You’ll need wet cleaning with degreasers before sealing.
Moderate damage. Visible staining with oily residue soaked into the drywall paper. Surface feels tacky or greasy, and regular cleaning leaves some discoloration.
Heavy contamination. Deep staining through the paper with strong odor that won’t quit. The paper shows darkening, and smoke oils have started getting into the gypsum core.
Severe damage. Paper facing is charred, bubbled, or separating from the gypsum. You’re seeing physical deterioration, not just color changes.
Structural damage beyond repair. Charred gypsum, crumbling core, or warped panels that have lost integrity. Sealing won’t fix these.
Smoke residue chemistry changes fast after a fire. Acidic compounds start etching painted surfaces within hours. What looks like simple soot on day one becomes bonded contamination by day three. Oily components keep migrating deeper into porous materials the longer they sit. That’s why quick action matters. The sooner you start cleaning, the more contamination stays near the surface where you can reach it.
Check for structural compromise before deciding to seal. Run your hand across the surface, feeling for soft spots, bumps, or areas where the paper feels loose. Press gently on suspect areas. Solid drywall pushes back firm. Compromised drywall feels spongy or the surface paper shifts under light pressure. Look for delamination where the paper’s pulling away from the gypsum core, especially around seams and corners. Check for warping by sighting down the wall from an angle. Gypsum that got hot enough or wet enough from firefighting efforts won’t stay flat. If you find crumbling gypsum, significant warping, or paper coming loose, you’re looking at replacement.
Safety Equipment and Workspace Preparation for Drywall Sealing
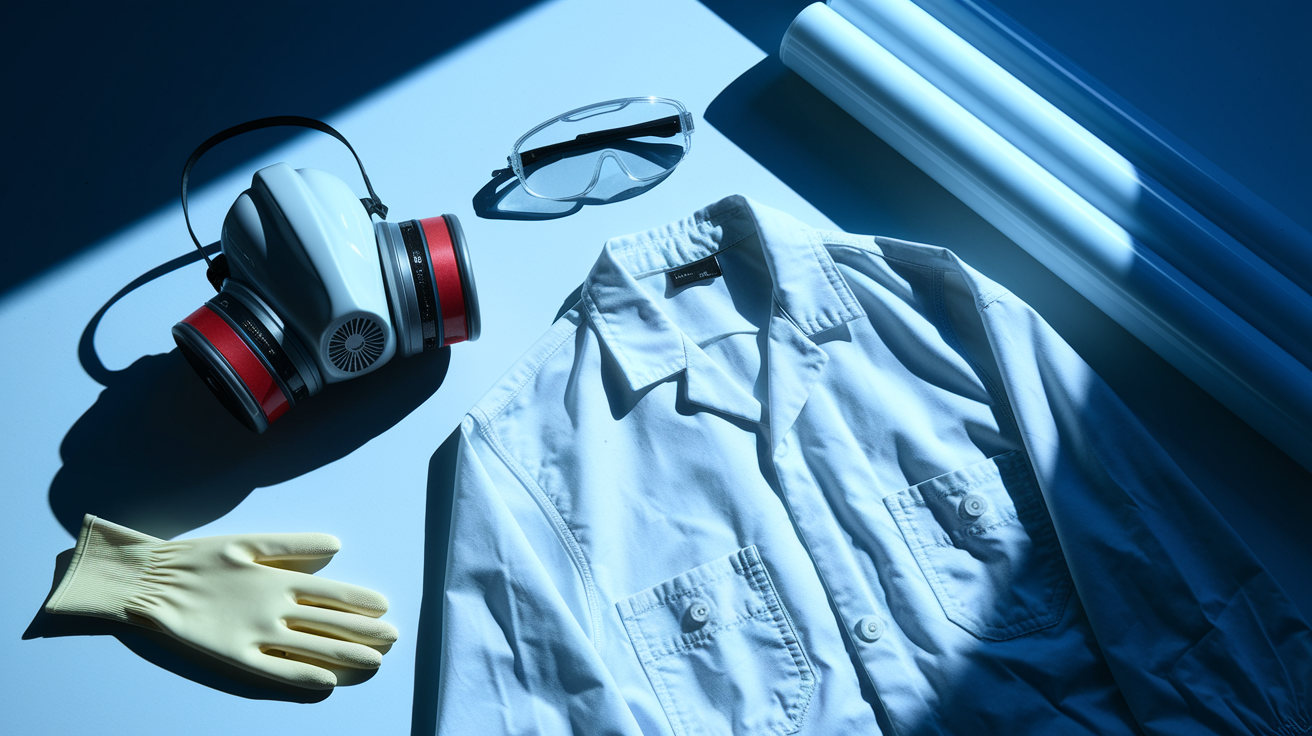
Smoke residue isn’t just dirty. It contains carcinogens, acidic compounds, and irritants you don’t want in your lungs or on your skin. The soot you’re about to disturb will go airborne, and the chemicals in primers give off fumes that need proper protection.
You need an N95 respirator minimum. Not a dust mask. N95 filters out at least 95% of airborne particles including the fine soot you’ll kick up during dry cleaning. If you’re using shellac based primers, upgrade to a respirator with organic vapor cartridges because those solvents are strong. Wear sealed safety glasses. Not just regular glasses. Soot gets everywhere, including your eyes when you’re working overhead. Use nitrile gloves rated for chemical resistance. Latex tears too easily, and you’ll be working with solvents and degreasers. Disposable coveralls keep contamination off your clothes and prevent you from tracking soot through clean areas.
Cover your floors with plastic sheeting and tape the edges down. Soot becomes airborne the second you start cleaning, and it settles everywhere. Use 6 mil plastic. Not the thin painter’s plastic that tears when you walk on it. Set up ventilation before you start. Open windows in the work area and place box fans in the windows blowing outward. This creates negative pressure that pulls contaminated air out instead of pushing it into other rooms. If you’re working in a room without windows, point fans toward the door and open windows elsewhere to create airflow. Position a dehumidifier if the area got wet from firefighting efforts. Drywall needs to be completely dry before you seal it. Cover electrical outlets with plastic and tape because disturbed soot is conductive. Seal doorways to adjacent rooms with plastic sheeting and tape to contain the mess.
Dry Cleaning Smoke Residue from Drywall Surfaces

Dry cleaning removes loose soot particles without introducing moisture that would set stains deeper into the surface. This step lifts the bulk of surface contamination so wet cleaning can tackle what’s left. Skip this, and you’ll just smear oily soot around when you start scrubbing.
Start with a HEPA vacuum using a soft brush attachment. Work in sections, moving the brush gently across the surface. Don’t press hard. You’re lifting loose debris, not scrubbing. Work from ceiling to floor so falling particles don’t recontaminate areas you’ve already vacuumed. The vacuum removes the top layer of dry soot that would otherwise become airborne during sponge cleaning or turn into a smeared mess during wet cleaning.
Now switch to chemical sponges. Sometimes called dry cleaning sponges. These aren’t regular sponges. They’re made from vulcanized rubber that grabs soot particles through friction. Start at the ceiling and work downward in overlapping sections about three feet wide. Use light pressure and straight downward strokes toward the baseboards. Don’t scrub in circles or back and forth. That spreads contamination. The sponge lifts embedded residue from the paint surface without spreading it around. As you work, the sponge surface loads up with soot and turns black. When a section gets saturated, fold the sponge to expose a clean surface. Keep folding until all sides are loaded, then switch to a fresh sponge. Some people try to rinse and reuse these sponges. Don’t. Once loaded, they smear instead of lift.
You’ll know dry cleaning is complete when the sponge stops picking up visible soot transfer. The wall should look significantly lighter, though it probably won’t look clean yet. That’s fine. You’ve removed the loose particles. The remaining discoloration is oily residue and staining that needs wet cleaning. If fresh sponge surfaces still show heavy black transfer after multiple passes, keep working that section. But if the sponge comes away mostly clean after a stroke, move on.
Wet Cleaning and Degreasing Smoke Damaged Drywall

Wet cleaning tackles the oily smoke residues, nicotine stains, and embedded contamination that dry cleaning leaves behind. This is where you actually remove the chemistry that causes persistent odor and staining.
The wet cleaning process follows five steps.
First, mix your cleaning solution. Use TSP (trisodium phosphate) at 1/4 cup per gallon of warm water, or use a TSP substitute product if you prefer something less caustic. Commercial smoke removers work well for heavy residues.
Second, apply solution to the wall. Use a sponge or cleaning cloth, working in 3 foot sections. Keep the surface damp but not dripping. You want to loosen the residue, not soak the drywall.
Third, allow dwell time. Let the cleaner sit for 2 to 3 minutes so it can break down the oily deposits. Don’t let it dry on the surface.
Fourth, scrub with controlled pressure. Use a soft scrub brush or abrasive sponge with enough pressure to remove residue but not enough to damage the paint or drywall paper. Work in circular motions.
Fifth, rinse thoroughly. Go over each section with clean water and a fresh sponge to remove all cleaner residue. Change your rinse water frequently.
TSP cuts through smoke residue effectively and it’s been the professional standard for decades. It’s alkaline, so it neutralizes acidic smoke deposits and breaks down oily films. The downside? It’s caustic. Wear gloves, and don’t let it sit on the wall too long or it can damage paint. TSP substitute products use different chemistry to accomplish similar results with less risk to your skin and painted surfaces. They take a bit more elbow grease but work fine for most smoke damage. Commercial smoke removers are formulated specifically for fire restoration. They cost more but they’re designed to handle the protein residues from kitchen fires and the sticky tars from low temperature smoldering fires that TSP sometimes struggles with.
Thorough rinsing matters more than most people realize. Any cleaner residue left on the wall will interfere with primer adhesion and can cause odor problems later. Go over each section at least twice with clean rinse water. Then wait. The drywall must be completely dry before you apply any primer. Touch the surface. It should feel dry, not cool or damp. If you have a moisture meter, confirm the reading matches normal indoor drywall levels (usually 5 to 12% depending on your climate). Running fans and a dehumidifier speeds drying. Most walls need 24 hours minimum to dry thoroughly after wet cleaning.
Product Selection Guide for Smoke Damage Primers and Sealers
Primer selection matters critically for smoke damage because unprimed walls allow odors and stains to pass through paint. When you use the wrong product, you’ll see yellowing or brown stains bleeding through your finish coat within weeks. Then you’re repainting, or worse, stripping everything and starting over. Proper sealing creates a barrier that locks contamination in place so it can’t migrate to the surface. When discussing proper primer selection, getting this step right prevents bleed through in restoration scenarios.
| Primer Type | Odor Blocking | Stain Blocking | Dry Time | Best For |
|---|---|---|---|---|
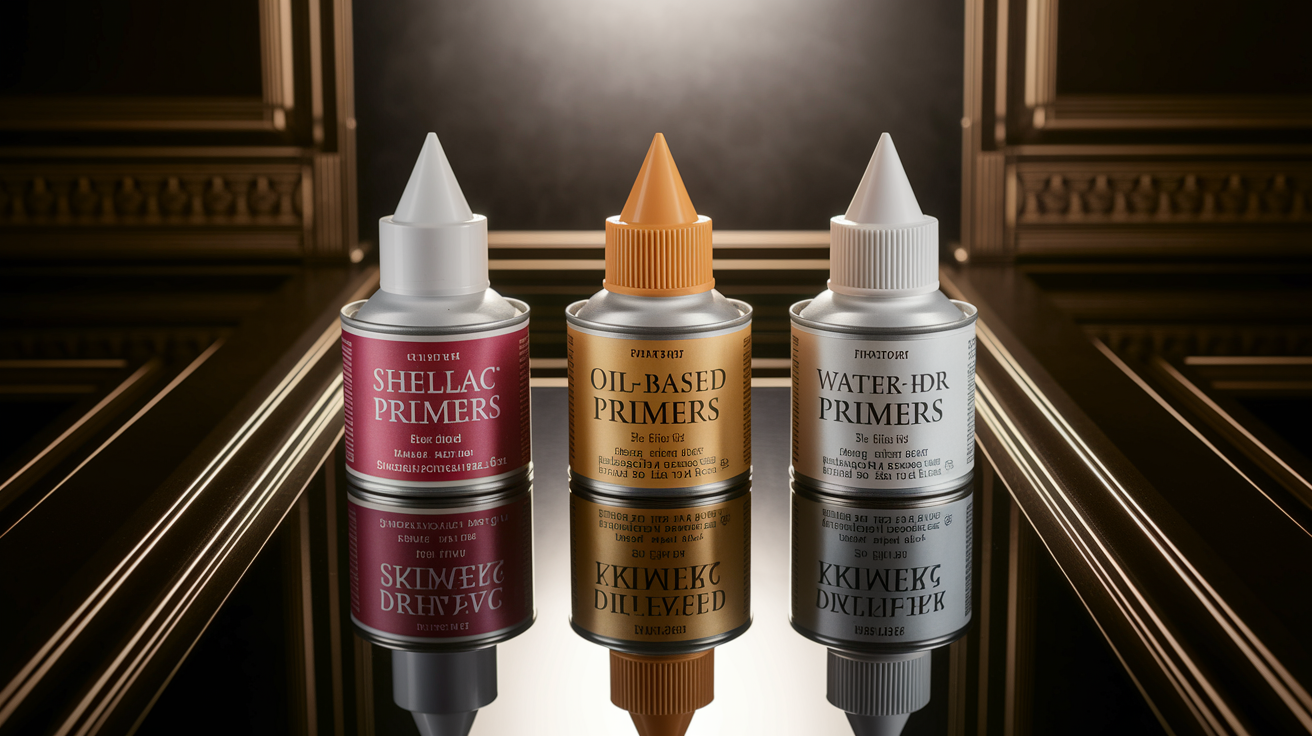
| Shellac Based | Excellent | Excellent | 45 minutes | Heavy smoke damage, persistent odors, nicotine staining |
| Oil Based | Very Good | Very Good | 4 to 6 hours | Moderate damage, when shellac fumes are concern |
| Water Based | Limited | Fair | 1 to 2 hours | Light surface damage only, minimal odor |
Zinsser BIN shellac based primer is the gold standard for heavy smoke damage. It seals in odors and stains better than anything else available, and it dries fast so you can apply a second coat the same day. The shellac creates a hard barrier that smoke oils and nicotine can’t penetrate. Use BIN when you’re dealing with significant smoke exposure, strong persistent odor, or visible nicotine staining. The downside is the fumes. Shellac based primers use denatured alcohol as a solvent, which means strong odors during application. You need serious ventilation and a respirator with organic vapor cartridges. KILZ Original oil based primer works as an alternative for moderate damage. It provides excellent stain blocking and good odor control without the intense fumes of shellac. Oil based primers take longer to dry, usually 4 to 6 hours before recoating, but they’re easier to work with for most homeowners. For light surface damage where you barely smell smoke anymore, water based stain blocking primers can work. But if you’re reading this article, your damage probably isn’t that light.
Bleed through happens when smoke contaminants penetrate through an insufficient sealer barrier. The wrong primer type simply doesn’t create a strong enough barrier. Shellac and oil based primers form a harder, denser film than water based products. When you use water based primer over smoke damage, the thin barrier allows volatile compounds to migrate through over time. You’ll see yellowing appear gradually as tannins, nicotine, and smoke oils work their way to the surface. Using too few coats causes the same problem. One thin coat of even good primer may not provide enough thickness to fully encapsulate the contamination. And if you applied primer over surfaces that weren’t completely clean and dry, you’ve trapped moisture or oily residues that will eventually push back through.
Wait 24 to 48 hours after sealing before testing. The primer needs to fully cure and off gas. Then apply a small test patch of your finish paint in an inconspicuous area. Let that dry completely and inspect it under good light. Look for any yellowing, brown spots, or discoloration bleeding through. Get your nose close and check for odor. If you detect breakthrough, you need more sealing. Apply an additional coat of sealer over the entire surface. If breakthrough is significant, switch to a stronger formula. You can apply shellac based primer over dried oil based primer if needed. That additional layer usually solves persistent problems.
Applying Smoke Damage Sealer to Drywall Surfaces

Choose your application method based on project size and what you’re working with. Rollers work best for large flat wall areas. They provide fast coverage and even film thickness. Brushes handle edges, corners, trim, and detail work where rollers can’t reach. Airless sprayers make sense for heavily textured surfaces or whole house projects, but they require practice, generate overspray, and need thorough masking.
For roller work on walls, select a 3/8 inch to 1/2 inch nap roller cover. Shorter nap for smooth walls, longer nap if your surface has any texture. Load the roller by rolling it in the paint tray until it’s saturated but not dripping. Start with a W pattern about four feet tall. Roll the primer on with moderate pressure in vertical strokes from ceiling to floor, then cross roll horizontally to even out the coverage. Overlap each pass by 10 to 15 percent so you don’t leave thin spots or holidays. Work in sections you can complete while maintaining a wet edge. If one section dries before you roll into it, you’ll see lap marks in the final finish.
Use a 2 inch angled sash brush for cutting in. Cut in all edges, corners, ceiling lines, and trim before rolling the main wall areas. Load the brush by dipping it about one third of the way into the primer, then tap off the excess against the inside of the can. Don’t wipe the brush across the rim because that removes too much product. Apply the primer with steady strokes, working it into corners and edges. Keep a wet edge by working quickly and maintaining overlap with adjacent areas. Good brushwork takes practice. The goal is smooth, even coverage without drips, runs, or heavy brush marks.
Most smoke damage requires two coats minimum. Shellac based primers dry fast, usually ready for a second coat in 45 minutes to an hour. Oil based primers need 4 to 6 hours between coats. Check the product label for specific recoat times. Environmental conditions matter. Ideal temperature range is 60 to 80°F with moderate humidity. Extreme cold slows drying and causes application problems. High humidity extends dry times and can cause the primer to take longer to cure. Run fans to maintain air circulation but don’t point them directly at wet primer because that can cause surface defects. Calculate coverage before you buy. A gallon of primer typically covers 300 to 400 square feet depending on surface porosity and application method. Measure your wall area by multiplying height times width, subtract major openings like doors and windows, then divide by your expected coverage rate. Most bedrooms need 2 to 3 gallons of primer for two coats.
Texture Matching and Paint Application Over Sealed Drywall

Finishing work makes repaired areas invisible and restores your home’s appearance. After all the cleaning and sealing, the goal is to make the walls look like the fire never happened.
If you had to patch damaged sections or if the cleaning process wore through existing texture, you need to match what’s there. Most homes have either smooth walls, orange peel texture, or knockdown texture. For orange peel, use a spray on texture product in a can. Hold the can about 18 inches from the wall and spray in short bursts using a circular motion. Build the texture in light layers. For knockdown texture, spray on orange peel texture, wait 10 to 15 minutes until it’s tacky but not wet, then lightly skim across the high spots with a drywall knife to flatten them slightly. Smooth walls just need a light skim coat of joint compound to fill any imperfections, then sand smooth. Practice your texture technique on cardboard first. Getting texture to match existing surface takes a few tries.
For paint application as the final restoration step after sealing, paint selection matters for long term performance in smoke affected areas. Semi gloss or satin finishes are more washable and resistant to future staining than flat paint. Smoke damaged rooms sometimes develop new light staining over the first year as remaining trace contamination in carpets or furnishings off gasses. Washable paint lets you wipe down walls without damaging the finish. Match the sheen to what’s already on adjacent walls unless you’re painting the whole room. Mixing sheens on the same wall looks wrong under angled light. If you’re unsure about your existing sheen, paint a small test area and compare when dry.
Apply two coats of finish paint minimum over sealed surfaces. One coat might look acceptable initially, but it won’t provide adequate protection or coverage. Cut in edges first with a brush, then roll the main areas within 15 minutes while the cut in paint is still wet. This prevents lap marks where brush and roller work meet. Roll in the same direction for uniform sheen. Most people roll floor to ceiling in vertical passes. Use good paint. Cheaper paints require more coats and don’t cover stain blocking primers as well as quality products. After the first coat dries completely (check the label, usually 2 to 4 hours), inspect for any areas where the primer shows through. Touch those up before applying the second coat. The second coat should give you complete, even coverage with consistent sheen and color.
Odor Testing and Verification After Sealing Drywall

Odors hide under normal conditions but emerge with heat and humidity changes. What smells fine today might smell like smoke tomorrow when weather changes or you close up the house and run heat. You need to test under conditions that will reveal hidden contamination before you call the job complete.
Close the affected room and run a space heater to raise the temperature above 80°F. Don’t overheat the space, just get it warm. Leave the room closed for 2 to 3 hours. Heat causes any remaining volatile compounds to off gas faster. Then leave. Go outside, breathe fresh air, reset your nose. After 10 to 15 minutes away, come back and open the door. Your first impression when entering tells you whether odor remains. Don’t stand there trying to detect smell. That first sniff when you walk through the door is most reliable. If you smell smoke, you’ve still got active contamination. Try the same test on a humid day or run a humidifier in the closed room. Moisture causes different compounds to release odor. Some smoke contamination only becomes noticeable when humidity is high.
Persistent odor after sealing indicates one of three problems. First possibility is incomplete sealing. You might have missed areas, applied primer too thin, or used a product that isn’t strong enough for your contamination level. Second possibility is hidden contamination in wall cavities, behind baseboards, or in other areas you didn’t treat. Smoke travels through electrical outlets, into attics, behind walls. If cavities weren’t addressed, they’ll keep releasing odor into living spaces. Third possibility is contamination in other materials. Carpet pad, furniture, HVAC system, or other porous materials continue releasing smoke smell even after walls are sealed. If you get persistent odor after proper sealing, add another coat of shellac based sealer first. If that doesn’t solve it, pull outlet covers and check whether smoke smell is stronger near openings into wall cavities. Consider professional ozone treatment or hydroxyl generator treatment for deep contamination. These machines generate oxidizing molecules that break down odor compounds at a molecular level, reaching areas that sealing can’t address.
DIY vs Professional Restoration: Costs and Decision Factors

Total cost varies with room size, damage severity, and whether you hire professionals. A typical 12×12 bedroom with moderate smoke damage will cost significantly less as a DIY project, but you’ll invest substantial time and physical effort.
| Item | DIY Cost Range | Professional Cost Range |
|---|---|---|
| Chemical Sponges (box of 6) | $15 to 25 | Included |
| TSP/Cleaner (5 lbs) | $15 to 20 | Included |
| Primer/Sealer (2 gallons) | $80 to 120 | Included |
| Finish Paint (2 gallons) | $60 to 100 | Included |
| Tools/Supplies (rollers, brushes, plastic, tape, PPE) | $60 to 90 | Included |
| Labor | Your time | $800 to 1500 |
| Total Per Room (12×12) | $230 to 355 | $1200 to 2000 |
DIY saves 50 to 70 percent on labor costs but requires 2 to 4 days of work for an average room. Day one is prep, dry clean, and wet clean. Day two, let everything dry, apply first primer coat. Day three, second primer coat, possibly texture matching. Day four, two coats of finish paint. That’s if everything goes smoothly and you’re working efficiently. First time DIY projects usually take longer. You’ll save money by buying materials yourself, using your own labor, and renting rather than owning specialized equipment like HEPA vacuums or airless sprayers. Keep materials receipts and photograph your work at each stage. If insurance is involved, documentation helps with reimbursement.
DIY makes sense for single room surface damage when you have time and basic skills. If smoke contamination is limited to one bedroom or an isolated area, the project scope stays manageable. Surface damage that responds to standard cleaning and sealing doesn’t require industrial equipment or specialized knowledge. You need reasonable DIY skills, meaning you’ve painted before and you’re comfortable working carefully on a ladder. And you need time. Rushing smoke remediation causes mistakes that lead to recurring odor or staining. If you’re dealing with small isolated areas, you’re physically capable of the work, and you can dedicate a week to the project, DIY saves significant money.
Professional restoration becomes necessary for extensive whole house damage, structural concerns that require assessment, proper insurance documentation and claims support, or situations where you need guaranteed odor elimination. When discussing scenarios that need professional restoration services, consider that professionals provide comprehensive damage assessment to determine what can be sealed versus what requires replacement. They use industrial strength cleaners and sealers that outperform retail products. Thermal foggers reach into cavities and penetrate porous materials where smoke has traveled. HEPA air scrubbers remove airborne particles while work progresses. And professionals provide completion guarantees backed by business insurance. If odor returns after professional remediation, they come back and address it. Most professional restoration includes assessment, containment setup, HEPA vacuuming, chemical cleaning, primer sealing, finish painting, and air quality verification.
Look for contractors with IICRC (Institute of Inspection, Cleaning and Restoration Certification) credentials, specifically the Fire and Smoke Restoration Technician certification. Ask for recent references from smoke damage jobs, not just general remodeling projects. Get written estimates that break down labor, materials, and specific scope. The estimate should detail which rooms they’ll address, how many primer coats they’ll apply, what type of sealer they’re using, and what the final finish will look like. Verify they carry insurance coverage for restoration work. Check that they have experience working with insurance companies if your project involves a claim. Local restoration companies with 5 plus years in business usually provide more reliable service than new startups or general contractors taking on restoration work.
When to Replace Rather Than Seal Smoke Damaged Drywall

Sealing only works when drywall structure remains sound and contamination is surface level. No primer technology can fix drywall that’s physically compromised or so deeply contaminated that the gypsum core has absorbed smoke throughout its thickness. Trying to seal badly damaged drywall wastes time and money on repairs that will fail.
Six conditions require replacement instead of sealing.
Charred paper facing. If the paper surface shows black charring, bubbling, or heat damage, the paper no longer bonds properly to the gypsum core and won’t hold primer or paint reliably.
Crumbling gypsum core. Gypsum that crumbles when you press it or shows powdery deterioration has lost structural strength and can’t support a finish surface.
Delamination. Paper facing that’s separating or pulling away from the gypsum core, especially around seams, corners, and edges, will continue separating under the weight of primer and paint.
Water saturation from firefighting. Drywall that stayed wet for more than 48 hours, shows heavy water staining, or feels soft has absorbed too much moisture and will remain prone to mold growth even after drying.
Structural warping. Panels that show significant bowing, twisting, or distortion from heat exposure won’t flatten and will create visible irregularities under paint.
Contamination into wall cavities. When smoke has penetrated behind the drywall into insulation and wall cavities with ongoing odor release, surface sealing won’t solve the problem.
Compare the economics of sealing versus replacement over 5 to 10 years. Proper replacement lasts indefinitely. You remove damaged material, install new drywall, finish it properly, prime with quality sealer, and paint. The result performs like new wall construction. Marginal sealing might work for a year or two, then stains start bleeding through or odors return. At that point, you’re repainting or worse, stripping and replacing anyway. If you’re questioning whether your drywall is too damaged, replacement is usually the right answer. The material cost difference between sealing and replacing isn’t huge for most rooms. A 12×12 room needs roughly 500 square feet of drywall at $12 to 15 per sheet, plus joint compound, tape, and labor. Compare that to the primer and paint costs you’ll spend anyway, and replacement often makes economic sense when damage is significant.
For partial replacement, cut damaged sections back to the nearest wall studs. Use a drywall saw or utility knife to score and snap the damaged panel. Remove fasteners and pull out the damaged section. Cut new drywall to fit the opening, leaving a slight gap (about 1/8 inch) around edges. Secure the new piece to studs with drywall screws every 8 inches. Apply paper tape and joint compound to all seams, feathering the edges 8 to 12 inches onto surrounding wall. After compound dries, sand smooth and apply texture to match existing surface. Then prime the entire wall surface, not just the patched area. Priming only the patch will show as a different sheen or slight color variation. Sealing the entire surface after patching ensures uniform appearance and complete odor blocking across the whole wall.
Final Words
Sealing smoke damaged drywall works when you follow the sequence and use the right products.
Start with honest damage assessment. If the paper’s charred or the gypsum crumbles, replace it. If the structure’s sound, move through dry cleaning, wet cleaning, and proper sealing with shellac or oil-based primers.
Test your work before you call it done. Close the room, warm it up, and check for lingering odors.
For small, isolated damage, DIY saves money and gets good results. For whole-house smoke damage or insurance work, bring in professionals with commercial-grade equipment and guaranteed odor elimination.
Either way, the goal’s the same: clean, sealed surfaces that stay odor-free and look finished.
FAQ
Do you have to replace drywall after smoke damage?
You do not always have to replace drywall after smoke damage. Surface-level soot and light to moderate smoke staining can usually be cleaned and sealed effectively. Replacement becomes necessary only when the drywall is charred, structurally compromised, water-saturated from firefighting efforts, or shows crumbling gypsum and paper delamination.
Will Kilz cover smoke damage?
Kilz Original oil-based primer will cover moderate smoke damage effectively by blocking stains and sealing odors. For heavy smoke damage, nicotine staining, or severe odor problems, shellac-based primers like Zinsser BIN provide stronger blocking performance. Water-based Kilz products offer limited effectiveness for smoke damage and should be avoided for this application.
How do you fix smoke damaged walls?
You fix smoke damaged walls by first dry cleaning with chemical sponges to remove loose soot, then wet cleaning with TSP or degreaser to remove oily residues. After the walls dry completely, apply two coats of smoke-sealing primer, then finish with texture matching and two coats of paint in the original sheen.
How do you fix severely damaged drywall after smoke exposure?
You fix severely damaged drywall by cutting out compromised sections to the nearest studs and installing new drywall pieces. Tape and finish the seams with joint compound, then seal the entire repaired surface with smoke-blocking primer before texture matching and painting. Complete replacement becomes necessary when charring, crumbling, or structural warping affects large areas.
How long does it take to seal smoke damaged drywall?
Sealing smoke damaged drywall typically takes 2 to 4 days for an average room when done properly. This includes dry cleaning, wet cleaning and drying time, applying two coats of sealer with drying time between coats, and final paint application. Professional crews can complete the process faster using commercial equipment and coordinated teams.
Can you paint over smoke damage without primer?
You cannot successfully paint over smoke damage without primer. Smoke residues, oils, and odors will bleed through standard paint within weeks, causing discoloration and lingering smells. Smoke-blocking primer creates a sealed barrier that prevents contaminants from penetrating the finish coat and is essential for permanent results.
What type of primer blocks smoke odor best?
Shellac-based primers like Zinsser BIN block smoke odor best because they create an impermeable barrier against both stains and volatile odor compounds. Oil-based primers like Kilz Original provide excellent blocking for moderate damage. Water-based primers lack the sealing properties needed for smoke damage and should not be used for this purpose.
How do you know if smoke sealing worked?
You know smoke sealing worked by conducting a warm room test after the sealer and paint dry completely. Close the room, raise the temperature to 80°F or higher with a space heater, wait 2 to 3 hours, then leave and return with a fresh perspective. No smoke odor should be detectable under these conditions.
What surfaces need smoke damage sealing?
Surfaces needing smoke damage sealing include painted drywall, bare drywall, wood trim, doors, ceilings, and any porous material exposed to smoke residue. Even surfaces that appear clean may harbor invisible protein smoke residues or penetrated oils that will cause odors later. Sealing creates a complete barrier across all affected surfaces.
How much does it cost to seal smoke damaged walls?
Sealing smoke damaged walls costs approximately $150 to $300 per room for DIY projects including cleaners, primer, and paint. Professional restoration runs $500 to $1,500 per room depending on damage severity, room size, and whether replacement sections are needed. Whole-house smoke damage restoration ranges from $3,000 to $15,000 depending on square footage and contamination extent.