

When fire chars your wall studs and floor joists, the obvious question is: can they still hold up your house? You can’t tell just by looking, and guessing wrong means collapse risk or hidden damage that shows up months later. Professional framing assessment finds what’s salvageable, what needs reinforcement, and what has to be torn out and rebuilt. We’ll walk you through the real repair process, from structural inspection and emergency shoring to sistering damaged joists, replacing compromised studs, and passing final code inspection.
Structural Assessment and Fire Damage Inspection
Repairing fire damaged interior framing isn’t something you just dive into. Before anyone starts swinging hammers, you need a complete understanding of what’s actually compromised, what can be saved, and what’s got to go.
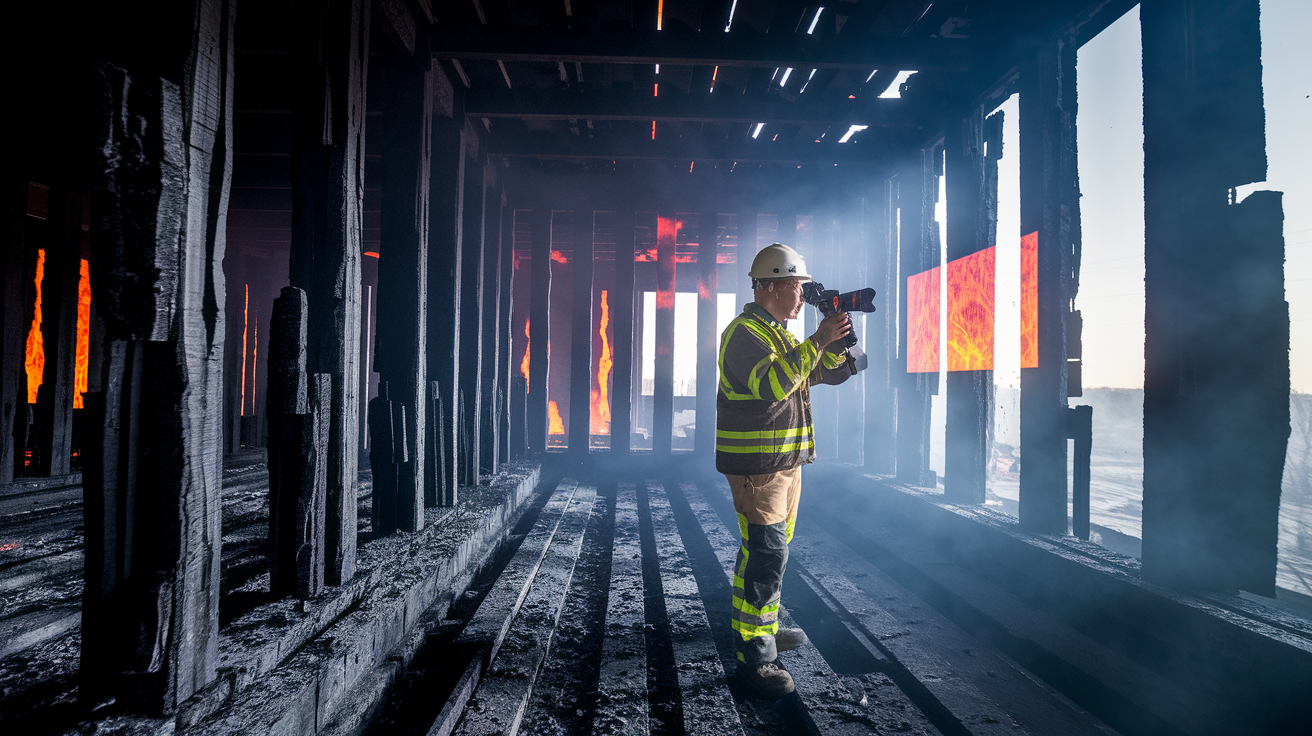
Professional assessment protects you from hidden damage that could lead to collapse or problems down the road. Structural engineers use thermal imaging to find heat damage that went deep into beams, studs, and load bearing walls, even when everything looks fine on the surface.
The repair process breaks down into six stages:
- Structural inspection and damage assessment (engineer evaluation)
- Emergency stabilization and temporary supports
- Demolition and removal of compromised framing members
- Smoke and soot remediation on salvageable materials
- Replacement or sistering of damaged framing components
- Final inspection and code compliance verification
A structural engineer evaluates every framing member that got exposed to fire. They’re measuring char depth on wood studs, checking moisture content in floor joists, testing whether ceiling joists and header beams can still handle their design loads. Wall framing, roof trusses, rim joists, foundation connections. They’re figuring out if the wood structure lost enough strength to become dangerous.
Char depth matters because fire burns wood from the outside in. If a 2×6 stud charred half an inch deep but still has five inches of solid wood, it might be salvageable with reinforcement. Two inches deep? It’s lost too much and needs replacement. Moisture meters confirm the wood dried properly after firefighting efforts, because trapped moisture causes rot and mold even if the framing looks stable. Thermal imaging reveals heat damage that weakened wood fibers without visible charring. Load bearing walls get extra attention since they’re holding up floors and roofs. You’re determining what stays, what gets reinforced, and what gets torn out and rebuilt.
Safety Measures and Demolition of Compromised Framing
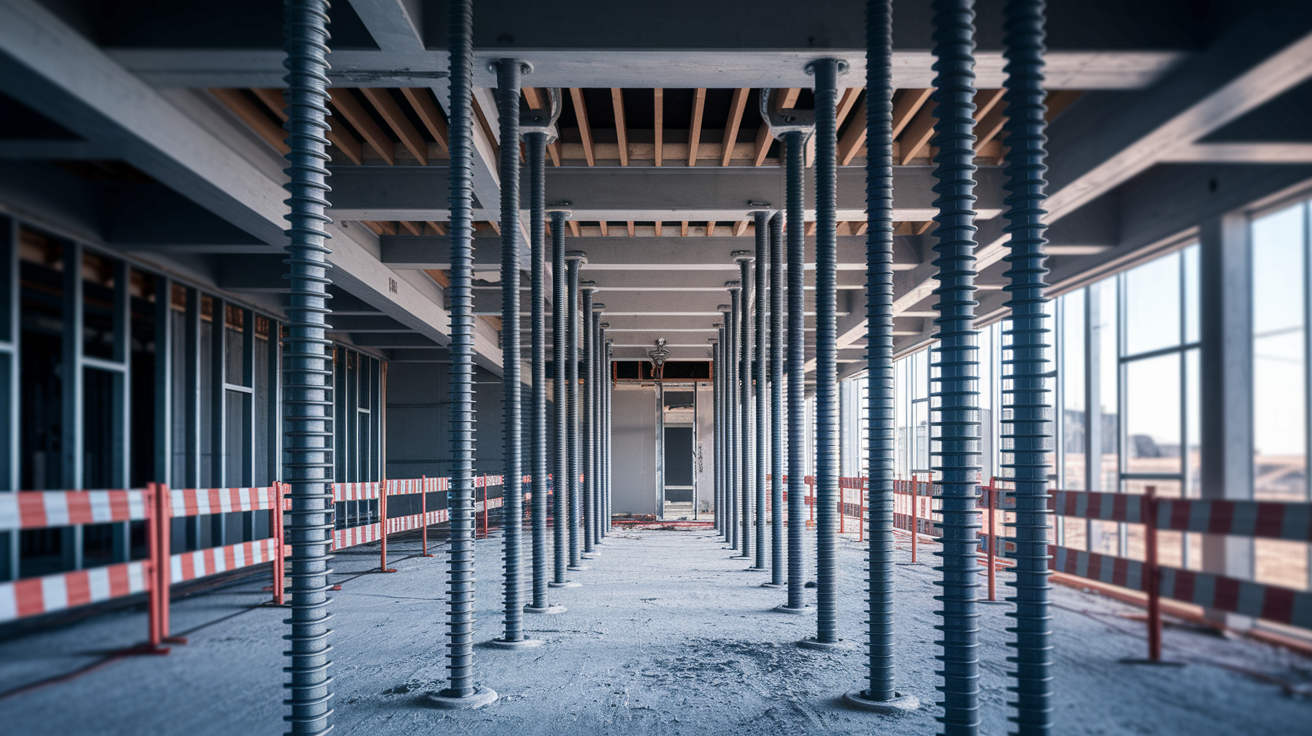
Before you remove any damaged load bearing members, temporary supports need to be installed to carry the weight those members currently hold. Adjustable steel posts under floor joists, temporary walls supporting ceiling joists, bracing for walls while studs get replaced. The building won’t collapse during demo if loads transfer properly to temporary supports first.
The demolition sequence matters. You don’t just remove charred studs at random. Start with non load bearing partitions, then work toward load bearing elements once shoring is in place. Ceiling joists come down carefully to avoid damaging roof framing above. Floor joists get cut and removed in sections rather than yanked out, which could shift adjacent members. Charred header beams over openings require extra care since they’re carrying significant point loads.
Disposal of fire damaged lumber follows local regulations. Some places classify heavily charred wood as construction debris, others require special handling due to smoke contamination. Materials that contacted flame retardants, solvents, or other chemicals during the fire need separate disposal. Asbestos in older homes requires certified abatement crews before demolition proceeds.
Five safety protocols during demolition:
- Personal protective equipment requirements: respirators with appropriate filters for smoke particulate, protective clothing, gloves, and eye protection to prevent exposure to soot and charred material
- Ventilation and air quality monitoring: continuous fresh air circulation and monitoring devices to detect carbon monoxide, volatile compounds, and particulate levels before workers enter
- Cross contamination prevention between affected and unaffected areas: sealed barriers and negative air pressure in work zones to keep smoke particulate from spreading through the house
- Proper handling of charred lumber and smoke damaged materials: controlled removal and immediate containment to prevent soot from spreading to clean areas
- Structural stabilization before removing load bearing elements: engineered temporary shoring and load transfer systems installed and verified before cutting or removing any structural members
Smoke and Soot Remediation on Structural Wood
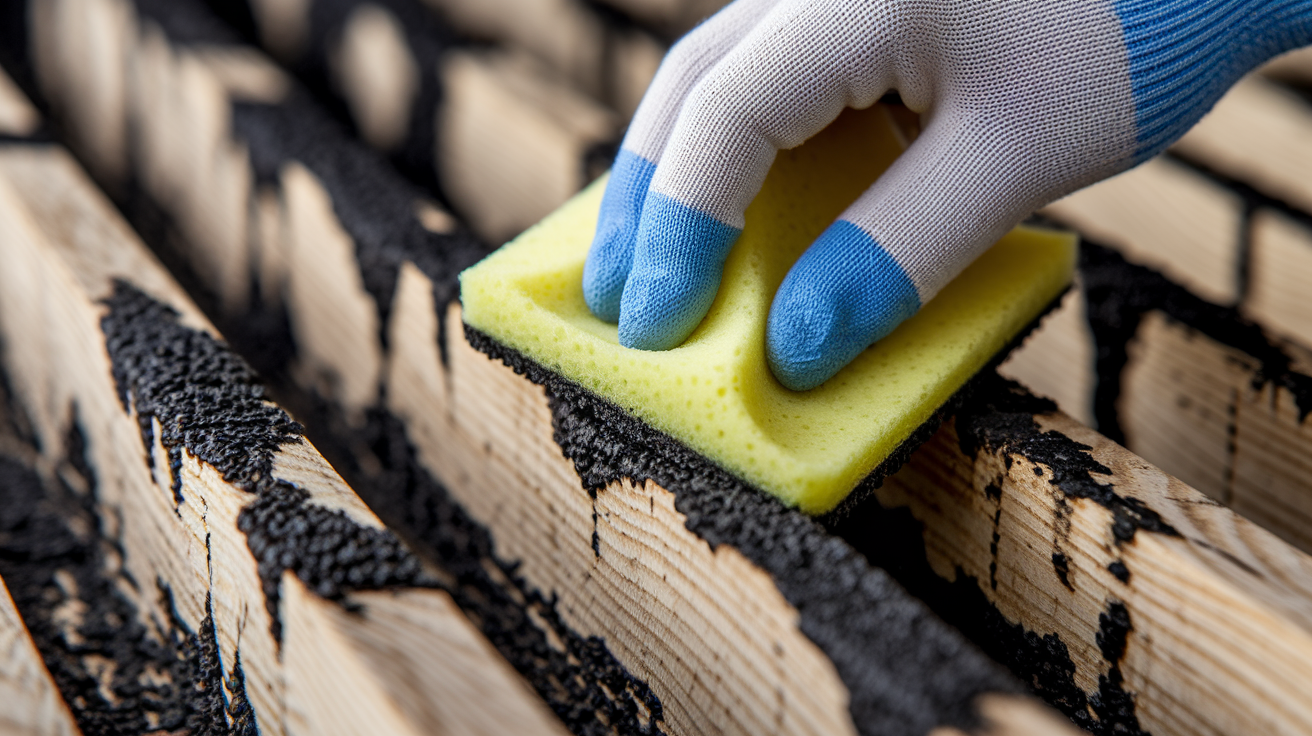
Salvageable framing with smoke and soot contamination needs professional cleaning before new materials get installed around it. HEPA vacuuming removes loose soot from wood studs and exposed joists. Dry chemical sponges lift embedded soot without driving it deeper into the wood grain. For heavy contamination, contractor grade wood cleaners break down oily residue left by synthetic materials that burned.
Odor sealing treatments lock smoke smell inside the wood so it doesn’t bleed into living spaces later. Pigmented shellac based sealers work well on framing that’ll be enclosed behind drywall. When fire retardant treatment is required by code for certain applications, it gets applied after cleaning and before enclosing the framing. This comes up in multi family buildings, near fire rated walls, or in attic spaces where draft stopping requirements apply.
HEPA filtration runs continuously during cleaning to capture airborne particulate. Air quality testing confirms particulate levels dropped to safe ranges before reconstruction begins. Moisture content testing on cleaned framing members ensures they dried below 19 percent, the threshold where mold growth accelerates. Wood that stayed wet too long from firefighting water may need replacement even if fire didn’t directly damage it. This remediation work prepares salvageable framing to integrate cleanly with new materials, preventing smoke odor and contamination from returning after you close up the walls.
Repair Methods: Replacement and Sistering of Damaged Framing

Whether you replace completely or sister depends on damage extent, structural requirements, and what the engineer’s assessment determined. Partial damage might allow sistering. Severe charring or compromised load capacity requires complete replacement.
Replacement Materials for Fire Damaged Framing
Replacement framing uses dimensional lumber that matches or exceeds the original framing size and structural capacity. A damaged 2×8 floor joist gets replaced with another 2×8 of the same grade or better. Moisture content for replacement wood studs must be below 19 percent before installation to prevent shrinkage and cracking as they dry. Kiln dried lumber works better than green lumber for this reason.
Fire retardant treatment is required by code when replacing framing in fire rated assemblies, like walls between dwelling units or between a garage and living space. Treated lumber arrives from the supplier already pressure impregnated with fire retardant chemicals. Engineered wood products like laminated veneer lumber or engineered joists offer high strength and dimensional stability for header beams and long spans. Metal studs provide a non combustible option for interior partitions and fire rated walls, though they require different fastening methods than wood.
Pressure treated lumber is required for bottom plates on concrete slabs or in areas with moisture exposure. Rim joists near grade level or in contact with masonry also need pressure treated material in many jurisdictions.
Sistering and Reinforcing Techniques
Sistering means attaching a new framing member directly alongside a damaged one to restore full load capacity. It’s appropriate when a joist or stud has surface charring or damage to one section but retains most of its structural integrity. The new member gets fastened securely to the existing member, and together they function as one stronger unit.
For floor joists, the sister joist runs the full length or extends at least three feet past the damaged section on each side. Fasteners are 10d nails or 3 inch structural screws spaced every 16 inches in a staggered pattern on both sides. The sister joist must bear fully on the same support points as the original. Ceiling joists follow the same approach. When sistering won’t provide adequate capacity, steel reinforcements like structural channels or plates get through bolted to the damaged member. This comes up with header beams that can’t be easily replaced due to access limitations.
Code requirements for sistering connections ensure the repair performs as well as original construction. Span calculations verify that the sistered assembly meets deflection limits and load capacity. Bridging installation between floor joists maintains proper spacing and prevents rotation. Blocking between joists at bearing points transfers loads correctly to supporting walls or beams below.
| Repair Method | Best Used For | Material Options |
|---|---|---|
| Full Replacement of Studs | Studs with heavy charring, multiple sections damaged, or load bearing walls requiring complete member replacement | Dimensional lumber matching original size, metal studs for fire rated walls, fire retardant treated lumber where required by code |
| Full Replacement of Joists | Joists with char depth exceeding 25% of cross section, severe heat damage, or compromised bearing connections | Dimensional lumber, engineered I joists, laminated veneer lumber for longer spans or heavy loads |
| Sistering Joists | Joists with localized damage, surface charring, or sagging that retains most structural capacity | Dimensional lumber matching original joist size and grade, full length or extending 3 feet past damage on each side |
| Sistering Studs with Steel Reinforcement | Load bearing studs with moderate damage where full replacement is difficult due to access or connections to other framing | Dimensional lumber for wood sister, steel channels or plates through bolted for heavy reinforcement, structural screws or bolts for connections |
Structural engineer recommendations determine which repair method applies to each damaged member. The engineer’s sealed drawings show exactly what gets replaced, what gets sistered, and what reinforcement details are needed. Following these specs maintains load paths and structural continuity throughout the repaired framing system.
Building Codes and Fire Rated Assembly Requirements

Fire damage repairs trigger permit requirements and must meet current building codes, not just the standards that applied when the house was originally built.
Seven typical permit and code requirements:
- Structural repair permits from local building department: required before starting demolition or framing work, ensuring the project is on record and inspections are scheduled
- Engineered drawings for load bearing modifications: sealed plans from a licensed structural engineer showing repair details, load calculations, and connection specifications
- Fire marshal review and approval for fire rated assemblies: verification that repairs maintain required fire resistance ratings in walls, floors, and other critical assemblies
- Rough framing inspections before concealing work: inspector examines framing members, fastener schedules, and structural connections before insulation and drywall cover them
- Updated fire stopping and draft stop installations: proper sealing materials installed at penetrations and concealed spaces to prevent fire spread
- Fire rated assembly documentation and compliance verification: records proving fire rated materials and construction methods match approved assemblies
- Final inspection clearance before occupancy: confirmation all work meets code and the structure is safe to occupy or use
Building inspectors verify that stud spacing meets code, typically 16 inches on center for load bearing walls. They check fastener schedules to ensure proper nailing or screwing patterns at top plates, bottom plates, and connections to headers. Load requirements for floors get confirmed through joist sizing, span tables, and bearing details. Structural calculations may be required for complex repairs like removing walls, installing new beams, or reinforcing compromised foundations.
Unpermitted work creates problems for insurance claims and future property sales. Insurance companies can deny claims if repairs weren’t done to code with proper permits. Future buyers or their lenders may require expensive remediation or certification if unpermitted structural work shows up during inspection or title review.
Fire rated walls are typically required between attached dwelling units, between garages and living spaces, in mechanical rooms, and around stairways in multi story buildings. These walls slow fire spread and provide escape time during emergencies. When framing repairs occur in these locations, the work must maintain the fire rating of the existing assembly. This means using fire rated lumber if specified, maintaining correct stud spacing, and coordinating with fire resistant drywall installation.
Fire stopping seals penetrations where pipes, wires, or ducts pass through fire rated walls or floors. The seal must be rated for the same fire resistance as the assembly it penetrates. Draft stops compartmentalize large concealed spaces like attics to prevent fire from spreading horizontally. These materials get installed in the framing before drywall closes everything up. Documentation requirements prove fire rating compliance, often through photos of materials, product data sheets showing fire ratings, and inspection records. For detailed guidance on maintaining fire ratings during drywall repairs, refer to Fire Rated Drywall Repair Best Practices which covers integration with repaired framing.
Fasteners and Connection Details for Replacement Framing

Proper fastener selection and installation meet code requirements and restore structural capacity to repaired framing.
| Connection Type | Fastener Requirement | Spacing |
|---|---|---|
| Stud to Plates | Two 16d nails or 3 inch structural screws through each stud end into top and bottom plates | Each stud at 16 inches on center |
| Header to King Studs | 16d nails or 3 inch structural screws, four fasteners per king stud connection | Nails spaced vertically along king stud height |
| Joist Hangers | Manufacturer specified hanger nails or structural screws, all holes filled | Every hole in the hanger must be filled per code |
| Rim Joist Connections | 16d nails toe nailed from floor joists into rim joist, three nails per joist | Every joist connection to rim board |
| Sister Joist Attachments | 10d nails or 3 inch structural screws in staggered pattern on both sides | 16 inches on center along full length of sister connection |
Nail schedules specify the size, type, and number of nails for each connection. A 16d nail is 3.5 inches long and appropriate for most framing connections. Structural screws are preferred when stronger withdrawal resistance is needed or when access makes nailing difficult. Code allows substituting screws for nails if the screw length and diameter provide equivalent shear and withdrawal capacity.
Framing anchors and hurricane ties provide critical connections in high stress locations like where rafters meet top plates or where joists connect to beams. These metal connectors prevent uplift and lateral movement during wind or seismic events. Each anchor has a specific fastener requirement, usually listed on the product or in manufacturer literature. Construction adhesive supplements mechanical fasteners at connections where extra strength or squeak prevention matters, like subfloor to joist connections or rim joist assemblies. The adhesive doesn’t replace nails or screws but works with them to create a stronger bond.
Insulation and Moisture Barrier Installation After Framing Repair
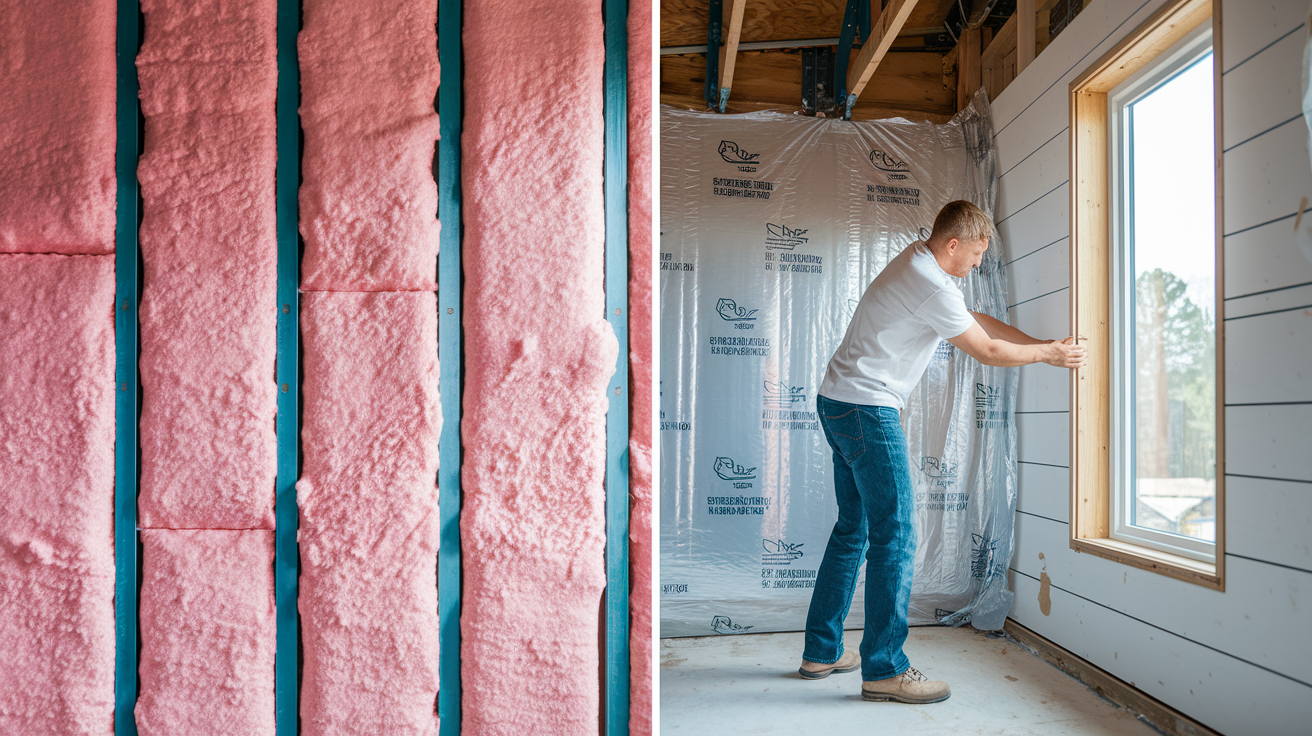
Fire damaged insulation gets removed during demolition and must be replaced once framing repairs are complete and inspected. New insulation meets current energy code requirements, which are often stricter than what was in place when the house was built. Wall cavities typically require R13 to R21 depending on climate zone. Floor insulation over unconditioned spaces needs R19 to R30. Attic insulation values range higher, from R30 to R60 in cold climates.
Vapor barriers and moisture barriers get placed on the warm side of the insulation in heating climates to prevent condensation inside wall cavities. In most of the country, this means the vapor barrier faces the interior living space. In hot, humid climates, placement may differ based on local building science and code requirements. The barrier material is typically 6 mil polyethylene sheeting or kraft faced insulation batts where the kraft paper serves as the vapor retarder.
Insulation installation happens after electrical wiring and plumbing lines are in place and inspected but before drywall goes up. Batts get cut to fit snugly around wiring and pipes without compressing the insulation, which reduces its effectiveness. Gaps around outlets, switches, and penetrations get sealed with caulk or spray foam to prevent air leakage. Proper moisture content in new framing before enclosing with insulation is critical. Wood framing above 19 percent moisture content can lead to mold growth inside closed wall cavities where you won’t see it developing.
Thermal bridging occurs where solid wood framing creates a path for heat transfer through insulated walls. Studs conduct more heat than insulation, reducing the wall’s overall performance. Continuous insulation on the exterior side of framing reduces thermal bridging but isn’t always practical during interior repairs. Spray foam insulation in repaired sections can fill irregular cavities and provide better air sealing than batts. Weatherproofing requirements apply where exterior walls were opened for framing access. This includes house wrap, flashing, and sealing around windows and doors to prevent water intrusion.
Working With Electrical, Plumbing, and HVAC During Framing Repairs

The rough framing inspection happens before electrical wiring, plumbing lines, and HVAC systems get installed or reinstalled. The building inspector verifies framing members, connections, and structural details meet code. Once that inspection passes, electricians and plumbers can proceed with their rough in work, running wires and pipes through the repaired framing.
Electrical wiring that remains in place during framing repairs needs protection from damage during demolition and construction activity. Circuits get de energized at the panel before work begins. Wires that run through repaired wall sections may need rerouting if stud locations change or if damaged wire insulation requires replacement. Any wire that shows heat damage or melted insulation gets replaced. Fire can compromise electrical insulation even when wires don’t appear burned.
HVAC system access matters when framing repairs affect ductwork locations or mechanical equipment rooms. Supply and return ducts that run through fire damaged areas need inspection for heat damage and smoke contamination inside the duct. Sheet metal ducts may have warped from heat. Flexible ducts often require replacement if exposed to fire. Seal all duct penetrations through fire rated assemblies with appropriate fire rated materials.
Plumbing lines near fire damaged framing need inspection for heat damage even if they didn’t melt or burst. Plastic supply lines and drain pipes can soften or weaken from heat exposure without visible damage. Copper pipes usually survive fire better than plastic, but joints and fittings should be checked for integrity. Each trade needs its own inspection after rough in work is complete and before walls close up. The electrical inspector checks wiring, boxes, and connections. The plumbing inspector verifies pipe sizing, support, and pressure testing. HVAC may require separate inspection depending on local jurisdiction.
Estimated Costs and Timeline for Interior Framing Repairs

Costs vary widely based on damage extent, accessibility, and structural complexity. A single charred wall with a few studs replaced might cost a few thousand dollars. Extensive framing repairs affecting multiple rooms or floors can reach tens of thousands.
Timeline depends on permit processing, inspection scheduling, and scope of work. Simple repairs move faster than complex structural modifications requiring engineered solutions.
Seven cost factors affecting interior framing repair:
- Extent of structural damage and number of framing members requiring replacement: more damaged studs, joists, and beams mean higher material and labor costs
- Need for temporary shoring and structural engineering services: engineer assessments, stamped drawings, and site visits add professional service fees
- Demolition complexity and hazardous material disposal: difficult access, heavy charring, or asbestos abatement increase demolition costs significantly
- Material selection (standard lumber vs. fire rated or engineered products): fire retardant treated lumber and engineered materials cost more than dimensional lumber
- Labor rates for specialized framing contractors and restoration professionals: experienced fire restoration crews charge premium rates but work efficiently and know code requirements
- Permit fees and required inspections: building permits, plan review fees, and multiple inspection visits add to total project cost
- Coordination with insurance claim processing: delays in claim approval or disputes over scope can extend project timeline and increase carrying costs
General timeline ranges look like this. Assessment takes 1 to 3 days once a structural engineer can access the site. Permit processing varies by jurisdiction, typically 1 to 3 weeks depending on plan review complexity and department workload. Demolition of compromised framing takes 2 to 5 days for moderate projects, longer for extensive damage. Framing repairs vary by scope. Replacing a few studs in one room might take 2 to 3 days, while major structural work can extend to several weeks. Inspections happen at multiple points, adding time between work phases.
Factors that extend timelines include structural engineering delays when complex calculations or redesign are needed. Material availability affects schedule if fire rated lumber or engineered products aren’t in stock locally. Weather delays exterior access when repairs involve outside walls or roof framing. Insurance claim processing can pause work while adjusters review scope or request additional documentation. Detailed estimates before starting work prevent disputes over what’s included and provide a roadmap for the insurance claim.
Insurance Claims and Documentation for Fire Framing Damage

Structural engineer reports and detailed damage assessments form the foundation of insurance claims for framing repairs. The engineer’s report documents what’s damaged, why it needs repair or replacement, and what methods will restore structural integrity. This professional documentation carries weight with insurance adjusters who need to justify claim payments.
Documentation needed includes photos of all damaged framing before demolition, during demolition showing hidden damage, and after repairs showing completed work. Material invoices prove actual costs for lumber, fasteners, and other supplies. Labor records show contractor hours and rates. Permit records and inspection reports demonstrate code compliance and proper oversight. Keep copies of everything organized by date and work phase.
Building code upgrades factor into insurance coverage decisions. If your 1970s house had 2×4 wall framing on 24 inch centers but current code requires 2×6 framing on 16 inch centers, the insurance company may cover bringing the repaired section up to current code under certain policy provisions. However, coverage for upgrades isn’t automatic. Some policies cover code compliance fully, others provide a limited allowance, and some exclude it entirely. Understanding your policy’s code upgrade coverage prevents surprise out of pocket costs.
Working with insurance adjusters and restoration professionals during the claim process requires patience and organization. The adjuster needs to see the damage, understand the scope, and verify the repair methods are necessary and appropriate. Restoration professionals experienced with insurance work know how to document damage, prepare estimates in formats adjusters recognize, and communicate effectively throughout the claim. Written estimates before demolition begins protect everyone by establishing what work is needed and what it should cost. Retention of all inspection reports and code compliance certificates proves the work was done properly and creates a permanent record for future property transfers.
Selecting Qualified Contractors for Post Fire Framing Work
Fire damage framing repairs require contractors experienced in structural restoration, not just general carpentry or remodeling work.
Eight contractor qualifications to verify:
- Licensed general contractor or specialized restoration contractor status: verify active license through state or local licensing board
- Experience specifically with fire damage structural repairs: ask for references from recent fire restoration projects, not just general framing work
- Relationship with structural engineers for assessment and design: established working relationships ensure smooth coordination on engineered repairs
- Insurance restoration project experience and references: contractors familiar with insurance claims know documentation requirements and estimating formats adjusters expect
- Knowledge of local building codes and fire rated assembly requirements: current code knowledge prevents failed inspections and rework delays
- Proper insurance coverage including liability and workers compensation: request certificates of insurance and verify coverage is active
- Equipment for safe demolition and smoke remediation: specialized tools like HEPA vacuums, air scrubbers, and thermal imaging devices indicate professional capabilities
- References from recent fire damage restoration projects: contact previous clients to verify work quality, timeline adherence, and communication effectiveness
Full service restoration companies coordinate all trades from assessment through final cleaning, which simplifies the process for homeowners managing insurance claims and recovery. A single point of contact schedules engineers, handles permits, manages subcontractors, and provides unified billing. Separate contractors for framing, electrical, plumbing, insulation, and drywall require the homeowner to coordinate schedules, resolve conflicts, and track multiple contracts. For comprehensive restoration services beyond framing, Water Damage Restoration and Repair Services demonstrates the integrated approach full service companies provide for multiple damage types.
Written contracts protect both parties by detailing scope of work, materials specifications, payment schedules, timeline expectations, and warranty terms. Detailed scope of work lists every repair task so there’s no confusion about what’s included. Payment schedules tie payments to completed milestones rather than upfront deposits that leave you vulnerable if the contractor disappears. Red flags include unlicensed contractors who can’t pull permits or provide insurance certificates. Cash only payment requests avoid paper trails and tax obligations. Pressure to skip permits saves the contractor hassle but leaves you liable for code violations and jeopardizes insurance coverage.
Final Words
Interior framing repair after fire demands professional assessment, systematic demolition of compromised members, and careful reconstruction that meets current building codes.
The process moves from structural inspection through emergency stabilization, smoke remediation on salvageable wood, replacement or sistering of damaged framing, proper fastener installation, and coordination with electrical and plumbing systems.
Every repair must pass inspection and maintain fire-rated assemblies where required.
Working with qualified restoration contractors and structural engineers protects your safety, satisfies insurance requirements, and delivers repairs that restore your home’s structural integrity for the long term.
FAQ
Does homeowners insurance cover housing after a fire?
Homeowners insurance typically covers temporary housing costs through Additional Living Expenses (ALE) coverage while your home is being repaired after a fire. This coverage pays for hotel stays, temporary rentals, meals, and other living costs above your normal expenses until your home is safe and habitable again.
How long do toxic fumes last after a fire?
Toxic fumes from a fire can linger for weeks or even months if smoke damage isn’t properly remediated, as smoke particles penetrate deep into structural materials, insulation, and porous surfaces. Professional smoke remediation with HEPA filtration, odor sealing, and air quality testing eliminates these fumes and makes the home safe to occupy.
How will you restore fire-damaged structural components?
Fire-damaged structural components are restored through systematic assessment by structural engineers, removal of compromised framing members, smoke remediation on salvageable materials, and replacement or sistering of damaged studs, joists, and beams to current building code standards. All repairs require proper permits, inspections, and final code compliance verification before occupancy clearance.
What is salvageable after a house fire?
Salvageable materials after a house fire include framing members with minimal char depth that retain structural capacity, undamaged floor joists and studs in less-affected areas, and structural elements that pass engineer evaluation for load-bearing integrity. Professionals use thermal imaging, moisture testing, and char depth measurements to determine what can be cleaned, treated, and kept versus what requires complete replacement.