

Think a water stain on your ceiling is just cosmetic?
It isn’t.
A leak can soak drywall, weaken joints, feed mold, and even make a ceiling sag or fall.
In this guide on ceiling drywall repair after leak you’ll get the exact first steps.
Stop the water, cut power, and begin drying.
You’ll learn how to check whether to patch or replace, what tools and materials you need, and clear signs it’s time to call a pro.
No guesswork.
Just steady steps to stop more damage and restore the ceiling.
What To Do Immediately After Discovering Water Damage
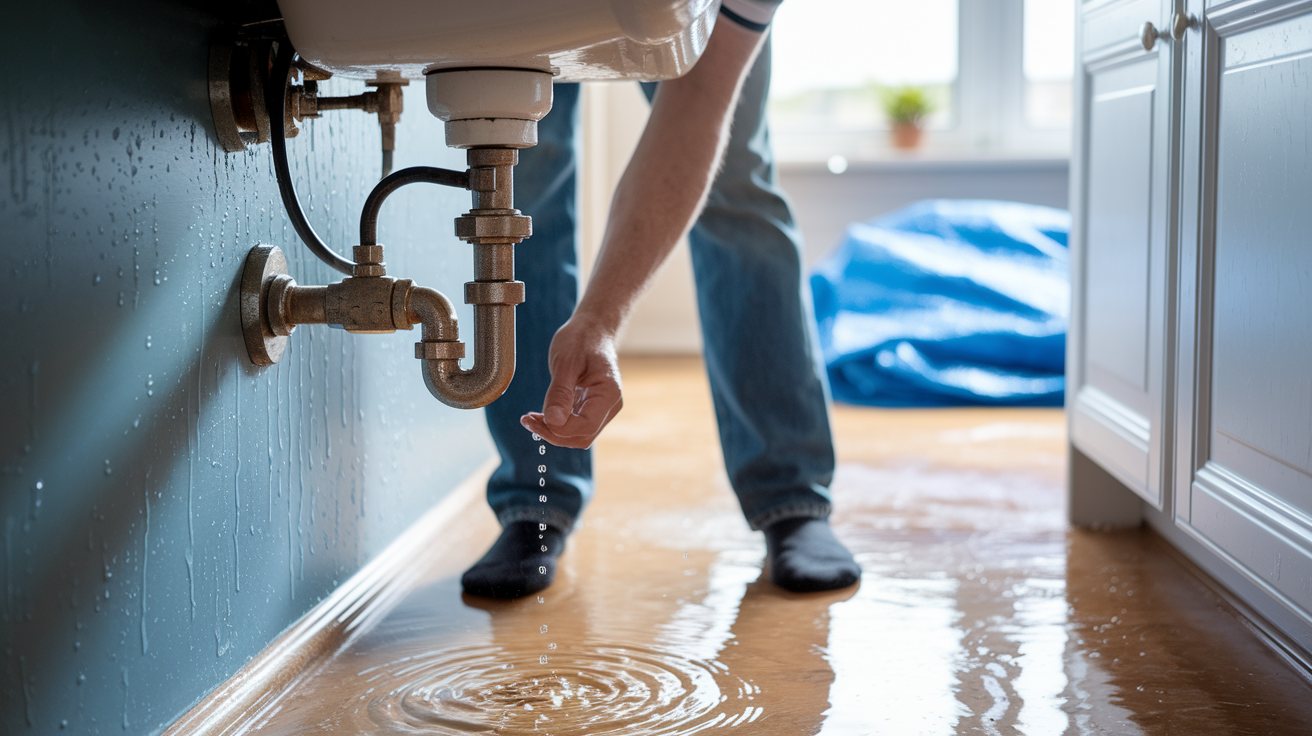
First thing you need to do is stop the water. If it’s a burst pipe or supply line, shut off the water main. Roof leak? Get a tarp over the damaged section outside or set buckets underneath until the weather clears. Can’t reach the roof? Contain what you can below and call for help.
Turn off electricity in the affected room. Water and electricity don’t mix, and wet drywall can conduct current. Flip the breaker for any lights, outlets, or fixtures near the damaged ceiling. Not sure which breaker controls that area? Turn off the main panel until you can figure it out. Move furniture, electronics, and anything else you want to keep dry out of the room or cover them with plastic sheeting.
Start drying the space as soon as the leak stops and it’s safe to work. You want to begin within the first 24 to 48 hours, before mold shows up or the ceiling gets worse. Follow these steps to protect the structure and keep damage from spreading:
- Open windows and doors to get air moving and let moisture escape.
- Set up fans aimed at the wet ceiling and surrounding walls to speed up evaporation.
- Run a dehumidifier if you’ve got one. It pulls moisture from the air faster than fans alone.
- If the ceiling is bulging with trapped water, puncture the lowest point carefully with a small utility knife and catch the water in a bucket. Relieving that pressure prevents collapse.
- Remove soaked insulation from the attic or ceiling cavity if you can reach it safely. Wet insulation holds moisture and slows everything down.
Don’t start repairs until everything’s dry. Sealing in moisture will cause mold, odors, and a failed patch.
How To Assess the Severity of the Ceiling Drywall Damage
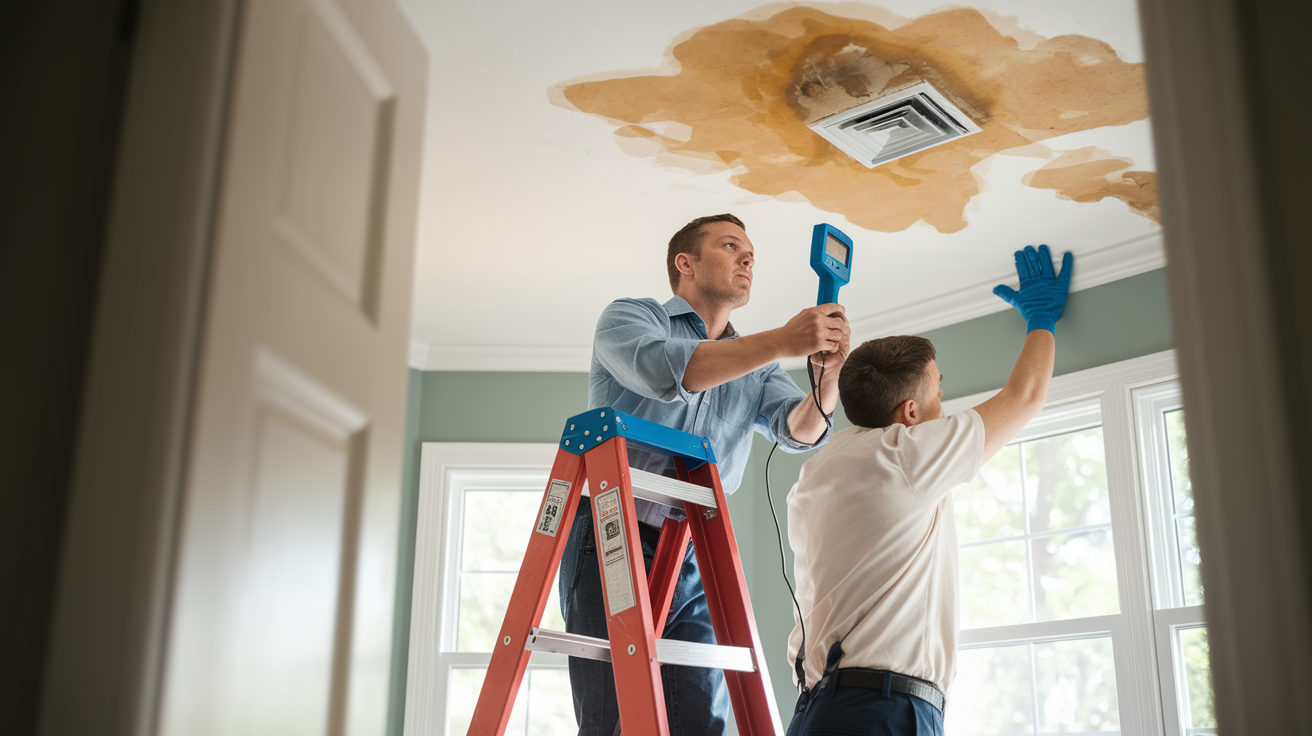
Once the leak is stopped and drying has started, you need to figure out whether the ceiling can be patched or needs replacing. Walk the room and look for visible stains, sagging sections, peeling tape at seams, and soft or crumbly texture. Press gently on stained areas with your fingertips. If the drywall feels spongy, cool to the touch, or gives under light pressure, it’s compromised and has to come out.
Measure the size of the damage. Small stains (less than a foot across) with firm, dry drywall around them can often be patched after treating the stain. Larger stains, sagging panels, or areas where the ceiling paper is peeling or blistering usually mean the drywall core absorbed too much water and lost its structure. If tape along seams is lifting or bubbling, or if you see a gray or chalky appearance when you peel back a small section, replacement is required.
When you’re not sure, cut a small inspection hole in a stained area using a utility knife. Look at the gypsum core inside. If it’s dark, soft, or crumbling, that section has to go. Cutting back to solid, dry material is the only reliable repair.
Tools and Materials Needed for Repair
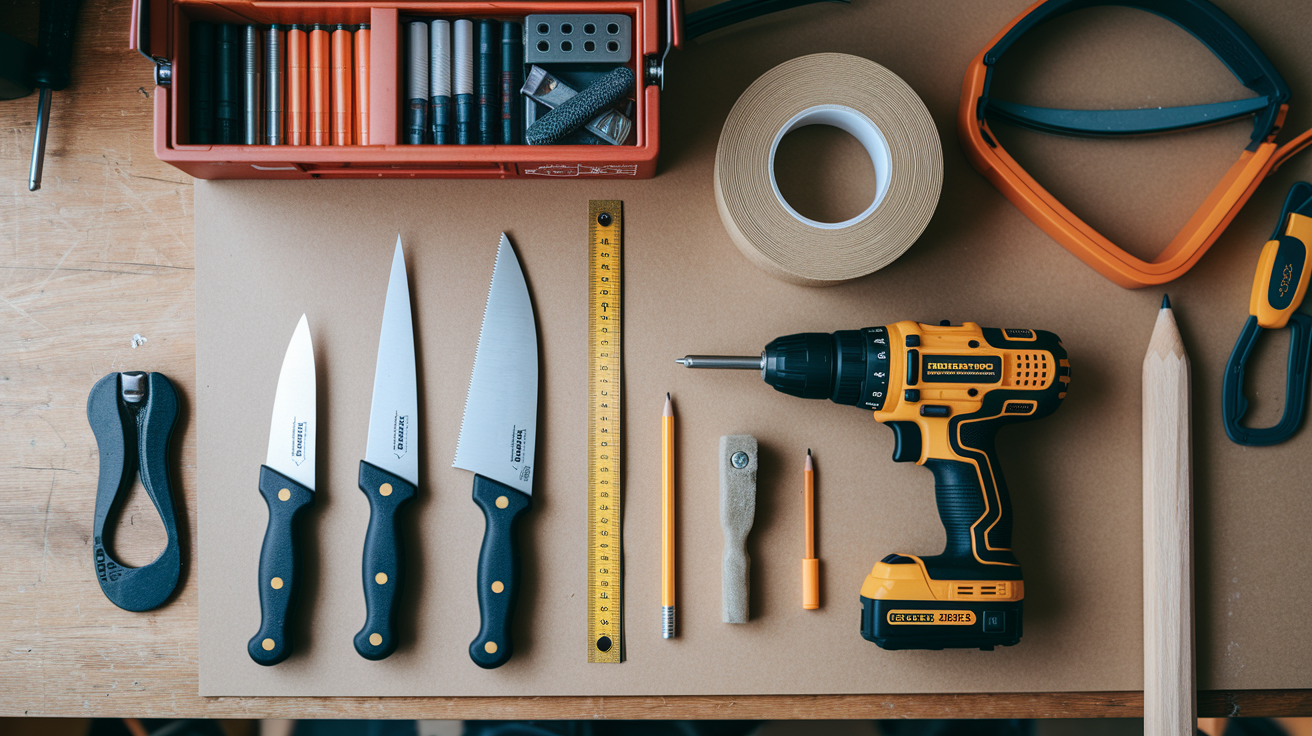
Having the right tools and materials on hand before you start makes the job faster and cuts down on mistakes. You don’t need specialty equipment for most ceiling repairs, but skipping key items will slow you down or leave a rough finish. Here’s what to gather:
- Utility knife with extra blades
- Drywall saw or oscillating multi-tool for cutting out damaged sections
- Tape measure and pencil
- 1 ¼” drywall screws
- Cordless drill or screw gun
- Replacement drywall (½” or ⅝” to match your existing ceiling)
- Fiberglass mesh tape or paper joint tape
- All purpose joint compound (also called mud)
- 6 inch and 10 or 12 inch putty knives
- Sanding block or pole sander
- Stain blocking primer (shellac based, oil based, or a recommended water based sealer)
- Dust mask, safety glasses, and gloves
Using the correct thickness of drywall and the right primer will prevent visible seams and stains from bleeding through your finished ceiling.
Step By Step Ceiling Drywall Repair After a Leak

This is the full sequence to remove damaged drywall, install a new piece, and prepare the ceiling for paint. Each step builds on the one before it, so follow the order and confirm dryness before you begin.
Start by marking the area you’ll remove. Use a pencil and straightedge to draw a square or rectangle around all visible damage, extending at least 6 to 12 inches beyond stains, soft spots, or sagging sections. Cutting back to solid drywall and ideally to the nearest ceiling joists gives you a stable base for the patch.
- Cut along your marked lines with a drywall saw or utility knife, scoring deeply and snapping the drywall if needed. Wear a dust mask and eye protection.
- Remove the damaged drywall and bag it right away to keep dust and contamination contained.
- Inspect the ceiling cavity. Look at the joists, insulation, and any plumbing or wiring. If insulation is wet or stained, pull it out and replace it after everything dries.
- Let the exposed framing and surrounding drywall dry for 24 to 48 hours. Use fans, dehumidifiers, or both, and confirm dryness by touch and with a moisture meter if you have one.
- Cut a replacement piece of drywall to fit the opening, trimming carefully so edges meet existing drywall without large gaps.
- Screw the new drywall into the ceiling joists every 8 to 12 inches, driving screws just below the surface without breaking the paper. If you’re working alone, use a drywall lift or temporary wood cleats nailed to the joists to hold the panel while you fasten it.
- Apply fiberglass mesh tape or paper tape over all seams, pressing it flat. Mesh tape is easier for beginners, but paper tape produces a flatter finish when done right.
- Spread a thin coat of joint compound over the tape with a 6 inch knife, embedding the tape fully and removing excess mud. Let it dry for 24 hours, then apply a second coat with a wider knife, feathering the edges outward, and repeat with a third coat if needed. Sand lightly between coats and after the final coat dries.
After sanding, the patch should feel smooth and flush with the surrounding ceiling. Wipe away dust with a damp cloth before priming.
Preventing Mold and Ensuring the Area Dries Properly

Mold can start growing within 24 to 48 hours of water exposure, so drying the ceiling completely isn’t optional. Even if the surface feels dry, moisture can remain inside the drywall core, behind insulation, or in the framing. That hidden moisture will cause mold, odors, and a patch that fails within weeks.
Use fans to move air across wet surfaces and into the ceiling cavity if you’ve removed drywall. A dehumidifier is more effective than fans alone because it pulls moisture out of the air instead of just circulating it. In cold weather, raising the heat in the room helps speed evaporation. If you see condensation forming on windows or walls, the air is too humid. Keep the dehumidifier running. A moisture meter is the most reliable way to confirm dryness. Readings should match the surrounding, undamaged drywall before you close the ceiling. If you don’t have a meter, the “touch test” works for most cases. Drywall shouldn’t feel cool, damp, or spongy.
If you see visible mold on framing, insulation, or drywall, don’t seal it in. Small surface mold on wood framing can be scrubbed with a diluted bleach solution (1 cup bleach per gallon of water), allowed to sit for 10 to 15 minutes, then wiped or rinsed. Replace any moldy insulation and discard moldy drywall. Mold covering more than 10 square feet, or mold that’s spread deep into materials, requires professional remediation with containment and HEPA filtration.
Estimated Costs for Ceiling Drywall Repair After a Leak

A small DIY patch using materials you already have or can buy at a hardware store might cost less than $100. That estimate includes a small sheet of drywall, joint compound, tape, sandpaper, primer, and paint. If you need to rent or buy tools like a drywall saw, sander, or moisture meter, add another $50 to $150.
Professional repairs vary widely depending on the size and complexity of the job. Factors that affect cost include:
Size of the damaged area. Larger patches or full panel replacements cost more in labor and materials.
Water category. Clean water from a supply line is simpler than contaminated water from a toilet or roof. Contaminated water requires additional cleaning and safety steps.
Mold remediation. If mold is present, expect containment, HEPA air scrubbing, and antimicrobial treatment, which can add hundreds to thousands of dollars.
Structural repairs. If ceiling joists are damaged or sagging, reinforcement or replacement raises the total significantly.
Hiring a contractor for a straightforward ceiling patch in one room might run $300 to $800. Larger jobs involving mold, multiple rooms, or structural work can reach several thousand dollars. Insurance often covers sudden incidents like burst pipes or water heater failures, but coverage depends on your policy and the cause of the leak.
When You Should Call a Professional

You can handle small patches under 10 square feet if the leak is fixed, the drywall is dry, the damage is cosmetic, and there’s no mold. Anything beyond that moves into territory where mistakes cost more than hiring help from the start.
Call a professional if the ceiling is sagging or if you see cracks in the drywall that run along joists. Both are signs that framing may be compromised and need reinforcement or replacement. Electrical fixtures, junction boxes, or wiring near the damaged area also require a licensed electrician to verify safety before you close the ceiling. Mold covering more than 10 square feet, or any mold you can’t positively identify as surface level, needs a remediation company with proper containment and air filtration. Sewage backups or water from toilets, drains, or flooding are contaminated and unsafe for DIY cleanup.
Textured ceilings are difficult to match without experience, and a poorly blended repair will be obvious every time you look up. If your ceiling has knockdown, orange peel, or popcorn texture, a drywall contractor can match it and make the repair invisible. High ceilings, vaulted spaces, or areas that are hard to reach safely are also better left to professionals who have lifts, scaffolding, and the experience to work overhead for long periods without injury.
Final Words
Stop the leak, shut off power if it’s near the wet area, move valuables, and start controlled drying right away. Quick action limits hidden damage.
Next, assess the ceiling, measure moisture, and gather the right tools. Follow the step-by-step patch and replacement process, and use moisture readings before you close the ceiling.
Know typical costs and when to call a pro for structural or electrical problems. With these steps, ceiling drywall repair after leak is manageable, and your home will be back to normal soon.
FAQ
Q: How to dry out a drywall ceiling after a leak?
A: To dry out a drywall ceiling after a leak, stop the source, remove wet insulation, run fans and a dehumidifier, and verify dryness with a moisture meter before closing the ceiling.
Q: How to repair a ceiling after a water leak?
A: To repair a ceiling after a water leak, cut out soaked drywall, inspect framing, replace wet insulation, install new drywall, tape and mud seams, sand, then prime and paint.
Q: How much does it cost to repair a ceiling after a leak?
A: The cost to repair a ceiling after a leak ranges from a few hundred dollars for small patches to several thousand for large or hidden damage; size, materials, mold, and electrical work drive the price.