

You’re staring at roof damage after a storm. A tarp costs $300. Emergency repair runs $3,000. Which one actually stops the next rainstorm from destroying your ceilings, walls, and everything inside? The answer isn’t always what you think. Tarps buy you time when you need it, but they’re not a fix. Emergency repairs solve the problem permanently, but you don’t always need them right away. Here’s how to know which protects your home when minutes matter.
Quick Decision Guide: Tarp or Emergency Repair?

| Situation | Tarp Solution | Emergency Repair | Urgency Level |
|---|---|---|---|
| Minor leak, attic drip during heavy rain | Usually sufficient for 30-90 days | Not immediately required | Low – schedule within 1 week |
| Moderate damage, missing shingle section | Adequate temporary protection | Recommended within 2-3 weeks | Moderate – tarp then plan repair |
| Structural compromise, sagging decking | Immediate tarp, then urgent repair | Required within 48-72 hours | High – both needed quickly |
| Widespread shingle loss, exposed underlayment | Emergency tarp to prevent next storm | Schedule within 1 week | High – tarp immediately |
| Leak near electrical fixtures or wiring | Not sufficient alone | Immediate professional response required | Critical – safety hazard |
Tarping provides temporary protective coverage lasting 30 to 90 days depending on material quality and weather exposure. It stops active water coming in and prevents further damage while you get permanent fixes arranged. Emergency repair delivers immediate solutions that restore your roof’s structural integrity and weatherproofing. The key difference is duration and purpose. Tarps buy you time. Repairs solve the problem.
Most people use tarping as the first response before professional assessment and permanent repair work begins. This makes sense when you’re waiting for insurance adjusters to inspect damage, when roofing materials are backordered, or when weather conditions prevent safe repair work. Tarping during these waiting periods keeps a small problem from becoming catastrophic interior damage.
Getting an accurate damage assessment determines the right response level. Walk through your attic during daylight and look for visible light coming through roof boards. Check for active dripping or water stains, and see whether structural components like rafters show sagging or cracking. When you’re not sure, get a professional inspection before deciding between temporary tarping and immediate emergency repair.
Cost Comparison: Tarping Versus Emergency Roof Repair

Cost drives most emergency roofing decisions, especially when damage happens unexpectedly and budgets are tight. Understanding the financial trade-offs between temporary protection and permanent fixes helps you make practical choices that protect both your home and your wallet.
Professional tarp installation typically costs between $200 and $1,000 depending on damage size, roof accessibility, and how bad the situation is. A $300 tarp installation can prevent $5,000 in water damage by stopping interior damage before it spreads to ceilings, walls, insulation, and belongings. DIY tarping runs $50 to $200 for materials if you already own basic tools and safety equipment. According to FEMA, one inch of standing water inside a home can cause over $25,000 in damage, making even professional tarping a worthwhile prevention measure.
Emergency roof repair costs vary significantly based on damage extent, roof pitch and accessibility, required materials, and contractor availability during peak seasons. Minor emergency repairs fixing small sections of shingles or flashing typically run $500 to $2,000. Moderate repairs addressing larger damaged areas or partial decking replacement range from $2,000 to $7,000. Major emergency work involving structural repairs, extensive shingle replacement, or underlayment damage can exceed $10,000. Prices spike during peak storm seasons when contractors are in high demand and emergency service fees apply.
| Solution Type | Typical Cost Range | Duration | Best For |
|---|---|---|---|
| DIY Tarping | $50 – $200 | 30-60 days | Minor damage, homeowners with safety equipment and roofing experience |
| Professional Tarping | $200 – $1,000 | 60-90 days | Most situations requiring temporary protection while arranging permanent repairs |
| Emergency Roof Repair | $500 – $10,000+ | Permanent | Structural damage, electrical hazards, extensive damage, or when tarping won’t provide adequate protection |
Critical Situations Requiring Immediate Professional Repair

Some roof damage exceeds what tarping can safely protect. These situations require immediate professional emergency repair instead of temporary covering.
When you see any of these, call a roofing contractor before attempting to tarp:
Active water pouring or streaming inside your home creates immediate interior damage to ceilings, walls, insulation, furniture, and personal belongings. Costs increase the longer water flows in.
Large sections of missing shingles exposing underlayment or bare wood decking leave your home vulnerable to devastating water intrusion during the next rainstorm.
Structural damage to rafters, joists, or decking with visible sagging or dipping indicates dangerous weakening that could worsen or lead to collapse in extreme cases.
Leaks near light fixtures, electrical outlets, fuse boxes, or attic wiring create serious shock and fire hazards requiring power shutdown and both roofing and electrical professional response.
Visible daylight shining through roof boards from inside your attic means complete roof penetration that tarping may not adequately seal.
Water stains spreading rapidly across multiple rooms or floors indicates extensive hidden damage behind walls and ceilings.
Compromised valley areas where two roof planes meet channel water incorrectly and speed up damage to surrounding structure.
Extensive granule loss across large shingle sections signals advanced deterioration where remaining material won’t hold tarp anchors securely.
Damaged chimney structures or failed flashing systems allow water penetration that tarps can’t address without professional metalwork repairs.
Professional roofing contractors assess structural integrity beyond visible surface damage. They identify hidden problems beneath symptoms you can see, provide accurate repair scopes, ensure work meets building codes, and determine whether damaged areas require spot repairs or more extensive reconstruction. Delaying professional help in these emergency cases risks safety, allows damage costs to grow as problems spread, and may create insurance complications if carriers determine you didn’t take reasonable steps to prevent additional damage.
Complete DIY Tarping Guide: Materials, Tools, and Installation
DIY tarping suits minor damage during clear weather when you have proper safety equipment and roofing experience. Professional installation is recommended for steep roofs above 6/12 pitch, extensive damage covering more than 100 square feet, or when weather conditions remain unstable with continued rain or wind forecasts.
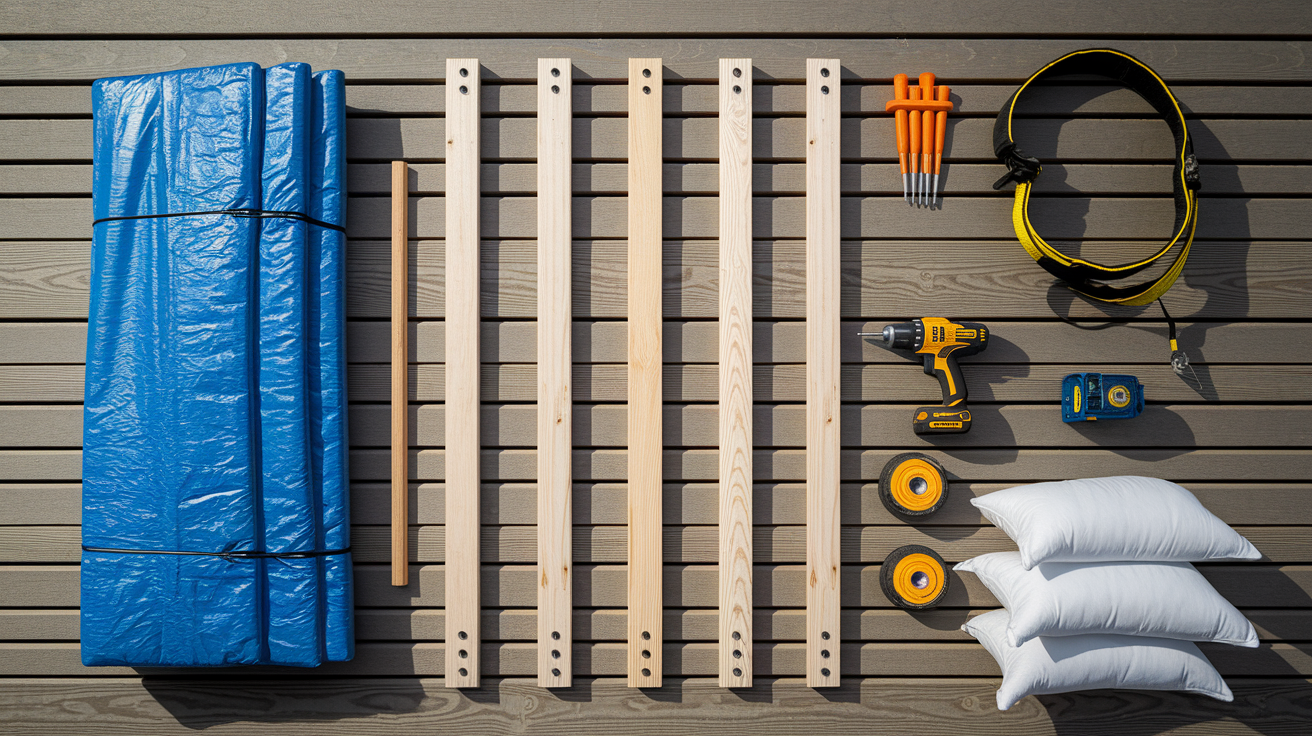
| Material/Tool | Specification | Purpose |
|---|---|---|
| Heavy-duty polyethylene tarp | UV-resistant, minimum 6-mil thickness, sized 2-3 feet beyond damage perimeter | Primary waterproof barrier preventing rain, snow, and debris infiltration |
| 2×4 wooden boards | Pressure-treated, 8-foot lengths, quantity based on perimeter securing needs | Anchor strips distributing fastener stress and preventing tarp tear-through |
| Roofing nails or screws | 1.5-inch minimum length with rubber washers to seal penetrations | Secures boards through tarp grommets into roof decking without creating new leak points |
| Extension ladder | Reaches 3 feet above roof edge with standoff stabilizer | Safe roof access without damaging gutters or siding |
| Fall protection harness | Full-body style with roof anchor point and minimum 6-foot lanyard | Prevents falls on steep or high roofs |
| Cordless drill or hammer | 18V drill with driver bit or 16-ounce framing hammer | Drives fasteners through boards and tarp into decking |
| Utility knife and measuring tape | Retractable blade knife, 25-foot measuring tape | Cuts tarp to size and measures coverage area accurately |
| Sandbags or weights | 40-50 pounds each, quantity based on tarp perimeter | Holds down tarp edges preventing wind uplift between anchor points |
Use minimum 6-mil thickness UV-resistant polyethylene as your standard tarp material for typical coverage lasting 30 to 60 days. Polyethylene tarps are lightweight yet tough, making them popular for roof repairs and easier to handle during installation. Vinyl tarps offer better durability and waterproof properties for extended coverage beyond 60 days, though they cost more and weigh significantly more during installation. Canvas tarps provide breathable coverage preventing condensation buildup under the tarp, but they’re not fully waterproof and work better for protecting materials than sealing roof damage.
Gather all tools and materials before climbing onto your roof. Safety equipment isn’t optional. Fall protection harnesses, proper footwear with slip-resistant soles, and a partner helping from the ground are essential components of safe tarp installation. Work during clear weather with dry roof surfaces and temperatures above 40 degrees when materials remain flexible and grip is reliable.
Installation steps:
-
Assess damage extent from inside your attic first. Look for daylight penetration, water stains, and compromised decking, then measure the damaged area adding 2 to 3 feet on all sides for adequate overlap.
-
Select an appropriately sized tarp with reinforced grommets spaced every 18 to 24 inches around the perimeter for secure anchoring without tear-through.
-
Position the tarp with smooth side facing up centered over the damaged area. Make sure it extends from ridge peak down past the damaged section toward the eaves to channel water properly.
-
Anchor the peak side first using 2×4 boards laid across the tarp through grommets, secured with roofing nails or screws with rubber washers driven into solid decking every 12 inches.
-
Pull the tarp downward toward eaves. Get rid of wrinkles and ensure taut coverage, then secure side edges with boards and fasteners maintaining consistent tension.
-
Secure all perimeter edges with wooden boards fastened through grommets at 12 to 18 inch intervals, paying extra attention to corners where wind uplift starts.
-
Weight the perimeter with sandbags placed every 3 to 4 feet between anchor points. This prevents wind from getting underneath and lifting edges during storms.
Never attempt tarp installation during active storms, high winds above 20 mph, or on wet and slippery roof surfaces where fall risk increases dramatically. Always use a safety harness on roofs steeper than 4/12 pitch or higher than one story off the ground. Never work alone. Keep a partner on the ground for tool passing, emergency help, and ladder stabilization. Maintain three points of contact when climbing ladders, avoid working near power lines, and stop immediately if conditions feel unsafe.
Tarp Lifespan and When Temporary Protection Fails

Properly installed roof tarps last 30 to 90 days depending on material quality, weather exposure intensity, UV radiation levels, and installation quality. Standard 6-mil polyethylene tarps in moderate climates with mixed sun and rain typically provide 30 to 45 days of reliable protection. Heavier 12-mil polyethylene or vinyl tarps in similar conditions extend coverage to 60 to 90 days. Harsh conditions with intense sun exposure, high winds, temperature extremes, or heavy snow loads shorten these timeframes significantly.
Vinyl tarps offer the longest lifespan with better UV resistance and tear strength, making them worth the extra cost for extended coverage periods. Polyethylene tarps are lightweight and popular for typical emergency situations, but they degrade faster under intense sun exposure. Canvas tarps provide breathability preventing condensation buildup underneath, but they’re not fully waterproof and work better for material protection than roof damage coverage.
Check your tarp condition weekly during the first month, then every 3 to 4 days as it ages past 45 days. Inspect after every storm or high wind event for displacement, new tears, or fastener pull-through. Catching degradation early lets you replace before complete failure during the next rain event.
| Degradation Sign | Meaning | Action Required |
|---|---|---|
| Fading or chalky discoloration across surface | UV breakdown weakening material structure | Replace within 1-2 weeks before material tears |
| Visible tears, holes, or separation at grommets | Material failure allowing water penetration | Replace immediately, repair not reliable |
| Reduced water resistance with seepage or dripping | Waterproof coating degraded by weather exposure | Replace within days to prevent interior water damage |
| Loose edges flapping during moderate winds | Fastener pull-through or inadequate securing | Re-secure with additional boards and fasteners, or replace if material torn |
| Brittleness or cracking when handling material | Extreme UV or cold damage making tarp fragile | Replace immediately, brittle material will fail during next storm |
Insurance Coverage for Roof Tarping and Emergency Repairs

Most homeowner insurance policies cover emergency tarping costs as part of storm damage or weather-related roof damage under dwelling coverage. Coverage typically includes both materials and professional installation labor when damage results from covered events like wind, hail, falling trees, or other acts of nature. Review your specific policy or call your insurance agent to confirm emergency protection coverage before damage occurs.
Insurance policies include a mitigation duty clause requiring you to take reasonable steps preventing additional damage after a covered loss occurs. Properly tarping damaged roof sections demonstrates good faith effort meeting this requirement and protects your claim from potential denial due to neglect. A $300 professional tarp installation prevents $5,000 to $25,000 in secondary water damage by stopping infiltration before it spreads through ceilings, walls, insulation, and interior belongings. According to FEMA data, one inch of standing water inside a home causes over $25,000 in damage on average, making immediate tarping one of the most worthwhile protection measures available.
Document everything before, during, and after tarping. Take timestamped photos of roof damage from multiple angles before covering it, showing the extent and type of damage clearly. Photograph tarp installation from ground level and closer views showing securing methods and coverage area. Save all receipts for materials purchased and services hired, including tarp supplies, installation labor, and related emergency protection expenses. Get written estimates from roofing contractors for permanent repairs before your insurance adjuster visits. Most insurers require inspection before authorizing permanent repair work, and solid documentation supports accurate damage assessment and claim approval.
Coordinate adjuster inspection timing with your contractor to ensure proper damage evaluation happens before tarp removal. Some adjusters want to see damage uncovered, while others accept thorough photo documentation. Ask your insurance company about their specific requirements when you file your claim.
Photograph any progressive damage that develops during your tarp coverage period, such as new water stains appearing, additional shingle loss around tarped areas, or interior damage spreading despite temporary protection. Maintain regular communication with your insurance adjuster about condition changes, tarp replacement needs, or developing secondary damage issues. This ongoing documentation protects your claim by showing you monitored the situation responsibly while waiting for permanent repairs.
Safety Risks of DIY Tarping Versus Hiring Professionals

Roof work accounts for thousands of homeowner injuries annually, with falls causing the majority of serious accidents requiring hospitalization or resulting in permanent disability. Climbing onto damaged roofing material adds to normal roof access risks with unstable surfaces, unexpected weak spots, and compromised structural support that can give way under body weight.
Specific safety hazards include:
Steep pitch instability on roofs above 6/12 slope where footing becomes difficult and fall risk increases dramatically without proper equipment.
Wet or icy surface conditions making shingles slippery and eliminating reliable foot traction.
Damaged structural integrity creating unexpected soft spots where decking has weakened from water infiltration.
Power line proximity near roof edges or overhanging nearby structures creating electrocution risk.
Inadequate fall protection equipment with improper harness use, missing anchor points, or insufficient lanyard length.
Weather exposure during installation including sudden wind gusts, temperature extremes, or unexpected rain making surfaces hazardous.
Professional roofing contractors bring OSHA-required safety training covering fall protection, ladder use, and hazard recognition that most homeowners lack. They use proper commercial-grade safety equipment including full-body harnesses, roof anchors rated for fall arrest loads, and slip-resistant footwear designed for pitched surfaces. Licensed contractors carry liability insurance and workers’ compensation coverage protecting you from financial responsibility if accidents occur on your property. Their experience working on unstable and damaged surfaces translates to faster, safer installation with better securing techniques and damage assessment. Team coordination during professional installation provides immediate help if problems develop, while solo DIY attempts leave you without help during emergencies.
Homeowner injuries sustained during DIY roof repairs may not be covered by your homeowner’s insurance policy, leaving you responsible for medical expenses, lost wages, and long-term care costs if serious injury occurs. Property liability coverage typically excludes injuries to the homeowner performing maintenance or repairs, a gap many people don’t discover until after an accident happens.
Weather Considerations for Roof Tarping and Emergency Repairs

Safe tarp installation requires clear weather windows with dry roof surfaces and wind speeds below 20 mph. Plan installation during morning hours when dew has dried but afternoon thunderstorms haven’t developed yet. Avoid working during temperature extremes below 40 degrees when materials become brittle or above 95 degrees when heat stress becomes dangerous and asphalt shingles soften underfoot.
Winter weather creates multiple challenges for both tarping and permanent repairs. Ice formation under tarps traps moisture against roof surfaces, speeding up rot in exposed decking. Snow load accumulation on tarped areas stresses already damaged structure and can cause fastener pull-through or material tearing. Freezing temperatures limit adhesive-based products like roofing cement and tape that won’t bond properly below 40 degrees. Shorter daylight work windows from November through February reduce available installation time and increase pressure to rush jobs as darkness approaches.
Summer conditions speed up UV degradation of tarp materials, shortening effective lifespan from 90 days to 45 days in intense sun exposure. Thermal expansion of roofing materials and tarp fabric during midday heat creates tension on fasteners and anchor points. Afternoon thunderstorm patterns in many regions limit safe work windows to morning hours only. Heat stress on workers during installation reduces focus and increases accident risk, making hydration breaks and shade rest periods essential but time-consuming.
Pre-season roof inspection during spring or fall provides valuable early warning of vulnerabilities before storm seasons arrive. Stock emergency tarp supplies in hurricane zones or severe weather areas so materials are immediately available when damage occurs and stores sell out. Recognize that contractor availability bottlenecks develop quickly during widespread disaster events when demand for emergency services overwhelms local capacity, making advance relationships with reputable contractors valuable for faster response when you need help.
How Long Emergency Roof Repairs Take Compared to Tarping

Time becomes critical when roof damage threatens ongoing interior damage with every passing hour and each approaching storm. Understanding realistic timeframes for different solutions helps you set appropriate expectations and plan accordingly.
Typical timeframes for different scenarios:
DIY tarp installation takes 2 to 4 hours for homeowners with basic skills and help, covering damage areas up to 200 square feet.
Professional tarp service responds same-day to within 24 hours depending on service availability and weather conditions, completing installation in 1 to 2 hours.
Minor emergency repair fixing small shingle sections or simple flashing issues requires 1 to 3 days from initial contact to completion.
Moderate emergency repair addressing larger damaged areas or partial decking replacement needs 3 to 7 days including assessment, material procurement, and installation.
Major emergency repair or partial replacement involving structural repairs, extensive shingle work, or underlayment replacement takes 1 to 3 weeks depending on scope and material availability.
Damage extent determines baseline repair duration, with each additional complication adding time. Material availability affects scheduling when specific shingle styles, colors, or specialty products require ordering from manufacturers or distant suppliers. Current weather conditions delay outdoor work during rain, high winds, or temperature extremes. Contractor schedule availability varies seasonally, with spring and fall storm seasons creating backlogs of 2 to 4 weeks while winter months often allow faster scheduling. Permit requirements in some jurisdictions add 3 to 10 business days for plan review and approval before work begins.
Peak season delays during spring hail storms or summer hurricane events can extend contractor response times from days to weeks as widespread damage overwhelms local capacity. Maintain your tarp properly during extended repair waits by checking condition weekly and replacing degraded tarps before failure. Many contractors charge emergency service fees of 50 to 100 percent above standard rates for immediate response during storms or outside normal business hours, a cost that may make sense for severe damage but seems excessive for minor issues that can wait.
Preventing Additional Damage While Waiting for Permanent Repairs
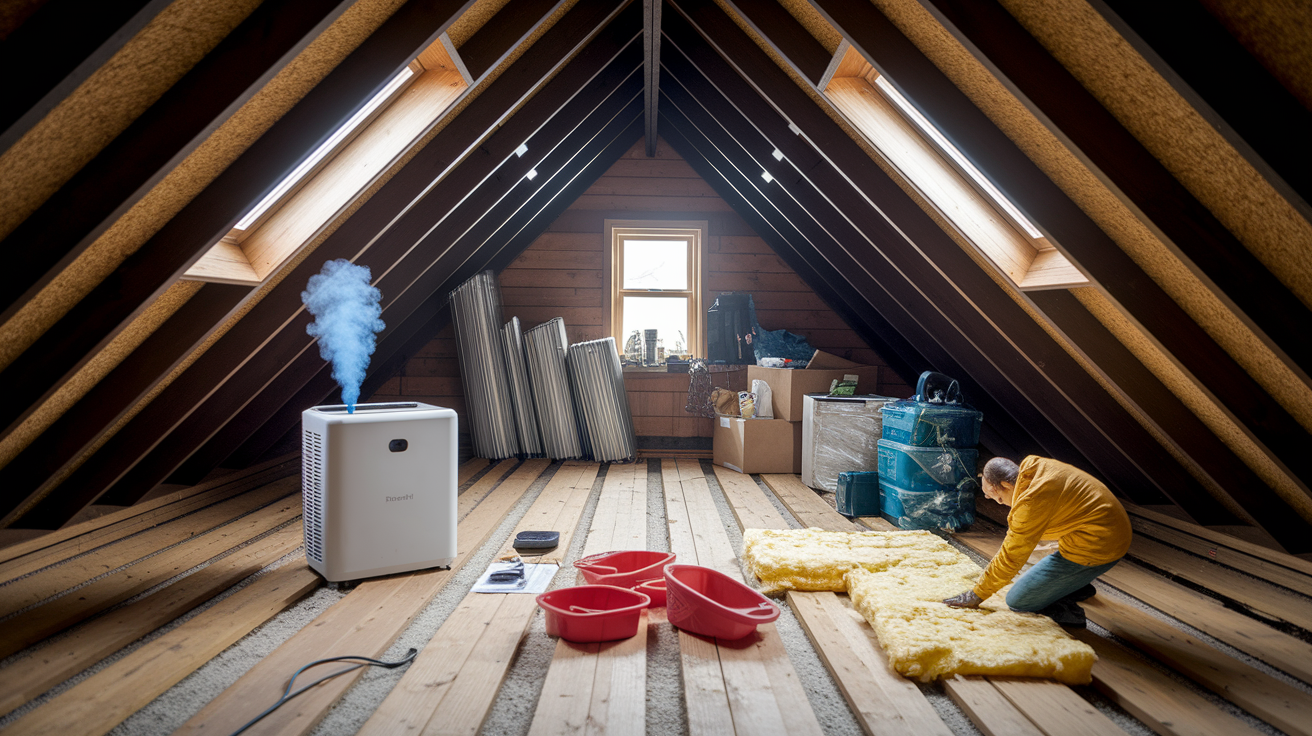
Proper interior moisture management prevents mold growth and secondary damage while your temporary tarp protects the roof above. Place large catch basins, buckets, or plastic bins under any active drip points where water penetrates despite tarping. Move furniture, electronics, and valuable belongings away from affected areas to prevent damage from unexpected leaks or tarp failure. Run dehumidifiers in rooms below damaged roof sections to reduce ambient moisture levels and prevent mold establishment. Increase ventilation by opening windows during dry weather to promote air circulation and faster drying. Check insulation in affected attic areas for saturation by squeezing material. If water drips out, that insulation needs removal to prevent mold growth and ceiling staining.
Tarp monitoring prevents small problems from becoming major failures. Conduct weekly visual inspections from ground level looking for sagging areas indicating water pooling, loose edges flapping during winds, or visible deterioration. Perform post-storm checks within 24 hours after high winds, heavy rain, or hail events that could damage or displace tarps. Address pooling water on tarp surfaces by improving drainage slope or adding support underneath to prevent ponding stress. Re-secure loose edges immediately by adding fasteners, replacing pulled-through boards, or repositioning sandbags before wind gets underneath and tears material. Watch for new leaks developing around tarp perimeter where water may channel under edges, indicating need for coverage expansion.
Attic ventilation and insulation management become critical during extended tarp coverage periods. Ensure ridge vents, soffit vents, and gable vents remain clear and functional to prevent condensation buildup under tarps. Remove saturated insulation from damaged areas within 48 hours of initial water exposure to prevent mold establishment and spreading. Monitor weekly for mold growth on wood framing, decking, or remaining insulation by looking for black, green, or white fuzzy growth and musty odors. Maintain airflow through affected spaces by running fans when weather permits, avoiding stagnant humid conditions where mold thrives.
Selecting a Qualified Emergency Roofing Contractor
Vetting contractors during roofing emergencies creates time pressure when your instinct is to hire the first person who answers the phone. Taking 30 minutes to verify credentials and check references prevents costly mistakes from hiring underqualified or fraudulent operators who disappear after collecting deposits or perform substandard work that creates more problems than it solves.
Essential contractor qualifications:
Active state and local licensing verifiable through your state contractor licensing board website or phone inquiry.
Current liability insurance and workers’ compensation coverage with certificates you can verify directly with insurance carriers.
Emergency response availability including after-hours phone contact and realistic response timeframes, not vague promises.
Established local business presence for at least 5 years with verifiable physical address, not just post office boxes.
Recent emergency work references you actually call to ask about response time, quality, communication, and final satisfaction.
Written estimates before work begins detailing scope, materials, labor, and timeline, never verbal-only agreements.
Insurance claim experience working with major carriers and understanding documentation requirements for smooth claim processing.
Manufacturer certifications from major shingle brands indicating advanced training and access to extended warranties.
Red flags require walking away immediately. Contractors requesting full payment upfront before starting work create unacceptable risk of abandonment or substandard completion. Door-to-door solicitation immediately after storms often signals storm chasers who lack local licensing, insurance, or quality commitment. Businesses without physical addresses or verifiable office locations can’t be contacted for warranty issues or problem resolution later. High-pressure tactics demanding immediate contract signing prevent proper comparison shopping and verification. Contractors who refuse to provide insurance verification or claim they’re covered by homeowner’s policies aren’t properly insured. Prices significantly below competitors by 30 percent or more often indicate cut corners, inadequate materials, or undisclosed limitations in scope.
Establish documented communication patterns from first contact. Get written agreements covering all work scope, materials specifications, timeline commitments, payment schedules, and warranty terms before work starts. Set expectations for progress update frequency like daily text message updates or scheduled phone calls every other day. Confirm after-hours contact availability for urgent questions during installation or if weather emergencies develop. Document these communication standards in writing so both parties understand expectations before problems occur.
Permit and Building Code Requirements for Emergency Roof Work
Emergency roof tarping typically doesn’t require building permits because it’s considered temporary protective covering rather than permanent construction. Permanent repair work usually requires permits when repairs exceed certain square footage thresholds that vary by jurisdiction, commonly 100 square feet in many areas, or involve structural components like decking replacement, rafter repair, or load-bearing modifications. Check with your local building department when scheduling permanent repairs to determine specific permit requirements for your situation, understanding that permits protect you by ensuring work meets code standards and gets proper inspection.
HOA notification and approval can complicate emergency roof work even when immediate protection is necessary. Review your homeowner association covenants for notification requirements after emergency damage, material and color restrictions that may affect repair options, architectural committee approval processes and typical timeline, and timeline exceptions granted for genuine emergency situations versus aesthetic-only concerns. Most HOAs allow temporary emergency tarping without pre-approval, but confirm this before installation if time permits. Permanent repairs may face restrictions on shingle colors, metal roofing materials, or solar equipment that affect your options for matching existing roof appearance.
Manufacturer warranties on roofing materials may be voided by unpermitted work that doesn’t meet installation standards or receive proper inspections. Future home sales face complications from undocumented repairs when buyers’ inspectors or title companies discover work without permits, potentially requiring expensive corrective work or price reductions to close transactions. Taking time to obtain permits during permanent repairs protects your investment despite the 3 to 10 day processing delays most jurisdictions require.
Common Mistakes Homeowners Make with Emergency Roof Damage
Emergency situations create decision-making pressure and stress that leads to predictable mistakes you can avoid by recognizing common patterns.
Seven common mistakes:
-
Delaying initial damage assessment and allowing active water infiltration to continue for hours or days while deciding what to do, multiplying interior damage costs unnecessarily.
-
Choosing undersized tarps that don’t extend 2 to 3 feet beyond damage perimeter, leaving edges exposed to wind-driven rain that seeps under tarp edges.
-
Inadequate tarp securing using too few fasteners, insufficient board anchoring, or missing sandbag perimeter weighting that allows wind to lift edges and flap material.
-
Waiting too long for permanent repairs while tarps degrade beyond 90-day design limits, eventually failing during storms and restarting damage cycles.
-
Not documenting damage before covering with tarps, creating insurance complications when adjusters can’t assess original damage extent from photos.
-
Hiring unlicensed contractors due to urgency without verifying credentials, insurance, or references, leading to substandard work or liability exposure.
-
Attempting dangerous DIY repairs on steep roofs, high elevations, or unstable damaged sections without proper safety equipment or skills.
Recognizing these mistakes in your own response allows quick course correction. If you’ve waited several days already, tarp immediately rather than delaying further while researching perfect solutions. Replace an undersized tarp before the next rain rather than hoping it holds. Call professionals when your DIY attempt feels unsafe rather than pushing through and risking injury. Document current conditions even if you didn’t photograph initial damage, then explain the timeline to your insurance adjuster rather than hiding the gap.
Professional consultation redirects your approach before costs multiply. A $150 inspection fee seems expensive during an emergency, but it prevents $3,000 mistakes from choosing wrong repair approaches or missing hidden damage that compounds later. Most reputable contractors provide free assessments for repair work they’ll perform, giving you expert guidance without upfront cost while you evaluate options and make informed decisions rather than panicked guesses.
Final Words
A tarp stops water from getting worse right now. Emergency roof repair fixes the problem completely.
Both have their place, and knowing which one fits your situation keeps small damage from turning into major interior problems.
Tarp when you need immediate protection and time to plan repairs properly. Call for emergency roof repair when the damage threatens safety, structure, or electrical systems.
Either way, move fast. The longer water sits, the more rooms it reaches and the more it costs to fix.
We’re here when you need help making that call.
FAQ
Can I put a tarp on my roof to stop leaks?
You can put a tarp on your roof to stop leaks as a temporary 30-90 day solution when properly installed with UV-resistant polyethylene, wooden anchor boards, and secure fastening. Tarping immediately prevents water damage to interior spaces while you arrange permanent repairs or wait for insurance adjusters.
What is the 25% rule in roofing?
The 25% rule in roofing refers to the guideline that if damage affects more than 25% of a roof section or overall surface area, complete replacement often becomes more cost-effective than patching. This threshold helps homeowners and contractors determine when comprehensive replacement delivers better long-term value than incremental repairs.
What constitutes an emergency roof repair?
Emergency roof repair is constituted by active water intrusion causing immediate interior damage, structural compromise with sagging or exposed decking, large missing shingle sections, or leaks near electrical components. These situations require immediate professional intervention beyond temporary tarping to prevent safety hazards and escalating damage.
How much does it cost to emergency tarp a roof?
Emergency roof tarping costs between $200 and $1,000 depending on damage size, roof accessibility, and installation complexity. Professional installation includes materials, labor, and proper securing methods that prevent wind displacement while protecting your home until permanent repairs can be completed.
How long does a roof tarp last in weather?
A roof tarp lasts 30 to 90 days in weather depending on material quality, UV exposure, and installation method. Vinyl tarps offer the longest durability for extended coverage, while standard polyethylene tarps require inspection and potential replacement after severe storms or prolonged sun exposure.
Will insurance cover emergency roof tarping?
Insurance will cover emergency roof tarping under most homeowner policies as part of storm or weather damage claims because tarping demonstrates good faith mitigation effort. A $300 tarp installation can prevent $5,000 in secondary water damage claims, satisfying your duty to minimize loss.
When should I call a professional instead of tarping myself?
You should call a professional instead of tarping yourself when damage involves steep roof pitch, structural instability, electrical component proximity, or adverse weather conditions. Professional installation includes proper safety equipment, experience with unstable surfaces, and insurance coverage that DIY attempts lack.
Can I leave a tarp on my roof permanently?
You cannot leave a tarp on your roof permanently because tarps degrade from UV exposure, develop tears and holes, and lose water resistance within 30-90 days. Tarps serve as temporary emergency protection while arranging permanent repairs, not as long-term roofing solutions.