

Have you ever wondered if you could manage fire damage cleanup on your own? I know it seems risky, but acting fast can stop more damage to your home. The first 48 hours after a fire are key. Our guide shows you clear steps, from securing your property to taking proper photos and notes for your insurance. With easy-to-follow actions and safety tips, you can turn a scary disaster into simple, manageable tasks. Ready to save time, money, and stress?
DIY Fire Damage Cleanup Roadmap: Step-by-Step Aftermath Process
When the fire is out, act right away. The first 48 hours are vital to stop more damage. Wait until the fire department or a trusted inspector (someone who checks the building’s safety) says it’s safe. When you get the green light, call your insurance agent. Take lots of clear photos or videos of everything damaged. For example, capture images of burned walls, melted fixtures, and any water damage to strengthen your claim. You can learn more about this in our guide on documenting fire damage.
Secure your property as soon as possible. Board up any windows, doors, or openings to keep strangers out and protect your home from weather damage. Quick action helps cut the chances of chemical damage, mold growth, or soot settling on surfaces. If the damage is severe, turn off utilities like electricity and gas before proceeding.
Make a detailed checklist of the steps you need to take. List everything from taking photos to securing the site and cleaning up. This way, you won’t miss an important detail. For instance, start with a safety check to ensure all entry points are sealed before you go inside. A clear, step-by-step plan can boost your confidence and help you recover safely.
Assessing Safety and Hazards in DIY Fire Damage Cleanup
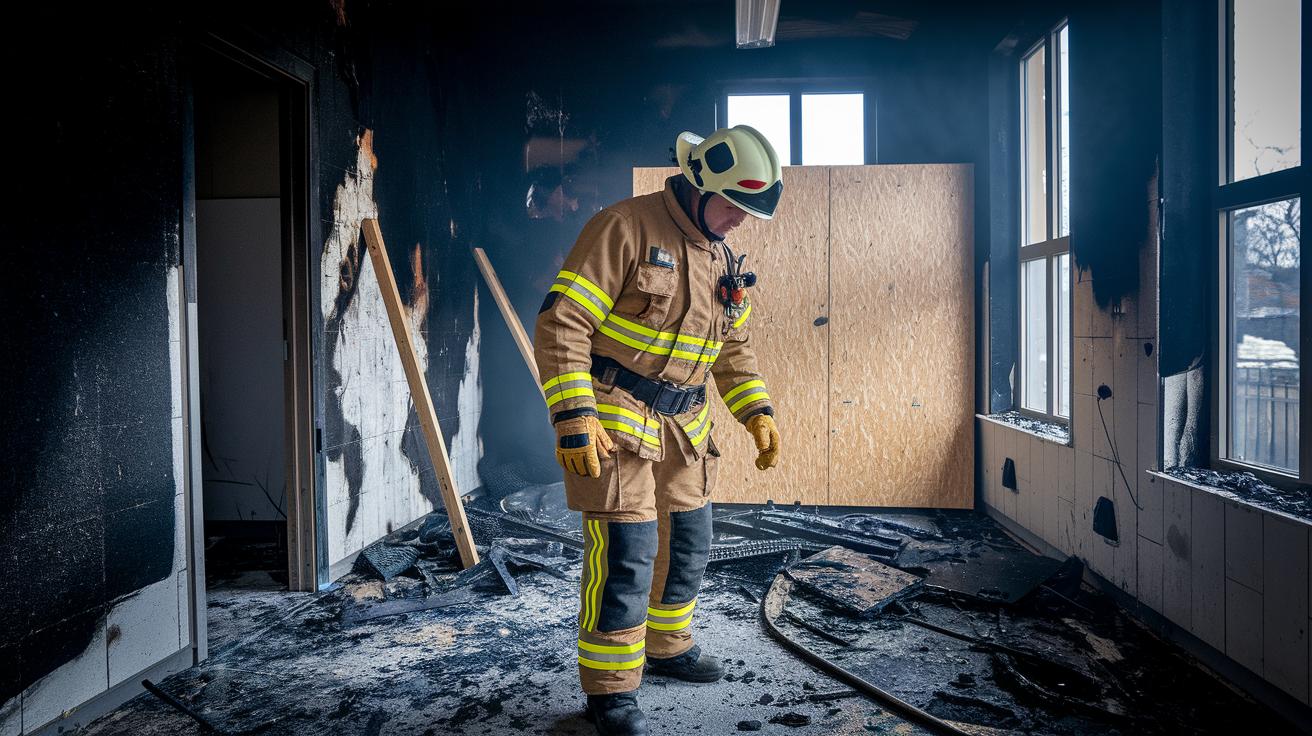
Fire damage can hide many dangers that must be checked before cleanup. Damaged structures, unstable beams, weakened floors, exposed wires, and chemicals from firefighting foam can all cause harm. Do not enter until a fire department or qualified inspector says it’s safe.
Before you go inside, make the area secure. Board up open windows and doors, and turn off utilities like gas and electricity to avoid accidental fires or shocks. Use a flashlight to inspect dark corners and look under debris for any hidden hot spots that could start another fire.
Your safety comes first. Always wear protective gear: an N95 respirator (a mask that filters out harmful particles), heavy-duty gloves, safety goggles, and strong boots. This equipment helps protect you from harmful chemicals and debris.
By checking for risks now, you set the stage for a safe and smart cleanup that protects you and your home.
Essential Tools, Supplies, and Equipment for DIY Fire Damage Cleanup
Start by gathering the right gear so you can clean safely and effectively. A HEPA-filter vacuum (a vacuum that traps tiny soot and mold particles) is essential for getting rid of loose debris. Use a negative air machine (a machine that pulls out smoke-filled air) to clear any lingering smoke. For stubborn odors, consider an ozone generator or a deodorizer. Don’t forget basic cleaning supplies such as scrub brushes, sponges, microfiber cloths, and a mild detergent or trisodium phosphate (a cleaner that breaks down tough stains).
Always wear proper personal protection. Use an N95 or better-rated respirator to keep harmful particles away, heavy-duty gloves for your hands, and safety goggles to protect your eyes. Coveralls or disposable Tyvek suits help keep your clothes clean, and rubber boots protect your feet from slippery or contaminated surfaces.
Keep a few basic tools close by to make the job easier. Buckets are great for mixing cleaning solutions, extension poles help you reach high areas, and an adjustable wrench is useful for safely shutting off utilities. These tools form the foundation of an effective cleanup plan and ensure you work safely while restoring your home.
For example, starting with a HEPA-filter vacuum to remove ash and soot stops particles from settling into surfaces while you clean.
DIY Fire Damage Cleanup: Soot and Smoke Removal Techniques for Different Surfaces
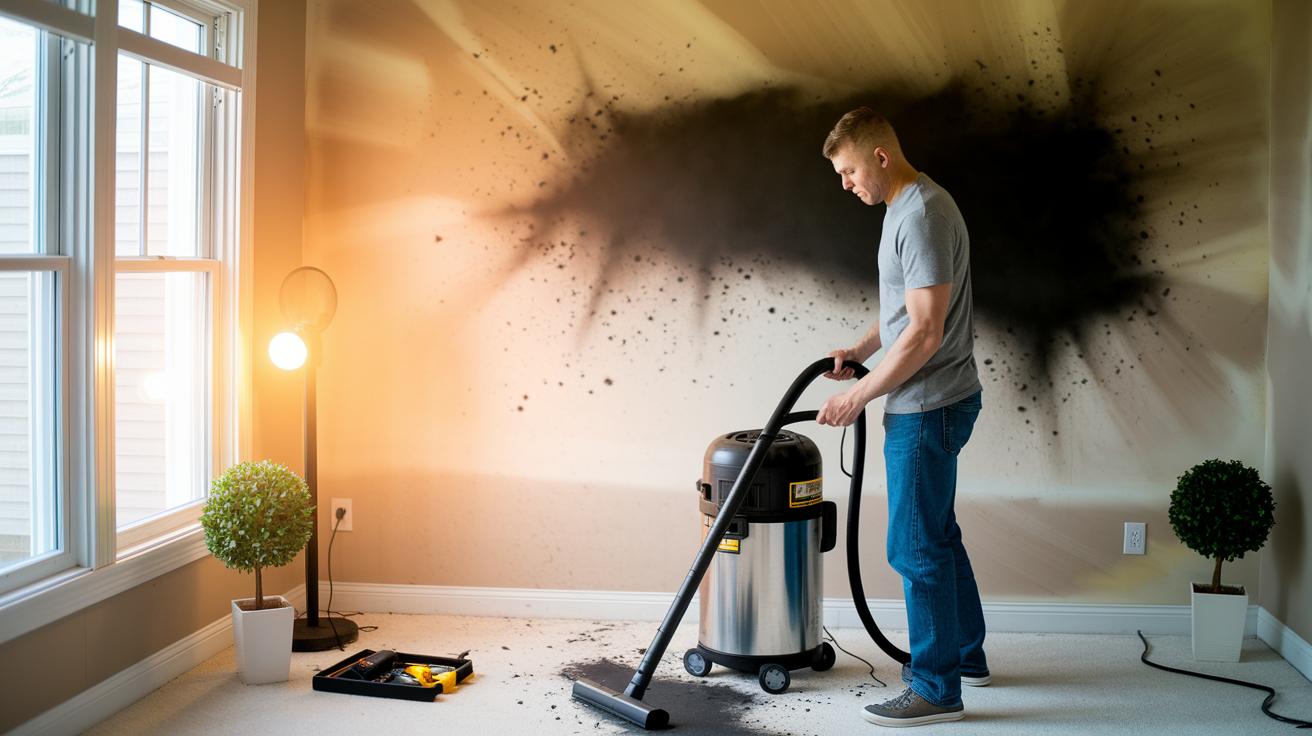
After a fire, the first thing you should do is remove loose soot and ash. Use a HEPA-filter vacuum (a vacuum that traps tiny particles) to clean every crack and crevice. If you notice soot on your walls, start by vacuuming to keep it from settling deeper.
Next, gently wipe your painted drywall with a dry-cleaning sponge. This helps lift off smoke residue. Then, wash the area lightly with a mild detergent solution. It’s a good idea to test a small spot first to make sure the solution doesn’t harm the paint.
When cleaning wood, mix a specialized wood cleaner with a little mineral spirits (a cleaning liquid that helps lift stains). This combination helps break down stubborn soot on trim or furniture. Once the wood is clean, use a neutralizing agent (a helper to stop any lingering chemical effects) as instructed by the manufacturer.
For upholstery and fabrics, always test a small, hidden spot before using an enzyme-based cleaner or an odor-neutralizing spray. This step prevents damage to delicate materials. If smoke smells persist, you might need advanced treatments like ozone treatments or thermal fogging.
Below is a table with techniques for cleaning different surfaces:
| Surface Type | Cleaning Method | Notes |
|---|---|---|
| Painted Drywall | Dry sponge, mild detergent wash | Test a small area first |
| Unglazed Brick/Stone | Stiff brush, trisodium phosphate solution | Wear a respirator |
| Wood Trim & Furniture | Mineral spirits, wood cleaner | Follow with a neutralizer |
| Upholstery | Enzyme cleaner, odor neutralizer | Avoid over‐wetting |
| HVAC Filters | Replace with HEPA-rated filters | Stops recirculation of particles |
Following these steps can help you remove soot and smoke residue safely, without causing extra damage.
DIY Fire Damage Cleanup: Managing Water and Secondary Damage
Act fast to stop additional damage from water left after firefighting. Within 24 to 48 hours, clear any standing water to reduce the chance of mold and protect your home's structure. Check the floors, subflooring (the layer under the floor), drywall, and insulation for any signs of moisture. Remove any materials that look wet to prevent hidden water damage from spreading.
Begin by using a wet/dry vacuum for your carpet and padding. Place industrial fans in windows or doorways to create a cross-breeze that speeds up drying. Run a dehumidifier (a machine that pulls moisture from the air) set to around 50% relative humidity to help lower the moisture level. A moisture meter (a tool that measures water levels) on walls and subfloors can also show you which areas need more attention.
Here is a quick checklist of the key tools and steps:
- Wet/dry vacuum with HEPA filter (an air filter that traps tiny particles)
- Industrial fans arranged for cross-ventilation
- Dehumidifier set to about 50% relative humidity
- Moisture meter for checking walls and subfloor
- Removal of waterlogged materials for proper disposal
These simple steps help you deal with water damage quickly and lower the risk of further issues as you clean up.
DIY Fire Damage Cleanup: Disposal of Charred Debris and Materials
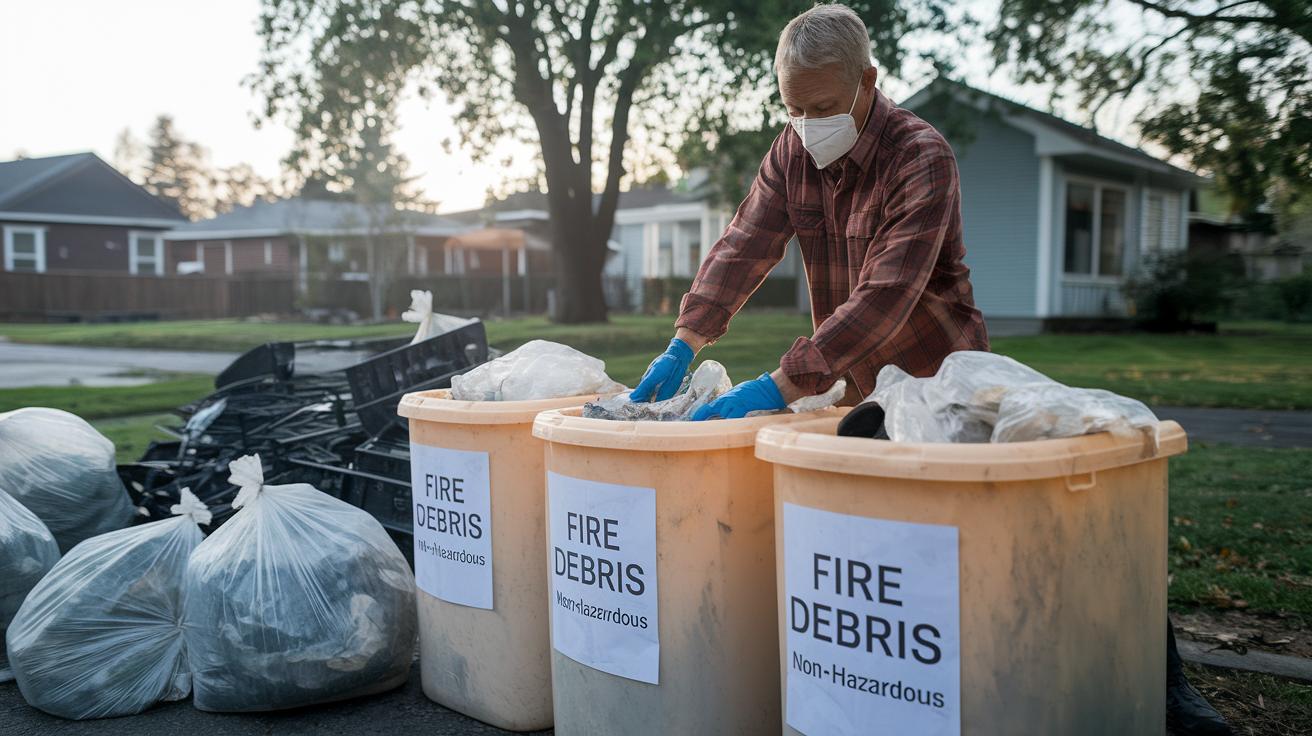
When you clean up after a fire, it helps to sort items into what you can save and what you need to toss. Start by figuring out which items can be cleaned and restored and which ones must go. Place burned wood, insulation, and building materials into separate bags or containers to keep safe items from dangerous waste. Always follow local rules for pickup or drop-off of fire-damaged materials. Label each container clearly, for example, "Fire Debris – Non-Hazardous", before transport. This keeps things organized and safe as you prepare to rebuild.
Wear protective gear while you work. Use the right tools and safe methods to remove waste and stop further contamination. Follow these steps to keep hazardous items separate from recyclable ones:
- PPE for handling debris (gloves, mask)
- Heavy-duty contractor bags or bins
- Local disposal facility contact info
- Separate electronics from organic materials
- Label and document disposal items
- Do a final sweep for small ash particles before leaving the site
DIY Fire Damage Cleanup: When to Seek Professional Restoration Assistance
Some fire cleanup tasks can be dangerous if you try to handle them on your own. When repairs involve important beams, walls that support your home, or exposed wiring, you need a licensed professional to inspect and fix these issues. Advanced treatments like large-scale ozone application (using machines that neutralize odors), thermal fogging (spraying a safe mist to reach hidden places), and home deodorization require special equipment and trained teams. These methods remove smoke and chemical residues that can harm your health if not cleared correctly.
If you notice widespread damage or suspect unseen problems such as a weakened structure or hidden chemicals, it is best to call an expert. Our professional teams are ready to inspect your home and perform emergency salvage work to protect both your property and your health. We make sure every high-risk area is treated properly so your home can be safely and effectively restored.
Final Words
In the action, we covered a clear roadmap for handling fire damage cleanup from safety checks and documenting damage to managing soot, water, and debris. We broke down each step so you can protect your home and belongings while reducing further risk. Remember, our diy fire damage cleanup guide is designed to help you act fast and safely. We believe that with the right steps and clear focus on early action, you can move forward with confidence and rebuild towards a safe living space.
FAQ
What to throw away after smoke damage
The answer explains that you should discard items that are heavily charred, porous materials like paper and fabrics, and any items that absorbed the smoke odor if they are no longer safe to clean.
How to clean smoke damage on walls and ceilings and overall fire smoke cleanup
The answer explains that cleaning smoke damage starts by removing loose soot with a HEPA-filter vacuum or dry sponge, then gently washing with a mild detergent solution to clear residue and odor.
What smoke damage cleaning products should be used
The answer explains that effective cleaning products include mild detergents, trisodium phosphate (a cleaning solution that breaks down grease), and enzyme cleaners designed to help remove smoke odor from affected surfaces.
How to get the fire smoke smell out of the house fast
The answer explains that quickly eliminating the smoke smell involves ventilating the space, using deodorizing sprays or agents, and employing ozone generators or similar treatments to neutralize lingering odors.
What is involved in professional cleaning after a fire and the fire restoration process
The answer explains that professional restoration follows a step-by-step process, including safety assessments, thorough cleaning, detailed documentation, and advanced odor and damage treatments to ensure the home is fully restored.