

Did you know the first five minutes after roof damage decide whether you’re looking at a quick fix or thousands in secondary water damage?
If water’s getting in, your first moves are simple: protect people, stop water from soaking insulation and ceilings, and start documenting what you see.
This post shows safe immediate steps: what to do inside, how to tarp once it’s safe, which tools to grab, and how to document damage for adjusters.
Do these steps now to limit hidden damage, speed drying and repairs, and make the rebuild clearer.
Immediate Emergency Actions to Protect a Damaged Roof
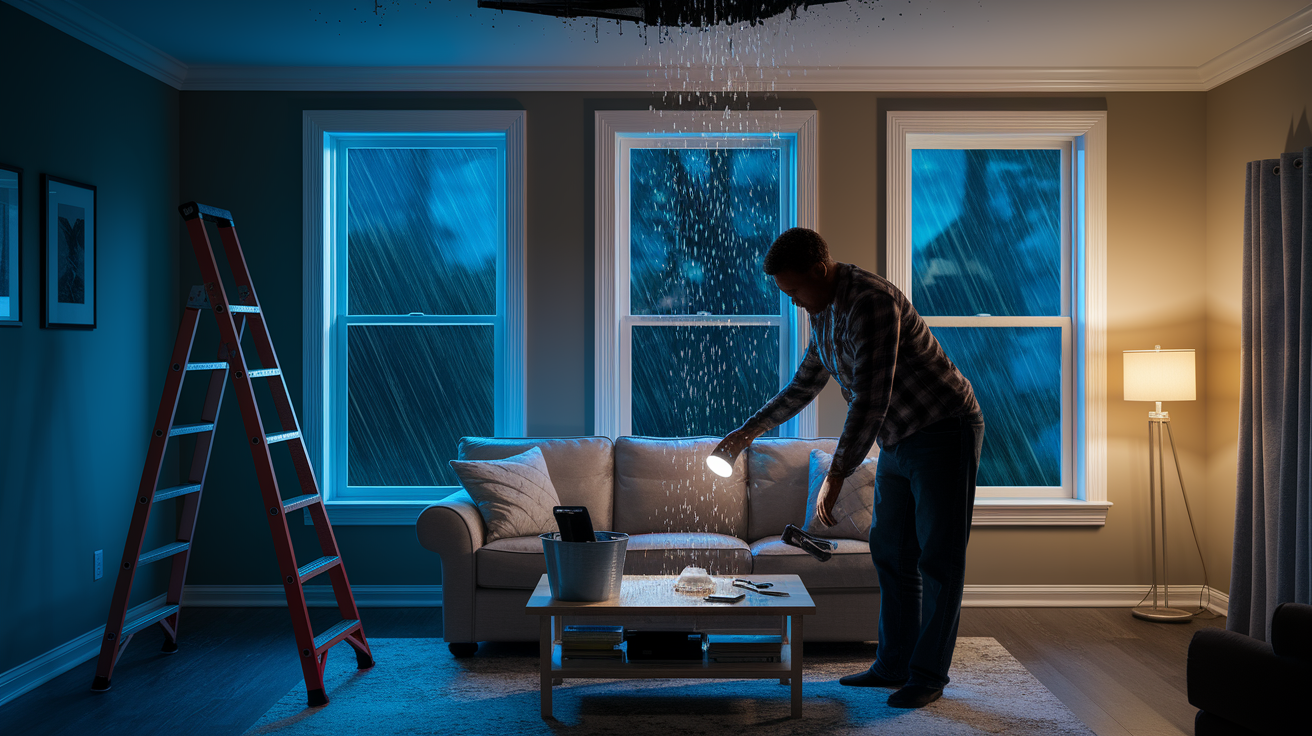
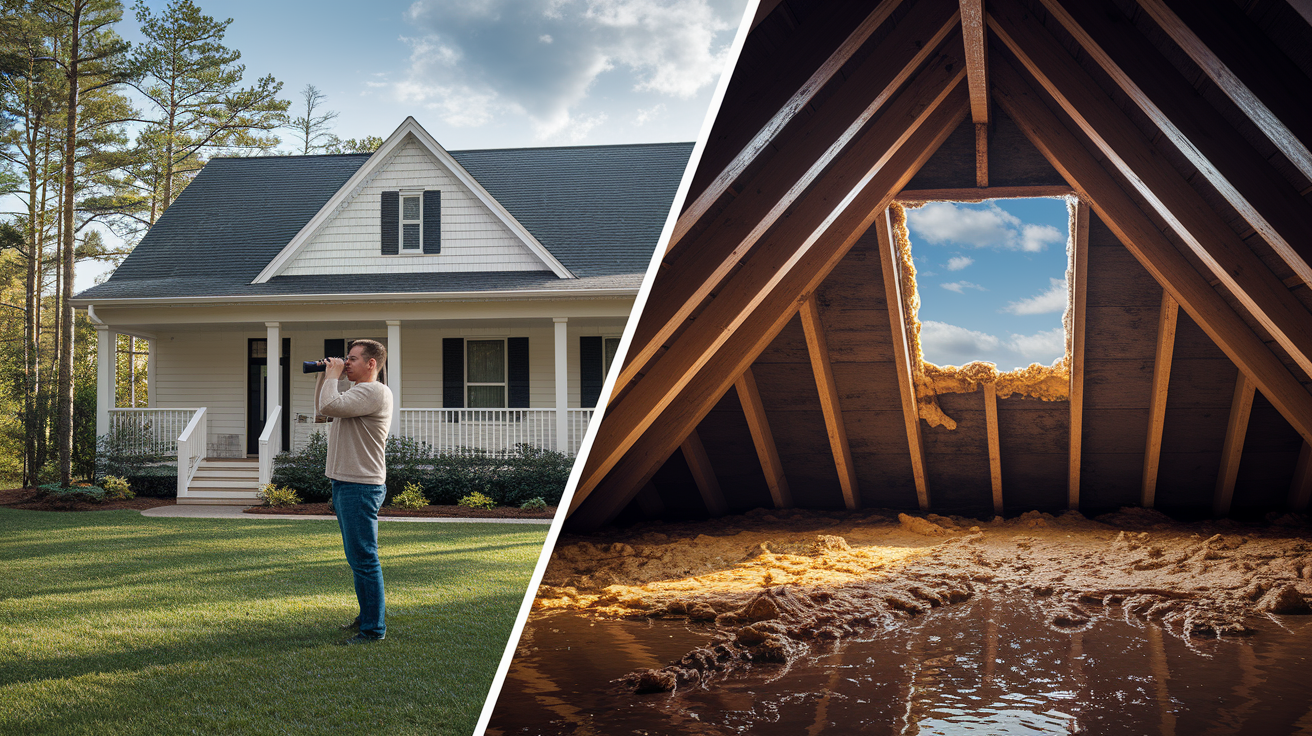
The first five minutes after you spot roof damage decide whether you’re looking at a quick fix or thousands in secondary water destruction. Your goal is simple: stop water from hitting insulation, ceilings, and walls while keeping yourself safe.
If water’s actively pouring in, you’re racing against absorption. Drywall, insulation, and flooring soak up moisture fast. Once they’re saturated, drying becomes a multi-day ordeal with equipment. Act now to limit how much material gets wet.
Every minute you wait, water spreads. It runs along rafters, seeps into wall cavities, drips onto belongings. Here’s what to do right away:
-
Turn off electricity to affected rooms at the breaker box if water’s dripping near light fixtures, outlets, or appliances. Don’t touch switches or electronics with wet hands.
-
Place buckets, trash cans, or large containers under active leaks to catch water before it soaks into floors or carpets. Empty them frequently.
-
Lay down towels, tarps, or plastic sheeting on floors and furniture directly below the damage to absorb drips and protect belongings.
-
Move valuables, electronics, and furniture out of rooms where water’s entering. If items are too heavy to move, cover them tightly with plastic and elevate them on blocks if possible.
-
Look up at the ceiling from inside and note where water’s entering. If you see bulging, sagging, or discolored drywall, place a bucket directly underneath and don’t stand below it.
-
Grab a flashlight, your phone, and basic tools like a hammer, nails, duct tape, and any tarps or plastic sheeting you’ve got on hand. You’ll need these in the next steps.
If the roof damage happened during an active storm, don’t go outside or climb onto the roof until conditions are safe. Wind, rain, lightning, and darkness make roof access extremely dangerous. Your first job is stopping damage from inside the house, not fixing the roof itself. Once the immediate interior is protected and the weather clears, you can assess the roof and begin temporary exterior coverage.
How to Safely Tarp a Roof After Storm Damage
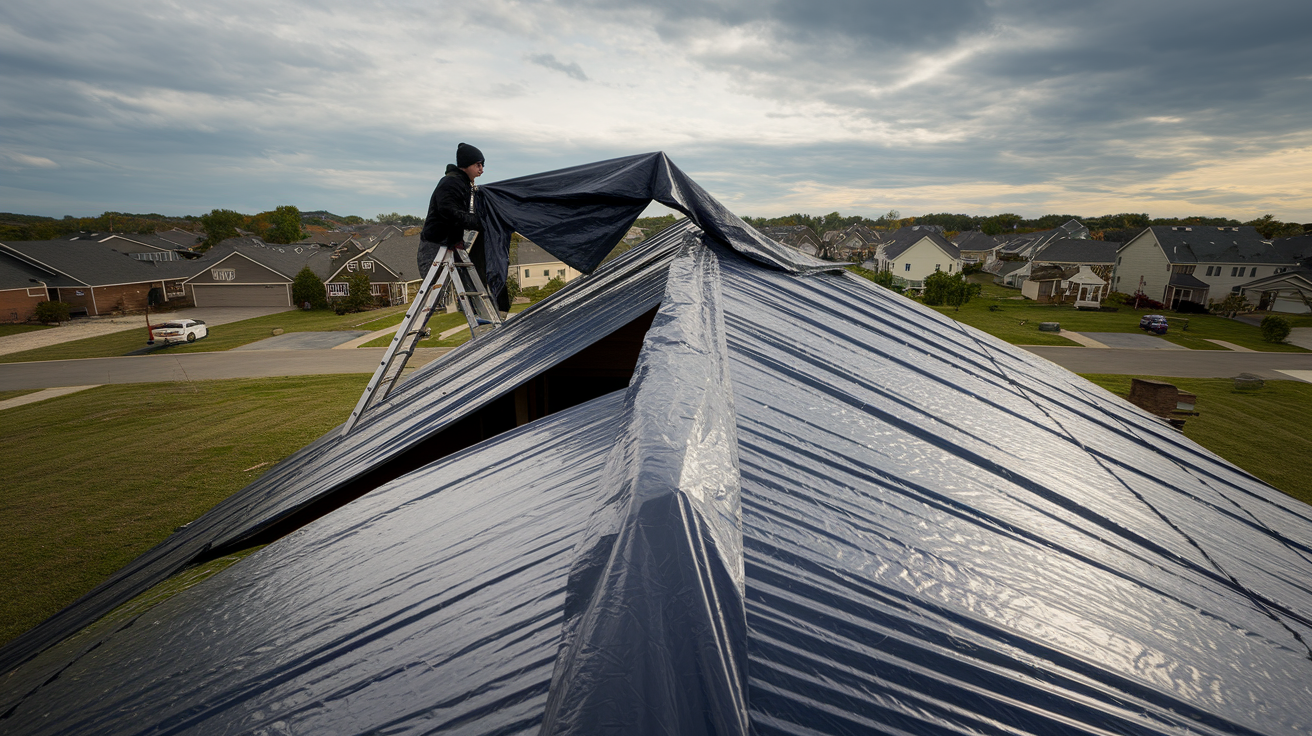
Tarping a roof is a temporary fix to keep rain, snow, and debris out until a contractor can complete permanent repairs. It’s appropriate when you’ve got a visible hole, missing shingles, or torn sections and weather is expected within hours or days. Tarping doesn’t repair the roof. It buys you time and prevents further water intrusion.
Step by Step Tarping Instructions
-
Wait for safe conditions. Don’t climb onto a roof during rain, high winds, ice, or darkness. If the roof’s steep (more than a 6/12 pitch) or you’re uncomfortable with heights, call a professional instead.
-
Set up a sturdy extension ladder at a 4:1 angle (for every 4 feet of height, the base should be 1 foot from the wall). Have a second person hold the ladder steady while you work.
-
Clear loose debris from the damaged area by hand or with a rake. Remove broken shingles, branches, and nails that could puncture the tarp or create uneven surfaces.
-
Unfold a heavy-duty poly tarp (10 to 12 mil thickness) that extends at least 2 feet past the damaged area in all directions. If the damage crosses the roof ridge, drape the tarp over the peak so water sheds evenly down both sides.
-
Secure one edge of the tarp first using a 2×4 board laid across the tarp, then fasten the board to the roof with 3 inch exterior screws driven through the board into roof decking every 12 to 16 inches. This is called the batten method and prevents the tarp from tearing at fastener points.
-
Pull the tarp tight and flat to eliminate sagging or pooling areas where water can collect. Loose tarps flap in wind and wear out quickly.
-
Fasten the remaining edges with more 2×4 battens, sandbags, or bricks placed along the lower edge. Avoid driving nails or screws directly through the tarp into undamaged roof areas. Each new hole is a future leak.
-
Inspect all edges and seams to ensure water can’t flow underneath. Pay special attention to roof valleys and areas where two roof planes meet.
Common mistakes include using tarps that are too small, which leave gaps for water to enter, and failing to anchor properly, allowing wind to rip the tarp loose within hours. Never walk on a tarp that’s already in place. It’s slippery and hides uneven surfaces underneath. And don’t use duct tape or staples as primary fasteners. They fail quickly in wet or windy conditions. If your tarp starts flapping or pooling water, re-secure it immediately before it tears or causes new damage.
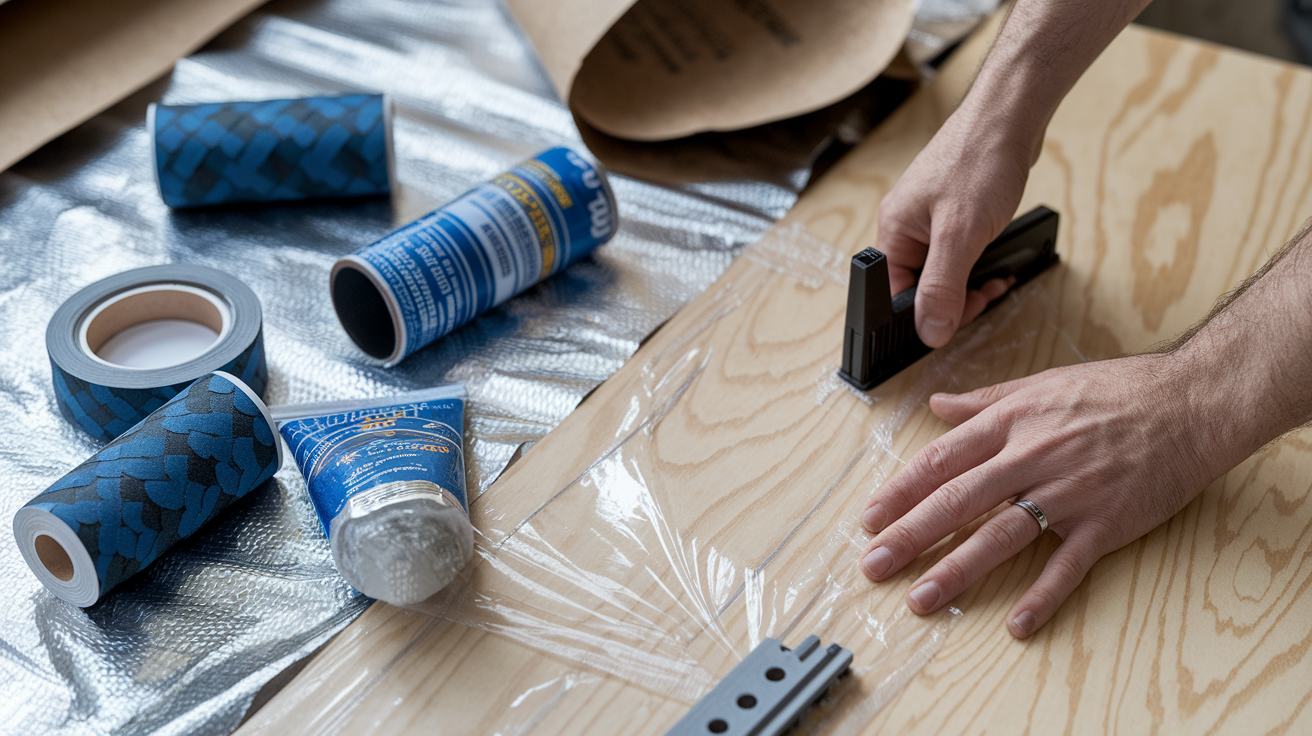
Essential Materials for Temporary Roof Protection
Having the right materials on hand makes emergency roof protection faster and safer. Most of these items can be purchased at hardware stores or home centers. Keeping a basic kit in your garage or shed means you’re ready when damage happens.
Materials and Quantities:
- Heavy-duty poly tarp, 10 to 12 mil thickness — at least one 12 x 20 ft tarp for moderate damage; add a second smaller tarp (10 x 12 ft) for backup or multiple holes
- 2×4 lumber boards, 8 ft length — three boards minimum for battens and anchoring
- Exterior grade plywood, 1/2″ or 3/4″ thick, 4 x 8 ft sheets — one to three sheets for boarding large openings
- Galvanized roofing nails, 8d size — box of 100 for securing boards and edges
- Exterior screws, 3 inch length — box of 50 for fastening battens through tarp into decking
- Sandbags or bricks — four to six for weighting tarp edges without puncturing
- Plastic sheeting, 6 mil, in rolls — for interior ceiling protection and covering furniture
- Roofing cement or fibered mastic, 1 gallon pail — for sealing small punctures or torn shingles
- Work gloves, safety glasses, and non-slip footwear — basic PPE for climbing and handling materials
- Cordless drill, hammer, utility knife, and tape measure — essential tools for cutting, fastening, and measuring
If you can’t find heavy duty tarps immediately after a storm, use what’s available. Painter’s drop cloths, canvas tarps, or multiple layers of plastic sheeting. They’re less durable but better than nothing. When plywood is sold out, you can substitute OSB (oriented strand board) or even metal roofing panels in a pinch. The goal is to create a weather tight barrier until permanent materials and contractors are available.
Safety Precautions When Protecting a Damaged Roof
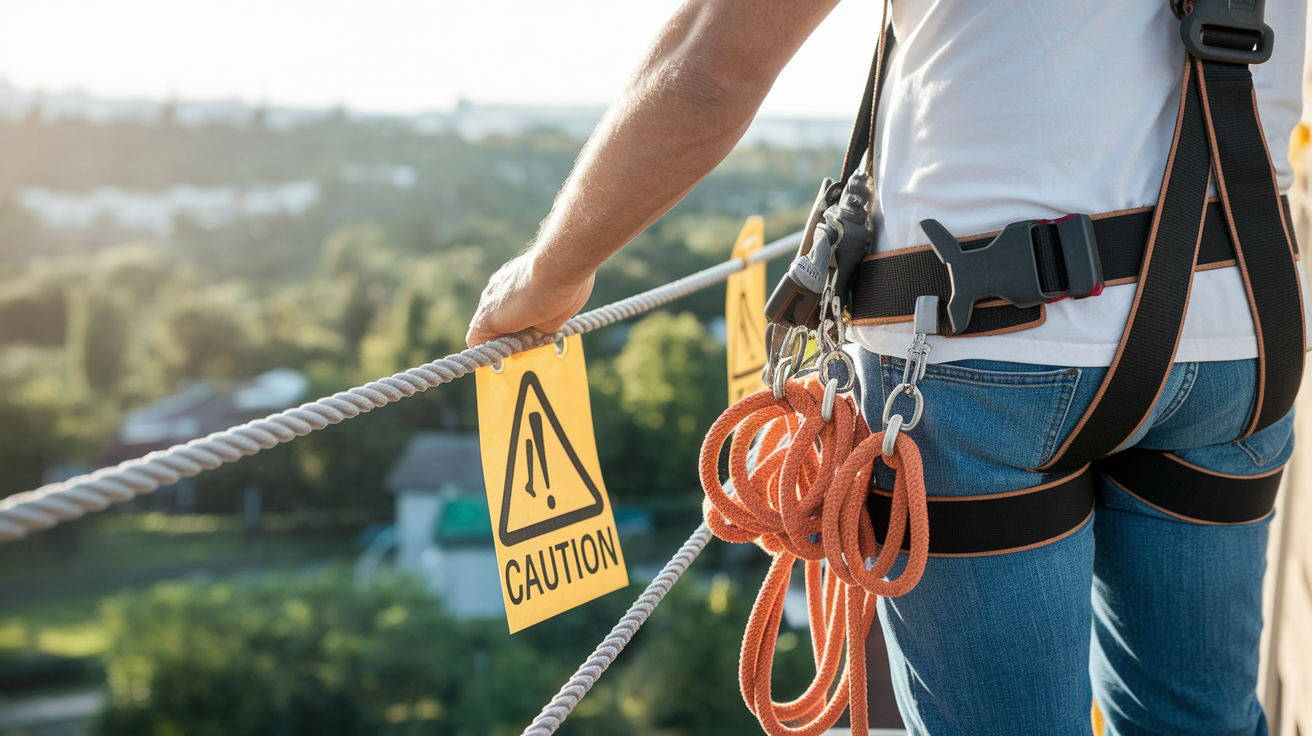
Roof work is one of the most dangerous home maintenance tasks, and emergency conditions make it riskier. Wet shingles, unstable decking, and unexpected weather changes can turn a simple tarp job into a fall or electrical hazard. Before you climb, evaluate whether the risk is worth it or whether waiting for a professional is the smarter choice.
Slippery surfaces are the top cause of falls. Asphalt shingles become slick when wet, and algae or moss growth makes them even worse. Metal roofs are nearly impossible to walk on safely during or after rain. If the roof pitch is steeper than 6/12 (6 inches of rise for every 12 inches of horizontal run), you shouldn’t attempt to walk on it without fall protection equipment like a full body harness and anchor rated for 3,000 pounds or more. Most homeowners don’t own this gear, and that’s a clear sign to call a roofer instead.
Electrical hazards are just as serious. If water’s leaking near light fixtures, outlets, ceiling fans, or any visible wiring, don’t touch those areas and don’t walk on the roof directly above them until you’ve shut off power to those circuits at the breaker box. Downed power lines near the home or touching the roof mean you shouldn’t approach the building at all. Call the utility company and emergency services immediately. Unstable roof decking is another critical warning sign. If you see sagging areas, soft spots when you press on shingles, or visible cracks in the roof surface from the ground or attic, the structure may not support your weight. Don’t climb onto a roof that looks compromised. Wait for an inspection by a contractor who can assess the framing and decking safely.
How to Assess Roof Damage After a Storm
Knowing what to look for helps you describe the problem accurately to contractors and insurers, and it tells you whether temporary protection is enough or if you need emergency structural work.
Start your assessment from the ground and from inside the attic if you can access it safely. Use binoculars to inspect the roof from the yard, looking for obvious gaps, missing shingles, or debris like tree branches. Walk around the entire perimeter of the house and check all roof planes, not just the side facing the storm. Wind and hail can damage multiple areas.
Key damage signs to document:
- Missing or displaced shingles — look for bare spots where shingles have blown off or lifted edges that expose underlayment
- Punctures or holes — caused by fallen branches, flying debris, or hail impact; measure the size with a tape measure if accessible
- Torn or lifted flashing — metal strips around chimneys, vents, and roof edges that have peeled away or bent
- Sagging or dips in the roofline — indicates possible structural damage to rafters, trusses, or decking
- Granule loss on asphalt shingles — shingles that look shiny, smooth, or have bald patches where the protective granules have worn away
- Interior water stains or drips — discolored ceiling patches, wet insulation, or active leaks inside the home
- Debris accumulation — branches, shingles, or roofing materials lying in gutters, on the roof, or around the house
If you can safely enter the attic, look for daylight coming through the roof, wet insulation, water stains on rafters, or sagging roof sheathing. These are signs of active or recent leaks. Don’t walk on wet insulation or attic floors without confirmed structural support. If any of these conditions are present and severe (such as large holes, visible sagging, or multiple leak points), don’t attempt DIY tarping and call a roofing contractor for same day emergency service.
Temporary Waterproofing Options Beyond Tarping
When tarps aren’t practical or available, other temporary methods can slow water intrusion until permanent repairs are completed. These solutions work best for small leaks, isolated damage, or situations where roof access is limited.
Alternative waterproofing methods:
- Roofing cement or mastic — apply directly to small punctures, torn shingles, or gaps around flashing; one tube covers 10 to 20 small patches and costs $10 to $30
- Self-adhering flashing tape — peel and stick rolls (3 to 4 inches wide, 33 feet long) that seal around vents, skylights, and small seams; works in dry conditions only
- Plastic sheeting stapled or taped to interior ceilings — catches drips and protects contents when exterior access is unsafe; use heavy duty painter’s plastic and duct tape or staples
- Emergency roof patch kits — pre-cut adhesive patches sold at hardware stores for quick shingle repair; follow manufacturer’s instructions for surface prep and application
- Plywood boards sealed with roofing cement — cut to fit over large holes, seal edges with mastic, and fasten with exterior screws every 8 to 12 inches
These methods are short term fixes, not replacements for professional repair. Roofing cement hardens and cracks over time, tape loses adhesion in temperature swings, and plastic sheeting indoors does nothing to prevent exterior damage or mold growth inside wall cavities. Use them to buy hours or days, then schedule a contractor to assess and repair the roof properly. If you’re dealing with ongoing leaks and none of these options stop the water, that’s a sign the damage is too extensive for temporary measures.
Documenting Roof Damage for Insurance Claims

Insurance companies require proof of damage, the timeline of events, and evidence that you took reasonable steps to prevent further loss. Good documentation speeds up claims and reduces disputes over coverage.
Take photos and videos as soon as it’s safe to do so, ideally before you make any temporary repairs. If that’s not possible, photograph the damage before and after you tarp or patch, and explain in writing what you did and when.
Steps for thorough documentation:
-
Capture wide angle exterior shots showing the whole house, roof, and surrounding context like fallen trees, storm debris, or weather conditions.
-
Take close-ups of each damaged area with a tape measure or ruler visible for scale; photograph missing shingles, punctures, torn flashing, and any debris on the roof.
-
Document interior damage including water stains on ceilings, wet walls, soaked insulation, and any belongings affected by leaks.
-
Record date and time stamps on all photos and videos; most smartphones do this automatically, but note it separately in a written log as well.
-
Keep receipts for all emergency purchases such as tarps, lumber, roofing cement, tools, and contractor fees for temporary work; insurers typically reimburse reasonable emergency expenses.
-
Don’t discard damaged materials like broken shingles, torn flashing, or punctured decking until your adjuster has inspected and photographed them; store debris in a safe, dry location if possible.
Most policies require you to notify your insurer within 24 to 72 hours of discovering damage, so call your agent or claims line as soon as the emergency is under control. Provide your documentation, explain what happened, and ask about next steps for inspection and temporary repair reimbursement. Avoid making permanent structural repairs until the adjuster has seen the damage, but do make temporary fixes to stop further water intrusion. That’s expected and covered under your duty to mitigate loss.
DIY vs. Professional Emergency Roof Repairs
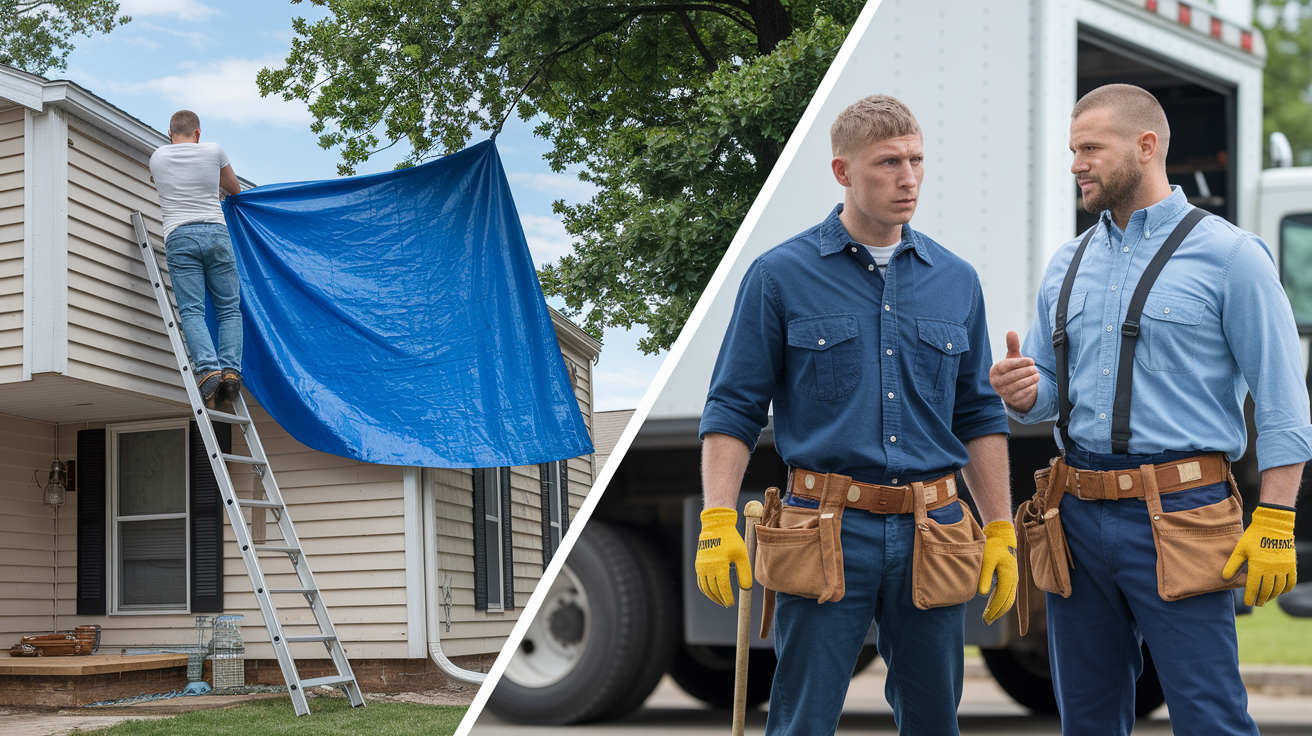
Small, accessible damage on a low slope roof in good weather can sometimes be handled by a confident homeowner with the right tools and materials. But many emergency situations are too dangerous, too complex, or too urgent for DIY work.
DIY is appropriate when the damaged area is small (less than 4 square feet), the roof pitch is gentle (6/12 slope or less), there’s no structural sagging or instability, and you’re comfortable working on a ladder with basic carpentry tools. Examples include replacing a few missing shingles, sealing a small puncture with roofing cement, or laying a tarp over a minor leak during dry weather.
Professional help is required immediately when damage exceeds 100 square feet, when rafters or trusses are broken or sagging, when a tree has fallen through the roof, or when there are electrical or gas hazards present. Steep roofs (greater than 6/12 pitch), multi-story homes, and situations involving asbestos or other hazardous materials also demand trained contractors with safety equipment and insurance. If your roof is more than 15 years old and experiencing multiple leaks across different areas, a professional inspection is essential to determine whether temporary patches will hold or if larger failure is imminent.
| Option | When Appropriate | Risks |
|---|---|---|
| DIY Tarp or Patch | Small damage <4 sq ft; low pitch ≤6/12; dry weather; homeowner experienced with ladders | Falls, inadequate coverage, missed hidden damage, voided warranties |
| Emergency Roofer (Temporary) | Moderate damage 4 to 100 sq ft; uncertain stability; steep pitch; active weather | Higher cost; availability delays during major storms |
| Emergency Roofer (Full Repair) | Large damage >100 sq ft; structural issues; tree impact; electrical/gas hazards | Significant cost; requires insurance coordination; multi-day timeline |
| Do Nothing / Wait | Never appropriate if damage allows water intrusion | Exponential interior damage; mold growth; insurance claim denial for failure to mitigate |
When hiring a contractor, verify they’re licensed, insured, and can provide a certificate of insurance with liability coverage. Ask for a written estimate that itemizes labor, materials, permits, and timeline. Avoid contractors who demand full payment upfront or only accept cash. Reputable companies work on deposits (10 to 30%) with the balance due on completion. Get at least two estimates when time allows, but in true emergencies where water’s actively entering, prioritize speed and availability over price shopping.
Expected Costs for Emergency Roof Protection and Repairs
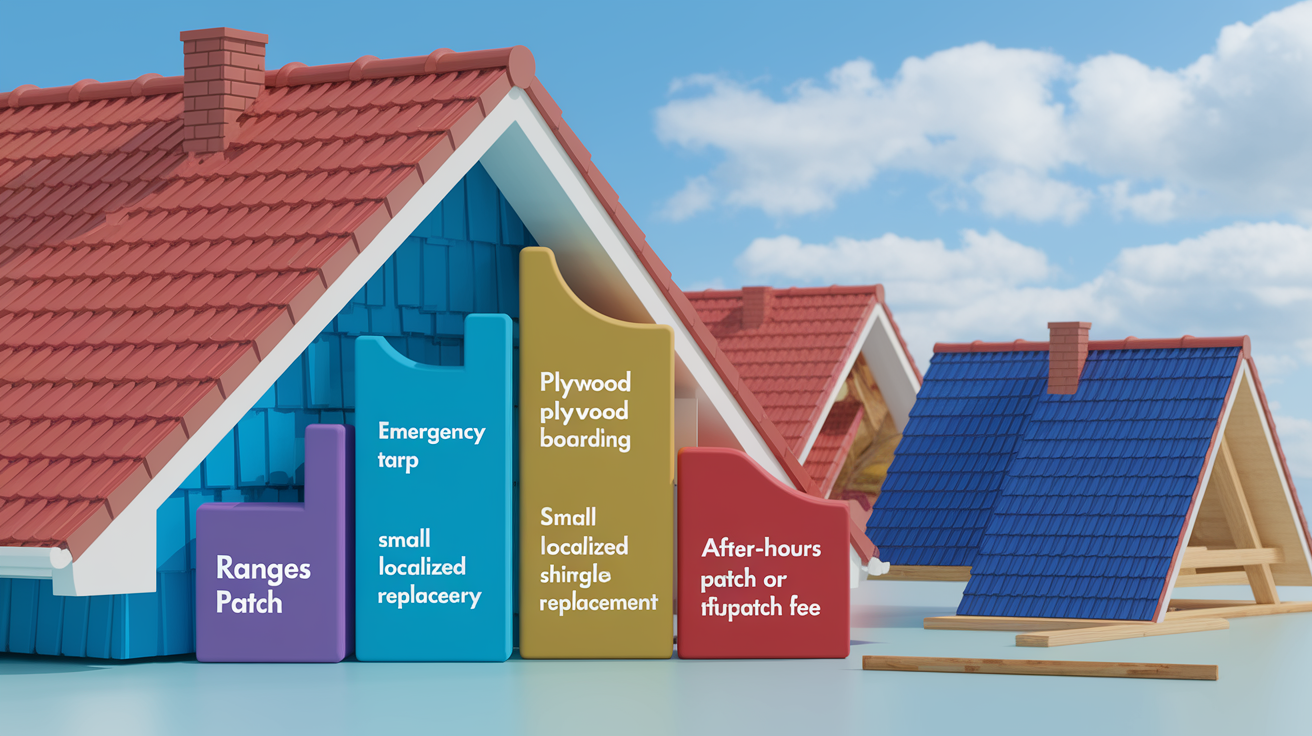
Emergency roof services cost more than scheduled work because of after hours dispatch, urgency, and unpredictable conditions. Knowing typical price ranges helps you budget and recognize fair pricing versus price gouging during storms.
A contractor installed emergency tarp typically runs $150 to $600 depending on roof size, accessibility, and how many tarps are needed. Single tarp jobs on ranch style homes with easy access commonly fall in the $200 to $450 range. Plywood boarding over large holes or blown off sections costs $200 to $800, with pricing influenced by the number of sheets required and roof pitch. After hours or weekend emergency service often adds a $100 to $300 dispatch fee to the total invoice.
Common emergency cost ranges:
- Emergency tarp installation by contractor: $150 to $600 per job
- Plywood boarding (large openings): $200 to $800 depending on materials and labor
- Small localized shingle replacement (up to 5 shingles): $200 to $1,000 including labor and materials
- Temporary patch or flashing repair: $200 to $900 for minor leaks sealed with roofing cement and new flashing
- After hours or same day emergency dispatch fee: $100 to $300 added to invoice
Permanent repairs vary widely. Replacing missing shingles and resealing flashing on a small area (20 to 100 square feet) typically costs $800 to $3,500. Larger repairs or partial re-roofing (100 to 300 square feet) run $3,000 to $10,000. Full roof replacement for a typical single family home ranges from $5,000 to $30,000 depending on materials, with asphalt shingle jobs averaging $8,000 to $15,000. If tree removal is required before repairs can begin, add $500 to $5,000 depending on tree size and cleanup complexity. Factors that increase cost include steep pitch, multi-story height, complex roof geometry with valleys and dormers, premium materials like metal or tile, and local permit or code requirements.
Final Words
in the action you learned the immediate steps: stop active leaks, check for hazards, move valuables, and cover exposed areas quickly.
We walked through safe tarping steps, the materials to have on hand, how to document damage for your claim, and when to call a pro.
Act quickly to limit water and structural harm. Use clear photos and receipts, and don’t climb onto unsafe sections. If you’d rather not DIY, get help right away. emergency roof protection after damage prevents more loss and helps you move toward repair with confidence.
FAQ
Q: What is the 25% rule in roofing?
A: The 25% rule in roofing means if over 25% of a single roof plane is damaged, many building codes or insurers push for a full replacement instead of spot repairs to keep the roof safe and consistent.
Q: Can I spray Roof Maxx myself?
A: You can spray Roof Maxx yourself, but the company often uses trained applicators; DIY risks include uneven coverage, wasted product, and ladder hazards—hiring a certified tech gives steadier results and safety.
Q: What constitutes a roofing emergency?
A: A roofing emergency is active water coming in, visible sagging or collapse, large open holes, exposed live wiring, or fast interior damage that threatens safety or valuables and needs immediate action.
Q: What not to say to a roof insurance adjuster?
A: You should avoid saying you caused the damage, that you already repaired things without receipts, or accepting verbal offers; stick to clear facts, document losses, and let the adjuster inspect first.