

Think a quick coat of sealer will fix your leaking basement floor? Think again.
A wet floor is a symptom, not the source.
If you only mop and paint, the water comes back and mold, warped trim, and ruined things follow.
This post shows how to find where water enters, stop it fast, and use repairs that actually hold, including crack patching, proper primers, and when to install a drain.
Read on and you’ll get step-by-step actions you can do today, and know when to call a pro.
Immediate Steps to Stop a Leaking Basement Floor

The first thing you need to do when water shows up on your basement floor is figure out where it’s coming from. Walk the entire floor and look at the perimeter where the slab meets the wall. Check for visible cracks, damp patches that stay wet longer than the rest of the floor, and white powdery deposits. That powder is called efflorescence, and it means water is pushing through the concrete. Mark every spot you find with chalk or tape so you can come back to it.
Next, classify the leak. Is it a slow seep that leaves a damp circle, or is water actively flowing? If you see standing water, remove it immediately using a wet vacuum or a submersible pump. The faster you pull water out, the less it soaks into walls, wood, and stored belongings. If you have an active leak where water is literally streaming through a crack, you can buy yourself time with hydraulic cement. Mix a small batch, press it into the crack while water is still flowing, and hold it for a few minutes. It sets in about three to five minutes and will slow or stop the flow long enough for you to plan a real repair.
Once the floor is clear and you’ve controlled active water, do a second walk through. Sometimes drying the surface reveals additional damp spots or hairline cracks you missed the first time. Take photos of every leak point and write down rough measurements. How big the crack is, how much area stays wet, whether the problem is along one wall or spread across the whole slab.
Your immediate action list:
Turn off the source if it’s a plumbing leak. If it’s groundwater, you can’t stop it but you can control how much enters. Extract all standing water with a wet vacuum or pump as fast as possible. Apply hydraulic cement to active cracks to buy time for a permanent fix. Mark and photograph every seepage point so you know what to repair next.
Common Basement Floor Leak Causes and How They Develop

Most basement floor leaks fall into a few predictable categories. The most common is hydrostatic pressure. When the water table rises or soil around your foundation gets saturated, groundwater pushes up through the slab. Concrete is porous, and any crack or weak spot becomes an entry point. You’ll usually see this type of leak get worse after heavy rain or spring thaw.
Cracks and cold joints are the second big cause. Concrete shrinks as it cures, and floors poured in sections create seams where those sections meet. Over time, settlement, freeze thaw cycles, or just age can open those joints or widen hairline cracks. Water follows the path of least resistance, so even a crack you can barely see can channel a surprising amount of moisture. If your gutters are clogged or your downspouts dump water right next to the foundation, that water soaks into the soil and eventually works its way under the slab.
Other leak sources include foundation wall cracks that let water run down to the floor wall joint and pool at the perimeter. Failed or missing perimeter drain tiles that no longer carry groundwater away from the footing. Plumbing leaks from supply lines or drain pipes buried in or beneath the slab. Condensation on cold concrete during humid weather, which can look like seepage but is actually moisture from the air. Seasonal groundwater spikes when the water table temporarily rises above your basement floor elevation. Window well leaks that allow surface runoff to pour through basement window openings and run across the floor.
Preparing the Basement for Leak Repair
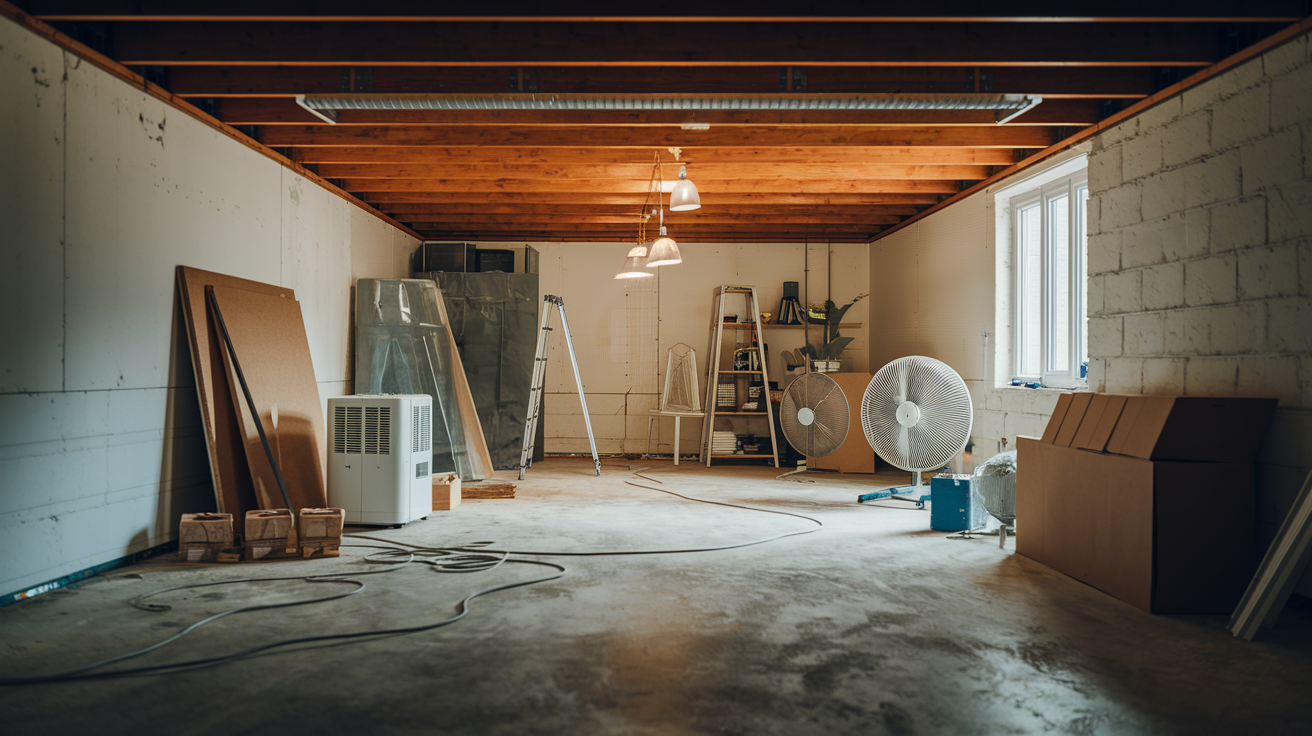
Before you can seal or patch anything, the floor has to be completely dry and clear of obstacles. Move furniture, boxes, and anything stored on the floor out of the work area. If the leak is near a wall, pull items away from that wall too. You need access and you don’t want belongings sitting in damp air while the repair cures.
Scrub the floor with a stiff brush to remove dirt, oils, old sealers, and loose concrete. Vacuum up all debris with a shop vacuum. If there’s grease or oil, use a concrete degreaser and rinse thoroughly. Any contamination left on the surface will prevent primers and sealants from bonding. Once the floor is clean, it has to dry. If the slab is damp from the leak itself or from cleaning, set up fans and a dehumidifier. Depending on humidity and airflow, drying can take anywhere from a few hours to a full day. You can test dryness by taping a piece of plastic sheeting to the floor. If moisture beads up under it after a few hours, keep drying.
Wear gloves and safety glasses during prep work, especially if you’re using acid based cleaners or concrete etching solutions. Ventilate the basement by opening windows or running exhaust fans. Fumes from sealers and epoxies can build up fast in an enclosed space. Re-inspect the floor after it dries. Sometimes additional cracks, damp zones, or efflorescence become visible once surface moisture evaporates. Mark those spots and add them to your repair list.
Choosing Materials to Fix a Leaking Basement Floor

The materials you need depend on whether you’re patching a crack, sealing the entire floor, or both. For small cracks and control joints, use a flexible polyurethane sealant. Polyurethane stays elastic as the concrete expands and contracts, so it won’t crack out after a few months. It comes in caulk tubes or larger cartridges for a caulk gun. If the crack is structural, wider than a quarter inch or if the concrete has shifted, you’ll need an epoxy injection kit or a polyurethane foam kit designed for crack repair.
Before you apply any topcoat or crack filler, use a primer compatible with your chosen waterproofing product. Primers improve adhesion and help sealers penetrate the concrete surface. Read the manufacturer’s instructions. Some sealers include primer in the first coat, others require a separate product.
For full floor waterproofing, you have two main options. A penetrating concrete sealer or a membrane coating. Penetrating sealers soak into the concrete and block moisture from within. Membrane coatings sit on top of the slab and form a rubber like barrier. Membranes are more common for basements with active moisture problems because they can bridge small cracks and handle higher moisture loads.
If you’re dealing with persistent seepage or you want extra protection, consider a waterproofing membrane made from heavy duty polyethylene or rubberized material. These roll out over the floor and sometimes extend partway up the walls. They’re especially useful if you plan to finish the basement later. Install the membrane first, then build your floor system on top.
You’ll also need a paint roller with an extension handle for applying sealers evenly across large areas. A caulk gun for polyurethane sealants and crack fillers. A wire brush and shop vacuum for crack prep. A mixing paddle and drill if you’re using two part epoxy. Plastic sheeting to protect walls and anything you can’t move. A dehumidifier to control humidity during and after application. Gloves, safety glasses, and a respirator if working with solvent based products.
Step by Step Basement Floor Sealing and Crack Repair
Cleaning and Priming the Slab
Start with a completely clean, dry surface. Sweep and vacuum the entire floor, then scrub any stains or residue with a concrete cleaner. If the manufacturer recommends acid etching, common with epoxy and some sealers, mix the etching solution according to the label, apply it evenly, scrub with a stiff brush, and rinse thoroughly. Let the floor dry completely before moving to the next step.
Once dry, apply primer. Pour a small amount onto the floor and spread it with a roller, working in overlapping passes to cover the entire surface. Primers typically dry within a few hours, but check the product instructions. The slab should feel slightly tacky or have a uniform sheen when the primer is ready for the next coat.
Repairing Cracks and Joints
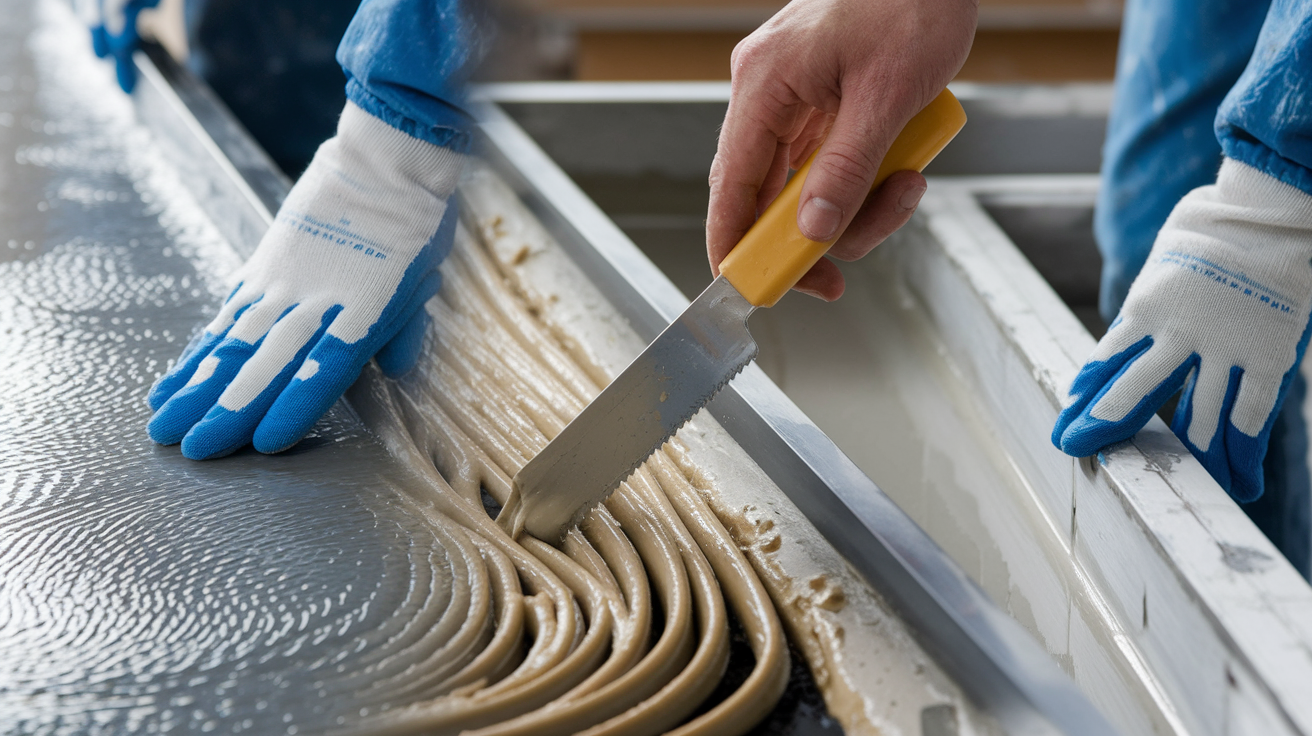
For hairline cracks, use a grinder or chisel to widen the crack to about half an inch in a V shape. This gives the filler something to grip. Vacuum out all dust and debris. If the crack is dry, you can fill it with a polyurethane or epoxy crack filler from a caulk tube. Inject the filler slowly, starting at one end and working to the other, overfilling slightly so it mounds above the surface. Smooth it with a putty knife and let it cure per the product’s instructions, usually 24 to 72 hours.
For wider cracks or cracks that show movement, use an epoxy injection system. Drill holes along the crack every 8 to 12 inches, insert injection ports, and seal the crack surface with epoxy paste. Once the paste cures, inject liquid epoxy through each port starting at the lowest point. The epoxy flows through the crack and bonds the concrete back together. This method is more involved but handles structural repairs that surface fillers can’t.
Applying Waterproofing Sealer
After cracks are sealed and the primer is dry, roll on your first coat of waterproofing sealer. Pour the sealer into a paint tray, load your roller, and apply it in even, overlapping strokes. Cover the entire floor, paying extra attention to corners, the perimeter, and any remaining small cracks or crevices. Don’t leave puddles, but don’t skimp either. Most sealers need a heavy, uniform coat to work.
Let the first coat dry according to the product label, typically 12 to 24 hours. Then apply a second coat the same way. Two coats create a more durable barrier and improve moisture resistance. Some high performance sealers call for a third coat in areas with known water problems. Allow the final coat to cure fully, usually 48 to 72 hours, before moving anything back onto the floor or exposing it to water.
When Interior Drains Are Needed
If you seal the floor and water still appears, or if seepage is widespread rather than isolated to a few cracks, sealing alone won’t solve the problem. You’re dealing with hydrostatic pressure or a high water table, and the water will find a way in no matter what you put on the surface. In these cases, you need an interior perimeter drain system. This involves cutting a trench around the inside edge of the basement floor, installing perforated pipe in gravel, and routing the water to a sump pump. The system intercepts groundwater before it can push up through the slab. Interior drains are a bigger project, often a mix of DIY and professional work, but they’re the only permanent solution when sealing fails.
Interior Drain Systems and Sump Pump Solutions for Persistent Floor Leaks

When sealing and crack repair don’t stop water from coming up through your basement floor, the problem is usually hydrostatic pressure. Groundwater sitting higher than your slab and forcing its way up. The fix is an interior perimeter drain, sometimes called a French drain or channel drain. You cut a trench around the inside edge of the floor where it meets the wall, install perforated pipe surrounded by gravel, and let the system collect groundwater before it surfaces. The pipe slopes toward a sump pit, and a sump pump sends the water outside.
Interior drains work because they relieve pressure. Instead of water pushing up through the weakest point in the slab, it flows into the drain pipe and gets pumped out in a controlled way. The trench is typically 4 to 6 inches wide and dug 3 to 6 inches below the floor elevation. You lay down landscape fabric, add a base layer of 3/4 inch crushed stone, set 4 inch perforated PVC or corrugated pipe on top, cover it with more stone, and then pour new concrete or leave it as a gravel channel if the basement won’t be finished.
Sump pump selection matters. A 1/3 to 1/2 horsepower submersible pump handles most residential basements. Pedestal pumps sit above the pit and are cheaper but noisier. Submersible pumps sit in the water and last longer. Add a battery backup system or a water powered backup if power outages are common in your area. Your drain system is useless if the pump doesn’t run. Discharge piping should run at least 10 feet away from the foundation and drain onto a slope or into a dry well, never back toward the house.
| Component | Typical Specs | Cost Range |
|---|---|---|
| Interior perforated drain pipe | 4″ diameter PVC or corrugated, 10–20 ft lengths | $1–$3 per linear foot |
| Crushed stone (3/4″) | ~0.5–1 cubic foot per linear foot of trench | $30–$50 per cubic yard |
| Sump pump (submersible) | 1/3–1/2 HP, 3,000–5,000 GPH capacity | $100–$700 |
| Battery backup system | 12V marine battery + controller | $200–$1,500 |
| Discharge piping and fittings | 1.5″ PVC, check valve, exterior termination | $50–$150 |
Exterior Waterproofing, Drainage, and Soil Grading Fixes

If water keeps coming through your basement floor despite interior repairs, the real problem is outside. Exterior waterproofing means excavating down to the footing, cleaning the foundation wall, applying a waterproof membrane or coating, and installing exterior drain tile at the footing level. The drain tile, usually 4 inch perforated pipe in gravel, collects groundwater and carries it away before it can build pressure against the foundation or seep under the slab. This is the most permanent fix, but it’s also the most invasive and expensive. Expect to pay between $5,000 and $20,000 depending on the size of your house, how deep the footing is, soil conditions, and site access.
Exterior work also gives you a chance to fix grading problems. Your yard should slope away from the foundation at least 6 inches over the first 10 feet. If the ground is flat or slopes toward the house, water pools next to the foundation and finds its way into the basement. Regrade with clean fill, tamp it down, and restore landscaping so surface runoff moves away. Downspouts are just as important. Extend them at least 5 to 10 feet from the house using rigid PVC extensions or flexible corrugated pipe buried in a shallow trench. If your downspouts dump water right next to the foundation, you’re feeding the problem.
Exterior membranes come in different forms. Rubberized asphalt, bentonite clay panels, and spray applied polymer coatings all work, but they have to be installed on a clean, dry foundation wall. Some contractors prefer a dimpled drainage board over the membrane. It creates an air gap and gives water a path to drain down to the footing tile instead of sitting against the wall. Backfill carefully with gravel near the wall and clean fill farther out. Avoid heavy clay soil right against the foundation because it holds water. Once backfilled, restore topsoil and slope everything away from the house.
Cost Breakdown for Fixing a Leaking Basement Floor
Basement floor leak repairs vary widely in cost depending on the severity and the fix you choose. A simple crack seal with polyurethane caulk and a couple coats of waterproofing sealer can cost under $200 if you do it yourself, while a full perimeter excavation with exterior waterproofing can run $15,000 or more. Most repairs fall somewhere in between. Understanding the cost drivers, materials, labor, equipment, and whether you’re addressing symptoms or the root cause, helps you plan the work and set a realistic budget.
Insurance sometimes covers water damage repairs, especially if the leak is sudden and accidental, like a plumbing failure. Chronic seepage from groundwater is usually excluded unless you have specific coverage for water backup or seepage. If you’re filing a claim, document everything. Take photos, keep receipts, get moisture readings if possible, and write a clear scope of what was damaged and what needs repair. Adjusters want proof that the damage happened and that the repair is necessary, not optional.
| Repair Type | DIY Cost | Professional Cost |
|---|---|---|
| Crack sealing (polyurethane or epoxy injection) | $50–$300 | $400–$1,500 |
| Waterproofing sealant (full floor, 2 coats) | $150–$500 | $800–$2,500 |
| Interior perimeter drain + sump pump | $800–$3,000 | $3,000–$8,000 |
| Exterior excavation and waterproofing | Not recommended DIY | $5,000–$20,000+ |
Preventative Measures to Keep Basement Floors Dry Long Term

Once you’ve stopped the leak and completed repairs, the next step is making sure it doesn’t come back. Prevention is cheaper and less disruptive than repeated fixes. Start with your gutters and downspouts. Clean them at least twice a year, more if you have trees nearby. Clogged gutters overflow and dump water right next to the foundation, which is exactly what you don’t want. Check that every downspout has an extension that carries water at least 10 feet away from the house, and make sure those extensions aren’t clogged or disconnected.
Control interior humidity with a dehumidifier rated for your basement’s square footage. Aim to keep relative humidity below 50 percent. High humidity doesn’t cause floor leaks, but it does promote mold, mildew, and condensation that can look like seepage and damage finishes. If your basement doesn’t have good airflow, add a fan or improve ventilation. Check basement windows for cracks or failed seals. Window leaks can run down the wall and pool on the floor, mimicking a slab leak.
Routine maintenance checklist:
Clean gutters and inspect downspout extensions every spring and fall. Test your sump pump monthly by pouring water into the pit and confirming it cycles on and drains. Inspect the basement perimeter for new cracks, damp spots, or efflorescence every few months. Check grading annually and add fill if soil has settled near the foundation. Replace sump pump batteries or backup systems every 3 to 5 years. Service or replace dehumidifier filters as recommended by the manufacturer.
When to Call a Basement Waterproofing Professional

Some leaks are straightforward DIY projects. Small cracks, surface dampness, or situations where a coat of sealer and better drainage solve the problem. Other leaks signal bigger issues that need professional assessment and repair. If you seal a crack and water reappears in the same spot, the crack is probably still moving or there’s a deeper structural problem. If you see multiple leaks along the same wall or across the whole floor, you’re dealing with widespread hydrostatic pressure or a failed drainage system, not a simple patch job.
Call a professional when you notice cracks wider than a quarter inch, especially if the edges are offset or the floor has heaved. Those are signs of foundation movement or soil pressure that sealing alone won’t fix. Persistent seepage, more than a gallon of water per day or continuous dampness even after repairs, means the water source is too strong for surface fixes. Professionals can install interior perimeter drains, sump systems, or exterior waterproofing and give you a warranty on the work, often 5 to 10 years or longer depending on the contractor and the system installed. If your insurance is involved or you’re selling the house soon, having a licensed contractor complete the work and provide documentation makes the process smoother.
Final Words
Water’s pooling on the basement floor. First stop the flow, extract standing water, and mark the leaks.
We covered quick fixes and how to find where water comes in, plus prepping the slab, picking the right materials, step-by-step crack and sealer work, when interior drains or a sump pump are needed, exterior fixes, costs, and simple upkeep.
Use this guide as your playbook for how to fix a leaking basement floor—stop more damage, document everything, and get the space dry and rebuilt. You’ll be back to normal.
FAQ
Q: How do I fix water coming through my basement floor?
A: Fixing water coming through your basement floor starts with locating entry points, stopping the source, extracting standing water, and plugging active leaks with hydraulic cement (fast-setting). Then dry, document, and plan permanent repairs like crack sealing or drains.
Q: Will homeowners insurance cover a leaky basement?
A: Homeowners insurance may cover a leaky basement if the damage comes from a sudden, accidental event like a burst pipe. Gradual seepage or groundwater runoff is usually excluded. Document photos, moisture readings, and call your insurer promptly.
Q: Can water seep through my concrete basement floor when it rains a lot?
A: Water can seep through a concrete basement floor during heavy rain when hydrostatic pressure or poor drainage pushes groundwater up through cracks and joints. Fix grading, downspouts, or install interior drains to stop recurring seepage.
Q: What is the cheapest way to seal a concrete basement floor?
A: The cheapest way to seal a concrete basement floor is a roll-on cementitious sealer or concrete masonry paint applied after thorough cleaning and drying. It’s a low-cost, temporary fix; persistent leaks often need injections or drains.