

Think you can just spray and paint over black mold on drywall? Think again.
When mold gets into the paper layer of drywall, surface cleaning usually won’t stop it.
Left alone it spreads, damages framing, and can irritate lungs.
This post walks you through safe, step‑by‑step actions for small jobs: stopping spores from spreading, the protective gear to use, how to cut and bag contaminated drywall, and when to call a professional.
Acting fast limits damage and makes repairs easier.
Immediate Steps for Safe Black Mold Drywall Removal
Black mold on drywall (Stachybotrys chartarum) needs fast action. You can’t clean or save porous materials like drywall and paper facing once mold gets in. Removal is the only fix that works. Water damaged drywall should be dried or torn out within 24 to 48 hours after exposure to stop mold before it starts. If you’re already seeing dark, slimy patches, the damage is active and you need to deal with it now.
Before you cut anything, measure the contaminated area. Small patches under 10 square feet (think a 3 foot by 3 foot section) can be handled by a prepared homeowner. Anything larger, hidden mold inside wall cavities, ceiling contamination, or mold in your HVAC system means you need a professional remediation contractor.
Here’s what to do for a small DIY job:
- Turn off your HVAC system. Shut down heating, cooling, and ventilation so spores don’t spread through ducts.
- Seal off the room. Use 6 mil plastic sheeting and duct tape to cover doorways, air vents, and any openings. You’re creating a containment zone.
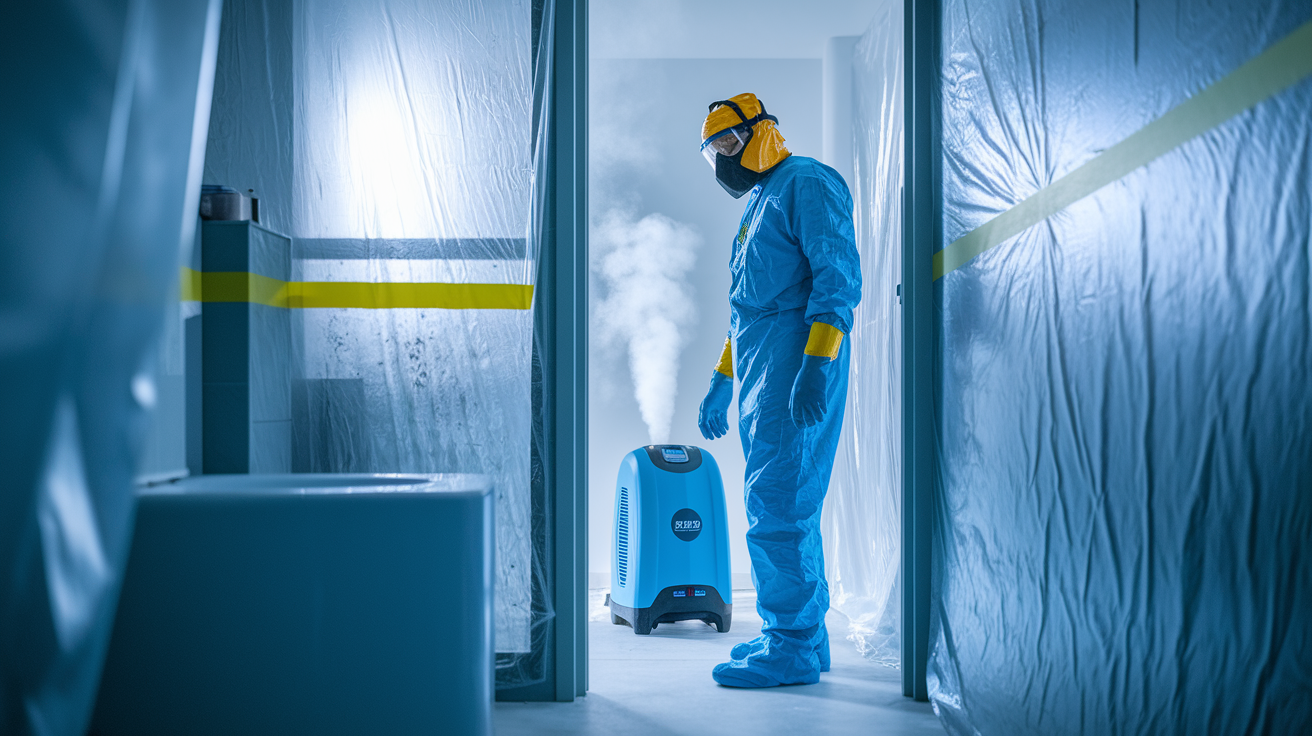
- Set up negative air pressure. Run a HEPA air scrubber or exhaust fan to pull air out of the work area and vent it outdoors. This keeps spores from drifting into clean spaces.
- Put on full PPE. Wear an N95 respirator (or P100 for heavier contamination), sealed goggles, nitrile gloves, and a disposable Tyvek suit with hood and shoe covers.
- Cut and remove moldy drywall. Score and cut at least 12 inches beyond visible mold. For heavy or uncertain growth, extend the cut to 18 inches. Remove all affected insulation too.
- Double bag debris. Seal removed materials in heavy duty 6 mil contractor bags. HEPA vacuum exposed framing, then clean with detergent or 3% hydrogen peroxide. Dry the structure to below 15–20% moisture content before closing it back up.
Later sections will expand on PPE options, containment techniques, tools, pricing, and when to stop and call a pro.
Identifying Black Mold on Drywall and Assessing Severity

Black mold typically shows up as dark green or black patches with a slimy or wet texture. It grows in areas with chronic moisture behind leaking pipes, around roof intrusions, in damp basements, or after flooding. The scientific name is Stachybotrys chartarum, and it loves cellulose materials like drywall paper and wood when relative humidity stays above 60% for extended periods.
Use these signs to confirm black mold and figure out how bad it is:
- Color and texture: Dark greenish black, often glossy or wet looking. Dry black mold can appear powdery.
- Smell: Strong musty or earthy odor, even if you don’t see visible growth yet.
- Water history: Recent or ongoing leaks, flooding, roof damage, or condensation problems in the area.
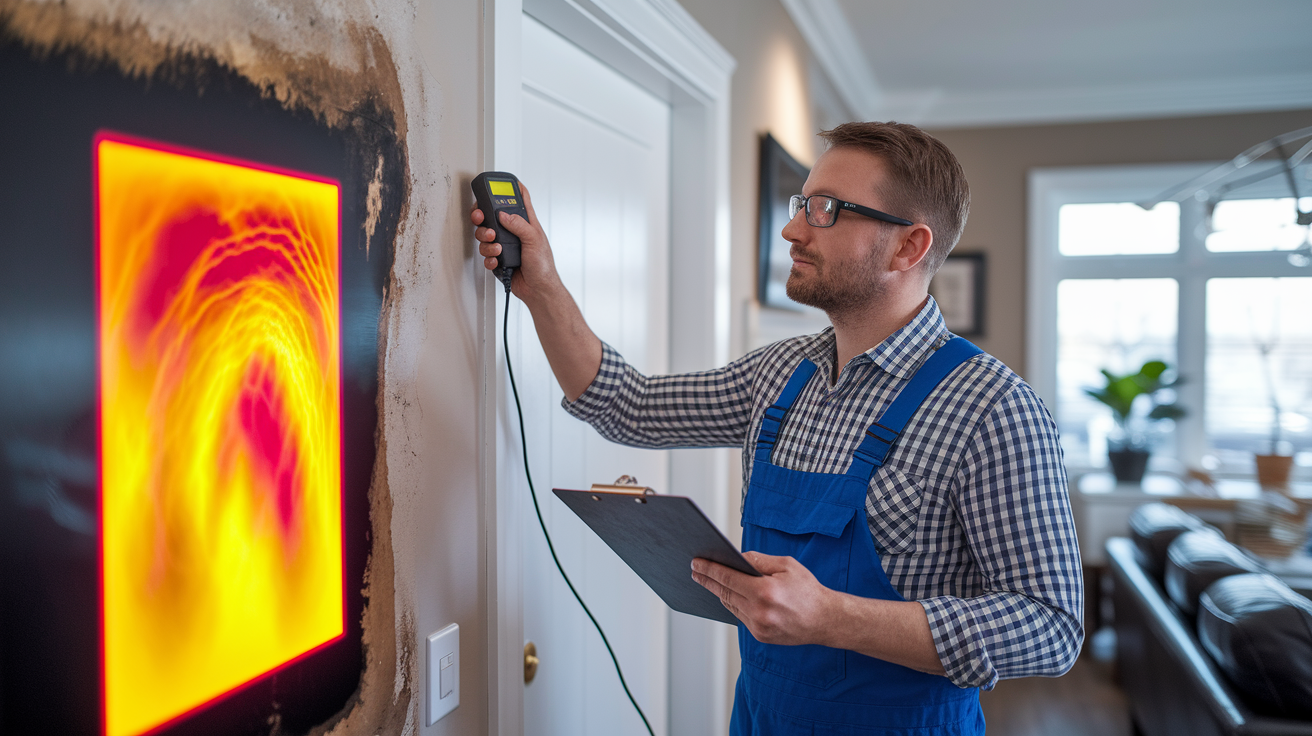
- Moisture readings: Use a moisture meter on studs and drywall. Readings above 20% for wood framing indicate active moisture that will support mold growth.
If the contaminated area measures more than 10 square feet, if you find mold inside wall cavities when you open a small inspection cut, or if people in the home are experiencing symptoms like coughing, nasal congestion, wheezing, eye irritation, or skin rash, don’t attempt DIY removal. Vulnerable groups (infants, elderly individuals, pregnant people, and anyone with asthma, allergies, or weakened immune systems) face higher risk from exposure and should leave the home during remediation.
Safety Gear and PPE for High Risk Mold Removal Conditions

Personal protective equipment isn’t optional for black mold removal. Cutting into moldy drywall releases a cloud of spores, mycotoxins, and dust. You need a barrier between your lungs, eyes, skin, and that contamination.
For small, contained jobs under 10 square feet with no structural damage, an N95 respirator provides baseline protection. These disposable masks cost around $10 to $30 each and filter at least 95% of airborne particles. Replace the mask if it becomes damp or hard to breathe through.
For moderate to heavy contamination (larger areas, visible mold inside walls, or wet insulation), upgrade to an elastomeric half mask or full face respirator with P100 cartridges. These reusable respirators cost $50 to $150, with replacement P100 filters running $20 to $40 per pair. P100 filters capture 99.97% of particles, including mold spores and fine dust. Full face models also protect your eyes.
Additional PPE you need for every job:
- Sealed goggles (non vented): $10–$25. Vented goggles allow spores in. Use tight fitting, sealed eye protection.
- Nitrile gloves: 4–7 mil thickness, disposable. A box of 50 costs $10–$20. For heavy contamination or sharp edges, double glove or use thicker chemical resistant gloves.
- Disposable coverall suit: Tyvek or similar material with hood and elastic cuffs, $15–$30 each. Tape the cuffs to your gloves and boots to seal gaps.
- Shoe covers or dedicated work boots: Disposable covers cost $5–$10 per pack. If you use work boots, clean them thoroughly before leaving the containment area.
- Hair covers (optional for severe jobs): Prevent spores from settling in your hair.
Wear all PPE from the moment you enter the containment zone until you finish bagging the last piece of debris. Remove PPE carefully in reverse order (gloves last) and dispose of it in the same contractor bags you use for moldy drywall.
Advanced Containment Setup for Mold Contaminated Drywall

Containment stops mold spores from spreading to clean areas of your home. Even a small drywall removal job requires full isolation of the work zone. Cutting and handling moldy materials releases spores into the air, and without containment those spores settle on furniture, carpets, and HVAC ducts throughout the house.
Start by turning off your central heating and cooling system. Seal all HVAC vents in the work area with 6 mil plastic sheeting and duct tape. If the system runs during demolition, it’ll pull contaminated air into the ductwork and distribute spores to every room.
Use 6 mil polyethylene sheeting to seal doorways, windows, and any openings. A single roll (typically 10 feet by 25 feet) costs $20 to $60. Overlap sheets by at least 12 inches and secure all edges with heavy duty duct tape or filament tape, which runs $6 to $15 per roll. If the doorway must remain passable, create a zippered entry or a double flap system using two overlapping sheets of plastic.
Negative air pressure is the key to stopping cross contamination. Set up a HEPA air scrubber or exhaust fan inside the containment zone and vent it directly outdoors through a window or exterior wall. The scrubber pulls air out of the work area faster than it leaks back in, creating a pressure difference that keeps spores from drifting into adjacent rooms. HEPA air scrubbers rent for $100 to $300 per week. Make sure the unit exhausts outside. Recirculating air defeats the purpose.
Here’s the containment sequence:
- Seal all HVAC vents and registers with plastic and tape.
- Cover the floor with plastic sheeting to catch debris and protect flooring.
- Hang 6 mil plastic over doorways, windows, and openings. Tape all seams.
- Position the HEPA air scrubber near a window or exterior opening and run ductwork outside.
- Turn on the scrubber before you start cutting drywall and leave it running until final cleanup is complete.
If you open a door or plastic barrier and feel air being pulled into the room, your negative pressure is working.
Tools and Materials Needed for Removing Moldy Drywall

You need cutting tools, cleaning equipment, moisture control devices, and disposal supplies. Buy or rent HEPA rated vacuums and dehumidifiers. Standard shop vacs and box fans will spread spores instead of capturing them.
Cutting and demolition tools: Utility knife with extra blades, drywall saw or jab saw, pry bar, hammer. For larger jobs a reciprocating saw speeds up cutting but increases dust. Total cost for hand tools: $20 to $100.
HEPA vacuum: A true HEPA vacuum filters 99.97% of particles at 0.3 microns, trapping mold spores and fine dust. Consumer models cost $200 to $800. Commercial units rent for $40 to $150 per day. Confirm the vacuum meets HEPA standards. Many shop vacs labeled “HEPA style” don’t meet the full specification.
Dehumidifier: After removing wet drywall, you’ve got to dry the framing before closing walls. Dehumidifiers cost $150 to $400 to purchase, or $40 to $80 per week to rent. Plan to run the unit 24 to 72 hours, depending on moisture levels and airflow.
Moisture meter: Pin type or pinless meters measure moisture content in wood and drywall. Readings should drop below 15–20% for studs before you install new drywall. Meters cost $30 to $150.
Disposal and cleaning supplies: Heavy duty 6 mil contractor bags (30–55 gallon), $10 to $20 per box. Buckets, scrub brushes, spray bottles, detergent, and 3% hydrogen peroxide for cleaning non porous surfaces. Don’t use bleach on porous materials like wood framing. It doesn’t penetrate and can leave moisture that encourages regrowth.
Containment materials: 6 mil plastic sheeting, duct tape, HEPA air scrubber (rental $100–$300/week).
Rent equipment locally or through tool rental chains to save on upfront costs for single use jobs.
Step by Step Black Mold Drywall Removal Procedure

This procedure applies to small, contained jobs under 10 square feet with no HVAC or structural complications. If you encounter extensive hidden mold, stop and call a professional.
-
Document the area. Photograph visible mold, water stains, and the overall room condition. Measure the square footage of contamination. Save this documentation for insurance or contractor estimates.
-
Turn off HVAC and power. Shut down heating, cooling, and ventilation. Turn off electrical circuits to the work area at the breaker panel to avoid cutting into live wires.
-
Set up containment. Seal doorways, windows, and vents with 6 mil plastic sheeting and tape. Position a HEPA air scrubber to exhaust outdoors and create negative air pressure.
-
Put on full PPE. Respirator, sealed goggles, Tyvek suit, nitrile gloves, shoe covers. Tape glove cuffs to suit sleeves.
-
Score and cut drywall. Use a utility knife to score cut lines at least 12 inches beyond visible mold. For heavy contamination or uncertain boundaries, extend the cut to 18 inches. Lightly mist the moldy surface with water from a spray bottle to reduce airborne spores when cutting. Cut slowly and carefully. Drywall dust mixed with mold spores creates a respiratory hazard even with a respirator.
-
Remove contaminated drywall and insulation. Pry off moldy drywall sections. Remove all wet, discolored, or crumbling insulation. Don’t try to salvage porous materials. If you find additional mold behind the first layer, extend your cuts and keep removing material until you reach clean, dry framing.
-
Double bag all debris. Place moldy drywall, insulation, and trim into heavy duty 6 mil contractor bags. Seal each bag, then place it inside a second bag and seal again. This prevents tears and leaks during transport.
-
HEPA vacuum all exposed framing. Vacuum studs, sill plates, and any remaining structure. Work slowly and thoroughly. Spores cling to wood grain and crevices.
-
Clean non porous surfaces. Scrub framing with a stiff brush, detergent, and water, or spray with 3% hydrogen peroxide and let sit 10 to 15 minutes before wiping. Don’t use bleach on wood. It evaporates quickly, leaves moisture, and doesn’t penetrate porous surfaces. For concrete or masonry, use TSP (trisodium phosphate) or a heavy duty cleaner.
-
Dry the structure. Run a dehumidifier and air movers (fans) for 24 to 72 hours. Use a moisture meter to confirm wood framing reads below 15–20% moisture content and relative humidity in the cavity stays under 50%. Don’t close the wall until drying is complete and verified. Trapped moisture will bring the mold back.
After drying, reinspect for any remaining discoloration, odor, or soft spots. If the area passes visual and moisture checks, you can proceed to repairs.
Disposal Rules for Mold Contaminated Drywall

Moldy drywall is construction debris, not household trash. Most municipalities allow disposal in regular construction and demolition landfills, but rules vary by location. Call your local waste management authority or landfill before hauling bags to confirm acceptance and labeling requirements.
Double bag all contaminated materials in 6 mil contractor bags. Tie and tape each bag shut to prevent tearing during transport. Don’t overfill bags. A half full bag is easier to carry and less likely to split. Transport bags directly from the containment area to your vehicle without setting them down in clean spaces. If possible, keep bagged debris outside in a sealed container until disposal.
Don’t put moldy drywall in compost bins, and don’t burn it. If your home was built or renovated before 1980 (especially before 1978), suspect asbestos in drywall joint compound, textured ceilings, and plaster. Cutting or sanding asbestos containing materials requires licensed abatement and special disposal. Test suspect materials before you start cutting. Asbestos testing costs $200 to $600 and can be completed in a few days by a certified lab.
When to Hire Professional Mold Remediation Services
Professional remediation becomes necessary when contamination exceeds your ability to safely contain, remove, and verify cleanup. The 10 square foot threshold is a common guideline, but other factors matter just as much.
Hire a professional if you encounter any of these conditions:
- Contaminated area larger than 10 square feet. Larger jobs require industrial containment, commercial grade HEPA filtration, and experience managing airflow and disposal at scale.
- Hidden mold inside wall cavities, ceilings, or under floors. If you open one section and find mold spreading along studs or sheathing beyond what you can see, the infestation is bigger than the visible patch. Professionals use thermal imaging and moisture mapping to locate hidden growth.
- HVAC or ductwork contamination. Mold inside ducts or air handlers spreads spores throughout the home every time the system runs. Duct cleaning and HVAC remediation require specialized tools and access.
- Recurrent mold despite prior removal. If mold keeps coming back in the same location, the moisture source hasn’t been fixed or the initial cleanup was incomplete. A professional can identify hidden leaks and perform clearance testing to confirm elimination.
- Occupants with serious health conditions. If anyone in the home has asthma, immune disorders, chronic respiratory conditions, or is pregnant, don’t attempt DIY mold removal. The risk of exposure outweighs the cost of hiring a contractor.
Professional costs vary by job size and complexity. Small jobs under 50 square feet typically run $500 to $3,000. Moderate remediation covering 50 to 500 square feet costs $1,500 to $10,000. Large or complex projects (whole rooms, structural repairs, HVAC contamination) can reach $5,000 to $30,000 or more. Professionals carry liability insurance, use industrial equipment, and provide documentation that satisfies insurance adjusters and health inspectors.
Costs of Black Mold Drywall Removal and Restoration

Black mold remediation costs break down into containment, removal, disposal, cleaning, drying, testing, and rebuilding. DIY jobs save labor but require equipment rentals and material purchases. Professional jobs include all labor, equipment, and insurance documentation.
| Job Size | Typical Cost Range |
|---|---|
| Small (under 50 sq ft, DIY or pro) | $500–$3,000 |
| Moderate (50–500 sq ft, professional) | $1,500–$10,000 |
| Large or complex (whole rooms, HVAC, structural) | $5,000–$30,000+ |
Per square foot estimates commonly range from $10 to $30 or more, depending on access, contamination severity, and local labor rates. Hidden mold, asbestos abatement, and post remediation repairs push costs higher.
DIY equipment and material costs include HEPA air scrubber rental at $100 to $300 per week, dehumidifier rental at $40 to $80 per week, 6 mil plastic sheeting and tape for $30 to $80, contractor bags for $10 to $20, PPE (respirator, Tyvek suit, gloves, goggles) for $50 to $100, and a moisture meter for $30 to $150. Add drywall, joint compound, primer, and paint for finishing, which varies by square footage.
Professional remediation includes containment setup, negative air pressure, removal, HEPA cleaning, disposal, moisture control, and documentation. Many contractors offer post remediation clearance testing for an additional $300 to $800 to verify the space is safe for reoccupation.
Insurance coverage for mold is inconsistent. Most homeowner policies exclude mold damage unless it results from a covered peril like a sudden pipe burst. Gradual leaks, long term humidity, and maintenance issues are typically not covered. Document everything (photos, moisture readings, contractor estimates, receipts) and submit claims promptly.
Preventing Mold from Returning After Drywall Removal

Removing moldy drywall solves the immediate problem, but mold will return if moisture conditions persist. Prevention is about controlling water, airflow, and humidity at the source.
Maintain indoor relative humidity between 30% and 50%. Use a hygrometer to monitor levels in bathrooms, basements, and other high risk areas. Humidity above 60% for extended periods creates ideal conditions for mold growth. Run dehumidifiers in damp spaces and empty collection tanks daily.
Fix leaks immediately. Plumbing leaks, roof damage, gutter overflow, and foundation cracks all introduce water into wall cavities and insulation. Repair the source within 24 to 48 hours and dry affected materials completely. Small leaks ignored for weeks cause more damage than sudden floods because mold has time to colonize porous materials.
Here are six prevention practices to follow after remediation:
- Improve ventilation. Install exhaust fans in bathrooms and kitchens that vent to the outside, not into attics or crawl spaces. Run fans during showers and cooking and leave them on for 15 minutes after.
- Use mold resistant materials. Install mold resistant drywall (paperless or fiberglass faced) or cement board in high moisture areas like bathrooms, laundry rooms, and basements.
- Keep gutters and downspouts clear. Water should drain at least 6 feet away from the foundation. Clean gutters twice a year and check that downspout extensions are in place.
- Slope grade away from the foundation. Soil should slope away from the house at a minimum 6 inch drop over 10 feet to prevent water pooling against basement walls.
- Monitor with a moisture meter. After repairs, check framing moisture levels periodically, especially after heavy rain or plumbing work. Catch problems early before mold appears.
- Dry materials within 24–48 hours. If a pipe leaks, a roof drips, or flooding occurs, extract water and start drying immediately. The faster you dry, the less chance mold has to establish.
Inspect basements, attics, and crawl spaces twice a year for signs of water intrusion, condensation, or musty odors. Early detection stops small problems before they require full remediation.
Final Words
Stop the leak, put on the right PPE, and set containment now — fast action limits spread and health risks.
This post walked you through spotting black, slimy patches, reading moisture meters, using HEPA air scrubbing and negative pressure, cutting 12–18 inches beyond visible growth, safe disposal, and when to call a pro.
For small jobs you’re likely able to follow these steps. For larger or HVAC-linked problems, get help. With careful drying and clear documentation, black mold drywall removal finishes with a healthy, fixed home.
FAQ
Q: Can black mold be removed from drywall?
A: The black mold can sometimes be removed, but drywall soaked or heavily contaminated usually must be cut out. Remove at least 12–18 inches beyond visible growth. Small areas (<10 sq ft) may be DIY; larger jobs need pros.
Q: Is drywall mold toxic?
A: Drywall mold can be toxic depending on the species; Stachybotrys (black mold) may produce harmful spores and mycotoxins. People with asthma, infants, or the elderly can react. Get removal and medical advice if symptoms appear.
Q: What kills mold and mildew on sheetrock?
A: Mold and mildew on sheetrock can be removed with detergent and water or 3% hydrogen peroxide, plus HEPA vacuuming. Porous drywall often can’t be saved—do not use bleach on soaked drywall; cut and replace if deeply contaminated.
Q: Is mold behind drywall a problem?
A: Mold behind drywall is a problem because it hides, spreads, and damages framing while creating health risks. You need moisture readings and likely removal; call pros if over 10 sq ft, HVAC involved, or occupants are vulnerable.