

Ever try wiping soot off a wall, only to watch the black streak spread wider instead of disappear? That’s because soot’s got oily, acidic particles that embed into paint when you scrub the wrong way. This guide walks you through the exact order of steps, from dry removal to gentle wet cleaning, that actually lifts soot without forcing it deeper or damaging your finish. You’ll learn which tools prevent spreading, how to test your paint’s tolerance, and when mild soap works versus when you need stronger solutions.
Essential Safety Precautions Before Cleaning Soot
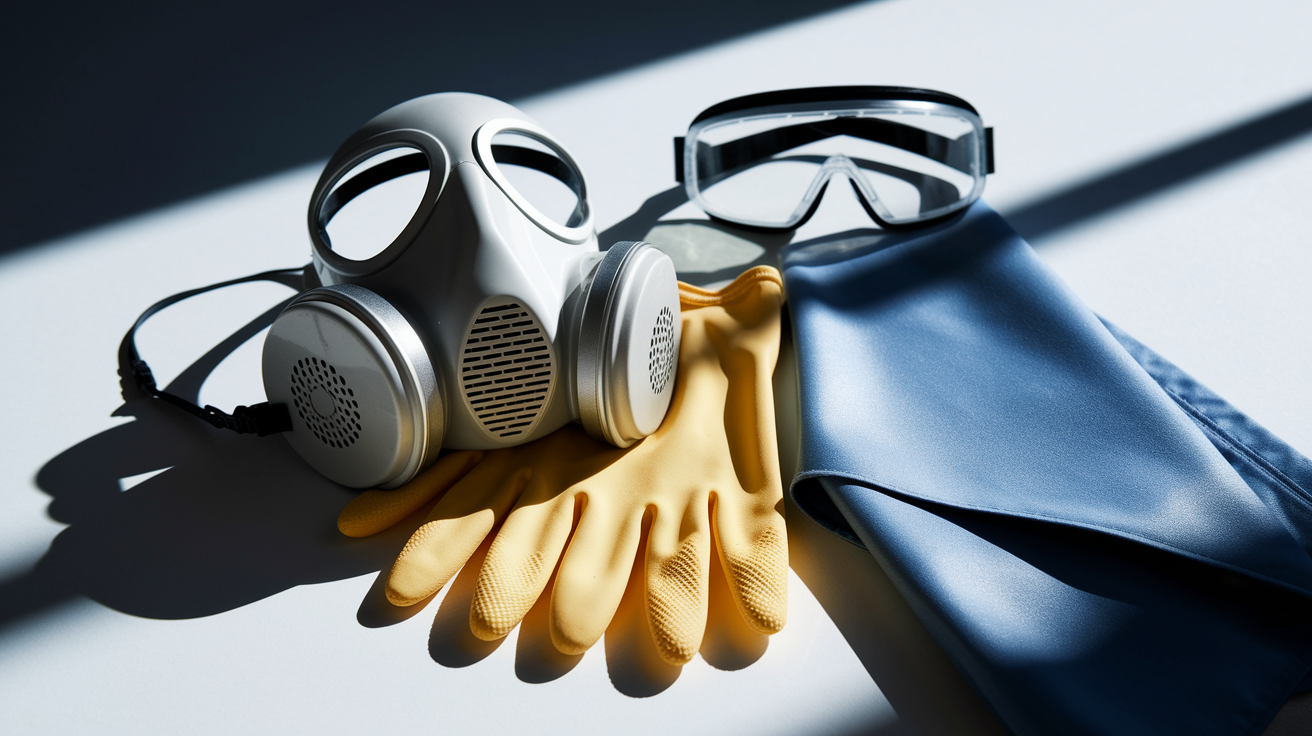
Soot’s got acidic compounds and fine particles that’ll irritate your lungs, eyes, and skin without proper protection. Setting up safety measures first means you won’t be halfway through the job, coughing and scrambling for a mask you should’ve put on twenty minutes ago.
Here’s what you need to do:
Open windows and doors for ventilation to push contaminated air out while fresh air comes in. Wear protective gloves so acidic soot particles don’t contact your skin. Use a respirator mask, not just a dust mask, because fine particles settle deep in your lungs where you don’t want them. Cover furniture and undamaged surfaces with drop cloths or old newspaper to contain the mess. Keep children and pets away from the work area until cleaning’s complete and everything’s dry.
Let the space ventilate for at least 30 minutes before you begin. Keep airflow going throughout the entire process. If you start feeling lightheaded, dizzy, or your throat’s irritated, step outside immediately for fresh air. Don’t push through discomfort. That’s your body telling you the air quality isn’t safe.
Required Tools and Materials for Soot Removal
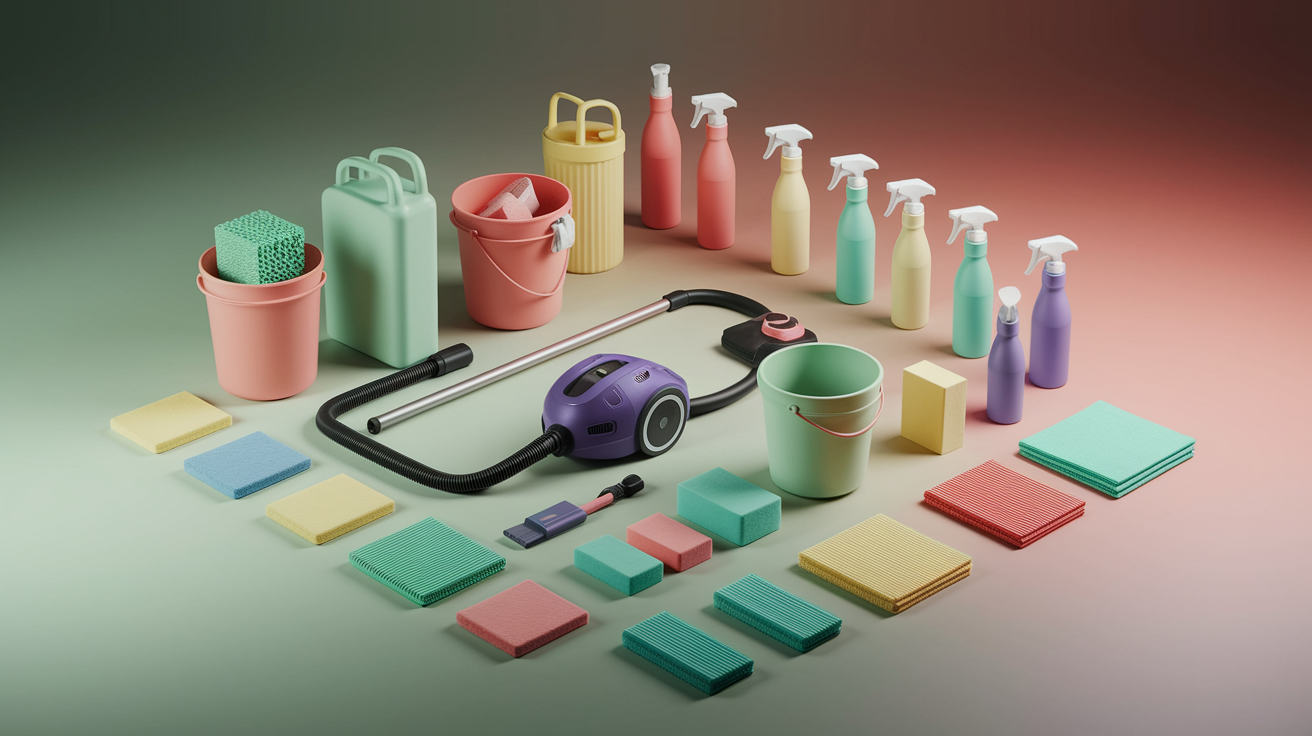
Having everything within reach before you start prevents those frustrating mid-project store runs when you’re already wearing dirty gloves. You’ll need specialty items mixed with common household supplies. Some tools are absolute must-haves. Others just make the job easier or faster.
| Tool/Material | Purpose | Essential or Optional |
|---|---|---|
| Dry cleaning sponge (chemical sponge) | Lifts soot without spreading it | Essential |
| Vacuum with upholstery attachment | Removes loose soot particles first | Essential |
| Bucket | Holds cleaning solution and rinse water | Essential |
| Dish soap or degreaser | Breaks down oily soot residue | Essential |
| Clean rags or microfiber cloths | Applies solution and dries walls | Essential |
| Protective gloves | Protects hands from soot and cleaners | Essential |
| Respirator mask | Prevents inhalation of particles | Essential |
| Drop cloths | Protects floors and furniture | Optional but helpful |
Chemical sponges are usually available at hardware stores, janitorial supply shops, or online. They look like dense foam blocks and cost around $5 to $15 each. Working on a tight budget? Multiple clean rags work for most steps, but the chemical sponge really isn’t something you should skip. It’s designed specifically to lift soot without water, which prevents spreading stains and makes everything that follows easier.
Testing Cleaning Products on Painted Wall Surfaces
Different paint finishes respond differently to cleaning products. The last thing you want is removing the soot but damaging your paint in the process. Matte and flat finishes are more delicate and absorb moisture faster than glossy or semi-gloss paints. Oil-based paints generally handle stronger cleaners better than latex.
Find a spot that’s normally hidden. Behind furniture or inside a closet works well. Apply a small amount of your cleaning solution to that area and gently wipe with the same technique you plan to use on visible walls. Let it sit for about 10 minutes without touching it.
Check the test spot for discoloration, shine changes, or texture differences. If the paint looks darker, lighter, or the finish appears duller or shinier than surrounding area, that cleaner’s too strong. You might also notice the paint texture feeling rougher or the surface getting slightly tacky. Wait at least 30 minutes for the spot to fully dry before making your final judgment. If everything still looks good after it’s completely dry, you’re safe to move forward with the full cleaning.
Complete Soot Removal Process for Painted Walls

Soot’s acidic nature makes it tricky because scrubbing actually forces those particles deeper into the paint’s pores, creating permanent stains you’ll never get out. The gentle-to-stronger approach protects your paint and gives you the best chance of complete removal. Following these steps in exact order matters because each one builds on the previous step’s results.
Here’s the complete process:
-
Vacuum loose soot particles using your vacuum’s upholstery brush attachment with very light brushing motions across the wall surface. Don’t press hard. Just let the bristles barely touch the wall while the suction pulls particles away. Work from top to bottom so falling soot doesn’t land on areas you’ve already cleaned.
-
Use the dry cleaning sponge with straight wiping motions across the wall. Don’t scrub in circles. The sponge works by absorbing soot on contact, so you’re literally wiping the particles onto the sponge surface. When one side gets dark and stops picking up soot, rotate to a clean side. Once all sides are contaminated, use a knife to slice off the dirty outer layer and keep using the fresh sponge underneath. When it gets too small to hold comfortably (about the size of a deck of cards), toss it and grab a new one if needed.
-
Prepare your cleaning solution by mixing six tablespoons of dish soap or degreaser into one gallon of hot water in your bucket. Stir it gently so you don’t create a bunch of suds that make rinsing harder later.
-
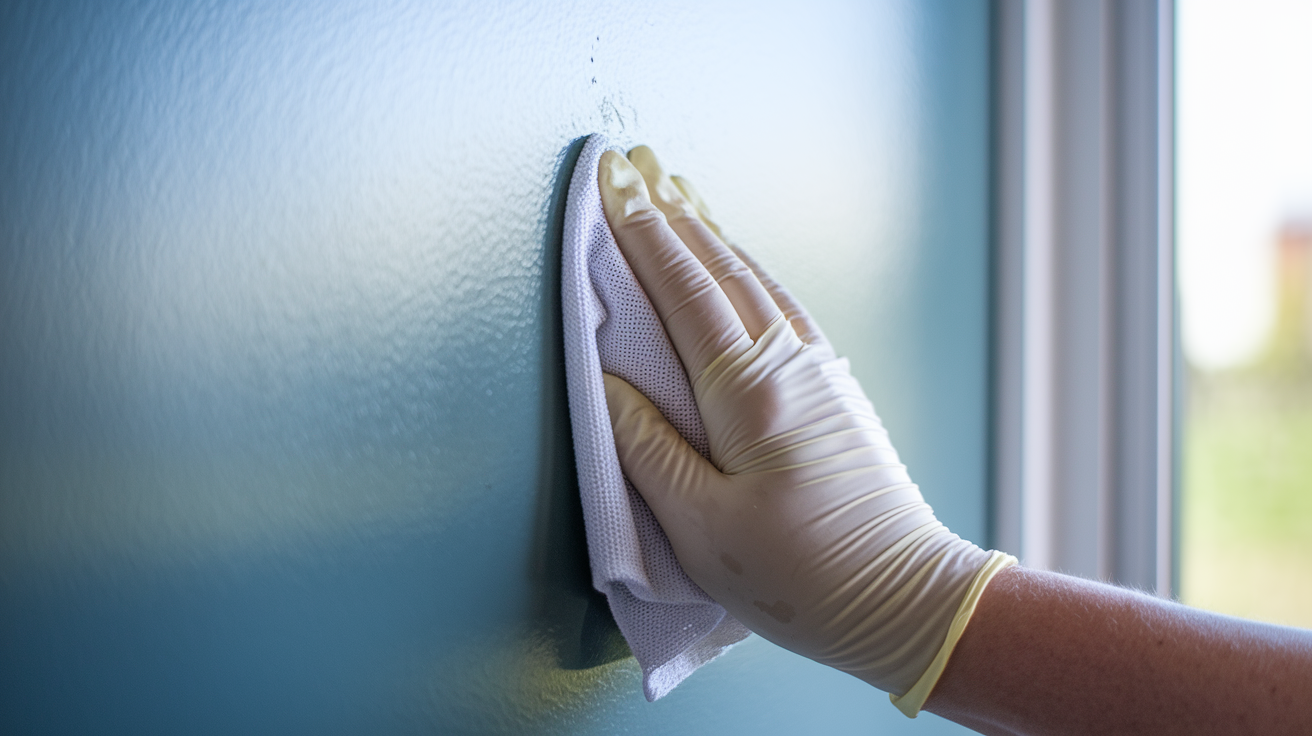
Apply the solution by dipping a clean rag into the bucket, wringing it out until it’s damp but not dripping, and wiping the wall from top to bottom using overlapping strokes. Use that same straight wiping motion, not circular scrubbing. Keep light, even pressure. Work in sections about three feet wide so the solution doesn’t dry on the wall before you rinse it.
-
Rinse with clean water using a second bucket filled with fresh water and new rags. Dampen the rag, wipe away the cleaning solution, and wring it out in the bucket when it gets dirty. Change your rinse water when it starts looking gray or murky.
-
Dry thoroughly using clean, dry cloths or set up a fan pointing at the wall to speed up the drying process. Getting the wall completely dry prevents water damage and stops any remaining soot from spreading.
Why Wiping Beats Scrubbing for Soot Removal:
Scrubbing creates friction that forces tiny soot particles into the microscopic texture of your paint surface. Once they’re embedded in those tiny valleys and pores, they’re essentially permanent. The particles actually bond with the paint at that point.
The correct wiping motion uses straight, overlapping strokes with just enough pressure to maintain contact with the wall. Think of it like you’re gently pushing soot along the surface and picking it up, not grinding it in. If you notice the paint texture starting to change, the finish getting rougher, or the stains spreading outward instead of lifting, stop immediately. That means you’re using too much pressure or the wrong motion.
If stains do spread, grab your dry cleaning sponge again and go back over that area before any liquid cleaners touch it. Sometimes you need multiple passes with the dry sponge before moving to wet cleaning, especially with heavy soot deposits.
You’ll know each step is complete when you stop seeing soot transfer to your tools. After vacuuming, the brush should come away clean. After dry sponging, the sponge sides should stay their original color. After wet cleaning, your rags should rinse clear. That visual feedback tells you when you’re ready to move forward, and when you need to keep working the current step.
Cleaning Solutions That Work on Soot-Stained Walls

Starting with the mildest effective cleaner protects your paint and gives you room to increase strength if needed. The dish soap solution we covered (six tablespoons per gallon of hot water) handles most light to moderate soot and should always be your first attempt. Homemade solutions work great for smaller jobs and when you want to avoid harsh chemicals, while commercial products earn their cost when you’re dealing with greasy, stubborn deposits.
Here are your alternatives when basic dish soap isn’t cutting it:
White vinegar and warm water (1:1 ratio) works for light soot from candles or minimal fireplace residue. The mild acidity helps break down soot without harsh chemicals. Mix equal parts in a spray bottle or bucket. Baking soda paste (3 parts baking soda, 1 part water) creates a gentle abrasive for concentrated spot treatment on stubborn marks. Apply, let sit for 2 to 3 minutes, then wipe away with damp cloth. TSP solution (follow manufacturer’s instructions exactly) tackles heavy buildup from fireplaces or extensive smoke exposure. This is strong stuff, wear gloves and eye protection. Usually mixed at about 1/4 to 1/2 cup per gallon of water. Commercial degreaser (as directed on bottle) specifically targets greasy soot from cooking fires or oil-burning sources. The formulation cuts through oily residues that water-based cleaners leave behind. Ammonia solution (1/4 cup per gallon water) removes stubborn stains but requires excellent ventilation and can’t be mixed with bleach or other cleaners. Open all windows and use fans to pull fumes out. This is your last-resort option before repainting.
Light soot from occasional candle use or minimal fireplace smoke typically responds to vinegar or the standard dish soap solution. Heavy deposits from a house fire, years of fireplace use without cleaning, or smoking indoors usually need TSP or commercial degreasers. For households with kids, pets, or chemical sensitivities, stick with vinegar and baking soda combinations. They’re gentler and safer even if they require more work and multiple applications.
Tackling Stubborn Soot and Different Smoke Residue Types

The source of your soot determines its texture, how it bonds to the wall, and what cleaning approach works best. Fireplace soot behaves completely differently than candle residue. Both are different from the tar-heavy deposits left by house fires or heavy tobacco smoke. Identifying what you’re dealing with helps you choose the right products and set realistic expectations.
Fireplace Soot and Wood Smoke Residue
Wood-burning fireplaces create a dry, powdery soot that’s usually black or dark gray and sits on the surface rather than bonding tightly to paint. This type responds well to the dry cleaning sponge technique. Start with thorough vacuuming, then multiple passes with the chemical sponge before you introduce any liquid. Most fireplace soot comes off relatively easily if you catch it before it builds up for years. When deposits get heavy (thick enough that you can see texture when you run your hand near the wall), you might be looking at buildup that’s soaked into the paint over time. At that point, even aggressive cleaning might leave shadows, and you’re better off planning to repaint after cleaning what you can.
Candle Soot and Greasy Deposits
Candle soot contains paraffin or other waxes that create a slightly sticky, greasy film rather than dry powder. You’ll notice it’s harder to wipe away and leaves a smear when you touch it. This type absolutely requires degreasing solutions to break down the waxy residue. Skip straight to dish soap or degreaser rather than wasting time with vinegar. One trick: let your cleaning solution dwell on the wall for 2 to 3 minutes before wiping. That gives the degreaser time to break down the waxy bonds. The soot often looks worse when you first apply water because the residue spreads before the cleaner starts working. That’s normal, just keep wiping.
Heavy Smoke Damage and Tar Buildup
House fires, even small ones, or years of indoor smoking create tar-based residues that are sticky, brown or yellow-tinted, and smell strongly even after cleaning. If your soot feels tacky to the touch or leaves brown-yellow stains on rags instead of pure black, you’re dealing with tar deposits. This level of damage usually penetrates beyond the paint surface into the wall material itself. You can clean the surface, but the odor and staining will likely return because contamination sits deeper than you can reach with regular cleaning. This is when professional restoration services with specialized equipment (ozone treatment, thermal fogging, seal coatings) become necessary rather than just helpful.
How do you know if a stain is stubborn or actually permanent? Stubborn stains lighten with each cleaning attempt, even if they don’t completely disappear. Permanent stains look exactly the same after two or three thorough cleaning attempts using progressively stronger products.
When standard cleaning isn’t enough, try these advanced techniques:
Increase solution strength gradually with each cleaning round. Start at the recommended dilution, then increase cleaner concentration by 50% if the first attempt shows improvement but doesn’t complete the job. Allow cleaning solution to dwell for 2 to 3 minutes on the wall before wiping. This soaking time helps cleaners penetrate and break down bonded soot particles. Use baking soda paste as a concentrated treatment on specific marks that won’t lift. Apply, let it sit, then wipe gently. The mild abrasive action sometimes releases particles that liquid cleaners can’t reach. Try TSP for grease-based soot that resists dish soap and standard degreasers. This is significantly stronger and works when other products fail on oily deposits. Apply rubbing alcohol to isolated stubborn spots using a clean cloth. The alcohol can dissolve certain soot compounds that water-based cleaners leave behind. Test first, especially on delicate paint finishes.
Typically, you should see noticeable improvement within two to three thorough cleaning attempts. If you’ve gone through the full process three times with progressively stronger products and the stains look unchanged, that’s your signal to consider professional help. Other signs that you need a restoration service: paint texture has changed (feels rough or damaged), color has absorbed into the wall rather than sitting on the surface, or strong smoke odor persists even after the visible soot is gone. These indicate contamination that’s soaked through the paint into the drywall or plaster underneath, which means surface cleaning alone won’t solve it.
Preventing Water Damage While Cleaning Soot
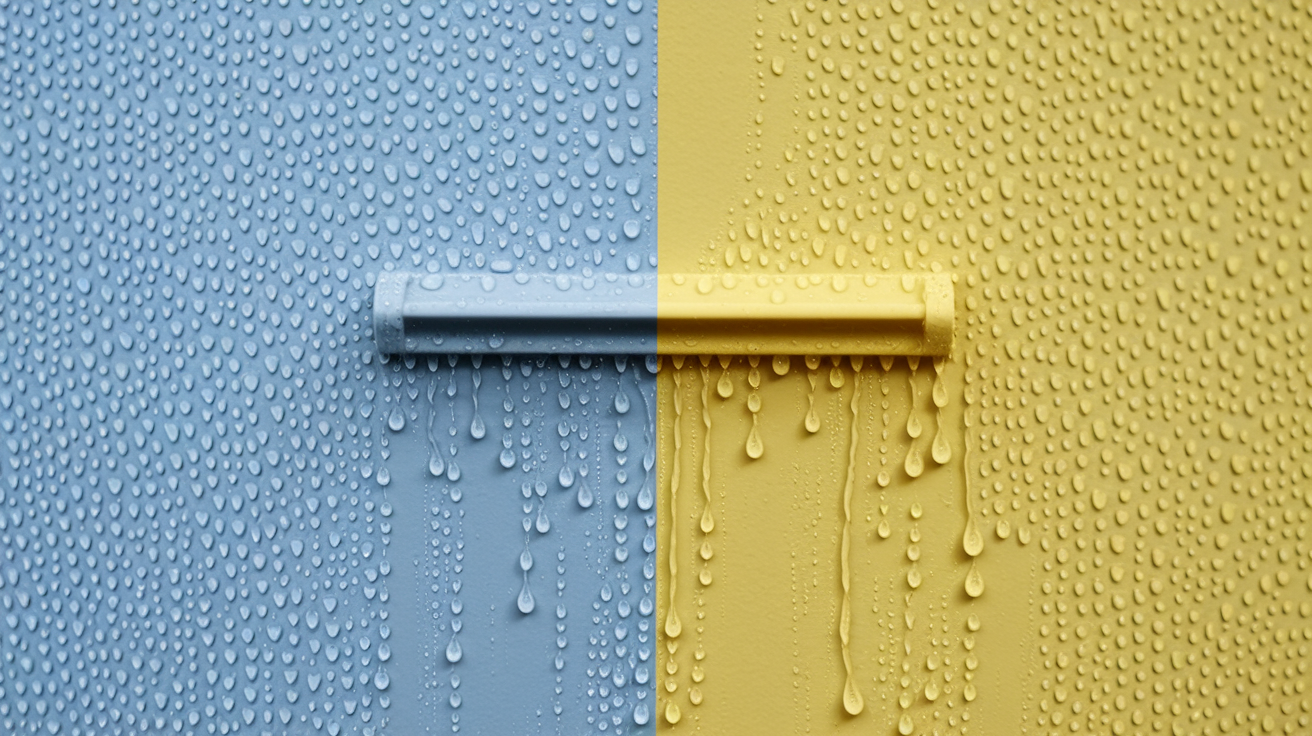
Over-wetting your walls during cleaning creates its own problems. Bubbling paint, water stains, damaged drywall paper, or even mold growth if moisture soaks in and doesn’t dry properly. The irony of causing water damage while trying to clean smoke damage is real, and it happens more often than you’d think when people scrub too enthusiastically with soaking wet rags.
The key is using damp cleaning cloths, not wet ones. After dipping your rag in the cleaning solution, wring it out until you can’t squeeze any more water from it. The cloth should feel moist to the touch but shouldn’t leave the wall looking wet or show any drips. That amount of moisture is enough to activate your cleaner and lift soot without saturating the paint layer.
Proper rinsing removes cleaning residue without adding excessive moisture. Use a separate bucket of clean water and fresh rags for rinsing. Dampen the rag, wipe away the cleaning solution, then immediately follow with a dry cloth to absorb excess moisture. Work in small sections, about three feet square, so you complete the wash-rinse-dry sequence before moving on. This prevents water from sitting on the wall long enough to cause problems.
After you’ve finished the entire wall, set up fans to keep air moving across the surface. Even with careful technique, the wall will be slightly damp and needs airflow to dry completely. Point fans at the wall from about three to six feet away and let them run for two to three hours. If the room feels humid or the wall still looks darker (indicating moisture), run a dehumidifier while the fans work. Plaster walls and other porous surfaces need extra attention because they absorb water more readily than modern drywall with latex paint. On plaster, use even less water, work in smaller sections, and increase drying time to four to six hours.
When to Repaint Walls After Soot Removal

Sometimes cleaning gets you close but can’t deliver the completely clean look you’re after. Soot particles can penetrate through the paint layer and stain the drywall or plaster underneath, especially when it’s been sitting for weeks or months before you cleaned it. Once contamination reaches that deep, surface cleaning just won’t bring the original appearance back. Matte and flat finishes are more vulnerable because their porous texture absorbs stains more easily than glossy paints.
Here’s when you know cleaning isn’t enough and repainting is the answer:
Discoloration remains after thorough cleaning. The wall shows yellow, brown, or gray shadows even after you’ve completed the full cleaning process with appropriate products. Paint texture has changed or roughened. The finish feels different to the touch, no longer smooth, indicating damage to the paint layer itself. Odor persists after cleaning. Smoke smell lingers in the room even though visible soot is gone, meaning particles have soaked deeper than cleaning can reach. Multiple cleaning attempts show no improvement. The stains look exactly the same after two or three cleaning rounds with progressively stronger solutions. Paint finish appears dulled or damaged. Glossy or semi-gloss paint now looks flat, or the sheen is inconsistent across the wall. Stains have penetrated through paint layer. You can see discoloration bleeding through from underneath, not just sitting on the surface.
Before you repaint, wash the wall one final time with TSP or a heavy-duty degreaser to remove any remaining surface oils or residue that would prevent new paint from bonding. Rinse thoroughly and let the wall dry completely, at least 24 hours. Then apply a stain-blocking primer specifically rated for smoke damage. Regular primer won’t seal odors or prevent stains from bleeding through your new paint. Products designed for smoke and fire restoration contain sealers that lock contamination in place.
If you’re only repainting one wall or a section of a room, color matching becomes critical. Paint fades over time from sunlight and age, so even if you have the original paint color name and formula, the new paint will likely look slightly different next to your existing walls. For the best match, take a paint chip from an inconspicuous area to your paint store for computer color matching, or plan to repaint the entire room for consistent appearance. If the soot damage came from a fire or significant smoke event, FireFloodRescue.com provides fire and smoke-related home repairs including drywall replacement and odor-sealing preparation that coordinates the full restoration from cleanup through finished surfaces.
Professional Soot Removal vs. DIY Cleaning

The decision to handle soot cleaning yourself or hire professionals comes down to the scope of damage and your available time. Light soot from candles or a small amount of fireplace residue is absolutely manageable as a DIY project. Heavy smoke damage from a house fire or persistent staining that won’t respond to cleaning is where professional services earn their cost through specialized equipment and experience you can’t replicate at home.
| Situation | DIY Appropriate | Professional Recommended |
|---|---|---|
| Light candle soot on small wall area | Yes, chemical sponge and basic cleaning handles this easily | No, cost would exceed DIY effort |
| Regular fireplace residue buildup | Yes, if buildup is light to moderate and responds to cleaning attempts | Consider if heavy deposits or staining persists |
| House fire damage | No, contamination typically penetrates too deep | Yes, requires specialized odor sealing and restoration |
| Persistent smoke odor | No, odor in walls indicates absorbed contamination | Yes, needs ozone treatment or thermal fogging equipment |
| Large affected area (multiple rooms) | Possible but time-intensive for homeowner | Yes, professionals complete the work faster with better equipment |
Professional restoration services go beyond basic surface cleaning. They include contamination testing to determine if soot has penetrated into wall cavities or insulation, specialized HEPA vacuuming that captures particles too fine for home equipment, industrial-strength cleaning compounds, ozone generators or hydroxyl machines for odor elimination, thermal fogging that reaches inside walls and ductwork, and stain-sealing primers applied before repainting. FireFloodRescue.com handles fire and smoke-related home repairs including odor-sealing preparation and drywall replacement, coordinating the full sequence from stabilization through finished repairs.
For moderate smoke damage from a contained fire, expect professional cleaning to cost $3,000 to $7,000 for a typical single-family home, depending on affected square footage and contamination severity. Timeline is usually three to seven days from initial assessment through completion. When interviewing restoration companies, ask about their process for odor elimination (not just masking), whether they perform air quality testing before and after, if their estimates include repairs or just cleaning, and how they handle insurance documentation if you’re filing a claim.
Maintaining Clean Walls and Preventing Soot Buildup

Stopping soot before it accumulates is significantly easier than removing thick deposits that have baked onto your walls over months or years. Most household soot comes from preventable sources. Fireplaces without proper maintenance, candles placed too close to walls, cooking without ventilation, and inadequate furnace filter changes.
Identify where soot originates in your home first. Stand in the rooms where you notice the most discoloration and look for patterns. Dark streaks above fireplaces, shadowing near candle holders, and kitchen walls near the stove are obvious sources. Less obvious: return air vents can create soot patterns on nearby walls if your furnace filter is overloaded with dirt.
Here’s what prevents buildup:
Clean fireplace chimneys annually to remove creosote that releases particles into your home, even when the damper is closed. Use proper candle placement by keeping candles at least 12 inches away from any wall surface and always using candle holders that catch drips. Install air purifiers in rooms with combustion sources like fireplaces, wood stoves, or frequently used cooking areas to capture particles before they settle on walls. Wash walls quarterly in high-soot areas using a damp microfiber cloth and mild soap solution to remove light deposits before they bond to the paint. Ensure proper ventilation when cooking by running range hood fans that vent outside (not recirculating models) every time you use the stove. Replace furnace filters regularly (every 30 to 90 days depending on filter type) to prevent particle buildup in your HVAC system that spreads through your home. Address smoking indoors practices if applicable, or establish designated outdoor smoking areas, as indoor smoking is the single biggest contributor to persistent wall staining.
A simple monthly routine catches soot early: wipe walls near combustion sources with a dry microfiber cloth, checking for any dark residue transfer to the cloth. If you see particles, do a quick wash with soap and water before they build up. This takes about 10 minutes per room and prevents the hours of intensive cleaning needed when deposits get thick. Early intervention when you first notice any darkening means you’re cleaning loose surface particles rather than bonded stains, and that’s the difference between a quick wipe-down and a full restoration project.
Addressing Soot Odor Removal from Walls
Visible soot removal is only half the job when smoke odor lingers in the room after cleaning. That persistent smell indicates particles have soaked into the porous structure of your paint, drywall, or plaster. Even tiny amounts of contamination trapped in those microscopic spaces release odor molecules continuously, especially when temperature and humidity change.
Paint isn’t actually solid. It has a porous structure at the microscopic level that allows the material to expand and contract with temperature changes. Soot particles smaller than what you can see get trapped in those tiny spaces. Drywall paper and plaster are even more absorbent. Once contamination reaches those depths, surface cleaning can’t pull particles back out.
Here’s the sequence for odor removal:
-
Wash walls with vinegar solution mixed at equal parts white vinegar and water. The acetic acid in vinegar helps neutralize odor compounds. Work from top to bottom across all affected walls, not just where you see staining.
-
Allow walls to air dry completely with fans running to create constant airflow across the surface. Point fans toward open windows to push odor-laden air out rather than just circulating it in the room. Run fans for at least four to six hours, longer if the room still smells smoky.
-
Place odor absorbers around the room after walls are dry. Fill shallow bowls with baking soda and set them on the floor along walls where odor is strongest. The baking soda absorbs odor molecules from the air. Replace the baking soda every three to five days. You’ll know it’s saturated when it no longer reduces the smell noticeably.
-
Repaint with odor-sealing primer if odor persists after washing, drying, and absorption attempts. Standard primers won’t work here. You need products specifically formulated to seal smoke odors. Apply two coats of sealing primer, then finish with your chosen paint color. This physically locks remaining contamination behind an impermeable barrier.
Mild odors typically dissipate within one to two weeks after thorough cleaning, ventilation, and baking soda absorption. If the smell remains strong after three weeks or returns when you run the heat or air conditioning, that indicates contamination has penetrated beyond the wall surface into insulation, framing, or ductwork. At that point, odor-sealing primer on walls alone won’t solve it. You’re looking at a situation where professional restoration with ozone treatment or hydroxyl generation becomes necessary to reach contamination in spaces you can’t access for direct cleaning.
Final Words
Getting soot off painted walls takes patience and the right approach, but most homeowners can handle light to moderate deposits with proper technique.
Start with dry methods like vacuuming and chemical sponges before adding any liquid cleaners. Always wipe, never scrub, to avoid pushing soot deeper into the paint.
Test your cleaning solution in a hidden spot first, work from top to bottom, and know when you’ve reached the limit of DIY cleaning.
If stains persist after two thorough attempts, if the paint texture changes, or if you’re dealing with house fire damage, that’s when professional restoration makes sense. We’ll assess what’s salvageable, seal odors properly, and finish repairs so they blend right back into your home.
FAQ
How do you remove soot from painted walls?
You remove soot from painted walls by first vacuuming loose particles with an upholstery brush, then using a dry cleaning sponge with a wiping motion, followed by washing with dish soap solution (six tablespoons per gallon hot water), rinsing with clean water, and drying thoroughly.
Does soot stain permanently?
Soot can stain permanently if handled incorrectly, particularly when scrubbed into paint pores or left untreated. Proper removal using wiping techniques with dry cleaning sponges before liquid cleaners prevents permanent staining, though some heavy deposits may penetrate paint layers beyond cleaning.
Does Dawn dish soap remove soot?
Dawn dish soap removes soot when mixed at six tablespoons per gallon of hot water and applied with a gentle wiping motion. The degreasing properties work well on light to moderate soot, though stubborn deposits may require stronger cleaners like TSP or commercial degreasers.
Does vinegar remove soot from walls?
Vinegar removes light soot from walls when mixed with warm water in a 1:1 ratio and applied with a wiping technique. It works best after using a dry cleaning sponge first, though heavier deposits require dish soap solution or commercial degreasers for complete removal.
What safety equipment do I need before cleaning soot?
You need protective gloves, a respirator mask, drop cloths, and proper ventilation before cleaning soot. Open windows and doors, cover furniture and undamaged surfaces, and keep children and pets away from the work area to prevent exposure to hazardous particles.
When should I hire professionals for soot removal?
You should hire professionals for soot removal when dealing with house fire damage, persistent odors after multiple cleaning attempts, large affected areas, or stubborn stains that won’t come out after two to three thorough cleanings using proper techniques.
How do I know if my wall needs repainting after soot cleaning?
Your wall needs repainting after soot cleaning if discoloration remains after thorough cleaning, paint texture has changed, odor persists, or stains have penetrated through the paint layer. Use stain-blocking primer before repainting to prevent soot from bleeding through new paint.
Why shouldn’t I scrub soot stains?
You shouldn’t scrub soot stains because scrubbing pushes the acidic particles deeper into paint pores, spreads contamination across larger areas, and embeds stains permanently. Instead, use straight wiping strokes with light pressure to lift soot from the surface.
What’s the difference between a dry cleaning sponge and a regular sponge?
A dry cleaning sponge (chemical sponge) lifts soot particles through a specialized rubber material when used dry with a wiping motion, while regular sponges spread wet soot and worsen stains. Always use the dry cleaning sponge before any liquid cleaners.
How long should walls dry after cleaning soot?
Walls should dry completely after cleaning soot, typically taking several hours depending on ventilation and humidity. Use fans to speed up the drying process and prevent water damage, ensuring walls are fully dry before repainting or sealing.
Can I use baking soda to remove soot from walls?
You can use baking soda to remove soot from walls by mixing three parts baking soda with one part water to create a paste for concentrated spot treatment. Apply to stubborn stains after trying gentler methods like dish soap solution.
What causes soot to smell even after cleaning?
Soot smells even after cleaning because smoke particles penetrate porous wall surfaces and paint layers beyond what surface cleaning reaches. The odor indicates trapped contamination that may require odor-sealing primer or professional restoration to fully eliminate.