

Most homeowners assume basement flooding just happens during storms, but the truth is most water problems start with simple maintenance you skipped last spring. Your gutters, grading, and sump pump create a protection system that either keeps water out or lets it pour in. This guide walks through the prevention steps that actually work, from extending downspouts to sealing cracks, plus a maintenance schedule so you know exactly what to check and when. We’ll help you layer multiple defenses so water stays outside where it belongs.
Essential Steps to Prevent Basement Flooding
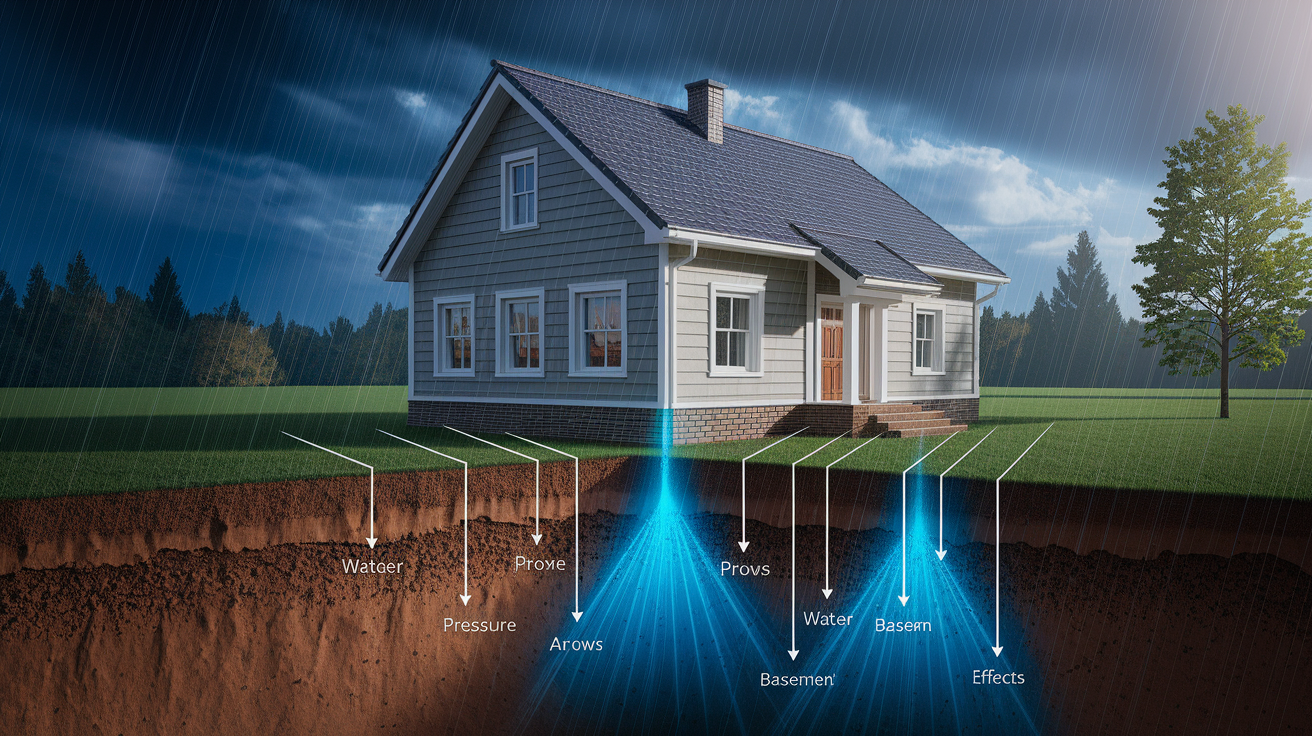
Why Basements Flood: Basements sit below ground level where water naturally flows, making them vulnerable to hydraulic pressure that pushes moisture through any opening. During heavy rain, a typical 2,000 square foot home must manage around 1,250 gallons of runoff from just one inch of rainfall. That volume combined with underground water pressure creates perfect conditions for basement flooding.
Here are the specific prevention steps that protect your basement:
-
Clean and maintain gutters. Remove leaves, twigs, and debris from gutters at least twice yearly, checking that water flows freely toward downspouts. Inspect for proper pitch (gutters should slope slightly toward downspouts) and look for rust holes or separated joints that leak. When gutters overflow, thousands of gallons pour directly next to your foundation instead of being directed safely away.
-
Extend downspouts properly. Position downspout extensions at least five feet from your foundation, using solid extensions or splash blocks that channel water away from the house. Short downspouts dump water right against basement walls where it seeps through over time. Walk your property during rain to verify water flows away from the foundation rather than pooling near it.
-
Install and test sump pump systems. Pour a bucket of water into your sump pit monthly to verify the pump activates, runs smoothly, and shuts off when water drops. Check that the float mechanism moves freely without sticking. Install a battery backup or water powered backup system so your pump keeps running during power outages when storms are worst.
-
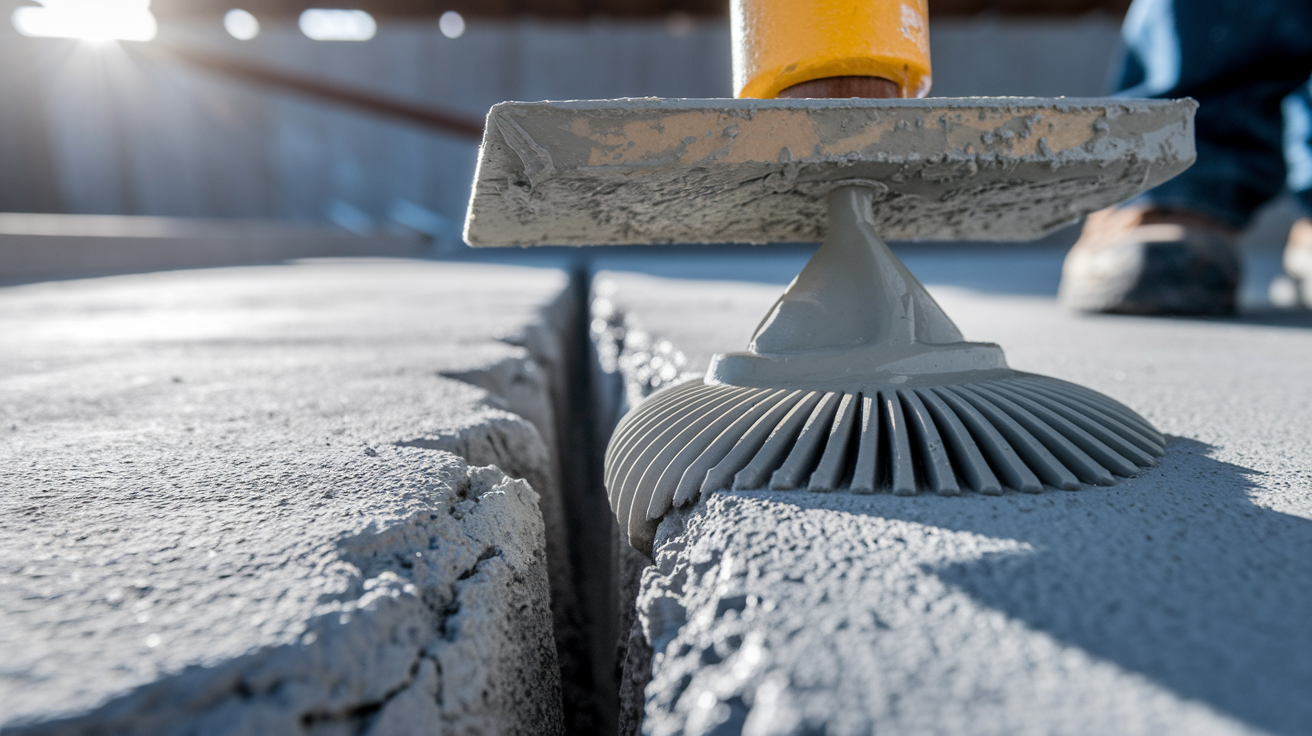
Seal foundation and floor cracks. Apply waterproof sealant, epoxy injection, or hydraulic cement to any visible cracks in foundation walls or basement floors, following product instructions for surface preparation. Inspect your entire basement annually (mark it on your calendar in spring) looking for new cracks or areas where old sealant has failed. Even hairline cracks let water seep through under pressure.
-
Improve yard grading and slope. Verify that your yard slopes at least six inches downward in the first ten feet from your house, meeting International Residential Code requirements. Check current grading by placing a long board or string level extending from your foundation, measuring the drop at the ten foot mark. If needed, add soil near the foundation and regrade to create proper slope, packing it firmly so it doesn’t settle back.
-
Install proper drainage systems. French drains use perforated pipes buried in gravel trenches around your home’s perimeter to collect groundwater before it reaches your basement walls. Interior drain tile systems work similarly inside your basement, channeling water to your sump basin. Both systems redirect subsurface water to sump pumps or storm drains, relieving hydrostatic pressure against your foundation.
-
Maintain sewer and septic systems. Flush only water, human waste, and biodegradable toilet paper down drains. Never pour fats, oils, or grease down sinks, and avoid flushing wipes (even “flushable” ones), paper towels, or feminine products. Cap unused basement floor drains with tight screw-on caps so sewer backups can’t flood through them. Install a backwater valve if your municipality allows it.
-
Monitor water heaters. Inspect water heaters annually if they’re out of warranty, every two years if still under warranty. Flush the tank every six months to remove sediment that causes rust and failure. Check the anode rod that prevents corrosion, replacing it when heavily corroded. Water heaters hold 40 to 50 gallons that can flood your basement instantly when they fail.
Combining multiple prevention methods creates layered protection. No single step prevents all flooding scenarios, but working together they address the various ways water enters basements. The maintenance schedule section below details exactly when to perform each task throughout the year.
Creating a Basement Flood Maintenance Schedule and Inspection Checklist

Regular maintenance catches problems before they become flooding disasters. A water heater inspection might cost an hour and nothing if everything looks good, but it prevents the $4,444 average post deductible damage when heaters fail. The same applies to every prevention method, so consistency matters.
| Task | Frequency | Season |
|---|---|---|
| Gutter cleaning | Twice yearly | Spring and fall |
| Sump pump testing | Monthly | Year round |
| Foundation inspection | Annually | Spring |
| Downspout check | Twice yearly | Spring and fall |
| Water heater inspection | Annually or bi-annually | Spring |
| Water heater flushing | Every 6 months | Spring and fall |
| Crack resealing | As needed | Spring |
| Grading inspection | Annually | Spring |
| Window well cleaning | Twice yearly | Spring and fall |
| Drainage system check | Annually | Spring |
| Backup system testing | Quarterly | Year round |
| General moisture inspection | Seasonally | All seasons |
Document what you find during each inspection. Take photos of cracks, note water stains, record when you replace parts or apply sealant. A simple notebook or phone photos folder labeled by date helps you track whether problems are getting worse or staying stable. When a contractor asks “how long has that crack been there,” you’ll know exactly.
Spring brings the heaviest maintenance load because winter freeze thaw cycles create new foundation cracks and spring thaw sends massive water volumes toward your house. Fall preparation matters too, clearing gutters before leaf drop finishes and testing systems before winter storms arrive. Summer storms can dump inches of rain in minutes, so monthly sump pump tests catch problems before the next severe weather event.
Gutters and Downspouts: Your First Line of Defense

Your roof collects every drop of rain that falls on it and funnels that water to gutters. On a 2,000 square foot home, one inch of rain generates 1,250 gallons of runoff. Without gutters directing that volume away from your foundation, it pours down your walls and pools at the base of your house where it seeps into your basement.
Clean gutters twice per year minimum, more often if you have trees that drop leaves, needles, or seeds directly onto your roof. Use a sturdy ladder, work gloves, and a bucket to collect debris as you scoop it out by hand or with a gutter scoop. Check that water flows freely toward downspouts by running a hose in the gutters and watching the flow. Look for sections that sag or hold standing water, inspect joints where sections connect for gaps or separation, and examine the gutter bottom for rust holes or cracks. While you’re up there, verify that gutters pitch slightly downward toward downspouts rather than sloping the wrong direction.
Key gutter system requirements include:
- Extend every downspout at least five feet from your foundation using rigid extensions, flexible tubing, or in ground drain pipes that carry water to drainage areas
- Install splash blocks or concrete pads under downspout ends so water doesn’t erode soil and create puddles that soak back toward your house
- Check ground level drainage areas where downspouts empty, making sure water flows away rather than sitting stagnant
- Look for water staining on siding below gutters, indicating overflow during heavy rain that needs immediate attention
- Notice if basement moisture problems line up with sections of house where gutters overflow or downspouts dump water too close
Replace gutters when you see persistent overflow despite cleaning, extensive rust damage creating holes, or sections pulling away from the house because fascia boards have rotted. Sagging gutters that can’t be adjusted to proper pitch need replacement too. New gutter systems cost less than repairing water damaged foundations and basements.
Proper Grading and Slope Requirements for Basement Protection

The ground around your foundation controls whether rainwater flows away from your house or toward it. Soil that slopes toward your basement creates a funnel effect, directing hundreds of gallons straight against foundation walls during every storm.
The International Residential Code requires six inches of fall in the first ten feet of slope away from your house. That means if you measure ten feet from your foundation, the ground at that point should be at least six inches lower than the ground touching your house. This grade pushes water away from your basement before it has a chance to soak in near foundation walls.
Check your current grading by placing one end of a long, straight board against your foundation at ground level and extending it ten feet out into your yard. Use a level on top of the board, then measure the gap between the board’s far end and the ground. If that gap is less than six inches, you need to regrade. Add topsoil against your foundation (not right against siding or brick, leave a small gap) and slope it gradually downward, packing it firmly so it doesn’t wash away or settle. Recheck with your board and level to verify you’ve achieved the proper slope.
Watch where you place shrubs, trees, and garden beds. Roots trap moisture against foundation walls, and dense plantings block air circulation that helps soil dry. Keep plantings at least two feet from your house. Reposition lawn sprinklers so they don’t spray against your foundation, and reduce watering frequency if your basement shows dampness during summer when you’re irrigating heavily. Grass doesn’t need as much water as people think, and overwatering can create basement moisture problems.
Installing and Maintaining a Sump Pump System

A sump pump sits in a pit in your basement floor, automatically pumping out water that collects there before it can flood your basement. The system only works when installed correctly and maintained regularly.
Proper sump pit installation requires specific sizing (typically 18 to 24 inches in diameter and 24 inches deep), a gravel base for drainage, and a solid liner that prevents soil from caving in. The pit bottom should slope slightly toward the center where the pump sits. The pit needs a sealed cover to prevent debris, humidity, and radon gas from entering your basement, but the cover must allow inspection access.
Test your sump pump monthly by pouring a large bucket of water into the pit quickly. Watch the float mechanism rise and trigger the pump, listen for smooth motor operation without grinding or squealing, and verify that the pump shuts off automatically when water drops to the low level. The discharge pipe outside should flow freely without backwashing into the pit.
Common sump pump failures include:
Overheating from running continuously because the pump is undersized for water volume or the discharge line is blocked
Undersized capacity unable to handle heavy flow during major storms, leading to basement flooding even with a working pump
Stuck float mechanisms jammed against the pit wall or tangled in debris, preventing the switch that activates the pump
Frozen discharge lines in winter that block water from exiting, causing the pump to run without actually removing water
Faulty check valves that allow pumped water to drain back into the pit, making the pump cycle constantly and wear out quickly
Power outages during storms that shut down electric pumps exactly when you need them most
Install a backup sump pump system if your basement has finished space or expensive equipment. Battery backup pumps cost $300 to $800 installed and automatically take over when power fails. Water powered backup pumps use municipal water pressure to create suction that removes sump water without electricity, with similar installation costs and lower long term maintenance since they have no motor to fail. The added protection makes sense in areas with frequent storms or unreliable power.
Sealing Foundation Cracks and Basement Floor Gaps
Foundation cracks let water seep through under pressure during heavy rain and snow melt. Even hairline cracks you barely notice can channel water into your basement when saturated soil creates hydraulic pressure against foundation walls.
Identify different types of cracks during your annual spring inspection. Hairline cracks (less than 1/8 inch wide) usually result from normal concrete settling and shrinkage as it cures. Wider vertical cracks may indicate settling or minor foundation movement. Horizontal cracks, stair step cracks in block foundations, or cracks wider than 1/4 inch signal structural problems that need professional foundation repair.
For DIY crack sealing, clean the crack thoroughly by brushing out loose concrete and debris, then use a shop vacuum to remove dust. Let it dry completely (run a dehumidifier if needed). Apply waterproof concrete sealant, epoxy injection, or hydraulic cement according to product instructions. Hydraulic cement works well for active leaks because it sets up even in wet conditions. Epoxy injection provides the strongest seal for dry cracks. Paint on concrete sealers work for minor surface sealing.
Mark your calendar for annual crack checks every spring after winter freeze thaw cycles. Walk your entire basement with a flashlight, looking at all foundation walls and floor edges. Check previously sealed cracks to verify the sealant hasn’t shrunk, cracked, or pulled away. Look for new cracks, efflorescence (white mineral deposits that indicate water seepage), or damp spots on walls.
Call for professional foundation repair solutions when you see warning signs beyond simple crack sealing. Horizontal cracks in poured concrete foundations or stair step cracks following mortar joints in block foundations indicate serious structural movement. Cracks that reopen after sealing, walls bowing inward, or cracks wider than 1/4 inch need structural evaluation and repair. Trying to seal structural cracks yourself just hides the problem temporarily while damage continues.
French Drains and Interior Drainage Tile Systems

French drains manage groundwater before it reaches your basement walls. These subsurface drainage systems collect water that’s moving through saturated soil and redirect it to drainage areas, storm sewers, or sump basins where pumps can remove it.
A French drain consists of a perforated four inch diameter pipe buried in a gravel filled trench around your home’s perimeter. The pipe is wrapped in filter fabric that allows water in while blocking soil and roots that would clog perforations. Water moving through saturated soil enters the gravel surrounding the pipe, then flows into the perforations and along the pipe to wherever it drains. The trench is backfilled with more gravel, then topped with soil and landscaping.
Critical installation requirements include proper pitch. Foundation drains must slope at least four inches per hundred feet of length so water flows by gravity rather than sitting stagnant in the pipe. The trench needs adequate depth (typically 12 to 18 inches below the basement floor level outside) to intercept water before it reaches foundation walls. The gravel or sand surrounding the pipe must be clean and sized correctly to allow water flow while supporting the soil above.
Interior drain tile systems work on the same principle but are installed inside your basement along the perimeter. Contractors jackhammer a trench in your basement floor next to foundation walls, install perforated pipe in gravel, and connect it to a sump basin. Water that seeps through foundation walls is immediately collected and pumped out. Interior systems avoid exterior excavation but require more invasive basement work.
Both systems redirect collected water somewhere it can drain safely. In most cases that means a sump basin with a pump that discharges water away from your house. In some properties with sloped lots, the drain can daylight (exit above ground) at a lower elevation. Storm sewer connection is possible if your municipality allows it and you have appropriate access.
Installing French drains requires digging trenches around your entire house to proper depth and pitch, which most homeowners can’t accomplish without excavation equipment. Contractors typically charge $3,000 to $8,000 depending on home size, trench length, depth requirements, and site conditions. Interior drain tile costs run similar or higher because of concrete cutting and sump installation. The investment makes sense when persistent groundwater problems can’t be solved with surface solutions like grading and downspouts.
Preventing Sewer Backup and Septic System Flooding

Sewer backups flood basements with contaminated water containing human waste and bacteria. Main sewer lines clog or overflow during heavy storms, sending sewage back up through basement floor drains and toilets instead of flowing away to treatment plants.
The simplest prevention is controlling what goes down your drains. Flush only water, human waste, and biodegradable toilet paper down toilets. Sounds obvious, but people regularly flush sanitary wipes (even ones labeled “flushable”), facial tissues, paper towels, feminine hygiene products, cotton swabs, and accidentally dropped items. All of these contribute to clogs in your home’s drain pipes and municipal sewer systems.
Protect your drains with these practices:
Never pour fats, oils, or grease (FOG) down kitchen sinks because they accumulate inside pipes as they cool, creating blockages that trap other debris and slow drainage
Use sink strainers to catch food particles, coffee grounds, and other solids that should go in trash instead of down drains
Run hot water for several seconds after using sinks to keep pipes clear
Try weekly drain maintenance by filling sinks completely, then releasing the water all at once to create pressure that helps clear pipes
Keep trees and large shrubs away from sewer lines because roots invade pipes seeking moisture, creating blockages
Cap any unused sewer connections in your basement with tightly fitted screw on caps. Older homes may have capped floor drains that once served laundry or utility sinks. If those caps are loose or missing, sewer backups can flood directly through those openings.
Install a backwater valve (also called a backflow preventer) in your main sewer line if your municipality allows it. This valve automatically closes when sewage tries to flow backward into your house, preventing backup even when main sewer lines overflow. The valve needs professional installation and costs $1,500 to $3,000 depending on access and local code requirements.
Septic system flooding differs from municipal sewer backups. If you have a septic tank, heavy rain can saturate the drain field where wastewater is supposed to filter into soil. When the drain field is flooded, wastewater backs up into your house. Prevent septic flooding by pumping the tank on schedule (typically every three to five years), avoiding excessive water use during saturated soil conditions, and keeping the drain field area clear of vehicles or structures that compact soil.
Water Heater Monitoring to Prevent Catastrophic Floods
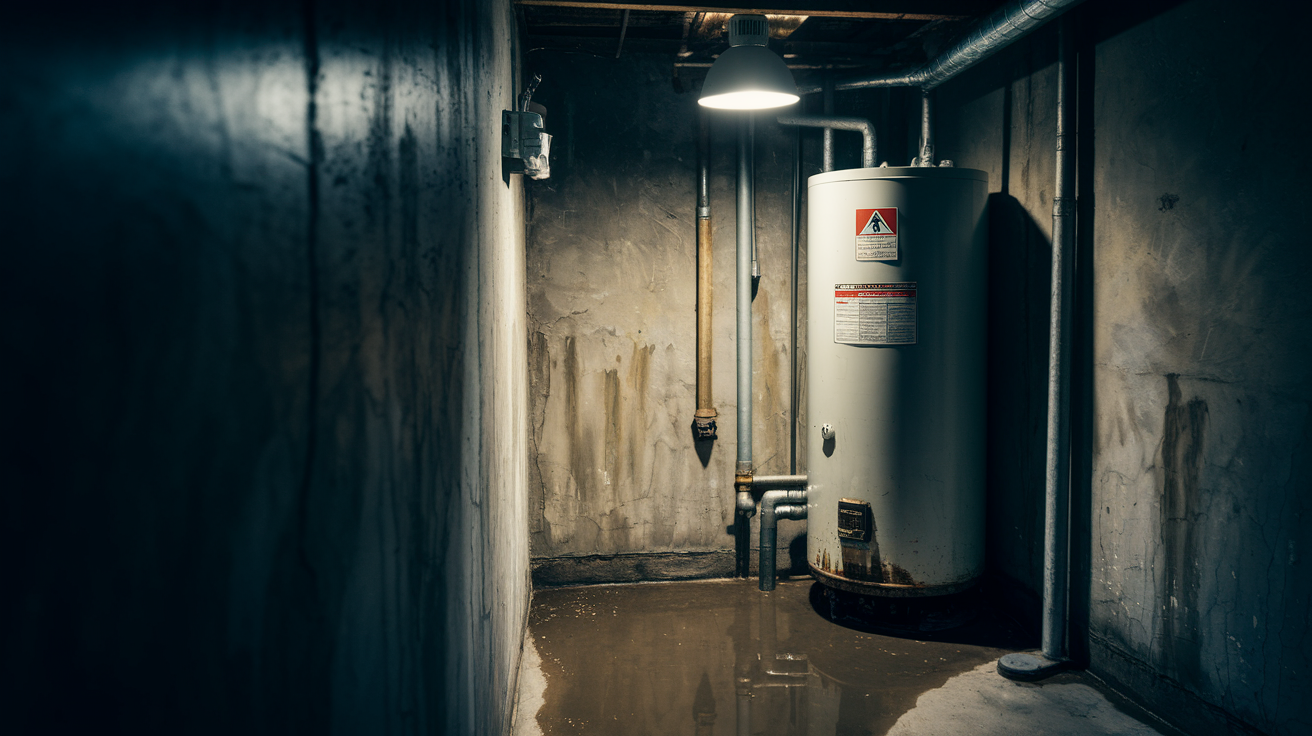
Water heater failure ranks in the top five causes of home water damage. The average post deductible cost when a water heater floods your basement is $4,444. Standard tanks hold 40 to 50 gallons that can release instantly when the tank ruptures, flooding your basement in minutes while you’re at work or asleep.
The typical water heater lasts about ten years. Start planning replacement a few years before that deadline, especially if yours is approaching nine or ten years old. Waiting for failure means emergency replacement at higher cost, often with flood damage to deal with simultaneously.
Follow this maintenance schedule based on warranty status. Inspect annually when your water heater is out of warranty, every two years if still under warranty. During inspection:
-
Flush the tank every six months by attaching a garden hose to the drain valve at the tank bottom, running it to a floor drain or outside, and draining several gallons to remove sediment and rust buildup that accumulates at the bottom and causes corrosion
-
Check the anode rod which prevents tank corrosion by corroding itself instead (it’s a sacrificial component), replacing it when heavily corroded or every three to five years depending on water conditions
-
Inspect all valves and connections for rust, moisture, or mineral deposits indicating slow leaks or seepage that will worsen over time
-
Look for signs of imminent failure including rust colored water, rust spots or moisture on the tank exterior, water pooling at the base, or rumbling and popping sounds when heating
-
Wrap the tank with an insulation blanket if it’s not already insulated, preventing condensation that promotes rust formation while saving energy by reducing heat loss
Keep clear access to your water heater for regular inspection. Don’t stack boxes, build shelves, or place equipment that blocks your ability to walk around the unit and see all sides. Place a shallow drain pan under the heater if your basement floor slopes toward vulnerable areas or finished space. Install a water sensor alarm on the pan that alerts you to leaks before they become floods.
Consider replacing water heaters older than eight or nine years even if they’re still working, especially if your basement has finished space or expensive equipment stored there. The cost of proactive replacement ($800 to $2,000 depending on capacity and fuel type) beats flood damage repair costs and the hassle of dealing with sudden failure.
Exterior and Interior Waterproofing Methods for Basements

Waterproofing creates moisture barriers that prevent water from entering your basement even when it’s present outside foundation walls. Interior and exterior approaches work differently but often are used together for comprehensive protection.
Interior basement waterproofing addresses the inside surface of foundation walls and floors. Methods include applying waterproof sealants or concrete sealer to foundation walls that block moisture penetration, installing vapor barriers (plastic sheeting or specialized membrane systems) that prevent humidity transmission, and creating interior drainage channels that collect any water that does seep through and direct it to sump basins. Interior waterproofing works best for minor moisture problems, managing humidity, and dealing with older foundations where exterior access is difficult or expensive.
Exterior basement waterproofing stops water at the source before it contacts foundation walls. This approach requires excavating soil away from the foundation to expose exterior walls, repairing any foundation cracks, cleaning and preparing the surface, then applying waterproof membrane or rubberized coating that creates a continuous moisture barrier. Contractors often install exterior drainage systems (French drains or drainage boards) at the same time to manage groundwater. Backfilling uses carefully selected soil or gravel that drains freely rather than holding water against the foundation.
Exterior waterproofing offers more thorough protection because it prevents moisture from ever reaching your foundation walls. This reduces hydrostatic pressure against the foundation and helps maintain structural integrity. The approach costs significantly more than interior methods, typically $8,000 to $15,000 or higher depending on foundation depth, access challenges, and whether foundation repairs are needed before waterproofing.
Additional benefits beyond flood prevention include structural improvements from relieved hydrostatic pressure and repairs to deteriorated foundation surfaces. Moisture control measures also create a 70 percent decrease in pest invasion problems since insects and rodents seek moisture rich environments near foundations. Reduced humidity in basements also means lower energy costs for cooling and less mold growth that affects indoor air quality throughout your home.
Choose interior waterproofing when you have minor moisture problems, need a more affordable solution, or can’t excavate due to landscaping, driveways, or neighboring structures too close to your house. Select exterior waterproofing for persistent flooding problems, visible foundation deterioration, new construction, or major renovation projects. Some situations call for both approaches, especially when dealing with severe water problems or finishing basement living space.
For comprehensive professional waterproofing services, contractors can assess your specific situation, test moisture levels, identify water sources, and recommend the appropriate combination of interior or exterior methods plus drainage improvements.
Window Wells, Standpipes, and Additional Flood Entry Points
Basement flooding doesn’t only happen through foundation walls. Windows, utility penetrations, door entries, and floor drains create additional paths for water to enter your basement during heavy rain or flooding.
Window wells surround below grade basement windows, creating a recessed area that collects water like a bucket during storms. Without proper protection, that collected water eventually forces its way through window frames or breaks the window under pressure. Install window well covers (clear plastic or metal grates) that keep rain and debris out while still allowing emergency exit access. Make sure each window well has a gravel base that drains water away and check that the drain isn’t clogged with soil or plant growth.
Standpipes provide temporary protection during known flood events. These three foot tall plastic or metal cylinders fit over floor drains or sewer connections, preventing backflow from overwhelming drains during heavy rain when municipal systems overload. They work for short term protection but aren’t a substitute for proper drainage and backwater valves.
Other flood entry points require attention:
Seal around all utility penetrations where water lines, gas lines, electrical conduit, or cables enter through foundation walls using hydraulic cement or expanding foam rated for exterior use
Protect basement door entries (bulkhead doors or walk out doors) with proper weather stripping, threshold seals, and check that doors close tightly against seals
Maintain floor drain traps with water (pour a bucket of water down drains monthly) so the trap prevents sewer gas and backflow from entering
Address bulkhead door leaks by replacing rotted framing, installing new rubber gaskets, and verifying the doors latch securely at all latching points
Walk your entire basement seasonally (spring, summer, fall, before winter) looking at every potential water entry point. Check windows, doors, utility penetrations, floor drains, and any place where different materials meet (like where concrete foundation meets wood framing). Look for water staining, efflorescence, rust, or damp spots that indicate previous water entry. Address each vulnerable location before the next heavy rain tests your prevention efforts.
Emergency Response Steps When Basement Flooding Occurs
When your basement floods despite prevention efforts, quick and safe response minimizes damage. Safety comes first because water and electricity create lethal conditions.
Do not enter a flooded basement if water is more than two inches deep or if it reaches electrical outlets, your electrical panel, your furnace, or any electrical equipment. Water conducts electricity and energized equipment or wiring can electrocute you even if you can’t see the source.
If safe entry is possible, follow these steps:
-
Shut off power at the main electrical panel for your entire house if the panel is in a dry location you can access safely; if the panel is in the flooded basement, call your utility company to disconnect power at the meter
-
Turn off gas at the main valve if you have gas service and can access the shutoff safely to prevent gas leaks if water has damaged gas lines or appliances
-
Shut off water at the main water valve to prevent additional water entering if the flood source is a plumbing failure rather than external flooding
-
Document damage with photos and video before moving or cleaning anything, for insurance claims and contractor estimates of repair needs
-
Remove standing water using a submersible pump for deep water or a wet dry vacuum for shallower flooding; if using a pump, ensure the power cord and pump are rated for submersion
-
Begin drying immediately using dehumidifiers, box fans, and opening windows if outdoor humidity is lower than inside; remove wet materials like cardboard, paper, fabric, and porous items that can’t be dried within 48 hours to prevent mold
-
Disinfect all surfaces that contacted flood water using a solution of four to eight teaspoons chlorine bleach per gallon of hot water, applying with a mop or spray bottle while wearing rubber gloves
Wear proper protective equipment for all water removal and cleanup work. Use rubber boots, rubber gloves that cover your forearms, and eye protection to prevent contaminated water contact. If flood water contains sewage (from toilet backup, sewer overflow, or floodwater that crossed ground surface), treat all contacted items as contaminated and dispose of anything that can’t be thoroughly disinfected. Sewage contains bacteria and pathogens that cause serious illness.
Throw away items that absorbed sewage containing flood water including drywall, insulation, carpeting, upholstered furniture, mattresses, and similar porous materials. The cost of saving these items isn’t worth the health risks from bacteria growth.
Call emergency professionals immediately if flooding is extensive (several inches deep across the entire basement), if the source can’t be stopped quickly, if sewage is involved, or if water has contacted electrical systems. Professional water damage restoration services have truck mounted extraction equipment, commercial dehumidifiers, air movers, and expertise to dry structural components before mold growth begins.
DIY Basement Flood Prevention vs. Professional Waterproofing Services
Some flood prevention work fits well within DIY capability while other tasks require professional equipment, expertise, or liability insurance. Understanding which is which helps you protect your basement effectively without overpaying for simple maintenance or risking failure by attempting complex work yourself.
| Prevention Method | DIY Feasible | Professional Recommended | Typical Cost Range |
|---|---|---|---|
| Gutter cleaning | Yes | When 2+ stories | $0-$200 |
| Downspout extensions | Yes | For buried drainage | $50-$300 |
| Minor crack sealing | Yes for hairline cracks | For structural cracks | $50-$500 |
| Sump pump testing | Yes | For repairs/replacement | $0-$1,200 |
| Grading adjustments | For minor touch-ups | For major resloping | $500-$3,000 |
| French drain installation | No | Yes | $3,000-$8,000 |
| Exterior waterproofing | No | Yes | $8,000-$15,000 |
| Foundation repair | No | Yes | $2,000-$10,000+ |
DIY appropriate tasks include routine maintenance and inspection work, minor repairs, and installations that don’t require excavation or specialized equipment. Clean your own gutters if you’re comfortable on ladders and your house is single story or you can work safely from a ladder. Install surface downspout extensions that simply attach to existing downspouts. Seal hairline foundation cracks after cleaning and preparing surfaces according to product instructions. Test your sump pump monthly and replace it if you’re comfortable with basic plumbing connections and electrical work. Touch up grading by adding bagged topsoil near your foundation and sloping it properly.
Professional services become necessary for excavation work (French drains, exterior waterproofing), structural repairs (foundation cracks wider than 1/4 inch, bowing walls, or any horizontal cracking), installations requiring permits and inspections (backwater valves, major drainage systems), and work requiring specialized equipment (commercial dehumidifiers for major flooding, concrete cutting for interior drain tile). Liability considerations also favor professionals for roofing related work on multi story homes or work near underground utilities.
Average basement flood repair costs range from $1,038 to $3,067 depending on water depth, affected area, and whether sewage contamination is involved. Costs can reach $6,000 for severe flooding or drop to around $450 for minor water entry caught quickly. Investing in prevention makes sense compared to these repair costs, especially since flooding often causes recurring damage if underlying problems aren’t addressed.
Get free estimates from licensed contractors for any work you’re considering having done professionally. Describe your specific flooding concerns, show them your basement and exterior drainage, and ask what they recommend to address your situation. Compare estimates from at least three contractors, checking that they’re licensed, insured, and established in your area. Ask about warranties on their work, typically ranging from one year for basic waterproofing to lifetime warranties for comprehensive systems.
Understanding Flood Insurance and Coverage for Basement Water Damage
Most homeowners assume their insurance covers flood damage. It doesn’t. Standard homeowners insurance policies specifically exclude flood coverage, defining flood as water entering from outside the home including rain, storm surge, overflowing bodies of water, and surface water.
The National Flood Insurance Program (NFIP) provides flood coverage through policies purchased separately from your homeowners insurance. NFIP policies cover structural elements of your home including the foundation, flooring, walls, electrical systems, plumbing, HVAC systems, and essential equipment like water heaters and sump pumps. The program also covers cleanup costs and structural repairs needed after flooding.
What NFIP doesn’t cover in basements includes finished walls, floors, ceilings, personal belongings, and furniture. If you’ve finished your basement with drywall, flooring, painted walls, and furnished living space, standard flood insurance won’t replace those improvements or contents. You need separate coverage endorsements to protect finished basement spaces, and those endorsements cost extra.
Sewer backup coverage is different from flood insurance and addresses water entering through drains, toilets, or sewer lines. Most homeowners policies exclude sewer backup damage but offer it as an endorsement for an additional $100 to $500 annually depending on coverage limits you select. This endorsement makes sense if your home has basement floor drains, is in an area with older sewer infrastructure prone to backup, or has experienced previous sewer related water damage.
Research your flood risk through FEMA flood maps, municipal planning departments, county engineering offices, or your insurance agent who can access flood zone mapping. Properties in Special Flood Hazard Areas (shown as zones A or V on flood maps) face the highest risk and mortgage lenders require flood insurance. Properties in moderate to low risk zones (B, C, or X) can still flood, especially during severe weather, but insurance isn’t mandatory.
Final Words
Stopping basement flooding means working multiple angles at once. Keep gutters clear, extend those downspouts at least five feet, test your sump pump monthly, and watch for foundation cracks before they turn into problems.
The maintenance schedule isn’t optional. It’s how you catch small issues before they dump hundreds of gallons into your basement.
Most of this is straightforward homeowner work. Some of it, like French drains or exterior waterproofing, needs pros. Either way, a dry basement doesn’t happen by luck. It happens because you planned ahead and stayed on it.
FAQ
How do you get your basement to stop flooding?
You get your basement to stop flooding by implementing multiple prevention layers including cleaning gutters twice yearly, extending downspouts at least five feet from your foundation, installing and testing a sump pump monthly, sealing foundation cracks annually, and ensuring proper yard grading with six inches of drop in the first ten feet away from your home.
Is it common for basements to flood?
Basement flooding is common because basements sit below ground level where water naturally collects, foundation cracks develop over time, drainage systems fail, and a typical 2,000-square-foot home manages approximately 1,250 gallons of runoff from just one inch of rainfall, creating significant pressure on basement waterproofing systems.
How much does it cost to waterproof a 1000 sq ft basement?
Waterproofing a 1,000 square foot basement typically costs between $1,038 and $3,067 on average, with highs near $6,000 and lows around $450 depending on whether you need interior sealing, exterior excavation and membrane application, drainage system installation, or comprehensive foundation repairs.
Does homeowners insurance cover basement flooding from rain?
Homeowners insurance typically does not cover basement flooding from rain because most standard policies exclude flood damage. You’ll need separate National Flood Insurance Program coverage for structural protection and cleanup, plus a sewer backup endorsement costing $100 to $500 annually for drain-related flooding.
What are the warning signs that my sump pump is failing?
Warning signs that your sump pump is failing include strange noises during operation, the pump running continuously without shutting off, visible rust or corrosion on the pump body, a stuck or jammed float mechanism, the pump not activating when you pour a bucket of water into the pit, and age approaching seven to ten years.
How often should I inspect my foundation for cracks?
You should inspect your foundation for cracks annually, preferably in spring after freeze-thaw cycles and before heavy rain seasons. Look for new cracks, widening of existing cracks, horizontal cracks indicating structural issues, and reseal any compromised areas immediately using waterproof sealants or hydraulic cement.
What is the proper slope for yard grading around my home?
The proper slope for yard grading around your home requires six inches of fall in the first ten feet away from your foundation, as specified by International Residential Code. This slope directs surface water away from basement walls and reduces hydrostatic pressure that forces water through foundation cracks.
When should I replace my water heater to prevent basement flooding?
You should replace your water heater when it approaches 10 years old, shows visible rust or moisture around connections, makes unusual noises, or requires frequent repairs. Plan replacement a few years before the expected lifespan ends, since failed water heaters cause average post-deductible damage of $4,444 per incident.
Can I install a French drain myself or do I need a professional?
Installing a French drain requires professional help because it involves digging trenches around your entire home, properly pitching perforated pipes at least four inches per hundred feet of length, wrapping pipes in gravel or sand, and connecting drainage to sump basins or storm drains correctly.
What items should never go down basement drains?
Items that should never go down basement drains include fat, oil, and grease that accumulate and cause blockages, sanitary wipes, facial tissue, paper towels, feminine products, toys, and anything except water, human waste, and biodegradable toilet paper to prevent sewer backup into your basement.
How do I test if my sump pump is working correctly?
You test if your sump pump is working correctly by pouring a bucket of water into the sump pit and watching the pump activate automatically when water reaches the trigger level, then shut off completely after pumping water out. Perform this test monthly year-round as part of your maintenance schedule.
What’s the difference between interior and exterior basement waterproofing?
Interior basement waterproofing addresses foundation cracks and weak spots from inside using sealants, concrete sealer, vapor barriers, and interior drainage systems, while exterior waterproofing stops water at the source through excavation, crack filling, waterproof membrane coating, and exterior drainage that also improves structural integrity.