

Ever tried patching a wall only to realize days later that the real problem’s hiding three inches deeper? You can sink cash into surface repairs while rot, compromised framing, or water damage keeps spreading behind the finish. Interior wall reconstruction pulls everything back to the studs so you rebuild it right, but it costs more and takes longer than patching. Knowing when you actually need full reconstruction, what it involves, and how to handle it safely keeps you from either wasting money on weak repairs or tearing out walls that didn’t need it.
When Walls Need Full Reconstruction vs. Simple Repair

Interior wall reconstruction means tearing everything out and starting fresh, from studs to the surface you’ll eventually paint. Repair just fixes what’s broken without pulling the whole thing apart. Getting this right affects your budget, timeline, and whether you’re in over your head or handling something manageable.
You’re looking at full reconstruction when water’s gotten into multiple stud spaces and compromised the framing and insulation. If a load-bearing wall shows sagging, bowing, or serious cracks, you need more than patching. The framing itself is failing. In older homes, when big chunks of plaster have let go from the lath backing, it’s usually smarter to strip it all and go with modern drywall. And if you find mold behind the wall during inspection, everything comes out. You’ll treat the affected wood and rebuild with clean materials.
Small cracks up to about 1.5mm rarely mean trouble. Fill them with flexible compound and move on. Nail pops, little holes from picture hangers, surface moisture that didn’t reach the framing… these are repair jobs. Hairline settling cracks and minor corner dings respond fine to patching and sanding.
Start your assessment with a tap test. Move along the wall knocking with your knuckles. Hollow sounds mean the plaster’s separated or there’s voids behind drywall. Look for bowing (sight down from corner to corner), water stains showing penetration patterns, and crack width. If a £1 coin fits in the crack, you’re past simple repair territory. Run a moisture meter over questionable areas. Readings above 17% mean active water problems and likely reconstruction.
Wall Demolition and Material Removal Methods

Get your safety gear sorted before you swing anything. N95 or P100 respirator for demolition dust, safety glasses with side protection, heavy gloves, hearing protection if you’re using power tools. Hang 6-mil plastic from ceiling to floor and tape the edges tight before you start. This keeps dust out of the rest of the house. HEPA vacuums actually capture fine particles instead of blowing them around like regular shop vacs do. Cover your floors with drop cloths or plastic sheeting, securing the edges. Makes cleanup possible and protects finished flooring.
Kill power at the panel before touching any wall that might have wiring. Use a non-contact voltage tester to confirm it’s actually dead, then cap exposed wires with wire nuts and tape. Work systematically. Pull trim and baseboards first (save them if they’re going back up), cut and cap utilities, strip drywall or plaster from studs, then yank out damaged framing. Drywall and plaster come off differently. Drywall breaks clean when you score and snap it. Plaster needs to be chipped away from lath in sections or you’ll crack everything around it.
Different materials need different approaches. For drywall, score along stud lines with a utility knife, snap panels away from framing, pull fasteners or break the board around screw heads. Plaster removal means using a flat bar and hammer to break the plaster keys behind wood lath strips. Work small sections to control the dust. When cutting studs, use a reciprocating saw at top and bottom, twist to break the nails free from plates, extract without wrecking adjacent framing. Wire lath gets cut with tin snips, fold sections away from framing, watch those sharp edges. For masonry walls, score with a grinder and masonry blade, break sections with a sledge, remove in chunks you can actually lift.
Plan for debris disposal. A 10-yard dumpster handles a single wall. Multiple walls need 20 yards. Materials with asbestos or lead paint require separate handling.
Framing Repair and Stud Replacement Techniques

Standard interior partition walls use 2x4s. Exterior walls or walls with plumbing runs typically get 2x6s. Studs sit 16 inches on center in standard construction, though some builders go 24 inches for non-load-bearing partitions. Older houses are all over the place with spacing.
Damaged Stud Replacement
The sister-stud fix works when damage is partial. Cut a matching piece of lumber and nail it right alongside the damaged stud using 16d nails every 16 inches. You’ve just doubled up the member and restored strength. Full replacement becomes necessary when rot, bugs, or structural problems affect more than a third of the stud. Cut top and bottom, twist it free from the nails, install a new stud toe-nailed into top and bottom plates. Drive three 16d nails through the plates into stud ends at angles for solid connection.
Header Installation for New Openings
Header size depends on span and what’s sitting above. A 2×6 handles a 3-foot opening in a non-load-bearing wall. 2×8 works for 4 feet. Go wider or deal with load-bearing conditions and you need engineered beams. Check span tables or talk to a structural engineer. King studs run full height on each side of the opening. Jack studs (trimmers) sit inside the kings and carry the header. The header rests on jack studs with its wide face vertical.
Blocking and Bracing Requirements
Fire blocking at 10-foot intervals slows fire through wall cavities. Install horizontal 2×4 blocks between studs mid-height in tall walls. Horizontal bracing strengthens walls over 10 feet, stops lateral movement. Put backing blocks behind planned fixture points (towel bars, grab bars, wall-mounted sinks) so you’re anchoring into solid wood instead of relying on drywall anchors. Corner bracing uses let-in diagonal pieces notched into stud faces or structural sheathing panels.
Safety Protocols and Health Hazard Management

PPE protects you from the stuff that’ll actually hurt you. N95 respirators filter construction dust fine for most work. P100 filters are required for plaster demo, which creates particles that blow right through lower-rated masks. Safety glasses with side shields stop flying debris. Heavy gloves protect from sharp edges, splinters, rough materials. Hearing protection matters during extended saw, grinder, or drill use. Prolonged exposure above 85 decibels causes permanent damage.
Test for asbestos before disturbing materials in homes built before 1980. Plaster, joint compound, some insulation from that era may contain it. Professional testing runs $200-500 but keeps you from breathing carcinogenic dust. If it’s there, pros handle removal. Homeowner abatement is illegal most places and dangerous regardless. Lead-safe practices are mandatory for pre-1978 painted surfaces. Lead dust from sanding or demo causes neurological damage, particularly in kids. Containment, HEPA vacuuming, wet methods minimize dust.
Don’t assume circuits are dead without testing. Use a non-contact voltage tester on all wires before touching them. Even with the breaker off, wires may be hot from another circuit, miswired, or backfed through multi-wire branches. Get a qualified electrician for panel work, circuit rerouting, or anything you’re uncertain about.
Dust containment protects the rest of your house. Plastic barriers sealed with tape create physical boundaries. Negative air machines with HEPA filtration pull air into the work zone so dust doesn’t migrate out. HEPA vacs capture particles during cutting and sanding. Seal HVAC registers to stop dust circulation. Tape plastic over vents in the work area and consider shutting the system down during heavy dust work.
Structural Assessment: Load-Bearing Identification and Damage Documentation

This matters because pulling out or compromising a load-bearing wall without proper support causes sagging floors, cracked ceilings, stuck doors, potentially catastrophic failure. Permits exist specifically for load-bearing mods to ensure engineering review and inspection. Adding temporary supports and permanent beams can tack $1,500-$4,000 onto your budget. Know what you’re dealing with before you start.
Check the attic or crawlspace where ceiling joists and roof struts rest. Walls supporting these are load-bearing. Look at floorboard direction upstairs since joists run perpendicular to boards. Walls parallel to joists often carry no load, walls perpendicular likely do. Assume all walls bear load until proven otherwise. Spine walls in Victorian houses that divide front and rear rooms and support floors above always carry loads. Party walls between attached homes typically carry roof loads. Interior walls stacked directly above basement beams usually carry significant loads. Central location often indicates load-bearing, especially in older homes with simpler framing. Thicker walls in masonry construction generally carry more load. Review blueprints if available. Inspect the basement or crawlspace for beams and posts that terminate at walls above.
Seven Load-Bearing Identification Methods:
- Attic joist direction check: Walls perpendicular to ceiling joists usually support those joists, parallel walls typically don’t
- Perpendicular floor joist alignment: Exposed basement joists reveal which walls run perpendicular and likely carry floor loads
- Exterior wall alignment: Interior walls directly above foundation walls or basement beams carry structural loads
- Central location in floor plan: Walls dividing the house into major sections often carry roof and upper floor loads
- Wall thickness comparison: Noticeably thicker walls may indicate load-bearing masonry
- Blueprint review: Original documents show structural walls, though renovations may have changed things
- Basement/crawlspace inspection for supporting beams: Steel or wood beams below terminate at load-bearing walls or posts above
Document damage with visual inspection. Vertical cracks at wall junctions often result from inadequate fixing or movement between different materials like timber stud meeting solid external walls. Horizontal cracks suggest foundation settlement or roof load issues. Diagonal cracks from door and window corners indicate structural movement or inadequate support. Water stains show moisture routes and help identify hidden damage. Bulging means plaster separation from lath or drywall buckling from moisture. Soft spots, crumbling plaster, wood rot all need documentation. Cracking above door frames or sticking doors may indicate structural problems in load-bearing walls. Photograph everything with measurements for insurance and contractor quotes. Put a ruler or tape in photos for scale.
Detect hidden damage before it surprises you. Moisture meters measure water content in materials. Readings above 17% mean active problems requiring source identification before reconstruction. Thermal cameras reveal temperature differences indicating missing insulation, air leaks, moisture behind surfaces. Exploratory holes (small access cuts in hidden spots) let you see cavity conditions, framing, insulation, hidden pipes and wiring.
Get professional help when planning load-bearing modifications. Structural engineers design beam systems to carry loads when walls get removed, ensuring proper sizing, support placement, connection details. Beam installation requires permits and inspections. Test for hazardous materials in older homes. Asbestos in plaster (common pre-1980s) and lead paint (most pre-1978 homes) need identification before disturbance for proper abatement planning and cost estimation.
Permit Requirements and Building Code Compliance
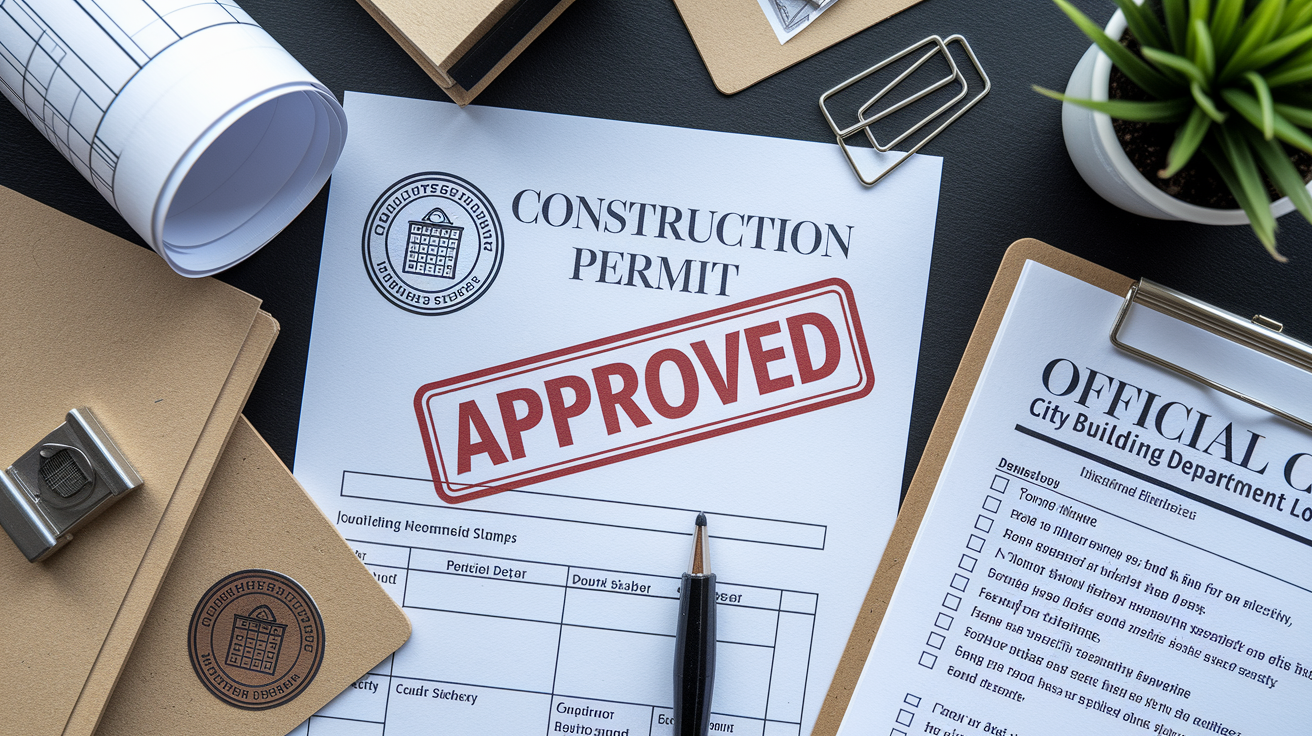
Permit necessity depends on scope. Structural work always requires permits. Removing or modifying load-bearing walls, adding walls that affect the building’s structure, installing beams all trigger permits. Electrical beyond simple device replacement needs permits. Plumbing rerouting needs permits. Cosmetic stuff like patching drywall, repainting, replacing trim typically doesn’t, though local rules vary.
Inspections happen at project milestones. Pre-closing inspection after framing mods but before insulation and drywall lets the inspector verify header sizing, stud spacing, blocking, bracing. Rough-in covers electrical and plumbing before walls close. Final inspection verifies completed work meets code for fire blocking, insulation, finish materials, workmanship. Failed inspections delay projects, prevent legal occupancy, affect resale. Buyers’ inspections and appraisers check for unpermitted structural work.
| Work Type | Permit Typically Required | Inspection Stages |
|---|---|---|
| Load-bearing wall removal | Yes | Framing, final |
| New non-load-bearing partition wall | Sometimes (check locally) | Final (if required) |
| Electrical circuit relocation | Yes | Rough-in, final |
| Plumbing rerouting | Yes | Rough-in, final |
| Cosmetic drywall repair and painting | No | None |
Code compliance covers multiple requirements. Fire-rated materials in attached garages. Walls separating garage from living space need 5/8-inch Type X fire-rated drywall on the garage side. Fire blocking in stud cavities at 10-foot intervals and at ceiling/floor intersections slows vertical fire spread. Electrical standards require outlets every 12 feet along walls, GFCI protection in bathrooms and kitchens within 6 feet of water, proper wire gauge for circuit amperage. Insulation standards vary by climate but require minimum R-values for exterior walls and air sealing.
Insulation Installation and Moisture Barrier Integration

Insulation type depends on application and performance needs. Fiberglass batts rated R-13 to R-15 fit standard 2×4 walls and provide adequate thermal resistance for most interior partitions. Mineral wool batts offer R-15 value with better sound blocking and fire resistance. Spray foam delivers R-6 per inch, seals air gaps, works well in irregular cavities but costs more. Studwork can be packed with sound-deadening mineral wool for better acoustic control between rooms.
Install batts friction-fit to fill cavities completely without gaps at top, bottom, sides. Gaps allow air movement that tanks thermal performance. Complete fill prevents thermal bridging where heat transfers through uninsulated stud faces. Don’t compress batts. Compressed R-15 performs at R-11 or less. Cut around electrical boxes, plumbing, blocking, filling voids with scrap. Split batts when necessary to wrap around wiring rather than compressing insulation behind cables.
Vapor barriers control moisture into wall cavities. Install 6-mil poly on the warm side, the interior in heating climates, potentially unnecessary or problematic in cooling climates. Seal seams with vapor barrier tape to prevent moisture bypass. Overlap sheets 6 inches at joints and seal to top and bottom plates. Direction differs by climate. Check local codes.
Soundproofing matters for party walls and bedrooms. Higher-density mineral wool beats standard fiberglass for noise reduction. STC ratings (Sound Transmission Class) measure sound blocking, with STC 50+ providing good privacy. Cheaply built party walls may need acoustic drywall over timber battens with an air void. The gap behind drywall enhances sound blocking by decoupling surfaces. Resilient channel or sound isolation clips between studs and drywall reduce sound transmission through framing.
Electrical Wiring and Plumbing Integration

Electrical relocation becomes necessary when removing load-bearing walls or creating openings that eliminate existing outlet and switch locations. Outlets required every 12 feet along walls per NEC, ensuring no point is more than 6 feet from an outlet. GFCI protection required in bathrooms, kitchens within 6 feet of sinks, other wet locations. Wire gauge must match circuit amperage. 14-gauge for 15-amp circuits, 12-gauge for 20-amp.
Licensed electrician requirements apply to panel mods, adding circuits, any work beyond basic device replacement. Homeowners can typically replace switches and outlets but can’t alter circuit wiring or add new circuits without licensed help in most places. Permits and inspections for electrical changes ensure code compliance and safety. Shut off circuits, verify power is dead, route new cables through walls before closing, make connections at boxes, restore power, schedule inspections.
Plumbing considerations include maintaining proper drain slope (1/4 inch per foot minimum for waste lines) when rerouting. Water line rerouting requires shutting supply, draining lines, cutting and installing new runs, pressure-testing before closing walls. Shutoff accessibility matters. Code requires accessible shutoffs for fixtures, so plan valve locations before closing walls. Plumbing vents can’t be eliminated without rerouting to maintain drainage and prevent sewer gas. Vent pipes must terminate through the roof or tie into existing stacks.
HVAC duct rerouting and register relocation may be necessary when wall mods block existing ductwork. HVAC balance gets affected by wall removal in some floor plans. Opening spaces can change air pressure and comfort. Consult HVAC contractors before closing walls if ductwork mods are needed.
Drywall Installation and Sheetrock Hanging Standards

Drywall type matches conditions and requirements. Standard 1/2-inch panels work for most interior walls. 5/8-inch provides better sag resistance for ceilings and improved sound control. Moisture-resistant green board suits bathrooms and damp areas, though cement board is preferred for tile backing in showers. Abuse-resistant panels with fiberglass facing withstand impacts in high-traffic areas like hallways and garages. Victorian lath and plaster is thicker than modern drywall and provides better soundproofing, but reconstruction typically uses drywall for cost and availability.
Six Hanging Best Practices:
- Perpendicular panel orientation to framing: Hang sheets across studs rather than parallel for max strength and minimal seams
- Tight butt joints without forcing: Panels should meet firmly without gaps, but forcing creates bulges and broken edges
- Tapered edge joints where possible: Factory tapered edges create recessed seams that fill flush; cut edges need more compound
- Cutouts marked from backside: Measure outlet and fixture locations, transfer to panel back, cut before hanging to avoid cracking installed panels
- Floating corner technique: Don’t fasten ceiling panels within 7 inches of corners to reduce cracking from structural movement
- Stagger seams between layers: When double-layering for fire rating or sound control, offset seams by 16 inches minimum
Fasteners ensure secure attachment. Drywall screws beat nails. They don’t pop out as framing lumber dries and shrinks. Screw spacing follows 16 inches on center along studs for walls, 12 inches for ceilings. Drive screws perpendicular, dimpling the paper face slightly without breaking through. Broken paper loses holding power. Ring-shank nails work if properly driven, but screws provide better long-term performance. Horizontal vs. vertical hanging depends on wall height. Horizontal reduces seams on 8-foot walls, vertical works better for taller walls.
| Drywall Type | Thickness | Primary Use | Moisture Rating |
|---|---|---|---|
| Standard | 1/2 inch | Interior walls, dry areas | Not moisture-resistant |
| Moisture-resistant | 1/2 or 5/8 inch | Bathrooms, laundry rooms | Water-resistant core and paper |
| Fire-rated Type X | 5/8 inch | Garage walls, fire separations | Not specifically moisture-resistant |
| Abuse-resistant | 1/2 or 5/8 inch | High-traffic areas, impact zones | Not moisture-resistant |
Corner bead and edge treatments finish wall intersections. Metal corner bead protects outside corners from impacts. Fasten every 9 inches with screws or crimping tool, keeping it straight and flush to both surfaces. Vinyl corner bead installs with joint compound instead of fasteners, providing similar protection with easier install. J-bead and L-bead trim drywall edges at windows, doors, other terminations. Paper-faced corner bead combines corner protection of metal with finishing ease of tape.
Joint Compound Application and Taping Methods

Joint compound types serve different purposes. All-purpose works for all three coats but dries slowly between applications. Lightweight sands easier and shrinks less but costs more. Setting-type (hot mud) hardens chemically within 20-90 minutes depending on formulation, allowing same-day multiple coats but offering limited working time and difficult sanding. Paper tape provides stronger joints than fiberglass mesh and works better for flat seams. Mesh tape self-adheres and works well for repairs but requires setting-type compound for adequate strength.
First Coat: Tape Embedding
Apply thin compound base along the seam using a 6-inch taping knife, filling the tapered joint recess about halfway. Center paper tape over the seam immediately and embed while the compound’s wet, pressing firmly with the knife to squeeze out excess and eliminate air bubbles. Remove excess by running the knife along the tape at a slight angle, leaving just enough to bond the tape. Allow 24 hours drying between coats. Rushing causes problems as wet compound beneath creates soft spots and bubbles. First coat coverage extends about 4 inches wide centered on the seam.
Second Coat: Joint Filling
Apply compound wider than first coat, typically 8-10 inches, using a 10 or 12-inch knife. Feather edges thin to blend into the wall, avoiding ridges. Fill fastener dimples with compound, scraping flush. Address any tape wrinkles or bubbles discovered after first coat dried. Cut out problem areas and re-tape if necessary. This coat fills the joint depression and begins blending the repair into surrounding surface.
Third Coat: Finishing and Blending
Final wide coat extends 12 inches or more using a 12-inch knife, creating gradual transition from joint to wall. Thin application matters. Thick coats crack and shrink. Feather edges to nothing, making the compound disappear into the wall. Light sanding between coats with 120-grit removes ridges and high spots. Final sanding with 220-grit creates smooth surface ready for primer. Don’t over-sand and expose tape or create low spots.
Texture Matching and Wall Finish Options
Texture matching matters because mismatched texture highlights repairs rather than hiding them. Seamless repairs require matching depth, pattern, direction of existing texture. Sample texture on scrap drywall before applying to the wall. Practice achieves consistent results and builds confidence.
Five Common Texture Types:
- Orange peel (light spray): Fine spray pattern resembling citrus peel, applied with hopper gun, covers minor imperfections while maintaining relatively smooth appearance
- Knockdown (troweled spray): Heavier spray pattern partially flattened with trowel after brief setup, creates varied surface with rustic character, hides larger imperfections
- Skip trowel (hand-applied): Joint compound randomly applied and smoothed with trowel, creates irregular pattern with high and low areas, labor-intensive traditional method
- Popcorn (ceiling): Heavily textured spray pattern typically limited to ceilings, hides major imperfections but difficult to match and contains asbestos in older applications
- Smooth (skim coat): Thin compound layer troweled smooth over entire surface, eliminates texture for modern appearance, requires skilled application
Texture application techniques vary by type. Spray textures require hopper guns connected to air compressors, with material consistency and air pressure adjusted to achieve desired pattern. Hand trowel methods use wide finishing knives or specialized texture trowels to apply and manipulate compound. Roller textures use special textured roller covers to create patterns in wet compound or paint. Skip-trowel timing matters. Knockdown texture requires waiting 5-15 minutes after spraying before troweling, exact timing depending on temperature and humidity.
Smooth finish alternatives and skim-coating eliminate texture for uniform appearance. Skim-coating existing texture requires applying thin layers of joint compound over the entire textured surface, building up and smoothing until texture is buried. Multiple thin coats work better than single thick applications that crack and sag. Sanding between coats and final sanding create smooth surface. This converts textured walls to modern smooth finish without demolition.
Plaster Repair and Lath Reconstruction
The lath and plaster system in older homes consists of wood lath strips nailed horizontally across wall studs with gaps between strips. Plaster pushed through gaps creates “keys” that lock the plaster to the wall. Traditional three-coat system includes scratch coat (pushed through lath to form keys), brown coat (builds thickness and levels surface), finish coat (smooth final surface). Victorian lime plaster was made from lime putty, sharp sand, chopped ox or horse hair for strength and crack reduction. When full replacement is needed depends on damage extent. Loose or missing plaster covering more than 25% of wall area often justifies full removal and drywall replacement, while smaller damaged areas respond to repair.
Lath repair starts with securing loose sections. Screw loose laths back using trim-head screws driven through plaster into studs, pulling loose areas tight to framing. Replace damaged sections by cutting out broken strips and installing new wood lath or expanded metal lath in the gap. Expanded metal provides better plaster key than wood strips and resists future movement. Fasten replacement lath to studs with roofing nails or screws, leaving slight gaps between sections for plaster to penetrate. Simple timber studwork with lath and plaster covering was widely used, similar to ceiling construction, making repair techniques applicable to walls and ceilings.
Three-coat plaster application follows traditional methods. Scratch coat is mixed thicker and pushed firmly through lath to form keys on the backside, then scratched with a scarifier tool to create horizontal grooves for brown coat adhesion. Allow 48-72 hours drying before applying brown coat. Brown coat builds thickness to near-final surface level, applied in layers if thickness exceeds 1/2 inch, with drying time between applications. Straightedging and darby work creates level surfaces. Final finish coat goes on thin (1/8 inch or less) and is troweled smooth with steel finishing trowels. Proper drying between layers prevents cracking from trapped moisture.
Modern alternatives simplify plaster repair. Bonding plaster over lath creates a base coat for modern joint compound finishing, combining traditional substrate with contemporary materials. Blueboard and veneer plaster systems use special gypsum panels as substrate for thin veneer plaster finish coats, providing plaster-like durability with easier application. Modern setting-type joint compound can substitute for traditional lime plaster in small repairs, hardening quickly and sanding reasonably smooth. Full replastering requires skilled tradespeople for proper finish. Trowel techniques take practice to master.
Painting Preparation and Surface Priming
Dust removal after sanding creates the foundation for quality paint finish. Vacuum all surfaces with a HEPA-filter vacuum, including walls, floors, horizontal surfaces where dust settles. Wipe walls with tack cloth to capture remaining fine particles. Damp wipe with clean water and lint-free cloths removes residual dust that tack cloths miss. Allow surfaces to dry completely before priming. Clean dust and dirt before applying primer for paint adhesion.
Primer types match surface conditions. PVA (polyvinyl acetate) primer seals porous new drywall and joint compound, preventing topcoat from absorbing unevenly and creating flat spots. Without primer, paint soaks into compound faster than into drywall paper, creating sheen differences visible in finished work. Stain-blocking primer prevents water stains, smoke damage, other discoloration from bleeding through topcoat. For fire and smoke-related home repairs, stain-blocking primer becomes essential. Smoke residue requires odor-sealing preparation before painting to prevent persistent smells from permeating fresh paint. High-hide primer covers dark colors or significant color changes with fewer topcoats. Two primer coats may be needed over bare drywall for uniform sheen, especially with deep or bright finish colors.
Primer application technique affects coverage and performance. Cut in edges first along corners, ceilings, trim using a 2-inch angled brush, creating a 2-3 inch band. Roll the field (main wall area) with a 3/8-inch nap roller for smooth surfaces or 1/2-inch nap for light texture. Maintain a wet edge by working in sections small enough to complete before the leading edge dries. Overlapping wet and dry primer creates visible lap marks. Apply even coverage without excessive thickness that drips or sags.
Spot-priming repairs and color-matching considerations apply when reconstruction affects only portions of walls. Prime all repaired areas even if surrounding wall was previously painted. Bare compound absorbs paint differently than sealed surfaces. Feather primer edges beyond repair areas to blend transitions. Color-matching existing paint requires paint store analysis of a chip or sample if original paint is unknown. Test paint color on primed surface before full application, as colors shift between wet and dry and appear different under room lighting than on small store samples.
Trim Installation and Architectural Detail Restoration
Measuring and cutting trim requires precision for professional results. Coping inside corners creates tight joints that accommodate wall irregularities. Cut the first piece square into the corner, then cut the second piece following the trim profile with a coping saw, creating a shaped end that overlaps the first piece. Mitering outside corners uses 45-degree cuts on both pieces, meeting at the corner point. Proper reveal at door casings leaves a slight setback (typically 1/8 to 1/4 inch) between door jamb edge and casing edge, creating a shadow line.
Five-Step Trim Installation Sequence:
- Door and window casings: Install first since baseboards butt against casing edges, ensuring clean transitions at openings
- Chair rail or wainscoting: Install at designed height (typically 32-36 inches) before crown and base, establishing middle wall datum
- Crown molding: Install after wall painting but before baseboard, allowing baseboard to hide small gaps at bottom wall if needed
- Baseboards: Install after flooring is complete so base sits on finished floor surface without gaps underneath
- Final caulking and touch-up: Fill gaps between trim and wall, touch up paint on trim faces and walls where installation caused marks
Fastening methods secure trim permanently without damage. Finish nails (15 or 16-gauge) work for most trim applications. Thinner nails reduce wood splitting compared to larger fasteners. Brad nails (18-gauge) suit thin or delicate trim profiles. Nail placement matters. Drive fasteners through trim into studs rather than just drywall for solid attachment. Locate studs before starting (stud finder or by tapping and listening for solid sound). Space nails 16 inches apart along trim length. Construction adhesive applied to trim back before nailing supplements mechanical fastening and fills minor gaps. Countersink nails slightly below wood surface using a nail set, then fill holes with wood putty matching the wood or paint color.
Matching existing trim profiles when working with partial wall reconstruction in older homes requires finding matching molding or having custom profiles milled. Architectural salvage yards stock period trim. Lumber yards carry common historical profiles. Custom milling shops can replicate unique profiles from samples. Door casing installed before baseboard creates proper layering. Crown molding requires compound miter cuts at corners where wall angles aren’t exactly 90 degrees. Adjustable miter saws and careful measurement solve this common challenge. Caulk gaps between trim and wall before painting using paintable latex caulk, creating seamless transitions.
Project Cost Estimation and Budget Planning
Typical cost components for interior wall reconstruction break down into demolition (10-15% of total), framing materials (15-20%), drywall and finishing materials (15-20%), trim and finish materials (10-15%), labor (60-70% of the professional total for full-service work). Material costs for a standard 12-foot partition wall run $200-400
Final Words
Interior wall reconstruction goes beyond patching holes. You’re restoring structural integrity, protecting your home from moisture damage, and creating walls that look finished, not fixed.
The work involves careful assessment, proper framing, code-compliant installation, and finish quality that matches the rest of your home.
When water damage, settling cracks, or structural issues compromise your walls, the right approach brings everything back to safe and solid. That’s what makes the difference between a temporary fix and a lasting repair.
FAQ
What is the 30% rule for renovations?
The 30% rule for renovations suggests limiting your renovation budget to approximately 30% of your home’s current value to avoid over-improving for your neighborhood. This guideline helps maintain reasonable investment expectations and prevents spending more than you can recover at resale.
How much does it cost to replace an interior wall?
The cost to replace an interior wall typically ranges from $1,000 to $3,000 for a standard non-load-bearing partition wall, including demolition, framing, drywall, and finishing. Load-bearing wall replacement costs significantly more, ranging from $3,500 to $10,000, due to structural engineering requirements and support beam installation.
What is the cheapest way to finish interior walls?
The cheapest way to finish interior walls is standard painted drywall with a smooth or light texture finish, costing $200 to $400 in materials for a typical wall. DIY installation saves 60-70% on labor costs, though professional results require proper taping, mudding, and sanding skills.
Is it worth replastering a wall?
Replastering a wall is worth it in historic homes where maintaining original lath-and-plaster construction preserves architectural character and superior soundproofing compared to modern drywall. For homes with minor damage, patching loose plaster costs less than full replacement, but extensive water damage or structural failure makes drywall replacement more cost-effective.
When should I hire a professional instead of doing wall reconstruction myself?
You should hire a professional for wall reconstruction when the project involves load-bearing modifications, requires building permits, affects electrical or plumbing systems, or includes structural concerns. Licensed contractors ensure code compliance, proper permit handling, and safe beam installation that DIY work cannot legally or safely accomplish.
How long does interior wall reconstruction take?
Interior wall reconstruction takes 5 to 10 days for a single wall from demolition through final paint, depending on project scope and drying time requirements. Load-bearing wall removal adds 1 to 3 weeks for permit approval, engineering consultation, and inspection scheduling at multiple project stages.
What materials are needed for basic interior wall reconstruction?
Basic interior wall reconstruction requires framing lumber (2×4 studs, top and bottom plates), 1/2-inch drywall panels, joint compound, paper tape, insulation, fasteners, primer, and paint. Additional materials include corner bead, baseboard trim, and specialty items like moisture-resistant drywall for bathrooms or fire-rated materials for attached garages.
Do I need a permit to remove or rebuild an interior wall?
You need a permit to remove or rebuild an interior wall when the work involves load-bearing modifications, electrical or plumbing relocation, or structural framing changes. Non-structural partition wall repairs typically don’t require permits, but local building codes vary, so check with your municipal building department before starting work.
How do I know if my wall is load-bearing?
You can identify a load-bearing wall by checking if ceiling joists or roof structures rest on it from the attic, examining if the wall runs perpendicular to floor joists, or confirming it aligns with exterior foundation walls. Central walls dividing front and rear rooms typically support floors above, and you should assume all walls are load-bearing until a structural engineer confirms otherwise.
What safety equipment is required for wall demolition?
Wall demolition requires N95 or P100 respirators for dust protection, safety glasses, heavy gloves, and hearing protection during power tool use. Homes built before 1980 need asbestos testing before disturbing plaster materials, and pre-1978 homes require lead-safe work practices when painted surfaces are involved.
How much does it cost to hire a contractor for wall reconstruction?
Hiring a contractor for wall reconstruction costs $800 to $1,500 in labor for a standard partition wall, with total project costs ranging from $1,000 to $3,000 including materials. Load-bearing wall removal with beam installation costs $3,500 to $10,000 due to structural engineering fees ($500-$1,500) and specialized labor requirements.
What’s the difference between drywall repair and full wall reconstruction?
Drywall repair involves patching existing materials for small holes, hairline cracks, or surface-only damage, while full wall reconstruction requires complete removal and rebuilding when water damage affects multiple stud bays, mold grows behind walls, or structural compromise occurs. Repair works for cosmetic issues; reconstruction addresses material failure or safety concerns.