

Can a tarp really save your home after a storm?
Yes, if it’s secured quickly and correctly, it can stop water from soaking insulation, walls, and wiring.
This guide walks you through safe, effective tarping—what to do first, how to anchor a tarp without making things worse, when to stop and call a pro, and which tools and materials actually work.
Read on for simple, step-by-step actions that prevent more damage while you wait for permanent repairs.
Quick Emergency Steps to Cover a Roof With a Tarp (Do This First)
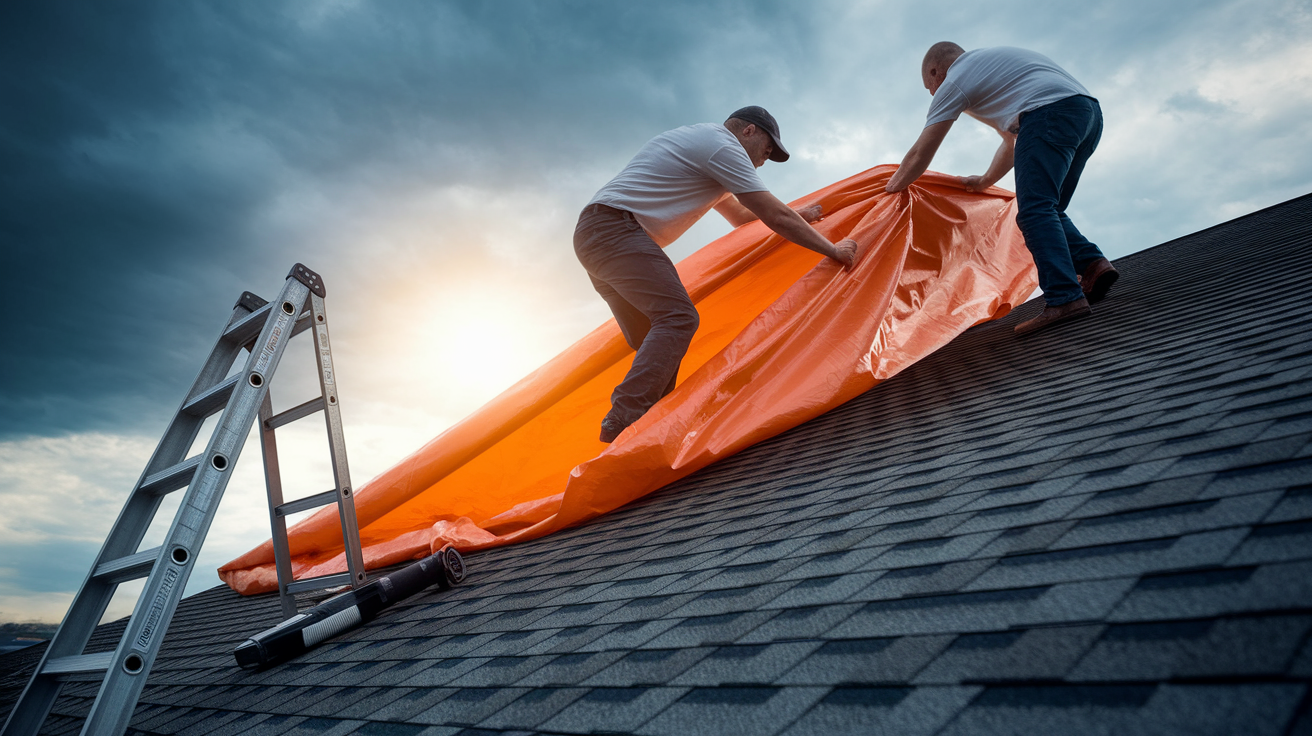
A damaged roof lets water into walls, insulation, ceilings, and electrical systems. Every minute counts. The goal of emergency tarping is to stop further water intrusion until permanent repairs can be scheduled. This isn’t a final fix. It’s a way to protect your home from more damage while you wait.
Don’t attempt tarping if there are downed power lines near the roof, if you see visible sagging or collapse, or if weather conditions include high winds, lightning, or heavy rain. Wait for conditions to improve or call a professional emergency service immediately.
Step by step emergency roof tarping:
-
Gather materials quickly. You need a heavy duty polyethylene tarp (6–10 mil minimum, sized to cover the damage plus 2–4 feet of margin), at least two 8 foot 2×4 boards, exterior screws or roofing nails, a cordless drill or hammer, work gloves, non slip boots, and a stable extension ladder.
-
Set up the ladder safely. Position the ladder on firm, level ground at a 4:1 angle (one foot out for every four feet up), and extend it at least three feet above the roof edge.
-
Work with a partner. One person on the roof, one person on the ground to hand up materials and call for help if something goes wrong.
-
Clear large debris from the damaged area. Remove any loose branches, broken shingles, or standing water so the tarp can lie flat.
-
Unfold and position the tarp. Spread the tarp over the damaged section so it extends at least 2–4 feet beyond all edges of the hole or leak, including up and over the roof ridge if the damage is near the peak.
-
Anchor the top edge first. Lay a 2×4 board across the top edge of the tarp (the side closest to the ridge), and screw or nail the board into the roof decking or rafters below, not into shingles alone.
-
Pull the tarp taut and secure the sides and bottom. Add 2×4 boards along each side and the bottom edge, spacing boards every 2–3 feet to prevent wind from getting underneath.
-
Check for loose corners and flapping edges. Walk the perimeter and add extra fasteners or small weights if you see any gaps or movement.
-
Inspect from the ground. Step back and confirm the tarp is smooth, covers all damage, and has no large wrinkles or pockets where water can pool.
-
Document the installation with photos. Take clear pictures of the damage before and after tarping for your insurance claim.
If wind speeds are above 15–20 mph, if you feel unsteady on the roof, or if the roof pitch is steep, stop and call a professional tarping service. Falling from a roof causes severe injury. Temporary tarping is only worth it if you can do it safely.
Preparing the Roof Surface Before Securing the Tarp
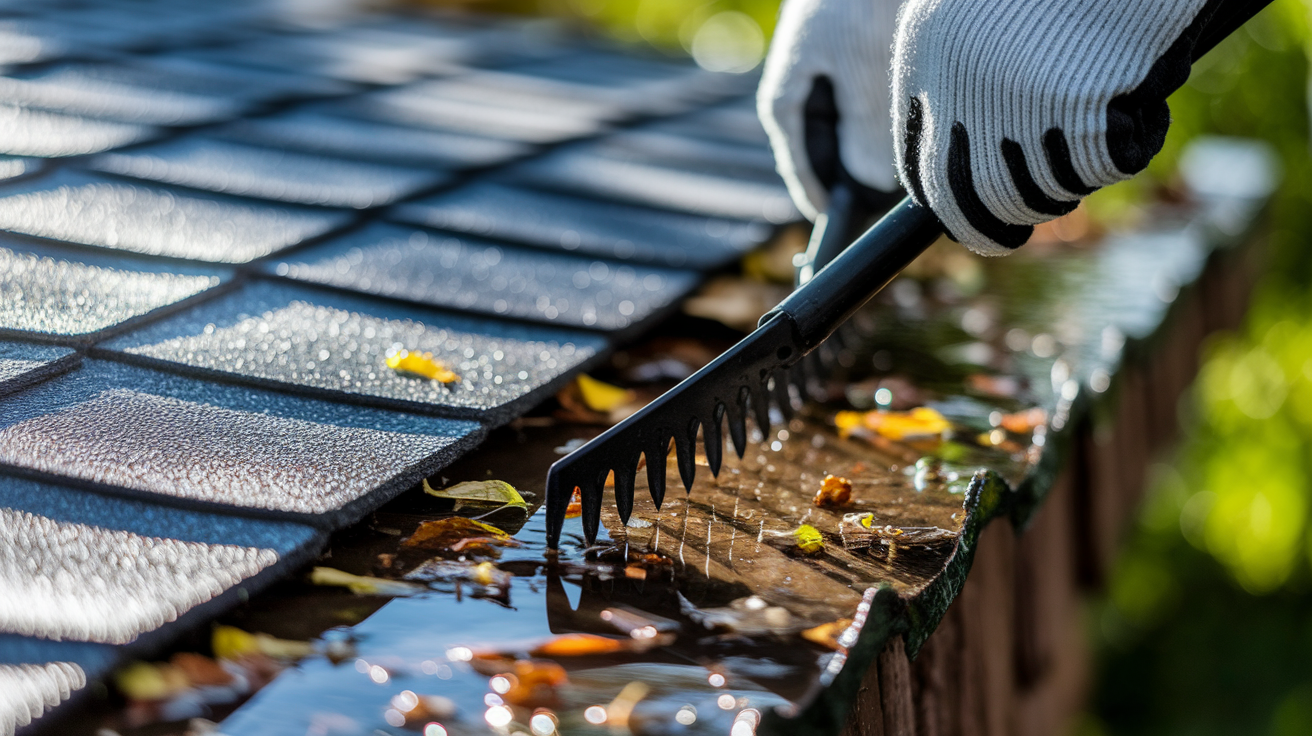
Before you lay down a tarp, you need to know what you’re working with. Walk the damaged area carefully and look for soft spots, cracked decking, or places where your weight might break through. If the roof feels spongy or you see visible sagging, stay off that section and mark it from a safe distance.
Use a roof rake, push broom, or your gloved hands to clear away leaves, broken shingles, small branches, and any standing water. Debris under the tarp creates lumps that let wind lift the edges. Moisture trapped between the tarp and roof can lead to mold or rot while you wait for repairs. If there’s a puncture or tear in the roof surface, note its location so you can center the tarp over it with enough overlap.
Before you start, check for:
- Loose or missing shingles that could shift when you walk or anchor the tarp
- Exposed nails or sharp edges that might puncture the tarp from below
- Wet or icy patches that increase slip risk
- Power lines, vents, or satellite equipment near the work area
Once the surface is clear and you’ve confirmed stable footing, you’re ready to position and secure the tarp.
Methods for Securing a Tarp Depending on Roof Damage Severity

The way you anchor a tarp depends on how much roof area is damaged and how long the tarp will stay in place. Small punctures need different treatment than a tree branch that punched through half the roof.
Light Damage (Small Leak or Missing Shingles)
For a hole smaller than a basketball or a missing shingle cluster, use a single tarp sized 10×12 feet or 12×16 feet. Drape the tarp over the damage so it extends at least 2 feet past the problem area on all sides. Anchor the edges with sandbags (20–30 pounds each) placed every 3–4 feet, or use a single 2×4 board screwed lightly into solid decking along the uphill edge to hold the tarp in place. This method works when you expect permanent repairs within a few days and wind speeds stay below 20 mph.
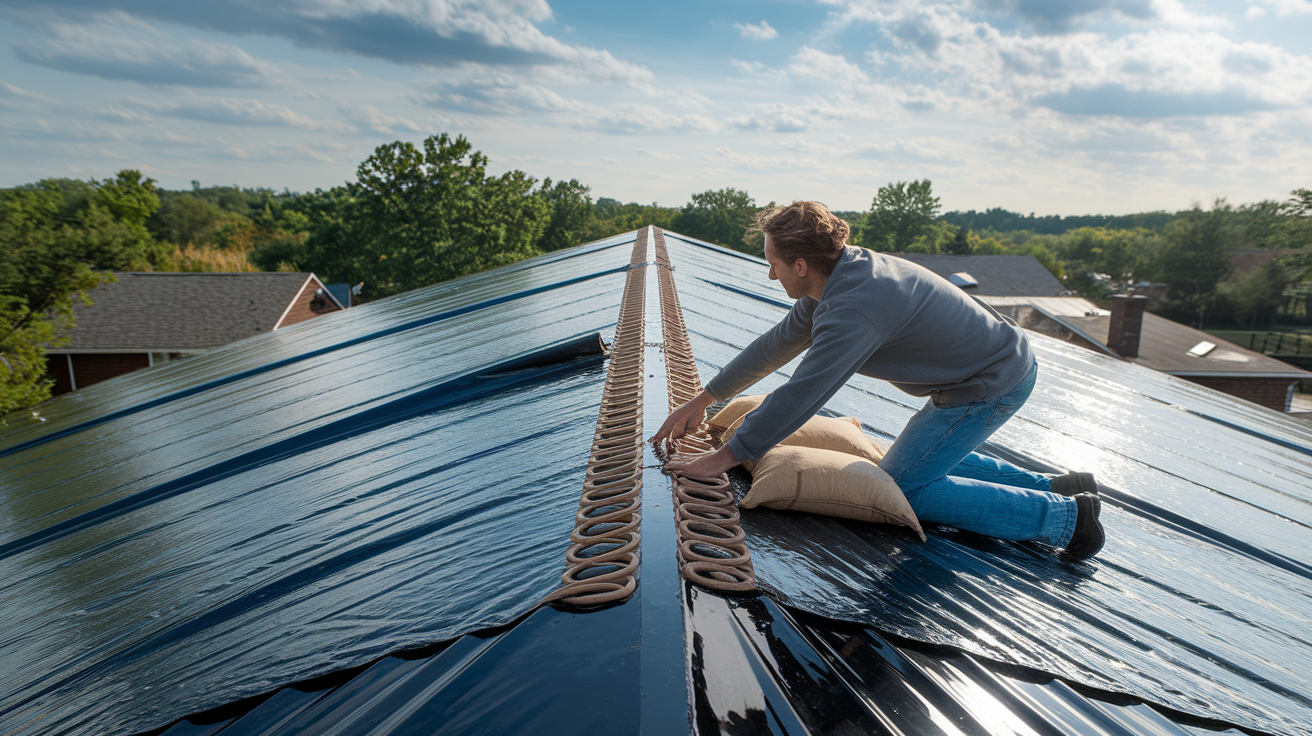
Moderate Damage (Hole Up to 4×4 Feet or Ridge Leak)
Use a 12×20 foot or larger tarp. Lay the tarp so it covers the damage and extends 3–4 feet beyond all edges. If the damage is near the ridge, run the tarp over the peak and down both sides at least 3 feet. Secure with 2×4 boards placed perpendicular to the roof slope, spaced every 2–3 feet across the width of the tarp. Fasten each board into roof rafters (typically spaced 16 or 24 inches on center) using 3 inch exterior screws with washers, not into shingles alone. This “sandwich” method keeps the tarp from flapping and resists moderate wind.
Severe Damage (Large Hole, Fallen Tree, or Structural Concern)
If the damaged area exceeds 4×4 feet, if you see broken rafters, or if the roof deck is visibly sagging, don’t attempt full tarping alone. If you must stabilize the area before professional help arrives, lay plywood or OSB sheathing over the open hole first, then tarp over the plywood. Use at least four 2×4 boards in a grid pattern, fastened into solid framing members around the perimeter of the damage. Don’t walk on compromised sections. If the damage involves electrical wiring, gas lines, or if you can’t safely access the area, call a licensed contractor immediately.
| Damage Level | Recommended Method | Notes |
|---|---|---|
| Light (small leak) | Single tarp + sandbags or one anchor board | Good for short term, low wind conditions |
| Moderate (4×4 ft or ridge leak) | Tarp + 2×4 sandwich every 2–3 ft, fastened into rafters | Handles moderate wind; suitable for 1–2 weeks |
| Severe (large hole, structural damage) | Plywood sheathing + heavy tarp + perimeter anchoring | Temporary only; call professionals for permanent repair |
How Roof Type Affects Tarp Installation
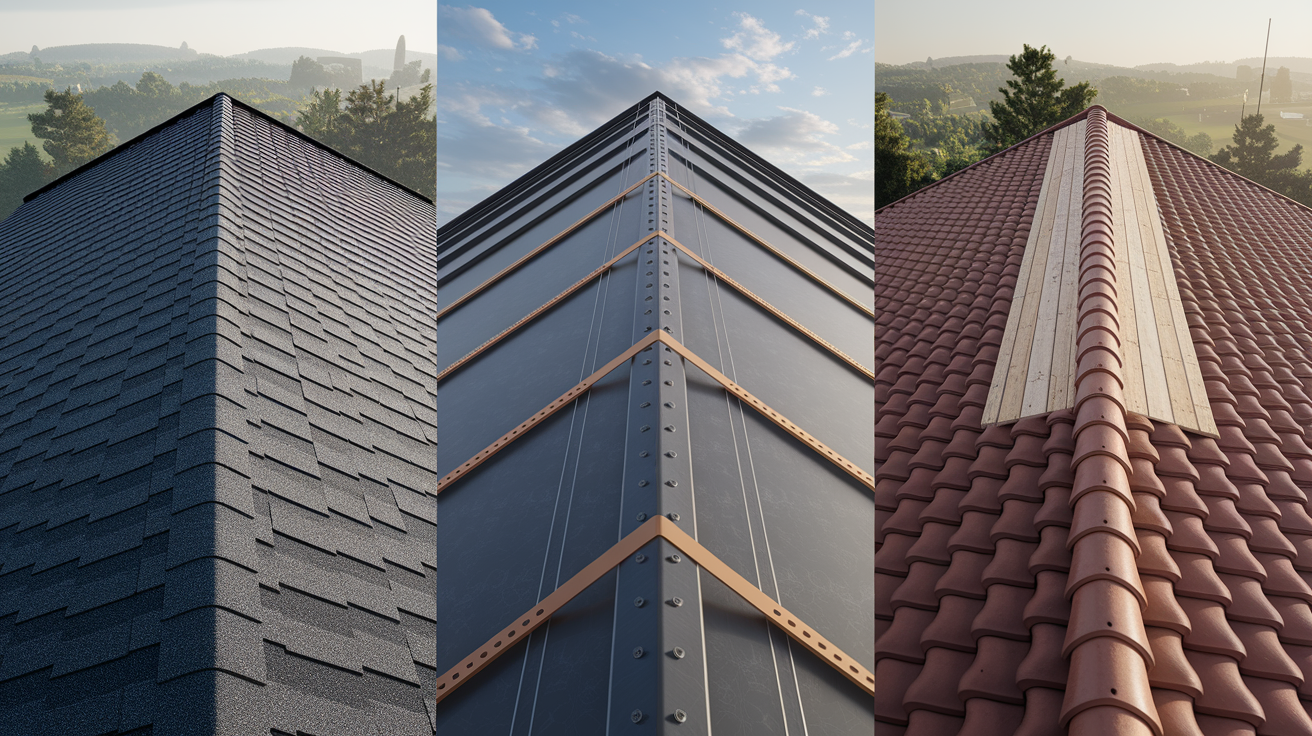
Asphalt shingle roofs are the easiest surface for emergency tarping. Shingles provide decent traction when dry, and the underlying wood decking accepts screws or nails without special tools. When you anchor 2×4 boards, aim to fasten into the roof deck or rafters, not just through the top layer of shingles. Shingles alone won’t hold under wind load. If the damaged area includes missing or loose shingles, clear them away so the tarp lies flat against solid decking. Asphalt roofs also allow you to use roofing cement or butyl tape along tarp edges to create a temporary waterproof seal.
Metal roofs require extra caution. The surface is slippery, especially when wet or covered with morning dew. Wear rubber soled boots with deep treads and consider using a safety harness anchored to a structurally sound point. Avoid driving screws or nails through metal panels if possible, because every new hole is a future leak point. Instead, use heavy duty ratchet straps looped under the ridge cap or around the eave edge, or anchor the tarp to fascia boards with screws and large washers. If you must fasten through metal, use neoprene washer screws designed for metal roofing and seal each penetration with roofing sealant immediately.
Tile roofs are fragile and crack under direct weight. Don’t walk on individual tiles. Lay plywood walkways over the tiles to distribute your weight, or work from a ladder positioned against the fascia. If tiles are already broken around the damage, remove the broken pieces carefully and set them aside. Position the tarp over the gap, then tuck the edges under adjacent intact tiles when possible, or use 2×4 boards placed across multiple tiles to spread the load. For larger damage, lay plywood sheeting under the tarp to bridge the gap, then anchor the plywood and tarp together to the roof structure. Tile roofs often require professional help because improper anchoring can crack more tiles and make permanent repairs more expensive.
Troubleshooting Common Problems When Securing a Tarp
Even a well installed tarp can develop issues after the first rainstorm or gust of wind. Most problems come from insufficient tension, poor anchor placement, or water pooling in low spots.
If your tarp starts flapping, wind is getting underneath. Check that all edges extend past the damage and are held down with boards or weights. Add extra 2×4 anchors or sandbags along the sides where the tarp lifts. Flapping tears grommets and weakens the material quickly.
Common tarp problems and fixes:
- Tarp flapping in wind. Increase anchor points, tighten straps, or add a center support pole under the tarp to reduce the surface area exposed to wind.
- Water pooling on the tarp. Adjust the tarp position so it slopes toward the eaves, or add a small support under the center to create a peak that channels water off the sides.
- Tarp shifting after rain. Re tighten anchor boards and check that screws or nails haven’t pulled out of wet decking; add washers to screws if needed.
- Leaks at tarp edges. Seal the perimeter with roofing cement or waterproof butyl tape; make sure the tarp overlaps the damaged area by at least 2 feet on all sides.
- Grommets tearing out. Distribute load by using tarp clips or by sandwiching the tarp edge between two boards before fastening; never tie knots directly through grommets.
Inspect your tarp after every storm and at least once a week. Loose anchors, new tears, or standing water mean the tarp isn’t doing its job anymore.
When You Should Call a Professional
Some roof situations are too dangerous or too complex for temporary tarping. If the damaged area is larger than 10×10 feet, if you see rafters broken or the ceiling inside your home sagging, or if water is actively pouring into your attic, a professional emergency roof service can respond faster and safer than a DIY attempt. Licensed roofers carry commercial grade tarps, harnesses, and scaffolding that let them work on steep pitches and multi story homes without the fall risk you face on a ladder.
Call a professional immediately if you see:
- Visible roof sagging, soft spots, or sections that feel unstable underfoot
- Electrical wires near or touching the damaged area
- A fallen tree or large branch still resting on the roof
- Roof pitch steeper than 6:12 (6 inches of rise per 12 inches of run), which is difficult to walk safely without specialized equipment
Emergency tarp services typically cost between $150 and $800 depending on roof size, access difficulty, and materials required. That cost buys you safety, speed, and proper documentation for your insurance claim. Temporary tarping is a smart DIY project for small, accessible damage in calm weather. When conditions or damage exceed those limits, the right call is to step back and let trained crews handle it.
Final Words
Stop ongoing water and get a tarp over the damage right away. Fast action prevents more soaking, mold, and warped boards.
This post walked you through quick steps, how to clear debris, secure tarps with 2x4s, methods for light to severe damage, roof-specific tips, troubleshooting, and when to call a pro.
Follow these practical steps on how to secure a tarp on a roof to limit damage, collect photos and readings for insurance, and buy time for a proper repair. You’ll feel steadier once the roof is stabilized.
FAQ
Q: What’s the best way to hold a tarp down on a roof?
A: The best way to hold a tarp down on a roof is using 2×4 battens laid over the tarp and screwed into solid wood beyond the damage, plus weights or straps at edges to resist wind uplift.
Q: How to attach a tarp to a roof without nails?
A: Attaching a tarp to a roof without nails uses non‑penetrating options like sandbags, heavy 2×4 battens weighted and tied, tarp clips with straps, or ratchet straps anchored to chimneys or ground points.
Q: How to attach a tarp to a roof temporarily?
A: Attaching a tarp to a roof temporarily means securing it with 2x4s across edges, fastening to safe framing or fascia, adding corner weights, and rechecking after wind or rain until a permanent repair is done.
Q: What is the 25% rule in roofing?
A: The 25% rule in roofing is the guideline that if over 25% of the roofing material on one plane is damaged, contractors or insurers often require replacement of that plane or the entire roof.