

Think a fresh coat of paint will stop smoke smells? Think again.
Paint can fail when odor molecules and soot push back through.
Sealing walls the right way—after you ventilate, remove soot, and fully dry—stops smells and keeps stains from reappearing.
This post walks you through the start‑to‑finish restoration steps: what to do first, how to clean and choose the right sealer, how to apply it, and how to confirm the odor is gone.
No guesswork. Real steps that make repainting stick.
Start-to-Finish Workflow for Sealing Smoke‑Damaged Walls
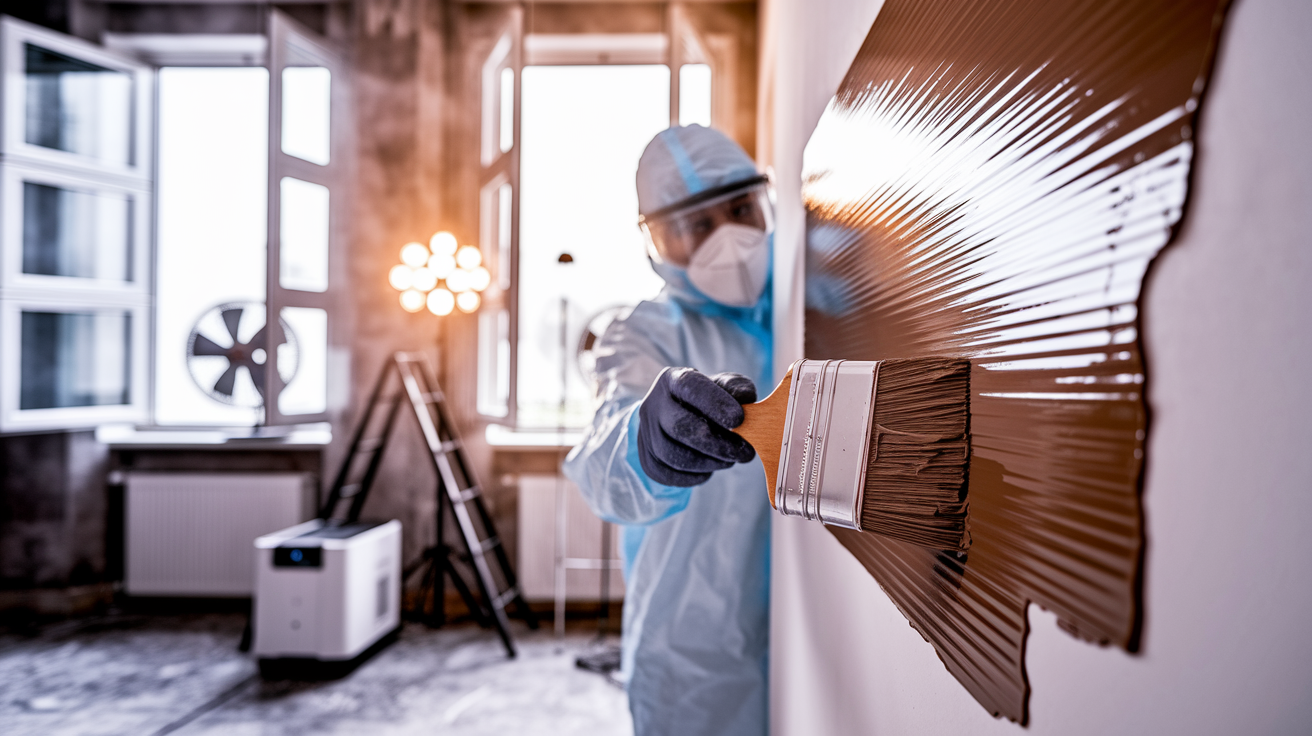
Sealing walls after smoke damage stops odor molecules from bleeding through fresh paint and prevents lingering soot stains from reappearing months later. A proper sealer acts as a barrier, not just cosmetic coverage. Without it, you’ll smell smoke every time the walls warm up, and yellow-brown ghosts of soot patterns will slowly push through your new finish coats.
Before you roll or spray any sealer, the walls must be dry, and the soot must be removed. Ventilation comes first. Open windows, set up box fans blowing outward, and place dehumidifiers in every affected room to pull moisture left by firefighting efforts out of carpets, draperies, and wall cavities. Next, use dry cleaning sponges or a commercial soot cleaner to lift as much residue as possible. Only when surfaces are clean and bone dry should you apply a specialized smoke odor sealer like ULTRA RECON Smoke Odor Sealer, which encapsulates malodors and locks down stains on porous substrates.
Here’s the complete sealing workflow:
- Ventilate immediately. Open all windows and run fans throughout the house to dry wet materials and push smoke particulates outdoors.
- Remove loose soot. Wipe walls ceiling down with chemical sponges or HEPA vacuum loose particles before wet cleaning.
- Wet clean stubborn residue. Apply a heavy duty cleaner formulated for soot removal, then rinse and let walls dry completely.
- Select the right sealer. Choose shellac based, water based, or oil based primer depending on odor severity, substrate condition, and occupant sensitivity.
- Apply sealer generously. Use brush, roller, or airless spray to coat all affected surfaces in one or two thick, even layers.
- Verify odor encapsulation. Wait for full cure, then smell test the space before applying finish paint.
Skipping any step or sealing over damp, dirty walls wastes time and money. Odors trapped under primer without proper cleaning will migrate back. Moisture sealed inside drywall can trigger mold or cause paint to peel. The correct sequence (dry, clean, seal) ensures long term odor control and a finish that lasts.
Advanced Soot‑Cleaning Techniques Before Sealing

Dry cleaning always comes before wet cleaning. Start at the ceiling and work downward in straight, vertical strokes using a chemical sponge, a rubber like block designed to lift dry soot without smearing. When the surface of the sponge turns black and stops grabbing particles, slice off the dirty layer with a utility knife or discard the sponge and grab a fresh one. Never scrub in circles. That grinds soot deeper into paint and wallpaper.
Once dry soot is removed, stubborn oily residue (especially in kitchens where grease mixed with smoke) requires wet cleaning. Apply a commercial cleaner like RECON Heavy Duty Cleaner with a sponge or microfiber cloth, working in small sections and rinsing frequently. Let each cleaned section air dry or use fans to speed the process. Walls must be completely dry before you prime. If drywall paper is still cool to the touch or darker in color, keep drying.
Common soot removal tools and when to use each:
HEPA vacuum removes loose, powdery soot from textured surfaces, baseboards, and corners before any wet or dry wiping.
Chemical dry sponge is best for painted drywall, wallpaper, and flat ceilings with light to moderate dry soot.
Degreaser or TSP solution cuts through oily kitchen smoke film and heavy residue that dry sponges can’t lift.
Microfiber cloths are ideal for final wipe down and rinsing after wet cleaning. Lint free and reusable.
Soft bristle brush is useful on textured or porous surfaces like stucco and brick, paired with wet cleaner.
If soot or odor remains after two rounds of cleaning, you’re chasing hidden contamination. Check above drop ceilings, inside HVAC ducts, or behind switch plates. Clean those sources before sealing, or the smell will keep coming back.
Primer and Sealer Types for Blocking Smoke Odors on Walls
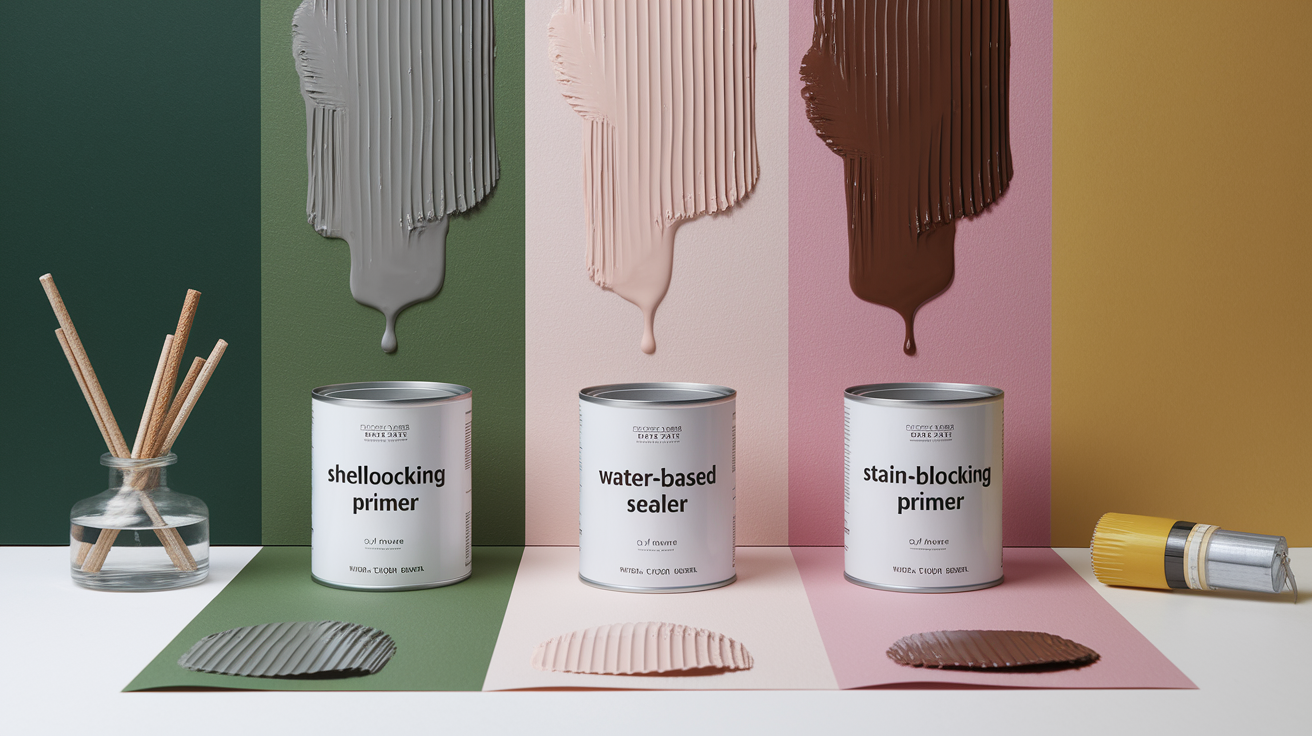
Not all primers block smoke odor. Standard latex or oil primers may hide stains, but they won’t stop volatile odor molecules from migrating through the dried film. You need a product specifically formulated to encapsulate smoke compounds: shellac based, water based odor sealers, or specialty oil primers designed for fire restoration.
Shellac Based Odor Blocking Primers
Shellac primers like Zinsser BIN have been the contractor go to for severe smoke odor for decades. They dry in under 30 minutes, adhere to almost any substrate (even glossy or imperfect surfaces), and create a hard, vapor impermeable film that locks odors in permanently. You can apply shellac in temperatures as low as 10°F, which helps when winter fires leave homes unheated.
The trade offs: shellac is the most expensive sealer type, it smells strongly of alcohol for up to a week (you may need to run carbon filtered air scrubbers), and it requires cleanup with denatured alcohol. It’s also flammable during application. Because it’s vapor impermeable, shellac can trap moisture inside walls if applied before materials are fully dry.
Water Based Odor Sealers
Water based acrylic sealers cost less than shellac and produce minimal odor and VOCs, making them safer for occupied homes and chemically sensitive individuals. Many formulations allow water vapor to pass through the cured film, which is critical for exterior walls or basements where trapped moisture can cause peeling or mold. Products like ULTRA RECON Smoke Odor Sealer apply by brush, roller, or airless spray and are designed to encapsulate odors and block tough stains on multiple substrates.
Limitations: water based sealers require better surface prep because they don’t adhere as well to glossy or dirty substrates. You may need two coats to fully block heavy soot stains, and you can’t apply them below about 45°F.
Oil/Alkyd Stain Blocking Primers
Oil based primers are widely available at home centers and are often the least expensive option. They tolerate imperfect surfaces, sand easily, and block stains well. But most alkyd primers make no smoke odor containment claims. They’re built for water stains, tannin bleed, and general priming, not fire restoration. They also require mineral spirits for cleanup, smell strongly during drying, and face tightening VOC restrictions that limit availability in some states.
| Primer Type | Odor Blocking | Stain Blocking | VOC/Smell Level | Best Use Cases |
|---|---|---|---|---|
| Shellac based | Excellent | Excellent | High VOC; strong alcohol odor for ~7 days | Severe smoke; cold weather; imperfect substrates |
| Water based acrylic | Good to Very Good | Good (may need 2 coats) | Low VOC; minimal odor | Occupied homes; sensitive occupants; vapor permeability needed |
| Oil/Alkyd | Poor (not odor specific) | Excellent | Moderate to High VOC; persistent petroleum smell | Stain blocking only; budget projects without odor issues |
Applying Sealers Correctly on Smoke Damaged Walls

Thick, even coverage matters more than speed. Pour your sealer into a lined tray if rolling, or load your airless sprayer and set the tip size according to the product label. Most smoke sealers are thicker than standard paint and need a .015 to .017 tip. Brush application works well for small areas, trim, and edges, but rolling or spraying is faster for full walls and ceilings.
Start at the top corner farthest from the door and work in sections, overlapping each pass by about half. Don’t stretch the product too thin. A generous coat encapsulates better than two skimpy ones. For shellac primers, one coat is often enough if applied heavily. Water based sealers usually require two coats for full odor suppression, especially over dark soot stains. Let the first coat dry to the touch (shellac in 30 minutes, water based in 1 to 2 hours) before recoating.
Application tips for consistent results:
Mix thoroughly. Some sealers settle or separate in the can. Stir for at least two minutes before pouring.
Maintain wet edges. Work quickly enough that each new section overlaps still wet primer to avoid lap marks.
Check temperature and humidity. Shellac tolerates cold but water based products need 45°F minimum and moderate humidity to cure properly.
Seal ceilings first, then walls, then trim, so drips and overspray land on unpainted surfaces.
Don’t apply finish paint until the sealer is fully cured. Shellac cures fast but off gasses alcohol vapor for days. Water based sealers may feel dry in two hours but need 24 hours or more to harden enough for a topcoat. If you smell smoke after the sealer dries, you either missed a spot, didn’t clean thoroughly, or need a second sealer coat.
Safety and Ventilation Precautions During Smoke Damage Sealing

Soot particles, especially from synthetic materials like foam or carpet, carry toxins: formaldehyde, benzene, and other volatiles that irritate skin, eyes, and lungs. Wear nitrile gloves, safety glasses, and a respirator with organic vapor cartridges and a P100 particulate filter when cleaning or applying solvent based sealers. Standard dust masks don’t filter chemical vapors.
Ventilation is non negotiable. Open windows on opposite sides of the room to create cross flow, and position box fans in windows blowing outward to exhaust fumes. If you’re using shellac primer, the alcohol vapor is flammable. Turn off pilot lights, avoid sparks, and keep a fire extinguisher nearby. The strong odor can also trigger headaches or nausea, so take breaks outdoors every 20 to 30 minutes.
For occupied homes or projects with sensitive individuals, run a HEPA air scrubber with activated carbon filtration while priming and for several days afterward. Carbon filters adsorb volatile organic compounds that HEPA alone can’t capture. If shellac odor lingers past one week, increase air exchange or switch to a water based sealer for remaining areas.
Essential safety gear and ventilation controls:
Respirator with organic vapor and P100 filters protects lungs from soot dust and solvent fumes during cleaning and priming.
Cross ventilation and exhaust fans push contaminated air outdoors and bring fresh air in. Critical during and after shellac application.
HEPA air scrubber with carbon filtration removes airborne particles and adsorbs lingering chemical odors in occupied spaces.
Repairing and Restoring Walls Before and After Smoke Sealing
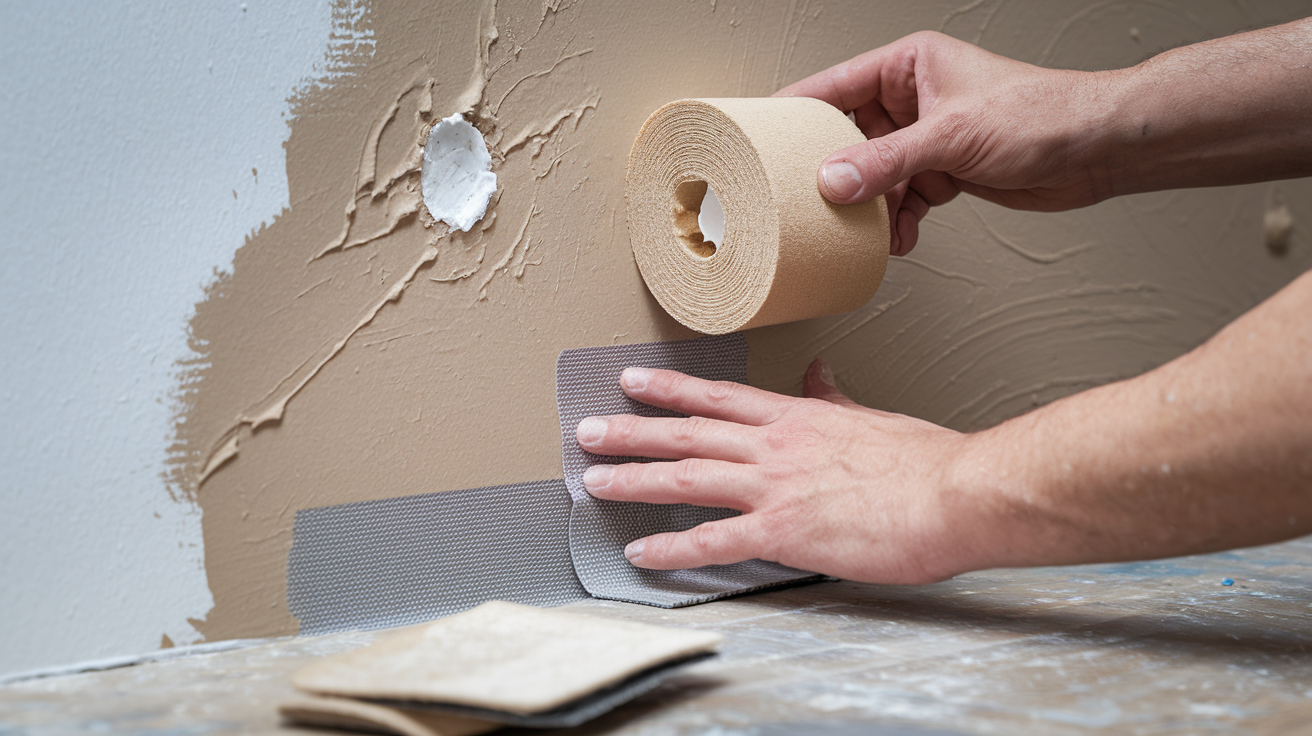
Small holes, cracks, and loose drywall tape must be fixed before you prime. Smoke often reveals damage that was easy to ignore before: screw pops, nail holes, seams that have pulled apart. Fill holes with lightweight spackle, wider cracks with setting type joint compound, and re tape any loose seams with mesh tape and a thin skim coat. Let repairs dry completely, then sand smooth with 120 grit paper.
Sanding creates dust, and dust on walls prevents sealer adhesion. After sanding, vacuum walls with a brush attachment, then wipe every surface with a tack cloth, a sticky, resin treated rag that picks up fine dust without leaving residue. If you skip this step, you’ll see grit bumps in your dried primer and rough texture in your finish coat.
Water based sealers are less forgiving of imperfect substrates than shellac or oil primers. If your walls are rough, stained, or previously coated with glossy paint, scuff sand with 80 grit paper to create tooth for the new sealer. Oil based and shellac primers stick to almost anything, but water based products may peel or fish eye over slick or contaminated surfaces.
Pre and post sealing repair sequence:
- Inspect for hidden damage. Check behind switch plates, inside closets, and above ceilings for soot, char, or water damage.
- Patch and fill. Repair all holes, cracks, and damaged drywall with appropriate compounds and let dry 24 hours.
- Sand repairs smooth. Use 120 grit paper on patches and 80 grit on glossy or rough areas that need tooth.
- Vacuum and tack. Remove all sanding dust with a HEPA vacuum and wipe surfaces with a tack cloth.
- Prime, then inspect again. After sealer dries, check for missed spots, bleed through, or new cracks that need a second fill and prime cycle.
If stains or odor bleed through after one coat of sealer, don’t start painting. Apply a second sealer coat and let it cure fully. Rushing to finish paint traps the problem under a cosmetic layer that will fail within months.
Eliminating Smoke Odors Before Sealing Walls
Sealing encapsulates odor molecules, but it doesn’t eliminate odor sources. If burnt carpet padding, charred insulation, or soot soaked HVAC ducts remain in the structure, sealing walls alone won’t solve the smell. Before you prime, walk every room and sniff: closets, behind appliances, inside cabinets. If you find concentrated odor, remove or clean the source.
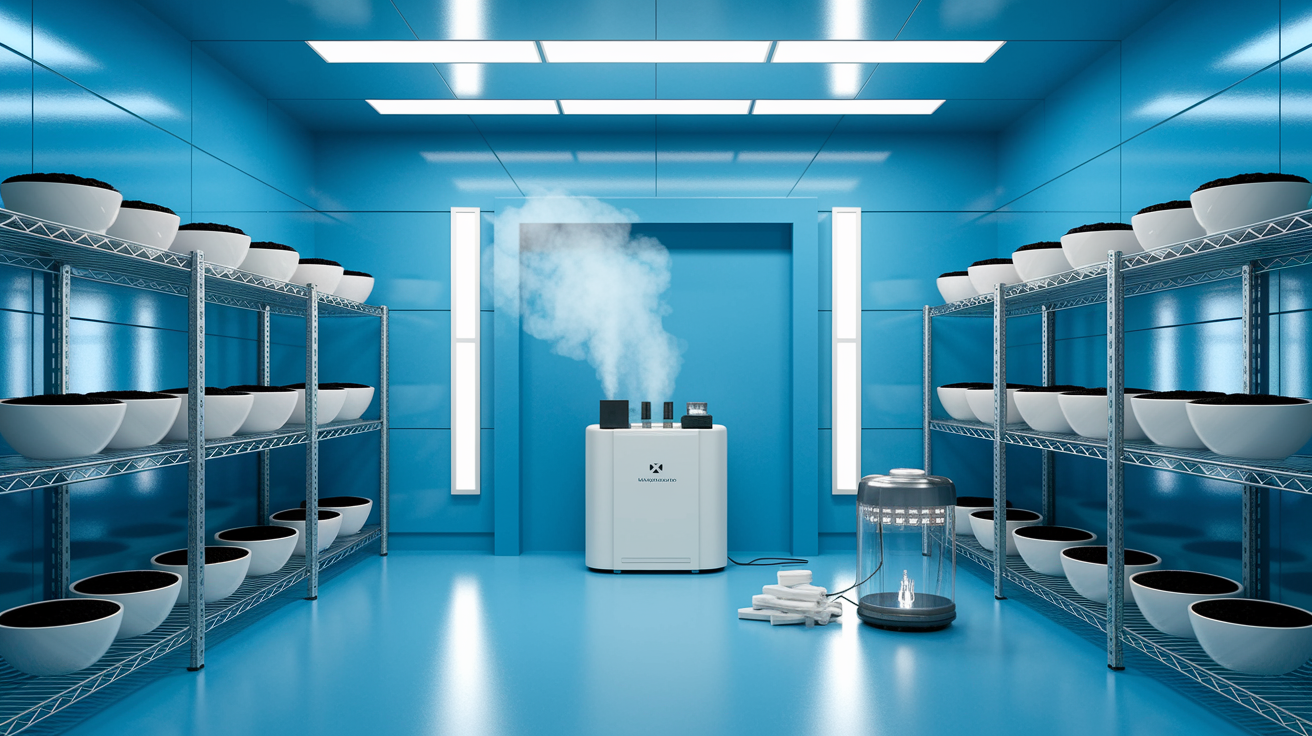
Thermal fogging and hydroxyl generators are professional odor removal tools. Thermal fogging disperses a deodorizing fog that penetrates porous materials and neutralizes smoke compounds. Hydroxyl generators break down odor molecules with UV light and are safe to use in occupied spaces, unlike ozone machines, which are effective but require full evacuation and ventilation afterward. Activated charcoal placed in open containers absorbs airborne odors in enclosed spaces like closets or drawers.
Low cost DIY methods (bowls of baking soda, vinegar wipes, or open boxes of activated charcoal) help with light residual odor but won’t handle structural contamination. If you still smell smoke after cleaning, fogging, and ventilating, the source is still present.
Common hidden odor sources to remove before sealing:
Carpet padding and underlayment absorb smoke and hold moisture. Usually must be removed and replaced.
HVAC ducts and filters distribute soot throughout the house. Ducts need cleaning and filters immediate replacement.
Insulation in walls and attics is porous and impossible to clean. Remove and replace if saturated with smoke.
Contents and furnishings like upholstered furniture, drapes, and clothing hold odor and re contaminate cleaned spaces.
Hidden cavities are spaces above drop ceilings, behind baseboards, and inside wall chases that trap soot and smell.
Once sources are removed and surfaces cleaned, sealing locks down the remaining trace odors that cling to framing, drywall paper, and subfloors.
DIY vs Professional Smoke Damage Wall Sealing

Homeowners can handle small, contained smoke events: a stovetop grease fire in one room, a fireplace backpuff that left soot on a single wall. The workflow is manageable. Ventilate, clean, dry, seal, paint. You’ll spend a weekend and a few hundred dollars on sealers, cleaning supplies, and basic PPE.
Whole house smoke damage from a structure fire is a different job. Professionals bring commercial grade HEPA air scrubbers, thermal foggers, moisture meters, and the training to find hidden contamination you’ll miss. They follow ANSI/IICRC S520 and RIA Guidelines, which specify inspection protocols, acceptable moisture readings, and Post Remediation Verification steps that confirm the structure is safe to seal and occupy. Certified restorers also document every step with photos and readings, which your insurer needs for claims and supplements when hidden damage appears.
When Homeowners Should Not DIY
If any of the following apply, hire an IICRC certified fire and smoke restoration contractor:
Smoke traveled through HVAC ducts. Ductwork cleaning and decontamination require specialized equipment and access.
Structural materials are charred or heat damaged. Hidden damage to framing, wiring, or sheathing needs inspection and safe removal.
Occupants are chemically sensitive or immune compromised. Professional grade containment, HEPA filtration, and low VOC methods reduce exposure.
Insurance claim is involved. Restorers provide the documentation, estimates, and communication with adjusters that protect your claim.
You smell smoke after two rounds of cleaning and sealing. The source is hidden, and finding it requires tools and experience.
Fire involved synthetic materials, plastics, or chemicals. Toxic residues require hazmat level PPE and disposal procedures beyond DIY scope.
Trying to DIY a job that needs professional intervention wastes money on materials that won’t solve the problem and delays the proper repair, which lets odors set deeper into porous materials.
Costs and Timelines for Sealing Walls After Smoke Damage
Sealer material costs range from $30 per gallon for basic oil primer to $80 or more per gallon for specialty shellac or high performance water based smoke sealers. A typical 12×15 room with 8 foot ceilings needs about two gallons for walls and ceiling at two coats, so figure $60 to $160 in sealer alone. Add cleaning supplies, sponges, PPE, and paint, and a DIY single room project runs $150 to $300.
Professional restoration and sealing timelines depend on damage extent and drying requirements. A small kitchen fire with localized smoke might take three to five days: one day for emergency cleaning and drying setup, two days for dehumidification and odor treatment, one day for sealing and priming, one day for final paint. Whole house smoke from a structure fire can take two to four weeks or longer if contents need pack out, HVAC cleaning, or structural demolition.
Shellac’s strong odor may require temporary relocation for sensitive occupants during application and cure, adding hotel costs to the project budget. Water based sealers allow same day re occupancy in most cases but take longer to fully cure.
| Expense Factor | Notes |
|---|---|
| Sealer material | $30–$80/gal; shellac most expensive, oil least; water based mid range; coverage ~200–400 sq ft/gal depending on porosity |
| Professional labor | $50–$100/hr typical; may include cleaning, sealing, and light repairs; whole house projects often bid as flat rate scope |
| Drying and odor equipment | Air scrubbers, dehumidifiers, thermal foggers billed daily or per project; $200–$800 depending on size and duration |
| Temporary housing | Required if shellac odor or safety concerns prevent occupancy; duration depends on ventilation and cure time |
Final Words
Start by drying and ventilating the space so you’re not sealing trapped moisture or soot. That first step keeps odors from coming back.
We walked through quick prep—ventilation, basic soot removal, full drying—then picked the right sealer, how to apply it, and how to check the job. We also covered safety, repair needs, and when to call a pro.
Do the steps in order and document as you go. Proper sequencing makes sealing walls after smoke damage stick for good, and your room will feel right again.
FAQ
Q: Can you paint over smoke damage on walls?
A: You can paint over smoke damage on walls only after you remove soot, fully dry the surface, and seal with an odor- and stain-blocking primer; otherwise stains and smell will bleed through.
Q: Will Kilz cover smoke damage?
A: Kilz can cover some smoke damage, but coverage depends on the Kilz product; shellac- or oil-based Kilz primers block heavy stains and odors better than basic water-based formulas.
Q: Do you have to replace drywall after smoke damage?
A: You have to replace drywall after smoke damage only if it’s warped, crumbling, soaked, or charred; otherwise thorough cleaning, drying, and sealing usually restore the wall.
Q: How to fix smoke damaged walls?
A: To fix smoke damaged walls, remove loose soot with a dry sponge or HEPA vacuum, ventilate and dry, repair damaged drywall as needed, then apply an odor-blocking primer and repaint.