

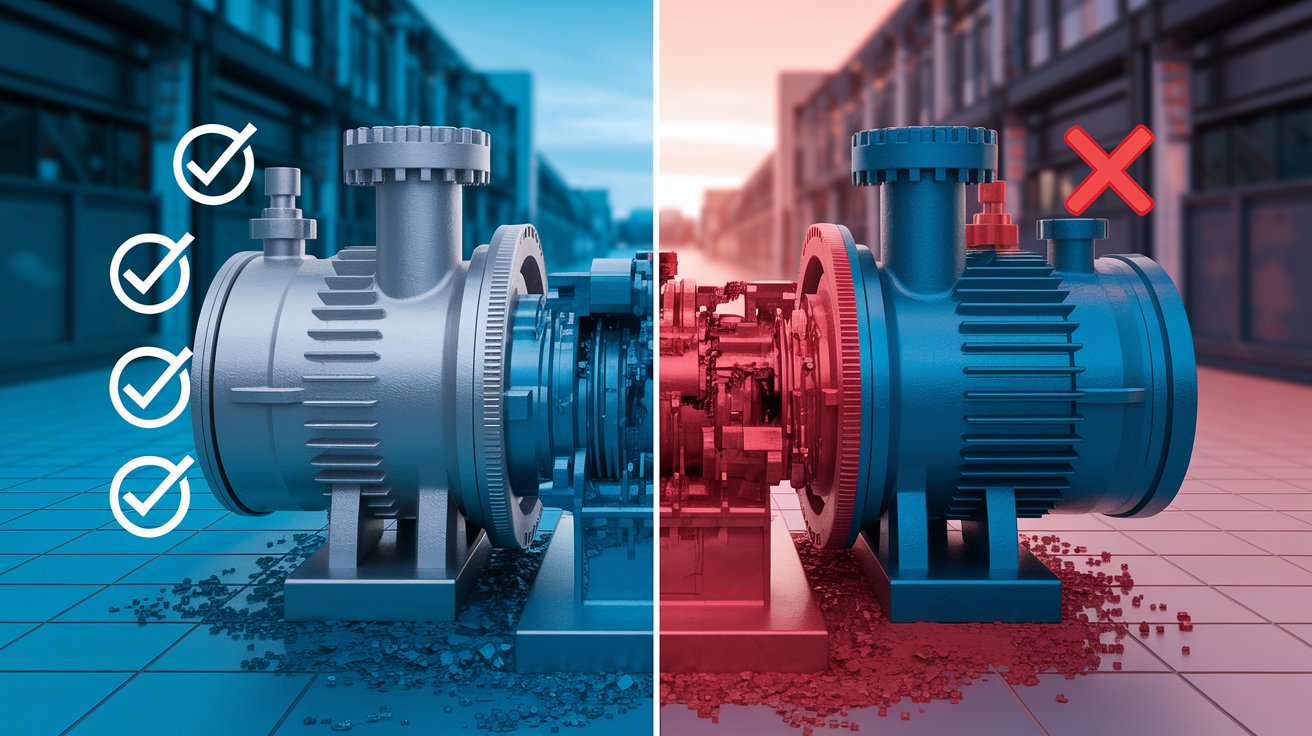
Your sump pump only matters when it’s running, but most homeowners never test it until water’s already pooling in the basement. That $200 piece of equipment stands between your finished basement and thousands in water damage, yet it sits ignored in the corner until it fails during the next heavy storm. Regular maintenance keeps your pump ready to activate the second water enters the pit, protects the motor from debris damage, and catches small problems before they turn into emergency flooding. Here’s what you need to check monthly and quarterly to keep your basement dry.
Critical Maintenance Checklist for Leak Prevention

Proper sump pump maintenance stops basement flooding before it starts. Your system needs to kick on when water shows up and run smoothly through the whole cycle.
Monthly Maintenance Checklist:
- Test pump operation by pouring water into the pit
- Inspect discharge pipe connections for leaks or separation
- Verify float switch moves freely without obstructions
- Check pump position to ensure it remains upright and level
- Clean inlet screens to prevent debris blockage
- Inspect electrical connections and GFCI outlet function
- Test backup system operation if installed
- Monitor for unusual sounds during pump cycle
Testing your sump pump with water matters more than anything else you’ll do. Grab a 5 gallon bucket, fill it up, and slowly pour it into the sump pit. Watch the float switch rise with the water level. It should move smoothly without catching on the pit walls or pump housing. When the water hits the activation point, the pump should start automatically within seconds. You’re looking for strong, steady discharge flow. The pump keeps running until the water level drops below the shutoff point, then stops on its own. Walk outside and check the discharge location to make sure water flows freely away from your foundation.
Normal operation sounds like a steady hum with consistent water movement through the discharge pipe. Warning signs? Grinding or rattling noises usually mean debris in the impeller. Continuous running points to positioning problems or a stuck float switch. Complete failure to start when water reaches the activation level needs immediate attention. Weak discharge that barely trickles from the outlet pipe also tells you something’s wrong. These symptoms need fixing before the next heavy rain.
Test your pump monthly to catch problems early. In early spring before heavy rain season, run a thorough test even if the pump hasn’t run recently. After extended dry periods when the pump sits idle for weeks, run a test cycle to verify it’s ready. Monthly checks take less than five minutes but prevent emergency failures that lead to basement flooding and expensive water damage.
Cleaning the Sump Pump and Pit to Remove Debris Buildup

Debris buildup causes pump failure and water backup by clogging inlet screens, jamming impellers, and stopping the float switch from moving properly.
Cleaning the Sump Pump Unit
Disconnect power completely before removing the pump from the pit. Lift the unit out and place it on a protected surface outside or in a utility sink. Use a garden hose to spray down visible dirt and gunk covering the pump housing. For stubborn debris, scrub with a stiff brush. Pay attention to the inlet openings where water enters the pump. Remove the bottom grate if your model allows access to the impeller. Check for wrapped debris like roots, fabric, or hair that stops the impeller from spinning freely.
Cleaning the Pit and Basin
Use a wet/dry vacuum to remove standing water and sediment from the bottom of the pit. That accumulated silt reduces the pit’s capacity and shortens the time between pump cycles. Scrub the pit walls with a brush to remove mineral deposits and grime. Check the pit liner for cracks or damage that could allow soil to get in. Clear the weep hole, that small opening near the pump base that equalizes pressure and prevents air lock.
Cleaning Inlet Screens and Vent Holes
Clean the inlet screen at least every four months using an old toothbrush and water. This screen acts as a filter, allowing water in while keeping dirt and debris out of the pump mechanism. When the screen clogs, water pools around the pump instead of being drawn in efficiently. That creates conditions for potential microbial growth. The vent hole on top of the pump maintains proper air pressure inside the housing. Use a small wire or toothpick to clear this opening if it gets blocked.
Clean your sump pump every few months during active seasons, or quarterly if your basement experiences frequent water intrusion. Signs that cleaning’s overdue include slower pumping action, visible debris floating in the pit, musty odors from standing water, or the pump running longer than normal to clear the same amount of water.
Discharge Pipe System Maintenance and Proper Placement

Discharge pipe failures cause water to flow back toward your foundation, overwhelming the sump pump and creating the exact flooding you’re trying to prevent.
Inspect pipe joints and connections every month for signs of separation or damage. Walk the entire discharge line from the pump to the outdoor exit point. Feel each connection to make sure pipes fit tightly together without gaps. Look for cracks in PVC piping, especially at elbows where stress concentrates. Check that mounting brackets hold the pipe securely without sagging sections where water could pool and freeze. Replace any damaged sections immediately. A $15 pipe replacement prevents thousands in water damage.
Water must discharge at least 20 feet from your home foundation to prevent it from seeping back into the soil around your basement and returning to the sump pump. Never allow discharge water to flow into sewer or septic systems. The volume overwhelms these systems and causes damage or backups. Avoid discharging onto driveways and sidewalks where continuous water exposure speeds up concrete deterioration and creates ice hazards in winter. Some municipalities restrict discharge into storm drains, so check local regulations before connecting to municipal systems.
The check valve prevents water in the discharge pipe from flowing backward into the pit after the pump shuts off. During your quarterly cleaning, remove and inspect the check valve for debris buildup inside the valve body. Rinse it thoroughly under running water. Check that the internal flapper moves freely. It should swing open easily when you blow through one end but seal completely when you try blowing from the opposite direction. A failing check valve forces your pump to re-pump the same water repeatedly, shortening motor life.
Winterize your discharge pipes in cold climates to prevent freeze related backups. Insulate above ground sections with foam pipe insulation rated for outdoor use. Consider installing a bubbler pot at the discharge point. This underground reservoir allows water to percolate into the soil even when the ground surface freezes. Alternatively, extend the discharge line underground below the frost line. Ice blockages turn a functioning pump into a useless motor that runs continuously without moving water.
Check local building codes before modifying your discharge system. Code violations can result in fines during home inspections and create insurance coverage problems if pump failure causes water damage. Proper discharge placement reduces maintenance requirements by preventing the pump from working against its own expelled water, which extends motor life and reduces how often you’ll need to replace components.
Checking Sump Pump Position and Float Switch Function

Motor vibrations during normal operation gradually shift the pump from its original position. Even small movements affect performance enough to cause continuous running or complete failure to activate.
Every month, verify the pump sits upright and centered in the basin. The pump base should rest flat on the pit bottom without tilting to any side. Natural vibrations during the pumping cycle cause the unit to “walk” across the pit floor over time. When a pump tips or leans, the float switch can catch against the pit wall, preventing it from rising with the water level. An off kilter pump also puts uneven stress on the impeller shaft and bearings, speeding up wear.
Inspect the float switch for free movement through its entire range of motion. The float, whether a ball on an arm or a vertical switch, needs several inches of clearance from the pit walls and pump housing. Manually lift the float to trigger the pump, then lower it to verify automatic shutoff. Some float switches hang from cords that can wrap around discharge pipes or get pinned under the pump body. Untangle any caught components and reposition them for unrestricted movement. The float should activate the pump when water reaches about two thirds of the pit depth and shut off when water drops to about six inches from the bottom.
Common positioning problems show specific symptoms. Continuous running usually means the float can’t drop low enough to trigger the shutoff switch. Check if the pump has shifted too close to one wall. Failure to start often indicates the float is pinned or the pump has tipped backward, preventing the float from rising. Pumps that cycle rapidly on and off suggest the float has minimal clearance and triggers at the slightest water movement. Reposition the pump by centering it in the pit, making sure the base sits level, and verifying at least three inches of clearance on all sides for the float mechanism.
Electrical Safety and Power Supply Maintenance

Working with electrical equipment in damp basement environments requires strict safety protocols to prevent shock hazards and make sure the pump functions when needed.
Verify your pump plugs into a working ground fault circuit interrupter outlet. GFCI outlets detect electrical current leaks and cut power instantly to prevent shock. Test the GFCI monthly by pressing the “test” button. The outlet should click and cut power. Press “reset” to restore function. GFCI breakers trip frequently in damp basement conditions, which effectively shuts off the pump without warning. After any power interruption or if you find the pump not running, check that the GFCI hasn’t tripped before assuming pump failure.
Inspect the power cord every month for damage, fraying, or deterioration from moisture exposure. Look closely where the cord enters the pump housing. This junction point often shows wear first. Check the entire cord length for cuts, exposed wiring, or soft spots in the insulation. The pump must plug directly into the outlet without extension cords, which create additional connection points where moisture can cause problems and reduce the electrical current reaching the motor.
Electrical Safety Precautions:
- Always disconnect power before any maintenance by unplugging the pump, not just turning off the switch
- Never touch the pump or electrical connections with wet hands or while standing in water
- Keep all electrical connections at least 12 inches above the highest potential water level in the pit
- Test the GFCI outlet monthly by pressing the test button to ensure it trips properly
- Inspect for any exposed wiring at the cord, plug, or pump connection points
- Call a licensed electrician immediately if you see sparking, smell burning, or the circuit breaker trips repeatedly
Before any maintenance work, unplug the pump and verify power is completely off. Don’t rely on the float switch being in the “off” position. Accidental water introduction during cleaning could trigger the pump unexpectedly. Set the unplugged cord where you can see it as a visual reminder that power is disconnected. After completing maintenance, make sure your hands and the plug are completely dry before reconnecting power.
Installing and Maintaining Backup Battery Systems

Backup systems prevent flooding during storms that knock out power exactly when your primary sump pump faces the highest demand from heavy rainfall.
| Backup Type | How It Works | Pros | Cons |
|---|---|---|---|
| Battery Backup | Separate pump powered by deep cycle marine battery, activates automatically when primary pump loses power | Reliable during outages, works 4 to 8 hours depending on pumping frequency, easy to test | Requires battery replacement every 3 to 5 years, needs charging system maintenance, limited runtime |
| Water Powered Backup | Uses municipal water pressure to create suction that removes water from pit, no electricity required | Unlimited runtime, no batteries to maintain, works during extended outages | Requires adequate water pressure (40+ PSI), uses 1 gallon of municipal water per 2 gallons pumped, not suitable for homes on well water |
| Backup Generator | Portable or standby generator powers primary pump and other essential systems during outages | Powers entire home, supports primary pump at full capacity, handles other appliances | Expensive initial cost, requires fuel storage and maintenance, needs manual startup unless professionally installed |
Battery backup pumps install directly in the sump pit alongside your primary pump. Choose a system with enough battery capacity to match your typical pumping needs. Homes with high water tables need larger batteries than homes with occasional seepage. The charging system requires a dedicated outlet and should show a steady green light indicating full charge. Test the battery backup every three months by unplugging the primary pump and pouring water into the pit to trigger the backup system. Replace the battery when it can’t maintain a charge or fails to run the pump for at least 30 minutes during testing.
Inspect your backup system monthly using the same procedure as your primary pump. Verify the battery charger shows a full charge indicator. Check that automatic switchover functions properly. When the primary pump loses power, the backup should activate within seconds. Clean corrosion from battery terminals using a wire brush and baking soda solution. Keep water level in flooded batteries topped off with distilled water. A backup system that isn’t maintained provides false security and won’t protect your basement when you need it most.
Installing Alarm Systems and Monitoring for Water Level Issues

Alarm systems provide early warning of pump failure or excessive water levels, giving you time to respond before flooding damages your basement.
Water level alarms alert you when water rises above the normal pumping range, indicating your sump pump isn’t keeping up with water intrusion or has failed completely. Basic alarms consist of a sensor probe mounted on a bracket inside the pit, positioned several inches above the pump’s normal activation point. When rising water touches the sensor, the alarm sounds. Typically a loud 85 decibel alert you can hear throughout the house. Install the sensor high enough to trigger before water reaches floor level but low enough to give meaningful warning time, usually about halfway up the pit depth.
Smart monitoring systems add WiFi connectivity and smartphone notifications to traditional alarms. These systems track pump cycles, runtime, and water levels continuously. You receive alerts on your phone when the pump runs longer than normal, cycles too frequently, or when water reaches alarm levels. Some systems send notifications when power outages occur, warning you that your primary pump is offline. Advanced models monitor backup battery charge levels and alert you when the battery needs replacement. Smart systems cost more than basic alarms but provide monitoring even when you’re away from home.
Test your alarm monthly by manually raising the sensor probe or triggering the test button if your system includes one. Replace batteries in wireless alarms annually, even if they still show charge. Weak batteries fail during emergencies. Keep the sensor probe clean by wiping it with a damp cloth during your regular pit cleaning to ensure reliable water contact and activation.
Seasonal Inspection Requirements and Maintenance Schedule
Scheduled maintenance prevents emergency failures by addressing small problems before they escalate into system breakdowns during storms.
Adjust your maintenance frequency based on conditions specific to your home. Homes with high water tables or frequent groundwater intrusion need more frequent inspections than homes with occasional seepage. Regional climate affects schedules. Areas with heavy spring rainfall require thorough pre-season preparation, while regions with year round precipitation need consistent monthly attention regardless of season.
| Maintenance Task | Monthly | Quarterly | Spring | Fall | Annual |
|---|---|---|---|---|---|
| Test pump with water pour | ✓ | ||||
| Inspect discharge pipe connections | ✓ | ||||
| Check pump position and float switch | ✓ | ||||
| Test GFCI outlet and inspect power cord | ✓ | ||||
| Clean inlet screen | ✓ | ||||
| Clean pump unit and pit | ✓ | ||||
| Inspect and clean check valve | ✓ | ||||
| Test backup battery system | ✓ | ||||
| Comprehensive pre-season testing | ✓ | ||||
| Winterize discharge pipes (cold climates) | ✓ | ||||
| Replace alarm system batteries | ✓ | ||||
| Professional inspection | ✓ |
Keep a maintenance log noting the date of each task, pump runtime observations, and any problems discovered. Track how long the pump runs during test cycles. Increasing runtime for the same amount of water suggests declining efficiency. Note unusual sounds, vibrations, or performance changes. These records help identify gradual deterioration and provide valuable information when consulting professionals about repair versus replacement decisions.
Recognizing Signs of Mechanical Failure and Troubleshooting Common Problems
Catching problems early through observation during monthly checks prevents minor issues from escalating into complete pump failure and basement flooding.
Common Problems and Diagnostic Steps:
Strange grinding or rattling noises. Likely cause is debris caught in the impeller. Disconnect power, remove pump, and inspect the impeller chamber for rocks, roots, or wrapped materials. Clean thoroughly and test. Persistent grinding after cleaning suggests bearing failure requiring replacement.
Pump runs continuously without shutting off. Check pump position first. It may have shifted so the float can’t drop low enough to trigger shutoff. Verify the float moves freely without catching on pit walls. Inspect the float switch mechanism for damage. Test by manually lowering the float. If the pump doesn’t stop, the switch has failed.
Pump won’t start when water reaches activation level. Verify power by checking the GFCI outlet hasn’t tripped. Confirm the float rises freely with water level. Manually lift the float. If the pump starts, the problem is float positioning or water level isn’t reaching the activation point. If manually triggering the float doesn’t start the pump, suspect electrical failure or a seized motor.
Pump cycles on and off rapidly. Indicates the check valve is stuck open, allowing water to flow back into the pit after each cycle. Remove and clean or replace the check valve. Can also result from a discharge pipe that’s too small in diameter for the pump capacity.
Excessive vibration intensity. Some vibration is normal, but violent shaking suggests an unbalanced impeller from debris accumulation or damage. Can also indicate loose mounting or a pump that’s shifted off center in the pit. Reposition the pump and clean the impeller.
Visible rust or corrosion on pump housing. Surface rust is cosmetic, but corrosion around seals, the power cord entry point, or the motor housing indicates water intrusion that will cause electrical failure. Inspect closely for pitting or flaking metal. Advanced corrosion requires pump replacement.
Musty or sewage like odors from pit. Suggests standing water between pump cycles where bacteria grows. Clean the pit thoroughly, improve drainage to the pit, and verify the weep hole isn’t clogged. Persistent odors may indicate sewer gas entering through cracks in the pit liner.
Weak discharge flow or water barely trickling out. Points to a clogged inlet screen, partially blocked discharge pipe, or failing impeller. Clean the inlet screen first, then inspect the discharge line for obstructions. If flow remains weak after cleaning, the impeller may be damaged or motor is losing power.
Sump pumps typically last 7 to 10 years with proper maintenance. Performance issues in pumps approaching or exceeding this age often indicate it’s time for replacement rather than repair. Frequent breakdowns, declining pumping capacity despite cleaning, or multiple component failures within a short period suggest the unit has reached end of life. Replacement costs $800 to $1,500 installed, while repeated repairs on an aging pump quickly approach this amount without providing long term reliability.
Keep notes on pump behavior changes between maintenance checks. Document when symptoms first appear, what conditions trigger them, and whether they worsen over time. These observations help professionals diagnose problems accurately and provide specific recommendations rather than general assessments.
Understanding Submersible vs. Pedestal Pump Maintenance Differences

The two main sump pump types require different maintenance approaches based on their design and component accessibility.
Submersible pumps sit entirely underwater in the sump pit with the motor sealed inside a waterproof housing. Maintenance focuses on seal integrity and gasket condition because any water penetration into the motor housing causes electrical failure. Inspect the power cord entry point where it enters the sealed housing. This junction uses a special gasket that can deteriorate from constant submersion. Check the base plate gasket that seals the motor compartment from the water intake section. Look for oil sheens on the pit water surface, which indicate seal failure and motor oil leaking from the housing. Complete submersion means you’ll remove the entire pump for cleaning and inspection rather than accessing components while the unit remains in the pit.
Pedestal pumps mount the motor on a column above the water level with only the intake hose submerged. This design allows easier maintenance access since the motor stays dry and visible at all times. You can inspect motor condition, check for overheating, and listen for bearing noise without removing anything from the pit. The motor shaft that connects to the submerged impeller requires occasional lubrication at the bearing points. Check your owner’s manual for lubrication type and frequency. Clean the intake screen at the bottom of the suction hose more frequently than submersible inlet screens because the narrower hose diameter clogs faster.
Combination systems use a primary pump (usually submersible for efficiency and quiet operation) with a secondary backup pump (often pedestal style for different activation points and power sources). Maintain each pump according to its specific type requirements. Test them separately by disconnecting one while testing the other to verify each unit functions independently.
Check manufacturer specific maintenance recommendations in your owner’s manual. Different brands use various float switch designs, seal materials, and motor configurations that affect maintenance procedures and parts replacement. Following manufacturer guidelines preserves warranty coverage and ensures you’re addressing the actual maintenance needs of your specific model rather than using generic procedures that might miss critical tasks.
DIY Maintenance Guidelines and Knowing When Professional Help Is Required
Safe DIY Maintenance Tasks:
Monthly water testing. Pouring water into the pit and observing pump operation requires no tools and carries minimal risk when you avoid touching electrical components.
Basic cleaning of pump exterior and pit. Disconnecting power first makes this safe for homeowners comfortable with simple hand tools.
Visual inspections. Checking pump position, examining discharge pipes, and verifying float movement are observation tasks requiring no specialized knowledge.
Alarm system checks. Testing and replacing batteries in alarm systems involves basic household skills.
Discharge pipe inspection. Walking the discharge line and checking connections requires no technical expertise.
Position verification and adjustment. Repositioning a shifted pump within the pit is straightforward once power is disconnected.
Professional help is required when the pump won’t start after water testing and you’ve verified power is reaching the outlet, any electrical issues beyond a simple GFCI reset such as sparking or burning smells, the pump experiences repeated failures despite proper maintenance, unusual grinding or squealing noises persist after thorough cleaning, water backs up into the basement despite the pump appearing to run, major component replacement like motors or complete pump units is needed, or water damage restoration services become necessary after pump failure causes flooding. Don’t attempt to repair sealed motor housings, replace internal electrical components, or diagnose complex mechanical failures. These situations require professional assessment for safety and proper repair.
Cost considerations favor a balanced approach. Professional annual inspections typically cost $150 to $300 and include thorough testing, cleaning, and component assessment that extends pump life. DIY monthly maintenance costs almost nothing beyond minimal cleaning supplies and your time. Emergency pump replacement during active flooding costs $1,200 to $2,000 with rush service fees, while planned replacement during dry conditions costs $800 to $1,500. Regular professional inspections combined with monthly DIY checks provide the most cost effective protection. You catch problems early when repairs are simple and inexpensive rather than waiting for complete failure that requires emergency service.
Find qualified professionals by asking for sump pump specialists rather than general plumbers. Specialists understand the nuances of different pump types and drainage systems. Verify they service any pump model regardless of who installed it, which matters if you move into a home with an existing system. Establish a relationship with a trusted provider for annual inspections rather than calling different companies each time. Consistent service from the same technician means they track your pump’s history and spot gradual performance decline. Check if they offer emergency service contracts that guarantee rapid response during pump failures, which provides protection during storms when multiple customers call simultaneously.
Protecting Your Foundation Through Drainage System Integration
Sump pump effectiveness depends on proper integration with exterior drainage systems. The pump removes water that’s already entered your drainage network, but comprehensive water management reduces how hard the pump works and how often it cycles.
French drains and interior perimeter drainage systems collect groundwater before it enters living spaces and direct it to the sump pit through perforated pipes embedded in gravel beds. These drainage pathways need maintenance to function efficiently. Check that exterior French drains remain clear of debris that blocks water flow. Inspect interior perimeter drains during your quarterly pit cleaning. If you notice reduced water flow into the pit during wet periods, the drainage pipes may be clogged with silt. Professional hydro jetting services clear blocked drainage lines, restoring proper water collection and reducing the load on your pump.
Downspout diversion keeps roof water away from your foundation and prevents massive water volume from overwhelming your sump pump during storms. Extend downspouts at least 10 feet from the foundation using solid pipe or roll out extensions. Never allow downspouts to discharge next to the foundation where water immediately seeps into the soil around your basement. A single downspout can deliver hundreds of gallons during heavy rainfall. Water that your sump pump must handle if it enters the drainage system instead of flowing away from the house.
Slope grading around your home creates the first line of defense against basement water intrusion. The ground should slope away from the foundation at least 6 inches over the first 10 feet. This simple grading directs surface water away before it can saturate the soil around your basement walls. Proper exterior drainage reduces sump pump cycling frequency dramatically. Pumps in homes with good exterior drainage may run only during heavy rainfall, while pumps fighting poor drainage run constantly during wet periods. Reduced cycling extends motor life, lowers electricity costs, and decreases the likelihood of failure during critical storms. Address exterior drainage problems and foundation grading issues as part of comprehensive basement water damage repair rather than relying solely on your sump pump to compensate for preventable water intrusion.
Replacement Parts, Costs, and Extending Your Sump Pump Lifespan
Typical sump pump lifespan ranges from 7 to 10 years, but proper maintenance can extend this to 12 years or more by reducing wear and preventing premature component failure.
| Part | Typical Lifespan | Replacement Cost Range | Signs of Wear |
|---|---|---|---|
| Float Switch | 5 to 7 years | $20 to $60 | Pump won’t activate or shut off, erratic cycling, visible cracks in float ball |
| Check Valve | 3 to 5 years | $15 to $40 | Water flowing backward after pump stops, pump cycling rapidly, clicking sounds in discharge pipe |
| Discharge Pipe | 10 to 15 years | $30 to $100 | Cracks especially at elbows, separation at joints, freezing damage, brittle or discolored PVC |
| Backup Battery | 3 to 5 years | $100 to $250 | Won’t hold charge, backup pump runs less than 30 minutes during testing, corrosion on terminals |
| Inlet Screen | 7 to 10 years | $10 to $25 | Clogged beyond cleaning, cracked or broken mesh, warped frame |
| Impeller | 5 to 8 years | $30 to $80 | Reduced pumping capacity, unusual vibration, visible damage to blades, bent shaft |
| Complete Pump | 7 to 10 years | $150 to $600 | Multiple component failures, motor overheating, seal leaks, cost of repairs approaching replacement cost |
Annual maintenance costs break down clearly between DIY and professional approaches. DIY maintenance requires minimal investment, perhaps $20 annually for cleaning supplies, replacement inlet screens, and testing materials. Your time investment runs about 30 minutes monthly plus quarterly deep cleaning sessions. Professional annual service typically costs $150 to $300 depending on your region and includes comprehensive testing, cleaning, component inspection, and a written assessment of pump condition. Many homeowners combine approaches by handling monthly checks themselves while scheduling professional service each spring before heavy rain season.
Regular maintenance improves energy efficiency by keeping the impeller clean and making sure the motor doesn’t work harder than necessary. A well maintained pump cycles less frequently because it removes water efficiently during each cycle rather than struggling with reduced capacity from debris buildup. Reduced cycling means lower electricity consumption. The difference may only be a few dollars monthly, but it adds up over the pump’s lifespan while also reducing wear on the motor and components.
Prevent corrosion and rust through proper cleaning that removes moisture trapping debris, adequate pit ventilation to reduce humidity around the pump housing, and addressing standing water between pump cycles that creates a corrosive environment. Standing water indicates either excessive groundwater intrusion that exceeds your drainage capacity or a pit that’s too shallow and doesn’t provide enough storage between cycles. Consider having a professional assess whether a deeper pit or additional drainage would reduce the corrosive conditions affecting your pump.
Mold Prevention and Humidity Control After Sump Pump Issues
Proper sump pump maintenance prevents moisture related problems by removing water before it saturates basement air and creates conditions where mold develops on surfaces and belongings.
A functioning sump pump controls basement moisture by actively removing groundwater before it accumulates and evaporates into the air. When pumps fail or struggle to keep up with water intrusion, humidity levels rise quickly. Elevated humidity above 60 percent creates ideal conditions for mold growth on drywall, wood framing, stored items, and furnishings. Your monthly maintenance routine directly prevents these moisture problems by making sure the pump activates reliably and removes water efficiently.
Monitor basement humidity levels using a simple hygrometer that costs $10 to $20 at hardware stores. Keep humidity between 30 and 50 percent year round. Install a dehumidifier as backup protection during humid summer months or after heavy rainfall when your sump pump runs frequently. The dehumidifier removes moisture from the air that evaporates from the sump pit and any dampness on basement walls. This two part approach, active water removal through the sump pump and humidity control through dehumidification, provides comprehensive moisture management.
After any pump failure that allows water to pool in the basement, inspect immediately for moisture damage. Check walls for water staining, feel carpets and belongings for dampness, and look for musty odors that indicate hidden moisture. Address small problems quickly by drying affected areas with fans, removing wet materials, and cleaning surfaces with appropriate solutions. Speed matters. Mold can begin developing within 24 to 48 hours of water exposure, so rapid response prevents small moisture incidents from becoming major problems.
When pump failure causes significant water intrusion or when you discover mold growth from extended moisture exposure, professional help becomes necessary. Water damage restoration services provide specialized equipment for thorough drying, moisture detection tools that find hidden dampness, and proper techniques for cleaning contaminated surfaces. Professional mold remediation may be required if growth covers more than 10 square feet or appears in HVAC systems where it can spread throughout your home. These situations affect property value because undisclosed moisture and mold problems create legal liability during home sales, and they impact flood insurance since repeated water damage from preventable maintenance failures can affect coverage and rates.
Final Words
Sump pump maintenance for leak prevention isn’t complicated, but it demands consistency.
Test your pump monthly. Clean the pit every few months. Check the discharge pipe, float switch, and electrical connections regularly.
These simple tasks protect your basement from flooding and save you from dealing with water damage, mold problems, and expensive emergency repairs.
Most maintenance work takes less than an hour and costs almost nothing compared to replacing a failed pump or repairing a flooded basement.
Start with a simple water pour test today. If the pump runs smoothly, you’re already ahead. If it doesn’t, you caught a problem before it turned into a leak.
FAQ
What maintenance needs to be done on a sump pump?
Sump pump maintenance needs include monthly testing by pouring water into the pit to trigger operation, inspecting discharge pipe connections and float switch movement, cleaning inlet screens every four months, checking pump position and electrical connections, testing backup systems, and monitoring for unusual sounds or performance issues.
Can I put a chlorine tablet in my sump pump?
No, you should not put a chlorine tablet in your sump pump. Chlorine can damage pump components, seals, and gaskets. Instead, clean the pump every few months by disconnecting power, removing it from the pit, hosing down debris, and using a wet/dry vac to remove sediment from the basin.
What can I put in my sump pump to keep it clean?
You should keep your sump pump clean using plain water and a scrub brush rather than adding chemicals. Hose down dirt and gunk, clean the inlet screen with a toothbrush and water, clear the weep hole, and use a wet/dry vac to remove standing water and sediment from the pit every few months.
Should I replace the water pump as preventative maintenance?
You should replace your sump pump when it’s 7 to 10 years old or showing signs of failure like continuous running, strange noises, or weak discharge, rather than on a fixed preventative schedule. Regular maintenance and repair is more cost-effective than premature replacement and extends pump lifespan significantly.
How often should I test my sump pump?
You should test your sump pump monthly by pouring a bucket of water into the pit to verify it triggers and drains properly, with additional testing in early spring before heavy rain season and after extended periods of inactivity to ensure reliable operation when needed most.
What are signs my sump pump needs professional repair?
Your sump pump needs professional repair if it won’t start during testing, makes unusual grinding or rattling noises, runs continuously without stopping, shows weak discharge flow, or cycles on and off too frequently despite cleaning and basic troubleshooting. Electrical issues beyond simple GFCI reset also require professional help.
How far should sump pump discharge be from my house?
Sump pump discharge should be at least 20 feet from your home foundation to prevent water from returning to the basement and overworking the unit. Never discharge into sewer or septic systems, and avoid draining onto driveways and sidewalks where continued water exposure speeds deterioration.
Do I need a battery backup for my sump pump?
You need a battery backup sump pump if you live in areas with frequent power outages or severe storms, as your primary pump won’t operate without electricity. Battery backup systems automatically take over during power failures, preventing basement flooding when protection matters most and primary pumps fail.
How do I know if my float switch is working?
You know your float switch is working by pouring water into the pit and watching it rise freely without catching on pit walls, activate the pump at the proper water level, and allow the pump to shut off automatically when water drains. Restricted movement or failure to trigger indicates adjustment or replacement is needed.
What causes a sump pump to run constantly?
A sump pump runs constantly when it’s shifted out of position due to motor vibrations, the float switch is stuck or misaligned, the check valve is broken allowing backflow, the pump is undersized for water volume, or there’s a leak in the discharge pipe returning water to the pit.