

Think grabbing a damp rag will clean soot?
It usually makes it worse.
Soot is tiny, oily carbon that smears into paint when it gets wet, so the fastest, safest move is dry first.
Start with a dry cleaning sponge (chemical sponge) and a HEPA vacuum, then use gentle wet cleaners like dish soap, vinegar, or baking soda.
If stains stay, step up to TSP or a commercial cleaner, then seal with a stain‑blocking primer before you repaint.
This post walks you step‑by‑step through what removes soot from walls, safety, and when to call a pro.
Immediate Methods That Remove Soot From Walls (Fastest Working Options)
The fastest way to remove soot from walls is to start dry, not wet. Soot’s made of fine, oily carbon particles that’ll smear and stain deeper into paint if you wipe it with water too early. Your first step is always to lift the loose soot off the surface using a dry cleaning sponge (also called a chemical sponge) and a HEPA vacuum with a soft brush attachment. Once the loose layer’s gone, you can move to mild wet cleaning with dish soap, vinegar, or baking soda. If stains remain after two cleaning cycles, switch to stronger commercial cleaners or TSP, then seal with a stain blocking primer before repainting.
A dry cleaning sponge costs about $5 to $15 each, and you’ll typically use one sponge per room depending on how much soot’s present. These sponges work by pressing against the soot and lifting it without rubbing or spreading. After dry cleaning, wet methods can be applied safely. The mildest option is dish soap. Mix 1 tablespoon of liquid dish soap per gallon of warm water. For light soot, add 1 cup of distilled white vinegar per gallon to cut through grease. For stubborn localized marks, make a paste with 3 parts baking soda and 1 part water.
Here’s the priority sequence for removing soot from walls:
-
Put on PPE: wear an N95 or better respirator, nitrile gloves, and safety goggles. Open windows and run fans for cross ventilation.
-
Vacuum loose soot first: use a HEPA vacuum with a soft brush attachment, holding the nozzle slightly off the wall to avoid grinding particles into the paint.
-
Use a dry cleaning sponge: press the sponge flat against the wall and lift in one direction. Don’t rub back and forth. When the sponge surface gets loaded with soot, slice or sand off the dirty layer to expose a clean side.
-
Test a small hidden area: before wet cleaning, test your chosen cleaner on a 2 to 4 square inch patch in a closet or behind furniture to confirm the paint won’t soften or discolor.
-
Apply mild dish soap solution: dampen a microfiber cloth with the soap water mix (wring it out so it’s damp, not dripping), wipe from top to bottom in vertical strokes, rinse the cloth frequently in clean water, and change the cleaning solution when it turns gray.
-
If stains remain, use vinegar or baking soda: apply a 1 cup per gallon vinegar solution or a baking soda paste to stubborn spots, let sit 5 to 10 minutes, then wipe and rinse thoroughly.
-
Escalate to TSP or commercial cleaners only if needed: mix ¼ cup TSP per gallon of warm water (follow the product label), apply with a sponge, rinse twice, and allow full drying. Expect 30 to 90 minutes total for wet cleaning one wall, plus drying time.
Dry sponge cleaning usually takes 10 to 30 minutes per wall and should always happen before any liquid touches the surface.
Safety Gear & Preparation for Cleaning Soot From Walls

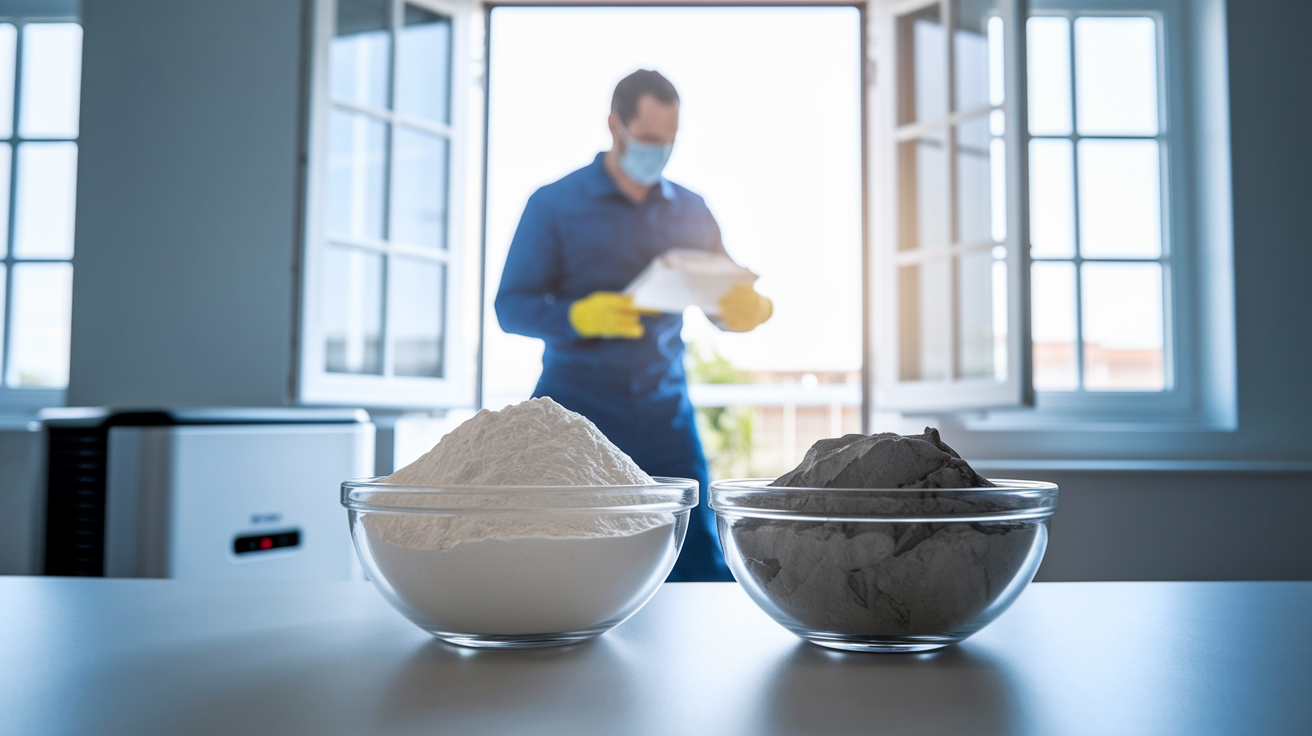
Soot particles are smaller than 1 micrometer and can stay airborne for hours, which means you’ll inhale them if you don’t wear respiratory protection. Soot also contains carbon compounds, tar, acids, and sometimes heavy metals, all of which can irritate skin, eyes, and lungs. Before you start cleaning, put on an N95 respirator (about $1 to $3 each in multi packs) or a reusable P100 half mask if you have heavy soot. Wear nitrile gloves (a box of 100 costs $8 to $20) and safety goggles ($5 to $15). Open windows and place a box fan in one window blowing out to create cross ventilation. This pulls soot laden air outside instead of circulating it through the house.
Lay plastic drop cloths on the floor under the wall you’re cleaning to catch falling soot and prevent it from grinding into carpet or hardwood. Move furniture away from the wall or cover it with plastic sheeting. Don’t skip the HEPA vacuum step. Vacuuming loose soot before you apply any cleaner prevents you from rubbing oily particles deeper into the paint and spreading stains across a larger area.
PPE and preparation checklist:
- N95 or P100 respirator
- Nitrile gloves and safety goggles
- Cross ventilation: open windows, use fans
- Plastic drop cloths to protect floors
- HEPA vacuum with soft brush attachment
- Test patch on a hidden 2 to 4 square inch area before full cleaning
Tools, Cleaners & Materials That Remove Soot From Walls

You’ll need a mix of dry tools and household cleaners to handle soot at different levels of severity. Start with items you probably already have, then add a few specialty products if needed.
Materials and approximate costs:
- Chemical or dry cleaning sponge (1 to 2 per room): $5 to $15 each. Designed to lift soot without water.
- HEPA vacuum with soft brush attachment: consumer models start around $100. If you don’t own one, consider renting or hiring a pro for extensive jobs.
- Microfiber cloths (set of 6 to 12): $8 to $25. Lint free and reusable.
- Warm water (1 to 2 gallons): tap water’s fine.
- Liquid dish soap (such as Dawn, 24 to 28 oz bottle): $3 to $6. Mix 1 tablespoon per gallon of water.
- Distilled white vinegar (1 gallon): $3 to $6. Mix 1 cup per gallon of water for light to moderate soot.
- Baking soda (1 lb box): $1 to $3. Use ½ cup per gallon of water, or make a paste with 3 parts baking soda to 1 part water for spot treatment.
- TSP (trisodium phosphate) or TSP substitute (1 to 4 lb box): $10 to $20. Mix about ¼ cup per gallon of warm water for heavy, oily residue. Follow product label directions.
- Commercial heavy duty cleaners (Krud Kutter, Simple Green, Zep): $6 to $15 per quart. Use for persistent, resinous soot.
- Stain blocking primer (Zinsser BIN shellac primer or Kilz Original oil based): $15 to $40 per quart. 1 quart covers about 100 to 125 square feet, 1 gallon covers 350 to 400 square feet.
- Paint for finish coats: $25 to $60 per gallon depending on brand.
- Plastic drop cloths: $5 to $15 for a roll. Protects floors and furniture.
Always start with the least invasive method. Dry cleaning sponge and mild dish soap. Then escalate only if stains remain. TSP and commercial degreasers are last resort options because they can dull or damage flat paint if overused. If you reach the point where cleaning fails, seal the stain with a shellac or oil based primer and repaint rather than scrubbing harder.
Dry Cleaning Methods That Remove Soot From Walls Without Smearing

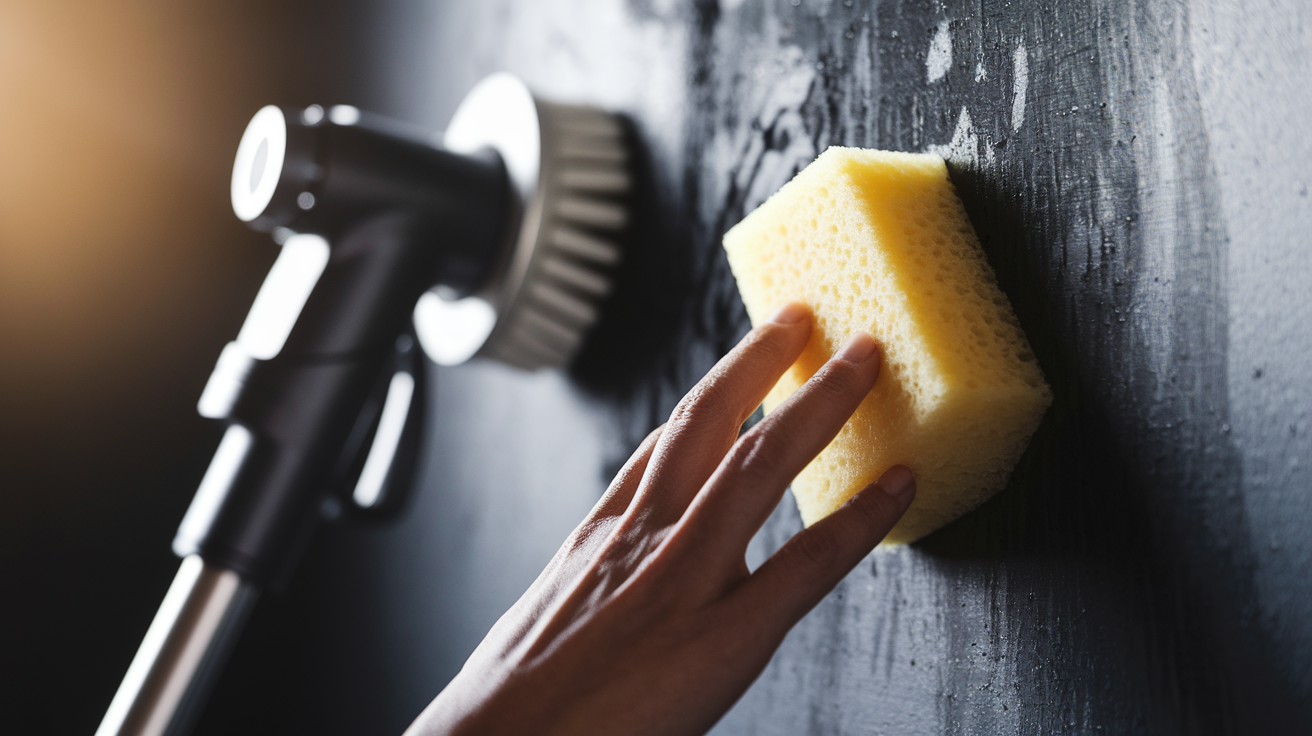
Dry methods are your first line of defense because they remove soot without pushing oily carbon deeper into porous paint. A dry cleaning sponge (sometimes called a chemical sponge even though it contains no chemicals) is made of vulcanized rubber and works like an eraser for soot. Press the flat surface of the sponge against the wall and lift in one direction. Don’t rub side to side or scrub in circles, because that spreads the residue. When the sponge surface gets saturated with black particles, slice off the dirty layer with a utility knife or sand it lightly with fine sandpaper to expose a clean surface underneath.
After sponging, use a HEPA vacuum with a soft brush attachment to pick up any loose soot left behind. Hold the nozzle about a quarter inch off the wall or let the soft bristles barely touch the surface. This prevents grinding particles into the paint. Work from top to bottom so falling soot doesn’t re contaminate areas you’ve already cleaned. Expect to spend 10 to 30 minutes per wall depending on coverage. Textured or knockdown plaster takes longer because soot settles into the peaks and valleys. Use the sponge gently and let the vacuum’s suction do most of the work instead of pressing hard.
Step by step dry cleaning process:
- Put on your N95 respirator, gloves, and goggles. Open windows and start ventilation.
- Lay plastic drop cloths on the floor beneath the wall.
- Starting at the top corner, press the dry cleaning sponge flat against the wall and lift in a single downward or sideways stroke.
- Rotate or flip the sponge to use a clean side after every few strokes.
- When the entire surface is loaded with soot, slice off the dirty layer or lightly sand the sponge to expose fresh rubber.
- After sponging the full wall, vacuum with the HEPA equipped soft brush, working top to bottom.
- Inspect the wall under good lighting. If a faint gray film remains, you can proceed to wet cleaning. If heavy black marks persist, repeat the dry sponge step before adding any water.
For smooth painted drywall, the sponge glides easily and lifts soot cleanly. On textured walls, use lighter pressure and make multiple passes rather than one heavy scrub. On semi gloss or satin finishes, the sponge works the same way but you may see fewer embedded stains because the paint’s less porous.
Wet Cleaning Solutions That Remove Soot From Walls Safely

Once loose soot’s gone, you can use water based cleaners to dissolve the oily film left behind. Always start with the mildest option. Dish soap. Stronger cleaners can strip paint or leave residue that bleeds through new coats. Mix 1 tablespoon of liquid dish soap (such as Dawn) per gallon of warm water in a bucket. Dampen a microfiber cloth in the solution, wring it out until it’s just damp (not dripping), and wipe the wall from top to bottom in vertical strokes. Rinse the cloth in a second bucket of clean water every few passes, and change the soapy solution when it turns gray. Dry the wall with a clean towel as you go to prevent water from soaking into the drywall.
If dish soap alone doesn’t remove all the discoloration, add 1 cup of distilled white vinegar per gallon of warm water. Vinegar cuts through grease and neutralizes some of the acidic compounds in soot. Apply the same way. Damp cloth, top to bottom, frequent rinsing, thorough drying. For small, stubborn spots, make a paste with 3 parts baking soda and 1 part water. Spread a thin layer on the stain, let it sit for 5 to 10 minutes, then gently rub with a damp cloth and rinse. Baking soda’s mildly abrasive, so use it sparingly on flat or matte paint to avoid dulling the finish.
Expect wet cleaning to take 30 to 90 minutes per wall, including drying time. Work in sections about 3 feet wide so you can rinse and dry before the solution evaporates and leaves streaks. If you’re cleaning a whole room, start with the ceiling (if affected), then walls, then trim and baseboards. Change your cleaning solution at least once per wall to avoid redepositing soot.
| Cleaner | Mix Ratio | Best Use Case |
|---|---|---|
| Dish soap | 1 tbsp per gallon warm water | Light to moderate soot on washable paint |
| White vinegar | 1 cup per gallon warm water | Oily residue or light smoke film |
| Baking soda paste | 3 parts baking soda : 1 part water | Localized stubborn marks on durable finishes |
Always test your chosen cleaner on a hidden 2 to 4 square inch area first. Inside a closet, behind a door, or under a light switch plate. Wait 10 minutes and check for paint softening, color change, or surface damage before cleaning the visible wall.
Stronger Cleaners for Stubborn Soot Stains on Walls

When dish soap, vinegar, and baking soda don’t fully remove the stain, escalate to a phosphate based cleaner like TSP (trisodium phosphate) or a commercial degreaser designed for smoke and soot. TSP’s a powerful alkaline cleaner that cuts through oily carbon residue, but it’ll dull flat paint and can etch some surfaces if left on too long. Mix about ¼ cup of TSP per gallon of warm water, following the product label for exact ratios and safety warnings. Always wear nitrile gloves, safety goggles, and a respirator when using TSP, and ensure good ventilation. Apply the solution with a sponge, let it sit for 2 to 5 minutes, then wipe and rinse twice with clean water to remove all residue. If TSP’s unavailable or you prefer a less caustic option, look for a TSP substitute at the hardware store. These products use different surfactants but work similarly.
Commercial smoke and soot cleaners like Krud Kutter, Simple Green Heavy Duty, or Zep Heavy Duty are formulated to dissolve tar and carbon without the harshness of TSP. Most dilute at a 1:10 or 1:20 ratio (follow the label). Spray or wipe the cleaner on, let it dwell for the recommended time, then scrub gently with a microfiber cloth and rinse thoroughly. These products often contain degreasers, surfactants, and mild solvents that break down soot more effectively than household cleaners. For resinous soot from candles or creosote from wood smoke, specialty soot removers sold at fireplace or restoration supply stores may work better than general purpose degreasers.
When and how to use stronger cleaners:
- Use TSP or commercial degreasers only after milder methods fail.
- Mix TSP at ¼ cup per gallon warm water (check product label for adjustments).
- Apply with a sponge, not a spray bottle, to control coverage and prevent over wetting.
- Let the solution sit 2 to 5 minutes, then wipe and rinse twice with clean water.
- Dry the wall immediately with towels to prevent water damage or paint peeling.
- Don’t use TSP on wallpaper, unsealed wood, or delicate plaster. Test first.
- If the paint surface dulls or shows wear after one TSP application, stop and prime the wall before repainting instead of scrubbing further.
- For enzyme cleaners or oxygen based formulas, follow product specific instructions. Some require longer dwell times.
If stains still show after a second TSP cleaning, the soot’s penetrated the paint layer. At that point, cleaning won’t help. You’ll need to seal the stain with a primer before repainting.
How to Remove Soot From Different Wall Surfaces

Painted Drywall
Flat or matte latex paint is the most porous finish and traps soot particles easily. Start with a dry cleaning sponge and HEPA vacuum, then test a small area with dish soap and water. If the paint softens, stops absorbing water, or shows shiny spots, stop wet cleaning immediately and move to primer and repainting. Eggshell, satin, and semi gloss paints are more washable and tolerate dish soap, vinegar, and even TSP better than flat finishes. Work in small sections, rinse frequently, and dry thoroughly to avoid water stains or bubbling. If the soot’s been on the wall for weeks or longer, the oily residue may have bonded to the latex and won’t come off without removing the paint. Seal it with a shellac primer and repaint.
Textured or Plaster Walls
Knockdown, popcorn, and other textured finishes hold soot in their peaks and valleys, making cleaning slower and less complete. Use a dry cleaning sponge first, pressing gently so you don’t tear or flatten the texture. Follow with a HEPA vacuum using the soft brush attachment held slightly off the surface. For wet cleaning, use a spray bottle to mist the dish soap or vinegar solution lightly onto the wall, then blot with a microfiber cloth instead of rubbing. Heavy scrubbing can remove texture or leave shiny spots. If stains remain after two cleaning passes, prime and repaint. Trying to scrub textured walls harder usually damages the finish without removing the soot.
Wallpaper
Vinyl coated or vinyl wallpaper can tolerate light damp cleaning, but paper backed wallpaper will absorb water, swell, and delaminate. Always test a hidden area first. For washable vinyl wallpaper, use a barely damp cloth with mild dish soap, wipe gently, and dry immediately. Don’t press hard or rub back and forth. For non washable paper wallpaper, stick to the dry cleaning sponge only. Don’t use any water. If soot stains remain, you may need to remove and replace the wallpaper rather than clean it. Textured or embossed wallpaper follows the same rules as textured walls. Blot instead of scrub, and stop if the paper starts to soften or peel.
Wood Trim and Baseboards
Wood and painted trim are often semi gloss or gloss, which makes them easier to clean than flat wall paint. Start with the dry cleaning sponge, then use dish soap and water with a damp cloth. Avoid soaking the wood or letting water sit on the surface, because prolonged moisture can cause swelling, warping, or finish damage. For oily soot on natural wood or stained trim, use a wood cleaner or a vinegar solution, wipe quickly, and dry immediately. If the wood’s unsealed or the finish is worn, cleaning may raise the grain or leave water marks. Test first, and consider refinishing if the damage is extensive.
When Cleaning Fails: Primers, Sealing & Repainting Over Soot Stains

If you’ve cleaned the wall twice with progressively stronger methods and gray or yellow stains still show through, the soot’s penetrated the paint. Scrubbing harder will only damage the surface. At this point, seal the stain with a stain blocking primer designed for smoke and soot. Shellac based primers like Zinsser BIN or oil based primers like Kilz Original are the most effective because they create a waterproof barrier that prevents tannins, oils, and carbon from bleeding through the new paint. Water based stain blockers are cheaper but less reliable for heavy smoke stains. They may allow discoloration to reappear after a few months.
One quart of shellac or oil based primer covers about 100 to 125 square feet, which is roughly one wall in a standard bedroom. One gallon covers 350 to 400 square feet. Expect to pay $15 to $40 per quart depending on the brand. Apply the primer with a brush or roller in one even coat, let it dry per the product instructions (usually 1 to 3 hours for shellac primers), then check the wall under good lighting. If the stain’s still visible, apply a second primer coat. Once the primer’s fully dry and no stain shows through, repaint with one or two finish coats of latex or acrylic paint in your chosen sheen.
Steps for priming and repainting over persistent soot stains:
- Clean the wall as thoroughly as possible to remove loose soot and oil, then let the wall dry completely for at least 24 hours.
- Lightly sand the surface with 220 grit sandpaper to help the primer adhere, then wipe away dust with a tack cloth.
- Apply one coat of shellac based stain blocking primer (such as Zinsser BIN) or oil based primer (such as Kilz Original) using a roller for large areas and a brush for edges and trim.
- Allow the primer to dry per the manufacturer’s instructions. Shellac primers typically dry in 1 to 3 hours.
- If the stain still shows through after the first coat, apply a second primer coat and let it dry. Once no discoloration is visible, proceed to finish painting.
If more than 10 to 20 percent of a room is affected, repainting the entire wall or room usually gives the best color match and avoids visible patches. Total material cost for primer and paint typically runs $40 to $150 per room depending on brand and quality.
Removing Smoke Odor Remaining After Soot Is Off the Walls
Cleaning soot off the walls removes the visible residue, but smoke odor can linger in drywall, insulation, HVAC ducts, carpet, and furniture. Start by improving ventilation. Open all windows, run exhaust fans, and use box fans to push stale air outside. Place bowls of baking soda or activated charcoal in the room to absorb odors naturally. Change HVAC filters immediately after smoke exposure and consider having the ducts professionally cleaned, because soot particles circulate through the system and redeposit on surfaces. If the smell persists after a week of ventilation and natural deodorization, you may need professional help.
Ozone generators and thermal fogging machines are effective for deep smoke odor removal, but they must be used by trained technicians. Ozone’s a toxic gas that can damage lungs and materials if misused, and thermal fogging requires sealing the space and using specialized equipment to disperse deodorizing chemicals. These methods aren’t DIY safe. Professional fire and smoke restoration companies offer ozone treatment, thermal fogging, and hydroxyl generator services as part of comprehensive remediation. If walls, carpet, and furniture still smell after cleaning, the odor may be embedded in porous materials that need to be sealed or replaced.
Odor removal options after soot cleaning:
- Open windows and use fans for continuous cross ventilation for at least 3 to 7 days.
- Place bowls of baking soda or activated charcoal bags in affected rooms to absorb odors naturally.
- Replace HVAC filters and consider professional duct cleaning to remove soot from the air system.
- Use HEPA air purifiers with activated carbon filters to capture particles and neutralize odors.
- For persistent smells, hire professionals for ozone treatment, thermal fogging, or hydroxyl generator deodorization.
If the smoke smell remains strong after two weeks of DIY efforts, call a fire restoration company. Odor that won’t dissipate usually means soot’s trapped inside wall cavities, insulation, or HVAC components. Areas that cleaning can’t reach.
Preventing Soot From Returning to Walls

The best way to deal with soot is to stop it from forming in the first place. Most household soot comes from candles, fireplaces, wood stoves, and poorly maintained heating appliances. If you burn candles regularly, choose beeswax or soy candles instead of paraffin, because paraffin releases more soot. Trim candle wicks to a quarter inch before each use. Long wicks produce taller, sootier flames. Place candles on stable trays or in glass holders, and keep them away from walls, curtains, and air vents where drafts can cause uneven burning and excess smoke.
For fireplaces and wood stoves, burn only seasoned, dry hardwood with a moisture content below 20 percent. Wet or green wood produces more smoke, creosote, and soot. Have your chimney inspected and cleaned at least once a year, or every one to three years depending on how often you use the fireplace. Install glass doors or mesh screens to contain sparks and reduce draft turbulence that can push soot into the room. Improve overall ventilation by using range hoods when cooking, opening windows periodically, and changing HVAC filters every one to three months to capture airborne particles before they settle on walls.
Soot prevention checklist:
- Trim candle wicks to ¼ inch before lighting.
- Use beeswax or soy candles instead of paraffin.
- Place candles in glass or metal holders on stable surfaces away from walls and vents.
- Burn only seasoned, dry wood in fireplaces and wood stoves.
- Schedule annual chimney inspections and cleanings (or every 1 to 3 years depending on use).
- Install glass doors or screens on fireplaces to reduce soot escape.
- Change HVAC filters every 1 to 3 months to capture airborne particles.
If you notice new soot deposits forming quickly after cleaning, check for draft problems, incomplete combustion in heating appliances, or candles burning in high traffic areas. Addressing the source stops the cycle of cleaning and re sooting.
When to Call Professional Soot Removal or Fire Restoration Services
DIY cleaning works for light to moderate soot from candles, small cooking incidents, or single room fireplace use. But when soot covers multiple rooms, smells persist after cleaning, or you suspect hidden contamination in HVAC ducts or wall cavities, professional fire and smoke restoration is the safer and more effective choice. Restoration technicians use commercial grade HEPA vacuums, thermal foggers, ozone generators, and specialty cleaning agents that aren’t available to consumers. They also inspect for structural damage, test air quality, and document the work for insurance claims.
Professional soot cleanup for a small room typically costs $200 to $600, depending on the extent of damage and the region. Whole house smoke remediation after a fire commonly ranges from $1,000 to $5,000 or more, with costs rising if HVAC cleaning, insulation replacement, or reconstruction is needed. Most restoration companies offer free inspections and written estimates, so you can compare options before committing. If your insurance covers the damage, the restoration company will often work directly with your adjuster and provide detailed photo documentation, moisture readings, and itemized scopes to support your claim.
Signs you should call a professional instead of cleaning yourself:
- Soot covers more than one room or has spread through HVAC ducts to multiple areas of the house.
- Smoke odor remains strong after a week of ventilation, cleaning, and natural deodorization.
- Walls, ceilings, or insulation show charring, water damage, or structural instability from fire or firefighting efforts.
- You experience respiratory irritation, headaches, or allergic reactions while cleaning, indicating high soot or chemical exposure.
- Hidden soot is suspected behind walls, in attic spaces, or inside ductwork. Areas you can’t safely access or clean without specialized equipment.
- Your insurance requires professional documentation, testing, or certified remediation for the claim to be approved.
Fire and smoke restoration companies operate 24/7 and can often respond within hours to prevent further damage. If you’re unsure whether to hire a pro, most companies will inspect the property for free and give you an honest assessment of whether DIY cleaning is feasible or professional remediation is necessary.
Final Words
Start by grabbing a chemical sponge and a HEPA vacuum to stop soot from spreading. Do this before any wet cleaning so stains don’t smear.
Test a 2–4 in² patch, then work top to bottom: dish soap mix, vinegar or baking soda for spots, and TSP or a stain-blocking primer only if cleaning fails. Wear an N95, gloves, goggles, and ventilate the space.
If you’re asking what removes soot from walls, dry-clean first, then move to mild wet methods and stronger cleaners as needed. You’ll get this fixed, step by step.
FAQ
Q: How do you get soot off painted walls?
A: Getting soot off painted walls requires dry-cleaning first — use a chemical sponge (don’t rub) and HEPA vacuum. Then wash top-to-bottom with a dish soap solution, spot-treat, and rinse.
Q: What is the best cleaner for black soot on walls? / What will dissolve soot?
A: The best cleaners for black soot on walls are mild dish soap (1 tbsp per gallon), white vinegar (1 cup per gallon), baking soda paste (3:1), and TSP (1/4 cup per gallon) for stubborn stains.
Q: Can soot damage walls if left uncleaned?
A: Soot can damage walls if left uncleaned by staining paint, leaving corrosive residue that etches finishes, causing persistent odor and trapping moisture that leads to hidden damage. Clean and document quickly to limit repairs.