

After a fire, your ceiling might look stable, but heat weakens joists and framing in ways you can’t see until it’s too late. Even small fires leave behind toxic soot, compromised electrical wiring, and water damage from firefighting that spreads through hidden cavities. This guide walks you through the critical safety steps, structural assessment, smoke remediation, and proper repair sequence you need to restore your ceiling safely and prevent hidden problems from causing failure later.
Emergency Response & Safety First Steps for Fire Damaged Ceilings

The moment you discover fire damage to your ceiling, safety is all that matters. A fire damaged ceiling puts you at immediate risk. Structural collapse, falling debris, compromised electrical systems, toxic residues. If your ceiling sags, shows large cracks, or looks unstable at all, get out and call 911. Heat weakens ceiling joists and framing, and even ceilings that look fine can fail without warning. Electrical wiring in ceiling cavities may have damaged insulation, creating shock hazards. Toxic soot and smoke coat surfaces and become airborne when you move around, so you need respiratory protection.
Before you touch anything or start cleanup, document the damage thoroughly. Photos and written descriptions. Take pictures from multiple angles showing the ceiling damage, surrounding walls, affected rooms, any visible structural components. Photograph smoke staining, charred materials, water damage from firefighting, debris. This documentation is essential for your insurance claim. Contact your insurance company within 24 to 48 hours to start the claim. Many policies require prompt notification, and delays complicate coverage.
Here are the 5 immediate steps after discovering ceiling fire damage:
- Evacuate if the ceiling looks unstable, sags, or has large cracks showing structural problems
- Call the fire department right away if you see smoke, smoldering materials, or suspect hidden fire in ceiling cavities
- Document everything with photos and written descriptions before any cleanup or removal starts
- Contact your insurance company within 24 to 48 hours to report damage and start your claim
- Secure the property from weather and unauthorized entry with tarps, boards, or temporary barriers
Professional restoration services and structural engineers determine whether your space is safe. They assess load bearing integrity, electrical hazards, contamination levels you can’t see. This assessment happens before any repair work begins.
Comprehensive Damage Assessment and Structural Evaluation

Professional fire damage assessment examines every component, from surface staining to hidden structural compromise. This evaluation determines repair scope, safety concerns, whether reconstruction is even feasible.
The visual inspection identifies cracks, holes, discoloration, areas exposed to heat, smoke, or water. Inspectors document grainy soot residue, smoky odors, charred or melted materials throughout affected spaces. They examine ceiling surfaces for bubbling paint, sagging sections, texture changes that indicate heat exposure. Water stains reveal where firefighting saturated materials. Surface inspection provides the foundation for understanding damage extent.
Structural component evaluation examines ceiling joists, load bearing structures, framing members for compromised integrity. Heat weakens structural members even without visible charring, reducing their capacity to carry loads. Inspectors check for warping, cracking, delamination in wooden joists and beams. They assess whether sistering new joists alongside damaged ones provides enough support or whether complete replacement is necessary. Metal components like light fixture mounting boxes and HVAC hangers get evaluated for heat related failure. Temporary shoring may be required when load bearing components are compromised during repair.
Fire damage severity falls into six distinct levels:
• Surface residue requiring dry cleaning only, with light soot deposits that respond to HEPA vacuuming and dry sponges
• Light staining needing wet cleaning, where smoke created visible discoloration requiring chemical cleaning solutions
• Moderate damage requiring aggressive techniques, including specialized cleaners and multiple treatment applications
• Heavy contamination demanding restoration with intensive cleaning, sealing, possible material replacement
• Severe damage necessitating replacement, where cleaning isn’t cost effective or materials can’t be adequately restored
• Structural damage beyond repair, requiring complete removal and reconstruction of ceiling assemblies
Hidden damage in attic spaces requires special attention since insulation and framing conceal problems. Electrical wiring, junction boxes, light fixtures need inspection by licensed electricians for heat damage, melted insulation, connection integrity. Smoke travels through wall and ceiling cavities, contaminating areas far from visible fire damage. Structural repairs must be completed and approved before cosmetic work begins. Building codes and safety standards govern all repairs. Structural engineer involvement is often necessary to verify the building is safe for occupancy.
Smoke Remediation, Soot Removal, and Odor Control

Smoke residue must be removed before structural repairs begin, or you’ll seal odor and contamination behind new materials. Timing matters because acidic smoke residues start etching surfaces within hours of exposure, permanently damaging paint, metal fixtures, even drywall facing. Different fire temperatures create different smoke types. Each requires specific cleaning methods. Low temperature fires produce wet smoke with sticky, smeary residues that require aggressive cleaning. High temperature fires create dry smoke with powdery deposits that respond to different approaches. The longer smoke residue stays on surfaces, the deeper it penetrates and the harder it becomes to remove.
The systematic cleaning sequence follows a specific order to prevent spreading contamination. HEPA vacuuming removes loose soot and debris first, working from ceiling to floor to prevent recontaminating cleaned areas. Dry cleaning sponges follow, using their chemical properties to absorb smoke residues without water. Wet cleaning comes next, using appropriate solutions for the specific smoke type present. Surfaces must dry completely before priming to prevent moisture from being trapped behind sealers. This approach addresses both visible contamination and embedded residues that cause persistent odors.
| Smoke Type | Fire Source | Residue Characteristics | Cleaning Approach |
|---|---|---|---|
| Wet Smoke | Low temperature smoldering fires, plastics, rubber | Sticky, smeary, strong odor, difficult to clean | Aggressive cleaning with specialized solvents, multiple applications required |
| Dry Smoke | High temperature fast burning fires, wood, paper | Powdery, dry, easily smears when wiped | Dry cleaning sponges first, then controlled wet cleaning |
| Protein Smoke | Kitchen fires from organic materials | Nearly invisible but extremely odorous, discolors varnishes | Specialized enzyme cleaners, repeated treatments, strong sealing required |
Smoke penetrates porous ceiling materials and remains after surface cleaning is complete. Odor causing molecules embed deep in drywall, insulation, structural members. Stain blocking primers seal these molecules before painting, preventing odor from bleeding through finish coats. These specialized primers contain ingredients that encapsulate smoke residue and create a barrier between contaminated surfaces and new finish layers. Standard primers fail on smoke damaged surfaces because they lack the sealing properties needed to contain persistent odors.
Professional odor elimination technologies address contamination that cleaning can’t reach:
• Ozone generators create powerful oxidizing molecules that break down odor molecules at a chemical level and penetrate porous materials deeply, but require complete evacuation during treatment
• Hydroxyl generators work safely during occupancy and neutralize organic compounds through advanced oxidation, making them suitable for occupied spaces during treatment
• Thermal fogging recreates the fire’s heat dynamics, with deodorizing fog penetrating where smoke traveled and neutralizing odor molecules chemically throughout hidden cavities
• Air scrubbers with HEPA filtration continuously clean the air during restoration work, capturing airborne particles and preventing cross contamination to clean areas
Water Damage and Moisture Control in Fire Damaged Ceilings
Firefighting water often causes more extensive damage than fire itself to ceiling materials. Hoses pump thousands of gallons into structures, and gravity pulls this water downward through ceiling assemblies. Water saturates insulation, drywall, ceiling joists, requiring removal and replacement even in areas with minimal fire damage. Soaked insulation loses its R value permanently and becomes a breeding ground for mold. Drywall paper facing delaminates when saturated, and the gypsum core loses structural integrity.
Moisture control begins immediately after the fire department clears the scene. Commercial dehumidification equipment extracts moisture from affected areas, processing hundreds of pints per day.
Professional restoration teams use moisture meters to verify complete drying before reconstruction begins. These meters measure moisture content deep in structural members, not just surface dampness. Readings must return to normal levels throughout the ceiling assembly before repairs proceed. Rushing this drying phase leads to trapped moisture and mold growth.
Trapped moisture leads to mold growth within 24 to 48 hours in warm conditions. Mold spreads rapidly through porous materials, requiring expensive remediation and posing health risks. Water damaged insulation can’t be salvaged and must be completely removed and replaced. Attempting to dry and reuse compromised insulation leaves moisture pockets that guarantee future problems. Drying must be complete before applying joint compound or paint, or moisture gets sealed behind finish surfaces, causing bubbling, peeling, odor problems.
Drywall and Plaster Ceiling Repair Methods After Fire

Determining repair extent starts with identifying where damage ends and sound material begins. Small areas of surface damage may only need patching, while extensive fire exposure requires removing entire ceiling sections.
All compromised drywall sections must be removed back to ceiling joists for solid attachment points. Cut damaged sections using a straightedge to create clean, straight edges that overlap joists on either side. An oscillating multi tool provides precision cutting for drywall removal without damaging structural framing. Remove all charred, water damaged, or smoke saturated material down to bare joists if necessary. Temporary support may be required for any compromised load bearing structures during removal. Once damaged material is out, clean all exposed framing and joists to remove soot and debris before installing replacement pieces.
New drywall pieces must be measured and cut to fit exactly into the opening with smoothed rough edges. Use 1/2 inch drywall for most ceiling applications, though some building codes require 5/8 inch Type X fire rated drywall. Secure replacement pieces with drywall screws spaced 8 inches apart along joists, placing screws at least 3/8 inch from edges. Screws provide better stability than nails for securing ceiling drywall, especially overhead. Pre drill screw holes near edges to prevent cracking. Ensure the replacement piece sits flush with surrounding ceiling surfaces, shimming behind if necessary to achieve proper alignment.
The drywall repair sequence follows these 5 steps:
- Remove damaged sections by cutting back to the nearest ceiling joists, creating clean straight edges for solid attachment points
- Install replacement pieces, securing them with drywall screws spaced appropriately and ensuring flush alignment with existing ceiling surfaces
- Tape joints using mesh drywall tape, which provides better adhesion than paper tape and reduces the risk of future cracking
- Apply compound in multiple layers, starting with embedding coat over tape, then two or three finish coats with complete drying and feathering between applications
- Sand smooth when completely dry, using progressively finer grits to achieve a finish ready for priming and painting
Ceiling texture matching presents unique challenges for fire damaged ceiling repair. Popcorn, knockdown, smooth finishes each require specific techniques and materials. Practice texture application on scrap drywall before working on the ceiling to match existing patterns. Overhead work requires proper scaffold or sturdy ladder setup with platforms that allow comfortable reach without overextending. Mesh drywall tape application over seams and joints provides reinforcement, followed by generous amounts of joint compound applied and smoothed for blending. Joint compound must dry completely between applications, typically 24 hours per coat. Feather edges outward to blend repairs with surrounding surfaces, extending each coat slightly beyond the previous one. Learn detailed drywall repair techniques and materials selection for fire damage scenarios.
Specialized Ceiling Types: Popcorn, Acoustic Tile, and Drop Ceiling Restoration

Three specialized ceiling types require different approaches than standard drywall when dealing with fire damage. Popcorn and textured ceilings, acoustic tile systems, drop ceiling grids each respond differently to fire, smoke, water exposure.
Popcorn and Textured Ceiling Fire Damage Repair
Popcorn ceilings installed before 1980 require asbestos testing before any cleaning or removal work begins. Many older popcorn textures contain asbestos fibers, and disturbing this material without proper containment creates serious health hazards. Testing costs $200 to $400 but prevents exposure to carcinogenic materials. If asbestos is present, certified abatement contractors must handle all removal work. HEPA vacuuming with soft brush attachments removes loose soot from popcorn textures without aggressive contact that dislodges texture material. Controlled misting with cleaning solutions, applied lightly to avoid saturating the texture, allows chemical cleaning without texture failure. Careful dabbing rather than rubbing prevents texture removal while addressing smoke staining. When cleaning fails to remove smoke damage adequately, encapsulation with specialized sealers locks in remaining contamination. Texture matching for partial repairs challenges even experienced professionals because spray texture patterns vary by application technique, gun settings, product formulation.
Acoustic Tile Ceiling Restoration After Fire
Porous acoustic tiles absorb smoke deeply, making replacement more cost effective than cleaning in most fire damage situations. Individual tile replacement involves carefully removing damaged tiles from grid systems and installing matching replacements. Finding exact tile matches for older installations can be difficult since manufacturers discontinue products regularly. Complete ceiling replacement becomes warranted when more than 30 to 40% of tiles show smoke damage, or when the grid system itself sustained heat damage. New acoustic tile systems cost less than extensive cleaning and treatment of heavily contaminated existing tiles. Insurance coverage often makes full replacement the practical choice.
Drop Ceiling Grid System Repairs
Grid systems require evaluation for heat damage to metal components, which can warp or lose strength when exposed to fire temperatures. Tile replacement in drop ceiling systems is straightforward. Lift damaged tiles out and drop new ones into place. Clean metal grid components using appropriate cleaners for smoke residue, paying attention to corners and connection points where soot accumulates. The advantage of complete replacement for insurance covered repairs is that new systems provide fresh, clean materials without contamination concerns, and installation goes quickly compared to cleaning and treating existing systems.
Insulation Replacement and HVAC System Considerations
Ceiling fire damage always affects insulation above the damaged area. Fire exposed insulation must be completely removed because soot contamination, reduced R value, and odor retention make it unusable. Heat degrades insulation’s thermal properties permanently, and smoke particles embed throughout the material. Attempting to leave compromised insulation in place guarantees persistent odor problems and reduces energy efficiency.
Water damaged insulation from firefighting efforts requires complete removal even in areas with minimal fire exposure. Fiberglass insulation loses effectiveness when saturated and takes weeks to dry completely in enclosed ceiling cavities.
Cellulose insulation turns into heavy, soggy clumps when wet and promotes mold growth rapidly. Contaminated insulation must be properly bagged and disposed of according to local regulations for fire damaged materials. Some jurisdictions classify fire debris as special waste requiring specific handling.
HVAC ductwork evaluation determines whether smoke contamination requires professional cleaning. Ducts pull smoke throughout the system during and after fires, depositing residue on interior surfaces. Smoke particles then circulate to clean areas every time the system runs, spreading contamination and odor. Professional duct cleaning uses specialized equipment to remove smoke residue from sheet metal interiors. Ceiling cavity cleaning before new insulation installation ensures no soot or debris remains on framing members or behind new materials. Proper insulation replacement meets current building code requirements, which often exceed the R values of older insulation. This upgrade improves energy efficiency while addressing fire damage.
Electrical System and Light Fixture Repairs in Fire Damaged Ceilings

Heat exposure damages electrical wire insulation even without visible burning, creating shock and fire hazards. Temperatures well below visible flame damage degrade plastic and rubber insulation on wiring, compromising its protective properties.
Junction box evaluation examines both the boxes themselves and all wire connections inside them. Metal boxes may show heat discoloration, while plastic boxes can melt or deform. Replace any junction box exposed to fire temperatures to ensure safe, code compliant electrical systems. All wire splices and connections require inspection for heat damage, corrosion, proper attachment.
Light fixture assessment determines when replacement is required versus simple cleaning. Heat exposure weakens fixture mounting, degrades sockets, damages wiring connections. Ceiling fan electrical connections and mounting box integrity after fire exposure need verification by licensed electricians because inadequate support leads to dangerous failures. Fans weigh 35 to 50 pounds and require properly rated mounting systems.
Licensed electrician involvement in all electrical repairs is non negotiable. Insurance companies require licensed work, building inspectors demand it, safety depends on it. Electrical repairs must be inspected and approved before concealment behind new drywall, so coordinate this inspection timing with your restoration schedule. Thermal damage to wire insulation that creates shock and fire hazards may not show visible signs, making professional evaluation essential even when wiring looks intact.
Sealing, Priming, and Paint Preparation for Fire Damaged Ceilings
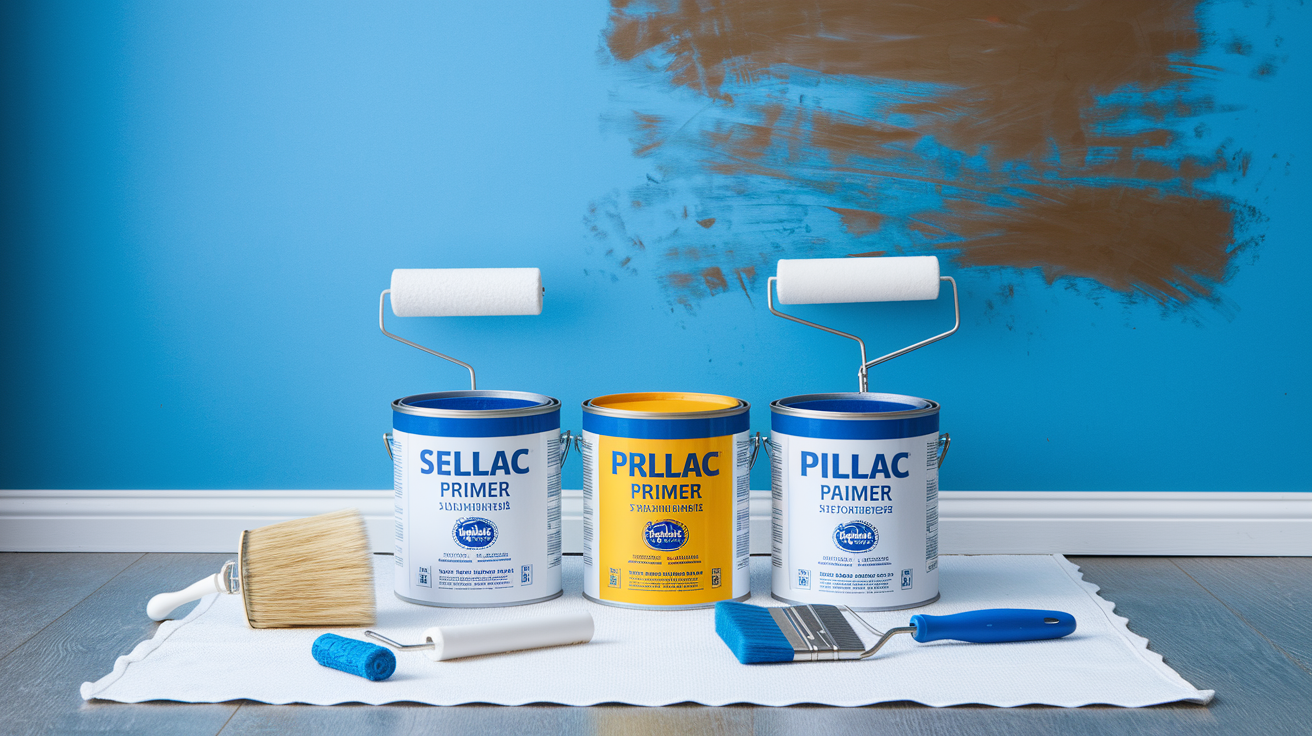
Standard primers fail on fire damaged surfaces because they lack the sealing properties needed to block smoke odor and prevent stain bleedthrough. Smoke damaged ceilings require specialized primers beyond regular paint products. These stain blocking primers contain shellac, oil based resins, or advanced polymers that encapsulate odor causing molecules and prevent them from penetrating through finish coats. Without proper primers, smoke odor returns within days or weeks, and brown staining appears through new paint.
Oil based stain blocking primers provide superior smoke sealing compared to water based products, though they require longer drying times and solvent cleanup. Shellac based primers offer the strongest odor blocking and fastest drying, making them ideal for severe smoke damage. Water based stain blockers work for light smoke exposure and offer easier application and cleanup. Surface preparation before primer application requires complete cleaning, drying, sanding to create proper adhesion. Any remaining soot or moisture reduces primer effectiveness. Multiple primer coat requirements depend on damage severity. Light smoke damage may need one coat, while heavy contamination requires two or three applications. Allow complete drying between coats, typically 3 to 4 hours for shellac based, 12 to 24 hours for oil based products.
Paint selection for ceiling specific formulations matters because standard wall paint doesn’t perform well overhead. Ceiling paints contain ingredients that reduce spattering during application and provide better coverage in one coat. They’re formulated to minimize roller marks and provide uniform appearance under various lighting conditions. Apply paint in thin, even coats with sufficient drying time between layers. Two finish coats over properly applied primer provide durable, professional results. Use quality roller covers designed for ceiling work to minimize texture and achieve smooth coverage.
| Primer Type | Best Used For | Drying Time |
|---|---|---|
| Shellac Based | Severe smoke damage, strongest odor blocking, heavy staining | 45 minutes to 1 hour between coats |
| Oil Based | Moderate to heavy smoke damage, excellent stain blocking, water damage | 12 to 24 hours between coats |
| Water Based Stain Blockers | Light smoke damage, easier cleanup, low odor application | 2 to 4 hours between coats |
Insurance Claims and Documentation for Ceiling Fire Damage

Immediate documentation with photos before any cleanup begins protects your insurance claim and provides evidence of damage extent. Take photos showing the ceiling from multiple angles, close ups of specific damage areas, wide shots showing affected rooms in context.
The insurance adjuster evaluation process examines damage, determines coverage, authorizes repair scope. Adjusters document what they observe, take their own photos, compare your damage to policy coverage terms. They assess whether damage resulted from the fire event covered by your policy or from other causes. Their evaluation determines initial claim approval and payment amounts. Be present during adjuster visits to point out damage they might miss and answer questions about the fire event.
Proper documentation requirements include photos taken immediately after the fire, written descriptions of damage to all affected areas, contractor estimates for repairs, the fire department report detailing the incident. The NFIRS report contains details on the fire’s cause and estimated losses, supporting your claim documentation. Save all receipts for emergency repairs, temporary lodging, expenses related to the fire damage. Document conversations with insurance representatives, noting dates, times, what was discussed.
Insurance typically covers structural repairs to restore your ceiling to pre loss condition, smoke remediation including cleaning and odor elimination, temporary living expenses if your home is uninhabitable. Specialized techniques like ozone treatment or thermal fogging may require justification beyond basic cleaning, so obtain detailed estimates explaining why these services are necessary. Evaluation of replacement versus restoration costs influences whether insurance approves extensive cleaning or authorizes complete replacement. Sometimes replacing materials costs less than intensive restoration efforts. Additional living expenses coverage includes hotel costs, restaurant meals, other expenses while your home is being repaired. Understand whether your policy pays actual cash value (depreciated value) or replacement cost (full cost of new materials and labor). The difference significantly affects your out of pocket expenses. Work with insurance approved or experienced restoration contractors who understand claim documentation and can communicate effectively with adjusters. Some repairs require multiple estimates for insurance approval, particularly for expensive specialized treatments. Professional restoration techniques that insurance may cover vary by policy and damage severity.
Fire Damaged Ceiling Repair Costs and Pricing Factors
Repair costs vary dramatically based on damage severity, ranging from minor smoke cleaning at a few hundred dollars to complete ceiling reconstruction costing tens of thousands. Surface smoke damage requiring only cleaning and repainting runs $500 to $2,000 for a typical room. Moderate damage requiring drywall replacement, insulation, finishing costs $3,000 to $8,000. Severe structural damage with joist replacement, electrical repairs, complete reconstruction ranges from $10,000 to $30,000 or more.
Material cost factors include drywall prices ($12 to $20 per sheet), insulation costs ($0.50 to $2.00 per square foot depending on type and R value), electrical components for replacement fixtures and wiring, finishing products including primer, paint, texture materials. Specialty materials like fire rated drywall or acoustic tiles increase costs. Structural lumber for joist repairs or replacement adds significant expense, especially for large dimensional timbers. Hidden damage discoveries increase initial estimates when inspection reveals problems concealed behind ceiling surfaces or above insulation. This happens frequently because fire and smoke travel through cavities invisible during initial assessment.
Six repair cost components affect your total project price:
• Damage assessment fees ranging from $200 to $500 for professional evaluation, moisture testing, structural analysis, though some contractors include assessment in project pricing
• Structural repairs including joist replacement, framing reinforcement, temporary shoring during reconstruction, typically the largest cost component for severe damage
• Material replacement costs for drywall, insulation, electrical components, finishing products, varying based on quality and building code requirements
• Odor elimination treatments including ozone generation, hydroxyl treatment, or thermal fogging when needed to address persistent smoke smell, adding $500 to $2,000
• Finishing work covering taping, mudding, sanding, priming, painting, texture matching to blend repairs with existing surfaces
• Permit fees required by local building departments for structural, electrical, significant repairs, typically $100 to $500 depending on project scope
Labor costs for specialized trades vary by region and contractor experience. Structural work runs $75 to $150 per hour, electrical repairs cost $85 to $150 per hour, drywall installation and finishing ranges from $50 to $90 per hour, painting services cost $40 to $75 per hour. Emergency response services carry premium pricing, sometimes 50 to 100% above standard rates, because they involve immediate availability and after hours work. Regional cost variations reflect local labor markets, material availability, cost of living differences. Contractor availability impacts pricing during busy seasons or in areas with limited qualified restoration professionals.
Choosing Qualified Contractors for Fire Damaged Ceiling Restoration
Contractor selection matters critically for fire restoration because this work requires specialized skills beyond general contracting. Fire damage involves structural assessment, smoke remediation chemistry, moisture control expertise, understanding of building codes specific to fire repairs. General contractors without restoration training miss hidden damage, use inadequate cleaning methods, create problems that emerge months later. Restoration specialists understand the complete sequence from emergency stabilization through final finishing, coordinating trades and maintaining quality standards throughout.
IICRC certification demonstrates that restoration professionals have completed formal training in fire and smoke damage restoration, water damage mitigation, applied structural drying. This certification isn’t just a piece of paper. It represents hundreds of hours of education and tested competency. Insurance company approval matters because approved contractors understand claim documentation requirements, communicate effectively with adjusters, follow protocols that facilitate payment. Working with approved contractors often speeds claim processing and reduces payment disputes. Emergency response capabilities and availability separate restoration companies from standard contractors. Restoration firms maintain 24/7 availability, rapid response teams, equipment ready for immediate deployment. Verify proper licensing for all trades involved in your repairs. General contractors need state or local contractor licenses, electricians require electrical licenses, some jurisdictions mandate restoration specific credentials. Bonding protects you if the contractor fails to complete work, and insurance coverage (general liability and workers compensation) protects you from liability for accidents during repairs.
Five essential questions to ask fire restoration contractors reveal their qualifications and suitability:
- What certifications do your technicians hold, specifically IICRC credentials for fire and smoke damage restoration, and are these certifications current and verifiable?
- How much experience do you have with fire damage similar to mine in scope and severity, and can you provide references from recent projects I can contact?
- What is your experience working with insurance claims, including documentation, communication with adjusters, your approval status with major insurance carriers?
- What timeline do you estimate for my specific project, broken down by assessment, structural repairs, drying, reconstruction, finishing phases with realistic completion dates?
- What warranty coverage do you provide on your work, including duration, what’s covered, whether warranty protection transfers if I sell the property?
Contract considerations and work guarantees protect both parties and establish clear expectations. Review contracts carefully before signing, ensuring they specify detailed scope of work listing all services and materials, payment schedules tied to completed phases rather than upfront payment, timeline commitments with start and completion dates, change order procedures for addressing unexpected damage discoveries, warranty terms covering workmanship and materials. Quality contractors stand behind their work with written guarantees covering repairs for at least one year. Some offer longer warranty periods for structural work or waterproofing components.
Repair Timeline and What to Expect During Ceiling Fire Restoration
Timeline variability depends on damage extent, ranging from quick surface repairs to months long reconstruction projects. Minor smoke damage requiring only cleaning and repainting takes 3 to 5 days. Moderate damage with drywall replacement needs 2 to 3 weeks. Severe structural damage requiring joist replacement and complete reconstruction extends to 4 to 8 weeks or longer.
The emergency stabilization and assessment phase begins within hours of initial contact. Restoration teams secure the property against weather intrusion and further damage, using tarps to cover roof openings and boarding damaged windows. They extract standing water and begin drying operations immediately to prevent mold growth. Initial assessment documents damage extent and identifies safety concerns requiring immediate attention. This emergency phase typically completes within 24 to 48 hours, establishing a stable situation before detailed planning begins.
The repair and reconstruction phase involves multiple steps, each with specific duration requirements. Structural repairs including joist replacement or reinforcement take 3 to 7 days depending on extent. Permit requirements and inspection scheduling affect timelines when building departments must review and approve structural work before proceeding. Drying time requirements for water damage must be completed before repairs begin, typically 3 to 7 days with commercial dehumidification equipment. Moisture testing verifies complete drying before reconstruction starts. Drywall installation and taping takes 1 to 2 days, followed by joint compound application requiring 24 hours drying time between coats. Multiple compound coats mean 3 to 5 days from first application to final sanding. Primer application requires complete drying before painting begins, adding another 12 to 24 hours. Paint application in multiple coats with drying time extends finishing by 2 to 3 days. Hidden damage discoveries extend timelines when inspection reveals concealed problems. Material availability affects schedules when specialty products require ordering. Weather delays impact timelines during roofing or exterior work.
| Damage Level | Assessment Phase | Repair Phase | Finishing Phase | Total Timeline |
|---|---|---|---|---|
| Light (surface smoke only) | 1 day | 1 to 2 days cleaning | 2 to 3 days priming and painting | 4 to 6 days |
| Moderate (drywall replacement) | 1 to 2 days | 5 to 7 days removal and installation | 7 to 10 days taping, mudding, painting | 2 to 3 weeks |
| Heavy (structural concerns) | 2 to 3 days | 10 to 14 days structural and material work | 7 to 10 days finishing | 3 to 4 weeks |
| Structural (joist replacement) | 3 to 5 days including engineering | 14 to 21 days structural repairs | 10 to 14 days complete finishing | 4 to 8 weeks |
Preventing Future Ceiling Damage and Fire Safety Measures
Smoke detector placement matters after ceiling repairs, with units positioned according to manufacturer specifications and building codes. Install detectors on ceilings or high on walls, avoiding corners where dead air spaces reduce effectiveness.
Kitchen ventilation prevents grease accumulation that contributes to fire risk and creates cleaning challenges. Range hood systems vented to the exterior remove cooking smoke, grease particles, combustion byproducts before they deposit on ceiling surfaces. Clean range hood filters monthly to maintain effectiveness. Electrical safety practices reduce fire risk throughout your home. Avoid overloading outlets with multiple high wattage appliances on single circuits. Replace damaged electrical cords showing fraying or exposed wires. Use surge protectors for electronic equipment clusters. Install AFCI (Arc Fault Circuit Interrupter) breakers in bedrooms and living areas as required by current electrical codes. Attic ventilation reduces fire spread risk by maintaining cooler temperatures and preventing heat buildup. Proper ventilation systems include soffit vents for intake and ridge or gable vents for exhaust, creating continuous airflow.
Building code compliance for fire safety features includes properly rated drywall in certain locations, fire rated assemblies between garage and living spaces, adequate electrical system capacity. Maintain electrical systems and fixtures through regular inspection. Look for warm outlets, flickering lights, frequently tripping breakers indicating problems. Schedule electrical system evaluations every 3 to 5 years to identify deteriorating components before they fail.
Fireproof materials and fire rated assemblies for ceiling construction provide improved protection in new construction or major renovations. Type X drywall contains special additives that improve fire resistance. Fire rated ceiling assemblies meet specific time ratings, typically 30, 60, or 90 minutes of fire resistance. Regular inspection schedules for fire safety equipment ensure smoke detectors function properly, fire extinguishers remain charged and accessible, escape routes stay clear. Test smoke detectors monthly by pressing test buttons. Replace detector batteries annually or when low battery warnings sound. Replace entire smoke detector units every 10 years as sensors degrade with age.
Final Words
Fire damaged ceiling repair starts with safety assessment and ends with a ceiling that looks like the damage never happened.
The process moves through clear stages: stabilize the structure, remove all smoke and soot, dry everything completely, repair or replace damaged materials, seal odors, and finish with quality paint and texture matching.
Yes, it’s a coordinated effort involving structural work, electrical repairs, insulation replacement, and careful finishing. But when each step happens in order with the right materials and techniques, your ceiling gets back to normal.
Work with qualified restoration contractors who understand the full sequence. Document everything for insurance. And trust the process to protect your home and give you a solid, clean ceiling overhead.
FAQ
How much does fire damage restoration cost?
Fire damage restoration costs typically range from $3,000 for minor smoke cleaning to $50,000 or more for complete ceiling reconstruction, depending on damage severity, structural repairs needed, and the size of the affected area.
Does insurance rebuild a house after a fire?
Insurance typically covers fire damage repairs including structural work, smoke remediation, and temporary living expenses, though coverage depends on your policy type, with replacement cost policies providing fuller coverage than actual cash value policies.
Can you paint over a smoke-damaged ceiling?
You cannot paint directly over a smoke-damaged ceiling because smoke residue will bleed through standard paint. You must first clean the surface, then apply specialized stain-blocking primers designed to seal odors before painting.
What is the average cost to repair a ceiling with water damage?
Water-damaged ceiling repair costs average $500 to $1,500 for minor fixes and $2,000 to $5,000 for extensive damage requiring drywall replacement, insulation removal, structural drying, and complete refinishing to match existing textures.
How long does fire damaged ceiling repair take?
Fire damaged ceiling repair takes 3 to 7 days for minor smoke damage and 2 to 6 weeks for structural repairs, depending on damage extent, drying time requirements, permit approvals, and the number of coats needed for finishing work.
What are the first steps after discovering ceiling fire damage?
The first steps after discovering ceiling fire damage include evacuating if the ceiling appears unstable, documenting all damage with photos before cleanup, contacting your insurance company within 24 to 48 hours, and calling professional restoration services for safety assessment.
When do I need a structural engineer for fire damaged ceilings?
You need a structural engineer for fire damaged ceilings when load-bearing joists show charring, the ceiling sags or has large cracks, or when building inspectors require professional verification that repairs meet local codes before occupancy approval.
What certifications should fire restoration contractors have?
Fire restoration contractors should have IICRC certification for smoke and fire damage restoration, proper state licensing for construction work, general liability and workers compensation insurance, and preferably insurance company approval for direct claim billing.
How do professionals remove smoke odor from ceilings?
Professionals remove smoke odor from ceilings through HEPA vacuuming, specialized cleaning solutions, complete surface drying, stain-blocking primers that seal odor molecules, and advanced techniques like ozone treatment or thermal fogging for deep penetration.
Should I replace or clean fire damaged acoustic ceiling tiles?
You should replace fire damaged acoustic ceiling tiles rather than clean them because the porous material absorbs smoke deeply, making effective cleaning nearly impossible, and replacement often costs less than the specialized restoration attempts required.