


When you spot water dripping from your ceiling, every minute counts. That dark stain spreading across your drywall isn’t just cosmetic damage, it’s active destruction happening inside your ceiling cavity right now, soaking insulation, weakening framing, and creating conditions for mold growth you can’t see yet. The good news: qualified local ceiling leak repair contractors operate in your area with emergency response teams ready to arrive within hours, stop the damage, identify the source, and start permanent repairs before a small problem becomes a major renovation.
Local Ceiling Leak Repair Contractors: Get Help Now

If you’re staring at a wet ceiling right now, here’s what you need to know: qualified local contractors are available in your area with emergency response capabilities, often arriving within hours of your call.
Professional ceiling leak repair services typically offer 24/7 emergency response for active leaks, same day service for urgent situations, and scheduled appointments for non-emergency repairs. When you first contact a contractor, expect questions about your location to confirm they service your specific area, your availability for on-site inspection, and the nature of the damage. Most reputable contractors offer free inspections where they assess the damage extent, identify the leak source, and provide detailed written cost estimates before any work begins. This initial visit helps you understand what you’re dealing with and what it’ll take to fix it properly.
When selecting local ceiling leak repair contractors, verify these essential qualifications:
• Active state licensing and full insurance coverage (liability and workers’ compensation)
• Emergency availability with clear response time commitments for urgent situations
• Specific service area confirmation for your exact location or zip code
• Free on-site inspection and detailed written estimates with no obligation
• Customer reviews and verifiable local references you can check
• Transparent pricing structure with itemized costs and no hidden fees
• Written warranty or guarantee on completed repair work
Typical price ranges for ceiling leak repairs vary based on damage extent and complexity. Small patch jobs covering limited areas generally run $200 to $500. Moderate repairs addressing larger sections or multiple damage areas cost $500 to $1,500. Extensive damage requiring structural work, large scale drywall replacement, or mold remediation can reach $1,500 to $5,000 or more. Factors affecting your specific cost include the leak source complexity (simple plumbing fixture versus hidden pipe), ceiling height and accessibility, materials needed, texture matching requirements, and whether structural framing repairs are necessary.
When contacting contractors, have ready your complete street address, photos or video of the visible damage, description of the leak source if you know it (bathroom above, roof area, plumbing fixture), and your homeowners insurance information if you plan to file a claim.
For non-emergency situations where you have time, request quotes from two to three contractors to compare their pricing approach, repair methodology, timeline estimates, and communication style. This comparison helps you make an informed decision and ensures competitive pricing.
Emergency Response and Immediate Actions for Active Ceiling Leaks

Quick action during active ceiling leaks minimizes damage spread and reduces your repair costs, but it requires both immediate homeowner response and professional emergency services to handle it right.
While waiting for emergency professionals to arrive, take these immediate actions:
- Move furniture, electronics, and belongings away from the leak area to prevent property damage
- Place buckets, containers, or plastic bins to catch actively dripping water
- Turn off the water supply at the main shutoff valve if the leak appears plumbing related
- Turn off electricity to the affected room at the breaker panel if water is dripping near light fixtures, outlets, or electrical components
- Poke a small controlled hole in the center of sagging ceiling areas to release pooled water before ceiling collapse occurs
- Document all damage with date stamped photos and video from multiple angles
- Contact a 24/7 emergency ceiling leak repair service immediately
- Call your homeowners insurance company to report the damage and start the claim process
Don’t delay calling professionals hoping the leak will stop on its own. Don’t attempt DIY repairs on active leaks before identifying and stopping the water source. Don’t ignore small leaks thinking they’re not serious, since hidden damage spreads behind visible symptoms. Don’t stand or place belongings directly under sagging ceiling sections that could collapse.
Professional emergency response typically follows this sequence. Phone consultation where you describe the situation and receive an estimated arrival time (usually one to four hours for true emergencies). Immediate on-site assessment upon arrival. Source identification and water shutoff. Emergency stabilization measures to prevent further damage. Water extraction from affected areas and materials. Temporary containment with plastic sheeting or tarps if needed. And scheduling the permanent repair timeline once stabilization is complete. Emergency teams prioritize stopping active water intrusion and preventing damage spread, then address the restoration work.
Emergency ceiling leak repair services operate 24/7 including nights, weekends, and holidays for urgent situations. After hours contact typically occurs through emergency phone lines with live operators or on-call technicians. Emergency service fees may apply for immediate response outside normal business hours, generally adding $100 to $300 to standard rates depending on time and day, but this premium cost prevents exponentially more expensive damage from hours of continued water intrusion.
Common Causes of Ceiling Leaks and Damage Assessment
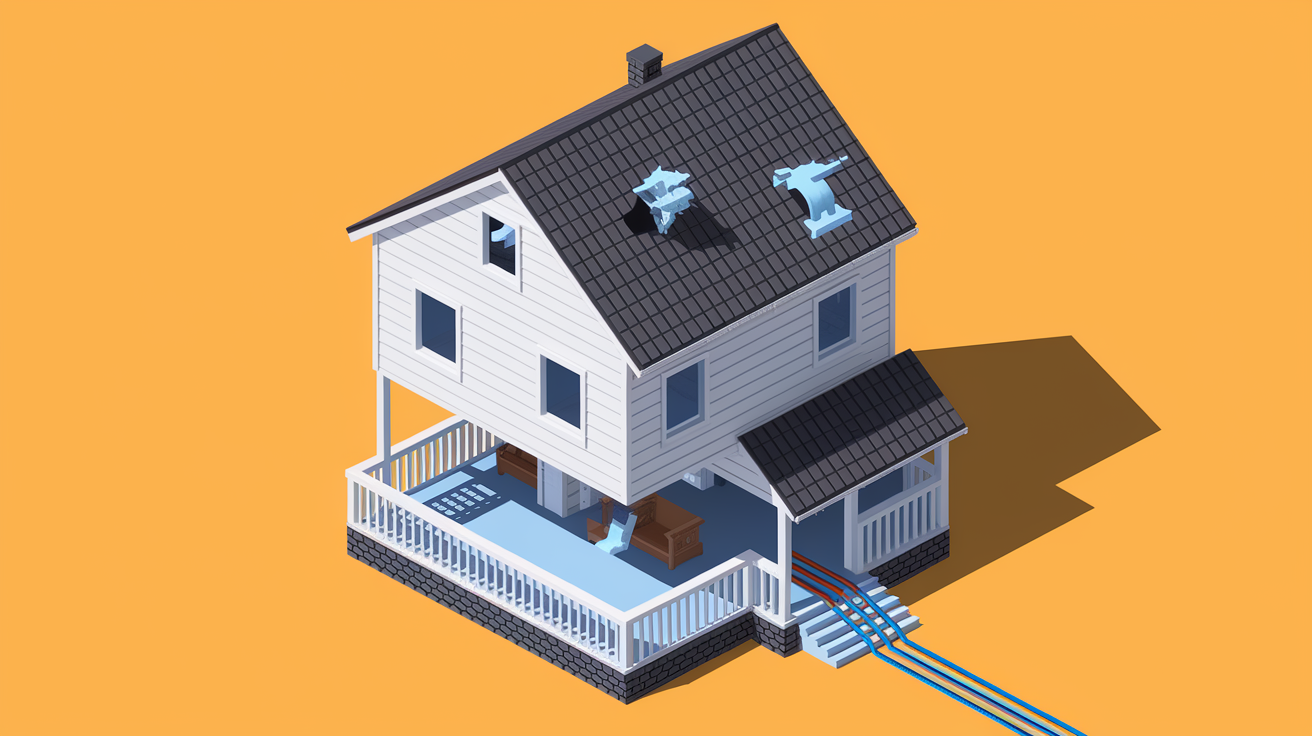
Identifying the leak source before starting ceiling repairs matters because fixing visible ceiling damage without addressing the water source means you’ll be calling contractors back in weeks or months when the leak returns.
Ceiling leaks in residential properties typically stem from several common categories, each requiring different repair approaches and expertise.
Plumbing Related Ceiling Leaks
Plumbing failures cause many ceiling leaks, particularly in homes with bathrooms, kitchens, or water heaters located above ceiling spaces. Burst pipes from freezing temperatures or age related deterioration release large volumes of water quickly. Bathroom fixture leaks develop around toilets, showers, and bathtubs when wax rings fail, caulking deteriorates, or drain connections loosen. Water heater failures occur when tanks corrode or pressure relief valves malfunction. HVAC condensation problems happen when air conditioning drain lines clog or condensate pans overflow, particularly in attic mounted units.
Roof and Exterior Related Leaks
Roof damage represents another major ceiling leak category. Missing, cracked, or lifted shingles allow water penetration during rain events. Ice dams form along roof edges in winter, forcing melting snow under shingles and into attic spaces. Clogged gutters and downspouts cause water to back up under roof edges rather than draining properly away from the house. Storm damage from high winds or fallen branches can puncture roofing materials. Flashing failures around chimneys, skylights, and roof penetrations create entry points for moisture.
Structural and Condensation Issues
Attic condensation occurs when warm moist air meets cold surfaces, creating moisture that drips onto ceiling materials below. Poor ventilation in attics prevents moisture escape, leading to accumulated dampness. Structural settling over time can create small separations where water finds its way through. Missing or inadequate vapor barriers allow moisture migration through building assemblies.
Professional contractors use moisture assessment tools including infrared thermal imaging cameras that detect temperature differences indicating wet areas, pin type and pinless moisture meters that measure moisture content in building materials, and visual inspection of attic spaces, plumbing fixtures, and roof areas to pinpoint exact water sources before beginning repairs. This diagnostic process ensures repairs address the actual problem rather than just covering symptoms.
Warning Signs Your Ceiling Needs Immediate Repair

Recognizing ceiling leak symptoms early prevents costly extensive repairs, stops damage from spreading to larger areas, and addresses potential safety concerns before they become dangerous.
Ceiling water damage progresses from minor discoloration to serious structural compromise. What starts as a small water stain can hide extensive hidden damage behind drywall, including saturated insulation, weakened framing, and developing mold growth. The visible symptoms you see represent only part of the actual damage extent.
Watch for these specific warning signs indicating your ceiling needs professional repair:
• Water stains or brown spots appearing on ceiling surfaces
• Paint bubbling, blistering, or peeling away from ceiling materials
• Visible sagging or bowing sections that weren’t there before
• Musty or moldy odors in rooms even when surfaces appear dry
• Ceiling texture flaking or falling in pieces
• Visible cracks running across ceiling surfaces or along wall junctions
• Soft or spongy spots when you gently press ceiling areas
• Mold or mildew growth appearing as dark spots or fuzzy patches
Hidden damage behind visible ceiling leak symptoms often exceeds what you can see from below. Water follows paths of least resistance through ceiling cavities, spreading laterally through insulation and along framing members before appearing at visible points. This means a small visible stain might indicate water damage affecting a much larger ceiling area. Electrical concerns make ceiling leaks particularly dangerous since water conducts electricity, creating shock risks around light fixtures, ceiling fans, and electrical junction boxes located in ceiling spaces.
When any of these warning signs appear in your home, schedule immediate professional inspection rather than waiting to see if symptoms worsen. Early intervention stops damage progression and costs significantly less than repairs after months of continued moisture exposure.
Complete Ceiling Leak Repair Process: From Assessment to Restoration

Professional ceiling leak repair follows a systematic approach ensuring permanent solutions rather than temporary patches that fail in months.
The complete ceiling leak repair process includes these coordinated steps:
- Source identification and complete water stoppage addressing the actual leak cause
- Moisture assessment using professional meters to determine wet material extent and required drying period (typically 48 to 72 hours before repairs can begin)
- Damaged material removal and proper disposal of wet drywall, insulation, and compromised framing
- Structural repair if water damage has affected ceiling joists, framing members, or load bearing components
- Drywall replacement or patching depending on damage extent and existing material condition
- Texture matching and professional application replicating your existing ceiling finish
- Primer application plus paint restoration to blend repairs invisibly with surrounding areas
Typical repair timelines depend on several factors. Minor patch repairs might be completed in one to two days once materials are dry. Moderate repairs requiring drywall replacement usually take three to five days including drying time. Extensive damage needing structural work, mold remediation, or large scale restoration can require one to two weeks. The required drying time before repairs begin, material availability from suppliers, complexity of matching existing textures, and contractor scheduling all affect your specific timeline.
Patching works when damage is limited to small areas (under two feet across), existing drywall remains structurally sound around damaged sections, and moisture exposure was brief without material deterioration. Complete drywall section replacement becomes necessary when damage covers large areas, moisture has saturated materials for extended periods causing deterioration, existing drywall has lost structural integrity and feels soft or crumbly, or multiple previous patches exist making it nearly impossible to blend things in properly.
Drywall installation for ceiling repairs requires precise techniques. Contractors secure new drywall panels directly to ceiling joists using appropriate fastener spacing, ensuring firm attachment that won’t sag over time. Taping and mudding seams involves applying paper tape or fiberglass mesh over joints, then covering with multiple coats of joint compound. Multiple coats (typically three) allow proper buildup and feathering. Sanding between coats creates smooth transitions, and final sanding achieves an invisible blend where new material meets existing ceiling. The goal is making repairs disappear completely.
Texture matching presents significant challenges requiring professional skill. Small variations in application technique, material consistency, or timing create noticeable differences. Professional contractors replicate existing ceiling finishes by analyzing your current texture, matching materials and application methods, testing techniques on scrap material first, and applying texture in patterns and densities matching surrounding areas. This skill level separates quality ceiling restoration from obvious patch jobs.
| Ceiling Texture Type | Application Method | Matching Difficulty |
|---|---|---|
| Flat/Smooth | Multiple coats of joint compound, sanded smooth | Moderate, requires perfect sanding |
| Orange Peel | Spray application with specific tip size and pressure | Moderate, consistent pattern needed |
| Knockdown | Spray texture then trowel to flatten peaks | High, timing and pressure critical |
| Skip Trowel | Hand applied joint compound in random patterns | High, requires artistic technique |
| Popcorn | Spray application of specialized acoustic material | Very High, material availability and blending challenges |
| Swirled | Hand applied with brush or trowel in circular patterns | Very High, consistent pattern replication difficult |
Primer application matters critically for water stained ceiling areas. Stain blocking primers seal discoloration preventing it from bleeding through new paint. These specialized primers bond to both new drywall and existing painted surfaces. Proper surface preparation before priming including cleaning, light sanding, and dust removal ensures strong primer adhesion and smooth final results.
Paint matching involves complexities beyond simple color selection. Age related color shifts mean your existing ceiling paint has likely faded or yellowed compared to the original color. Sheen differences (flat, eggshell, satin) affect light reflection and appearance even with identical colors. Professional ceiling restoration typically requires multiple paint coats for even coverage and color consistency. Sometimes painting entire ceiling sections rather than just repaired spots becomes necessary for truly invisible repairs and consistent appearance, particularly when existing paint has aged significantly or when repaired areas are large or centrally located.
Preventing Mold Growth After Ceiling Water Damage

Ceiling water damage creates ideal conditions for mold growth by providing moisture, organic material (drywall paper, wood), and often dark hidden spaces where colonies develop unnoticed, making prevention critical for health and safety.
Professional mold prevention during ceiling leak repairs includes complete drying of all affected materials using commercial dehumidifiers and air movers, typically running 48 to 72 hours minimum. Dehumidification reduces ambient moisture levels preventing condensation on surfaces. Air circulation with high velocity fans prevents stagnant conditions where mold thrives. Moisture barrier installation when replacing insulation prevents future moisture migration. Antimicrobial treatments applied to framing and surfaces in severely affected areas inhibit mold development even if minor moisture recurs.
Mold remediation specialists become necessary when visible mold growth covers areas larger than ten square feet, when mold has developed in HVAC systems requiring ductwork cleaning, when occupants experience respiratory symptoms suggesting widespread contamination, or when testing reveals toxic mold species requiring specialized removal protocols. Standard ceiling repair contractors handle mold prevention through proper drying and materials replacement, but active mold remediation requires additional certification and procedures.
Signs that mold may be present after ceiling water damage include:
• Persistent musty or earthy odors that don’t dissipate after cleaning
• Visible dark spots, discoloration, or fuzzy growth on ceiling materials or in attic spaces
• Respiratory symptoms including coughing, sneezing, or difficulty breathing that improve when away from home
• Continued moisture or dampness in materials even after repairs
• Deteriorating building materials including crumbling drywall or soft wood framing
Air quality testing conducted by certified professionals measures airborne mold spore concentrations, identifies specific mold species present, and determines whether levels exceed safe thresholds. Safe insulation replacement in ceiling water damage situations requires removing all wet material since saturated insulation loses effectiveness and harbors moisture even after apparent drying. Ventilation improvements prevent future moisture accumulation and mold risks by ensuring adequate attic airflow, proper bathroom exhaust fan operation, and controlled humidity levels throughout the home.
Understanding Ceiling Leak Repair Costs and Pricing

Ceiling leak repair costs vary significantly based on damage extent, leak cause complexity, accessibility of affected areas, and specific restoration requirements for your situation.
The main cost components in ceiling leak repairs include emergency service fees if immediate response is required (typically $100 to $300 additional), leak source repair costs varying widely (plumbing repairs $150 to $1,000 or more, roofing repairs $300 to $2,000 or more), water damage restoration including drying and material removal ($500 to $3,000), drywall materials and installation ($2 to $4 per square foot), texture matching ($1 to $3 per square foot depending on complexity), and painting ($150 to $500 for ceiling sections).
Typical pricing structures vary by contractor and project type. Hourly rates for ceiling leak repair labor generally run $50 to $100 per hour, used primarily for small repairs or when damage extent is uncertain. Project based pricing provides fixed costs for defined scope of work, preferred for moderate to large repairs with clear parameters. Square footage pricing applies primarily to material calculations including drywall, texture, and paint coverage. Most contractors provide project based estimates after on-site inspection since ceiling leak repair involves multiple variables affecting final cost.
Factors affecting your total repair costs include:
• Damage extent and ceiling area affected (small patch versus multiple rooms)
• Accessibility challenges including high ceilings, vaulted designs, or difficult to reach locations
• Material type and texture complexity requiring specialized matching techniques
• Structural repairs needed when joists, framing, or load bearing elements are compromised
• Mold remediation requirements adding specialized labor and containment procedures
• Premium finishes or matching custom hand applied textures requiring advanced skills
Free inspection offerings from reputable contractors allow damage assessment and cost estimation without obligation. Detailed written estimates should itemize labor, materials, and additional services separately so you understand cost breakdown. Ask about warranty coverage including duration, what’s covered, and any exclusions or conditions. Reputable contractors stand behind their work with guarantees typically ranging from one to five years depending on repair type and company policy.
Financing options, payment plans, and available discounts help manage costs for larger ceiling leak repair projects. Some contractors offer payment plans allowing costs spread over several months, financing through third party providers for qualified homeowners, and discounts for seniors, military veterans, or first time customers that can reduce total costs by five to fifteen percent.
Insurance Claims for Ceiling Leak Damage

Homeowners insurance typically covers ceiling leak damage from sudden and accidental water discharge including burst pipes, appliance hose failures, and storm related roof damage, but excludes damage from gradual leaks, maintenance neglect, or flooding (which requires separate flood insurance).
Immediate steps when discovering ceiling leak damage matter for successful claims. Stop the water source if safely possible to prevent continued damage. Document everything thoroughly with date stamped photos and video showing damage extent, water source if visible, and affected belongings. Protect your belongings by moving them away from damaged areas and placing tarps over furniture if needed. Notify your insurance company immediately, typically within 24 to 48 hours of discovery, since delayed reporting can complicate claims or lead to coverage denial.
Working with insurance on ceiling repairs follows these steps:
- Contact your insurance company immediately to report the claim and receive a claim number for reference
- Document all damage thoroughly with photos, video, and written descriptions from multiple angles and perspectives
- Obtain professional damage assessment and detailed written repair estimates from licensed contractors
- Save all receipts, correspondence, and documentation related to the damage and repairs
- Understand your deductible amount and coverage limits before approving repair work to avoid unexpected out of pocket expenses
Reputable contractors assist with insurance claims by providing detailed damage documentation with photos and measurements, written damage assessment reports explaining cause and extent, itemized repair estimates breaking down labor and materials, direct communication with insurance adjusters when homeowners provide authorization, and supplemental estimates if initial assessments underestimate needed repairs. This contractor support streamlines the claims process and helps ensure adequate coverage for complete restoration.
Warranty coverage from contractors provides protection after completed ceiling leak repair work. Standard warranties typically cover workmanship for one to two years, meaning if repairs fail due to installation errors the contractor returns to fix issues at no additional charge. Material warranties vary by product but often run five to ten years for drywall, paint, and related materials. Get warranty terms in writing, understand what specific issues are covered versus excluded, note the duration and any maintenance requirements, and keep contractor contact information for future warranty service if needed.
Choosing Between Plumbers and General Contractors for Ceiling Leaks

Ceiling leak repair often requires coordinated expertise since water damage involves both source repairs (plumbing, roofing) and restoration work (structural repair, drywall, painting), sometimes needing specialists from multiple trades working in sequence.
Call plumbers first when you have active plumbing leaks from visible pipes, recent pipe bursts requiring immediate shutoff, bathroom or kitchen fixture failures with water actively flowing, or water heater malfunctions. Plumbers handle the source repair, stopping water and fixing plumbing components, but typically don’t perform drywall, texture, and paint restoration. After plumbers complete source repairs, general contractors or restoration companies handle ceiling restoration work. Call roofers followed by contractors when ceiling leaks occur during or after rain, when you see roof damage or missing shingles, or when leaks appear near roof penetrations like chimneys or skylights. HVAC technicians followed by contractors address condensation issues from air conditioning systems, clogged drain lines, or poorly maintained equipment causing ceiling moisture.
Leak detection specialists use thermal imaging cameras, moisture meters, acoustic listening devices, and video inspection equipment to identify hidden water sources when leak origin isn’t obvious from visual inspection. These specialists pinpoint exact leak locations before invasive investigation or repair work begins, particularly valuable for hidden plumbing leaks in walls or under slab foundations.
Contact the appropriate professional based on your specific situation:
• Visible pipe leak with active water flow: Plumber immediately
• Roof damage causing leaks during rain: Roofer for source repair, then contractor for ceiling restoration
• HVAC condensation creating ceiling moisture: HVAC technician for system repair, then contractor for affected ceiling
• Unknown leak source with no obvious origin: Leak detection specialist for diagnosis, then appropriate trade for repairs
• Extensive water damage affecting multiple areas or systems: Restoration company coordinating all necessary trades and repairs
Integrated restoration companies handle complete ceiling leak repair from source identification through final restoration, providing a single point of contact that simplifies the process for homeowners. These full service companies typically have plumbers, carpenters, drywall specialists, painters, and project coordinators on staff or under contract, allowing them to manage the entire repair sequence. This approach streamlines scheduling, ensures proper sequencing of repair stages, provides unified warranty coverage, and reduces homeowner stress by eliminating the need to coordinate multiple contractors independently.
Structural Damage Assessment and Ceiling Safety Concerns
Water damaged ceilings can compromise structural integrity by saturating and weakening ceiling joists and framing, adding significant weight from pooled water, and causing material deterioration that affects load bearing capacity, making professional structural assessment critical for safety.
Visible signs of structural ceiling damage requiring immediate professional evaluation include pronounced sagging with obvious bowing or drooping sections, separation from walls where ceiling pulls away at edges, visible warping or twisting of ceiling joists when viewed from attic spaces, and areas feeling distinctly soft or spongy when gently pressed from below indicating material deterioration. These symptoms suggest the ceiling has lost structural integrity and poses collapse risk.
Electrical safety concerns occur when ceiling leaks develop near light fixtures, ceiling fans, recessed lighting, or exposed electrical junction boxes located in ceiling cavities. Water conducts electricity, creating serious shock risks. If water drips near electrical components or you see sparking, buzzing, or flickering lights related to ceiling leak areas, turn off power to affected circuits immediately at your breaker panel and contact licensed electricians before addressing ceiling repairs. Never touch electrical fixtures, switches, or outlets with wet hands or while standing in water.
Hidden dangers of ceiling water damage extend beyond visible symptoms:
• Compromised insulation effectiveness reducing energy efficiency and comfort even after visible repairs
• Weakened ceiling joists and framing that may not show obvious sagging but have reduced load capacity
• Electrical short circuit risks in wiring running through ceiling spaces and junction boxes
• Mold growth developing in hidden wall and ceiling cavities undetectable from visible surfaces
• Pest attraction to moisture and deteriorating materials creating secondary infestation problems
• Progressive deterioration continuing even after visible water stops if materials remain damp
Professional structural assessment procedures examine the full extent of ceiling damage. Moisture meter testing identifies wet areas in ceiling materials, framing, and insulation. Joist inspection from attic spaces checks for warping, cracking, or deterioration in load bearing members. Load capacity evaluation determines whether structural support remains adequate or requires reinforcement. Assessment results determine whether ceiling sections need complete replacement with new framing versus targeted repairs to sound structural members, and whether temporary support installation is needed during repair work.
Sagging ceilings represent imminent collapse risk requiring immediate professional evaluation and potential evacuation of rooms below until stabilization occurs. Ceiling collapses happen suddenly, creating injury risks from falling materials and debris. If ceiling sections sag noticeably or show rapid progression, don’t enter affected rooms, contact emergency repair services immediately, and follow professional guidance about temporary support installation if repairs can’t begin immediately.
Service Area Coverage and Contractor Availability
Reputable ceiling leak repair contractors typically serve defined geographic areas allowing them to maintain specific response time commitments, manage travel costs efficiently, and serve local markets with established reputations, which is why verifying service area coverage before requesting services prevents scheduling issues and ensures appropriate response times.
Contractor availability factors affect when repairs can begin in your home. Emergency after hours service availability means some contractors respond 24/7 for active leaks and urgent situations while others operate standard business hours only. Typical scheduling wait times for non-emergency ceiling repairs range from same day availability during slow periods to one to two weeks during peak demand seasons. Seasonal demand affects contractor availability significantly, with spring storms, winter pipe freezes, and summer storm seasons creating higher call volumes and longer scheduling delays.
Booking methods vary by contractor and urgency. Phone consultation for urgent ceiling leak issues provides immediate contact with contractors who can ask questions, provide initial guidance, and dispatch emergency teams. Online scheduling for non-emergency appointments allows convenient booking through contractor websites, though urgent situations always warrant phone contact. Video assessment options some contractors now offer involve homeowners providing phone or tablet video of damage for initial evaluation, helping contractors prepare appropriate equipment and materials before arrival.
Questions to ask when contacting ceiling leak repair contractors include:
• Do you service my specific address or zip code with standard response times?
• What’s your typical response time for my type of issue (emergency versus scheduled)?
• Do you offer free on-site inspection or estimate, or is there an assessment fee?
• What’s your current scheduling availability for non-emergency repairs?
• Do you provide written satisfaction guarantees or warranties on completed work?
Checking customer reviews and local reputation verifies contractor reliability and service quality before scheduling. Google reviews show recent customer experiences and overall ratings. Better Business Bureau ratings and accreditation indicate complaint history and resolution practices. Neighborhood referrals from local homeowners who’ve used specific contractors provide firsthand accounts of communication, workmanship, and reliability. Verify license status through state contractor licensing boards to confirm credentials remain current and in good standing.
Preventive Maintenance to Avoid Future Ceiling Leaks
Preventive maintenance costs significantly less than emergency ceiling leak repairs by identifying vulnerabilities before they cause damage, protecting home value through proactive care, and preventing the disruption and expense of major restoration projects.
Recommended inspection schedules help homeowners catch problems early. Annual roof inspections by qualified professionals check for damaged shingles, worn flashing, and potential leak sources, ideally scheduled in spring or fall. Seasonal gutter cleaning twice yearly (spring and fall) prevents water backup under roof edges. Regular attic checks for moisture, ventilation issues, or insulation problems, particularly after severe weather events, identify developing concerns. Periodic plumbing fixture examinations in bathrooms and kitchens above ceiling spaces catch small leaks before they cause visible ceiling damage. These routine checks create opportunities to address minor issues before they escalate.
Preventive measures homeowners can take include:
• Clean gutters and downspouts twice yearly removing leaves, debris, and blockages that force water under roof edges
• Inspect roof after severe storms checking for lifted or missing shingles, damaged flashing, or storm debris
• Check attic for proper ventilation and insulation ensuring adequate airflow prevents moisture buildup
• Seal bathroom and kitchen plumbing fixtures properly maintaining caulking around tubs, showers, and sinks
• Test plumbing supply lines for corrosion or wear inspecting exposed pipes, hose connections, and shutoff valves
• Maintain HVAC systems with regular filter changes and annual professional service preventing condensation issues
• Address small ceiling cracks before moisture intrusion by sealing with appropriate caulk or filler
• Ensure proper grading around home foundation directing water away from the structure prevents basement moisture migrating upward
Professional annual inspections catch small issues before they become major ceiling leak problems. During preventive assessments, qualified contractors check roof condition including shingles, flashing, and penetrations, examine attic spaces for moisture signs, ventilation adequacy, and insulation condition, inspect plumbing fixtures and supply lines in areas above ceiling spaces, evaluate HVAC systems for proper drainage and operation, and review gutters, downspouts, and exterior drainage patterns. This comprehensive evaluation identifies vulnerabilities requiring attention.
Permanent solutions to identified vulnerabilities prevent recurring ceiling damage and eliminate the frustration of repeated repair needs. Addressing root causes rather than symptoms means you’re not calling contractors back in months when the same problem returns, protecting your home investment through proactive care.
Final Words
Ceiling leaks need fast action and the right local help.
Finding qualified ceiling leak repair near me services means checking licenses, reading reviews, and getting clear estimates before work starts. Most contractors offer free inspections and transparent pricing.
Stop the water first. Then let professionals handle source repair, drying, drywall work, and finish details that match your home.
Whether it’s a pipe burst, roof damage, or slow leak, the goal stays the same: get it dry, make it safe, and finish it right so you’re back to normal.
FAQ
How much does ceiling leak repair cost?
Ceiling leak repair costs typically range from $200 to $500 for small patches, $500 to $1,500 for moderate repairs, and $1,500 to $5,000 or more for extensive water damage requiring structural work, complete drywall replacement, and full restoration.
Does homeowners insurance cover ceiling leaks?
Homeowners insurance typically covers ceiling leaks caused by sudden incidents like pipe bursts or storm damage, but excludes gradual leaks from poor maintenance or neglect. Coverage depends on the water source and whether damage was preventable through normal upkeep.
Should you call a plumber or roofer for a ceiling leak?
You should call a plumber for visible pipe leaks or plumbing fixture failures, a roofer for exterior damage causing leaks, and a general contractor or restoration company for unknown sources or extensive water damage requiring coordinated multi-trade repairs.
What factors affect ceiling leak repair costs?
Ceiling leak repair costs are affected by damage extent and ceiling area affected, accessibility challenges, material type and texture complexity, structural repairs needed, mold remediation requirements, and premium finishes or custom texture matching that requires specialized skill.
How long does ceiling leak repair take?
Ceiling leak repair timelines depend on damage extent, required drying time before repairs begin (typically 48 to 72 hours), material availability, texture matching complexity, and contractor scheduling. Small patches may take one day while extensive repairs require several days.
What are the warning signs of ceiling water damage?
Warning signs of ceiling water damage include water stains or brown spots, paint bubbling or peeling, visible sagging or bowing, musty odors, texture flaking or falling, visible cracks, soft spots when touched, and mold or mildew growth requiring immediate attention.
When should you replace ceiling drywall versus patching?
You should replace ceiling drywall when damage covers large areas, moisture exposure was prolonged, existing drywall has compromised structural integrity, or sagging indicates joist damage. Small isolated damage under one square foot typically allows simple patching instead.
How do contractors match existing ceiling texture?
Contractors match existing ceiling texture by identifying the specific type (orange peel, knockdown, skip trowel, popcorn, swirled), using appropriate application tools and techniques, applying sample areas for approval, and sometimes texturing entire ceiling sections for consistent appearance.
What immediate actions should you take during an active ceiling leak?
During an active ceiling leak, move furniture away from the area, place buckets to catch water, turn off water supply if plumbing-related, shut off electricity to the affected room, poke small holes in sagging areas to release pooled water, and contact emergency repair services.
Can ceiling leaks cause mold growth?
Ceiling leaks create ideal conditions for mold growth within 24 to 48 hours of water exposure. Professional moisture removal, complete drying, dehumidification, air circulation, and addressing hidden dampness in insulation prevent mold development after water damage repairs.
Do ceiling leak repair contractors offer emergency services?
Most professional ceiling leak repair contractors offer 24/7 emergency services for active leaks with typical response times of one to four hours. Emergency service fees may apply for after-hours calls, but immediate response minimizes total damage and repair costs.
How do you document ceiling leak damage for insurance claims?
Document ceiling leak damage by taking date-stamped photos and video of all affected areas, damaged belongings, and water source if visible. Save all receipts, obtain professional damage assessments with itemized estimates, and notify your insurance company immediately after discovery.