

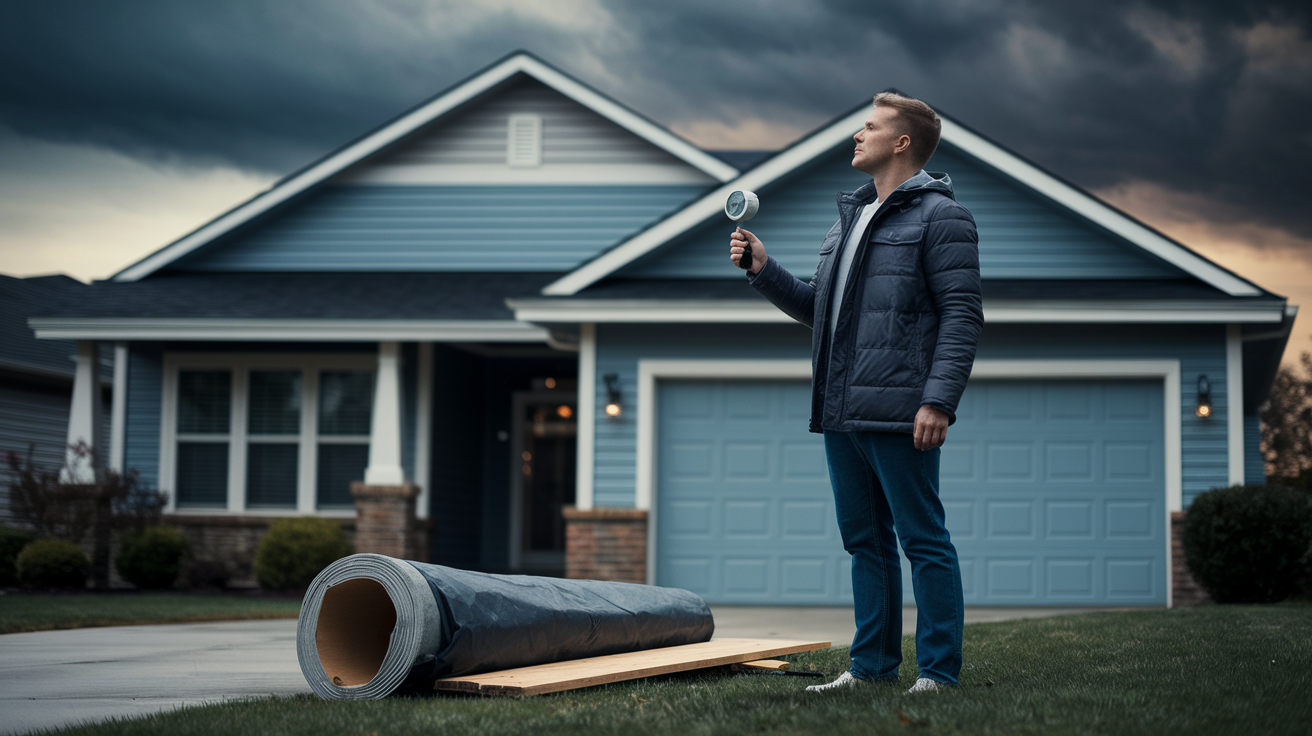
Think a little leak won’t hurt? That’s the costly mistake most homeowners make.
Before you touch a ladder, check weather and your safety. Falling is worse than a wet ceiling.
Act fast: a tarp, a taped patch, or roofing cement can stop water from soaking decking, insulation, and ceilings.
This guide walks you through the emergency roof weatherproofing methods that actually work, when to climb, how to tarp and seal correctly, what to document for insurance, and when to call a pro so the problem doesn’t get worse.
Immediate Steps to Protect Your Roof Right Now (Do This First)
Before you touch a ladder or grab a tarp, stop and check the weather. If the wind’s gusting above 15 to 20 mph, rain is still heavy, or lightning is anywhere nearby, stay off the roof. Even a small slip on wet shingles can mean a serious fall. Your first job is keeping yourself safe, then stopping more water from getting in.
If conditions allow you to move, the fastest way to protect your roof is covering the damaged area with a heavy duty tarp or plastic sheeting. Lay the cover flat over the hole or missing shingles, extending it at least three to four feet past the damage on all sides. Water runs downhill, so make sure the material overlaps the problem area in the direction rain flows. Pull it tight to avoid puddling, then secure the edges with wood boards and nails or screws driven through the tarp into the roof deck.
Speed matters because every minute of exposure lets more water soak into your decking, insulation, and ceiling. A small leak can turn into warped wood and mold within days. Get the opening covered, even if the fix isn’t perfect.
Here’s what to do in order:
Check current weather and roof surface conditions before climbing. If it’s unsafe, wait or call for help. Move valuables, electronics, and furniture away from the leak zone inside your home. Place buckets under active drips. Position your tarp or plastic sheeting over the damaged section, making sure it extends well beyond the edges. Secure all four edges using 1×4 or 1×6 boards nailed or screwed through the cover into solid roof decking. Walk the perimeter and check for gaps, loose corners, or areas where wind could catch the material and pull it free.
How to Assess Roof Damage Safely and Quickly
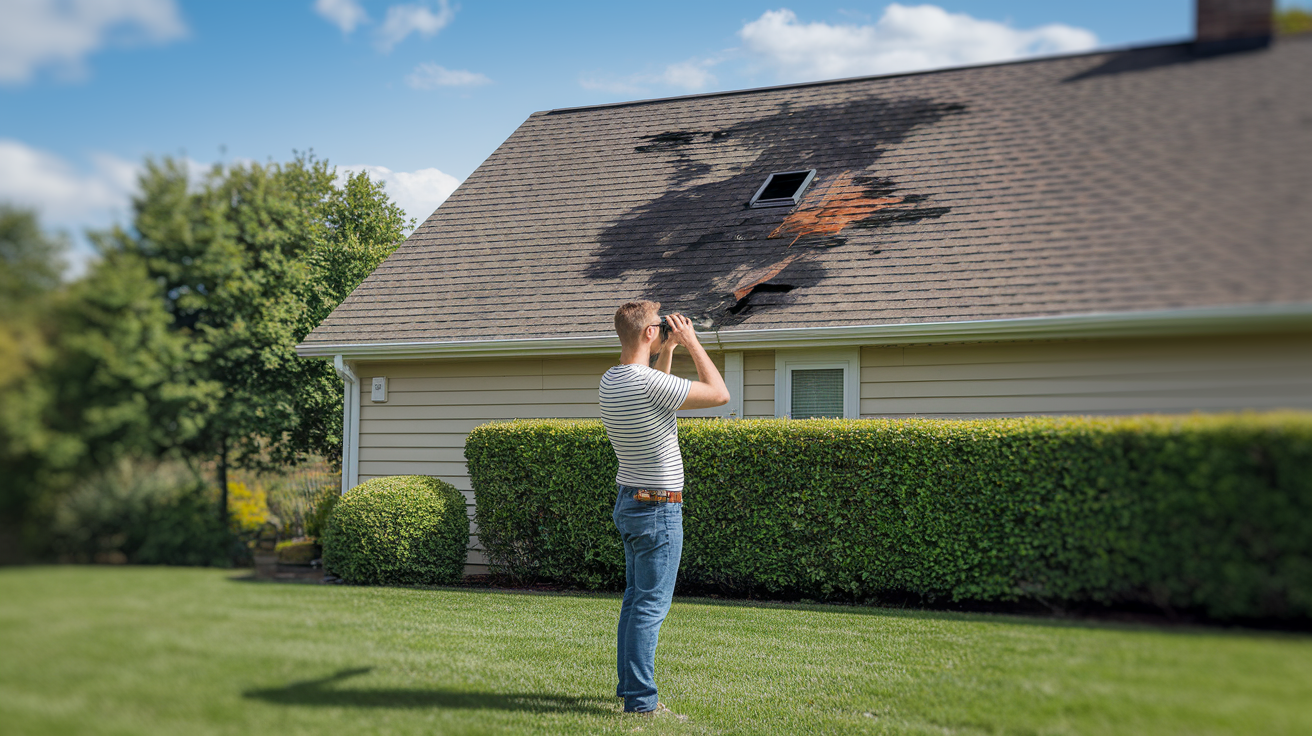
Start your inspection from the ground using binoculars or a camera with a zoom lens. Look for obvious signs like missing shingles, torn sections, visible holes, or sagging areas. If you can see daylight through your attic ceiling or water stains spreading across drywall, you already know there’s a breach. Walk around your house and check all roof slopes, paying attention to valleys, ridge lines, and spots near chimneys or plumbing vents where flashing might’ve pulled loose.
If you must get closer, use a sturdy extension ladder and only climb high enough to see the roof surface clearly. Never step onto the roof unless it’s completely dry, the wind is calm, and you’re wearing non slip shoes. Watch for soft or spongy spots in the decking, which signal rot or water damage underneath. Missing shingles, cracked flashings, punctures from fallen branches, and large sections of exposed underlayment all require immediate temporary coverage. Any area where you can see tar paper, felt, or bare wood is letting water in and needs to be sealed or tarped right away.
Temporary Covering Methods for Emergency Weatherproofing
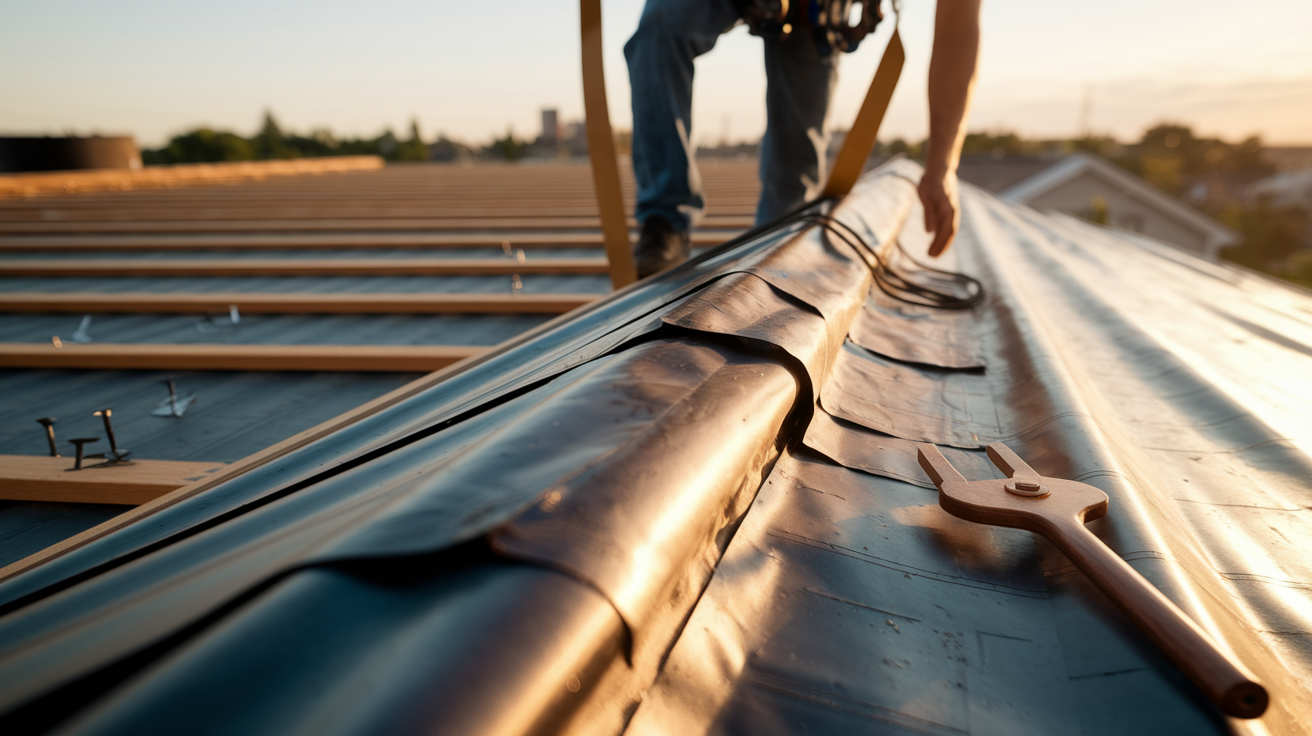
A heavy duty tarp is your best short term shield against rain and wind. Choose a tarp that’s at least 12 feet by 20 feet for most localized damage, or go up to 20 by 30 feet if the affected area is large. Lay it smooth and flat across the damaged zone, making sure it runs from a point above the damage all the way down past the eaves if possible. That way, water hitting the tarp flows off the roof instead of pooling or seeping under the edges.
If you don’t have a tarp, thick plastic sheeting can work in a pinch. The key difference is durability. Tarps resist tearing and UV damage better than most plastic, so they’ll last weeks or even months if secured properly. Plastic sheeting is fine for a day or two, but plan to upgrade or call a roofer soon after. Whichever material you use, avoid letting it flap in the wind. Loose fabric acts like a sail and can rip free, taking shingles with it. Also, don’t punch unnecessary holes. Every fastener you drive through the cover is a potential leak point if not sealed or positioned correctly.
Here’s a reliable six step installation sequence:
Clear loose debris, broken shingles, and branches from the damaged area so the tarp lays flat. Unroll the tarp and position it to cover the damage plus at least three to four feet of surrounding roof on all sides. Align one long edge near the roof ridge (if accessible) and let the opposite edge drape past the eaves. Place a 1×4 or 1×6 wood board along the top edge of the tarp, then drive 1 1/4 inch galvanized roofing nails or screws through the board and tarp into the roof deck every two to three feet. Repeat the board and fastener method along the sides and bottom edge, pulling the tarp taut before securing each section. Inspect all edges and add extra nails or rope tie downs if wind is forecast.
Emergency Sealing and Patch Options for Small Roof Openings
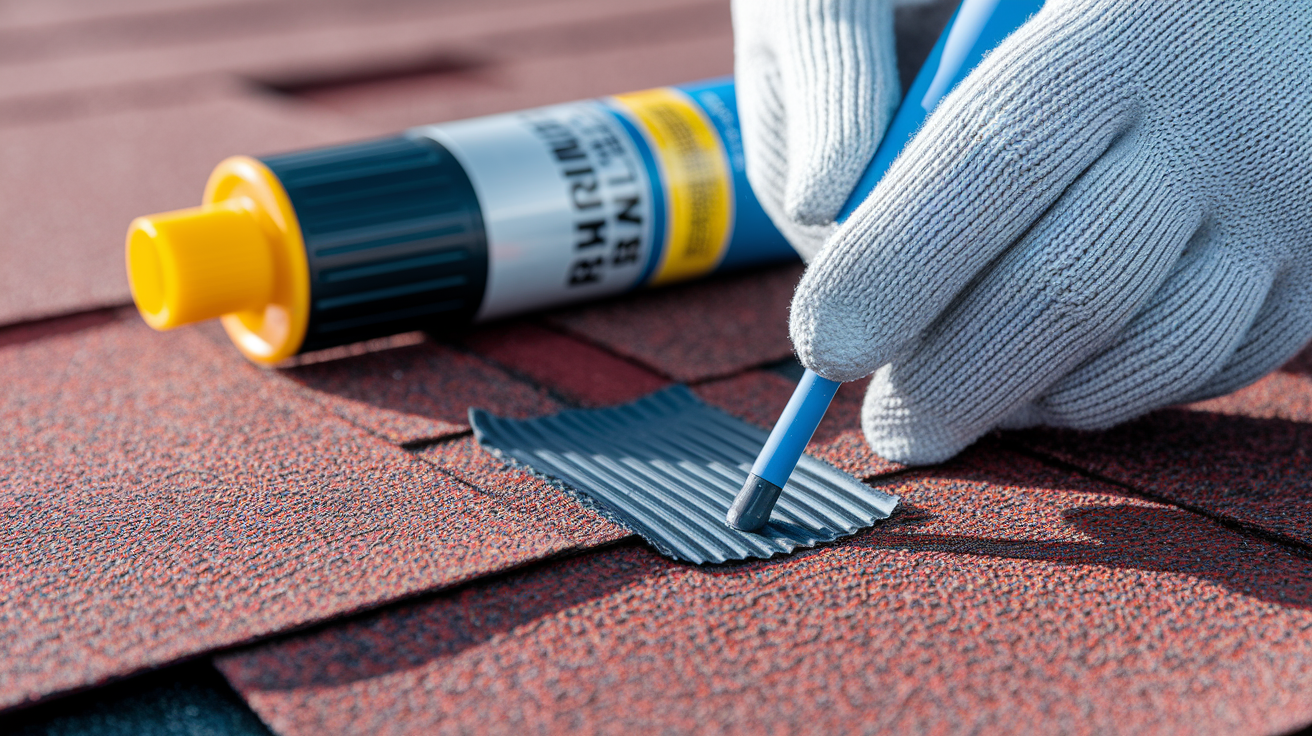
When the hole is smaller than a dinner plate, a tarp might be overkill. Roofing cement, butyl tape, or a peel and stick patch can seal the opening in fifteen to thirty minutes. Roofing cement comes in caulk tubes (around 10 ounces) for small cracks or one gallon tubs for larger repairs. Squeeze or trowel a thick bead around the edges of a puncture, nail hole, or split flashing, then press the sealant into the gap. If the surface is wet, dry it as much as you can with a towel first. Most cements won’t bond well to standing water.
Roofing tape works best on seams, flashings, and areas where two materials meet. Look for butyl or EPDM tape that’s two to four inches wide. Peel off the backing, press the tape firmly over the leak, and smooth out any air bubbles. These tapes are sticky enough to grab onto shingles, metal, and even damp surfaces, making them handy when you’re racing the weather.
Common emergency sealants and their uses:
Roofing cement or tar. Thick paste for sealing cracks, coating nail heads, and bonding patches around vents and chimneys.
Roofing tape (butyl or EPDM). Adhesive strips for sealing seams, flashing edges, and small tears in shingles.
Asphalt roof patch fabric. Fiberglass mesh embedded in adhesive. Cut to size and press over punctures or worn spots for a reinforced seal.
Silicone or polyurethane caulk. Flexible sealant for narrow gaps in flashings or around penetrations. Holds up in temperature swings.
Safety Considerations During Emergency Roof Work

Roofs are slippery when wet, steep, and often higher than they look from the ground. A fall from even a single story roofline can cause broken bones or worse. Never climb onto a roof during active rain, high wind, ice, or lightning. If you’re not confident working at heights, or if the roof pitch is steep enough that you feel unstable, stay off and call a professional. Temporary damage is better than a trip to the emergency room.
When conditions are calm and dry, use a sturdy extension ladder rated for your weight plus the tools you’re carrying. Set the base one foot away from the wall for every four feet of ladder height, and make sure both feet are on solid, level ground. Wear rubber soled shoes with good grip, work gloves, and safety glasses. If the roof slope is steeper than 6:12 (six inches of rise for every twelve inches of run), consider using a roof harness anchored to a rated point that can hold at least 5,000 pounds of force. Don’t rely on chimneys or vent pipes as anchor points unless they’re specifically designed for fall protection. Keep one hand free whenever possible, and move slowly. Rushing leads to mistakes.
When to Call a Professional for Emergency Roof Repair

Some damage is beyond a tarp and a tube of roofing cement. If you see sagging sections, large holes where decking has collapsed, or multiple leaks scattered across different areas, the structure might be compromised. A professional crew has the equipment, safety training, and heavy duty materials to secure a damaged roof quickly, even in bad weather. Many roofing companies offer 24/7 emergency response and can be on site within hours.
You should also call for help if water is pouring in faster than you can catch it, if electrical fixtures are sparking or getting wet, or if you’re simply not comfortable climbing a ladder. Trying to DIY a repair when you’re unsure can make the damage worse and void insurance coverage if the insurer determines the work was done improperly. Professional emergency tarping typically costs between $150 and $500 depending on roof size and access difficulty, which is a small price compared to the cost of interior water damage spreading through ceilings, walls, and insulation.
Situations that require expert help right away:
Structural instability such as bowed rafters, sagging roof deck, or ceilings that feel soft or bulge downward. Damage covering more than 10 to 15 percent of the roof area, or multiple leaks in different zones that can’t be covered with a single tarp. Electrical hazards including wet wiring, sparking outlets, or water dripping near your breaker panel or light fixtures.
Final Words
In the action, stop the leak and cover exposed areas with a tarp or heavy plastic. Do a quick safety check before you climb and move furniture out of harm’s way. These steps slow damage right away.
Next, inspect from the ground for missing shingles, punctures, sagging, or active drips. Use roofing tape or patch sealant for small holes. If the roof is unstable, or water keeps coming in, call a professional.
These emergency roof weatherproofing methods — fast tarping, safe assessment, temporary sealing, and timely pro help — keep water out and protect what matters. You’ll be back to normal soon.
FAQ
Q: How to temporarily waterproof a roof?
A: Temporarily waterproofing a roof means covering exposed areas with a tarp or heavy plastic, sealing small holes with roofing tape or sealant, and securing edges to stop more water until permanent repairs.
Q: What is the 25% rule in roofing?
A: The 25% rule in roofing usually means if less than 25% of the roof is damaged you can patch or repair sections; if damage exceeds 25% a full replacement or different permit and insurance handling is often needed.
Q: How do I stop my roof leaking in heavy rain?
A: Stopping a roof leak in heavy rain means first protecting people and belongings, then placing buckets, applying a tarp or plastic over the roof, temporarily sealing small holes, and calling a pro if the leak continues.
Q: Does liquid rubber roof coating work?
A: Liquid rubber roof coating works as a flexible, waterproof layer on clean, dry roofs, good for sealing leaks and flat surfaces, but it won’t fix structural damage or major storm failures.