

Standing water in your basement isn’t just about removing the flood. It’s about stopping the clock before mold locks in, materials rot, and your foundation takes permanent damage. Most homeowners focus only on pumping water out, then wonder why their basement still smells damp weeks later or why walls start crumbling. Real basement drying is a sequence: safe extraction, aggressive air movement, controlled humidity, and knowing when you’re actually done. Here’s how to dry your flooded basement the right way, step by step.
Essential Steps and Overview for Drying Your Flooded Basement

Basement flood recovery isn’t one thing. It’s a sequence: immediate safety measures, water extraction, drying and dehumidification, sanitization, damaged material removal, and long term waterproofing. Understanding the full sequence helps you work systematically instead of just reacting when the next problem shows up.
Before you touch anything in a flooded basement, turn off electrical power to affected areas at the circuit breaker. Standing water and electricity create lethal shock hazards. Don’t step into flooded areas until power is confirmed off. Use battery powered flashlights or work lights for visibility during cleanup. Wear rubber boots that cover your ankles, waterproof gloves, an N95 respirator to filter airborne contaminants, and safety goggles to protect against splashing contaminated water. If you’re working in a basement with minimal natural light, set up battery powered floodlights before you start removing water.
Water removal methods depend on flooding depth. For water less than 2 inches deep, towels, mops, and buckets handle the job. Between 2 and 6 inches, a wet shop vacuum pumps water efficiently. For deeper flooding, rent a submersible pump to handle the bulk of the water, then switch to a wet vac for the final inches. Check the water level outside your foundation before pumping. If exterior water sits higher than interior water, pump slowly. Pumping too fast creates pressure differences that can push walls inward or cause structural damage.
After standing water removal, the drying race begins. You’ve got a 48 hour window to dry everything completely before mold and mildew establish themselves in damp materials. Deploy dehumidifiers immediately to pull moisture from the air. Position fans to create cross ventilation and speed evaporation from wet surfaces. Open all doors, windows, closets, and cabinets to expose hidden damp areas. Remove wet carpet padding right away, even if you plan to save the carpet itself. Padding holds moisture and never dries properly. Monitor humidity levels and keep them below 50% throughout the drying period.
Sanitization requirements depend on water contamination. Clean water from a broken pipe needs basic disinfecting. Gray water from washing machines or dishwashers requires more thorough cleaning with stronger solutions. Black water from sewage backups demands professional remediation. Scrub all affected surfaces with appropriate disinfectants to prevent bacterial growth and eliminate odors.
Call professional restoration services when flooding exceeds 1 inch deep, when you’re dealing with sewage contamination, when structural damage appears (cracks, bowing walls, shifting foundations), when mold coverage exceeds 10 square feet, or when you can’t complete drying within 48 hours. These situations exceed safe DIY limits and require specialized equipment, expertise, and often insurance documentation.
Safe Water Extraction Methods Based on Flooding Severity

Water depth determines which extraction method works best and how quickly you can restore your basement to dry conditions.
For shallow flooding under 2 inches, manual methods work fine. Old towels, a mop and bucket, or a household wet dry vacuum handle small water volumes. Start at the highest point and work toward floor drains or the lowest corner. Wring towels into buckets, dump buckets outside away from your foundation, and repeat. This approach works when flooding affects only part of your basement or when water depth barely covers the floor.
When water reaches 2 to 6 inches deep, rent or buy a wet shop vacuum with sufficient capacity. A 6 gallon shop vac fills quickly, so consider a 16 gallon model for faster progress. Position the vacuum at the deepest point, let it fill, then carry it outside to empty. Work in sections, moving systematically across the basement. Wet vacs work well for this depth range because they handle debris mixed with water (leaves, mud, small stones) without clogging.
For flooding deeper than 6 inches, a submersible pump moves water much faster than a shop vac. Submersible pumps sit directly in the water and can move hundreds of gallons per hour through a discharge hose. Run the hose outside, directing water at least 10 feet from your foundation so it doesn’t seep back in. Let the pump run until water drops below 2 inches, then switch to a wet vac for the remaining shallow water. Pumps struggle with the last inch or two because they need minimum depth to function properly.
Here’s the critical pumping technique that prevents wall damage: never pump faster than the exterior water table drops. If heavy rain saturated the ground around your foundation, exterior water pressure supports your basement walls from outside. Pumping the interior too quickly removes that interior support while exterior pressure remains, which can bow or crack walls inward. Pump slowly when exterior water levels are high. Remove a few inches, wait an hour, check for wall movement, then continue. This gradual approach prevents structural damage that costs thousands to repair.
Equipment rental sources and costs:
Local hardware stores and home improvement centers: Wet vacs $30 to $50 per day, submersible pumps $50 to $75 per day. Equipment rental specialists: Heavy duty pumps $60 to $90 per day, industrial dehumidifiers $40 to $70 per day. Big box home improvement chains: Weekend packages combining pumps, fans, and dehumidifiers $150 to $200. Restoration equipment suppliers: Professional grade air movers $35 to $60 per day. Online tool rental platforms: Delivery available, similar pricing to local stores with convenience fees.
For long term protection, install a permanent sump pump system. Dig a sump basin at your basement’s lowest point (typically a corner) about 24 inches deep and 18 inches in diameter. Install a basin liner, then set the pump inside. Connect perimeter drain tile to the basin so groundwater collects there instead of seeping through walls. The pump automatically activates when water reaches a set level, discharging it through a pipe that exits your home and slopes away from the foundation. Install a backup battery system so the pump continues working during power outages, when you need it most.
Test your sump pump monthly during wet seasons by pouring a bucket of water into the basin. The pump should activate within seconds. Clean the inlet screen seasonally to prevent debris clogs. Replace pumps every 7 to 10 years even if they still function, because motor failure during a flood creates expensive damage.
Drying Your Basement with Dehumidifiers and Air Circulation

Air circulation and humidity removal work together to dry your basement efficiently. Moving air carries moisture away from wet surfaces into the air. Dehumidifiers pull that moisture from the air and collect it as water. Without circulation, damp air sits against wet walls and floors. Without dehumidification, humid air can’t absorb more moisture. You need both systems working simultaneously.
Strategic fan placement accelerates drying more than simply turning on fans and hoping for the best. Position fans to create cross ventilation by aiming them from one side of the basement toward opposite windows or doors. Place fans at angles that direct airflow across wet walls, not directly at them. Glancing airflow works better than perpendicular blasts. Set up oscillating fans to cover wider areas. Point fans at wet carpet to speed surface drying. Open windows only when outdoor air is less humid than basement air. Check weather forecasts or use a hygrometer to compare humidity levels. Opening windows when outside air holds more moisture than inside air actually slows drying and can introduce additional humidity.
Dehumidifier and fan placement strategy:
Position one dehumidifier per 500 square feet of flooded basement space for adequate moisture removal capacity. Place dehumidifiers in the center of rooms away from walls to allow air circulation around all sides. Aim floor fans at 45 degree angles across walls to maximize surface area coverage and evaporation rates. Set up air movers in corners pointing toward the center to eliminate stagnant humid pockets. Open all closet and cabinet doors to expose interior surfaces to circulating air. Remove dresser drawers and position fans to blow through the openings for interior drying. Check and empty dehumidifier collection buckets every 4 to 6 hours during heavy use.
Don’t use your HVAC system if any part of it got wet during flooding. Running a contaminated system spreads mold spores and bacteria through every room in your house via air ducts. If you must use climate control, run air conditioning only, not heat. Cold air holds less moisture than warm air, so AC helps remove humidity while heating adds moisture capacity to the air and slows drying.
Maintain indoor humidity below 50% throughout the drying process. Use a hygrometer to monitor levels in different basement areas. Humid air feels heavy and slightly damp on your skin. Dry air feels lighter and more comfortable. If humidity stays above 50% despite running dehumidifiers, you need additional units or more powerful equipment.
Basement Drying Timeline and Moisture Monitoring

Drying speed depends on water volume, material types, ventilation quality, and ambient temperature. A lightly damp concrete floor in a well ventilated basement with good dehumidification might dry in 24 hours. Heavy flooding that saturated walls, insulation, and framing in a poorly ventilated space might take 5 to 7 days even with professional equipment.
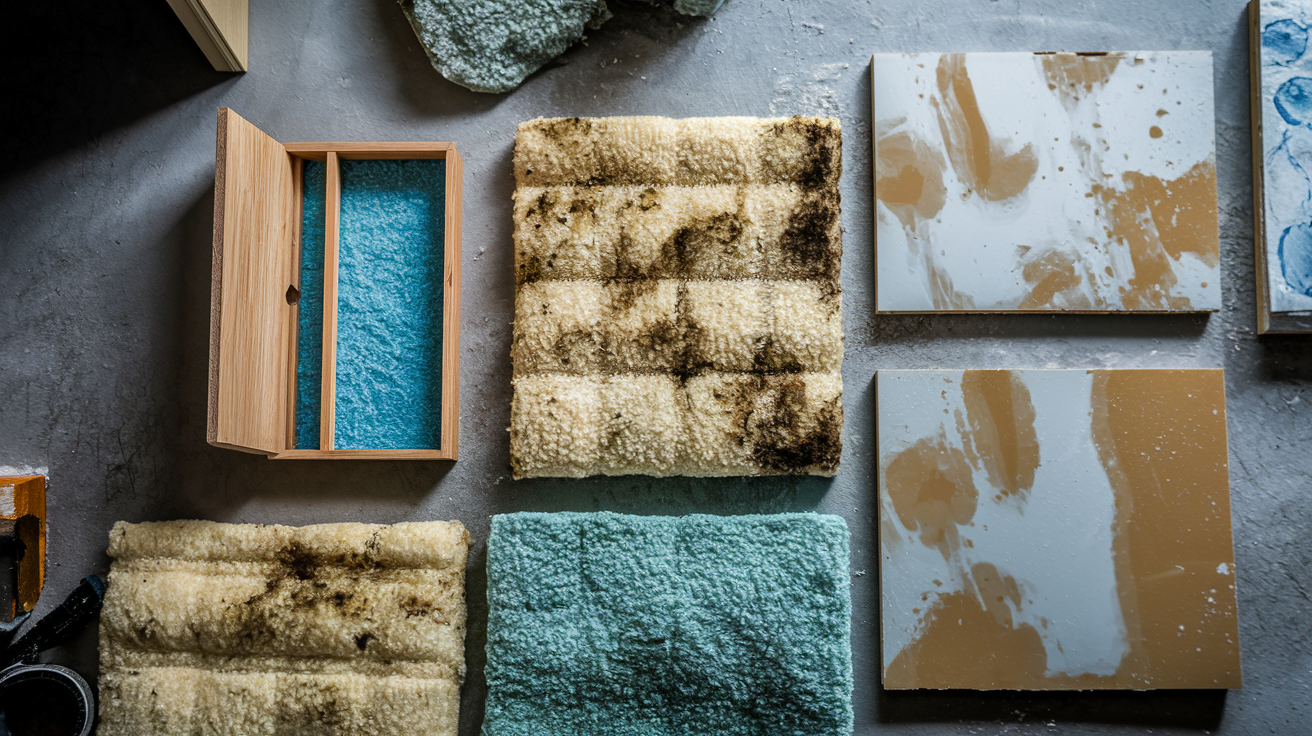
Items that remain wet beyond safe limits must be discarded. The 48 hour threshold applies to porous materials that can harbor mold growth. If you can’t dry something completely within two days, the mold risk outweighs the item’s value. This is especially true for upholstered furniture, mattresses, and carpet padding. Materials that absorb water deeply and dry slowly.
| Material Type | Typical Drying Time | Monitoring Method |
|---|---|---|
| Concrete floors (unsealed) | 3 to 5 days with active drying equipment | Moisture meter probe reading below 4% moisture content |
| Drywall (unpainted or primed) | 48 to 72 hours for surface; 5 to 7 days for complete interior drying | Surface feels completely dry to touch; moisture meter reads below 1% at depth |
| Wood framing (studs, joists) | 5 to 10 days depending on wood species and saturation level | Pin type moisture meter inserted into wood reads below 15% moisture content |
| Fiberglass insulation | Cannot be effectively dried; removal and replacement required | Visual inspection; if compressed, soaked, or contaminated, remove immediately |
| Carpet and padding | Carpet surface 24 to 36 hours; padding must be replaced regardless of drying time | Carpet backing should feel completely dry; lift corners to check moisture beneath |
Use a moisture meter to verify complete drying in areas you can’t easily see or touch. Pin type meters insert probes into materials to measure internal moisture content. Pinless meters use sensors pressed against surfaces to detect moisture without creating holes. Check behind baseboards, inside wall cavities through small inspection holes, beneath flooring edges, and in wood framing. Hidden moisture pockets cause mold growth weeks after visible surfaces appear dry. The concrete might feel dry on top while still holding moisture 2 inches down. Drywall might seem fine on the surface while the paper backing against studs remains damp. Verify dryness with meters, not assumptions.
Removing Damaged Materials from Your Flooded Basement
Some materials can be dried and saved. Others absorb contamination, hold moisture indefinitely, or lose structural integrity when wet. Knowing which category each material falls into saves time and prevents future problems.
Assess flooding severity and contamination level first. Clean water from a broken supply line causes less damage than sewage backup. Materials touched by sewage must be removed regardless of drying potential. Gray water from washing machines or dishwashers affects salvage decisions based on how long materials stayed wet. Quick response saves more materials than delayed cleanup.
Carpet evaluation depends on carpet type, padding condition, and water cleanliness. Pull up a corner and check the backing. If it looks heavily soiled or smells musty even after surface drying, the carpet needs replacement. Carpet padding must always be removed and replaced, even if you successfully dry and reinstall the carpet itself. Padding absorbs water like a sponge and creates a damp layer that never fully dries against the concrete floor. This trapped moisture causes mold growth beneath the reinstalled carpet within weeks. Roll up padding, cut it into manageable sections, and dispose of it immediately. Professional carpet cleaning and sanitizing can save quality carpet that dried within 48 hours, but padding is always a loss.
Inspect drywall at the flood line. Water wicks upward through drywall paper facing, typically 12 to 18 inches above the waterline. Look for swelling, discoloration, or soft spots. Use a drywall saw or reciprocating saw to cut horizontally across damaged sections, cutting back to studs on either side for clean edges. Remove all wet or contaminated drywall below the flood line plus an additional 12 inches above for safety. Check insulation behind removed drywall. Wet fiberglass insulation compresses, loses R value, holds moisture against framing, and promotes mold growth. Remove it while wearing gloves, long sleeves, pants, and an N95 respirator. Wet fiberglass releases irritating particles. Bag it immediately for disposal. Spray foam insulation sometimes survives if dried quickly and not contaminated, but fiberglass insulation never recovers from soaking.
Furniture decisions depend on construction and contamination. Solid wood furniture can be dried if cleaned quickly. Particle board or MDF furniture swells and crumbles when wet. Discard it. Upholstered furniture depends on water cleanliness and frame type. Clean water on a solid wood frame might be salvageable with professional cleaning. Sewage contact means disposal. Move furniture out of wet areas immediately to assess damage and prevent additional absorption. Don’t turn on any electronics or appliances that got wet until a professional inspects them. Water and electricity create shock hazards, and internal moisture causes shorts that damage components or create fire risks.
For important documents and photos soaked during flooding, freeze them immediately to stop mold growth. Place wet papers and photos in ziplock bags and put them in your freezer. This stabilizes damage until you can properly dry them later using specialized techniques or professional document restoration services. Don’t attempt immediate drying. Papers stick together, ink runs, and photos fuse if handled wet.
Materials requiring immediate removal:
Carpet padding of any type. Replacement mandatory even if carpet is salvageable. Wet fiberglass insulation loses effectiveness and promotes mold growth. Drywall below the waterline plus 12 inches above. Paper facing holds moisture and contaminants. Particle board and MDF furniture swells and loses structural integrity when wet. Cardboard boxes and contents stored on basement floors absorb water rapidly and transfer moisture to contents. Contaminated porous items touched by sewage or gray water can’t be adequately sanitized.
Disinfecting and Sanitizing Your Basement After Water Removal

Water contamination level determines sanitization intensity and health risks. Category 1 water comes from clean sources: broken supply lines, sink overflows, appliance leaks. It contains no sewage or chemical contamination. Category 2 gray water comes from washing machines, dishwashers, sump pump failures, or toilet overflows containing only urine. It holds bacteria and requires thorough disinfection. Category 3 black water contains sewage, chemicals, or floodwater from outside. It poses serious health risks and usually requires professional remediation. Understanding your water category helps you decide whether DIY cleanup is safe or whether professional help is necessary.
Start sanitization by removing all debris, mud, and solid contaminants from floors and walls. Sweep or shovel out mud. Pick up and dispose of leaves, sticks, insulation pieces, and other flood debris. Pressure wash walls and floors using a high pressure hose or electric pressure washer at 1,500 to 2,000 PSI to remove dirt stuck to surfaces. Work from top to bottom, starting at walls and ending at floor drains or the lowest point where wash water can exit or be vacuumed up. After pressure washing, mix a bleach disinfecting solution: 1 cup household bleach (5 to 6% sodium hypochlorite) per gallon of water. Apply this solution to all surfaces that touched floodwater. Walls, floors, studs, concrete, and exposed framing. Use a pump sprayer for large areas or a sponge mop for floors. Let the bleach solution sit on surfaces for 10 minutes minimum to kill bacteria, viruses, and mold spores effectively. Don’t rinse the bleach solution off. Let it air dry. The remaining residue continues providing antimicrobial protection as surfaces dry. For Category 2 gray water cleanup, increase bleach concentration to 1.5 cups per gallon for stronger disinfection.
Wear full protective equipment during all disinfection work. Rubber gloves protect your hands from bleach and contaminants. An N95 or P100 respirator filters airborne bacteria and bleach fumes. Safety goggles prevent splashes from reaching your eyes. Wear long sleeves, long pants, and rubber boots that cover your ankles. Ventilate the space by opening windows and doors and running fans, but never mix bleach with ammonia or other cleaners. This creates toxic chloramine gas that causes serious respiratory damage.
When contamination levels involve sewage (Category 3 black water), professional remediation is necessary instead of DIY cleaning. Sewage contains harmful bacteria like E. coli, viruses like hepatitis A, and parasites that cause serious illness. Professional remediation companies use specialized antimicrobial treatments, dispose of contaminated materials properly, and follow health department protocols for sewage cleanup. Attempting DIY sewage cleanup exposes you and your family to health hazards that outweigh any cost savings.
Preventing Mold Growth in Your Dried Basement

Mold spores exist everywhere. In the air, on surfaces, in dust. They remain dormant until conditions favor growth: moisture, organic food sources (wood, drywall paper, carpet), temperatures between 60 to 80°F, and poor ventilation. After flooding, your basement offers ideal mold conditions unless you dry everything within 48 hours. Mold establishes itself faster than most homeowners realize. Within 24 to 48 hours of flooding, spores begin colonizing damp surfaces. By 72 hours, visible growth appears as fuzzy patches or discoloration. After one week, established mold spreads aggressively and produces more spores that contaminate other areas.
Early warning signs help you catch mold before it spreads. A musty, earthy smell indicates mold presence even when you can’t see visible growth. It’s often growing behind walls or beneath flooring. Black, green, or white spots appearing on walls, floors, ceiling joists, or stored items signal active mold colonies. Condensation on walls, pipes, or windows shows humidity levels support mold growth. Water stains that reappear after cleaning suggest ongoing moisture problems feeding mold behind surfaces.
Eight mold prevention strategies:
Maintain basement humidity below 50% year round using dehumidifiers set to run automatically when humidity rises. Ensure proper ventilation throughout the basement by installing exhaust fans or opening windows during dry weather. Use mold resistant drywall (paperless or fiberglass faced) and mold resistant paint for basement renovations and repairs. Conduct monthly inspections of basement walls, floors, corners, and stored items for early mold detection. Run a dehumidifier continuously during humid summer months and damp spring/fall periods. Install air circulation fans to prevent stagnant humid air pockets in corners and closed spaces. Repair plumbing leaks, foundation cracks, and window seal failures immediately to eliminate moisture sources. Install vapor barriers on concrete walls and floors to prevent moisture transmission from exterior soil.
For small mold areas under 10 square feet, DIY cleaning works safely. Mix water and detergent (dish soap works fine) in a bucket. Scrub mold spots with a stiff brush dipped in the solution while wearing a mask and gloves. The physical scrubbing removes mold from surfaces more effectively than cleaning solutions alone. After scrubbing, apply the bleach disinfecting solution described earlier (1 cup bleach per gallon water) and let it sit for 10 minutes. Dry the cleaned area thoroughly using fans and dehumidifiers. Mold returns quickly to damp surfaces, so drying is as important as cleaning. Open windows to ventilate the space and exhaust mold spores outside while you work.
When mold coverage exceeds 10 square feet, professional mold remediation is required. Large mold infestations release massive spore counts during cleaning that contaminate your entire home through HVAC systems and air currents. Professionals use containment barriers, negative air pressure systems, HEPA filtration, and specialized cleaning agents to safely remove extensive mold growth. They also identify and correct the moisture sources that allowed mold to spread so widely. Health risks from large mold exposures include respiratory problems, allergic reactions, asthma attacks, and immune system effects. For more information about professional services, see our guide on Professional Mold Inspection and Remediation: Protecting Your Health.
To learn more about addressing the underlying moisture problems that lead to mold growth, review our article Understanding Common Causes of Water Damage in Homes.
Long Term Waterproofing Solutions for Basement Flooding Prevention
Interior waterproofing manages water that already penetrated your foundation. Exterior waterproofing prevents water from reaching foundation walls in the first place. Most effective flood prevention combines both approaches, creating multiple barriers between groundwater and your basement.
Exterior Waterproofing Methods
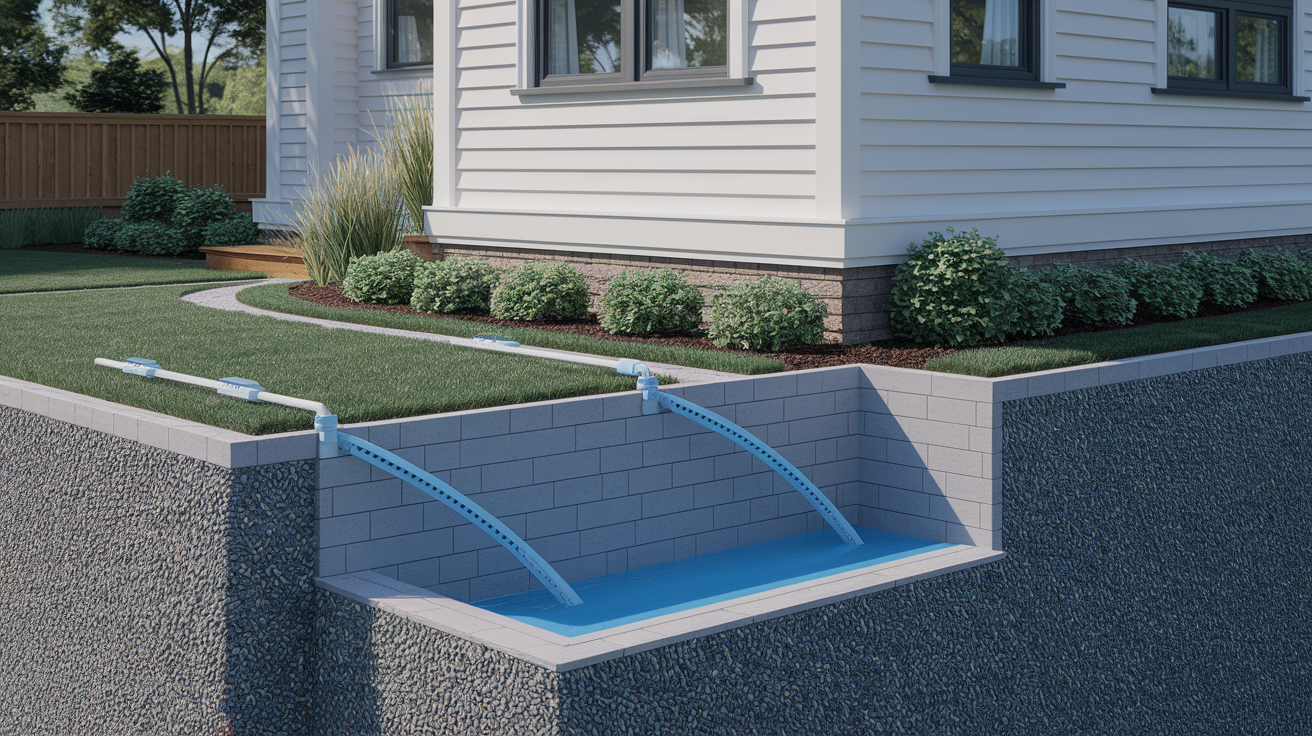
Exterior drainage systems intercept groundwater before it contacts foundation walls. French drains are the most common exterior system: a perforated pipe buried in gravel alongside your foundation’s footing, sloped to drain water away from your home. Installing a French drain requires excavating around your foundation to the footing depth (typically 6 to 8 feet), installing filter fabric, laying perforated drain pipe in gravel, covering it with more gravel, and backfilling with soil. The drain pipe carries groundwater to a discharge point away from your house, either to daylight at a lower grade, to a dry well, or to a storm drain if local codes allow.
Foundation excavation also allows applying waterproof membranes to exterior walls. After excavating, clean all soil from foundation walls, then apply rubberized waterproofing membrane or spray applied coatings designed for below grade use. These membranes create a continuous moisture barrier from footing to grade level. Dimpled drainage boards installed over membranes add a second protection layer by creating an air gap that guides water down to footing drains instead of pressing against walls.
Proper landscape grading directs surface water away from your foundation before it saturates soil and creates hydrostatic pressure. Create at least a 6 inch slope over the first 10 feet from your foundation. This means soil should drop 6 inches in elevation for every 10 feet of distance from your house. This grade prevents water from pooling near foundations and seeping down to create basement flooding. Regrade settled soil periodically to maintain proper slope.
Window wells collect water if not properly designed. Fill window wells with 3/8 inch to 3/4 inch coarse aggregate (gravel) from the window sill level down to the footing. This allows water to drain rapidly instead of pooling against basement windows. Connect a perforated drain pipe from the bottom of the window well to your foundation’s perimeter drain tile system so water flows away continuously.
Interior Waterproofing Solutions
Interior sealants and coatings create moisture barriers on the inside surface of foundation walls. Hydraulic cement fills cracks in concrete walls and floors. It expands slightly as it cures, locking into cracks and stopping active water leaks. Clean cracks thoroughly, then pack hydraulic cement deep into the opening using a trowel or putty knife. Work quickly. Hydraulic cement sets fast.
Interior waterproof coatings are thick paints formulated to block moisture transmission through concrete walls. Apply two coats following manufacturer directions. These coatings handle minor moisture vapor transmission but can’t stop significant water pressure or active leaks. Use them on walls that show dampness but no flowing water.
Interior drainage channels capture water that seeps through floors at the wall floor joint. Installing interior drains requires cutting a channel along basement perimeters, removing concrete, installing perforated drain pipe in gravel, and covering it with new concrete. These drains connect to a sump basin where a pump discharges water outside. Interior drains work when exterior excavation is impossible or too expensive.
Vapor barriers are plastic sheeting (6 mil or thicker polyethylene) applied to walls and floors before finishing basements. They prevent moisture from reaching drywall, insulation, and framing. Install vapor barriers with sealed seams and edges to create continuous protection.
| Solution Type | Cost Range | Effectiveness Level | Best For |
|---|---|---|---|
| French drain installation (exterior) | $3,000 to $10,000 depending on excavation depth and perimeter length | Very high, prevents water from reaching foundation | Homes with high water tables or chronic groundwater problems |
| Exterior membrane application | $4,000 to $12,000 including excavation and membrane materials | Very high when combined with drainage system | Foundations with multiple leaks or porous concrete |
| Sump pump system (basin, pump, discharge line) | $500 to $1,500 for DIY; $1,200 to $2,500 installed professionally | High for managing collected water | Basements at lowest point of property or with interior drainage |
| Interior sealant and coating | $200 to $800 for DIY materials; $1,500 to $3,500 installed | Moderate, handles moisture vapor but not active leaks | Damp walls without flowing water or as supplement to other methods |
| Hydraulic cement crack repair | $50 to $200 for DIY materials; $300 to $800 per crack professionally | Moderate to high for small isolated leaks | Individual cracks less than 1/4 inch wide with slow seepage |
Combining multiple waterproofing approaches provides the most reliable flood prevention. Installing exterior drainage, applying foundation membranes, maintaining proper grading, operating a sump pump system, and sealing interior surfaces creates redundant protection. If one barrier fails or becomes overwhelmed, others continue protecting your basement. This layered approach costs more initially but prevents repeated flooding damage that quickly exceeds prevention costs.
Ongoing Maintenance to Keep Your Basement Dry

Small routine maintenance tasks prevent major flooding events and protect waterproofing investments. Neglected maintenance allows minor problems to compound into expensive failures that flood basements repeatedly.
Gutters and downspouts move thousands of gallons of water away from your foundation during rainstorms. When gutters clog with leaves and debris, water overflows and saturates soil next to your foundation, creating exactly the hydrostatic pressure that causes basement flooding. When downspouts discharge too close to your house, water pools and seeps down to footings. These simple maintenance failures cause more basement flooding than any other preventable factor.
Nine essential maintenance tasks with recommended frequencies:
Clean gutters twice yearly (spring and fall) to remove leaves, shingle granules, and debris that block water flow. Inspect and extend downspouts annually to ensure they discharge at least 4 feet from your foundation, adjusting extensions that shifted or broke during winter. Monitor foundation cracks seasonally (quarterly checks) to identify new cracks or widening existing cracks that allow water intrusion. Clean window wells after heavy storms to remove accumulated debris, soil, and vegetation that blocks drainage. Test sump pumps monthly during wet seasons (spring and fall) by pouring water into the basin to verify automatic operation. Inspect landscape grading annually to identify settled areas near foundations where water pools instead of draining away. Renew caulk and sealant every 2 to 3 years around basement windows, pipe penetrations, and wall floor joints where materials degrade over time. Monitor basement humidity weekly during humid summer months using a hygrometer, adjusting dehumidifier settings to maintain levels below 50%. Flush drainage systems annually by running hoses into drain openings to clear accumulated sediment and verify water flows freely.
Document maintenance activities in a simple log: date completed, work performed, and observations noted. Patterns emerge when you review maintenance records. If you clean gutters three times in one season because they keep filling rapidly, nearby trees may need trimming. If foundation cracks reappear after repairs, you may have ongoing settling that requires structural evaluation. If window wells fill with soil repeatedly, regrading may be needed to redirect surface water. Records turn random tasks into systematic prevention and help you identify deeper issues before they cause flooding.
When to Call Professional Restoration Services for Basement Flooding

Certain flooding situations exceed safe DIY capabilities due to health risks, required expertise, specialized equipment needs, or time constraints. Understanding these limits protects your safety, prevents inadequate cleanup that creates long term problems, and helps you make informed decisions about when professional restoration delivers better outcomes than DIY efforts.
Several factors determine whether professional services are necessary. Flooding extent matters. A few gallons from a broken pipe differs from 6 inches of standing water throughout your basement. Contamination level affects health risks and cleanup requirements. Time availability determines whether you can complete drying within the critical 48 hour window. Structural concerns require engineering knowledge beyond typical homeowner expertise. Insurance involvement often requires professional documentation and certified restoration work.
Twelve scenarios requiring professional restoration services:
Water depth exceeding 1 inch covering significant basement area. Volume and weight exceed DIY equipment capacity and require professional pumps, extractors, and drying equipment. Sewage backup or black water contamination poses serious health risks requiring specialized disposal and sanitization beyond safe DIY limits. Mold coverage exceeding 10 square feet total area releases dangerous spore concentrations requiring containment, professional cleaning, and HEPA filtration. Horizontal cracks in foundation walls wider than 1/8 inch or any horizontal crack accompanied by wall movement indicates structural failure needing engineering assessment. Basement walls bowing or leaning inward more than 1 inch shows foundation failure from hydrostatic pressure requiring immediate stabilization. New foundation cracks or widening of existing cracks suggests ongoing structural movement needing professional evaluation and repair. Efflorescence mineral deposits (white powdery substance) on walls indicating chronic groundwater intrusion reveals moisture problems requiring exterior drainage solutions. Door frames or window frames becoming distorted or difficult to operate signals foundation movement affecting structural integrity. Flooded HVAC systems, furnaces, or water heaters require professional inspection before reactivation due to electrical hazards and component damage. Valuable items requiring specialized restoration (antiques, important documents, electronics) need professional equipment and techniques for successful recovery. Insurance claims involvement because insurers typically require professional documentation, certified estimates, and licensed contractor repairs for claim approval. Time limitations preventing 48 hour drying completion because missed deadline creates mold growth requiring professional remediation to prevent health hazards.
Structural warning signs deserve special attention because they indicate foundation damage that threatens your home’s stability. Horizontal wall cracks form when exterior soil pressure overwhelms foundation strength. These cracks differ from common vertical settlement cracks. Horizontal cracks mean the wall is failing and may collapse inward. Bowing walls show advanced failure stages where pressure has pushed walls past their structural limits. Efflorescence looks like white mineral powder or crystal formations on concrete surfaces. It appears when groundwater carries dissolved minerals through concrete walls, leaving deposits as water evaporates. Efflorescence proves ongoing water intrusion through foundation walls. One time flooding doesn’t create efflorescence. It develops from chronic moisture exposure over months or years. When you see efflorescence, your foundation is soaking up groundwater continuously, weakening concrete and creating conditions for failure.
Structural repairs cost substantially more than basic flood cleanup. According to industry data, structural crack repairs range from $2,165 to $7,793, with an average cost around $4,975 for professionally engineered solutions. Foundation stabilization using carbon fiber reinforcement strips, steel I beams, or wall anchors adds $4,000 to $15,000 per wall depending on failure severity. These costs seem high, but they’re far less than foundation collapse and whole home structural damage that occur when warning signs are ignored.
Select qualified contractors by verifying state licensing for general contracting or specialized restoration work. Confirm insurance coverage including general liability and workers’ compensation. Request references from recent basement flooding projects and contact those homeowners about their experience. Obtain at least three detailed written quotes covering scope of work, materials specified, timeline for completion, and payment schedule. Compare not just prices but approaches. Some contractors take shortcuts that create problems later. Ask how they plan to handle your specific issues: what equipment they use, how they verify complete drying, what structural repairs they recommend, and what warranties they provide on completed work.
For situations requiring immediate professional response to prevent escalating damage, review our guide on Emergency Water Removal Services: When Every Minute Counts. Professional restoration companies respond 24/7 with industrial equipment and trained teams who stabilize flooding situations quickly. Restoration costs vary based on flooding severity, contamination level, and required structural repairs. Basic water extraction and drying for a 1,000 square foot basement ranges $2,500 to $4,500. Adding sewage sanitization increases costs to $4,000 to $7,000. Structural repairs, mold remediation, and content restoration add to base costs depending on damage extent. Most restoration companies work directly with insurance companies, handling claims documentation and coordination to streamline the process for homeowners.
Final Words
Get the water out fast, dry everything within 48 hours, and watch for hidden moisture that can turn into mold.
That’s how to dry out a flooded basement without creating bigger problems down the road.
Safety comes first. Then speed. Then thorough drying and sanitizing.
When you handle it right, your basement goes back to being dry, clean, and usable. If the job’s bigger than you can handle in two days, or if you’re seeing structural damage, call someone who does this every day.
Either way, you’re protecting your home from the kind of damage that gets worse when you wait.
FAQ
How long does it take to dry out a basement after a flood?
Drying out a basement after a flood typically takes 24 to 72 hours depending on water volume, material types, ventilation quality, and outdoor humidity levels. Complete drying within 48 hours prevents mold and mildew formation, which starts when excessive moisture remains beyond this critical timeframe.
How much does it cost to dry out a flooded basement?
The cost to dry out a flooded basement ranges from equipment rental fees of $50 to $200 per day for DIY efforts to $2,000 to $10,000 for professional restoration services depending on flooding severity, contamination level, and required structural repairs or material replacement.
How to get moisture out of the basement?
Getting moisture out of the basement requires removing standing water with wet vacuums or submersible pumps, then running dehumidifiers and fans for 24 to 72 hours while maintaining indoor humidity below 50 percent. Open windows only when outdoor air is less humid than indoor air to speed evaporation.
Will homeowners insurance pay for a flooded basement?
Homeowners insurance typically covers basement flooding from sudden internal water sources like burst pipes or appliance failures but excludes groundwater seepage, sewer backups without specific riders, and gradual damage from poor maintenance. Check your policy for water damage coverage details and required endorsements before assuming coverage.
What safety precautions should I take before entering a flooded basement?
Before entering a flooded basement, turn off electrical power to the basement at your main panel to prevent shocks and fires, then wear rubber boots, waterproof gloves, N95 respirator, and safety goggles. Use battery-powered lighting only and never touch wet electrical equipment or outlets.
When should I call professionals instead of drying my basement myself?
Call professionals for flooding over 1 inch deep, sewage or chemical contamination, mold exceeding 10 square feet, structural damage signs like wall cracks or bowing, or when you cannot complete drying within 48 hours. Professional equipment and expertise prevent secondary damage and health risks.
What materials must be removed after basement flooding?
Materials requiring removal after basement flooding include carpet padding (even if carpet dries), wet fiberglass insulation, water-damaged drywall below the flood line, particle board, soaked cardboard, and porous items contaminated by sewage. These materials cannot be adequately sanitized or dried.
How do I prevent mold growth after basement flooding?
Preventing mold growth after basement flooding requires completing all drying within 48 hours, maintaining humidity below 50 percent, ensuring proper ventilation throughout the space, and using dehumidifiers until moisture meters confirm dryness. Clean all surfaces with disinfectant and discard items that remain wet beyond the safe timeframe.
What’s the difference between clean water and contaminated water flooding?
Clean water flooding (Category 1) comes from supply lines and requires basic sanitization, gray water (Category 2) from appliances needs thorough disinfection, and black water (Category 3) from sewage or outdoor sources requires professional remediation due to dangerous bacteria and health risks requiring specialized equipment and safety protocols.
How do I know if my basement has hidden moisture after drying?
Hidden moisture in your basement appears through moisture meter readings above 15 percent in drywall or wood, musty odors indicating trapped dampness, condensation on cool surfaces, or continued high humidity readings above 50 percent. Check wall cavities, beneath flooring, and inside enclosed spaces where moisture pockets hide.
What are signs of structural damage from basement flooding?
Signs of structural damage from basement flooding include horizontal wall cracks, bowing or leaning foundation walls, new or widening cracks, white mineral deposits (efflorescence) indicating groundwater intrusion, and distorted door or window frames. These conditions require professional structural assessment before proceeding with repairs.
Should I use my HVAC system while drying my flooded basement?
Do not use your HVAC system if it flooded, as this risks spreading mold spores through air ducts throughout your home. Use air conditioning only, not heat, because warm air holds more humidity than cold air, which slows the drying process and maintains conditions favorable for mold growth.