

Think a little char on your door frame is just cosmetic? It isn’t always. Surface blackening often sands, fills, and seals back to normal, but soft, spongy, or warped wood means the frame won’t hold hinges or the latch and needs replacement. This post shows how to inspect the jamb, smell and touch for hidden damage, and follow clear safety steps. You’ll get step‑by‑step repairs for light and moderate burns, guidance on when to replace, and simple cost ranges so you know what comes next.
How to Repair a Fire‑Damaged Door Frame (Start Here)

Check the frame before you decide whether to repair it or tear it out. Surface charring that leaves the wood hard and stable can usually be repaired. If the burn goes deep enough that you can push a fingernail or screwdriver into the wood and it feels soft or crumbly, the structure is compromised and you’re looking at replacement.
Start by touching and smelling the frame. Charred wood that still feels solid can be cleaned, filled, and refinished. If you press on the burnt area and it gives, flakes, or feels spongy, the fire has eaten into the load‑bearing fibers. Heat also warps frames, even when there’s no visible char. A door that used to close tight and now sticks or won’t latch at all often means the frame twisted in the heat.
Here’s what tells you the severity you’re dealing with:
Surface char less than an eighth of an inch deep with hard wood underneath means you caught a break. Smoke odor that hasn’t soaked all the way through the grain is another good sign. But deep cracking or checks that run with the grain and open when you press them? That’s trouble. Same goes for structural softness where the wood compresses under light thumb pressure, or warping that prevents the door from closing or causes gaps at the latch or hinges.
Light damage means sanding, filling, and repainting. Moderate damage means cutting out bad sections and splicing in new wood. Severe damage means pulling the frame and starting over. The frame has to hold the door, the hinges, and the latch under stress. If the fire took that strength away, repairs won’t bring it back.
Identifying the Extent of Fire Damage
Walk the perimeter of the frame and look at each jamb and the head. Blackened wood that still sounds solid when you tap it with a knuckle may only need surface work. Blistering paint is a warning that heat soaked through the finish and into the wood below, even if you don’t see char yet.
Check for deformation by closing the door slowly and watching the gaps. If the door used to fit evenly and now binds at the top or bottom, the frame moved. Fire doesn’t have to leave scorch marks to ruin alignment. Steam from extinguishing water also swells wood, and that swelling can stay or turn into cracks as the frame dries out unevenly.
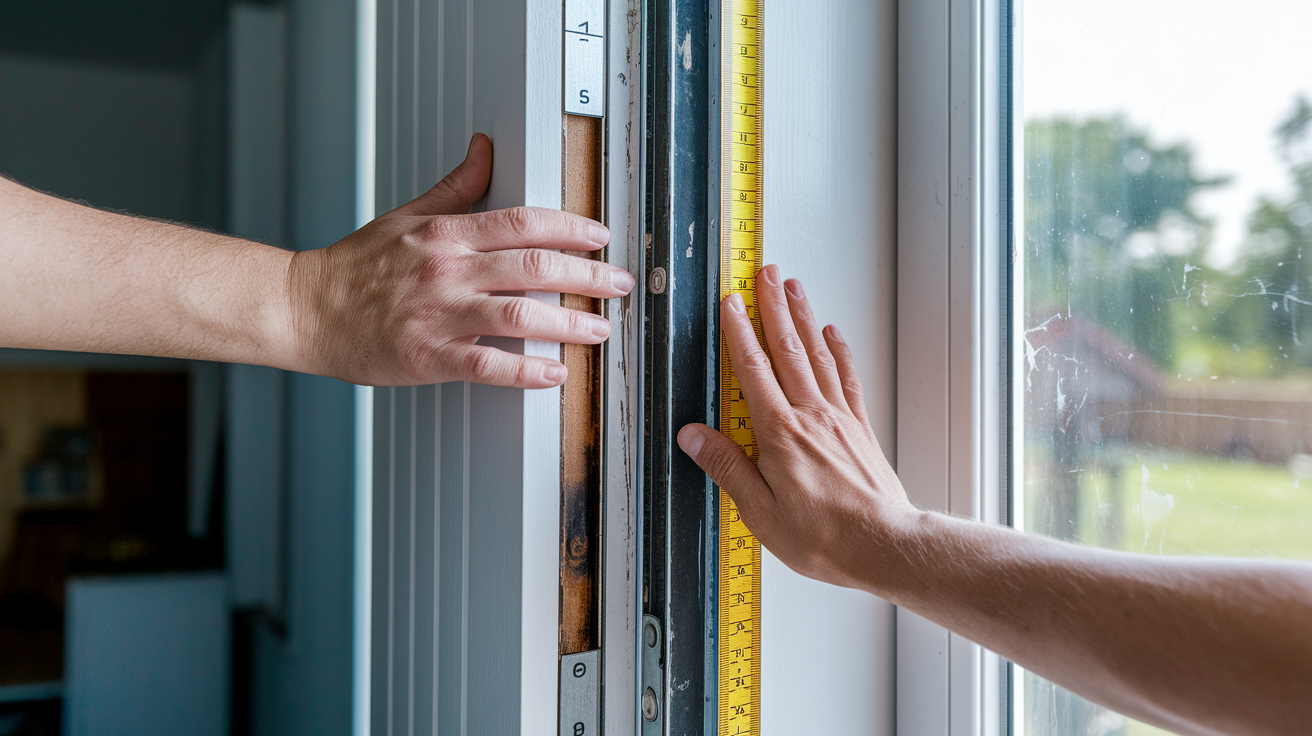
Run your hand along all four edges of the frame and note any soft spots, splinters, or sections that feel punky. Measure the reveal (the gap between the door and the frame) at the top, bottom, and both sides. Differences of more than a quarter inch mean the frame shifted. Push gently on charred areas with the flat of a screwdriver to see if the wood compresses or crumbles.
Check every hinge screw by tightening it slightly. If screws spin or pull out easily, the wood around them is damaged. Look inside the frame pocket if you can access it, especially at the corners where the head meets the jambs. Hidden joint failures start there. Smell the frame. Smoke odor that lingers after cleaning usually means the damage goes deeper than the surface.
If more than one of these checks fails, you’re past cosmetic repair. If only the surface is affected and the frame still holds screws and stays square, you can fix it.
Safety Precautions Before Beginning Repairs

Put on a respirator rated for fine particulates before you sand or scrape burned wood. Soot and ash contain chemicals from whatever burned (paint, foam, plastics) and inhaling that dust irritates your lungs and throat. Nitrile gloves protect your hands from splinters and from the black residue that sticks to everything.
Open windows and set up a fan to pull air out of the room. Fire‑damaged wood can splinter in unexpected directions when you work it, and the charred surface hides cracks. If electrical boxes or wiring run near the frame, verify the power is off before you start cutting or drilling.
Wear an N95 or P100 respirator to block soot and sanding dust. Safety glasses keep debris out of your eyes. Work gloves that allow grip but protect from splinters are worth it. Long sleeves prevent skin contact with soot and char.
If the frame feels unstable or leans, brace it with a temporary support before you remove damaged sections. A frame that’s holding the door but barely can shift or collapse once you start cutting.
Step‑by‑Step DIY Repair for Minor Fire Damage
Minor fire damage means surface charring with solid wood underneath, no deep cracks, and a frame that still closes the door properly. This repair stabilizes the wood, fills cosmetic damage, and seals out smoke odor.
Remove the door and any hardware still attached to the frame so you have clear access to every surface. Wipe down the entire frame with a damp rag to remove loose soot, then scrub with a degreasing cleaner like TSP substitute and rinse.
Sand the charred surface with 80‑grit sandpaper on a block or orbital sander, working until you reach clean wood. Go slow and check often so you don’t remove too much material. Switch to 120‑grit and smooth the sanded area, feathering the edges so the repair blends into the undamaged wood.
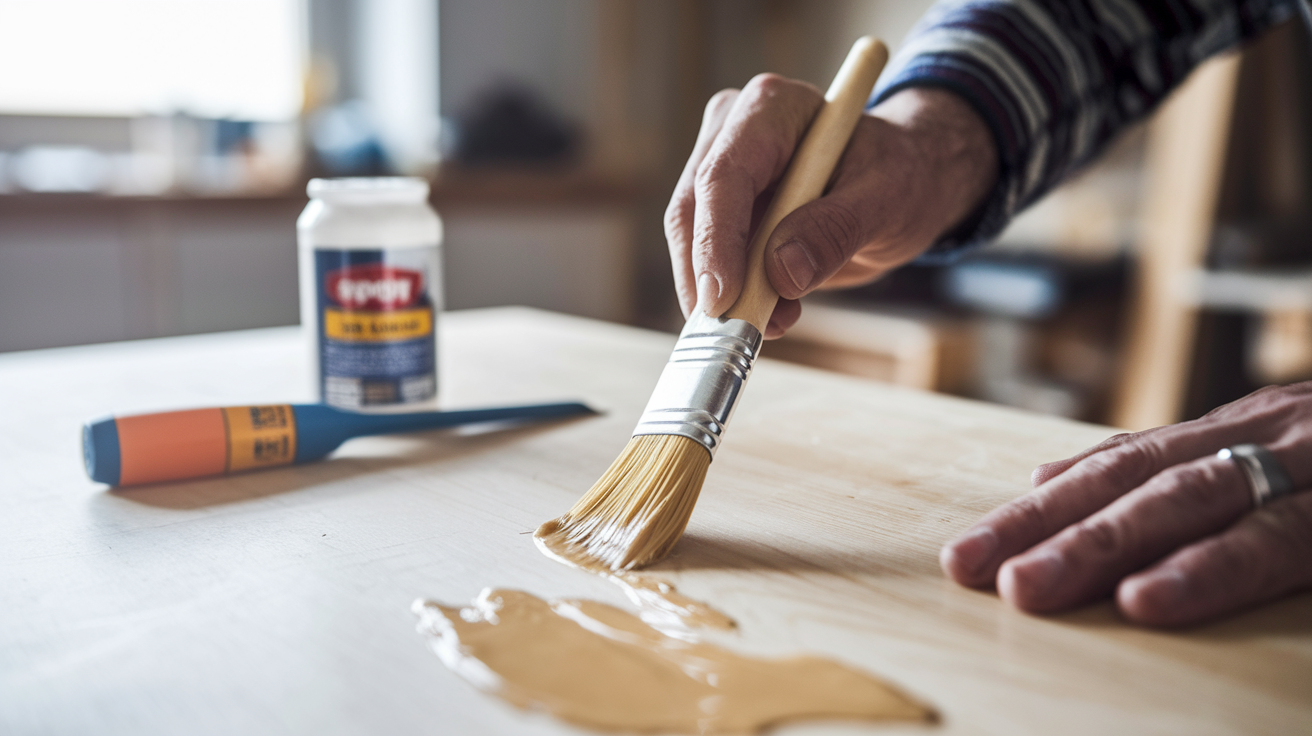
Brush or spray wood hardener onto any areas that feel slightly soft or spongy. Let it soak in for the time listed on the bottle, usually 15 to 30 minutes. Mix two‑part epoxy wood filler and press it into any gouges, checks, or voids using a putty knife. Overfill slightly because the filler will shrink as it cures.
Once the filler is fully hard (often 2 to 4 hours), sand it flush with 120‑grit, then finish with 180‑grit for a smooth surface. Prime the entire frame with a stain‑blocking primer to seal smoke odor and prevent bleed‑through, then apply two coats of paint or stain to match the original finish.
Let each layer dry completely before moving to the next step. Rushing the process leaves soft spots under the paint that will dent or crack later. The wood hardener step is the one people skip, and it’s the reason DIY repairs fail six months later when a hinge screw pulls out.
Repairing Moderate to Severe Fire Damage

Moderate to severe damage means charring deeper than a quarter inch, visible cracks that open when the door swings, or sections where the wood has lost its structure. You can still repair this without replacing the whole frame, but you’ll be cutting out bad wood and splicing in new material.
Mark the damaged section with a pencil, extending at least two inches past the worst char into solid wood. Use a hand saw or reciprocating saw to cut out the bad section, making straight cuts so the new piece will fit cleanly. If the damage is near a hinge or latch, cut past the hardware mounting area and plan to reposition it on fresh wood.
Cut a replacement piece from lumber that matches the frame’s dimensions. Most interior frames are made from 1x or 5/4 stock. Dry‑fit the new piece, then secure it with construction adhesive and three‑inch structural screws driven at an angle through the new wood into the old. For deep burns on the face of the jamb, rout or chisel a clean recess, glue in a matching patch, clamp it until the adhesive sets, then sand flush.
You’ll need kiln‑dried lumber in the same species and thickness as the original frame. Two‑part epoxy adhesive or polyurethane construction adhesive. Structural screws, 3 to 4 inches long, with countersink heads. Shims, clamps, and a level to hold alignment while adhesive cures.
After the repair cures, plane or sand any edges that sit proud of the original surface. Prime and paint the entire frame so the repair disappears. Check the door’s operation before you finish. If it binds or the latch doesn’t catch, you’ll need to plane the repair or adjust the strike plate.
When a Fire‑Damaged Door Frame Must Be Replaced

Replace the frame when charring penetrates more than a quarter inch and you can compress the wood with thumb pressure. At that point the fire has destroyed the internal structure, and even after you fill and seal the surface, the frame won’t hold hardware or resist the forces of a door swinging and latching thousands of times.
Warping is the other clear signal. If the frame twisted enough that the door won’t close without forcing it, or if gaps at the hinges or latch are wider than three‑eighths of an inch, heat deformed the wood past the point where planing and shimming will fix it. Frames that have pulled away from the wall studs or show cracks at the corner joints are also done.
Replace immediately if you see char depth beyond 1/4 inch that leaves spongy or crumbly wood. Frame twist or bow that prevents the door from closing and latching. Hinge mounting areas so weakened that screws won’t hold or pull through.
Trying to repair a frame that should be replaced wastes time and materials. The door will sag, the latch will miss the strike, and within weeks you’ll be back to square one. Pull the trim, cut the nails or screws holding the frame to the rough opening, and install a new pre‑hung unit or build a new frame from scratch.
Estimated Costs for Repair or Replacement

Minor repairs using sandpaper, wood hardener, filler, and paint cost between fifty and one hundred dollars in materials if you do the work yourself. Add another twenty to forty dollars if you need to buy a respirator, gloves, and brushes. Professional repair for light damage typically runs from one hundred fifty to four hundred dollars, depending on the extent of surface prep and whether the contractor needs to remove and rehang the door.
Full replacement of a standard interior door frame averages two hundred fifty to seven hundred dollars when you hire a carpenter. That price includes removing the old frame, installing a new one, shimming it plumb and square, and reinstalling trim. Solid wood or custom‑sized frames cost more than stock pine or finger‑jointed material.
| Repair Type | Typical Cost | Notes |
|---|---|---|
| DIY surface repair | $50–$100 | Sandpaper, filler, primer, paint |
| Professional minor repair | $150–$400 | Includes labor, surface prep, refinish |
| Full frame replacement | $250–$700 | Remove old, install new, trim work |
These numbers assume an interior door frame in a single‑family home. Fire‑rated frames, steel frames, or frames in commercial buildings cost more and often require licensed contractors and inspections.
Hiring a Professional for Fire‑Damaged Door Frame Repair

Hire a contractor when the damage extends into structural members, when the frame is part of a fire‑rated assembly, or when you’re unsure whether the repair will pass a building inspection. Fire damage specialists assess not just the wood you can see, but hidden issues like weakened wall studs, compromised drywall, and smoke penetration into insulation.
Professionals also use specialty products (shellac‑based sealers, odor‑blocking primers, and structural epoxies) that aren’t sold in most hardware stores. If you’re filing an insurance claim, a licensed contractor’s written estimate and scope of work carry more weight than a homeowner’s DIY repair log.
Look for proof of a contractor’s license and general liability insurance. References from recent fire‑damage or restoration projects. Familiarity with local building codes and fire‑door requirements if applicable. Willingness to provide a written estimate that breaks out materials and labor. Clear timeline for starting and finishing the work.
Ask whether the estimate includes disposal of damaged material, repainting, and reinstalling hardware. Some contractors charge separately for trim work or finish carpentry. Get the scope in writing so there’s no confusion about what’s covered.
Insurance and Documentation for Fire‑Damaged Door Frames

Take photos of every side of the frame before you touch anything. Shoot close‑ups of charred areas, cracks, and warping, and wide shots that show the door in context. Insurers need to see the extent of damage, and photos taken after you’ve started repairs won’t prove what the fire actually did.
Write a short description that lists what burned, what got wet during extinguishing, and what you’ve done since the fire. Keep receipts for any materials you buy and any contractor estimates you collect. Some homeowner policies cover both repair and full replacement, but the adjuster decides which route is appropriate based on the damage and the cost to restore the frame to its pre‑loss condition.
Claim approval depends on what caused the fire and whether your policy excludes certain events. If the fire started from covered causes (an electrical fault, a cooking accident), the frame repair or replacement usually falls under dwelling coverage. If you’re filing a claim, don’t throw away the damaged frame until the adjuster has inspected it or given you written permission to dispose of it.
Final Words
You’re staring at a burnt frame, loose paint, softened wood, maybe a warped jamb. First thing: check how deep the char is and stop further damage.
Use this guide for quick checks, safety steps, sanding and filling for minor burns, deeper fixes, clear replacement thresholds, cost ranges, and what to document for your insurer.
If it’s more than you want to tackle, hire a pro for fire damaged door frame repair so hinges align and the seal holds. With the right approach, the frame will be fixed and the door will work like before.
FAQ
Q: Can a fire door frame be repaired?
A: A fire-damaged or otherwise damaged door frame can often be repaired when damage is limited to surface char, hard blackening, or minor warping; replace if deep charring over 1/4 inch, structural softness, or hinge failure.
Q: How much does it usually cost to fix or replace a fire door frame?
A: The cost to repair or replace a fire-damaged door frame typically runs under $100 for DIY materials, $150–$400 for professional repairs, and $250–$700 for full replacement, depending on materials and labor.