

Think soot wipes off like regular dust? Try that and you’ll smear black powder deep into your walls, turning surface soot into permanent staining. Soot contains acidic compounds that etch into paint and drywall within hours, and touching it with water before removing the dry layer creates an oily mess that spreads instead of lifts. The good news: cleaning soot follows a clear order that works. Dry cleaning first using chemical sponges, then wet cleaning only where needed, then odor control, then a final check to make sure it’s actually gone. Skip steps or reverse the order and you’ll make it worse.
Complete Soot Cleaning Process: From Safety Setup to Final Restoration

The complete soot cleaning process comes down to six steps that build on each other: shut off your HVAC and get air moving, gear up with proper protection including respirator and gloves, lift away loose soot using dry chemical sponges working top to bottom, switch to wet cleaning only after dry work is done, tackle odors through ventilation and absorption, then inspect everything to make sure it’s actually clean. This order isn’t arbitrary. Each step protects the next one from creating worse problems. Jump straight to wet cleaning without removing dry soot first and you’ll smear that powder deep into surfaces, turning a fixable mess into permanent staining.
Soot breaks down into two types based on how the fire burned. High oxygen fire soot looks dry and powdery, almost like fine dust that brushes off until it touches water, then it smears everywhere. This type needs dry cleaning sponges and zero water contact until every loose particle is gone. Low oxygen fire soot feels greasy and sticky, leaving an oily film that grabs onto more dirt. This residue needs wet cleaning with high alkaline degreasers, but only after you’ve dealt with the dry layer first. Figuring out which type you’re dealing with determines your entire approach.
Speed matters. Within hours, acidic compounds in soot start etching into surfaces, discoloring paint, tarnishing metal, working their way into porous stuff like drywall and wood. Small jobs in one room with light surface soot work for DIY if you follow the right methods. Large scale damage hitting multiple rooms, heavy buildup, or contamination in your HVAC system needs professional fire damage restoration to prevent permanent damage and health risks from doing it wrong.
Essential Safety Equipment and Protective Measures for Soot Cleaning
Soot particles contain toxic combustion byproducts. Carbon, acids, chemicals from burned synthetics. These particles get into your body through breathing contaminated air, touching your face with dirty gloves, or direct contact with skin and eyes. Extended exposure causes respiratory irritation, chronic bronchitis, aggravated asthma. In severe cases it contributes to coronary heart disease or cancer from accumulated toxin exposure.
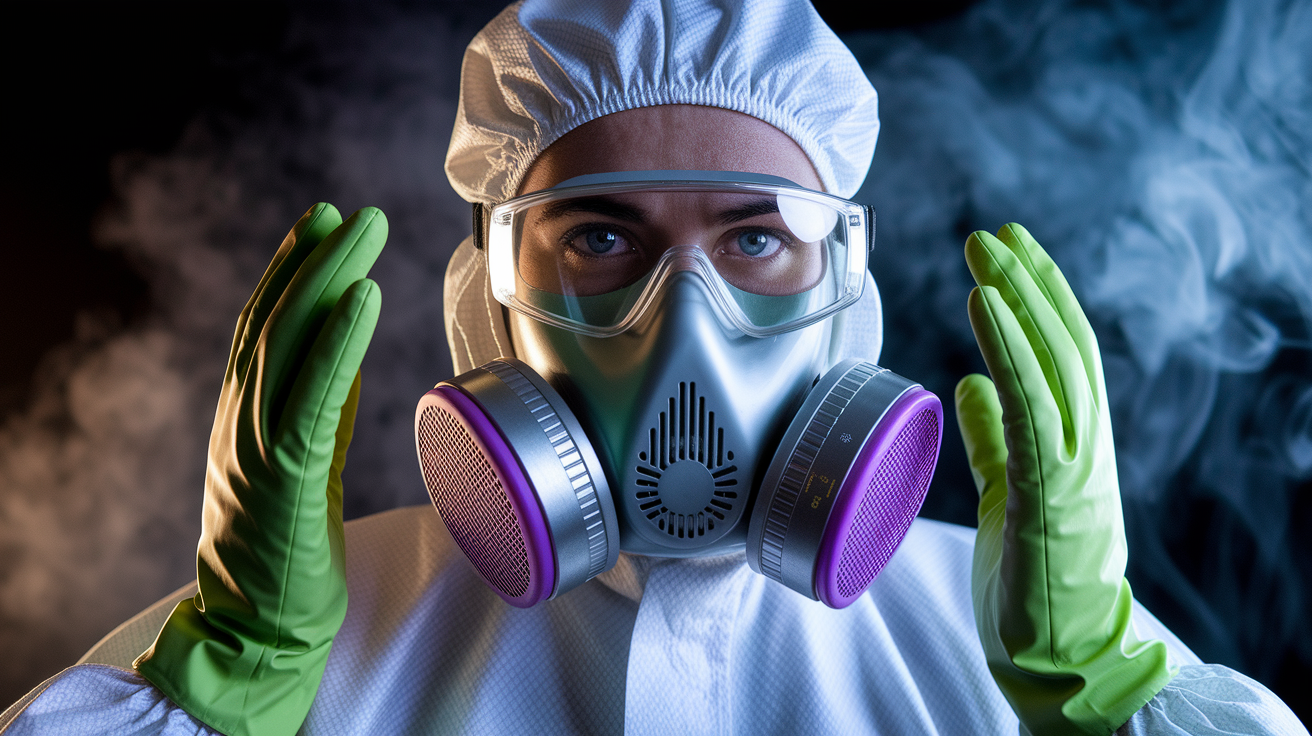
N95 respirator minimum for light soot, P100 respirator for heavy contamination or tight spaces. Nitrile gloves extending past your wrists, doubled up for long sessions. Safety glasses or goggles with side shields keeping particles away from eyes. Long sleeve shirt and long pants made from tightly woven fabric, not loose knits that trap particles. Closed toe work boots or shoes you can clean or toss after the job. Disposable coveralls for heavy soot environments so you don’t contaminate your regular clothing and the rest of your home. Head covering like a disposable cap to keep soot out of your hair.
Open every window and door in the affected area before you start. Turn off your HVAC at the thermostat and the breaker to stop circulating soot particles through ductwork into clean areas. Set up fans blowing outward to create negative pressure that pulls contaminated air outside instead of pushing it deeper into your house. This ventilation setup needs to run continuously during all cleaning work.
Don’t touch surfaces with bare hands during your initial walkthrough. Soot transfers instantly to skin, then spreads to every surface you touch afterward. Doorknobs, light switches, your phone. Keep contaminated gloves in the work area and remove them before leaving, or you’ll track soot throughout your home.
Understanding Different Types of Soot and Smoke Residue Patterns
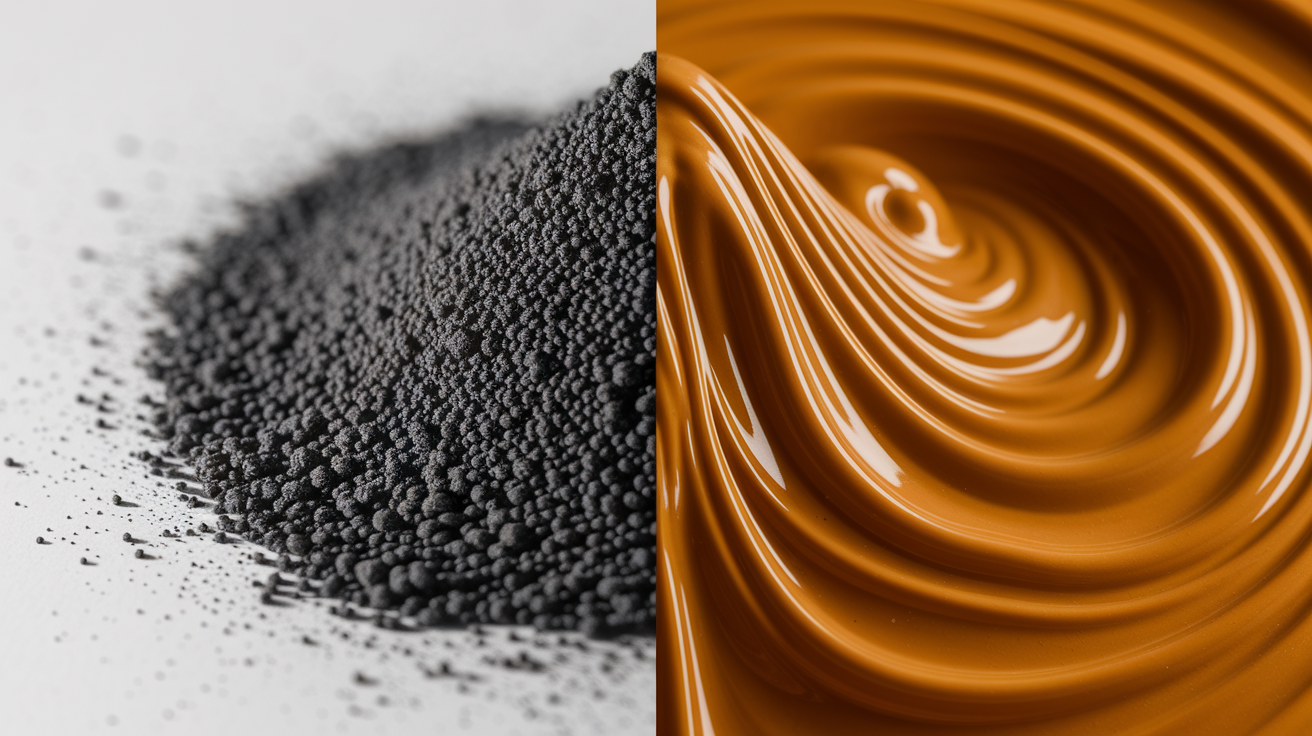
Soot forms when materials burn without enough oxygen to achieve complete combustion. Instead of turning entirely to ash and gas, carbon particles cluster together with partially burned material, creating the black residue that coats everything cooler than the fire itself. Different materials produce different soot types. Wood creates dry, powdery residue while plastics and synthetics leave greasy, sticky films. The oxygen available during burning determines whether soot stays dry or turns oily.
High Oxygen Fire Residue (Dry Soot)
High oxygen fires burn hot and fast, producing fine, powdery soot that looks like black dust. This residue comes from burning wood, paper, natural fabrics, other cellulose materials with plenty of air feeding the flames. Dry soot sits on surfaces without bonding deeply at first, making it easier to remove if you use the right method. It brushes off like powder when touched but smears instantly when exposed to moisture, spreading the stain and pushing particles into porous surfaces where they become nearly impossible to extract. Dry chemical sponges lift this residue without water, keeping it from becoming a permanent stain.
Low Oxygen Fire Residue (Oily Soot)
Low oxygen fires smolder slowly, producing thick, greasy soot that feels sticky and coats surfaces with an oily film. Smoldering synthetic materials like plastics, foams, rubber, polyester create this residue when they don’t get enough air to burn cleanly. The soot contains unburned oils and tars that bond to surfaces immediately and attract more dirt over time. Dry cleaning sponges can’t remove this greasy film. You need wet cleaning with high alkaline degreasers that break down the oil bonds. The challenge is removing the dry surface layer first before introducing moisture, or you’ll create a smeared mess that spreads across walls.
Protein Residue from Synthetic Materials
Protein residue forms when synthetic materials vaporize during fires, leaving nearly invisible deposits that discolor paint and release persistent odors. You often can’t see this residue until weeks later when yellow or brown stains appear on walls and ceilings. It requires specialized sealers that lock in the discoloration and odors before repainting, otherwise the stains bleed through new paint within days.
Most real world fires produce mixed residue requiring multiple cleaning methods applied in sequence. You’ll find dry soot on surfaces near natural materials and oily residue near plastics or foam, sometimes in the same room. Start with dry cleaning methods everywhere, then assess which areas need wet cleaning for remaining greasy films.
Required Cleaning Materials and Specialized Equipment for Soot Removal
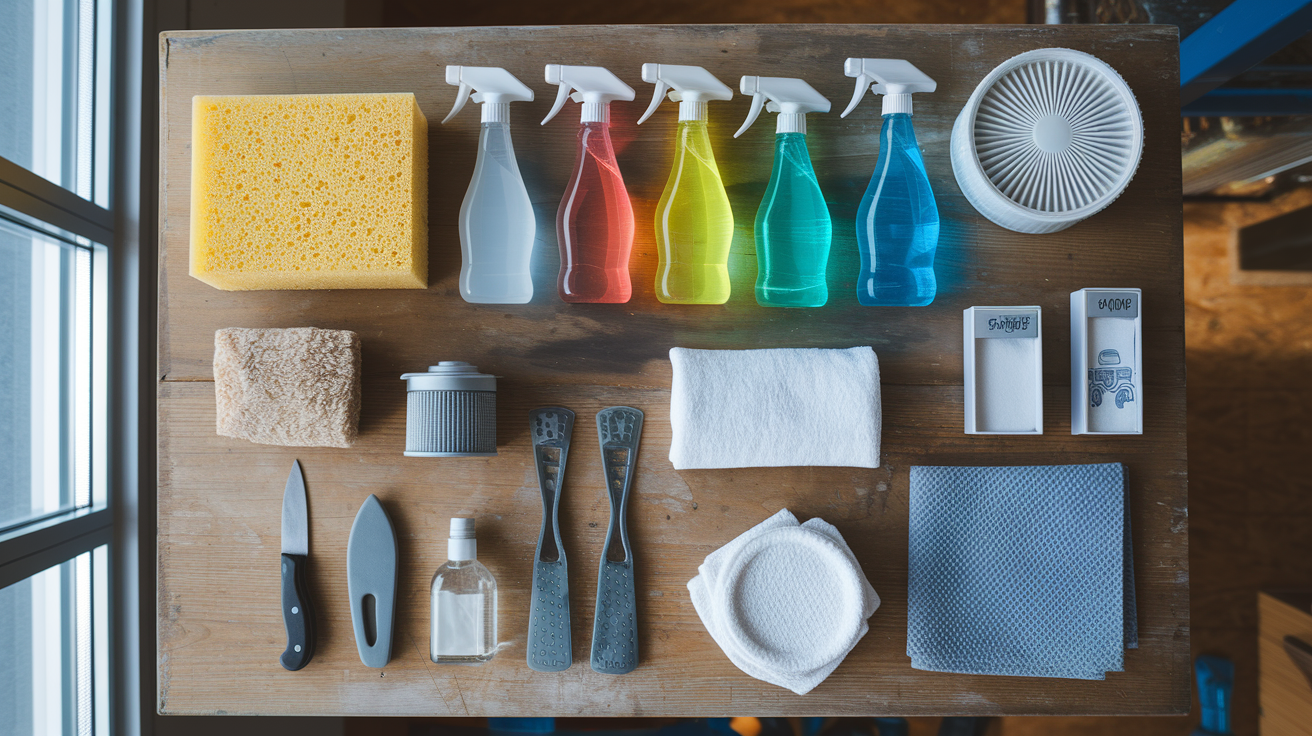
Gather all materials before starting work so you don’t contaminate clean areas by walking back and forth. The cardinal rule: dry cleaning happens first, wet cleaning happens only after all loose soot is removed. Introducing moisture too early turns removable powder into permanent stains.
| Material Type | Specific Products | Purpose |
|---|---|---|
| Dry cleaning tools | Chemical sponges (dry cleaning sponges), utility knife | Lifts dry soot without moisture; slice off soiled sides to expose clean sponge |
| Vacuum equipment | Shop vacuum with HEPA filter, upholstery brush attachment | Removes loose particles before wiping; HEPA filter prevents recirculating fine soot |
| Alkaline cleaners | TSP (trisodium phosphate), dish soap, commercial degreaser | Cuts through oily residue; mix few tablespoons per gallon hot water |
| Solvent cleaners | Rubbing alcohol, white vinegar, paint thinner | Dissolves sticky residue on non-porous surfaces like glass and metal |
| Absorption materials | Baking soda, cornstarch, commercial absorbent powder | Draws oils from carpets and fabrics before vacuuming |
| Application tools | White cotton rags, microfiber cloths, cellulose sponges | Applies cleaners without scratching; white cloths show when they’re saturated |
| Rinse and dry supplies | Clean water buckets, terry cloth towels | Removes cleaning product residue; pat dry method prevents smearing |
| Containment materials | Plastic sheeting, painter’s tape, newspapers | Protects floors from falling soot during ceiling and wall cleaning |
Chemical sponges work through a vulcanized rubber compound that attracts and holds soot particles without moisture. These sponges last through extensive cleaning when maintained properly. Wipe until the surface gets loaded with soot, then slice off the dirty layer with a utility knife to expose fresh sponge underneath. Once a chemical sponge gets wet, it loses effectiveness permanently. Buy extras because you’ll need several for whole house cleaning.
HEPA vacuums matter because standard vacuum filters let fine soot particles pass through, blowing them back into the air you’re breathing. The upholstery brush attachment prevents grinding particles into surfaces. Hold the nozzle about one half inch away from walls and ceilings, letting suction pull particles off without direct scrubbing contact.
Tile, glass, sealed stone, and glazed surfaces tolerate water based cleaning. Wood, drywall, unsealed grout, electronics, and porous materials need dry only methods or minimal moisture application. When you must use liquid cleaners on these sensitive surfaces, apply product to your cloth rather than spraying directly, use minimal moisture, and dry immediately with clean towels.
Step by Step Cleaning Process for Walls and Ceilings with Soot Damage

Clean ceilings first, then walls, then floors. Gravity pulls loose soot downward, so working top to bottom prevents contaminating surfaces you’ve already cleaned. Trying to clean walls first means ceiling soot falls onto your finished work, forcing you to clean the same wall twice.
Cover floors directly below your work area with newspapers or plastic sheeting weighted down at edges to catch falling soot without creating trip hazards. Remove or cover furniture to prevent transferring soot from your clothing.
Vacuum ceiling surfaces with your shop vacuum held one half inch away from the surface, using slow, overlapping passes. Never let the nozzle drag across soot or you’ll smear it. Work in sections small enough to complete without arm fatigue causing sloppy technique.
Wipe ceilings with a dry chemical sponge using light pressure and straight wiping motions, never circular scrubbing. Turn the sponge to a clean side after every few strokes. When all sides show soot buildup, slice off the contaminated layer with your utility knife. The sponge removes what vacuuming missed without spreading residue.
Repeat the vacuum and dry sponge process on walls, working from ceiling line downward in vertical strokes. Stop periodically to inspect your sponge. If it’s smearing rather than lifting, you’ve hit oily residue that needs wet cleaning later. Mark these spots mentally and move on with dry cleaning for now.
Test your wet cleaning solution in an inconspicuous spot like inside a closet or behind furniture. Wait five minutes to confirm it doesn’t damage paint or cause discoloration before applying to visible areas.
Mix high alkaline cleaner according to package directions, typically a few tablespoons of TSP or dish soap per gallon of hot water. Apply with a slightly damp sponge or cloth, working in small sections. Wipe in straight, downward motions, never circular scrubbing that spreads residue.
Rinse each cleaned section immediately with a cloth dampened in plain water to remove cleaning product residue. Cleaners left on surfaces attract dirt and create sticky films.
Pat surfaces dry with clean terry cloth towels immediately after rinsing. Standing moisture on drywall causes swelling and paint damage.
Scrubbing drives soot particles deeper into porous surfaces like drywall and textured paint. What looks like aggressive cleaning actually creates permanent staining by forcing carbon into microscopic pores. Light wiping pressure and proper product selection do more than hard scrubbing.
Test every cleaning solution before widespread use. Paint formulations vary. What works safely on one wall might strip paint or cause discoloration on another. Testing takes two minutes and prevents ruining entire rooms.
Remove light fixtures, ceiling fan blades, and register covers before cleaning surrounding surfaces. Soot hides on top of these items and falls off during cleaning, contaminating your finished work. Clean these items separately in sinks or outdoors, let them dry completely, then reinstall after all other cleaning is done.
Carpet and Upholstery Restoration Methods for Smoke Residue

Carpets and upholstery trap soot deep in fibers where standard cleaning can’t reach. The porous, textured nature of fabric makes it impossible to wipe clean like hard surfaces. You need absorption and extraction methods that pull contamination out rather than pushing it deeper.
Start by removing large soot pieces using a spoon edge or dull butter knife held at a shallow angle. Lift particles off without applying downward pressure that grinds them into carpet backing. Work slowly. This tedious step prevents turning surface soot into embedded staining.
Sprinkle baking soda or commercial absorbent powder liberally across the entire affected carpet area, creating a layer thick enough to coat fibers without seeing through to the carpet color underneath.
Let the powder sit for at least one hour, longer for heavy soot. The powder absorbs oils and moisture from soot particles, making them easier to vacuum out.
Vacuum slowly with your upholstery attachment using overlapping passes, emptying the vacuum canister frequently to maintain suction power.
Blot remaining spots with a white cloth dampened in rubbing alcohol or hydrogen peroxide diluted with three tablespoons warm water per cup of peroxide. Never rub. Press the cloth down, lift straight up, move to a clean cloth section, and repeat.
For light colored carpets only, hydrogen peroxide works as both cleaner and mild bleach. On dark carpets, it causes unwanted lightening. Test in a hidden area first, always.
Upholstered furniture requires the same gentle approach. Vacuum first with the upholstery brush, apply absorbent powder, wait, vacuum again, then blot spots with appropriate cleaning solution. Avoid soaking fabric. Light moisture application and immediate blotting prevents watermarks and mildew in cushion foam.
Professional steam cleaning becomes necessary when soot penetrates deep into carpet padding or upholstery foam. Home methods can’t reach backing materials where odor causing residue hides. If you still smell smoke after surface cleaning, the contamination goes deeper than DIY extraction can address.
Cleaning Soot from Specialized Surfaces and Hard to Reach Areas
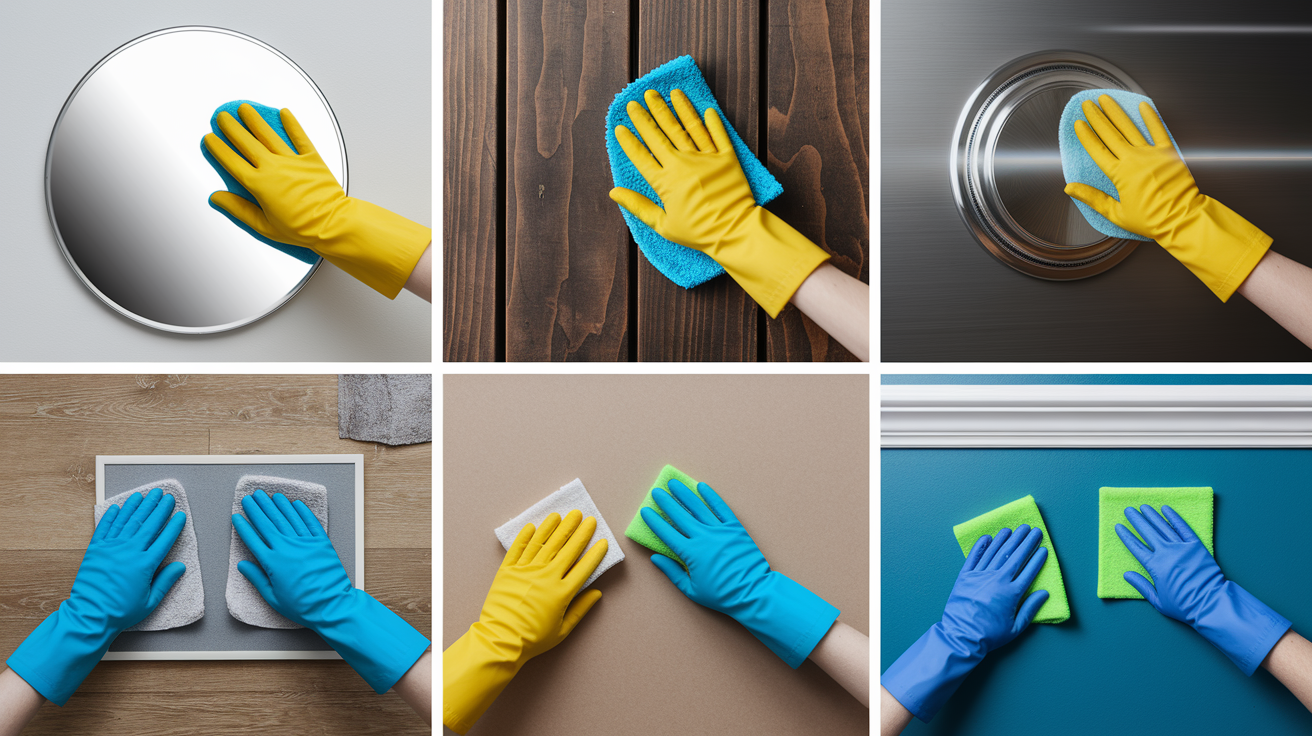
Surface material determines cleaning method safety. Water safe surfaces tolerate aggressive wet cleaning, while porous and moisture sensitive materials need dry methods or minimal liquid application with immediate drying.
| Surface Type | Recommended Method | Products to Avoid |
|---|---|---|
| Glass, mirrors, tile | Dry sponge first, then glass cleaner or vinegar solution | Abrasive scrubbers that scratch |
| Sealed wood, laminate | Dry sponge only, minimal damp cloth if needed, immediate drying | Water based cleaners, excessive moisture |
| Metal fixtures, hardware | Dry sponge, then rubbing alcohol or metal polish | Harsh acids that cause corrosion |
| Electronics, screens | Compressed air for vents, barely damp microfiber for cases | Any liquid near components, spray cleaners |
| Unsealed wood, raw drywall | Dry sponge only, may require sealing and repainting if stained | Water based cleaners that cause swelling |
| Baseboards, painted trim | Full wet cleaning after dry sponge, since these are typically sealed | Excessive scrubbing that removes paint |
Electronics need special caution because moisture and cleaning chemicals damage internal components. Unplug everything before cleaning. Use compressed air to blow soot out of vents, USB ports, and button gaps. Wipe exterior cases with a barely damp microfiber cloth. Damp means you squeezed out every drop of water you could. Never spray cleaning solutions directly on electronics or use wet wipes that leave moisture behind.
Remove light fixtures, ceiling fans, and vent covers completely before cleaning the mounting surfaces behind them. Trying to clean around installed fixtures leaves shadow lines where soot remains. Take fixtures outdoors or to a utility sink where you can wash them thoroughly without worrying about drips. Clean light bulbs individually with rubbing alcohol on a cloth. Soot on bulbs reduces light output and creates odor when heated.
HVAC System Contamination and Air Duct Cleaning After Smoke Events

Soot travels through forced air systems, spreading from the fire area throughout your entire home via supply ducts. Your HVAC system acts like a distribution network, pulling contaminated air from the affected area, pushing it through ductwork, and delivering soot particles to every room with a register. Within hours, rooms untouched by direct smoke show soot deposits around vents and on walls near airflow paths.
Turn off your HVAC system at both the thermostat and the breaker before starting any soot cleanup. Leaving it running spreads contamination faster than you can clean and forces you to re-clean already finished areas.
Inspect all return and supply registers throughout your home for soot accumulation. Remove register covers and look into ducts with a flashlight. If you see black residue coating interior duct surfaces more than six inches deep, your ductwork is contaminated.
Replace your HVAC filter immediately even if it looks clean on the outside. Soot particles too fine to see have loaded the filter media, reducing airflow and recirculating smoke odor. Mark your calendar to replace the filter again after one week of operation, since residual dust gets stirred up when you restart the system.
Decide between DIY register cleaning and professional duct cleaning based on contamination depth. Surface soot around registers responds to dry sponge cleaning followed by wet cleaning with degreaser. Contamination deeper than arm’s reach into ductwork requires professional negative pressure cleaning with specialized equipment.
Clean all visible ductwork and register boots using the same dry then wet method you used on walls, working carefully to avoid dislodging insulation or damaging flexible duct sections.
After completing all other home cleaning, restart your HVAC system and monitor for smoke odor. Persistent smell indicates contamination remains in ductwork or the air handler unit itself.
Professional duct cleaning uses truck mounted vacuums creating negative air pressure while rotating brushes scrub duct interiors. This process costs more than DIY register cleaning but becomes necessary when contamination extends throughout your duct system. Trying to operate your HVAC with contaminated ducts means breathing soot particles continuously and re-soiling cleaned surfaces.
Odor Elimination Techniques and Deodorization Strategies for Smoke Smell
Smoke odor persists after visible soot removal because microscopic carbon particles embed in porous surfaces, releasing smell continuously. Cleaning removes surface contamination, but odor molecules remain trapped in drywall, wood framing, insulation, and concrete. Materials you can’t wipe down.
Maximum ventilation through open windows and doors, running for several days to weeks, carries odor molecules outside as they off-gas from porous materials. Stagnant air lets smell concentrate.
Absorbent materials like bowls of baking soda, activated charcoal bags, or commercial odor absorbers placed throughout affected areas capture airborne odor molecules. Replace absorption materials every few days as they become saturated.
Wash all fabrics including curtains, bedding, clothing, and removable cushion covers using hot water and detergent. Smoke odor clings to textiles even when they don’t show visible soot.
Professional ozone treatment floods affected areas with ozone gas that oxidizes odor molecules, chemically breaking them down rather than masking smell. This method requires complete evacuation of people, pets, and plants during treatment since ozone irritates lungs at effective concentrations.
Thermal fogging uses heated deodorizing solution that vaporizes into microscopic droplets penetrating the same porous materials where smoke particles hide, neutralizing odors at the source.
Seal and repaint surfaces that remain odorous after cleaning and deodorization. Shellac based or specialty odor blocking primers trap remaining smell before topcoat paint, preventing bleed through.
Ozone generators work extremely well but come with important safety restrictions. During operation, ozone levels reach concentrations that damage lungs and aggravate respiratory conditions. All living things must leave the treatment area, and the space needs thorough ventilation for several hours after treatment ends before reoccupancy. You can rent portable ozone generators from equipment rental stores or hire professionals who handle setup, monitoring, and ventilation.
Avoid masking products like air fresheners, scented candles, or fragrance sprays. These products coat surfaces with oils that trap odor molecules underneath rather than eliminating them. When the fragrance fades, smoke smell returns stronger than before because you’ve added another layer that prevents off-gassing.
Smoke odor dissipation takes anywhere from a few days for minor surface contamination to several weeks for deeper penetration into building materials. Multiple cleaning treatments, aggressive ventilation, and patience work better than expecting instant results. The smell fades gradually as trapped particles off-gas and ventilation carries them away.
DIY Cleaning Techniques Versus Professional Fire Damage Restoration Services
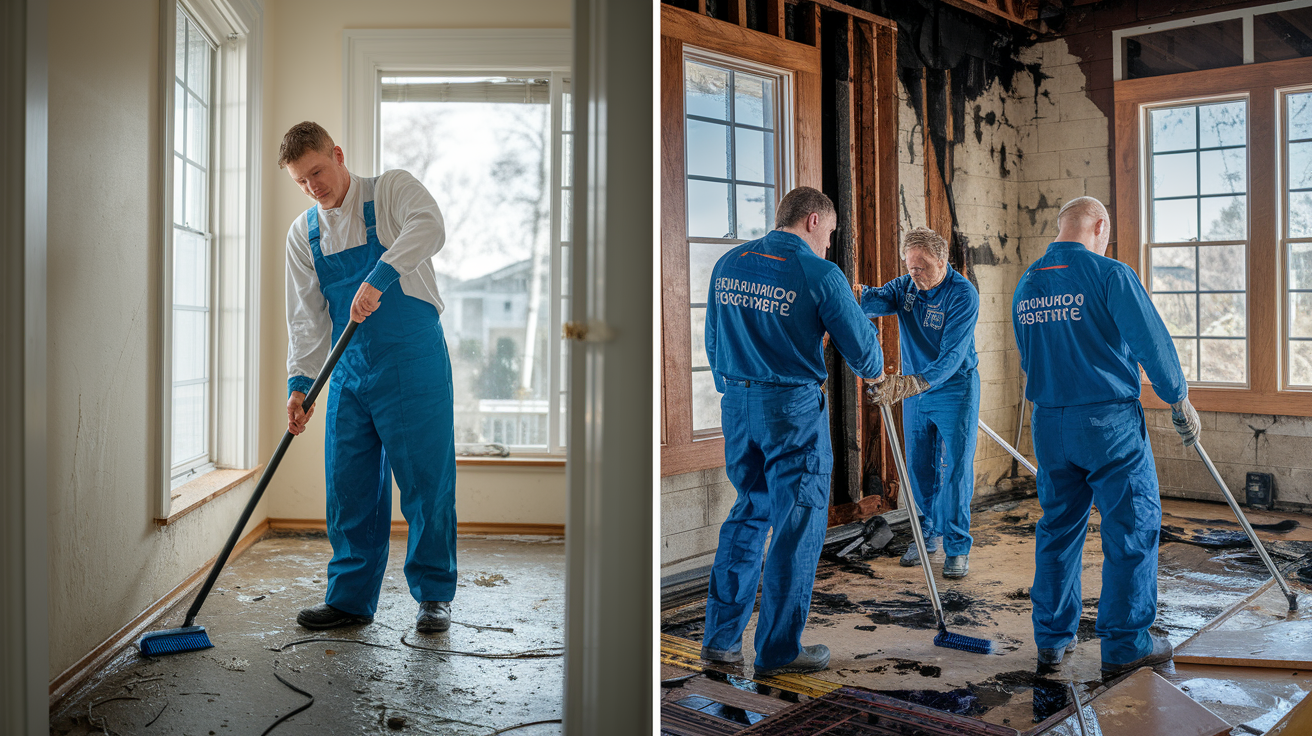
Deciding between DIY and professional restoration depends on damage extent, affected materials, your available time, and health considerations. The wrong choice leads to incomplete cleaning, permanent damage, or health risks from toxin exposure.
| Damage Severity | DIY Appropriate | Professional Recommended |
|---|---|---|
| Light surface soot in one room | Yes, if you have proper safety equipment and follow dry first cleaning protocols | Optional for faster completion and guaranteed results |
| Multiple rooms with moderate soot | Possible but time intensive, requires several days of dedicated work | Yes, for thorough cleaning and to prevent cross contamination |
| Heavy soot coating all surfaces | No, volume exceeds DIY capacity and increases health risks | Essential for proper cleaning, sealing, and odor elimination |
| HVAC system contamination | Register cleaning only, not internal ductwork | Yes, for complete duct cleaning and air handler decontamination |
| Structural materials affected | No, requires assessment of hidden damage and specialized treatment | Essential for safety evaluation and comprehensive restoration |
Professional fire damage restoration teams bring equipment homeowners can’t access: truck mounted negative air machines that prevent contamination spread, commercial grade HEPA air scrubbers, hydroxyl generators for odor elimination, and thermal imaging cameras that identify hidden moisture and heat damage. They complete in days what takes homeowners weeks, with results backed by industry certification and often required by insurance companies for claim approval.
Fire Damage Restoration services include complete assessment of visible and hidden damage, documentation for insurance claims, content pack out to clean belongings off site in controlled facilities, structural cleaning using professional methods, odor elimination through multiple treatment types, and final restoration that returns your home to pre-loss condition. Pack out matters for items that can’t be cleaned on site. Upholstered furniture, electronics, clothing, and documents get transported to specialized facilities with equipment designed for each material type.
Professional restoration becomes essential when soot affects areas you can’t easily access, when odor persists after DIY cleaning attempts, when HVAC contamination spreads damage throughout your home, or when insurance claim documentation requires certified work. Trying to save money with DIY on large scale damage often costs more in the end through incomplete cleaning, permanent staining, and claim complications.
Cost benefit analysis favors DIY for truly minor surface soot in small areas where you can see every affected surface and complete cleaning in a weekend. The moment damage extends beyond one room or penetrates into porous materials, professional services deliver better outcomes for comparable or lower total cost when you factor in your time, equipment purchases, and risk of inadequate cleaning.
Cost Estimates and Insurance Claim Considerations for Soot Removal Projects
Soot cleaning costs vary wildly based on damage extent, affected materials, accessibility, and whether you’re handling cleanup yourself or hiring professionals. Understanding cost factors helps you budget appropriately and make informed decisions about DIY versus professional services.
Material costs for DIY single room cleaning run approximately $150 to $300 including chemical sponges ($8 to $15 each, need multiples), HEPA shop vacuum rental ($40 to $60 per day), cleaning solutions and solvents ($30 to $60), disposable protective equipment ($20 to $40), and containment supplies ($20 to $40). Time investment ranges from 8 to 16 hours for a typical bedroom, longer for rooms with heavy buildup or difficult surfaces.
Single room DIY cleaning: $150 to $300 in materials plus 8 to 16 hours of labor over multiple days. Whole house DIY cleaning (1,500 to 2,000 square feet): $500 to $1,200 in materials plus 40 to 80 hours of work spread across two to three weeks. Single room professional cleaning: $800 to $2,500 depending on room size, damage severity, and included services. Whole house professional restoration (1,500 to 2,000 square feet): $5,000 to $15,000 for complete cleaning, deodorization, and minor repairs. Contents cleaning and pack out: $2,000 to $8,000 depending on inventory volume and item types requiring specialized treatment. HVAC duct cleaning: $400 to $1,000 for standard residential system, more for extensive contamination requiring multiple treatments. Advanced odor elimination (ozone or hydroxyl treatment): $500 to $2,000 for whole house treatment with professional monitoring.
Insurance claims for fire and smoke damage typically cover reasonable and necessary restoration costs including professional cleaning, odor elimination, and repairs to return your home to pre-loss condition. Your policy deductible applies, and you’ll need to demonstrate the damage and restoration scope through documentation.
Document everything before starting any cleaning. Take photographs and video of all affected areas from multiple angles showing damage extent and soot coverage. Photograph inside cabinets, closets, and ductwork if accessible. Make a detailed inventory of damaged contents with descriptions and estimated values. Keep receipts for all cleaning supplies, equipment rentals, and professional services. This documentation supports your claim and helps adjusters understand the full scope.
Insurance adjusters expect reasonable cleaning attempts on salvageable items before replacement claims. They may require professional cleaning estimates even if you plan to DIY the work. Many policies specify that restoration must use professional services for certain damage types or claim amounts above specified thresholds. Check your policy language and talk to your adjuster before making decisions that could affect claim approval.
Prevent claim denials by following proper notification procedures immediately after discovering damage, getting adjuster approval before starting extensive work, hiring licensed and insured contractors when using professionals, keeping detailed records of all communications and expenses, and completing cleaning promptly to prevent additional damage from delayed treatment. Waiting too long to start cleanup can result in partial claim denial for damage that spread after the initial loss.
Sealing, Priming, and Repainting Requirements After Soot Cleaning
Cleaning removes surface soot, but staining and odor often remain in paint and drywall, requiring sealing before repainting. Skip this step and you’ll see yellow or brown stains bleeding through new paint within days or weeks, forcing you to repaint correctly the second time.
Test cleaned surfaces by wiping with a white cloth dampened in rubbing alcohol. If black or brown residue transfers to the cloth, the surface needs additional cleaning before priming. If the cloth stays clean but you smell smoke odor, the surface needs odor blocking primer.
Apply stain blocking primer to all affected surfaces even if they look clean. Oil based primers work best, but low VOC water based alternatives exist for health sensitive situations. Shellac based primers like BIN provide the strongest odor blocking when smell persists after cleaning.
Use two coats of primer on heavily affected areas where soot penetrated deeply. One coat seals light contamination, but deep staining requires additional barrier layers.
Sand lightly between primer coats with fine grit sandpaper to smooth raised grain and create better adhesion for the next coat. Wipe away sanding dust with a tack cloth before applying additional coats.
Match your final paint to existing wall color using paint samples you bring to the store. Paint fades over time from UV exposure and age, so “matching” the original color from five years ago means matching the current faded shade, not what the can says it should be.
Apply paint in thin, even coats rather than thick coverage attempting to hide everything in one pass. Multiple thin coats prevent drips, level better, and create more durable finish than single heavy coats.
Specialty odor blocking primers contain additives that chemically neutralize smell rather than just creating a physical barrier. These products cost more than standard primers but eliminate persistent smoke odor that survives cleaning and deodorization. The most effective formulations use shellac or oil bases that penetrate and seal porous surfaces completely.
Some staining won’t respond to any amount of cleaning because acids in soot etched into paint, chemically changing the surface. These areas need primer to block the stain from showing through topcoat paint. Testing a small section with primer and paint before committing to entire walls confirms the primer blocks staining adequately.
Professional color matching uses spectrophotometers that analyze existing paint color and create custom mixed paint matching the current shade exactly. This technology prevents the common problem of “close enough” color matching that looks acceptable in the store but shows obvious differences on the wall. Your local paint store offers this service, usually for free when you purchase the paint.
Achieving a finish that blends into the rest of your home means extending new paint slightly beyond the repair area, thinning it at the boundary. On textured walls, match the texture pattern before painting to prevent smooth spots that show despite color matching.
Professional Certification Standards and What to Look for in Restoration Companies
IICRC certification represents the industry standard for fire and water damage restoration, demonstrating that technicians completed training in proper restoration protocols, safety procedures, and current best practices. The Institute of Inspection, Cleaning and Restoration Certification develops standards based on scientific research and field experience, then tests professionals to verify they can perform restoration work correctly. Not all restoration companies hold IICRC certification, but those that do follow standardized procedures proven to deliver complete restoration while protecting occupant health.
| Credential/Feature | Why It Matters | Questions to Ask |
|---|---|---|
| IICRC certification | Verifies training in proper restoration methods and current industry standards | Which technicians hold certification? Can you provide certificate numbers for verification? |
| 24/7 emergency response | Fast response prevents damage from spreading and reduces total restoration costs | What’s your actual response time? Do you charge extra for after hours or weekend calls? |
| Insurance claim experience | Proper documentation and adjuster communication streamline claim approval and payment | Do you handle insurance billing directly? Can you provide references from recent insurance paid jobs? |
| Professional equipment | Commercial grade HEPA air scrubbers, negative air machines, and hydroxyl generators deliver results impossible with consumer equipment | What specific equipment do you use? Can I see your equipment before you start? |
| Clear communication protocol | Regular updates and transparent processes reduce homeowner stress and prevent surprises | Who’s my point of contact? How often will I receive progress updates? |
Professional restoration equipment separates qualified companies from general contractors attempting fire cleanup with consumer grade tools. Truck mounted negative air machines maintain controlled air pressure that prevents contamination from spreading during cleaning, while commercial HEPA air scrubbers filter entire rooms continuously. Thermal imaging cameras identify heat damage and hidden moisture problems invisible to visual inspection. Hydroxyl generators eliminate odors through advanced oxidation that’s safe for occupied spaces, unlike ozone treatment requiring evacuation.
Response time expectations matter because soot damage worsens with every passing hour. Legitimate restoration companies offer genuine 24/7 emergency response, not answering services that schedule callbacks the next business day. When you call at 2 AM Saturday, you should speak with someone who can dispatch a technician immediately, not leave a message for Monday morning.
Communication protocols should include a dedicated project manager serving as your single point of contact, daily or every other day progress updates depending on project length, clear explanations of what work is happening and why, transparent pricing with detailed estimates before work begins, and availability to answer questions throughout the process. Companies that go quiet after signing contracts create unnecessary stress during an already difficult time.
Final Words
Soot damage cleaning starts with fast action and the right approach. Stop your HVAC system, protect yourself with proper safety equipment, and use dry methods before introducing any moisture.
Match your cleaning technique to the soot type. High-oxygen fires leave dry residue that needs chemical sponges, while low-oxygen fires create oily deposits requiring wet cleaning with degreasers.
If the damage covers multiple rooms or includes HVAC contamination, professional restoration brings commercial equipment and certified techniques that homeowners can’t match. We handle the whole sequence from stabilization through finish work so you’re not coordinating different contractors.
The key is moving quickly before soot spreads, using the correct methods for each surface, and knowing when to call for help.
FAQ
Does soot stain permanently?
Soot does not stain permanently if you clean it promptly with the right methods. Fresh soot comes off with dry-cleaning sponges and proper detergents, but delays let it settle deeper into surfaces, making removal much harder and sometimes requiring sealing and repainting to prevent bleed-through.
Does Dawn dish soap remove soot?
Dawn dish soap removes soot effectively when used as a wet-cleaning step after dry sponge cleaning. Mix a few tablespoons with hot water for a high-alkali solution that breaks down oily soot residue on hard surfaces like tile and glass, but always dry-clean first to prevent smearing.
What to throw away after a house fire?
Throw away porous items heavily saturated with soot like food, cosmetics, medicines, burned clothing, charred fabrics, and anything with structural damage or deep smoke penetration. Non-porous items like glass, metal, and sealed hard surfaces can usually be cleaned and saved if you address them quickly.
How much does soot cleaning cost?
Soot cleaning costs range from minimal for single-room DIY projects using basic supplies to several thousand dollars for whole-house professional restoration involving contents cleaning, HVAC decontamination, and finish work. Extent of damage, square footage, and required equipment drive the final price.
Can I clean soot myself or do I need a professional?
You can clean soot yourself for small, contained incidents like a single candle mishap or minor cooking smoke, but professional help becomes necessary when multiple rooms are affected, HVAC systems spread contamination, or oily residue covers large areas requiring specialized equipment and techniques.
How long does it take to remove smoke smell after cleaning soot?
Smoke smell takes a few days to a few weeks to dissipate after cleaning soot, depending on damage severity and ventilation. Surface cleaning removes visible residue, but embedded carbon particles in porous materials require odor elimination techniques like ozone treatment or thermal fogging for complete removal.
What’s the difference between dry soot and oily soot?
Dry soot from high-oxygen fires appears powdery and requires dry-cleaning sponges, while oily soot from low-oxygen fires feels greasy and needs wet cleaning with degreasers. Using the wrong method spreads contamination, so identifying soot type before starting determines which cleaning approach will work.
Why can’t I use water on all surfaces with soot?
Water damages wood, electronics, drywall, and porous materials by causing warping, short circuits, and microbial growth when used on soot. Reserve wet cleaning methods for tile, glass, and waterproof surfaces only, and always use dry-cleaning sponges first to prevent spreading soot deeper into materials.