


Storm cleanup can be fast and safe when you have a clear plan. I know dealing with damage is stressful, and a simple checklist can turn chaos into an easy process.
First, check your property for hazards like fallen trees or loose branches. Wear proper safety gear such as gloves and sturdy boots.
Next, take clear photos of any damage. These pictures will help support your insurance claim.
By following these steps, you can regain control and start restoring your home with confidence. We are here to help if you need guidance along the way.
Storm Damage Cleanup Checklist: Step‐by‐Step Guide
After a storm, fallen trees, scattered debris, and hidden dangers can make your property unsafe. First, check your area carefully for risks like downed power lines, leaning branches, or unstable structures. Wear safety gear such as sturdy boots, work gloves, safety glasses, and a hard hat if you have one. Take photos to document the damage for your insurance before you start cleaning up.
Plan your cleanup and mark off any dangerous spots first. Clearing light debris like twigs and leaves helps create safe paths. Quickly checking roofs, walls, and trees prevents more harm. This checklist gives you clear steps to keep safe while you record damage and begin the repair process.
- Look around for hazards like downed power lines and leaning branches.
- Put on your safety gear (sturdy boots, work gloves, safety glasses, and a hard hat if you have one).
- Take clear photos of the damage for your insurance.
- Remove light debris, such as twigs and leaves, to make safe walking paths.
- Check roofs, walls, and structures for cracks, bulges, or other damage.
- Inspect trees for split bark, exposed roots, or signs they might fall.
- Mark and avoid areas with electrical or structural dangers.
- Collect small items to protect them from further harm.
- Review the area to be sure you haven’t missed anything before repairs.
- For large debris or dangerous materials, call a professional cleanup service at storm damage cleanup near me.
Post‐Storm Property Evaluation Checklist

After a storm, take a close look at your property to spot hidden damage. Walk around your home and check key areas like the roof, siding, and windows. This simple inspection can reveal issues that might worsen if not fixed right away. It also helps you decide when to call in professionals.
- Look at roof shingles and flashing (the metal strips around the roof) for missing or broken parts.
- Check the siding for cracks, warping, or loose pieces.
- Inspect window frames and door seals to spot gaps or signs of water getting in.
- Examine foundation walls for new cracks or shifts.
- Check gutters, downspouts, and drainage areas for blockages or overflowing water.
- Look inside for ceiling leaks, bulging walls, or stains that could signal water damage.
- Assess exterior trim and vents to see if they are secure.
- Examine decks, porches, or fences for stability and signs of wear.
Use what you find to plan any needed repairs. If you see serious damage, call a professional to help keep your home safe until full repairs can be made.
Storm Damage Cleanup Safety Guidelines
After a storm, please take a close look at your property. Watch out for hazards like fallen power lines, exposed wires, leaning branches, and unstable structures. Stay out of flooded areas until you are sure the power is off. Use caution tape or other physical barriers to mark these dangerous spots. This helps keep you, your loved ones, and our crew safe during cleanup.
Before beginning cleanup, put on proper protective gear. Wear hard hats, steel-toed boots, heavy-duty gloves, and eye protection. These items help protect you when you move debris or handle unstable materials. If you find new dangers, stop working immediately and call for professional help.
Storm Damage Debris Removal and Disposal Outline
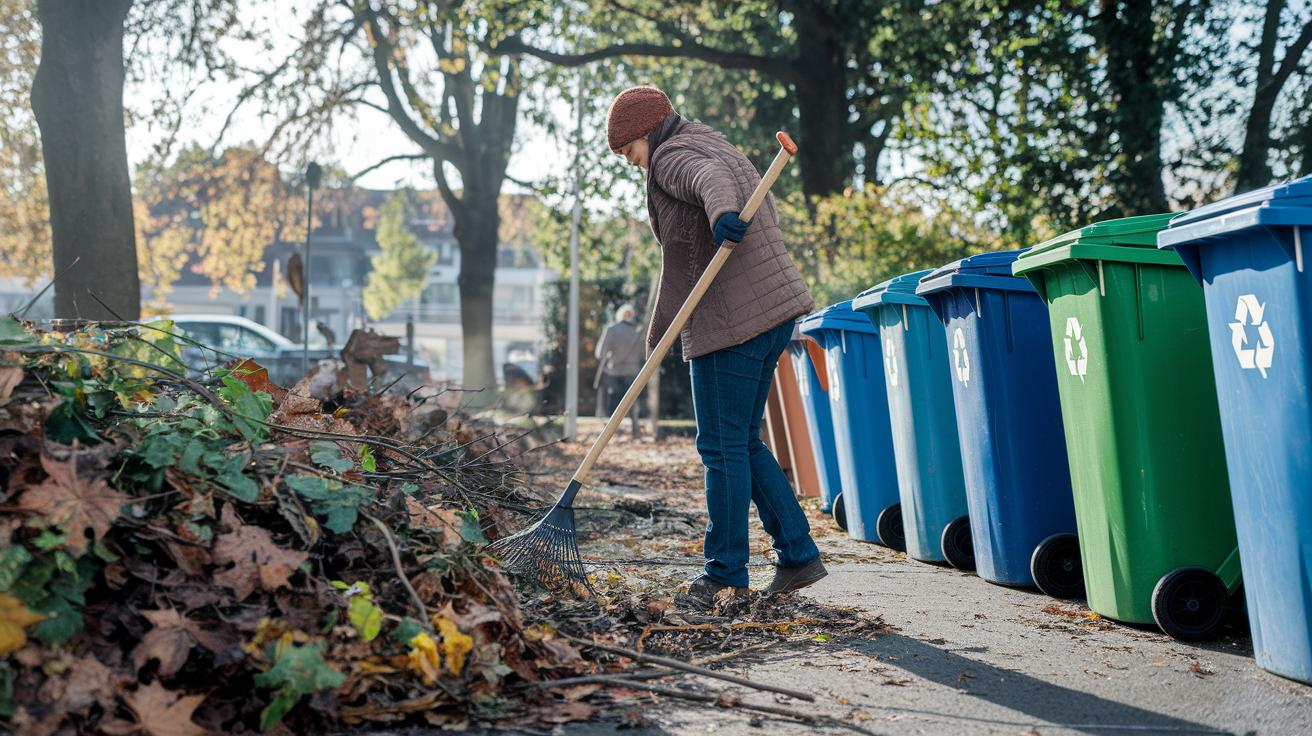
We begin by removing light debris like twigs, leaves, and small branches with rakes or leaf blowers. This clears your paths and removes trip hazards. It also helps you spot bigger damage. Sorting early lets you decide what can be reused, recycled, or properly thrown away according to local rules.
Next, we separate organic materials from construction scraps. Organic items, branches and leaves, can be chopped and turned into mulch or compost. Inorganic items, such as broken glass and damaged building parts, must be kept apart to avoid mixing contaminants. Any contaminated or diseased pieces should be bagged tightly to keep pests away and slow down decay. This careful sorting not only helps with disposal but can also reduce waste management costs by following your city’s guidelines.
Finally, we work with local waste services to handle debris correctly. Local rules often specify how to manage different types of debris, so it’s smart to call your local authorities for pickup times or drop-off spots. Marking off areas where debris is set out helps keep the site organized and speeds up cleanup, reducing the risk of more damage.
Storm Damage Water Infiltration Assessment and Extraction Techniques
Hidden water damage may hide behind walls, under floors, or near your foundation. Look for signs like damp patches, wall discolorations, or soft spots on the floor. Finding these clues early lets you begin cleaning before issues like mold start. A careful check of all areas where water might have seeped in can protect your home and help lower repair costs.
Once you spot water damage, it’s time to remove the water and dry things out. We suggest using tools like submersible pumps for heavy water, wet/dry vacuums for floors and tight corners, or portable extraction units for hard-to-reach damp spots. Setting up a drainage system inside your home can help keep extra water away. After the water is removed, turn on dehumidifiers (machines that pull moisture from the air) and air movers to reduce moisture quickly, ideally within 24 hours. For more details on these tools, check out water extraction near me.
| Extraction Tool | Primary Use |
|---|---|
| Submersible Pump | Removes large amounts of water from flooded areas |
| Wet/Dry Vacuum | Takes water from floors and tight spaces |
| Portable Extraction Unit | Quickly clears standing water in hard-to-reach spots |
| Dehumidifier | Reduces air moisture to speed up drying |
Storm Damage Mold Prevention and Moisture Control Strategies

After we remove the water, we focus on stopping mold from growing. First, we treat wet surfaces with EPA-approved antimicrobials (germs-killing products) to lower the risk of mold spores taking hold. Then, we run dehumidifiers (machines that pull moisture from the air) and air movers to push out dampness until walls and floors have less than 15% moisture. This low moisture level makes it hard for mold to develop, which helps protect your indoor air quality.
We also work to keep the air dry. Our goal is to maintain humidity under 60%. We open windows or use fans to circulate air better. We check progress with moisture meters (tools that measure moisture) and adjust our methods as needed. These steps, combined with the antimicrobial treatment, work together to reduce mold risks and keep your home safe during the restoration process.
Storm Damage Insurance Documentation and Repair Scheduling Guide
After a storm, clear records help your insurance claim and repair work run smoothly. We know how stressful it is, so here’s a simple way to document the damage. Start with taking clear photos and making a list of every damaged item. This careful record-keeping supports your claim and helps guide the repair schedule.
- Take clear photos of every damaged area. Make sure each image has a time stamp.
- Write down a list of affected items, noting their condition and where they are located.
- Gather repair estimates and written quotes from different sources.
- Check the background of each contractor (look for reviews or ask for references).
- Review local permit rules and note any special guidelines.
- Keep a work log each day to record repair progress, any extra damage, or follow-up issues.
By following these steps, you create a strong record for insurance adjusters and repair teams. Working with trusted professionals ensures your documentation and repair scheduling meet both insurance and local requirements.
Storm Damage Final Inspection and Comprehensive Review Checklist

After we've finished all the repairs and cleanup, take one last walk around your property. Check that all the debris is gone, the water is fully removed, and the repairs meet your expectations. Look carefully at the roofs, walls, and trees to make sure nothing was missed. As you inspect, rate any issues on a scale from 1 to 5, with 5 meaning the damage is serious and needs more work. Use what you see to update your maintenance schedule and stay on top of any ongoing risks. Also, confirm that all professional services have completed their work and provided you with the final paperwork for your insurance records.
- Ensure all debris is cleared
- Confirm water removal and drying are complete
- Check the quality of all repairs
- Rate any remaining issues on a scale from 1 to 5
- Update your maintenance and inspection records
- Verify professional services have officially closed out
- Identify and address any lingering hazards
Final Words
In the action, our guide walks you through a clear storm damage cleanup checklist. We cover safety measures, debris removal, water extraction, damage documentation, and final property checks to help you take swift, safe steps.
Each section lays out simple tasks to regain control after a disaster. Follow the checklist and work through each step, knowing that every action brings you closer to restoring your home and peace of mind.
FAQ
What steps are included in a typical storm damage cleanup checklist?
The storm damage cleanup checklist starts by evaluating hazards, documenting damage with photographs, removing light debris to create safe paths, and inspecting structural elements to plan further repairs.
What should I do during a post-storm property evaluation?
A post-storm property evaluation involves checking roofs, siding, window frames, and foundations for cracks or leaks. This early assessment helps you spot damage and plan necessary repairs.
How can I ensure safety during storm damage cleanup?
Ensuring safety means wearing protective gear like hard hats, work gloves, and steel-toed boots while checking for hazards such as fallen power lines and exposed wires before starting cleanup.
What is the proper procedure for debris removal and disposal?
Proper debris removal begins with collecting light debris like twigs and leaves, sorting waste per local guidelines, and safely disposing of larger or hazardous materials by coordinating with local waste management.
How do I assess and address water infiltration after a storm?
Assessing water infiltration means checking behind walls, under floors, and around the foundation. After identifying moisture, you can use pumps and dehumidifiers to extract water and control further damage.
How should I document storm damage for insurance claims?
Documenting storm damage involves taking clear, timestamped photos, making a detailed inventory of affected items, and gathering repair estimates. This organized record supports a strong insurance claim.
What should I check during a final inspection after cleanup and repairs?
A final inspection ensures that all debris, water, and structural issues are resolved. It includes a walkthrough to confirm cleanup, rate any remaining damage, and update maintenance schedules.