


Have you ever wondered if a clear photo could save you from future claim hassles? When trouble hits, every moment and every picture matters. Photos capture the damage and show what your home looked like before repairs. In this post, we share simple steps to help you take the best images for your insurance claim. We explain how to get everything from wide shots to close-ups so you can protect your home and support your claim with confidence.
Essential Photo Checklist for Insurance Claims After a Disaster
Before you start cleaning up, take clear photos of the damage. These pictures show the condition of your home before any debris is removed. A good set of photos helps keep important evidence safe. Use your phone or camera and make sure the images are focused and easy to see.
Follow these simple steps to build your visual checklist:
- Take a wide shot of the entire damaged area. For example, capture an image of your front yard and house to show the overall extent of damage.
- Snap close-up photos of specific details. Look for signs like burn marks on a doorframe from a fire, water stains from a leak or burst pipe, or dents from hail or fallen branches.
- Capture several angles of each area. Move around the spot and take side and top-down photos so nothing is missed.
- Separate your shots of the inside and outside. Photograph outside damage like broken windows and siding, and focus on indoor areas like floors, walls, and fixtures that show water or fire damage.
- Save your photos safely. Upload your pictures to a cloud backup from your phone to make sure they won't be lost.
Only enter your home when experts say it's safe. And always wear protective gear like gloves, masks, and boots.
For more tips, check out the resource: Insurance claim documentation checklist for homeowners.
Exterior Damage Photo Techniques for Claims After a Disaster
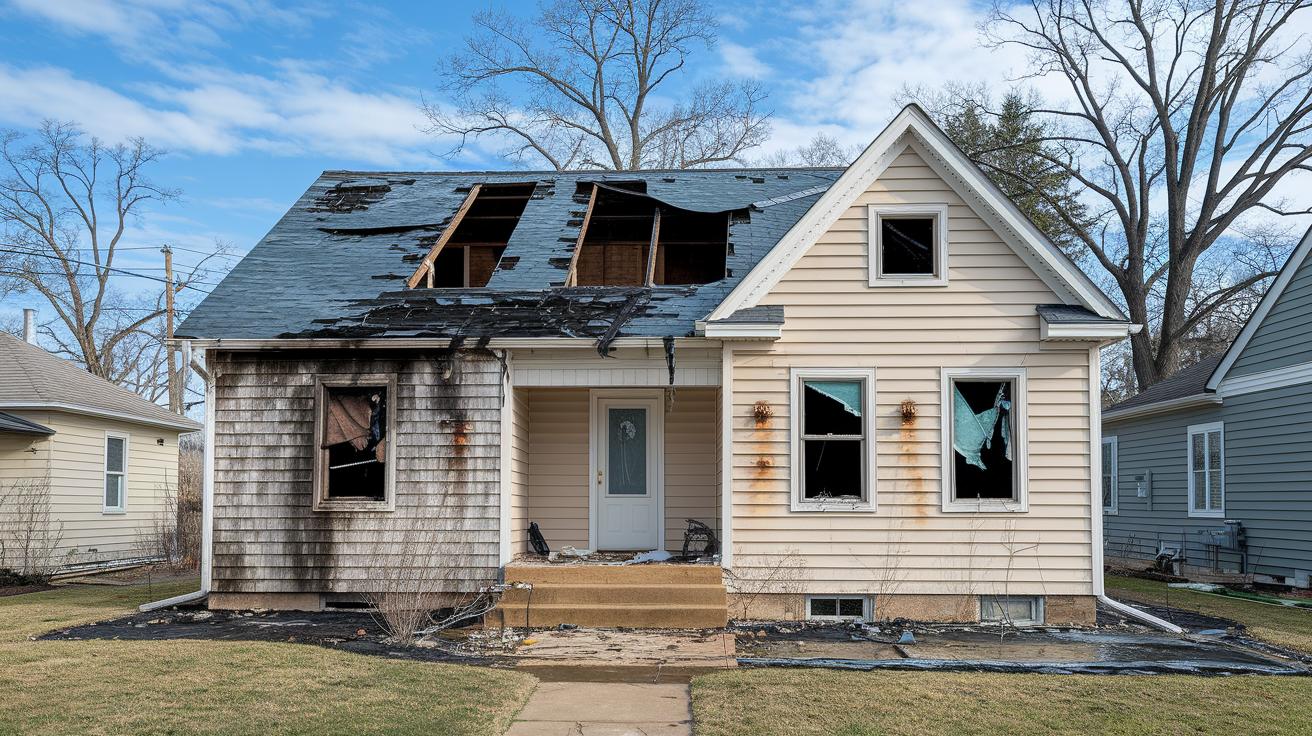
Start with a wide shot of your property to show the overall damage. Focus on the roof to capture missing shingles, holes, or water pooling. For example, take a photo from an angle that clearly shows water collecting near a gap.
Next, take photos of the siding and walls. Look for dents, cracks, or burn marks from the event. Snap shots from different angles, one straight-on and another from the side, to show the depth of any cracks.
Now direct your attention to windows and doors. Get close-up images of broken glass or warped frames to clearly show the damage. Slowly pan from one side to the other to capture every detail.
Don’t forget the surroundings. Photograph any damaged landscaping, fences, or gardens. Also, take ground-level photos to show waterlines or erosion around the foundation.
Finally, capture any harm to outdoor utility equipment like HVAC units and meters. Use natural light and shoot from several angles. This helps build a strong photo record that supports your claim.
Interior Impairment Capture Advice: Photographing Inside Damage
Start by taking clear photos of every affected area inside your home. These pictures help show the full extent of the damage. For example, capture images of warped flooring, peeling paint, or burned surfaces. Try using natural light and keep your camera or phone steady, so the details come through.
| Interior Area | Damage Detail |
|---|---|
| Flooring | Warped wood, stains, and buckled sections from water |
| Walls and Ceilings | Peeling paint, soot build-up, and mold spots |
| Electrical Fixtures | Burn marks and water damage near outlets |
| HVAC & Appliances | Moisture or fire residue on vents and ductwork |
| Personal Contents | Visible damage to furniture and electronics (including visible serial numbers) |
Take close-up photos from different angles. Use good, clear lighting and, if you can, record the date and time on each image. If you notice water stains on a hardwood floor, snap both a wide shot for context and a close-up to show detailed damage.
Specialized Photography for Fire, Flood, and Storm Damage Evidence
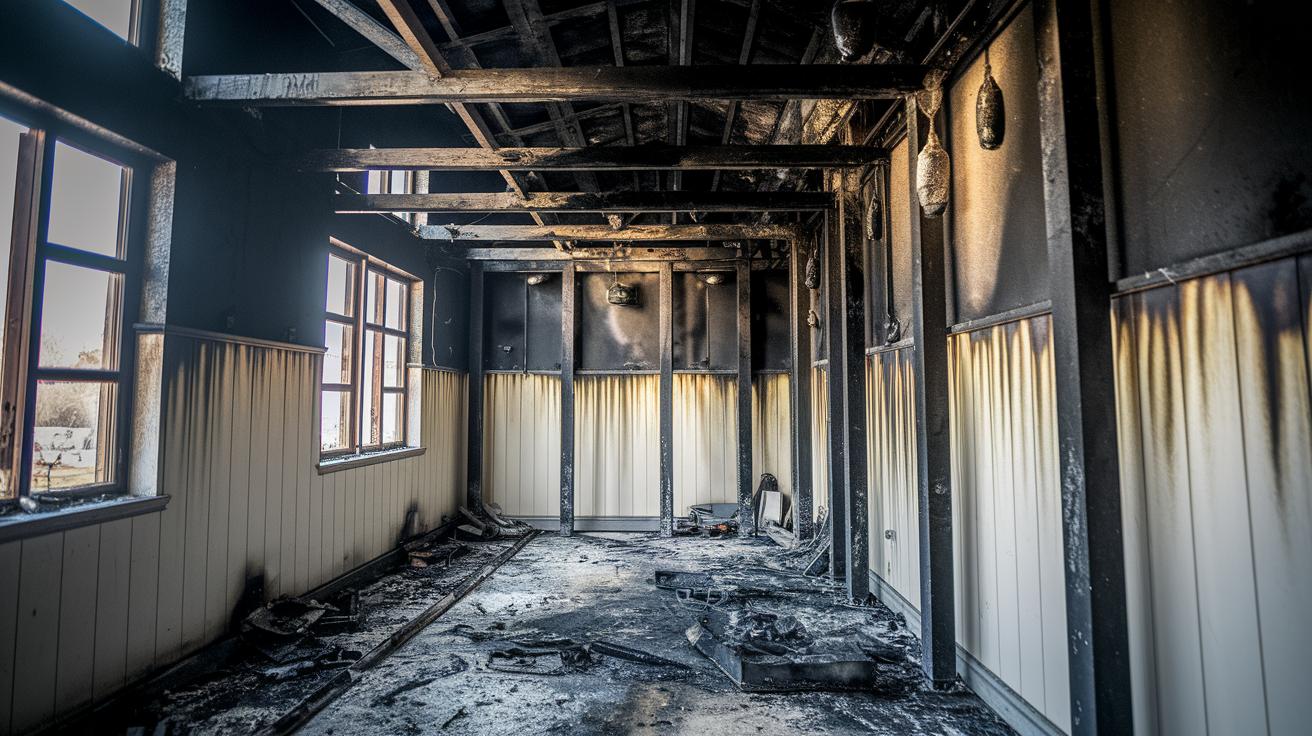
Fire Damage Photo Tips
When you take photos of fire damage, focus on the details that show how the fire changed your property. Snap close-ups that highlight the burn marks and the texture changes on wood or other surfaces. Capture the deep char on beams or doorframes and any soot sticking to walls or fixtures. Mix wide shots that show the entire scene with detailed images that capture melted fixtures or warped structure. This variety helps prove both the overall extent and the specific points of damage.
Flood Impact Photo Tips
For flood damage, clearly document the effects of water on your home. Photograph high water marks on walls and areas where water pooled, causing wood or drywall to swell. Look for signs like moisture trails or early mold growth from long exposure to damp conditions. Capture shots from floor to ceiling to clearly record the damage line. These images will help show the ongoing changes caused by water exposure.
Storm Ruin Photo Tips
When you document storm damage, focus on what the wind and debris did to your property. Take photos of hail dents on metal surfaces and damage from falling trees or debris. Capture roof tears from different angles, one close to the roof edge and another from a safe distance to show the full roof condition. Also, record any broken siding or shattered windows. These images give a complete view of how the storm affected your property.
Angles, Lighting, and Technical Settings for Clear Damage Photos
When you document damage, using the right camera settings is key. Hold your camera so the lens is parallel to the walls or floors (this is called orthogonal framing). This method keeps the image straight and shows every crack and dent in clear detail. Shoot in early mornings or late afternoons when the natural light is soft to reduce glare.
Set your focus manually or tap your smartphone to focus. This helps capture sharp edges and the true texture of surfaces. Adjust your ISO (the camera sensor's sensitivity to light) based on your setting. In bright areas, use an ISO of 100 to 200 to keep photos clear and free from grain. In dimmer areas, bump the ISO to 400 to 800 so you capture more detail.
These steps give you clear, high-quality images that show the full extent of the damage. With clear photos, claims personnel can quickly see and evaluate the loss. Taking the extra time to set your camera right makes your evidence stronger and more reliable.
Chronological Visual Records Post-Disaster: Logging and Storage Strategies

After a disaster, every photo you capture helps tell your property's story. First, add a timestamp to each picture. You can use your phone's date and time or note it manually in a spreadsheet or file name. Also, record where each damage occurred to build a strong visual record for your claim.
Next, sort your photos by damage type, such as exterior, interior, or belongings. This helps you create an easy-to-follow timeline of what happened. Place your images in dedicated folders so you can track any changes as repairs begin.
Be sure to back up your photos in at least two secure spots. For example, save them in a cloud service and on an external hard drive. If you spot new damage during clean-up or repairs, update your files right away with fresh photos and note any details in your log.
This careful record builds a clear digital timeline that simplifies the claims process and supports your case with simple, dated evidence. Keep your records updated until your claim is settled to capture every important detail.
Integrating Photos into an Organized Claim Submission Package
A clear photo record makes your insurance claim easier to review. It helps everyone quickly see what needs repair. When you take photos of the damage, labeling each one clearly makes a big difference.
Each picture should have a clear category and be saved in a common file format like JPEG (a standard image file). Write a short caption that explains what you see and describes the damage. For example, a photo labeled "Roof Damage – Water Pooling" with a note about the number of pictures shows the exact problem more clearly than a general image.
Group your photos by type of damage. You can use groups like exterior, interior, and personal property. This organized way makes your claim easy to follow and helps your evidence stay clear throughout the restoration process.
Below is an example of how to organize your images:
| Category | File Format | Caption | Photo Count |
|---|---|---|---|
| Exterior | JPEG | Damage overview and specific close-ups | Multiple |
| Interior | JPEG | Room-by-room damage details | Multiple |
| Contents | JPEG | Damaged personal items with serial information | Multiple |
Final Words
In the action, we covered a clear guide for capturing essential damage photos. We detailed ways to document exterior, interior, and event-specific issues like fire, flood, and storm damage. We touched on angles, lighting, and technical tips to ensure every shot is reliable. This guide shows what photos to take for insurance claims after a disaster, making it easier to build a solid case. With a straightforward checklist in hand, you can move ahead with confidence and get your property safe and ready again.
FAQ
Q: What pictures do insurance companies need?
A: The pictures insurance companies need include clear images of all damaged areas. Capture both wide shots and close-ups of interior and exterior damage, such as water stains, burn marks, or structural issues, before any cleanup begins.
Q: How to take photos for insurance claim?
A: Taking photos for an insurance claim means using clear angles with ample natural light. Capture the damage from multiple perspectives, include wide shots and close-ups, and document details before debris removal starts.
Q: What’s the biggest mistake people often make when dealing with an insurance claim?
A: The biggest mistake is not fully documenting all damage before cleanup. Missing clear, detailed photos of affected areas can delay the claim process and reduce the recovery of proper funds.
Q: Should I upload photos to an insurance claim?
A: Uploading photos to your insurance claim is recommended. Digital images stored securely with timestamps support your claim by clearly showing the damage and speeding up the review process.