Home Blog Page 6

Storm Damage Cleanup Checklist: Fast & Safe Steps

0

Storm cleanup can be fast and safe when you have a clear plan. I know dealing with damage is stressful, and a simple checklist can turn chaos into an easy process.

First, check your property for hazards like fallen trees or loose branches. Wear proper safety gear such as gloves and sturdy boots.

Next, take clear photos of any damage. These pictures will help support your insurance claim.

By following these steps, you can regain control and start restoring your home with confidence. We are here to help if you need guidance along the way.

Storm Damage Cleanup Checklist: Step‐by‐Step Guide

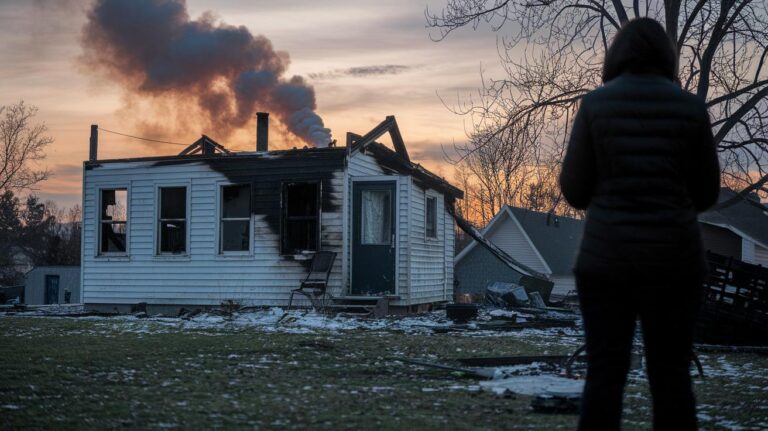
After a storm, fallen trees, scattered debris, and hidden dangers can make your property unsafe. First, check your area carefully for risks like downed power lines, leaning branches, or unstable structures. Wear safety gear such as sturdy boots, work gloves, safety glasses, and a hard hat if you have one. Take photos to document the damage for your insurance before you start cleaning up.

Plan your cleanup and mark off any dangerous spots first. Clearing light debris like twigs and leaves helps create safe paths. Quickly checking roofs, walls, and trees prevents more harm. This checklist gives you clear steps to keep safe while you record damage and begin the repair process.

  1. Look around for hazards like downed power lines and leaning branches.
  2. Put on your safety gear (sturdy boots, work gloves, safety glasses, and a hard hat if you have one).
  3. Take clear photos of the damage for your insurance.
  4. Remove light debris, such as twigs and leaves, to make safe walking paths.
  5. Check roofs, walls, and structures for cracks, bulges, or other damage.
  6. Inspect trees for split bark, exposed roots, or signs they might fall.
  7. Mark and avoid areas with electrical or structural dangers.
  8. Collect small items to protect them from further harm.
  9. Review the area to be sure you haven’t missed anything before repairs.
  10. For large debris or dangerous materials, call a professional cleanup service at storm damage cleanup near me.

Post‐Storm Property Evaluation Checklist

img-1.jpg

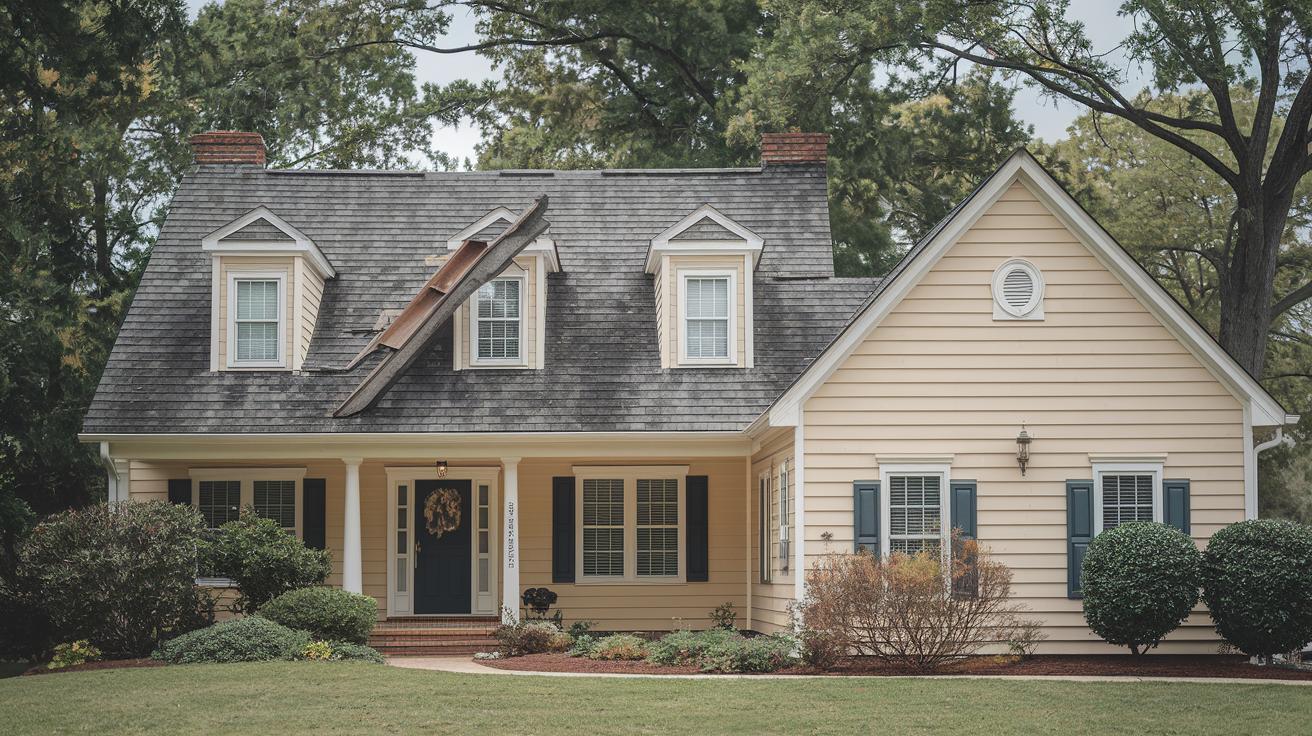
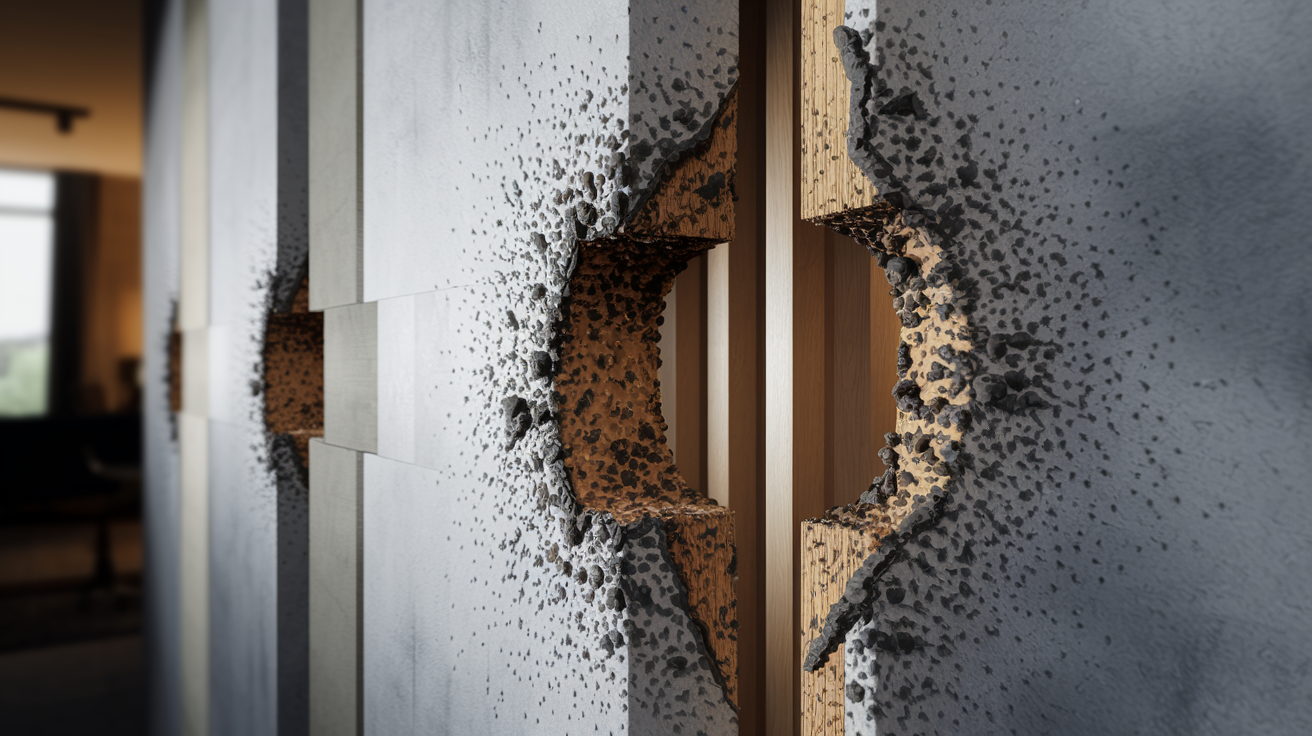
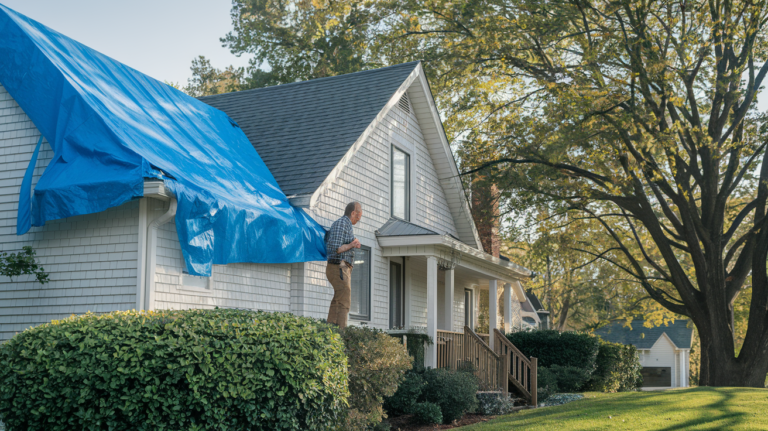
After a storm, take a close look at your property to spot hidden damage. Walk around your home and check key areas like the roof, siding, and windows. This simple inspection can reveal issues that might worsen if not fixed right away. It also helps you decide when to call in professionals.

  • Look at roof shingles and flashing (the metal strips around the roof) for missing or broken parts.
  • Check the siding for cracks, warping, or loose pieces.
  • Inspect window frames and door seals to spot gaps or signs of water getting in.
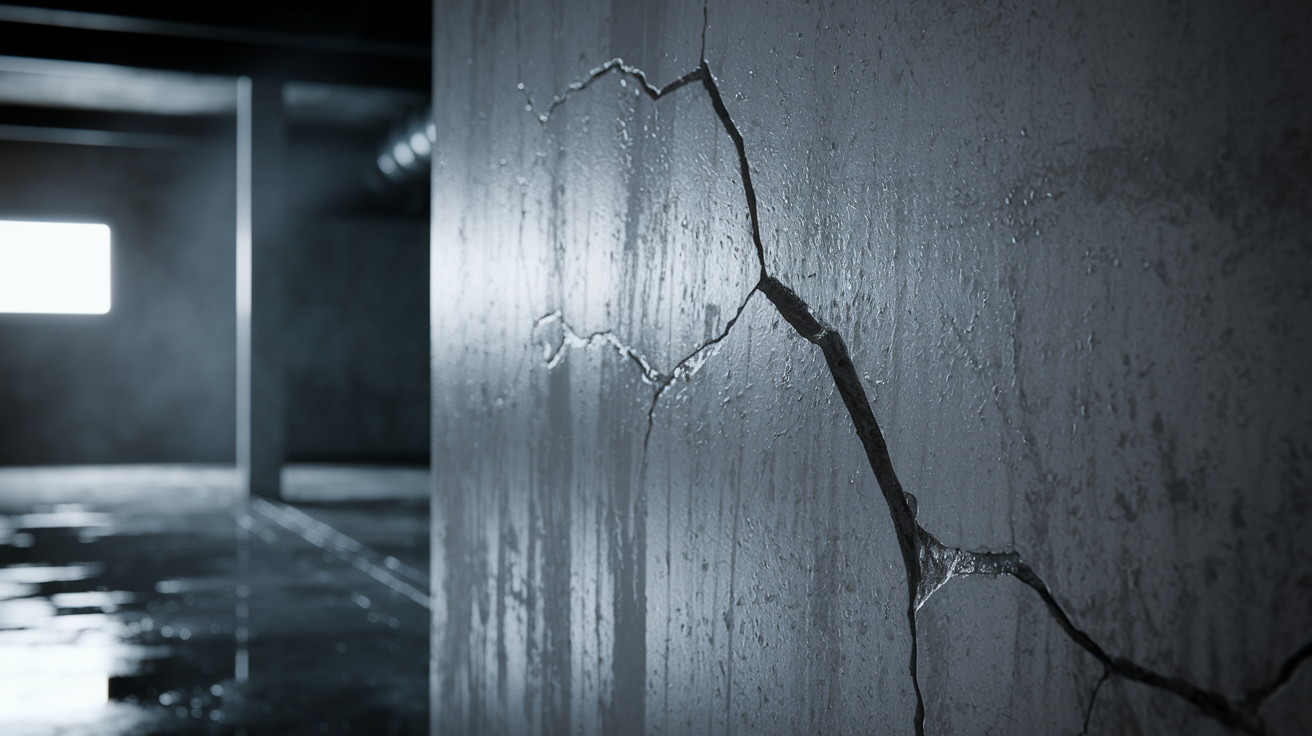
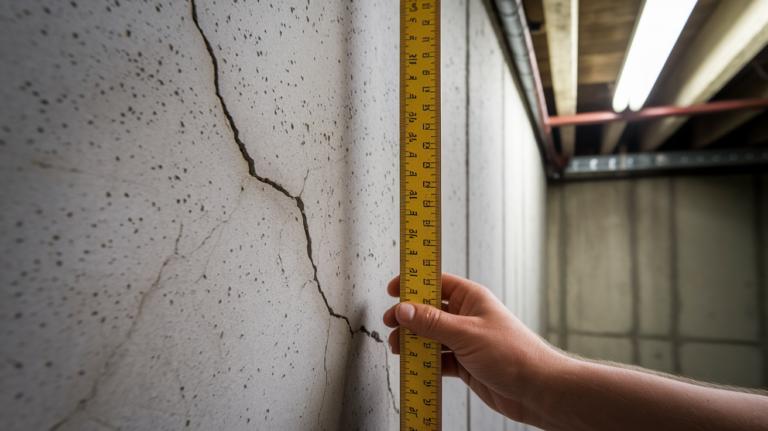
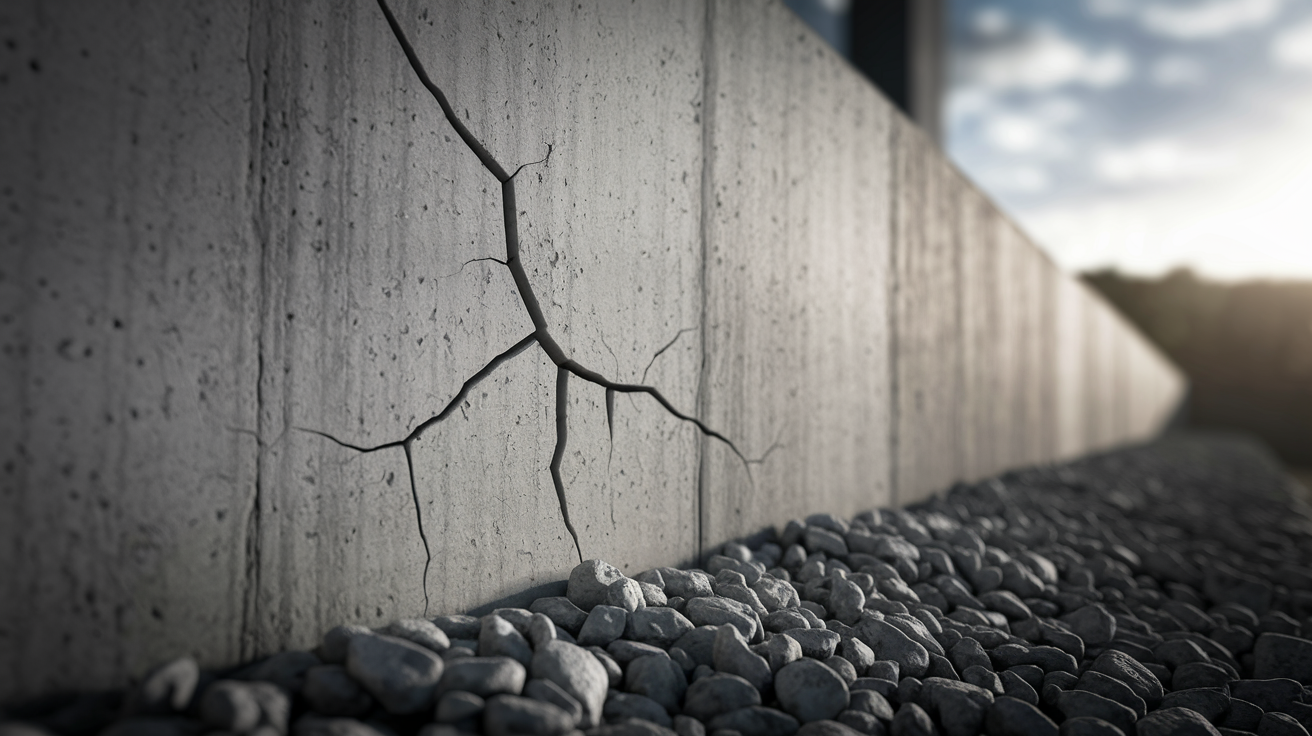
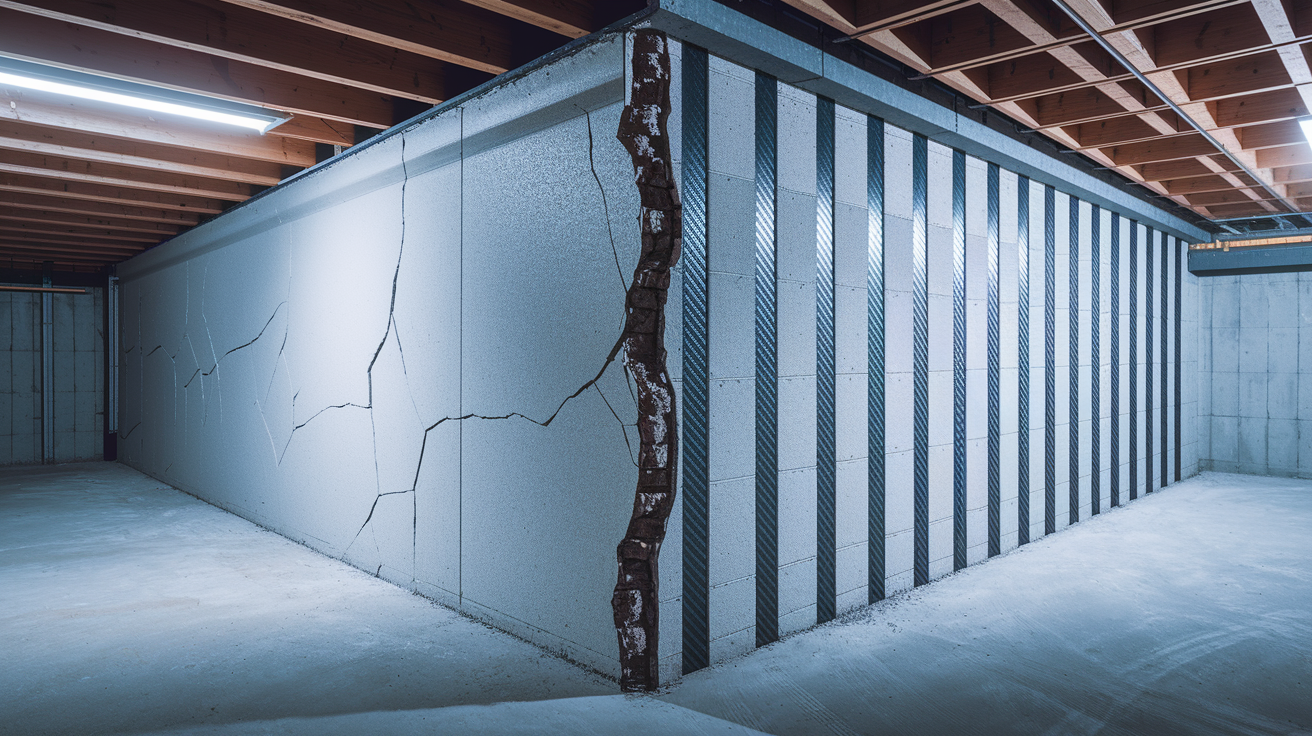
  • Examine foundation walls for new cracks or shifts.
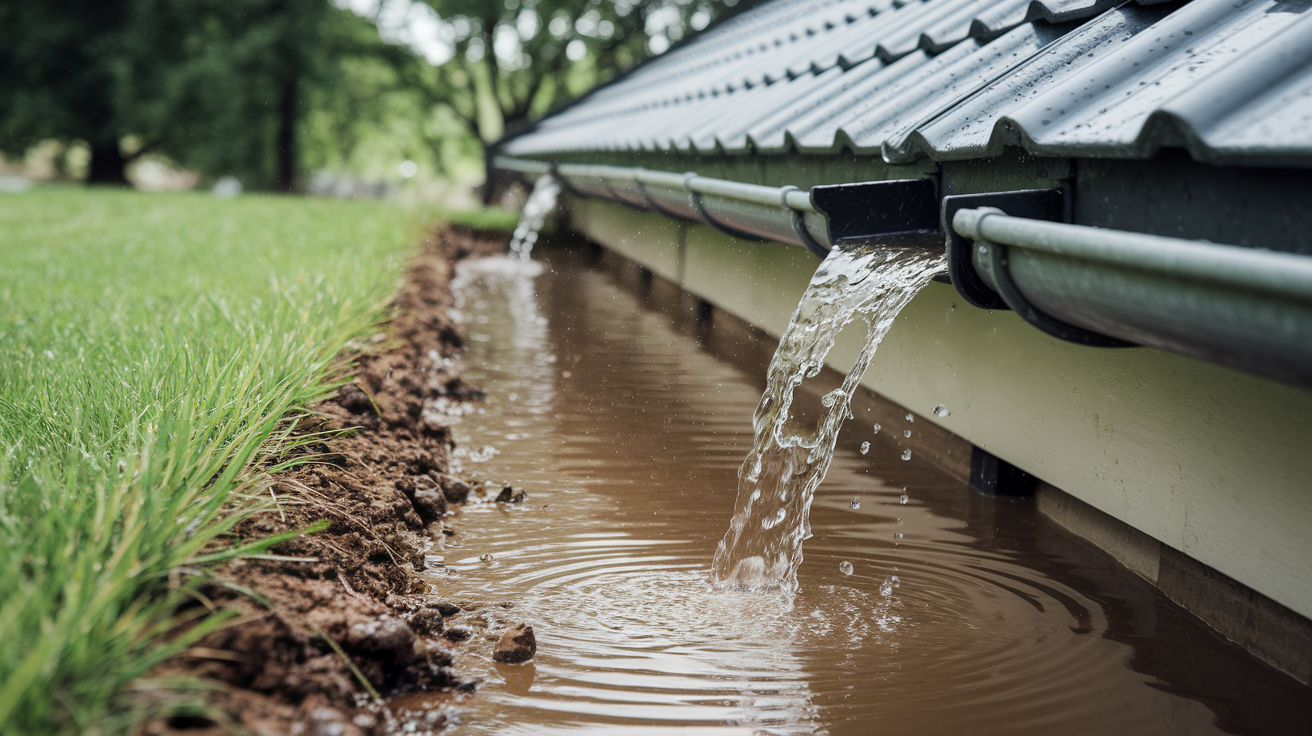
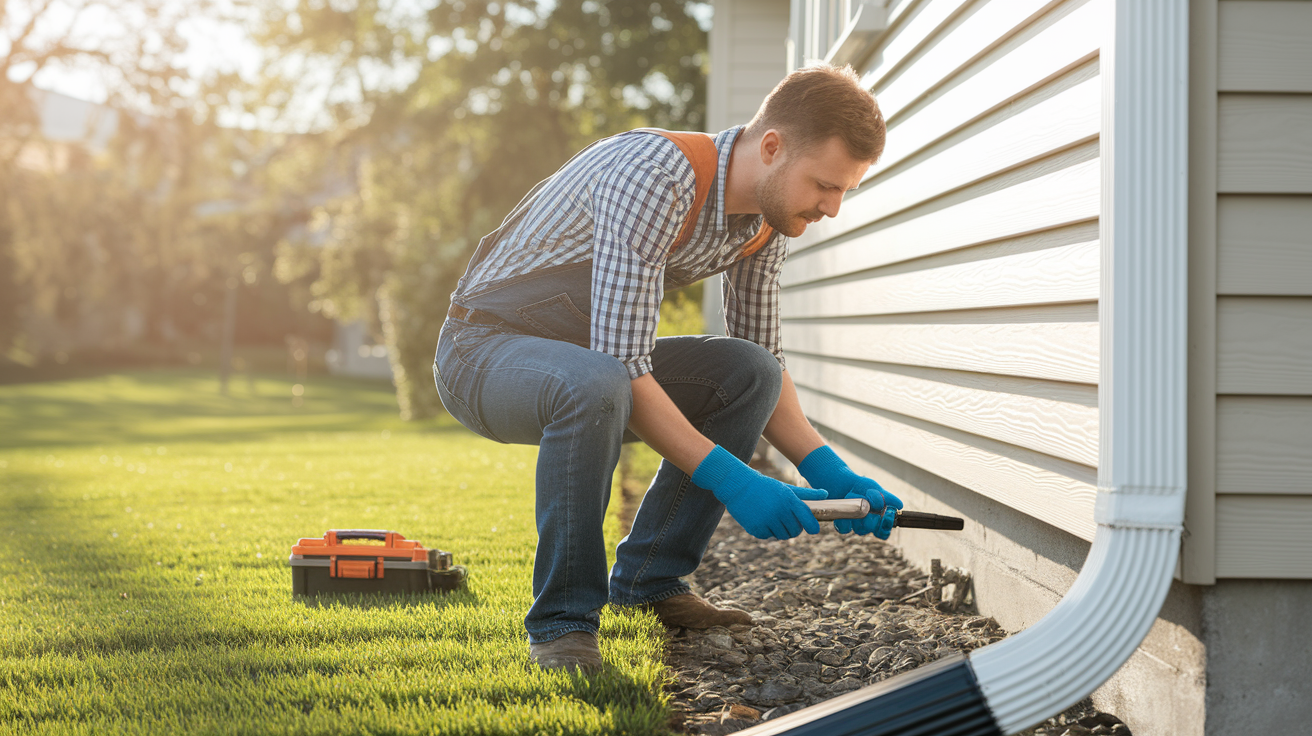
  • Check gutters, downspouts, and drainage areas for blockages or overflowing water.
  • Look inside for ceiling leaks, bulging walls, or stains that could signal water damage.
  • Assess exterior trim and vents to see if they are secure.
  • Examine decks, porches, or fences for stability and signs of wear.

Use what you find to plan any needed repairs. If you see serious damage, call a professional to help keep your home safe until full repairs can be made.

Storm Damage Cleanup Safety Guidelines

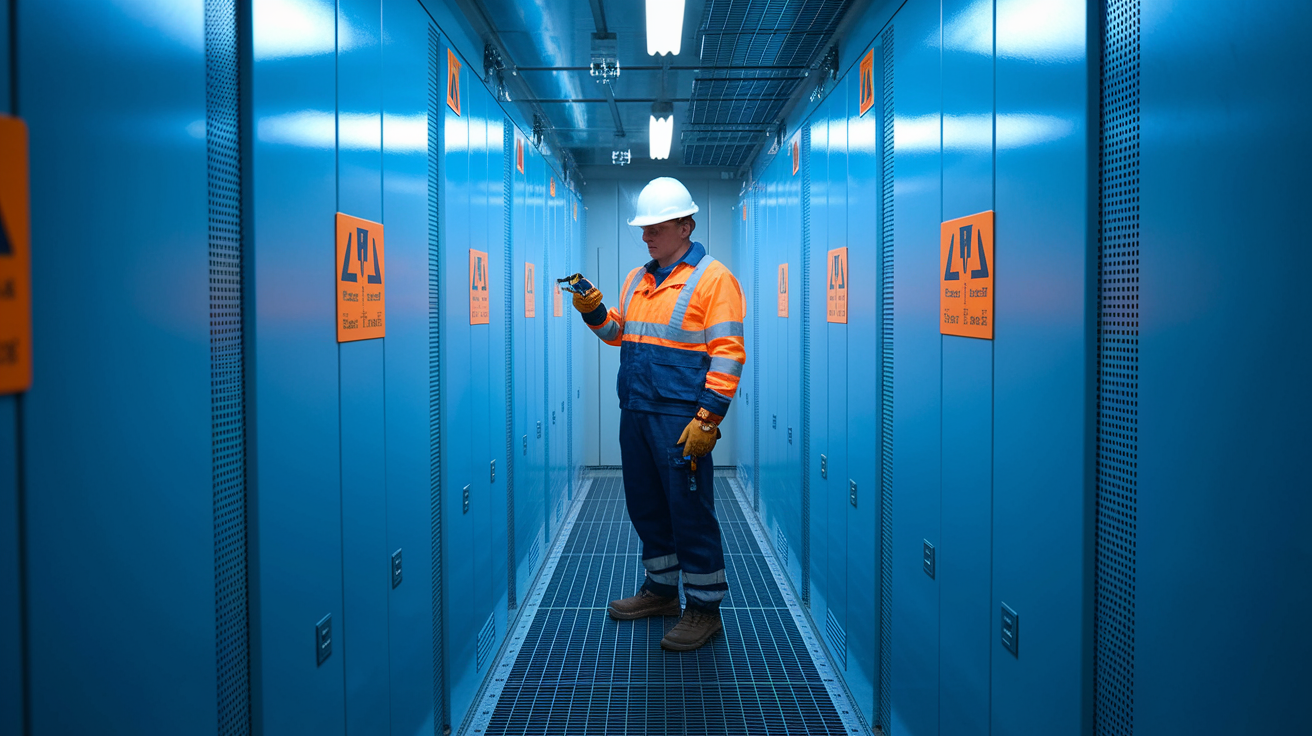
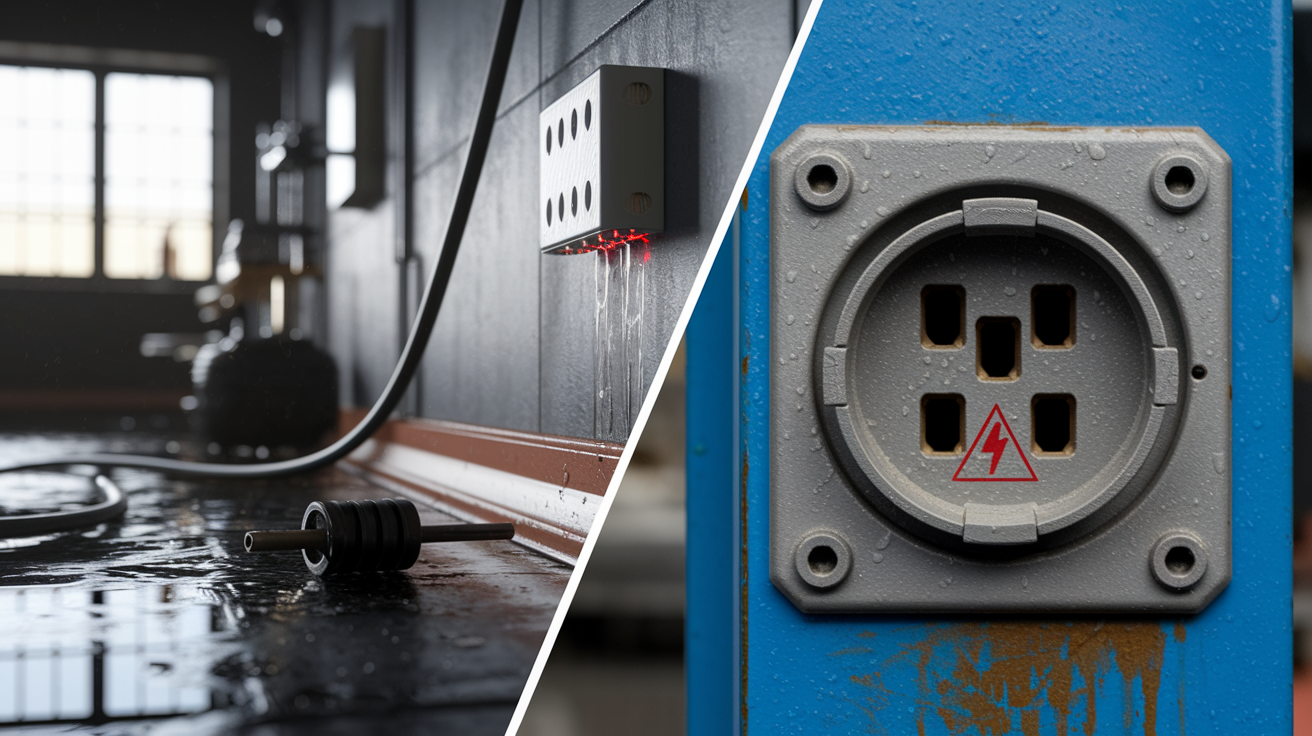
After a storm, please take a close look at your property. Watch out for hazards like fallen power lines, exposed wires, leaning branches, and unstable structures. Stay out of flooded areas until you are sure the power is off. Use caution tape or other physical barriers to mark these dangerous spots. This helps keep you, your loved ones, and our crew safe during cleanup.

Before beginning cleanup, put on proper protective gear. Wear hard hats, steel-toed boots, heavy-duty gloves, and eye protection. These items help protect you when you move debris or handle unstable materials. If you find new dangers, stop working immediately and call for professional help.

Storm Damage Debris Removal and Disposal Outline

img-2.jpg

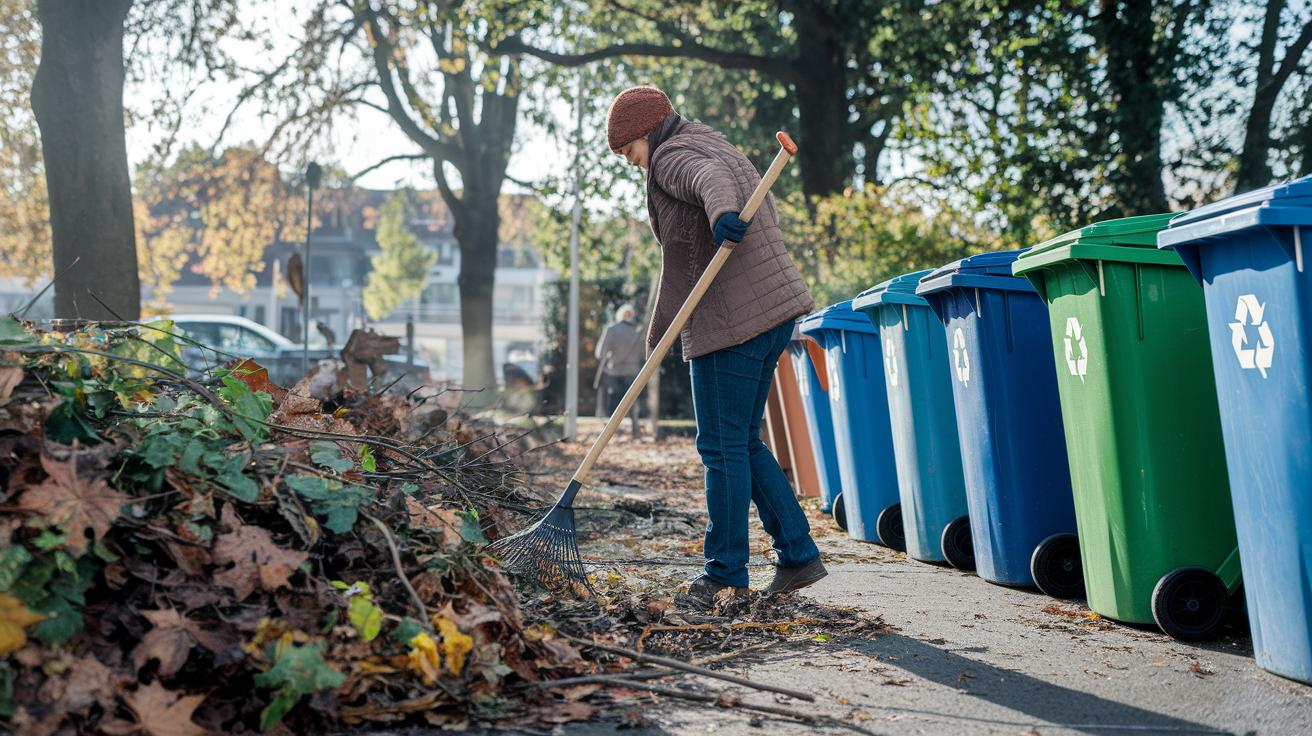
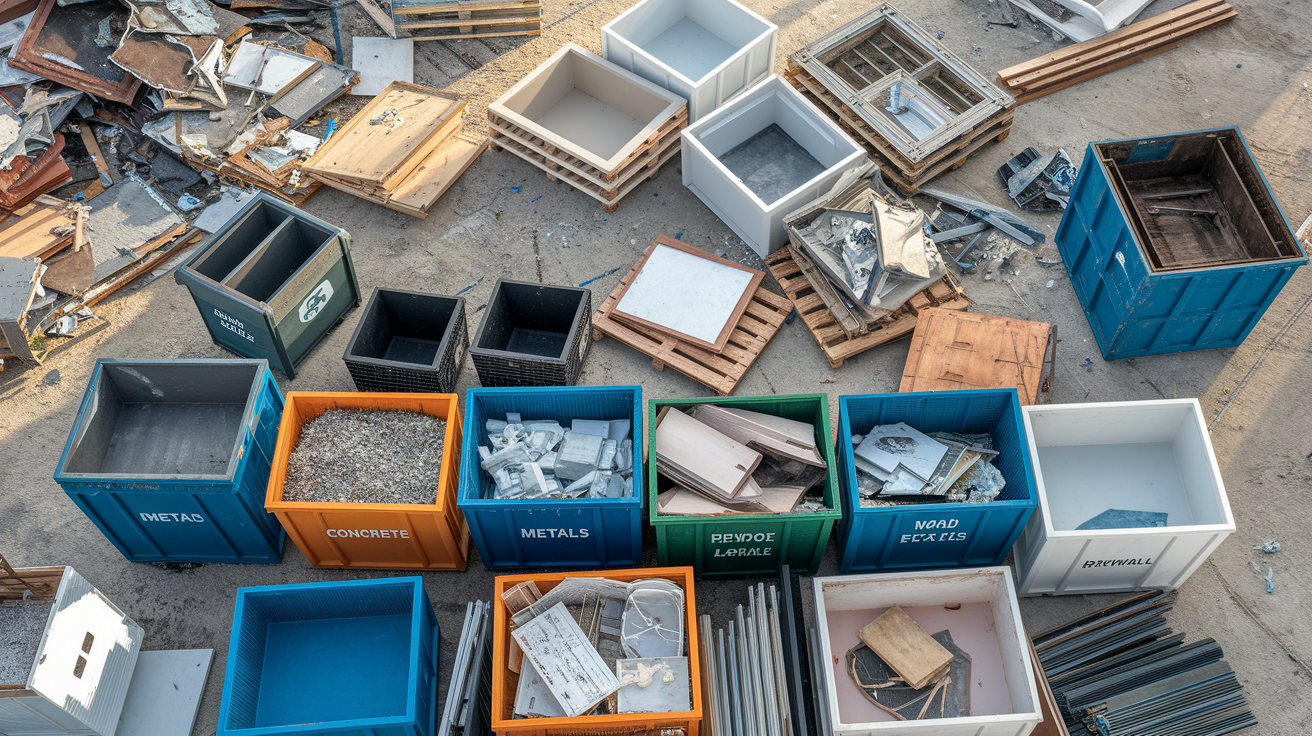
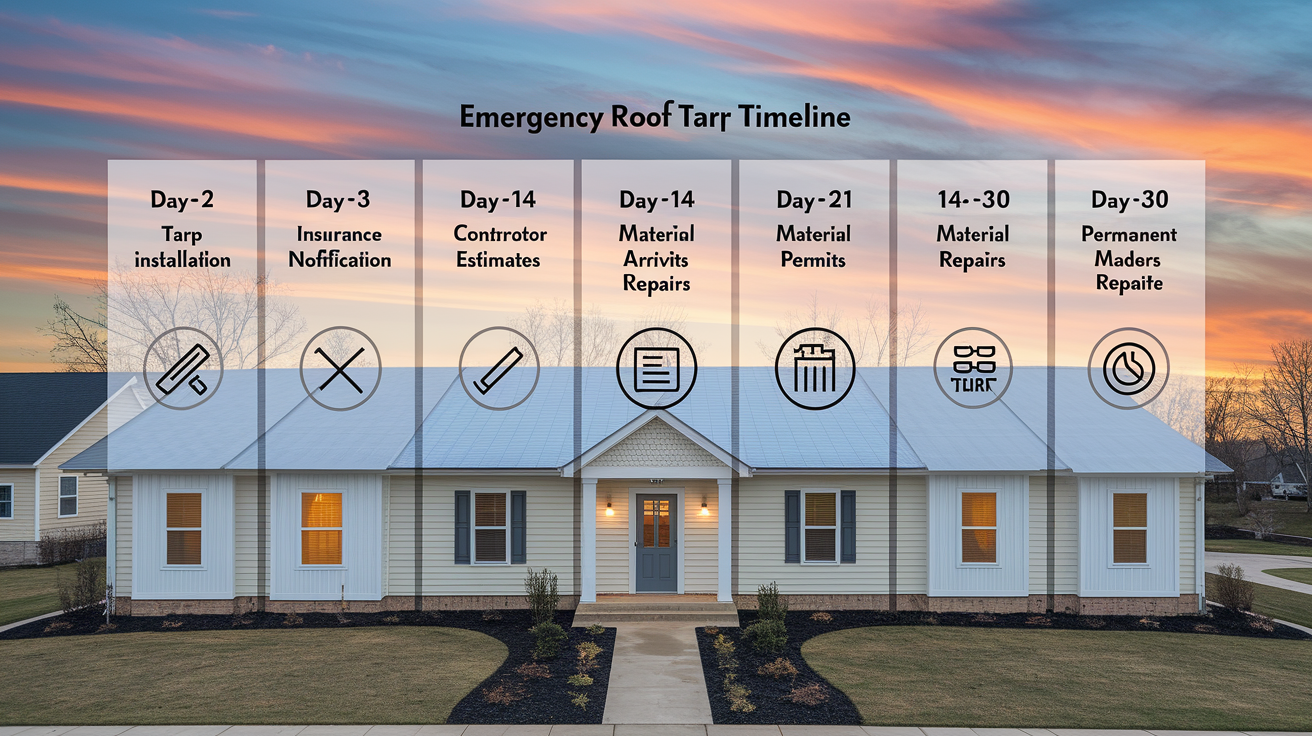
We begin by removing light debris like twigs, leaves, and small branches with rakes or leaf blowers. This clears your paths and removes trip hazards. It also helps you spot bigger damage. Sorting early lets you decide what can be reused, recycled, or properly thrown away according to local rules.

Next, we separate organic materials from construction scraps. Organic items, branches and leaves, can be chopped and turned into mulch or compost. Inorganic items, such as broken glass and damaged building parts, must be kept apart to avoid mixing contaminants. Any contaminated or diseased pieces should be bagged tightly to keep pests away and slow down decay. This careful sorting not only helps with disposal but can also reduce waste management costs by following your city’s guidelines.

Finally, we work with local waste services to handle debris correctly. Local rules often specify how to manage different types of debris, so it’s smart to call your local authorities for pickup times or drop-off spots. Marking off areas where debris is set out helps keep the site organized and speeds up cleanup, reducing the risk of more damage.

Storm Damage Water Infiltration Assessment and Extraction Techniques

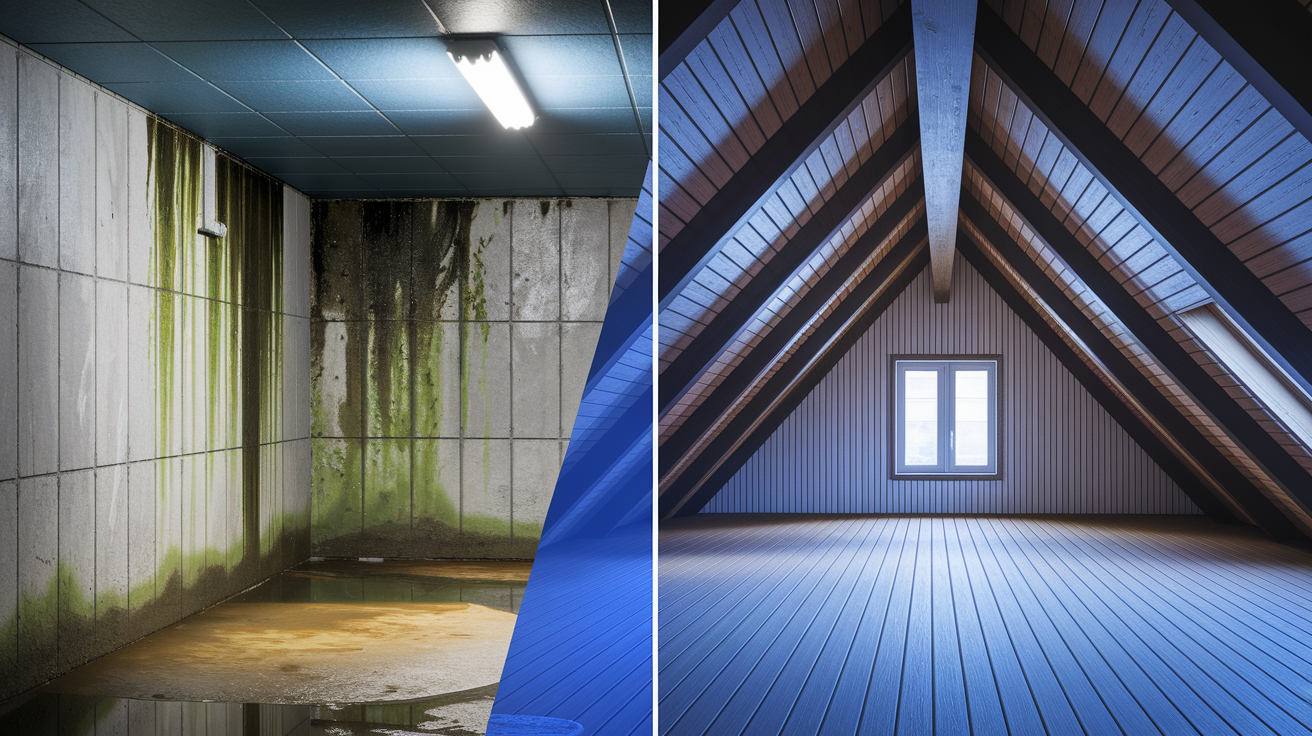
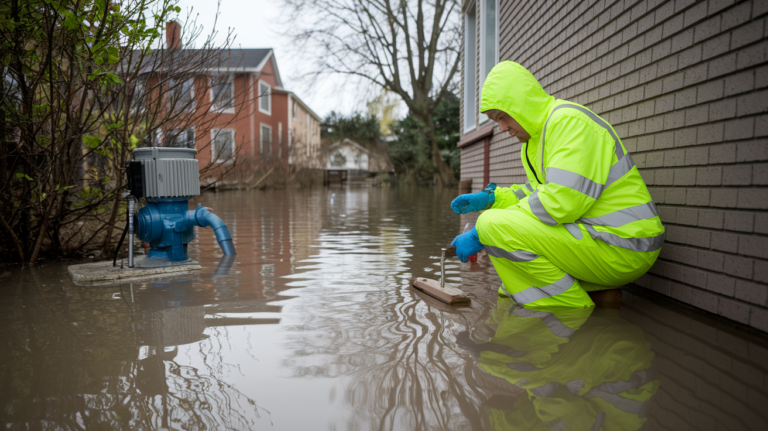
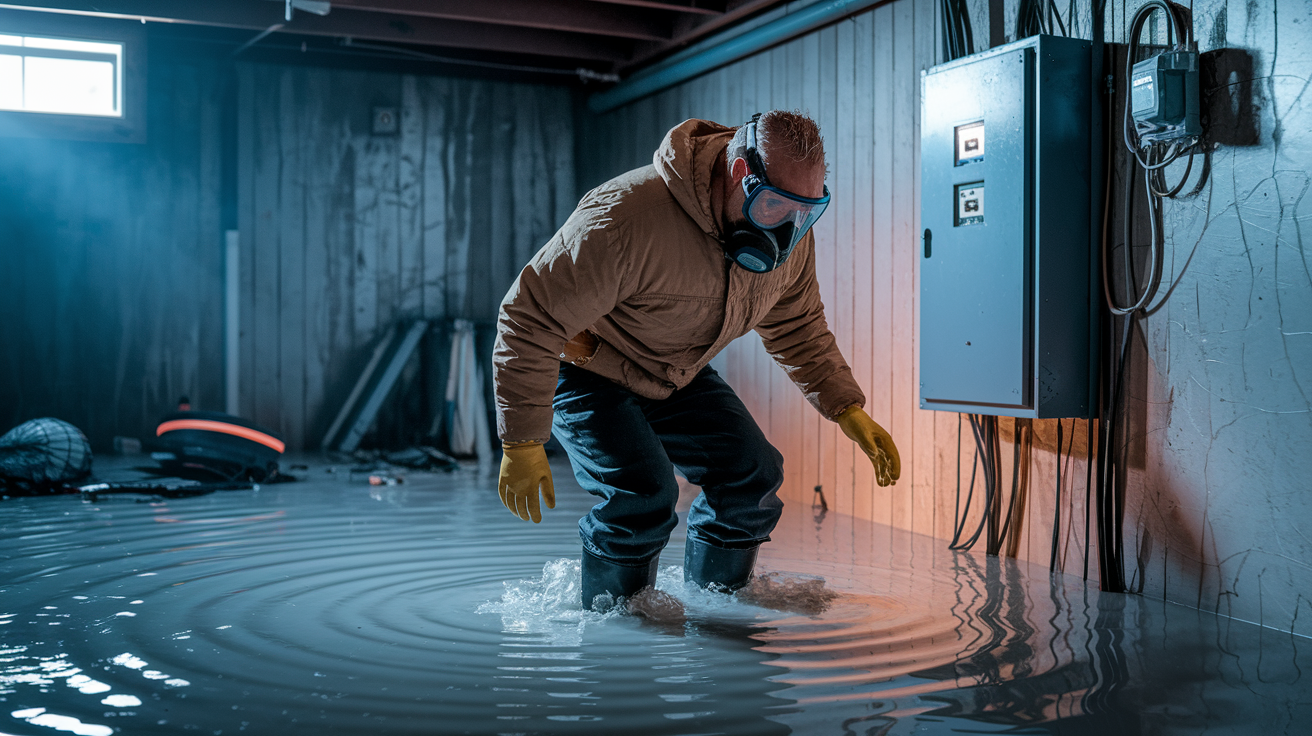
Hidden water damage may hide behind walls, under floors, or near your foundation. Look for signs like damp patches, wall discolorations, or soft spots on the floor. Finding these clues early lets you begin cleaning before issues like mold start. A careful check of all areas where water might have seeped in can protect your home and help lower repair costs.

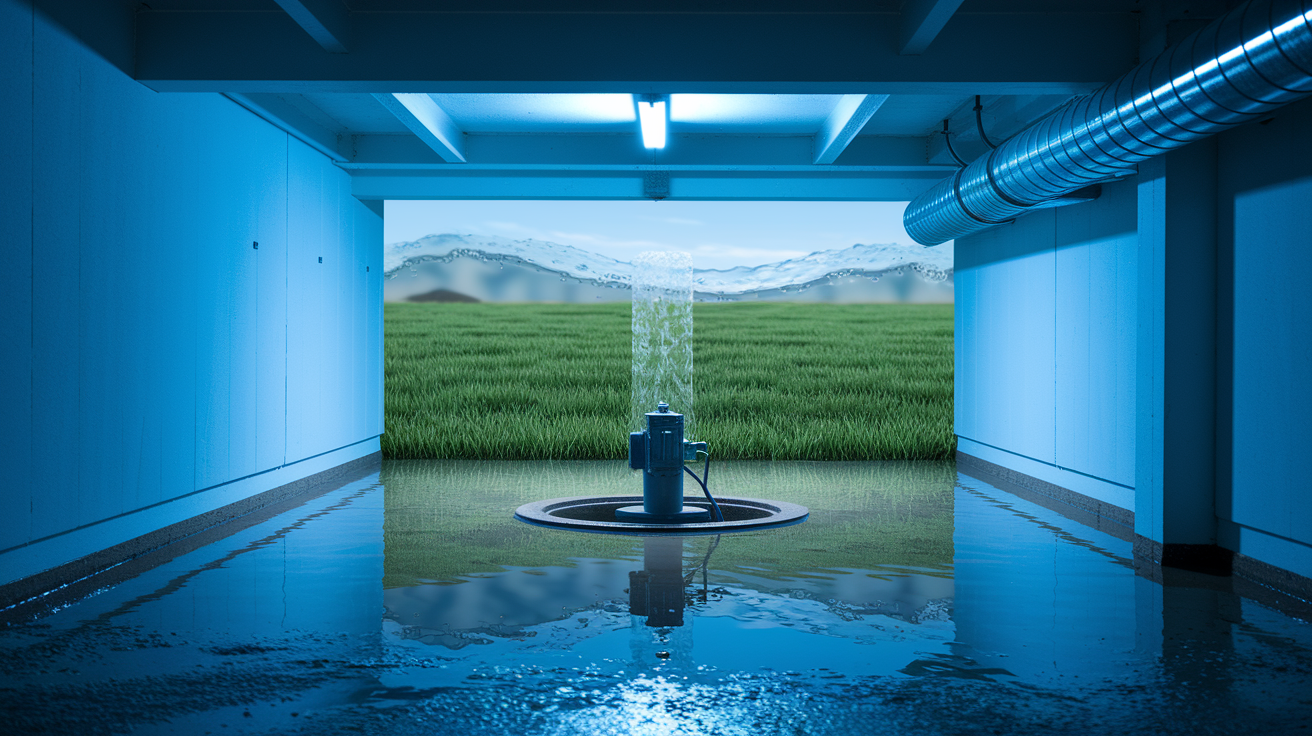
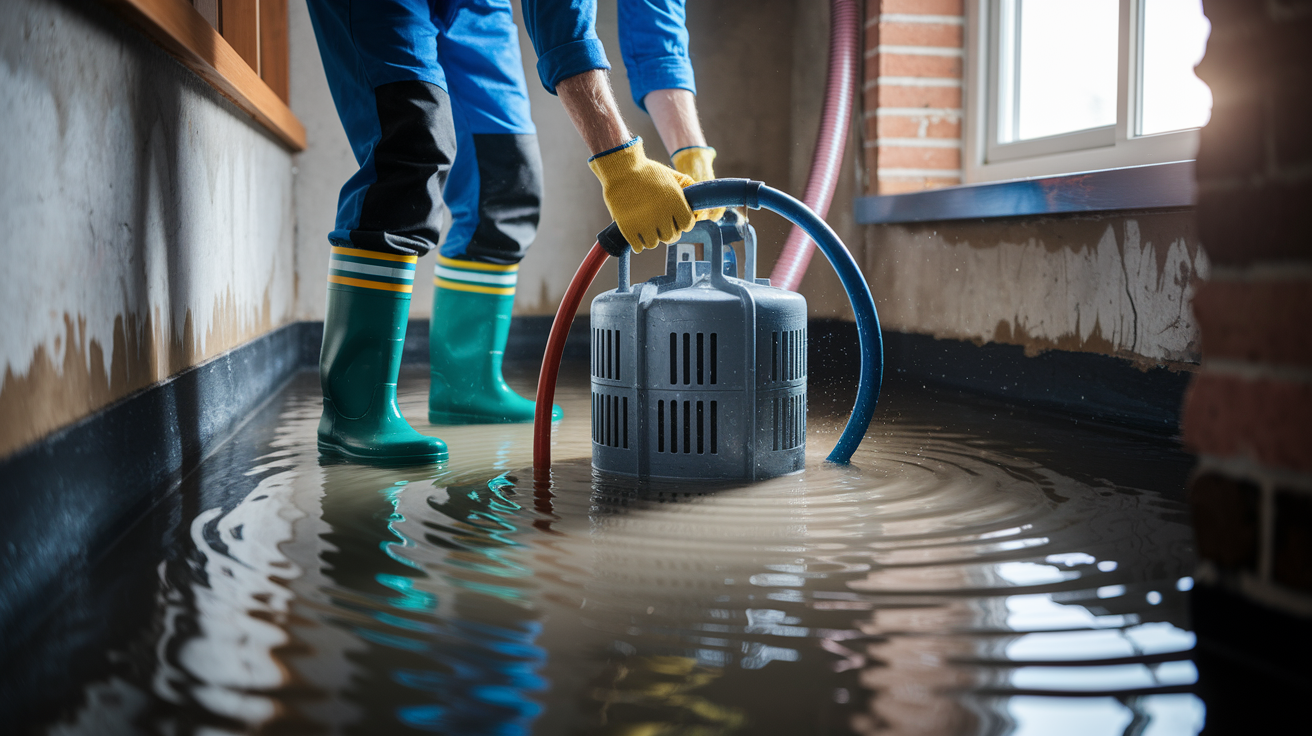
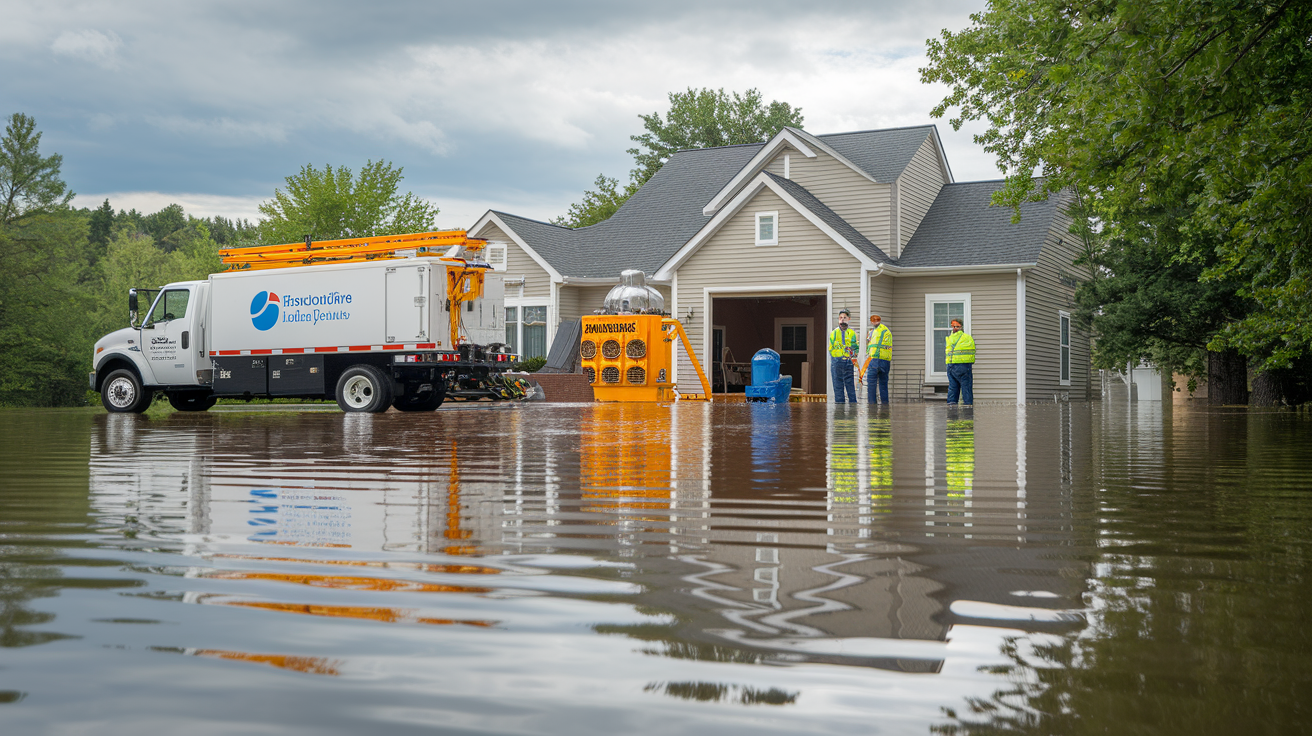
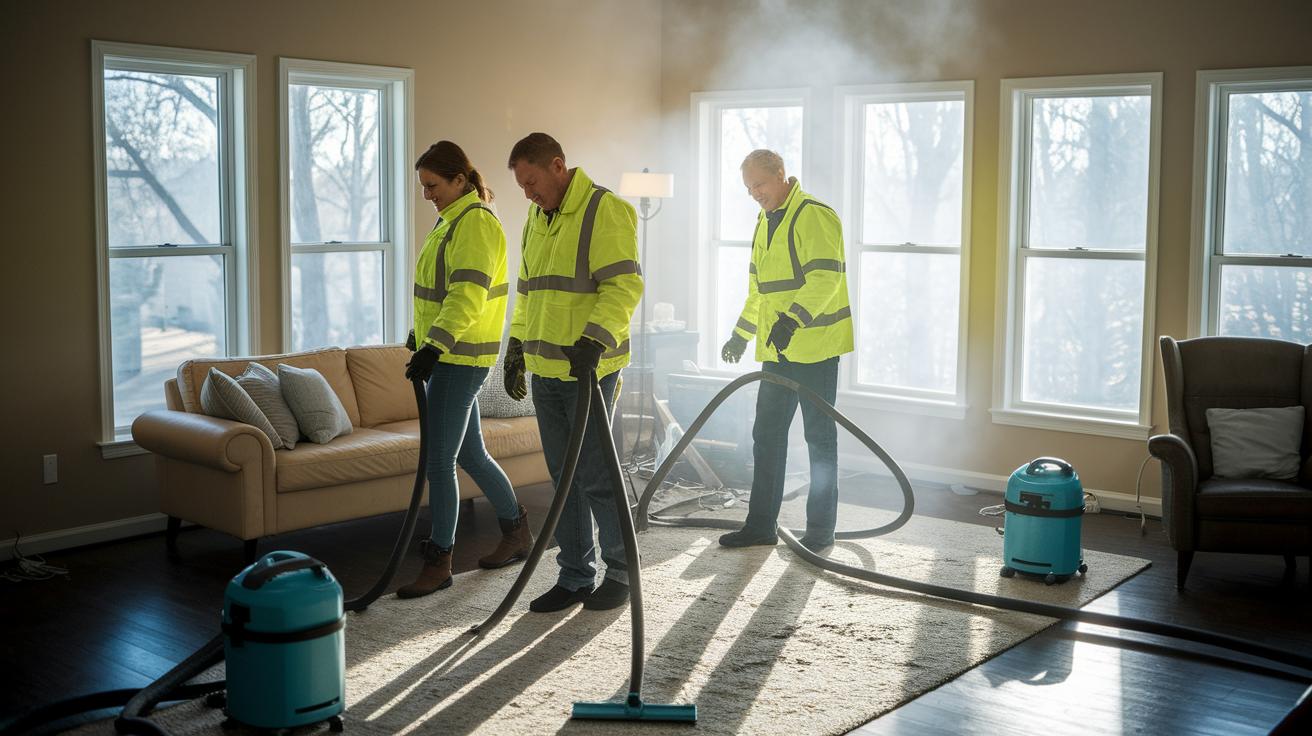
Once you spot water damage, it’s time to remove the water and dry things out. We suggest using tools like submersible pumps for heavy water, wet/dry vacuums for floors and tight corners, or portable extraction units for hard-to-reach damp spots. Setting up a drainage system inside your home can help keep extra water away. After the water is removed, turn on dehumidifiers (machines that pull moisture from the air) and air movers to reduce moisture quickly, ideally within 24 hours. For more details on these tools, check out water extraction near me.

Extraction Tool Primary Use
Submersible Pump Removes large amounts of water from flooded areas
Wet/Dry Vacuum Takes water from floors and tight spaces
Portable Extraction Unit Quickly clears standing water in hard-to-reach spots
Dehumidifier Reduces air moisture to speed up drying

Storm Damage Mold Prevention and Moisture Control Strategies

img-3.jpg

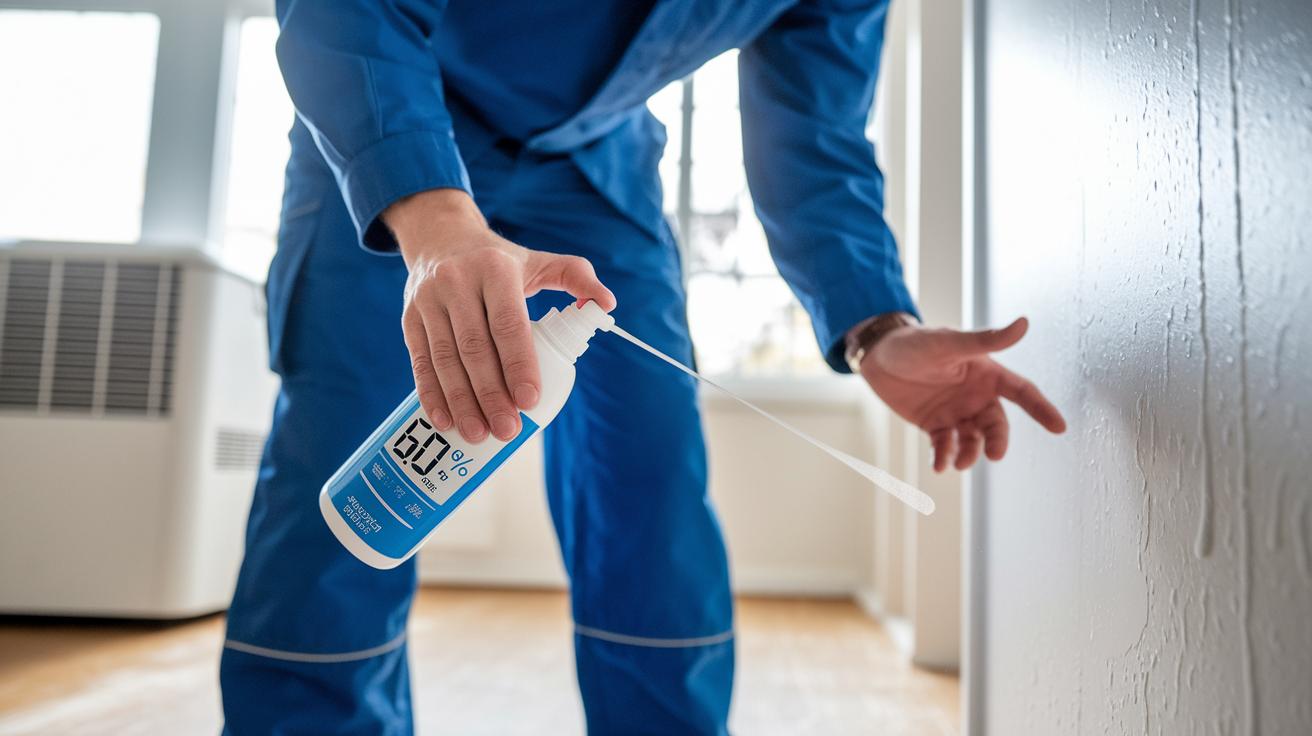
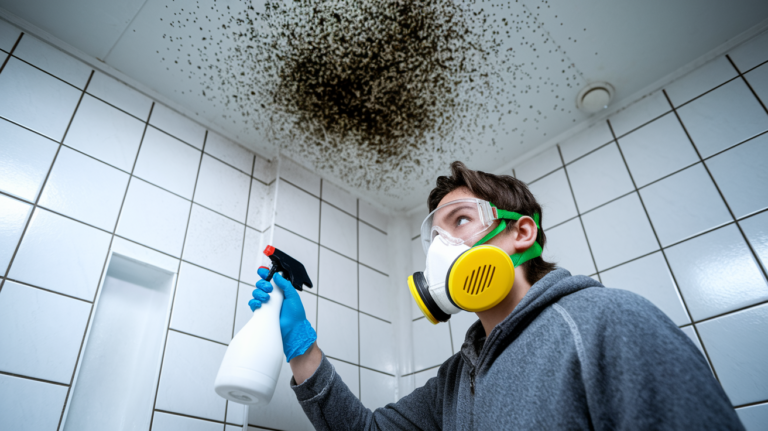
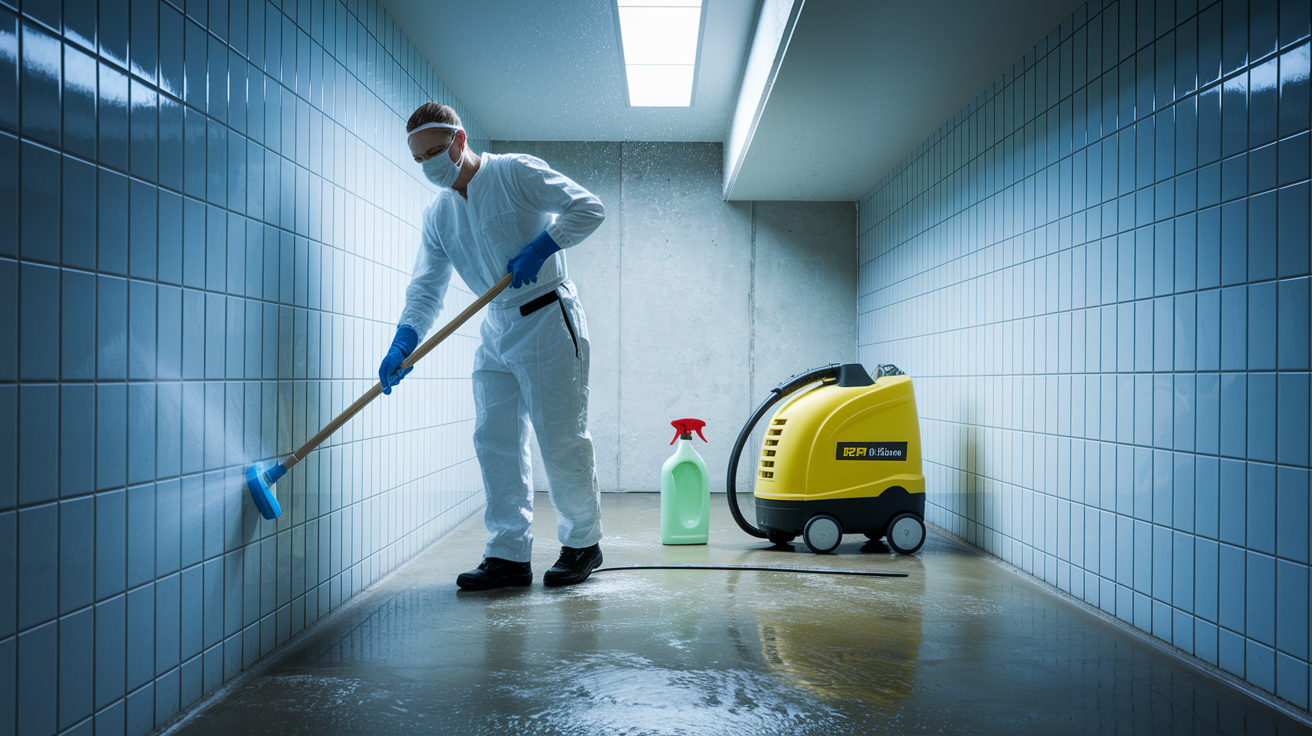
After we remove the water, we focus on stopping mold from growing. First, we treat wet surfaces with EPA-approved antimicrobials (germs-killing products) to lower the risk of mold spores taking hold. Then, we run dehumidifiers (machines that pull moisture from the air) and air movers to push out dampness until walls and floors have less than 15% moisture. This low moisture level makes it hard for mold to develop, which helps protect your indoor air quality.

We also work to keep the air dry. Our goal is to maintain humidity under 60%. We open windows or use fans to circulate air better. We check progress with moisture meters (tools that measure moisture) and adjust our methods as needed. These steps, combined with the antimicrobial treatment, work together to reduce mold risks and keep your home safe during the restoration process.

Storm Damage Insurance Documentation and Repair Scheduling Guide

After a storm, clear records help your insurance claim and repair work run smoothly. We know how stressful it is, so here’s a simple way to document the damage. Start with taking clear photos and making a list of every damaged item. This careful record-keeping supports your claim and helps guide the repair schedule.

  1. Take clear photos of every damaged area. Make sure each image has a time stamp.
  2. Write down a list of affected items, noting their condition and where they are located.
  3. Gather repair estimates and written quotes from different sources.
  4. Check the background of each contractor (look for reviews or ask for references).
  5. Review local permit rules and note any special guidelines.
  6. Keep a work log each day to record repair progress, any extra damage, or follow-up issues.

By following these steps, you create a strong record for insurance adjusters and repair teams. Working with trusted professionals ensures your documentation and repair scheduling meet both insurance and local requirements.

Storm Damage Final Inspection and Comprehensive Review Checklist

img-4.jpg

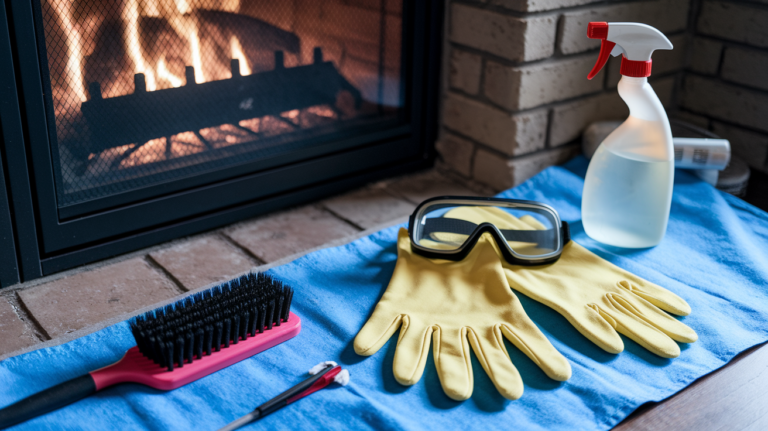
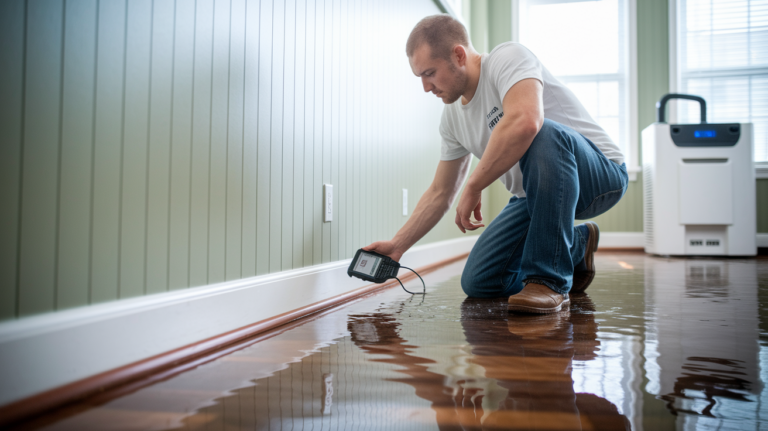
After we've finished all the repairs and cleanup, take one last walk around your property. Check that all the debris is gone, the water is fully removed, and the repairs meet your expectations. Look carefully at the roofs, walls, and trees to make sure nothing was missed. As you inspect, rate any issues on a scale from 1 to 5, with 5 meaning the damage is serious and needs more work. Use what you see to update your maintenance schedule and stay on top of any ongoing risks. Also, confirm that all professional services have completed their work and provided you with the final paperwork for your insurance records.

  • Ensure all debris is cleared
  • Confirm water removal and drying are complete
  • Check the quality of all repairs
  • Rate any remaining issues on a scale from 1 to 5
  • Update your maintenance and inspection records
  • Verify professional services have officially closed out
  • Identify and address any lingering hazards

Final Words

In the action, our guide walks you through a clear storm damage cleanup checklist. We cover safety measures, debris removal, water extraction, damage documentation, and final property checks to help you take swift, safe steps.

Each section lays out simple tasks to regain control after a disaster. Follow the checklist and work through each step, knowing that every action brings you closer to restoring your home and peace of mind.

FAQ

What steps are included in a typical storm damage cleanup checklist?

The storm damage cleanup checklist starts by evaluating hazards, documenting damage with photographs, removing light debris to create safe paths, and inspecting structural elements to plan further repairs.

What should I do during a post-storm property evaluation?

A post-storm property evaluation involves checking roofs, siding, window frames, and foundations for cracks or leaks. This early assessment helps you spot damage and plan necessary repairs.

How can I ensure safety during storm damage cleanup?

Ensuring safety means wearing protective gear like hard hats, work gloves, and steel-toed boots while checking for hazards such as fallen power lines and exposed wires before starting cleanup.

What is the proper procedure for debris removal and disposal?

Proper debris removal begins with collecting light debris like twigs and leaves, sorting waste per local guidelines, and safely disposing of larger or hazardous materials by coordinating with local waste management.

How do I assess and address water infiltration after a storm?

Assessing water infiltration means checking behind walls, under floors, and around the foundation. After identifying moisture, you can use pumps and dehumidifiers to extract water and control further damage.

How should I document storm damage for insurance claims?

Documenting storm damage involves taking clear, timestamped photos, making a detailed inventory of affected items, and gathering repair estimates. This organized record supports a strong insurance claim.

What should I check during a final inspection after cleanup and repairs?

A final inspection ensures that all debris, water, and structural issues are resolved. It includes a walkthrough to confirm cleanup, rate any remaining damage, and update maintenance schedules.

How to Clean Soot from Fireplace Safely at Home

0

That fireplace you’re staring at right now? The one with black film on the brick, cloudy glass doors, and soot dust settling on your mantel? You can clean it yourself in one afternoon without harsh chemicals or calling someone. Most homeowners think they need a pro, but soot removal is straightforward if you match the right cleaning method to your fireplace surfaces and follow a clear sequence. Here’s how to get your fireplace clean and safe without spreading soot through the rest of your house.

Preparation: Tools, Supplies, and Safety Essentials

0-ACj0l-QIGuZR_WBoefcA

Get everything ready before you start. If you don’t, you’ll end up walking through your house with soot on your hands, spreading the mess to rooms that were perfectly clean five minutes ago.

The fireplace needs to be completely cool. We’re talking 12 to 24 hours after your last fire. Touch a warm surface and you’ll release more soot into the air, making everything harder.

Here’s what soot actually is: acidic carbon residue that shows up as either an oily film or dry powder. When you breathe it in, those particles get into your bloodstream. That’s not being dramatic. The health risks include respiratory problems, heart disease, and cancer. Safety gear isn’t optional.

What You Actually Need:

Safety Stuff

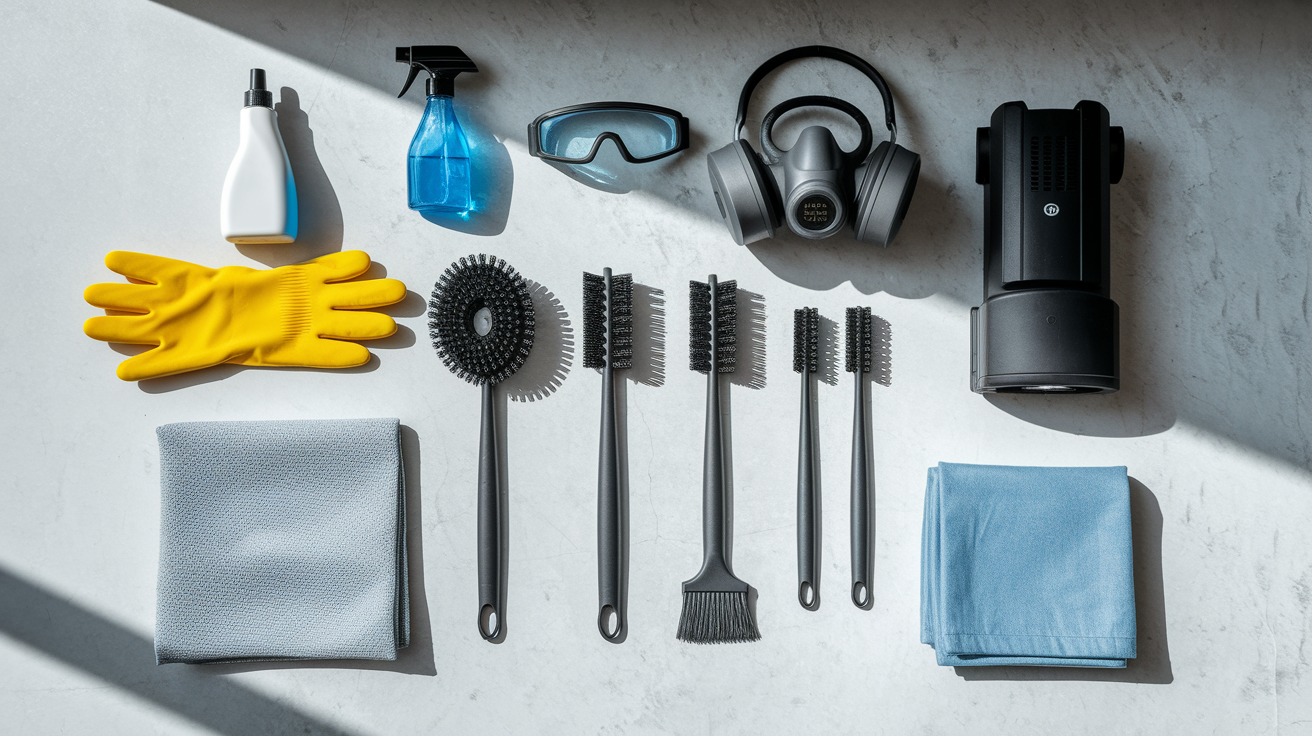
  • Heavy duty rubber gloves (soot is acidic, cleaning chemicals are harsh)
  • Safety glasses or goggles (debris falls, chemicals splash)
  • Face mask or respirator rated for fine particles, not one of those flimsy dust masks
  • Old long sleeved clothing you’re okay throwing away after
  • Open the damper fully before you start so fumes can escape
  • Open windows in the room for cross ventilation

Cleaning Tools

  • HEPA filter vacuum with brush attachment (regular vacuums just blow fine soot back into the air)
  • Scrub brushes in different sizes
  • Wire brush for heavy soot on masonry
  • Stiff bristle brush for general scrubbing
  • Several sponges
  • Spray bottles
  • Multiple buckets (one for solution, one for rinse water)
  • Heavy drop cloths
  • Kneeling pad or folded towel (your knees will thank you)
  • Optional: power drill brush attachments if you want to save your arms some work

Before You Touch Anything

  • Hold your hand near surfaces without actually touching to verify they’re cool
  • Don’t touch anything during your first look around. You’ll transfer soot to your clothes or skin.
  • Test any cleaning solution on a hidden spot first
  • Keep trisodium phosphate (TSP) away from your skin and eyes
  • Cover mantels and decorative stuff with plastic sheeting

One trip through your hallway with contaminated hands creates cleaning problems in rooms that have nothing to do with your fireplace.

Quick Overview: Matching Cleaning Methods to Your Fireplace Surfaces

k5M_I2YeT5ql_XTMUzoLkQ

The right method depends on what you’re cleaning and how bad the buildup is. Most complete fireplace cleaning takes 2 to 4 hours, depending on severity and which surfaces need attention.

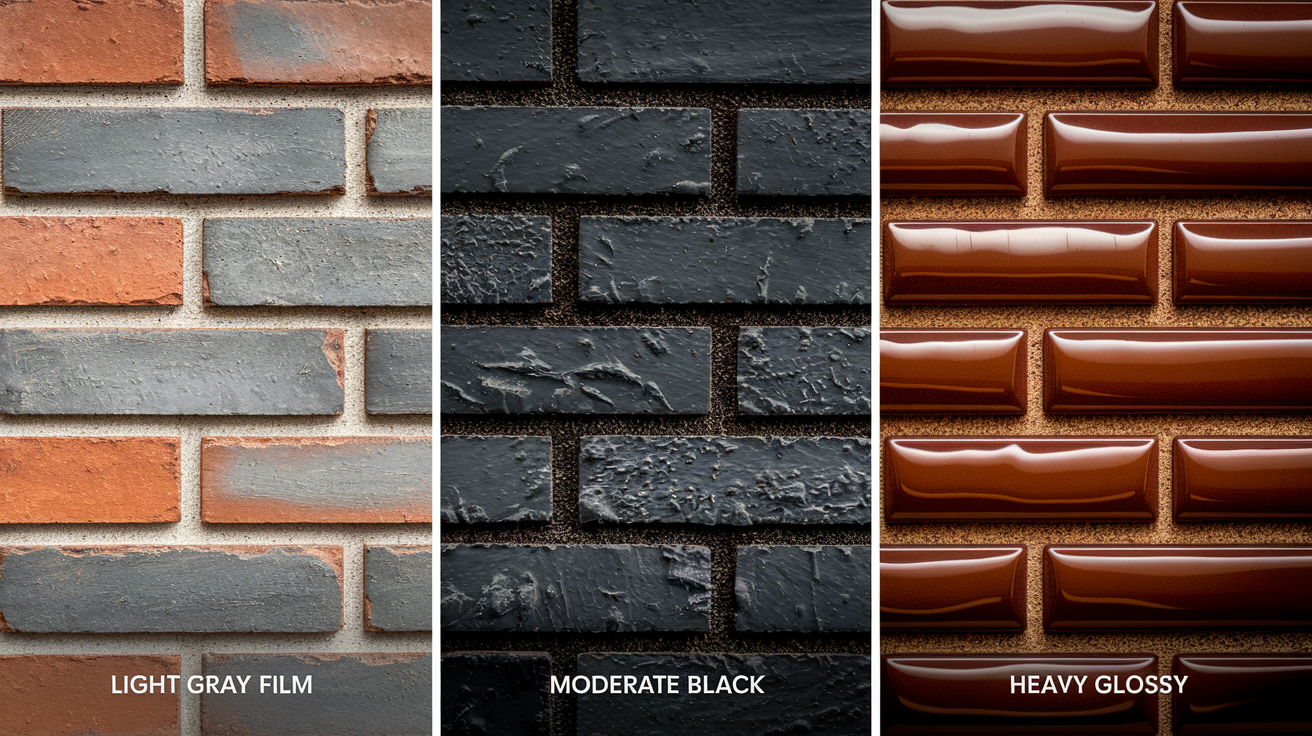
Surface Type Light Soot (thin gray film) Moderate Soot (visible black coating) Heavy Soot/Creosote (thick, glossy deposits)
Brick/Stone Masonry Vinegar solution + soft brush Salt soap cream or pumice ammonia mixture + stiff brush TSP solution + wire brush, or commercial brick cleaner
Glass Doors Vinegar water spray + microfiber cloth Baking soda paste + soft cloth Commercial glass cleaner + multiple applications
Metal Components Mild soap solution + soft cloth, dry immediately Dish soap + gentle scrubbing, thorough drying Degreaser + careful application, inspect for finish damage
Painted Surfaces Damp cloth with mild soap only Gentle soap solution, test first for paint damage Professional assessment recommended to avoid stripping paint

Detailed instructions for each surface type are in the sections below. Figure out how bad your soot is and what materials you’re working with, then jump to whichever sections apply.

Step by Step: Cleaning Soot from Brick and Stone Masonry

7pBcHMZFQvmdkUtnxct1Sw

Porous masonry absorbs soot differently than glass or metal. Those tiny holes in brick and stone pull soot particles deep into the material. That’s why you need solution strength and waiting time that matches how far the soot penetrated. Start gentle, go stronger if you need to.

How to Clean Brick and Stone:

  1. Remove all cooled ash with a HEPA filter vacuum (fine particles will float back onto surfaces you just cleaned otherwise)
  2. Sweep the firebox to clear loose debris that’ll turn into mud when it meets cleaning solution
  3. Pick your cleaning solution based on how bad the buildup is (see options below)
  4. Apply solution generously from top to bottom so gravity works with you
  5. Let it sit. 5 minutes for light solutions, 15 to 20 minutes for TSP. The chemical needs time to break down the soot before you start scrubbing.
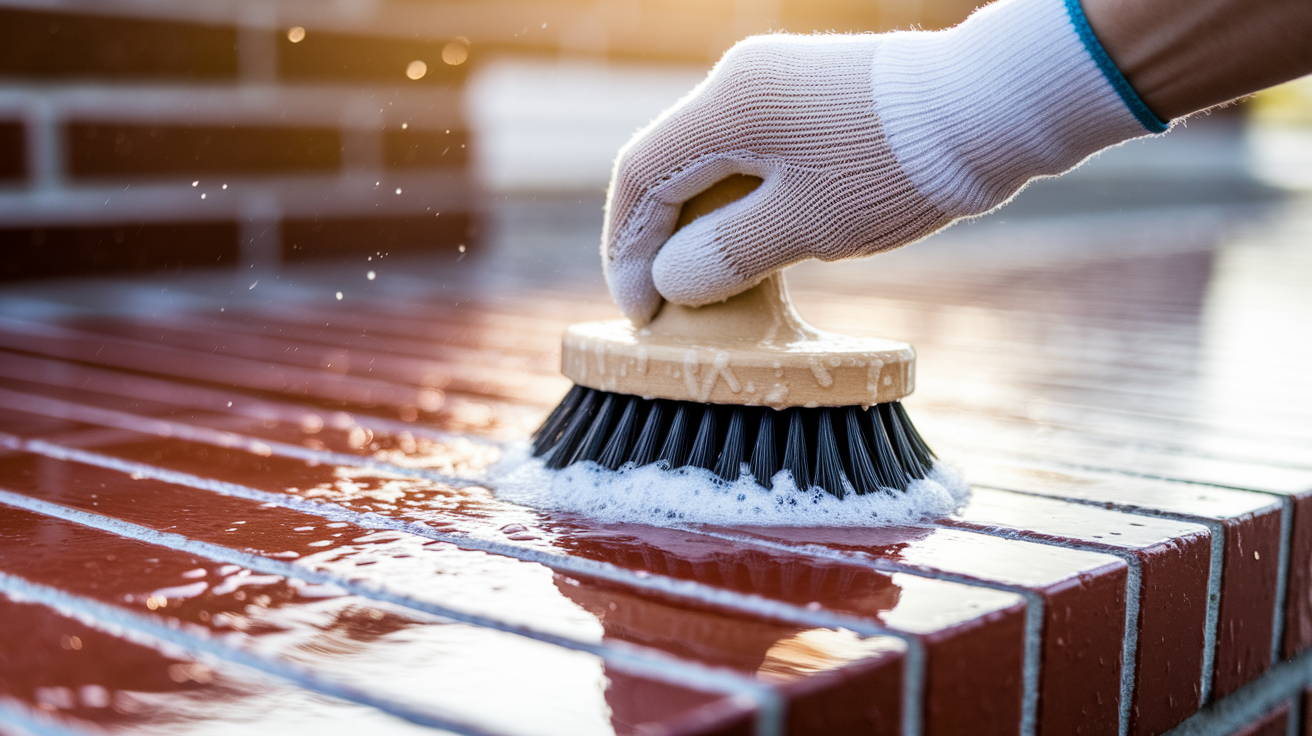
  6. Scrub in circles with a stiff brush, working top to bottom so you don’t re soil areas you already cleaned
  7. Pay attention to mortar joints with a smaller brush or toothbrush (soot collects in those recessed spots)
  8. Rinse thoroughly with clean water and a fresh sponge, changing the rinse water when it turns black
  9. Do at least two complete rinse cycles to get all the cleaning solution residue out
  10. Let the masonry air dry completely (this can take several hours for porous surfaces)
  11. Check for stubborn spots and repeat treatment on those specific areas if needed

Light Soot Solutions

For thin gray film or recent light buildup, try dish soap and warm water at a 1:10 ratio first. This handles surface level soot that hasn’t gone deep yet.

White vinegar solution using equal parts vinegar and water cuts through the oily part of soot. A spray bottle gives you even coverage.

Baking soda paste (three parts baking soda to one part water) works for spot treatment on tough areas that don’t respond to the general solution.

Moderate Buildup Solutions

Salt soap cream combines 1 ounce table salt with 1 ounce soap and just enough water to make it creamy. Rub it onto stains with a cloth, wait at least 10 minutes, then scrub with a stiff brush. The salt is a mild abrasive while the soap breaks down the oily film.

The pumice ammonia combination mixes detergent or soap with pumice powder, hot water, and a small amount of ammonia into a thick mixture. Apply it and let it dry completely. The drying process pulls soot out of the pores. Once it’s dry, scrub it off with a stiff brush. This takes more waiting but less scrubbing effort.

Heavy Deposits Solutions

TSP (trisodium phosphate) uses 1/4 to 1/2 cup per 2 gallons of water. Wear gloves and goggles. TSP burns skin and eyes on contact. The alkaline nature breaks down acidic soot effectively, so you need less scrubbing force because the chemical does most of the work.

Commercial alternatives include Krud Kutter, Brick Anew, and specialized brick and stone cleaners at hardware stores. You’ll pay more but you don’t have to handle TSP powder. Follow the manufacturer’s directions exactly for dilution and timing.

Stubborn stains that won’t budge after your first try often need a pumice stone for spot treatment. Rub gently in circles on specific discolored areas. Deep soot penetration into porous surfaces may need two or three applications of your chosen solution, letting each treatment penetrate before you scrub. Use a toothbrush for grout lines and mortar joints where bigger brushes can’t reach.

Step by Step: Cleaning Soot from Glass Fireplace Doors

MyY4vvMGTSaYbBkU4D_-Ow

Clean glass doors after you finish the brick interior, not before. Dripping solution from overhead brickwork will re soil glass you already cleaned, making you do it twice.

How to Clean Glass Doors:

  1. Remove loose ash from the glass with a dry cloth, wiping gently so you don’t smear the ash into a film
  2. Spray generously with vinegar solution (equal parts white vinegar and water) or commercial glass cleaner made for fireplaces
  3. Let it sit 2 to 3 minutes to break down the oily soot film that makes glass cloudy
  4. Wipe with a damp cloth in circles, starting at the top and working down
  5. For stubborn spots, make baking soda paste (3 parts baking soda to 1 part water) and gently rub with a soft cloth
  6. Buff dry with crumpled newspaper or a dry microfiber cloth for no streaks (newspaper works better than paper towels here)
  7. Check for missed spots by looking at the glass from different angles in good light, then repeat on any problem areas

Really heavy buildup may need three or four treatments before the glass becomes completely clear. The key is letting each application break down the soot before you wipe.

Don’t use abrasive scrubbers, steel wool, or razor blades on fireplace glass. These cause permanent scratching that ruins the glass and creates rough surfaces where future soot sticks faster.

Step by Step: Cleaning Soot from Metal Fireplace Components

jcDJ-yX3RTCoCcCPvRJmrg

Figure out what kind of metal finish you’re dealing with. Painted metal, polished brass or chrome, and raw iron or steel each need different treatment to avoid damage.

How to Clean Metal Surfaces:

  1. Identify the finish type and whether components come off or are permanently attached
  2. For removable non electrical metal parts (andirons, grates, tool sets), take them outside and spray with a garden hose to remove loose soot before detailed cleaning
  3. For attached metal surfaces, wipe with a barely damp cloth to remove loose particles without spreading soot around
  4. Apply mild dish soap solution (a few drops in warm water) with a soft sponge in gentle circles
  5. Skip abrasive scrubbers that scratch decorative finishes and create dull spots on polished surfaces
  6. Dry immediately and thoroughly with a soft cloth to prevent rust, especially critical on raw iron or steel that oxidizes fast when moisture sits on the surface

Painted metal needs extra care to avoid chipping or stripping the finish. Test your cleaning solution on a hidden spot first, and use the minimum scrubbing pressure needed.

Polished metals like brass, chrome, or nickel plated components may need specific metal polish after cleaning to restore shine. Soot creates a tarnish like effect that dulls reflective surfaces even after the black residue is gone.

Any metal showing rust spots after cleaning needs immediate attention with appropriate rust treatment before the next fire. Rust spreads quickly once it starts, and heat from fires speeds up the corrosion process.

Addressing Heavy Creosote and Stubborn Soot Stains

hd1SsQR-T5q3YX00-GS-ng

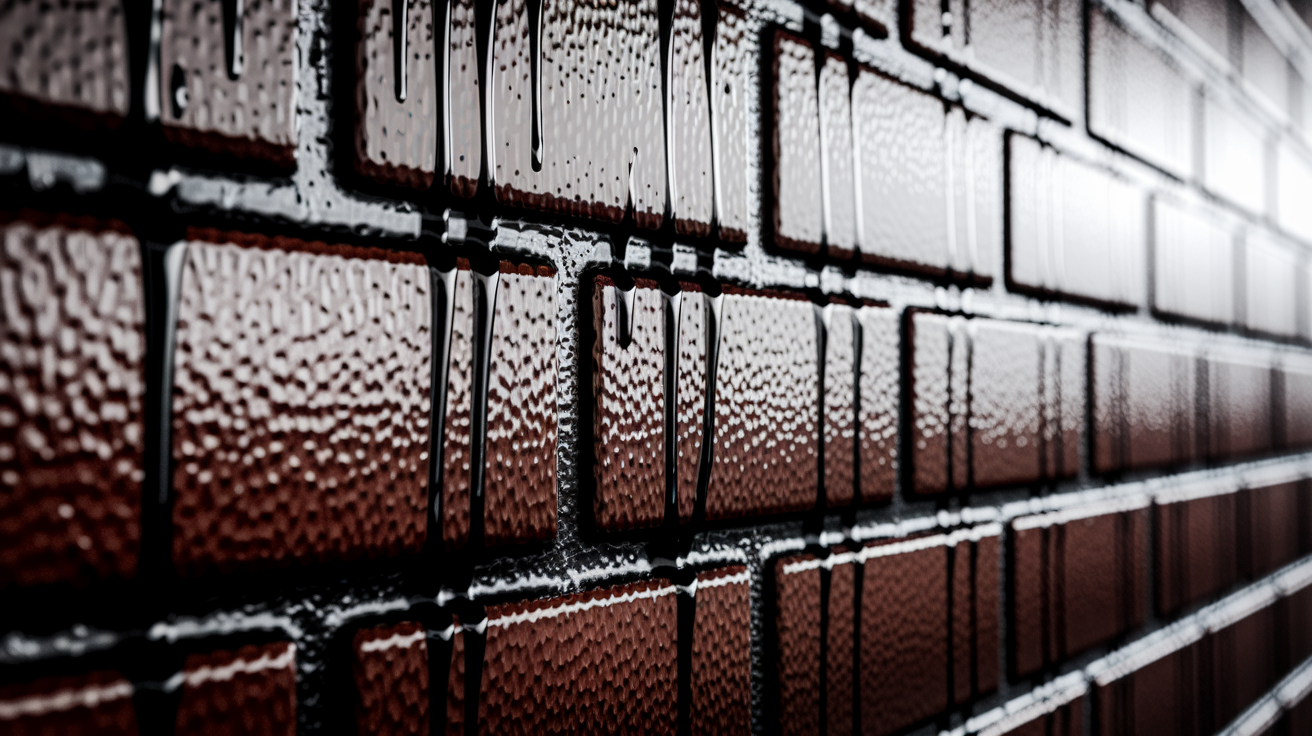
Surface soot appears as dry, powdery gray or black film that wipes away with moderate effort. Deep creosote staining shows up as shiny, glazed, tar like texture that feels sticky or hard when you touch it. These are fundamentally different problems.

Creosote buildup over 1/8 inch thick or Stage 3 creosote (glossy black coating that looks almost like thick paint) requires a professional chimney sweep. This stuff is extremely flammable. It can ignite from a single spark and cause a chimney fire that spreads to your home’s structure. Don’t try DIY removal when you see thick, shiny deposits. Call a professional, since the fire hazards from excessive creosote and what happens if you neglect cleaning create serious risks.

For heavy buildup that’s still in DIY range, TSP with extended waiting time works well. Mix your solution and apply it, then wait 15 to 20 minutes before scrubbing. Let the chemical do most of the work. Use a wire brush with firm pressure and work in small sections. Heavy soot often needs two or three treatment cycles on the same area, with fresh solution each time. Soot eraser products at hardware stores give you an option between soap and water alone and full TSP treatment.

The extreme case naptha soap formula is your final DIY option before calling pros. Shave a bar of naptha soap into a pot with 3 quarts of water and boil until the soap melts completely. Let it cool to room temperature, then add 1 pound of pumice powder and 1 cup of ammonia. Apply this thick mixture to stains and leave it for at least 1 hour (some people leave it 2 to 3 hours for severe staining). Scrub with a stiff bristle brush afterward. This formula is intensive but effective on soot that penetrated deeply into unsealed masonry over multiple burning seasons.

Sometimes staining becomes permanent despite aggressive cleaning when soot penetrated so deeply that no surface treatment can reach it. At that point, your options include painting with heat resistant masonry paint formulated for fireplace interiors or professional sandblasting that removes the top layer of brick surface. Neither is ideal, but both beat living with heavy black staining.

Cleaning the Hearth and Protecting Surrounding Areas

jp1kqdvdQkO2qVb5UmO16g

Preventing soot transfer to surrounding surfaces starts before you touch the fireplace. Drop cloth placement matters because cleaning solution and loosened soot will drip downward throughout the process. One missed spot means black stains on flooring or carpet.

Hearth cleaning depends on the material. Tile or stone hearths can use the same solutions as the fireplace interior brick, so you’re just extending your work area. Sealed wood hearths need wood safe cleaners only. Never vinegar, which stains and damages wood by breaking down the finish and darkening the grain. Painted surfaces need a gentler approach with mild soap solution to avoid stripping or damaging the finish. All hearth cleaning should be done barely damp rather than soaking wet, since excess moisture seeps into seams and creates water damage to underlying structures that you won’t notice until problems show up weeks later.

Protecting and cleaning adjacent areas prevents soot from settling onto surfaces you use daily. Vacuum upholstery and curtains near the fireplace with a HEPA filter attachment before you start scrubbing. The agitation releases soot particles into the air that settle on fabric. Wipe down mantels and decorative trim with a barely damp cloth to remove settled soot dust. Address any cleaning solution overspray on walls or floors immediately before it dries. Dried solution leaves white residue that’s harder to remove than the original soot. Use multiple drop cloths in overlapping layers extending at least 4 feet out from the fireplace opening to catch drips during your top down scrubbing.

Check surrounding areas after you finish the main work. Look for soot footprints on floors, solution drips on walls, or dust on nearby furniture. These problems are easy to fix right away but become permanent stains if you ignore them.

Maintenance Schedule to Minimize Future Soot Buildup

uzyrxjPHTGOfjDlmdwFvGQ

Prevention and regular light cleaning take way less time and effort than intensive deep cleaning of heavy buildup. A quick 15 minute session after every 5 to 6 fires prevents hours of heavy scrubbing later.

Prevention by Category:

Proper Burning

  • Burn only seasoned hardwood with moisture content below 20% (wet wood creates excessive smoke and soot)
  • Make sure the damper is fully open before lighting fires so smoke exits through the chimney instead of depositing in the firebox
  • Avoid smoldering fires that produce excess smoke. Maintain active flames with adequate air supply.
  • Crack a window if fires consistently smoke
  • Use glass doors to contain smoke when the fire is dying down and producing more soot than flames

Regular Cleaning

  • Remove ash when it reaches 1 inch depth to prevent it from absorbing moisture and creating paste that’s harder to clean
  • Light cleaning after every 5 to 6 fires prevents soot from penetrating into porous surfaces before it sets deeply
  • Wipe glass doors weekly during burning season with vinegar solution to prevent buildup you can’t see through

Professional Maintenance

  • Schedule annual professional chimney inspections even if you do your own firebox cleaning
  • Get the chimney swept when creosote reaches 1/8 inch thickness anywhere in the system

A seasonal routine creates a predictable schedule. Light cleaning in spring after burning season ends removes accumulated residue before summer humidity causes it to set into brick pores. Assessment and any needed deep cleaning in early fall before burning season begins means you’re starting with a clean system. Monthly ash removal and glass cleaning during active winter burning months prevents excessive buildup between seasonal deep cleaning sessions.

Consistent light maintenance prevents soot from penetrating deeply into brick and masonry pores. When soot sits only on the surface, each cleaning session takes 20 to 30 minutes instead of 3 to 4 hours, and you need only mild soap instead of aggressive chemicals.

When Professional Chimney Cleaning Becomes Necessary

Q2tHXlCkR4uvPOqPKr_Y_Q

DIY cleaning addresses visible firebox surfaces but can’t reach critical chimney areas including the flue, smoke chamber, and chimney cap. These areas accumulate dangerous creosote you can’t see or access from inside your home, even with the best tools and effort.

Signs You Need a Professional Chimney Sweep:

  • Creosote buildup exceeding 1/8 inch thickness anywhere in the system (check by looking up into the flue with a flashlight)
  • Glazed shiny or tar like creosote deposits indicating Stage 3 buildup that’s highly flammable and can’t be safely removed with household methods
  • Chimney hasn’t been professionally inspected in over a year, regardless of how much you use the fireplace
  • Visible damage to chimney liner or masonry structure (cracks, missing mortar, loose bricks)
  • Persistent smoke entering the room during fires despite having the damper fully open (indicates blockage or draft problems)
  • Strong creosote or smoke odor even when the fireplace isn’t in use (suggests heavy buildup in the flue)
  • You’re uncertain about chimney structural condition or safety after buying a home or before resuming use after years of inactivity
  • You’re planning to use a fireplace that’s been inactive for multiple years (animals may have nested in the flue)

Professionals have specialized equipment homeowners don’t: rotary brushes on flexible rods that clean the entire flue length, industrial vacuums that capture all debris without releasing it into your home, and inspection cameras that identify structural issues like cracked liners or damaged mortar during the cleaning process. They can remove dangerous creosote levels that pose immediate fire risk, and they’re trained to spot problems that aren’t obvious when you’re looking at a brick firebox.

Typical professional service costs range $150 to $300 for standard cleaning and inspection, though prices increase for severe creosote problems or needed repairs. Best timing is late summer or early fall before burning season starts, when chimney sweeps aren’t yet overwhelmed with emergency calls from people who waited until the first cold day. Professional cleaning doesn’t eliminate the need for you to maintain visible firebox areas between annual services. You still need to remove ash regularly and wipe down surfaces after heavy use.

Final Words

Keeping your fireplace clean protects your home and makes the space safer for your family.

Start with the right safety gear and cleaning solution for your specific surface type. Work top to bottom. Scrub stubborn areas with the appropriate brush strength. Rinse thoroughly.

Light maintenance after every few fires prevents heavy buildup that requires hours of intensive scrubbing. When you learn how to clean soot from fireplace surfaces correctly, each cleaning session gets faster and easier.

If you see thick glazed creosote or damage beyond surface soot, call a professional chimney sweep. Some situations need specialized equipment and safety knowledge.

Clean firebox. Clear glass. Protected home.

FAQ

How do you get rid of black soot in a fireplace?

You get rid of black soot in a fireplace by first vacuuming loose ash with a HEPA filter, then scrubbing surfaces with appropriate cleaning solutions matched to the material and buildup severity, working from top to bottom with stiff brushes, and rinsing thoroughly.

Does Dawn dish soap remove soot?

Dawn dish soap does remove light soot when mixed with warm water at a 1:10 ratio and applied with scrubbing action using a stiff brush, though heavier buildup requires stronger solutions like TSP or vinegar-based cleaners for complete removal.

Does soot stain permanently?

Soot can stain permanently when it penetrates deeply into unsealed porous masonry before cleaning, especially if left untreated for extended periods, though most surface soot removes successfully with appropriate cleaning solutions and sufficient scrubbing effort before deep penetration occurs.

Is vinegar good for cleaning soot?

Vinegar is good for cleaning light to moderate soot when mixed with equal parts water and applied to brick, stone, or glass surfaces, though it should never be used on wood floors or hearths as it causes staining and finish damage.

What safety equipment do you need to clean fireplace soot?

You need safety equipment including gloves, safety glasses, a face mask or respirator, and long-sleeved clothing to protect skin and lungs from soot’s acidic particles that can cause respiratory problems when inhaled during the cleaning process.

How long should you wait before cleaning a fireplace after use?

You should wait a minimum of 12 to 24 hours after the last fire before cleaning a fireplace to ensure all surfaces have cooled completely, preventing burns and allowing ash to settle for safer removal.

When does creosote buildup require professional cleaning?

Creosote buildup requires professional cleaning when it exceeds 1/8 inch thickness anywhere in the system or appears as shiny black tar-like Stage 3 deposits that are highly flammable and cannot be safely removed with household cleaning methods.

How often should you clean soot from your fireplace?

You should perform light soot cleaning after every 5 to 6 fires to prevent penetration into porous surfaces, remove ash when it reaches 1-inch depth, and schedule professional chimney inspections and deep cleaning annually before burning season begins.

Smoke Odor Blocking Primer That Actually Works for Your Home

Think a fresh coat of paint will hide smoke smell? It won’t.
Smoke odor blocking primer actually traps nicotine, tar, soot, and the tiny odor molecules that keep a room smelling like smoke.
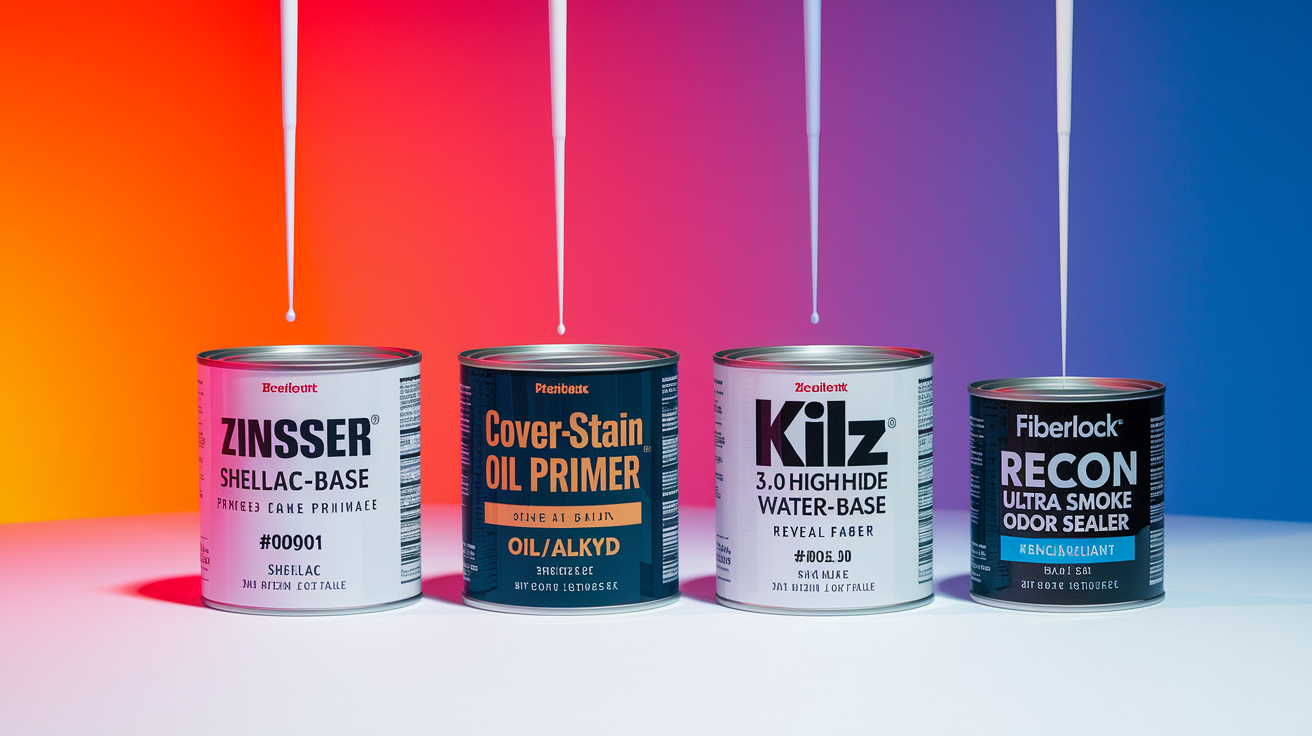
In this post I cut through the hype and show which primers really work and why, shellac for heavy smoke and fire soot, oil-based for moderate cigarette staining, and water-based for light cooking or pet odors.
You’ll also get the surface prep and application tips that stop smell from coming back, not just cover it up.

Essential Overview of Smoke Odor Blocking Primer Performance

YygRlzk_Sp-HFYmamCzYFg

Smoke odor blocking primers trap smoke particles, nicotine, tar, and volatile odor molecules inside walls, ceilings, and trim. They create a thick barrier that physically locks residue in place so it can’t bleed through your finish paint or evaporate into the air. Without proper sealing, smoke odor keeps off-gassing through fresh paint, and stains show up again as yellowing or brown spots within weeks.

The most reliable product for heavy smoke is a shellac-based primer. Zinsser B-I-N original formula (product #00901) is the industry benchmark. Shellac dries fast, usually tack-free in 20 to 45 minutes, and locks in severe nicotine staining and fire smoke with one or two coats. Oil-based primers like Cover-Stain work well for moderate cigarette smoke but dry slower, taking 6 to 8 hours between coats. Water-based high-hide primers are convenient for light odors. Lower smell, easier cleanup. But they struggle with heavy contamination and often require multiple coats. Plan coverage at around 400 square feet per gallon rather than the 500 stated on some labels, because smoke primers go on thin and solids settle quickly in the can.

One coat of shellac or oil primer is usually sufficient for light cigarette smoke or minor nicotine staining. Two coats are needed for long-term heavy smoking, fire soot, or tar buildup. Surface prep matters as much as primer choice. Dry wipe walls, HEPA-vacuum ceilings, wet-clean with vinegar or a degreaser (not TSP unless the manufacturer allows it), patch holes, and sand smooth with 120-grit paper before you open the primer can.

Six key problems smoke odor blocking primers solve:

  • Prevents nicotine and tar from bleeding through topcoats as yellow or brown stains
  • Traps volatile odor molecules so rooms stop smelling like smoke after painting
  • Seals soot residue on ceilings and walls after fire or heavy burn events
  • Stops tannin bleed from knotty wood and raw lumber (bonus benefit beyond smoke)
  • Covers protein-based cooking smoke and grease odors on kitchen surfaces
  • Eliminates persistent smells from cat urine, pet accidents, and other organic stains

Comparing Top Smoke Odor Blocking Primer Options

1skgLvFATfGBqs7CSbcC2Q

Choosing the right product depends on contamination severity and your comfort with solvent odors. Shellac-based primers deliver the strongest odor seal but come with high fumes and require alcohol cleanup. Oil-based options balance performance and drying time, while water-based primers offer low-odor convenience at the cost of sealing power. Pricing also varies. Shellac formulas typically cost $35 to $60 per gallon, oil-based primers run $25 to $45, and water-based high-hide products range from $20 to $35 per gallon. Coverage averages 300 to 400 square feet per gallon across all types, with porous or soot-heavy surfaces reducing that by 20 to 50 percent.

For cigarette smoke with visible nicotine staining, shellac is the default choice. One coat eliminates odor and stain in most cases. Fire smoke with soot or char requires shellac or specialized encapsulants, sometimes labeled “Ultra” or “Recon,” that bond to carbon residue. Light cooking smoke or minor pet odors can often be handled with a quality water-based primer, saving you ventilation headaches. If you’re unsure, start with oil-based for moderate smoke. It’s forgiving, effective, and widely available.

Product Type Best For
Zinsser B-I-N Shellac-Base Primer (#00901) Shellac Heavy nicotine, fire smoke, tar, persistent odors, knotty wood bleed
Cover-Stain Oil Primer Oil/Alkyd Moderate cigarette smoke, stains, mixed odors, slower drying acceptable
Kilz 3.0 High-Hide Water-Base Primer Water-Base Light cigarette smoke, cooking odors, low-VOC requirement, easier cleanup
Fiberlock Recon Ultra Smoke Odour Sealer Encapsulant Post-fire soot, char, extreme contamination, commercial restoration work

Surface Preparation Before Applying a Smoke Odor Blocking Primer

SEB3M8suRLiCsMLFbGDNjA

Primer can’t seal smoke odor if the surface underneath is still contaminated. Loose soot, greasy nicotine film, and moisture all prevent adhesion and let odors bleed through. Start by dry-wiping walls and ceilings with old newspaper or disposable rags to remove surface solids without smearing them deeper into the texture. Follow with HEPA vacuuming. Standard shop vacs just blow fine particles back into the air. For heavy soot or fire residue, use a dry chemical sponge first, then wet-clean with a vinegar solution (one cup per gallon of water) or a standard degreaser. Don’t use TSP unless your primer manufacturer explicitly allows it. Some shellac and oil products react badly to phosphate residue. Let the surface dry completely, at least 24 hours in humid conditions, and confirm substrate moisture is below 12 percent if you have a meter.

Sand patched areas and glossy surfaces with 120-grit paper to give the primer tooth. For trim and smooth woodwork, finish with 220-grit so you don’t telegraph scratches through the topcoat. Feather the edges of spackled holes so they blend into the surrounding wall. Wipe down all sanded surfaces with a tack cloth or damp rag to remove dust. Primer bonds to clean drywall paper, not to a layer of fine powder.

Watch for moisture and temperature limits that cause adhesion failure. Don’t prime if the surface temperature is within 15 degrees Fahrenheit of the dew point. Condensation forms under the primer film and traps moisture, leading to peeling and continued odor problems. If you’re working in a basement or after water cleanup, run dehumidifiers and confirm walls are dry to the touch and cool but not cold. For popcorn ceilings with deep smoke contamination, consider removal rather than sealing. Oil-based and even shellac primers sometimes fail when soot has soaked into the thick texture, and scraping the ceiling is faster than applying three coats of encapsulant and still smelling smoke.

Application Techniques for Smoke Odor Blocking Primers

ggAhmrNSqunRvMwLFPxZw

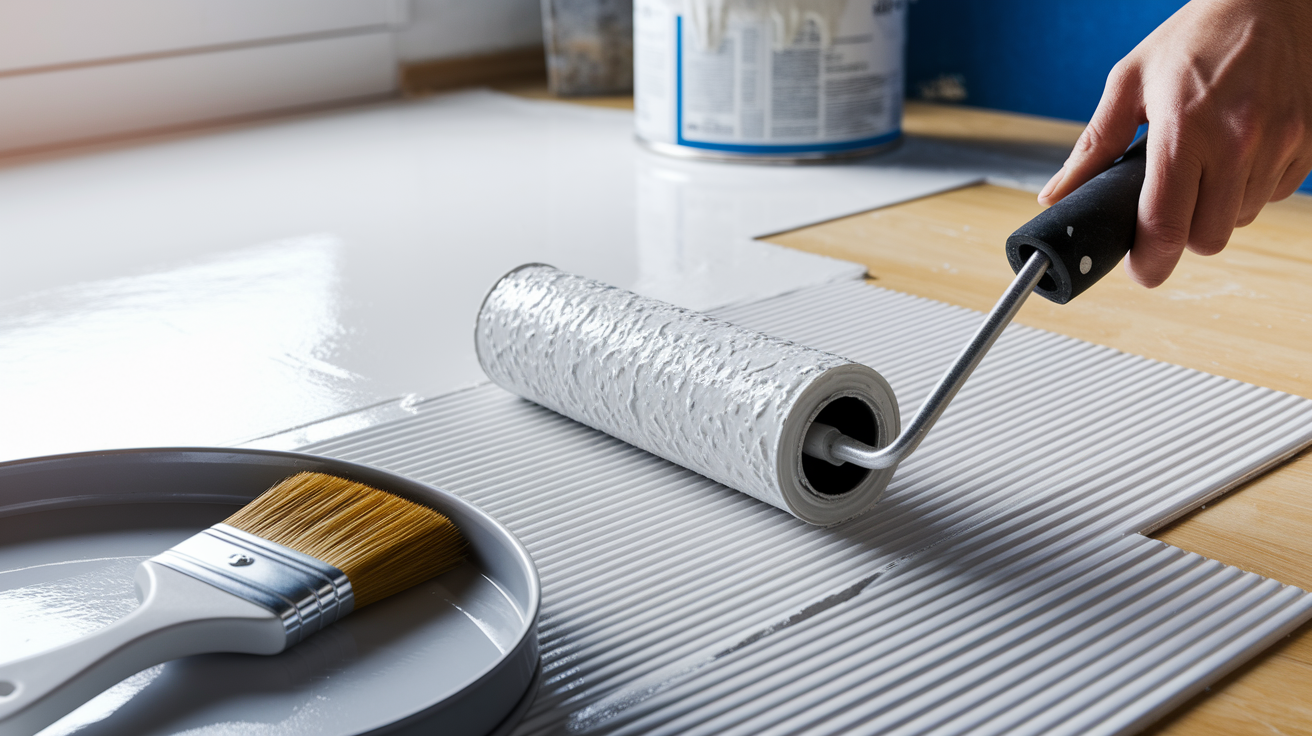
The right tools and timing make the difference between a permanent seal and a primer coat that fails in three months. Use a good-quality brush and roller. Natural or synthetic bristles work for shellac and oil primers, synthetic only for water-based. Plan to throw away your brush and roller cover after using shellac. Cleaning them with alcohol is possible but time-consuming and expensive compared to the cost of a new foam cover. Save the roller handle by wiping it down immediately with 99 percent isopropyl alcohol or denatured alcohol.

Pour only what you can use in about ten minutes into a small cut bucket or roller pan, then cover the pan between applications. Shellac primer’s solids settle fast, and the top of the can dries into a skin if you leave it open. Stir thoroughly before you start and every 15 minutes during the job. For small touch-up spots, keep the primer wet on your brush with a few drops of 99 percent alcohol while you move from one area to the next.

Five key application mistakes to avoid:

  • Recoating shellac too early (under 20 minutes) or too late (over 60 minutes). Adhesion suffers at both ends of the window
  • Attempting to spray shellac primer through an airless sprayer. It clogs hoses and tips almost immediately
  • Skipping respiratory protection when using shellac or oil primers. Organic vapor cartridges are required, not optional
  • Thinning shellac or encapsulant primers without manufacturer permission. Most are engineered not to be thinned
  • Applying primer over damp or greasy surfaces. The film won’t bond and odor molecules pass right through

Shellac becomes tack-free in 15 to 45 minutes depending on temperature and airflow. You can apply a second coat or start topcoating as soon as it’s dry to light touch. Oil-based primers need 6 to 8 hours between coats, sometimes longer in cold or humid rooms. Water-based high-hide primers recoat in 1 to 4 hours. Always follow the product data sheet recoat window. Early recoating lifts the first layer, and late recoating causes delamination because the film has cured too hard to bond chemically with the next coat. Wear gloves, eye protection, and an organic vapor respirator when working with shellac or oil products. The fumes are strong, and prolonged exposure causes headaches and respiratory irritation even in ventilated spaces.

Understanding Smoke Types and Choosing the Right Odor Blocking Primer

GEvCg8Q-SZ-LFQutXy2tcw

Not all smoke damage is the same. Cigarette smoke leaves a sticky, yellowish nicotine film that clings to walls, ceilings, and trim but usually stays on the surface. One coat of shellac or oil primer locks it down in most homes. Heavy, long-term smoking (think decades of chain-smoking in a closed house) creates thick tar deposits that can bleed through one coat, especially on ceilings where heat rises and concentrates the residue. In those cases, two coats of shellac primer are standard before you apply any finish paint.

Cooking smoke, especially from frying or grilling indoors, deposits grease and protein residue that smells different from tobacco. Water-based primers often handle light cooking odors after proper degreasing, but if the smell is strong or the surfaces feel tacky, switch to oil or shellac. Fireplace smoke and wood-burning stove residue contain soot and creosote that penetrate deeper into drywall texture and raw wood. Shellac works, but clean the soot first with a dry sponge and degreaser or the primer just seals dirt to the wall without stopping the smell.

Structure fire smoke is the most aggressive contamination. Soot from burned synthetics, plastics, and household materials includes tar, acids, and carbon particles that etch into painted surfaces and porous substrates. Standard latex primers fail completely here. You need either a heavy-duty encapsulant product designed for post-fire work or multiple coats of shellac primer after HEPA vacuuming and wet cleaning with a commercial degreaser. Even then, if insulation, ducting, or framing is saturated with smoke, surface priming alone won’t eliminate the odor. Hidden sources continue to off-gas through walls and vents.

Choosing Primers for Fire/Structure Smoke

Fire and heavy soot situations require specialized encapsulants that go beyond standard shellac or oil primers. Products labeled “smoke and odor encapsulant sealer” or “Recon Ultra” are formulated with higher solids and antimicrobial additives to bond with carbon residue and prevent microbial growth in the damp conditions that sometimes follow firefighting efforts. These products are often sold in 5-gallon contractor buckets and cost $120 to $300, but they deliver permanent odor control that retail primers can’t match. Expect to apply one heavy coat, allow full cure (24 to 72 hours), then assess whether a second coat is needed. If odor persists after two coats of a commercial encapsulant, the contamination has likely penetrated insulation, HVAC ducts, or structural framing, and material replacement is the only reliable fix.

Coverage, Cost, and Quantity Planning for Smoke Odor Blocking Primers

Ex2JMIYVTRyRw_dVyvobFA

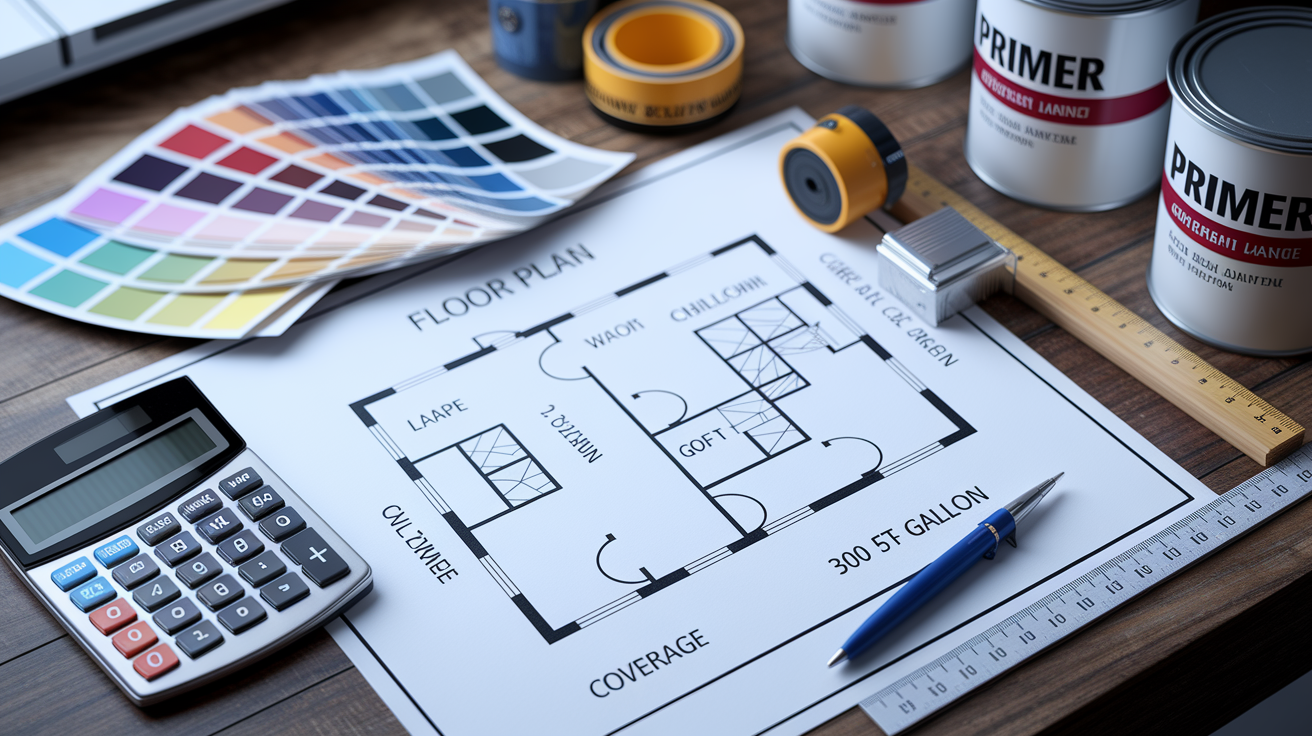
Accurate quantity planning prevents mid-job store runs and wasted primer. Most smoke odor blocking primers cover 300 to 400 square feet per gallon on smooth, sealed drywall. Porous surfaces like raw drywall, textured ceilings, or soot-covered plaster reduce effective coverage by 20 to 50 percent because the substrate absorbs more liquid. A typical 12-by-12-foot room with 8-foot ceilings has roughly 448 square feet of wall and ceiling surface. Plan on 1 to 2 gallons per coat depending on texture and contamination level. Buy two gallons if you’re priming ceilings or applying two coats for heavy smoke.

Pricing varies by primer type and package size. Shellac-based primers cost $35 to $60 per gallon, with quart sizes running $15 to $30 for small patch jobs. Oil-based primers are slightly cheaper at $25 to $45 per gallon. Water-based high-hide primers cost $20 to $35 per gallon and are the most economical choice for light smoke. Professional encapsulants sold in 5-gallon buckets range from $120 to $300, averaging about $25 to $60 per gallon when purchased in bulk. For a whole-house smoke remediation, calculate total wall and ceiling square footage, add 20 to 50 percent for waste and porosity, and multiply by the number of coats you expect to apply. A 1,500-square-foot home with moderate cigarette smoke might need 8 to 12 gallons of primer for a two-coat system, costing $200 to $600 depending on product choice.

Four cost-calculation tips:

  • Measure room perimeter and ceiling area separately. Ceilings often need an extra coat
  • Add 30 percent to your coverage estimate for textured or porous surfaces
  • Buy primer in gallon sizes for anything larger than a single room. Quarts are convenient but expensive per square foot
  • Plan for disposal costs if using shellac. Brushes, rollers, and drop cloths soaked with solvent-based primer require proper disposal or curbside hazardous waste pickup

Safety, Ventilation, and VOC Considerations When Using Smoke Odor Blocking Primers

Nr5p9X-cRra2LGXv4ImoZw

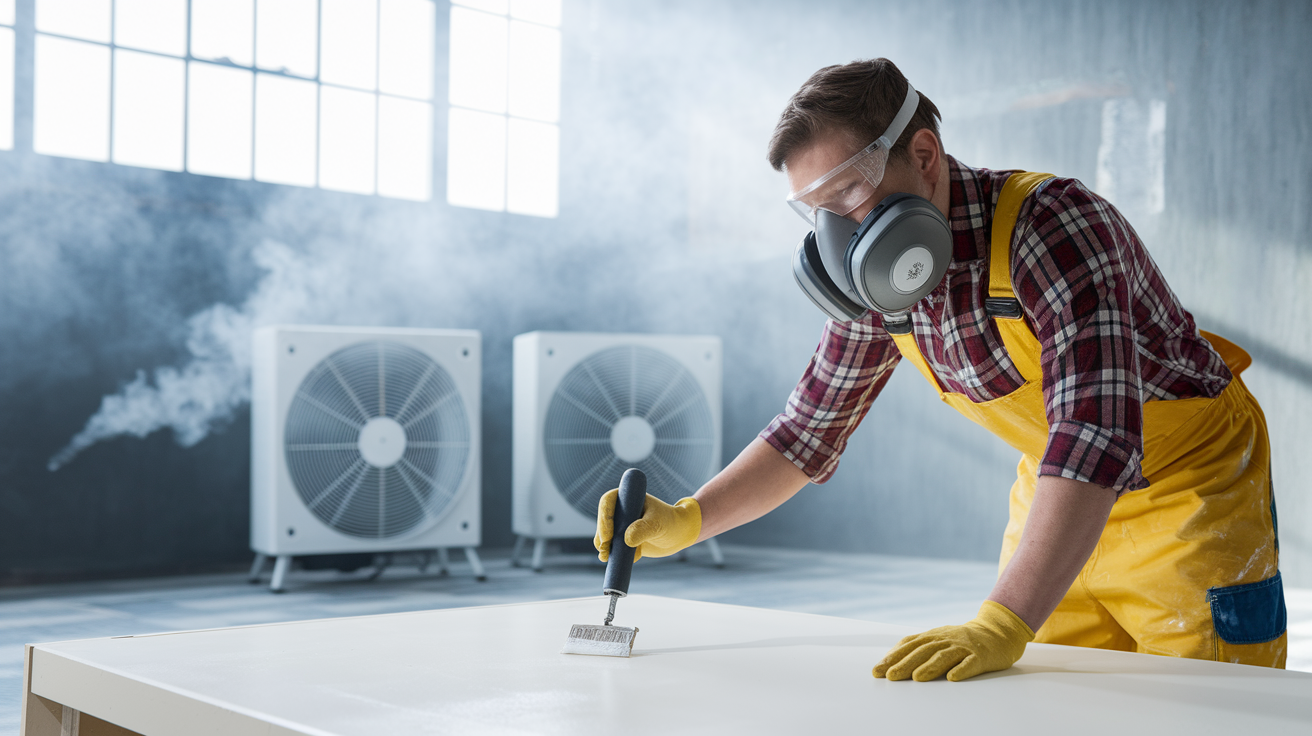
Shellac and oil-based primers release high levels of volatile organic compounds during application and drying. The strong solvent smell lingers for 24 to 72 hours even with windows open and fans running. These fumes cause headaches, dizziness, and respiratory irritation if you work without protection. Always wear a respirator rated for organic vapors. Paper dust masks don’t filter solvent fumes. Wear nitrile or solvent-resistant gloves to protect your skin, and use safety glasses to keep drips and splatter out of your eyes. Never apply shellac or oil primers near open flames, pilot lights, or sparking tools. The fumes are flammable.

Ventilation isn’t optional. Open all windows in the work area and use box fans to push fumes outside. Set up cross-ventilation with one fan pulling fresh air in and another exhausting fumes out. Keep the room ventilated for at least 24 hours after you finish priming, longer in cold or humid weather when drying slows. If you’re priming multiple rooms, work on one at a time and close doors to contain fumes.

Water-based odor-blocking primers have lower VOC levels and much less smell, which makes them easier to use in occupied homes or spaces with limited ventilation. The trade-off is reduced effectiveness on heavy smoke. Water-based products rely on encapsulation polymers rather than solvent penetration, so they don’t lock down tar and nicotine as aggressively as shellac. If odor control is the priority and you can tolerate the fumes and drying time, stick with shellac or oil. If you need low-VOC compliance for health reasons, regulations, or tenant sensitivity, use a water-based high-hide primer and plan for a second coat and longer ventilation after finish painting.

When Primers Aren’t Enough: Additional Smoke Odor Remediation Methods

XK9yO6VuT6Gt9Xjz7atxfw

Primers seal smoke residue on painted surfaces, but they can’t eliminate odors embedded in insulation, ductwork, carpet padding, or structural framing. If rooms still smell like smoke after priming and painting, the contamination is hidden behind walls or inside the HVAC system. Thermal fogging uses heated deodorizing chemicals that penetrate porous materials the same way smoke did, neutralizing odor molecules at the source. Ozone treatment generates ozone gas that oxidizes odor compounds, but it requires the building to be unoccupied during treatment and thoroughly aired out afterward. Ozone is harmful to breathe and degrades rubber, plastics, and fabrics if exposure is prolonged.

HVAC duct cleaning removes soot and smoke particles that settle inside supply and return lines. Every time the furnace or air conditioner runs, contaminated ducts blow odor back into the living space even if walls and ceilings are sealed. Professional duct cleaning combined with HEPA filter replacement addresses this hidden source. In severe fire or long-term smoking cases, insulation replacement is often the only permanent fix. Fiberglass batts and blown cellulose absorb smoke and tar deeply, and no surface primer can seal odors coming from inside wall cavities.

Method Purpose When Needed
Thermal Fogging Neutralizes odors in porous substrates (wood, insulation, fabric) Persistent smell after priming walls and ceilings; odor in hidden cavities
Ozone Treatment Oxidizes smoke odor molecules throughout enclosed spaces Whole-house smoke smell; unoccupied building; combined with material replacement
HVAC Duct Cleaning + Filter Replacement Removes soot and odor particles circulated by heating/cooling system Odor returns when HVAC runs; visible soot on vents or registers

Professional-Grade Solutions and When to Hire a Smoke Odor Specialist

KpJuLNiwT3GalMYmb4-JSw

Some smoke damage is beyond DIY repair. If you open a wall and see black staining on the back of the drywall, smell smoke inside electrical boxes, or find insulation that crumbles and releases odor when touched, the contamination has penetrated structural cavities. At that point, surface priming is a temporary cover that will fail within months as hidden smoke continues to off-gas. Fire restoration contractors use commercial encapsulants in 5-gallon buckets. Products like Sentinel 539 with antimicrobial additives or Fiberlock Recon Ultra designed for post-fire soot. These formulations have higher solids content, better penetration, and chemical resistance that retail primers can’t match.

Professional remediation also includes documentation for insurance claims. Adjusters require before-and-after photos, moisture readings, material disposal logs, and detailed scopes of work to approve smoke damage repairs. Contractors trained in IICRC fire and smoke restoration standards know how to write supplements when hidden damage appears after the initial estimate, and they understand the claims process in ways that speed approval and reimbursement. If your smoke damage involves structure fire, long-term heavy smoking with visible tar buildup, or failed DIY attempts where odor returned after painting, hiring a certified specialist saves time, money, and repeated failures.

Watch for signs you need professional help: odor that returns within weeks of priming and painting, visible staining that bleeds through two coats of shellac, smoke smell concentrated near HVAC vents or electrical outlets, or drywall that feels damp or soft in areas with no visible water damage. Certified contractors carry specialty equipment. Thermal foggers, hydroxyl generators, HEPA air scrubbers, moisture meters, and infrared cameras that identify and treat contamination you can’t see or reach. The cost is higher than DIY priming, but the results are permanent and often covered by homeowner’s insurance when fire or catastrophic smoke damage is documented. For heavy smoke restoration, read more about integrated solutions at Smoke Odor Removal & Fire Repair.

Final Words

Choose the right product: shellac for heavy smoke, oil for moderate, and water-based for light jobs. Prep first—HEPA vacuum, dry wipe, sand, and patch—so the coating seals instead of failing.

Apply with the right tools, respect drying and recoat windows, and wear a respirator while ventilating the space. If odor or soot runs deep, add HVAC cleaning, insulation replacement, or bring in a specialist.

A quality smoke odor blocking primer often stops the smell and keeps stains from coming back. With careful prep and the right product, the room will be ready for repairs and daily life again.

FAQ

Q: What primer gets rid of smoke smell?

A: The primer that gets rid of smoke smell is a shellac-based odor-blocking primer like Zinsser B‑I‑N. Shellac seals nicotine, soot, and odor; oil primers work for light cigarette smoke while water-based may fail on heavy residue.

Q: What is the best primer to hide smoke?

A: The best primer to hide smoke is a shellac-based primer for heavy staining and odor; oil-based primers work for moderate smoke. Use one coat for light nicotine, one to two coats for heavy or long-term smoke.

Q: Does odor blocking primer work against smoked in house?

A: An odor-blocking primer can stop smoke smell on surfaces, but it only works after thorough cleaning. Severe, long-term, or structural smoke often needs extra cleaning, multiple coats, or additional remediation like HVAC or insulation work.

Q: Is there a paint that covers smoke smell?

A: Paint alone won’t reliably cover smoke smell; an odor-blocking primer must be used first. After priming, standard paint hides appearance but won’t seal odor without that primer layer.

What Is Emergency Restoration: Fast, Clear Solutions

0

Have you ever wondered how quickly help can change a bad situation into calm? When disaster strikes, we jump in fast to protect your home or business. We handle everything from a burst pipe to a kitchen fire and even work to stop mold (a fungus that can damage surfaces and affect health) from spreading. Our team inspects the damage right away and fixes problems using simple, clear steps, so you can feel safe again without extra stress.

what is emergency restoration: Fast, Clear Solutions

Emergency restoration helps repair your home or business when disaster strikes. We work day and night so you don’t have to wait to get help. When damage is reported, we jump in to secure your property and stop further loss.

This service covers many problems like water damage from burst pipes, fire damage with sooty residue and smoke smells, and even mold that pops up in wet conditions. Whether it's a sudden flood or a kitchen fire, our team uses special tools and techniques to stop the damage right away.

We start with a careful inspection to see how bad the damage is. Our technicians use tools like moisture meters (devices that check water levels) to uncover hidden issues without extra destruction. Then, we create a clear plan to stabilize the situation, prevent more damage, and clean up, all so you can get back to a safe home quickly.

Core Emergency Restoration Services: Water, Fire & Mold

img-1.jpg

When disaster hits, different types of damage need special care. Whether it’s water damage, fire aftermath, or mold growth, we act fast to stop further harm. We use moisture meters (tools that check for water levels) and quick water extraction (removing water) to find hidden water and remove it.

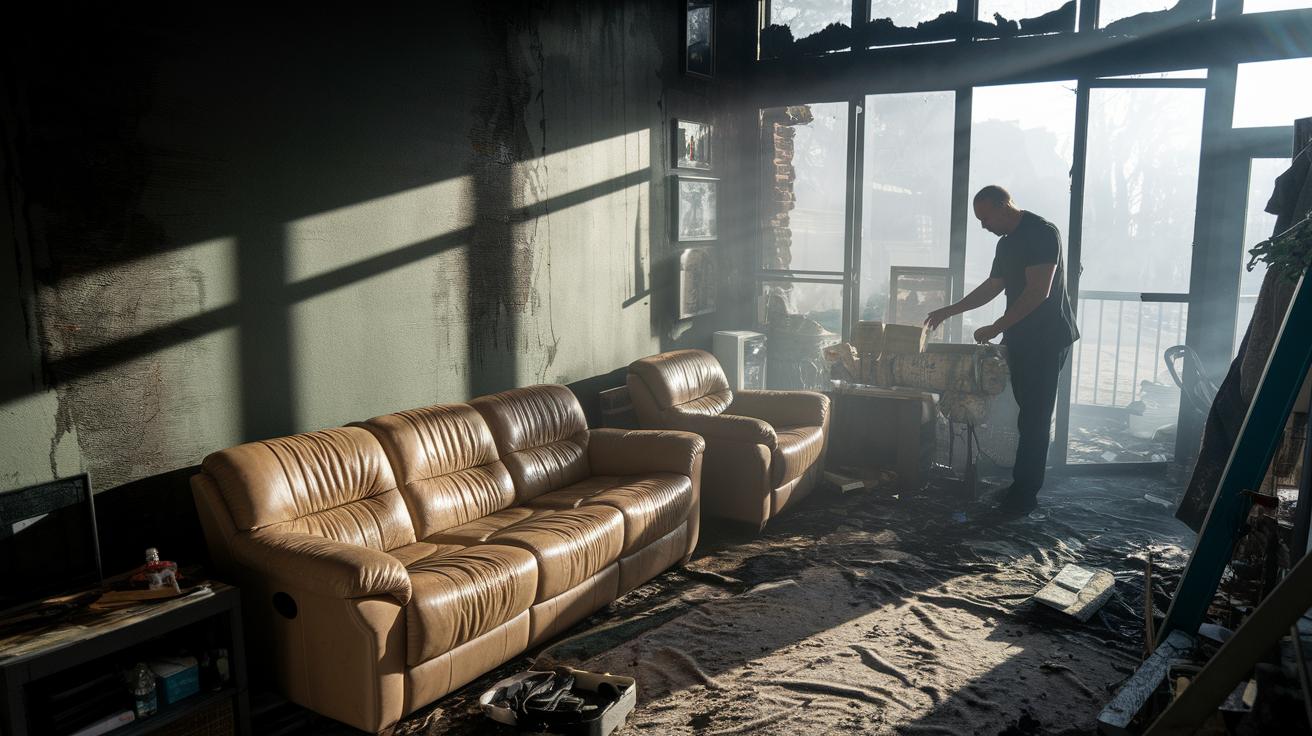
For fire-damaged areas, our team dries the structure, cleans soot, and gets rid of lingering smells. We use tested methods that help restore your home safely and quickly.

When it comes to mold, we begin with a careful inspection to find any hidden growth. Once we spot the mold, we contain the area, remove the mold, and clean all surfaces thoroughly to keep your home safe.

Water Damage Remediation

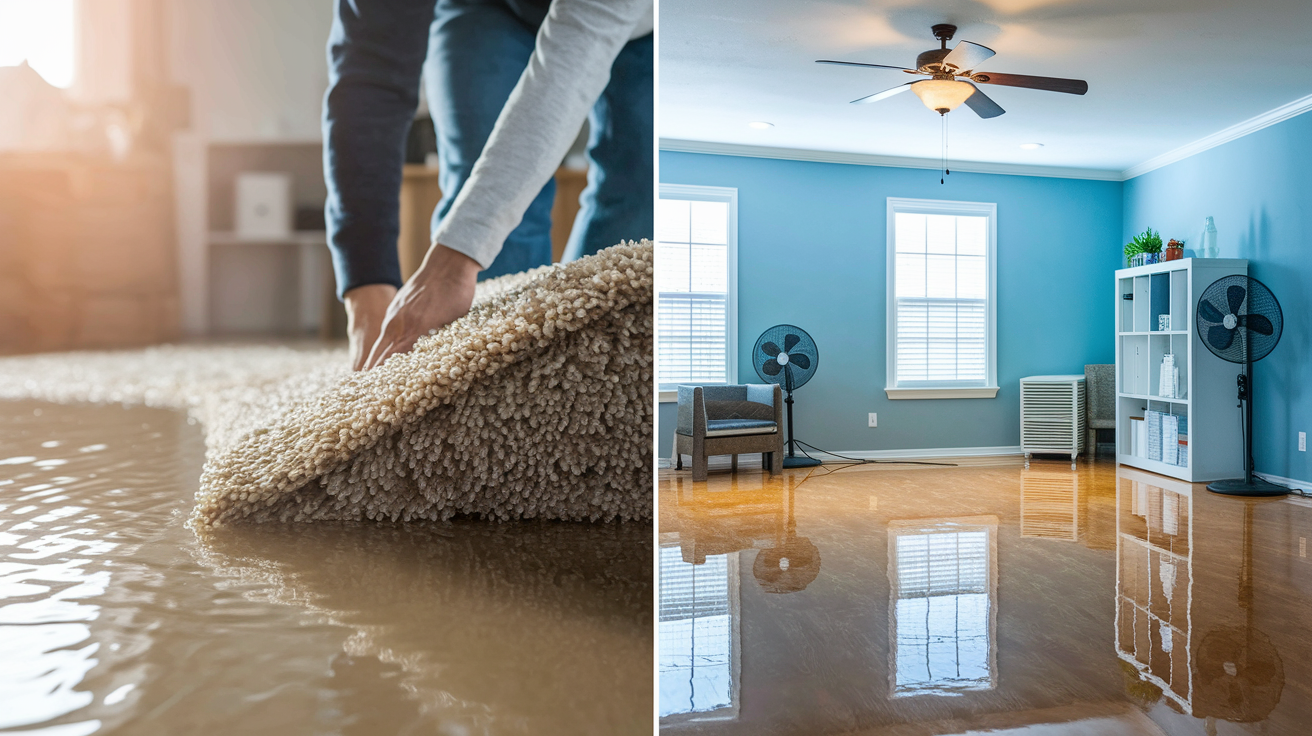
We start by checking for hidden water using moisture meters (devices that measure moisture). Then we remove the water, dry the affected materials with special dehumidifiers (machines that pull moisture from the air), and monitor the progress. For example, if a burst pipe soaks your living room carpet and furniture, our team quickly extracts and dries the area to prevent more damage.

Fire Damage Restoration

Fire damage repair is more than just clearing out burned items. Our technicians dry the structure and clean off soot, smoke, and odors using proven techniques. Imagine a kitchen fire where the smoky smell disappears after careful cleaning and repairs. This process improves air quality and makes your home safe to live in again.

Mold Remediation

To handle mold, we begin with a thorough inspection to find any hidden spots. Once detected, we contain the area, remove the mold, and sanitize all surfaces. This careful work stops the mold before it can harm your home.

Service Type Key Actions Typical Timeline
Water Remediation Detection, Extraction, Drying 1–5 days
Fire Restoration Soot Cleaning, Odor Removal, Repairs 3–7 days
Mold Remediation Containment, Removal, Sanitizing 2–6 days

Step-by-Step Emergency Restoration Process Guide

When a disaster hits, we act fast. This guide gives you a simple overview of what we do, with more details to follow. From your first call, we provide clear, real-time help to get your home safe again.

  • 24/7 Emergency Call & Dispatch: Call us anytime, day or night.
  • On-Site Damage Assessment: We check your home to see what’s damaged.
  • Area Containment & Safety Setup: We secure the area and set up safety measures.
  • Water Extraction & Structural Drying: We remove water and dry out your structure.
  • Soot, Smoke & Odor Removal: We clean away soot, smoke, and odors.
  • Mold Inspection & Remediation: We check for mold and remove it safely.
  • Content Documentation & Protection: We document and protect your belongings.
  • Structural Repairs & Reconstruction: We repair and rebuild damaged areas.
  • Final Quality Inspection: We do a final check to ensure everything is right.

Following these steps, we restore safety and make your home livable again while keeping you informed every step of the way.

For example: When you call, our team arrives within minutes, checks your home, and gives updates until everything is fully restored.

Key Benefits of Rapid Emergency Restoration

img-2.jpg

When we act fast, you save money and stop damage from getting worse. Quick response helps us stop issues like mold (fungus growth) and worn materials before they grow into costly problems.

Our team works to rescue your important items and essential papers. We carefully take photos, pack, and label your belongings so everything is clear for your insurance claim and repair work.

Fast restoration helps keep your home strong and safe. When we jump into action, we stop hidden issues from turning into major problems. Quick repairs mean less hassle for you and lower costs over time.

Initiating Emergency Restoration: When to Act and Selecting Services

When you notice water gathering or damp spots in your home, it’s time to take action. Puddles on the floor or damp walls can mean water has seeped into your home. This can hurt your foundation and walls if not treated quickly. A lingering smoke smell or a thin layer of soot after a fire shows hidden damage. Even small mold spots on walls or ceilings need prompt care because waiting too long can lead to bigger problems and costlier repairs.

For instance, if you catch a hint of smoke where you thought it was safe, it might be an early warning sign. Acting now can help save your belongings and prevent minor issues from turning into major structural damage.

Choosing the right emergency restoration service is essential when you face such a crisis. Here are some guidelines to follow:

  1. Look for a company that responds 24/7. This way, help is available any time you need it.
  2. Check that the team has certified technicians (experts in their field) and uses industry-approved methods.
  3. Confirm they use advanced equipment to find and fix hidden damage.
  4. Make sure they offer clear documentation and understand insurance claims to simplify your recovery.

For example, a service that shows up quickly with proper credentials gives you peace of mind. With a team that follows set steps and has solid reviews, you can focus on getting your life back to normal while professionals work safely on your home.

Final Words

In the action, we covered the essentials of what is emergency restoration. We explained how rapid response helps secure your property, curtail further damage, and protect your belongings after disasters like water, fire, or mold incidents.

We also outlined the step-by-step process that keeps you safe and your home livable. With clear steps, quick intervention, and coordination with insurance, early action brings safety and peace of mind. Stay confident knowing help is always just a call away.

FAQ

Frequently Asked Questions

What is emergency restoration and what do emergency restoration companies do?

Emergency restoration means specialized services that quickly assess, stabilize, and repair property damage after disasters. These 24/7 companies use tailored plans to stop further damage and restore safety.

What is water damage remediation?

Water damage remediation is the process that detects hidden moisture, extracts water, and dries the area using tools like moisture meters and dehumidifiers, preventing mold growth and lasting damage.

How much does fire restoration cost?

Fire restoration cost depends on how extensive the damage is, the cleaning required, and the repair work needed. Technicians assess each situation first to provide a detailed estimate.

Is water restoration worth it?

Water restoration is worth it since prompt action prevents mold, reduces repair costs, and salvages items. Quick remediation helps preserve your property and restores a safe living space.

What are five examples of emergency situations requiring restoration?

Emergency situations include water leaks, flooding, fire incidents, burst pipes, and mold outbreaks. Each of these conditions requires rapid professional intervention to prevent further harm.

Mold Remediation After Water Damage: Protect Your Home and Health

0

Here’s your intro paragraph:

Most homeowners think mold appears weeks after water damage. Wrong. Active mold growth starts within 24 to 48 hours after water hits drywall, carpet, or wood. That narrow window means yesterday’s burst pipe becomes today’s health risk if you wait. Mold remediation is about moving fast to find hidden moisture, remove contaminated materials, and stop spores from spreading through your home. This guide walks through what professional remediation actually involves, when DIY drying isn’t enough, and how to protect your family from respiratory problems that mold exposure causes.

What Mold Remediation After Water Damage Actually Involves

lCbtYfOfTheyoKUIjEpgSQ

Mold remediation after water damage is the full process of finding, removing, and preventing mold that shows up when moisture gets into your home. The clock starts immediately. Mold spores go from dormant to active growth within 24 to 48 hours after water exposure. Quick action stops small moisture issues from becoming widespread mold that spreads through walls, floors, and your HVAC system.

Initial Inspection and Moisture Assessment

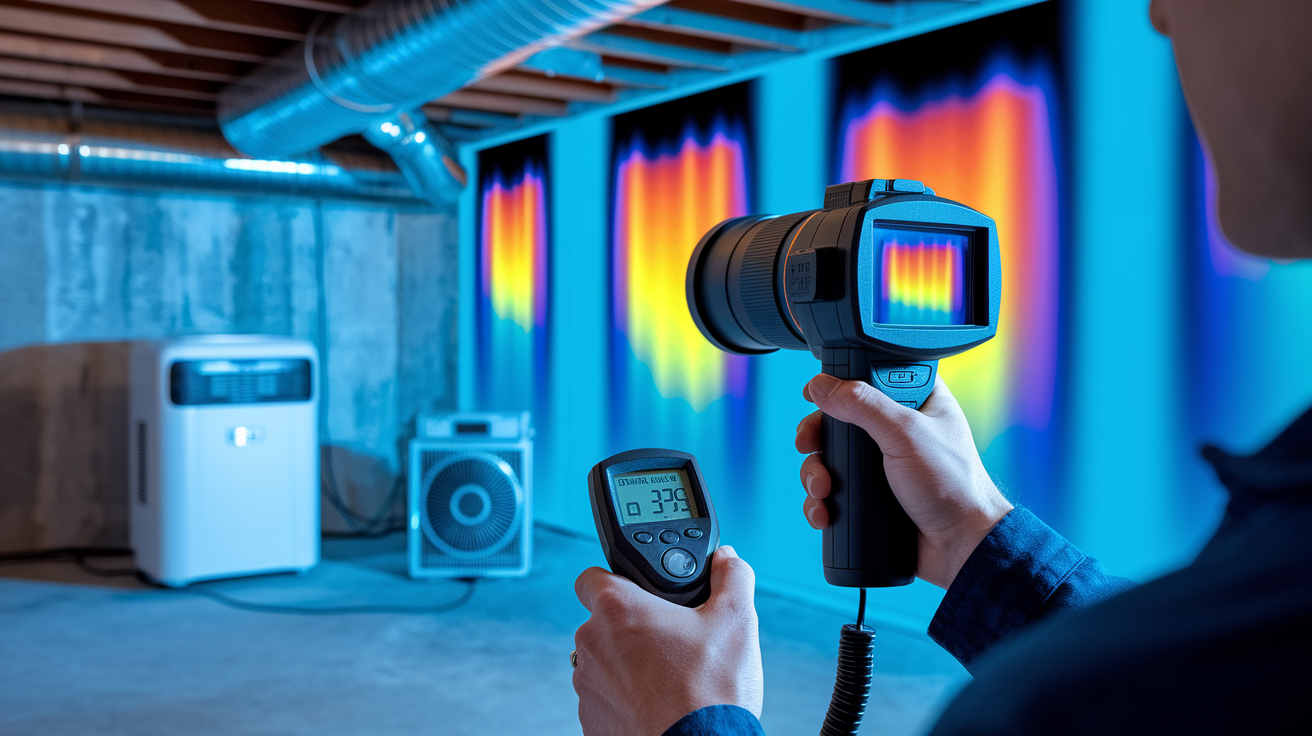
Professional remediation starts with a complete inspection using specialized detection gear. Technicians use moisture meters to measure water content in building materials, pinpointing exact moisture levels in drywall, wood framing, and subfloors. Thermal imaging cameras show hidden water behind walls and in ceiling cavities by picking up temperature differences from evaporation. Hygrometers measure relative humidity in affected rooms, confirming whether conditions support mold growth.

Moisture mapping documents every wet area throughout your home, creating a scope that guides the whole remediation process. Inspectors check wall cavities by drilling small test holes when needed, examine crawl spaces and attics, and trace how moisture has traveled. This assessment determines whether water moved beyond the visible damage zone into structural cavities where mold grows unseen.

Standing Water Extraction

Water removal happens first, using equipment matched to the water type and volume. Submersible pumps handle deep standing water from flooding. Truck mounted extraction units remove water from carpets and padding. Wet vacuums pull moisture from hard surfaces and tight spaces.

The water source type determines extraction protocols. Clean water from burst supply lines requires standard extraction. Gray water from appliance discharge needs sanitization during removal. Black water from sewage backup demands full protective equipment, separate extraction tools, and immediate material disposal. Technicians contain extraction areas to stop contaminated water from spreading during removal.

Structural Drying and Dehumidification

Drying out your home’s structure takes precise equipment and constant monitoring. High velocity air movers create airflow across wet surfaces, speeding up evaporation from floors, walls, and contents. Commercial dehumidifiers pull moisture from the air, preventing it from condensing back onto surfaces or migrating to other rooms.

Professionals use psychrometric calculations to determine optimal temperature, humidity, and airflow settings for your specific materials and conditions. Different materials dry at different rates. Drywall might take three days, while hardwood subfloors could need a week. Technicians take daily moisture readings, tracking progress until readings show materials have returned to normal dry standards, typically below 15% moisture content for wood and under 1% for drywall.

Containment and Air Filtration

Physical containment prevents mold spores from spreading during remediation. Technicians seal affected areas using heavy plastic sheeting over doorways and vents, creating a controlled work zone. Negative air pressure systems use fans to pull air from the contained area through HEPA filters before exhausting it outside, making sure airborne spores don’t escape into clean areas.

HEPA filtered air scrubbers run continuously inside containment zones, capturing microscopic mold spores as they become airborne during cleaning and removal. These machines cycle room air through filters rated to trap 99.97% of particles 0.3 microns or larger. Containment stays in place throughout the project until final cleaning confirms no spores remain.

Cleaning, Removal, and Disposal

Salvageable materials get thorough antimicrobial treatment. Technicians apply EPA registered fungicides to wood framing, concrete, and other non porous surfaces where mold has grown. These treatments kill active mold and help prevent regrowth after moisture is controlled.

Contaminated porous materials that can’t be effectively cleaned get removed and disposed of. That means pulling out water damaged drywall, removing wet insulation, and tearing up moldy carpet and padding. Removed materials go into heavy duty disposal bags, sealed immediately to prevent spore release. Technicians establish designated exit routes and disposal zones to avoid carrying contaminated materials through clean areas. All removed materials are transported directly to disposal facilities following local regulations.

Restoration and Reconstruction

Final restoration brings your home back to pre damage condition. This phase includes replacing removed drywall, installing new insulation, laying fresh subfloors where needed, and repainting affected walls and ceilings. Trim work, baseboards, and door casings get reinstalled. For more information about this finishing work, check out our guide on water related home repairs.

Restoration complexity varies based on how much material required removal. A small bathroom leak might need one wall section replaced. A basement flood could require complete reconstruction of finished spaces, including framing repairs, electrical work, and flooring installation.

Understanding when to tackle water damage yourself versus calling professionals depends on several factors. Small affected areas under 10 square feet with Category 1 clean water from a known source can sometimes be handled with prompt drying if you’ve got proper equipment and no health risks. Professional services become necessary when affected areas exceed 10 square feet, Category 2 or 3 water is involved, structural materials show damage, or anyone in your household has respiratory conditions or compromised immunity. Certified technicians have specialized training, professional grade equipment, and experience identifying hidden moisture that homeowners typically miss. Health risks from improper mold handling and the high likelihood of incomplete drying that causes recurring problems usually make professional remediation the safer, more cost effective choice.

Timeline and Temperature Conditions That Trigger Mold Growth

Oar2r0HoRQSFztRQEZt_zQ

Mold spores exist everywhere, floating dormant in the air until they find the right conditions to activate. When water damage introduces moisture, those dormant spores land on wet surfaces and begin growing within 24 to 48 hours. This narrow window explains why immediate response matters. After two days, what started as controllable moisture becomes active mold colonization that spreads fast.

Temperature plays a supporting role. Most mold species thrive between 77 degrees Fahrenheit and 86 degrees Fahrenheit, a range that matches typical indoor conditions in homes during warmer months. Even in winter, interior heated spaces often fall within this range. Mold doesn’t need extreme heat. It just needs sustained moisture in a temperature range that doesn’t freeze or cook it, which describes most residential environments year round.

The combination of moisture, temperature, and organic food sources creates ideal conditions. Mold feeds on cellulose materials common in homes: the paper facing on drywall, wood framing, carpet backing, ceiling tiles, and fabrics. Poor ventilation after water damage prevents moisture from evaporating, keeping materials wet longer and extending the window for mold to establish. Hidden moisture trapped in wall cavities or beneath flooring creates persistent damp conditions that support continuous growth even after visible surfaces dry.

Building materials and areas most vulnerable to rapid mold colonization after water exposure:

Drywall and drywall paper backing (mold grows on both sides when wet). Carpet and carpet padding (absorbs water quickly, dries slowly). Wood framing and subfloors (moisture penetrates grain, supporting deep growth). Insulation materials (fiberglass and cellulose trap moisture). Ceiling tiles (porous composition absorbs water readily). Textiles including curtains, upholstery, and bedding (fabric fibers hold moisture).

Health Risks and Safety Concerns From Water Damage Mold

W44Xzo9XQz-MaUjpfOhb2Q

Mold exposure triggers immediate health responses in most people. Respiratory problems show up first: coughing, sneezing, wheezing, and throat irritation caused by inhaling airborne spores. Allergic reactions develop quickly, producing symptoms similar to seasonal allergies including runny nose, itchy eyes, and skin rashes. People with asthma experience worsened symptoms, with mold spores triggering attacks and increasing the frequency of breathing difficulties.

Two mold species deserve special attention after water damage. Stachybotrys chartarum, commonly called black mold, produces mycotoxins that cause severe respiratory problems and neurological symptoms in some individuals. Aspergillus species release spores that can cause lung infections in people with weakened immune systems. Both species grow readily on water damaged cellulose materials, appearing dark green or black and often producing a musty odor.

Children, elderly individuals, and anyone with compromised immune systems face elevated risks from any mold exposure. Children’s developing respiratory systems make them more vulnerable to long term effects. Elderly individuals often have reduced immune function and pre existing respiratory conditions that mold exposure worsens. People undergoing chemotherapy, living with HIV/AIDS, or taking immunosuppressant medications can develop serious fungal infections from mold that healthy individuals would tolerate.

Anyone attempting mold remediation work needs proper protective equipment. N95 respirators or better filter airborne spores before they reach your lungs. Disposable nitrile gloves prevent skin contact with mold and contaminated materials. Eye protection stops spores from entering through mucous membranes. Disposable coveralls keep spores off your clothing and skin. Safety protocols include containing work areas, wetting materials before removal to reduce airborne spores, and sealing contaminated materials immediately in heavy plastic bags. Cutting corners on protective equipment or containment procedures exposes you to health hazards and spreads contamination throughout your home.

Identifying Hidden Moisture and Water Intrusion Sources

2e3NsJvaQpGWpCMt9RVWqA

Visible water damage shows you where the problem started, but moisture migrates. Water follows gravity, spreading down through floor assemblies. It wicks horizontally through porous materials like drywall and insulation. Capillary action pulls moisture up through concrete foundations. Within hours of a water event, moisture has traveled beyond the obvious wet spot into wall cavities, subfloor layers, and insulation voids where you can’t see it.

Professional detection methods reveal this hidden moisture before mold establishes. Moisture meters with penetrating probes measure water content inside materials without causing significant damage. Readings above 15% in wood or 1% in drywall indicate elevated moisture that supports mold growth. Thermal imaging cameras detect temperature differences caused by evaporating moisture, highlighting wet areas behind walls and in ceilings as cooler zones. Moisture mapping involves taking systematic readings throughout affected areas and adjacent spaces, creating a documented picture of how far water traveled.

The consequences of missing hidden moisture show up weeks later. Mold grows inside wall cavities, feeding on drywall backing and wood framing. Musty odors develop but the source remains concealed. By the time visible mold appears on interior walls or ceilings, extensive colonization has already occurred in the hidden spaces behind. This secondary damage costs significantly more to remediate than addressing the hidden moisture immediately.

Common hidden moisture locations after water damage:

Wall cavities between studs where water runs down from above. Under flooring and within floor assemblies, especially near water sources. Attic spaces where roof leaks or HVAC condensation goes unnoticed. Crawl spaces beneath homes with poor vapor barriers. Behind and under kitchen and bathroom cabinets. Inside HVAC ductwork where condensation accumulates. Ceiling voids above affected rooms where water spreads before soaking through. Beneath and behind appliances where slow leaks go undetected.

Different Water Categories and Their Mold Remediation Requirements

LWNxezfaRoa6VGqicn1niA

Water damage falls into three categories that determine how remediation must proceed. Category 1 involves clean water from sanitary sources: burst supply pipes, failed water heater tanks, or appliance supply line breaks. This water doesn’t contain contamination when it enters your home. Remediation focuses on extraction and drying, with mold risk increasing the longer materials stay wet. If addressed within 24 to 48 hours, Category 1 water damage often requires minimal material removal.

Category 2 gray water contains some contamination from sources like washing machine discharge, dishwasher overflow, or toilet overflow containing only urine. This water carries bacteria, chemicals, or organic matter that requires sanitization during remediation. Porous materials like carpet and padding typically need removal because effective sanitization isn’t possible. Drywall often stays if only the bottom section got wet and drying happens quickly, but complete removal becomes necessary if wicking spread moisture high up the wall.

Category 3 black water is grossly contaminated and poses serious health hazards. Sources include sewage backup from blocked drain lines, toilet overflow containing feces, flooding from rivers or streams, and any standing water that has sat for more than 48 hours regardless of original source. Black water contains harmful bacteria, viruses, parasites, and toxic chemicals. All porous materials exposed to Category 3 water require removal and disposal. This means all affected carpet, padding, drywall, insulation, and often wood framing if contamination penetrated the material.

Material salvageability depends on both water category and how long materials stayed wet. Carpet exposed to Category 1 water and dried within 24 hours might be salvageable. The same carpet exposed to Category 2 water typically requires disposal. Any porous material touched by Category 3 water gets removed immediately, with no attempt at salvage. Drywall exposed to black water must be cut out at least 12 inches above visible water lines because wicking and contamination spread higher than the visible stain. Insulation in walls and floors affected by contaminated water requires complete removal because effective cleaning isn’t possible and contamination spreads through the material.

Treating Porous Versus Non Porous Materials After Water Damage

YfC8i7BXQK6szbBZBI-0oA

Material porosity determines whether remediation can save it or must remove it. Porous materials contain microscopic spaces that absorb and hold water, creating conditions where mold grows deep within the material where cleaning can’t reach.

Porous materials present the biggest challenges after water damage. Drywall absorbs water throughout its gypsum core and paper facing. Once wet, the paper backing provides an ideal food source for mold that grows within hours. Standard drywall that stays wet more than 48 hours or gets exposed to contaminated water typically requires removal. Insulation whether fiberglass batts or blown cellulose loses R value when wet and cannot be effectively dried or cleaned. Carpet and padding trap water, dry slowly, and develop odors from microbial growth within the backing and pad. Upholstered furniture with fabric covering and foam padding cannot be thoroughly cleaned internally. Ceiling tiles absorb water quickly and lose structural integrity, sagging and staining even after drying.

Non porous materials resist water absorption and can usually be cleaned and salvaged. Metal surfaces including ductwork, structural steel, and appliances can be wiped clean and treated with antimicrobials. Glass and hard plastics don’t absorb water and clean easily with standard disinfectants. Semi porous materials fall in between. Wood framing absorbs surface moisture but can be dried and treated if addressed quickly. Solid wood flooring can sometimes be saved if water extraction and drying happen within 24 hours. Concrete absorbs water slowly through its porous structure but can be dried and sealed. Tile and grout require cleaning and sanitizing, with grout sometimes needing sealing to prevent moisture retention.

Material Type Porosity Level Treatment Approach
Drywall Highly Porous Remove if wet over 48 hours or contaminated; clean water exposure under 24 hours may be salvageable with fast drying
Carpet and Padding Highly Porous Remove padding in most cases; carpet salvageable only with Category 1 water and immediate extraction
Insulation Highly Porous Remove and replace; cannot be effectively dried or cleaned
Wood Framing Semi Porous Dry thoroughly, monitor moisture levels, apply antimicrobial treatment; replace if decay present
Concrete Semi Porous Extract surface water, dry with air movers and dehumidifiers, apply penetrating sealer
Metal Surfaces Non Porous Clean with detergent, dry completely, treat with antimicrobial, address any rust
Tile and Grout Semi Porous (grout) Clean tile, scrub and sanitize grout, seal grout lines, replace if damaged

Antimicrobial Treatment and Sanitization Methods

jajBMTjDQGiTNIuxhmv82A

Surface antimicrobial applications kill active mold growth and help prevent regrowth on salvageable materials. EPA registered fungicides get applied to cleaned surfaces including wood framing, concrete, and other materials that will remain in the structure. These chemical treatments penetrate porous surfaces to kill mold at the root level. Application happens after physical cleaning removes surface growth and contamination. Technicians spray or wipe antimicrobials onto all affected surfaces, making sure complete coverage on every area where moisture was detected. The treatment needs dwell time to work, typically 10 to 15 minutes before drying.

Air treatment technologies work alongside surface cleaning. HEPA filtration systems capture airborne mold spores as they circulate through the machine. HEPA filters trap 99.97% of particles 0.3 microns or larger, which includes mold spores, bacteria, and most airborne contaminants. Air scrubbers fitted with HEPA filters run continuously during remediation, pulling contaminated air through filters and returning clean air to the work area. Hydroxyl generators offer another approach, producing hydroxyl radicals that neutralize mold spores, bacteria, and viruses in air and on surfaces. These units replicate natural atmospheric cleaning processes without creating harmful byproducts, allowing operation in occupied spaces unlike ozone generators that require evacuation.

Killing surface mold addresses current growth, but preventing regrowth requires controlling moisture. Antimicrobial treatments provide a limited protection window, typically effective for a few weeks to months depending on conditions. If moisture returns or humidity stays elevated, mold will grow again even on treated surfaces. Thorough application matters. Missed spots become recontamination sources, with surviving mold spreading back across treated areas. Professionals make sure complete coverage by systematically treating every surface in the affected zone, including structural members hidden behind removed drywall.

Odor elimination confirms effective sanitization. Musty, earthy smells indicate active microbial growth releasing volatile organic compounds as metabolic byproducts. These odors persist until the source mold is killed or removed. Surface cleaning and antimicrobial treatment reduce odor by eliminating active growth. Air filtration captures odor causing particles. Hydroxyl generators break down odor compounds at the molecular level. Persistent odors after treatment indicate hidden moisture or missed contamination requiring further investigation and treatment.

Post Remediation Verification and Clearance Testing

13dZLmk2T5SJmBOqGITUZw

Visual inspection confirms all visible mold has been removed and affected materials have been properly addressed. Professionals examine every surface in the remediation area, looking for any remaining discoloration, growth, or water staining. They check that all contaminated materials were removed as documented in the scope. Structural members get inspected to verify cleaning and treatment. Adjacent areas beyond the original containment zone get checked for any cross contamination that occurred during the project. Technicians document findings with photographs showing completed work and clean surfaces.

Moisture verification uses the same equipment that identified the original problem to confirm conditions have returned to normal. Moisture meters check material moisture content in wood framing, subfloors, and any remaining drywall. Readings should match dry standard levels typically below 15% moisture content for wood and under 1% for drywall. Hygrometers measure relative humidity in affected rooms, confirming levels have dropped to normal ranges between 30% and 50%. Elevated moisture at this stage indicates incomplete drying that could allow mold to regrow. Additional drying time becomes necessary until readings confirm proper dry conditions.

Air quality testing provides scientific verification when needed. Spore count testing isn’t required for every project, but becomes valuable in certain situations: when occupants have health concerns, the affected area was extensive, or verification is needed for insurance claims or property transactions. Testing involves collecting air samples from remediated areas and comparing spore counts and species to outdoor baseline samples and unaffected interior areas. Results showing indoor spore levels at or below outdoor levels with no unusual species present confirm successful remediation. Elevated indoor counts or presence of moisture indicator species signal incomplete remediation requiring additional work. Testing must be performed by qualified professionals following proper protocols to get accurate results.

Cost Factors and Insurance Considerations for Mold Remediation

rYIZ43PsTk2I6pNi0-KegA

Several variables determine remediation costs. Square footage of affected areas drives labor and material expenses, with larger projects requiring more equipment, longer timelines, and more extensive material replacement. Water category significantly impacts cost. Category 1 clean water projects cost less because less material requires disposal and sanitization needs are minimal. Category 3 black water projects cost substantially more due to extensive material removal, disposal requirements, and intensive sanitization protocols. Material removal scope affects total cost. Projects requiring only drying and cleaning cost less than those needing complete gut and rebuild of affected spaces. Complexity increases costs when water has affected finished basements, multiple stories, or areas with difficult access.

General cost ranges vary by project scale. Small single room projects affecting under 10 square feet with minimal material damage typically run $500 to $1,500, primarily for inspection, drying, and antimicrobial treatment. Medium projects involving multiple rooms or one significantly affected area with some material removal range from $2,000 to $6,000, including extraction, drying, disposal, and basic restoration. Large scale whole house or severely contaminated projects cost $10,000 to $30,000 or more, requiring extensive demolition, disposal, structural drying, and complete reconstruction. Emergency response services outside normal business hours typically add 20% to 40% to base costs but provide immediate water extraction that prevents damage from spreading.

Insurance coverage depends on your policy and the cause of water damage. Most homeowner policies cover mold remediation when it results from sudden and accidental water damage, like burst pipes, appliance malfunctions, or storm damage to roofing. Coverage typically includes assessment, containment, removal, and restoration to pre loss condition. Mold resulting from long term leaks, maintenance issues, or gradual seepage usually gets excluded because policies don’t cover damage from lack of maintenance. Flood damage requires separate flood insurance. Standard policies exclude flooding from external water sources. Check your policy’s mold coverage limits. Many carriers cap mold remediation coverage at $10,000 to $25,000 regardless of actual costs.

Documentation requirements for insurance claims start immediately. Take extensive photos and videos of all water damage and affected areas before any cleanup begins. Keep copies of all moisture readings and inspection reports from professionals. Obtain detailed written scope of work estimates from licensed remediation contractors. Save every receipt for equipment rentals, materials purchased, and services provided. Understand your policy’s exclusions and coverage limits before assuming costs will be covered. For information on working with adjusters and documenting claims, see our insurance claims assistance page.

Steps to maximize insurance claim success:

Notify your insurance carrier immediately after discovering water damage, ideally within 24 hours. Document everything with thorough photos, videos, and written notes before any cleanup begins. Obtain multiple professional assessments and scope estimates from licensed contractors. Keep detailed records of all receipts, invoices, and correspondence with contractors and adjusters. Understand your policy’s specific exclusions, coverage limits, and deductibles before work begins. Consider hiring a public adjuster if your claim is denied or the settlement offer seems inadequate.

Common Water Damage Scenarios That Lead to Mold Growth

VYkDE2i2QbeVu4hbDzh8iw

Understanding the typical situations that create mold problems helps you recognize when immediate action becomes necessary. Each scenario presents different challenges related to water source contamination, materials affected, and likelihood of hidden moisture spreading beyond the obvious damage.

Every water damage event carries mold risk, but some create worse conditions than others. Category 3 sewage backup introduces contamination that makes everything it touches dangerous. Slow roof leaks allow moisture to saturate insulation and framing for weeks before you notice ceiling stains. Basement flooding affects below grade spaces with limited ventilation where drying happens slowly. Recognizing the specific risks of each scenario helps you respond appropriately.

Water Damage Scenario Common Affected Areas Mold Risk Level Typical Timeline
Burst Supply Pipes Immediate vicinity, walls, floors, adjacent rooms if water spreads Moderate if addressed within 24 to 48 hours; High after 48 hours Active water flow until shut off; damage accumulates quickly
Roof Leaks Attic insulation, ceiling drywall, wall cavities, sometimes down to lower floors High due to hidden moisture in concealed spaces Often develops over weeks or months before visible interior damage appears
Basement Flooding Concrete walls and floors, finished basement materials, utilities, stored contents Very High due to slow drying, poor ventilation, and often contaminated water Immediate impact during flood event; mold establishes within 48 hours
Sewage Backup Basement or lower floor drains, flooring, walls, any contents in contact Extreme due to contamination and rapid bacterial growth Immediate contamination requiring prompt professional remediation
Appliance Malfunctions Laundry room, kitchen, surrounding floors and cabinets, wall base Moderate to High depending on water volume and detection speed Can develop slowly from small leaks or suddenly from catastrophic failure
HVAC Condensation Around air handler units, inside ductwork, ceiling below units, nearby walls Moderate but persistent due to ongoing moisture if not corrected Develops gradually; often detected late when mold odor or visible growth appears
Crawl Space Moisture Floor joists, subfloors above, insulation, foundation walls High due to persistent humidity and poor ventilation Chronic condition developing over months or years
Storm Water Intrusion Basement windows, foundation cracks, lower floors, surrounding soil High due to volume, contamination, and saturated materials Immediate during storm event; damage worsens rapidly without extraction

Prevention Strategies to Avoid Mold After Future Water Events

Preventing water damage entirely isn’t always possible, but you can reduce mold risk when water problems occur. These strategies focus on early detection, rapid moisture control, and maintaining conditions that don’t support mold growth.

Moisture control fundamentals create conditions where mold struggles to grow. Keep indoor humidity below 60%, ideally between 30% and 50%, especially during humid months. Use dehumidifiers in naturally damp areas like basements and crawl spaces. Make sure bathrooms and kitchens have working exhaust fans that vent outside, not into attics. Run these fans during showers and cooking, continuing for 15 to 20 minutes after to remove moisture. Address small leaks immediately. A dripping faucet or weeping pipe joint seems minor but provides constant moisture that supports mold growth.

Rapid response minimizes damage when water events occur. Know where your main water shut off valve is located and how to operate it. Keep contact information for licensed restoration services readily available. Have basic emergency supplies on hand: wet/dry vacuum, fans, tarps, and moisture barriers. Act within hours, not days. Extract standing water, move contents out of wet areas, and start drying immediately even if professional services are hours away.

Ten specific prevention actions to reduce water damage and mold risk:

Install water leak detectors near water heaters, washing machines, and under sinks; smart detectors send phone alerts when moisture is detected. Inspect your roof annually for damaged or missing shingles, deteriorated flashing, and blocked valleys that channel water improperly. Maintain gutters and downspouts by cleaning them twice yearly and making sure downspouts direct water at least 6 feet away from the foundation. Insulate pipes in cold areas including crawl spaces, attics, and exterior walls to prevent freeze related bursts. Service HVAC systems annually, checking condensate drain lines for clogs and drain pans for cracks that allow water accumulation. Use exhaust fans during and after showers, running them for 20 minutes post shower to remove humidity. Check appliance supply hoses and drain lines yearly, replacing washing machine hoses every 5 years and inspecting dishwasher connections for leaks. Install a sump pump with battery backup in basements prone to groundwater seepage, testing operation every few months. Grade soil away from your foundation with at least a 6 inch drop over 10 feet to prevent water from pooling against basement walls. Keep indoor humidity between 30% and 50% using dehumidifiers and monitoring with a hygrometer, especially in basements and during humid seasons.

When to Call Professional Mold Remediation Specialists

Certain water damage situations require professional expertise from the start. Affected areas larger than 10 square feet exceed what homeowners can effectively handle with consumer equipment. Category 2 gray water or Category 3 black water introduces contamination requiring specialized training, protective equipment, and disposal protocols that aren’t appropriate for DIY attempts. Visible mold growth indicates established colonization that has likely spread beyond visible surfaces. Structural materials affected by water including wall cavities, subfloors, or framing require professional moisture assessment to detect hidden damage. If anyone in your household has respiratory conditions, asthma, or compromised immunity, professional remediation protects them from exposure risks during the process.

Look for specific qualifications when selecting remediation professionals. IICRC certification demonstrates standardized training in water damage restoration and mold remediation techniques. Verify proper state licensing where required and confirm the company carries general liability insurance and workers’ compensation coverage. Ask about documented training in EPA guidelines and industry standards for mold remediation. Confirm they have specialized equipment including industrial dehumidifiers, air movers, HEPA filtration systems, moisture detection tools, and containment supplies. Request references from recent similar projects.

DIY remediation attempts carry real risks when done inadequately. Incomplete drying leaves hidden moisture that causes mold growth weeks later, often more extensive than the original problem. Improper disposal of contaminated materials spreads spores throughout your home during removal. Failing to establish containment allows cross contamination into previously clean areas. Personal health exposure during removal without proper respiratory protection, skin protection, and containment causes allergic reactions and respiratory problems. These mistakes often cost more to correct than hiring professionals initially.

Professional assessment provides value even when damage seems minor. Professionals detect hidden moisture your eyes can’t see using specialized equipment. They identify the full scope of affected materials before mold becomes visible. Early professional moisture mapping prevents secondary damage that becomes significantly more expensive to address later. An assessment typically costs $200 to $500 but can save thousands by identifying problems early and creating an accurate remediation plan. For immediate response to water damage situations, visit our FireFloodRescue emergency services page to connect with certified technicians available 24/7.

Final Words

Mold remediation after water damage isn’t something you can put off or half-finish. The 24-48 hour window matters.

Once moisture settles into drywall, insulation, or wood framing, the clock starts. Fast response stops small problems from becoming full-scale remediation projects.

Whether you’re dealing with a burst pipe or basement flooding, the key is stopping the water, drying everything thoroughly, and addressing contaminated materials the right way.

If the affected area is large, the water is contaminated, or you’re seeing visible growth, bring in certified professionals who understand the process from assessment to final air quality clearance.

FAQ

How should you deal with mold after water damage?

To deal with mold after water damage, stop the water source first, then dry affected areas within 24 to 48 hours using fans and dehumidifiers. Remove and dispose of contaminated porous materials like drywall, carpet, and insulation. Clean salvageable surfaces with antimicrobial treatments, and run HEPA air scrubbers to capture airborne spores.

What are the 10 warning signs of mold toxicity?

The 10 warning signs of mold toxicity include persistent coughing, sneezing, trouble breathing, irritated or watery eyes, skin rashes, headaches, fatigue, difficulty concentrating, worsening asthma symptoms, and ongoing sinus congestion. Children, elderly individuals, and those with compromised immune systems experience more severe reactions and need professional assessment immediately.

How long does it take for mold to set in after water damage?

Mold sets in within 24 to 48 hours after water damage when moisture, warmth, and organic materials are present. Dormant mold spores already in your home become active when exposed to wet drywall, wood, carpet, or insulation. This narrow window makes rapid drying and moisture removal critical to preventing colonization.

How likely is mold to come back after remediation?

Mold is unlikely to come back after professional remediation if all moisture sources are eliminated and affected materials are properly dried or removed. Residual moisture, missed water intrusion points, or inadequate drying create conditions for regrowth. Post-remediation moisture testing and maintaining indoor humidity below 60% prevent recurrence.

When should you use professional mold remediation services instead of DIY methods?

You should use professional mold remediation services when affected areas exceed 10 square feet, water damage involves gray or black water, structural materials are compromised, or household members have health vulnerabilities. Professionals have moisture detection equipment, HEPA filtration systems, proper protective gear, and IICRC certification to handle contaminated materials safely.

What equipment is essential for proper mold remediation after water damage?

Essential equipment for mold remediation includes moisture meters and thermal imaging cameras for detection, commercial dehumidifiers and air movers for drying, HEPA-filtered air scrubbers for spore capture, containment barriers to prevent cross-contamination, and antimicrobial treatment solutions. Protective gear like N95 respirators, gloves, eye protection, and disposable coveralls is required during removal work.

Which building materials require removal versus cleaning after water damage?

Porous materials like drywall, carpet, padding, insulation, and ceiling tiles typically require removal after significant water exposure because they absorb moisture and support mold growth. Non-porous materials like metal, glass, and hard plastics can be cleaned and sanitized. Semi-porous materials like wood framing and concrete can often be dried, treated, and salvaged.

How does water category affect mold remediation requirements?

Water category determines remediation complexity and safety protocols. Category 1 clean water from burst pipes allows material salvage if dried quickly. Category 2 gray water from appliance overflow requires sanitization and often material disposal. Category 3 black water from sewage or flooding demands extensive removal of contaminated porous materials and professional handling.

What verification steps confirm mold remediation was successful?

Successful mold remediation is confirmed through visual inspection for remaining growth, moisture meter readings showing material moisture content below 15%, humidity levels between 30 and 50%, and air quality testing measuring acceptable spore counts. Professional clearance testing provides documentation that affected areas are safe for reoccupancy.

How can you prevent mold growth after future water damage events?

You can prevent mold growth by maintaining indoor humidity below 60%, ensuring proper ventilation in bathrooms and kitchens, addressing leaks immediately, and drying wet materials within 24 hours. Install water leak detectors, inspect roofs annually, maintain gutters, service HVAC systems regularly, and keep emergency contacts for restoration services readily available.

Property Damage Claim Adjuster: What They Do and When You Need One

Think your insurance check will cover everything? Think again.
A property damage claim adjuster is the licensed pro who inspects damage, documents what’s wrong, and figures out what the insurer should pay to repair or replace your stuff.
They translate policy wording into a scope of repairs and a dollar value, and who shows up (staff, independent, or public) changes the game.
This post lays out what adjusters do, how they work, and when you should hire one so you don’t leave money on the table.

What a Property Damage Claim Adjuster Does

Yy54FaOMT1-nEb84ZbZzUg

A property damage claim adjuster is a licensed professional who investigates insurance claims, evaluates structural damage, and determines how much money an insurer should pay to repair or replace damaged property. They’re the primary technical authority during the claims process, translating policy language into dollar amounts and timelines.

Their work is both analytical and procedural. Adjusters interpret insurance contracts, apply state regulations, and confirm whether specific damages fall within covered perils or exclusions. They also act as the insurer’s representative in most communications with policyholders, contractors, and third party specialists like engineers or restoration vendors.

The core responsibilities include:

Conducting on-site inspections to measure and photograph structural, water, fire, smoke, or storm damage. Reviewing police reports, fire department documentation, and witness statements. Estimating repair scope and costs using industry software and material databases. Negotiating settlement amounts with policyholders or their representatives. Communicating coverage determinations, claim status, and next steps to all parties. Preparing written reports and justifications for approval or denial decisions.

Adjusters bridge the gap between policyholders who need their homes repaired and insurers who must verify coverage, confirm damage, and control claim costs. This balancing role can create tension when interests diverge, but skilled adjusters reduce friction by explaining decisions clearly, documenting findings thoroughly, and maintaining open communication throughout the process. They prevent guesswork by measuring damage with tools, not assumptions. Every line item in an estimate ties back to visible, verifiable evidence.

Types of Property Damage Claim Adjusters

FsAsaIyaRbyI5ZktN9E2Hg

Not all adjusters work for the same employer or serve the same interests. The insurance industry relies on three distinct adjuster categories, each with different loyalties, fee arrangements, and regulatory responsibilities. Understanding who your adjuster represents helps you navigate the claims process and set realistic expectations.

Staff Adjusters

Staff adjusters are full-time employees of insurance companies. They receive salaries, benefits, and performance evaluations from the insurer that issues your policy. Their primary duty? The company. Which means their incentive structure aligns with controlling claim costs and processing files efficiently. Staff adjusters typically handle daily claims like routine water leaks, small fires, vandalism, and minor storm damage. They work from regional offices, maintain steady caseloads, and follow internal protocols set by claims departments.

Independent Adjusters

Independent adjusters operate as contractors hired by insurers on a per-claim or per-event basis. They don’t receive salaries or benefits from any single carrier. Instead, they work through independent adjusting firms and are deployed when claim volume spikes after hurricanes, wildfires, tornadoes, or hailstorms. Independent adjusters still represent the insurer’s interests and are paid by the insurer, but they juggle assignments from multiple carriers. Their workload can surge during catastrophe seasons and drop sharply during quiet months, making the role less predictable than staff positions.

Public Adjusters

Public adjusters are licensed professionals who represent policyholders, not insurers. They’re hired directly by homeowners, business owners, or property managers to investigate damage, prepare detailed scopes of loss, interpret policy language, and negotiate settlements with the insurer. Public adjusters charge fees based on a percentage of the final claim settlement, typically between five and fifteen percent depending on state caps and case complexity. They can be especially valuable when claims are large, disputed, or involve coverage gray areas.

Staff and independent adjusters appear automatically when you file a claim. Public adjusters enter the picture only when you choose to hire one. If your insurer assigns a staff or independent adjuster and you later hire a public adjuster, both will inspect the same damage and may disagree on scope, cost, or coverage.

The Property Damage Claims Process

raLfW9zZR9OnlO8A11fKCg

Adjusters guide nearly every stage of a property damage claim, from the moment you report the loss to the day you receive your final check. The process follows a predictable sequence, though timelines vary based on damage complexity, documentation quality, and whether disputes arise.

The typical claims workflow unfolds in six steps:

Reporting the claim. You contact your insurer by phone, app, or online portal to notify them of damage. The insurer opens a claim file, assigns a claim number, and logs the date and description of the loss.

Initial contact. An adjuster (staff or independent) is assigned to your file. They reach out within one to three business days to schedule an inspection and request preliminary documentation such as photos, receipts, or police reports.

On-site inspection. The adjuster visits your property to measure damage, take photos and videos, interview you or witnesses, and note visible structural issues, water intrusion, smoke residue, or missing materials. This visit typically lasts one to three hours depending on loss size.

Documentation and evidence review. The adjuster compiles inspection notes, reviews policy coverage, checks for exclusions, and gathers third party reports. You should provide receipts, contractor estimates, pre-loss photos, maintenance records, and any mitigation invoices during this phase.

Estimate preparation and review. The adjuster creates a scope of loss and cost estimate using software like Xactimate. They calculate actual cash value (depreciation included) or replacement cost value (no depreciation) depending on your policy terms, then submit the estimate for internal approval.

Settlement offer and payment. The insurer issues a written settlement offer. If you accept, payment is released, often in multiple disbursements if repairs are ongoing or if a mortgage lender holds an interest in the property. If you dispute the offer, you may negotiate, request an appraisal, or hire a public adjuster or attorney.

Most straightforward claims close within two to six weeks. Complex claims involving structural engineering, mold remediation, business interruption, or coverage disputes can stretch three to six months or longer. Delays typically occur when documentation is incomplete, when contractors and adjusters disagree on scope, or when insurers request additional inspections or specialist reports. The clearer and more organized your evidence, the faster the adjuster can move your file toward settlement.

When to Hire a Public Adjuster

2lnLm1BYQK2GMENRSxkuxA

Hiring a public adjuster isn’t necessary for every claim, but certain circumstances make professional representation a smart investment. Public adjusters bring technical estimating skills, policy interpretation experience, and negotiation leverage that most homeowners lack, especially when facing unfamiliar damage categories or large financial stakes.

Consider hiring a public adjuster when your claim involves significant repair costs, structural unknowns, or suspected hidden damage that the insurer’s adjuster may overlook. High-value properties, historic homes, and custom construction often require detailed scopes that go beyond standard estimating templates. Public adjusters can identify damage to specialty materials, custom millwork, historic finishes, and non-standard building methods that staff adjusters may not price accurately.

Disputes over coverage or settlement amounts are another strong signal. If the insurer’s offer falls thousands of dollars below contractor bids, or if the adjuster denies portions of your claim based on exclusions you believe don’t apply, a public adjuster can prepare a counter-estimate, cite relevant policy language, and negotiate directly with the insurer’s claims department.

You may benefit from a public adjuster if you:

Receive a settlement offer significantly lower than independent contractor estimates. Face extensive property damage requiring multiple trades and long-term reconstruction. Lack the time, technical knowledge, or construction background to prepare accurate scopes and cost breakdowns. Experience a partial or full claim denial that you believe is incorrect or unsupported by the policy. Encounter long delays, unresponsive adjusters, or repeated requests for documentation without progress toward settlement.

Public adjusters typically work on contingency, charging a percentage of the final settlement after your deductible is subtracted. Fees commonly range from five to fifteen percent, with exact percentages governed by state caps and the complexity of the claim. In Texas, for example, public adjuster fees are often capped at ten percent of the claim proceeds after the deductible. Always confirm the fee structure in writing before signing a contract, and verify that the adjuster holds a valid state license and bond.

Qualifications and Licensing Requirements for Adjusters

FlaKalNfSNS77XW2IHikkQ

Most states require property damage claim adjusters to hold an active license issued by the state’s department of insurance or equivalent regulatory agency. Licensing ensures that adjusters meet minimum education standards, pass competency exams, and maintain continuing education to stay current on policy language, building codes, and estimating practices.

Typical prerequisites include a high school diploma or GED, though many adjusters hold associate or bachelor’s degrees in insurance, construction management, or related fields. Candidates must complete pre-licensing coursework covering insurance principles, claims procedures, ethics, and state regulations. After finishing the course, they sit for a state administered exam that tests knowledge of policy contracts, coverage types, appraisal processes, and adjuster duties. Passing scores vary by state, and some states require background checks or fingerprinting.

Once licensed, adjusters must fulfill continuing education requirements to renew their credentials. Renewal cycles range from one to three years depending on the state, and CE credit hours typically fall between eight and twenty-four per cycle. Coursework often covers updates to building codes, new estimating software features, changes in flood or windstorm coverage, and case studies on complex claims.

Recognized professional certifications include:

IICRC certifications for water damage restoration and applied structural drying. AIC (Associate in Claims) and CPCU (Chartered Property Casualty Underwriter) designations. State-specific All Lines Adjuster licenses that permit handling property, casualty, and liability claims. Xactimate or similar estimating software proficiency certificates.

Public adjusters face additional licensing hurdles in many states, including separate exams, surety bonds, and stricter continuing education mandates. Independent and staff adjusters working across state lines may qualify for reciprocal licenses if their home state has agreements with others, reducing the need to retake exams.

Costs, Fee Structures, and Payment Models

qnivlGrSjmbsSLZoDD66g

Understanding how adjusters are paid clarifies whose interests they serve and what costs you’ll incur. The fee model varies sharply depending on whether the adjuster works for the insurer or for you.

Public adjusters charge contingency-based fees calculated as a percentage of the final claim settlement. The percentage is negotiated before the contract is signed and is typically applied to the net recovery after your policy deductible is subtracted. For example, if your claim settles for fifty thousand dollars, your deductible is two thousand dollars, and the public adjuster’s fee is ten percent, the adjuster receives four thousand eight hundred dollars and you receive forty-three thousand two hundred dollars. Contingency arrangements mean you pay nothing if the adjuster fails to secure a settlement, though some firms charge flat fees or hourly rates for consultation work on disputed claims or appraisal support.

Staff adjusters and independent adjusters are paid directly by the insurance company, not by the policyholder. Staff adjusters earn salaries or hourly wages plus benefits. Independent adjusters work on contract and are compensated per claim file or per day deployed, with rates rising during catastrophe assignments when demand spikes. Neither type bills the homeowner, and their fees don’t reduce your claim payout. However, their compensation structures create built-in incentives to control costs and close files efficiently, which can influence how aggressively they negotiate on scope, materials, or labor rates.

Final Words

In the action, we showed what a property damage claim adjuster does, the types you’ll meet, the step‑by‑step claims process, when a public adjuster helps, basic licensing, and how fees are handled.

Adjusters inspect, document, estimate, and negotiate so your repairs and safety come first. Fast, measured steps cut the chance of hidden moisture or unfinished work.

A clear, experienced property damage claim adjuster makes the process less stressful and helps get your home back to normal.

FAQ

Q: What does a property damage adjuster do?

A: A property damage adjuster inspects damage, determines what the policy covers, estimates repair costs, documents losses with photos and readings, negotiates with the insurer, and guides you through the claims steps.

Q: What not to say to claim adjuster?

A: You should avoid telling a claim adjuster you caused the damage, guessing the cause, giving recorded statements without advice, accepting the first offer, promising repairs, or altering damaged areas before documentation.

Q: How much does a claims adjuster make per claim?

A: Claims adjuster pay per claim varies: staff adjusters are salaried, independent adjusters often get per file fees or hourly pay, and public adjusters usually earn a contingency fee (often 5–15% of the settlement).

Q: How to settle a property damage claim?

A: To settle a property damage claim, document losses with photos and receipts, report promptly, get contractor estimates, review the insurer’s scope, negotiate or hire a public adjuster, and accept only a clear written agreement.

3 Subfloor Repair After A Flood Sparks Hope

Have you seen your floor soaked with water and wondered if it will ever feel safe again? We understand how overwhelming it can be when water damages your subfloor. There is hope. Quick water removal, careful drying with the right machines, and smart repairs can restore your home’s strength and stability. In three clear steps, we help fix a flooded subfloor so you can feel safe and secure in your home from day one.

Critical Steps to Repair Your Flooded Subfloor

First, clear out all the extra water. Remove standing water right away to stop damage and keep conditions safe. Always turn off the electricity before you enter. We use strong pumps or our emergency water extraction system (equipment that removes water quickly) to get the job done fast. In one case, quick water removal helped prevent extra moisture from soaking into the subfloor, lowering the risk of more problems later.

Next, take care of any hidden moisture. Even after you remove most of the water, dampness can stay under the boards. Use dehumidifiers (machines that pull moisture from the air) and fans to speed up drying. This step is key because any remaining moisture can weaken the layers below. While drying, it’s smart to check that the subfloor is coming back to a stable condition.

When the area is completely dry, inspect the subfloor carefully. Look for signs like swelling, soft spots, or loose sections that suggest damaged plywood or OSB panels (Oriented Strand Board, a type of engineered wood). Mark these areas with chalk so you know exactly what needs fixing. Also, use a stud finder (a tool that locates support beams) to check the joists before you cut anything. This helps you remove only the affected wood while keeping the good parts intact.

Finally, cut out and replace the bad boards. Secure the new panels well and seal the joints to bring back strength and stability. By following these steps, you can repair your flooded subfloor safely and confidently, protecting your home from further issues.

Identifying Damage in a Flood-Soaked Subfloor

img-1.jpg

Run your hand over the wood to check for damage. Look for swollen areas, soft spots, or boards that are coming apart in materials like plywood or OSB (a type of engineered wood). Use chalk to mark any spot that feels weak.

Dark stains and a musty smell may mean mold or mildew is growing under your floor. Also, check for small leaks from your roof, windows, or plumbing that might slowly damage the wood over time. You might need a quick wood strength test (a simple check of the wood’s condition) to find hidden issues.

Make a note of each problem on a simple checklist. Writing down both the feel of the wood and any signs of long-term damage helps us do a complete subfloor evaluation.

Drying and Moisture Removal Techniques for Flooded Subfloors

Natural drying can take months if left on its own. We speed things up by using industrial dehumidifiers (machines that pull moisture from the air) that cut drying time to just a few days. We also set up fans around the area to keep air moving, which helps evaporate and carry moisture away from the subfloor.

Thermal drying systems gently warm the space so water evaporates faster, much like warming a cold sponge to help it dry. You can see the effect by feeling the subfloor; after a few hours of heat, it should feel warmer and drier.

Before we start any repairs, we check the wood with a moisture meter (a tool that measures dampness) to make sure the area is dry. Using fans with dehumidifiers also stops mold from forming and prevents additional damage.

Step Action
1 Place dehumidifiers and fans together to boost drying.
2 Use thermal units to warm the area and speed up evaporation.
3 Test with a moisture meter to ensure the wood is dry.

Essential Materials and Tools for Subfloor Restoration

img-2.jpg

Begin by collecting the panels needed for subfloor repair. Most jobs use softwood or 3/4 inch plywood/OSB sheets that come in sizes up to 4×12 ft. These panels provide a solid base for your floors and meet construction standards to keep your home safe.

Gather the right tools to work efficiently. A circular saw (a power tool with a round blade) makes clean, accurate cuts. A chalk line helps you draw straight marks, while a stud finder shows where the support beams (joists) are hidden before you cut. Use a drill with subfloor screws to secure the new panels and a pry bar to remove any damaged sections. A moisture meter (a tool that checks how wet something is) confirms the wood is dry before installation, helping prevent future issues.

Always wear your safety gear during repairs. An N95 respirator protects you from mold spores and dust. Gloves safeguard your hands, and eye protection shields your eyes from debris. This gear helps keep you safe as you work.

For larger projects, consider renting extra equipment. An industrial fan boosts airflow, and dehumidifiers (machines that remove moisture from the air) quickly lower moisture levels. Renting moisture-detection tools can also help you monitor the drying process on bigger or more complex jobs.

With these materials and tools, you’re ready to replace damaged subfloor panels safely and correctly, ensuring your restoration project runs smoothly.

When to Hire a Professional for Subfloor Repair After Flooding

If you spot more than 10 square feet of mold or see that your support beams (the structural parts that hold up your floor) are weak, it's time to call a certified expert. They can come to your home, check the damage up close, and create a clear repair plan that finds even the hidden issues.

When mold keeps coming back, a mold cleanup specialist can apply an anti-microbial coating (a treatment that stops germs from growing) to help control it. They also disinfect the foundation and handle any biohazard cleanup safely. With the proper tools and training, these experts ensure that repairs meet building standards and keep any premium subfloor panels under warranty.

If you aren’t comfortable with complex structural fixes or if the damage goes beyond a simple repair, hiring a professional becomes essential. Consider these points:

  • How widespread the mold growth is
  • Any visible damage to beams or support systems
  • Your level of comfort with tackling the repair yourself

A certified contractor will ensure that your repair work is safe and follows current codes. With their expertise, your home can quickly return to a secure, livable condition.

Preventing Future Subfloor Flood Damage

img-3.jpg

Place a waterproof membrane or gasproof barrier between the slab and the subfloor in areas that flood. This extra layer blocks water from seeping into your home's structure. When installed correctly, it stops moisture from reaching areas that could rot or grow mold.

Before you lay finishing flooring, treat new panels with a mold inhibitor (a product that stops mold from starting) or an anti-microbial coating (a treatment that fights germs). This step lowers the chance of mold and helps keep your wood floors clean longer.

Improve airflow with energy-efficient ventilation. Use fans and vents to create a steady breeze that speeds up drying and keeps mold from forming. Good ventilation protects your subfloor and makes the indoor air fresher after a flood.

Check the seals around plumbing, appliances, and your foundation regularly. Small leaks can cause big problems over time, so routine inspections are important. If you suspect a leak, fix it quickly to stop further damage.

By following these steps, your home is better protected against future floods. For more ideas on keeping your home safe, take a look at our home safety checklist after a flood.

Final Words

In the action, we acted fast to clear excess water, assess floor joists, and mark damaged areas. We used pressure fans and dehumidifiers to dry out the subfloor thoroughly before making precise cuts and replacing boards. We covered safety steps and detailed tools to prepare for subfloor repair after a flood. By following these tasks, you can limit repair costs while preventing further damage. The process restores both your home and your sense of security. Stay positive; with the right steps, your home will be safe and livable again.

FAQ

What is the best method for subfloor repair after a flood?

The best method involves removing standing water, drying the area with industrial dehumidifiers and fans, and then cutting out and replacing any damaged panels while using proper safety gear.

How can I do DIY subfloor repair after a flood, including for concrete subfloors?

DIY repair means you first locate and mark warped or rotten areas using a stud finder and chalk, then carefully cut, replace with new panels, and seal joints. Safety gear like gloves and eye protection is a must.

What is the cost of repairing a water-damaged or rotten subfloor?

Repair costs depend on the extent of water damage, type of panel used, and whether you hire a specialist. Expenses can vary, so get a detailed estimate to understand labor and material costs.

Can a water-damaged subfloor be repaired, or is it ruined if it gets wet?

A water-damaged subfloor can be repaired if damage is isolated. If the boards are heavily swollen or rotten, replacing the entire section is needed to keep your home safe.

When should I replace my subfloor due to water damage?

Replace your subfloor when you see significant swelling, separation, or persistent mold and rot. These signs indicate that the board has lost structural integrity and poses further risk.

How long does it take for water to damage a subfloor?

Water can cause damage to a subfloor in a matter of hours if standing. However, severe rot and mold growth may take days to develop, so prompt action is essential.

KILZ for Smoke Odor: Which Formula Actually Works

You’ve probably heard you can just prime over smoke smell and call it done, but pick the wrong KILZ formula and that odor comes creeping back in three months. The difference between formulas isn’t marketing hype. It’s chemistry. Oil-based KILZ Original locks down heavy cigarette tar differently than water-based KILZ 2 handles light residue. We’ll break down which formula actually seals smoke odor based on what you’re dealing with, not what the label claims.

Effective KILZ Products for Blocking Smoke Odor

QYOS6M4ST86geu8EUcn1Sg

KILZ primers block smoke odor when you pick the right formula and don’t mess up the application. The primer seals smoke contaminated surfaces before you paint, stopping odor molecules from bleeding through to your finished wall. Without it, smoke smell comes right through even if you slap on three coats of regular paint.

KILZ makes primers with different chemical bases (oil, water, and shellac performance hybrids) built to handle different levels of smoke damage. What you need depends on whether you’re dealing with light residue or heavy cigarette smoke that’s been soaking in for years.

Product Base Type Smoke Odor Blocking Power Best Application Key Features
KILZ Original Oil-based Heavy-duty Severe cigarette smoke, fire damage, interior/exterior surfaces Trusted for 40+ years, excellent adhesion, blocks heavy stains and odors
KILZ Original Low Odor Oil-based Heavy-duty Heavy smoke damage in occupied spaces Lower VOC than standard oil primers, still requires ventilation
KILZ Restoration Water-based with oil/shellac performance Heavy-duty Cigarette smoke, fire damage, pet odors, subfloors Water cleanup, comparable blocking to oil primers, one-coat coverage
KILZ 2 Water-based Light to medium Third-hand smoke, light staining Fast-drying, multi-surface, economical for mild odor issues
KILZ 3 Premium Water-based Medium Moderate stains, covering dark colors High hiding power, not specifically formulated for heavy odor blocking

For light smoke exposure or third-hand residue, KILZ 2 works fine and costs less. If someone smoked occasionally in one room years back, this water based formula seals those mild odors. For heavy cigarette smoke where walls show yellowing and the smell hits you at the door, use KILZ Original or KILZ Restoration. Both handle severe tobacco damage.

Fire damage needs KILZ Original or KILZ Restoration depending on your situation. Go with oil based KILZ Original when you’re working on exterior surfaces, empty spaces, or anywhere you can ventilate heavily during application. Pick water based KILZ Restoration when you need easier cleanup, lower VOC exposure, faster dry times, or you’re working in occupied spaces where strong solvent odors create problems. Both block smoke odor equally well. The choice comes down to application conditions rather than blocking power.

Cigarette Smoke and Tobacco Odor Removal with KILZ

gJolBhMITY6RB4ZlcUUkqQ

Cigarette smoke doesn’t just float through a room and disappear. The tar and nicotine penetrate porous surfaces like drywall, wood, and ceiling tiles, bonding with the material microscopically. This creates visible yellow brown staining plus embedded odor that lives inside the wall surface itself. You’ll see stains on walls and ceilings, but you’ll also find smoke residue on cabinet interiors, closet walls, door frames, anywhere air circulated while someone smoked indoors.

Just painting over smoke damaged surfaces traps odor molecules beneath the paint film temporarily. They migrate through latex paint within weeks or months. The paint acts like a temporary lid, not a permanent seal. As temperature and humidity shift, those trapped odor compounds work their way through the paint layer and release back into the room. You’ll notice the smell returning gradually. You might see yellow staining bleeding through your fresh paint.

KILZ primers create a chemical barrier that encapsulates smoke residue and blocks odor transmission through to the topcoat. The primer seals the contaminated surface, preventing smoke compounds from moving through the paint system. For rental properties where a tenant smoked for years, house flipping projects where you’re removing smoke smell before listing, or moving into a home where previous owners smoked, KILZ application to all interior surfaces eliminates the odor source rather than just covering it.

Surface Preparation Before Applying KILZ Primer

4OETockmRbW-IkN70BQ0Tw

Surface prep determines whether your primer seals smoke odor or fails within months. Cleaning removes surface contamination that would otherwise prevent primer adhesion and leave gaps in your odor barrier.

  1. Wipe down all surfaces with a damp cloth to remove dust, cobwebs, and loose debris that would prevent primer contact with the wall surface.

  2. Remove any loose or peeling paint using a scraper or wire brush, creating a solid substrate for the primer to bond to.

  3. Clean heavily nicotine stained surfaces with TSP (trisodium phosphate) cleaner to cut through the greasy tar residue. Mix according to package directions and scrub walls, ceilings, and woodwork thoroughly.

  4. Rinse TSP cleaned surfaces with clean water to remove cleaner residue that would interfere with primer adhesion.

  5. Allow all surfaces to dry completely, typically 24 hours after washing, before applying any primer.

Surface preparation matters because KILZ needs direct contact with the contaminated material to seal it effectively. Dust, grease, or loose paint creates separation between the primer and the smoke damaged surface, leaving pathways for odor to escape. On heavily smoked surfaces where nicotine has created a shiny, sticky coating, that residue must be cleaned off or the primer won’t bond properly to the wall beneath it.

Application Methods for KILZ Smoke Odor Primers

limos2epQe2Slchq7-0jOQ

Start by cutting in around edges, corners, and trim using a quality angled brush. Load the brush with primer, then work it into corners and along ceiling lines where rollers can’t reach. This creates a sealed perimeter before you fill in the main wall areas.

After cutting in, use a 3/8 inch to 1/2 inch nap roller to fill in the remaining wall and ceiling surfaces. The roller distributes primer evenly across large areas without the streaking that brushes sometimes leave. Roll in a W pattern to spread primer, then fill in sections with overlapping vertical strokes for solid, even coverage.

Application Factor Specification
Coverage per gallon 300-400 square feet depending on surface porosity
Dry time before topcoat 1 hour minimum for KILZ Restoration, 2-4 hours for oil-based formulas
Coat requirements One coat sufficient for cigarette smoke, two coats for severe fire damage
Stirring frequency Thoroughly before use, occasionally during application to maintain consistency

One coat handles cigarette smoke odor blocking in most situations when applied at proper thickness without thin spots or holidays. You’ll know you need a second coat if you see staining bleeding through the primer after it dries, or if you still smell smoke odor coming through the sealed surface. Check the primed surface after it dries completely. If you see yellow brown discoloration appearing through the primer or notice smoke smell when you put your nose near the wall, apply a second coat before painting.

Fire Damage Restoration Using KILZ Primers

RGzJex2SdapwKvgVMCbgQ

Wildfire smoke exposure differs significantly from direct fire damage inside a structure. Wildfire smoke that drifted into a home through windows or ventilation creates surface contamination similar to cigarette smoke. It deposits odor and soot on walls and ceilings but doesn’t usually involve heat damage or heavy charring. KILZ Restoration or KILZ Original handles wildfire smoke odor effectively on these surfaces.

Direct fire damage inside a structure involves heat exposure, heavy soot deposits, charred materials, and potential structural compromise that primer alone can’t fix. KILZ works on surfaces that remain structurally sound after fire. Drywall that’s smoke stained but not burned through, wood framing that’s blackened but not charred deep, concrete that’s discolored but not cracked. The primer seals smoke odor into these salvageable materials so they can remain in place rather than requiring replacement.

When fire damage includes melted materials, deep charring that compromises structural integrity, collapsed drywall, or insulation that absorbed smoke and water during firefighting, Fire and smoke-related home repairs: drywall replacement, odor-sealing preparation, insulation removal and replacement, repainting, trim and door repair, and restoring damaged interior finishes handle the damage repair before any primer application. Primer seals smoke odor in damaged but salvageable materials. It doesn’t restore materials that are physically destroyed or structurally unsafe.

Drying Time and Topcoat Compatibility for KILZ Primers

AZ7uxM9jT0eTTyUnfZCb6g

Proper drying time ensures the primer fully cures and creates an effective odor barrier before you seal it beneath topcoat paint.

KILZ Restoration allows topcoat application after 1 hour minimum dry time in normal temperature and humidity conditions. KILZ Original and other oil based formulas require 2 to 4 hours before recoating, longer in cool or humid conditions. Best practice waits 24 hours before topcoating any primer, even fast drying formulas, to ensure complete curing and maximum odor blocking.

Temperatures below 50°F significantly extend dry times and may prevent proper curing. Don’t prime in cold conditions. High humidity slows drying for all primer types but especially affects water based formulas. Use ventilation and dehumidification if needed.

Applying topcoat paint before the primer fully dries traps solvents beneath the paint layer, creating soft spots that remain tacky and don’t cure properly. This compromises the odor barrier and leaves sections where smoke smell can eventually penetrate. Remove painter’s tape before the topcoat fully dries to avoid pulling up dried paint edges, usually 30 to 60 minutes after painting, when the surface is dry to touch but not fully cured.

Cost Considerations and Where to Purchase KILZ Primers

ccdMrGy-SKypzeHH8_Xglg

KILZ primer costs vary significantly between container sizes, with larger containers offering substantially better per gallon pricing. Paint shortages and market fluctuations affect pricing. One documented case showed a 5 gallon container increasing approximately $40 within one year.

For whole house smoke odor projects or multi room renovations, buying the 5 gallon size reduces your per gallon cost considerably compared to multiple 1 gallon purchases. Calculate your square footage coverage needs before purchasing to determine the most economical container size.

Container Size Typical Price Range Best For
1 gallon $25-$45 Single room, small repair projects, testing product before larger purchase
2 gallon $50-$75 2-3 room projects, moderate smoke damage
5 gallon $110-$180 Whole house projects, rental property preparation, house flipping

Home Depot and Lowe’s stock KILZ products in store where you can examine different formulations and ask staff questions about which product fits your project. Amazon offers delivery convenience and sometimes competitive pricing, particularly useful when you need large quantities delivered to your project site. Compare in store and online pricing before purchasing, checking for contractor discounts at home improvement stores if you’re buying multiple containers for extensive projects.

Safety Precautions When Using KILZ for Smoke Odor

62XBlXnRS82Exii8WTXtYw

Primer application temporarily adds strong chemical odors to spaces that already have compromised air quality from smoke damage. This doubled odor exposure requires proper protection.

Use a respirator with organic vapor cartridges (not just a dust mask) when applying oil based KILZ formulas in enclosed spaces. Wear safety glasses or goggles to protect eyes from primer splatter, particularly important when rolling ceilings. Use nitrile or latex gloves to prevent skin contact with primer and solvents.

Set up cross ventilation with fans in windows, one blowing out to exhaust fumes and one bringing fresh air in. Limit continuous exposure time to 2 or 3 hours, taking breaks outside to clear your lungs. Keep children and pets completely away from the application area until primer dries and odor dissipates.

Oil based KILZ formulas contain higher VOC levels and require substantial ventilation during application and drying. The strong solvent smell indicates active off gassing of chemical compounds that shouldn’t be breathed heavily. Even KILZ Original Low Odor, while producing less smell than standard oil primers, still releases VOCs and needs ventilation. Water based KILZ Restoration contains lower VOC levels and produces less intense odor during application, but you still need airflow to prevent vapor buildup in enclosed spaces.

Cleanup procedures differ significantly between formulas. Oil based KILZ requires mineral spirits or paint thinner to clean brushes, rollers, and any spills. Soap and water won’t work. Water based KILZ Restoration cleans up with soap and water, eliminating the need for chemical solvents. Clean tools immediately after use before primer dries on the bristles or roller nap.

Dispose of oil soaked rags, used mineral spirits, and leftover oil based primer according to local hazardous waste regulations. Don’t pour solvents down drains or throw oil soaked materials in regular trash where they can spontaneously combust. Water based primer disposal follows standard latex paint disposal rules for your municipality.

Alternative Brands and When to Consider Them

mZtbN9dYRTW6oMMH5ftB8Q

Zinsser BIN shellac based primer represents the primary alternative to KILZ for extreme smoke odor situations. BIN uses denatured alcohol as its solvent base rather than mineral spirits or water, creating a harder, more impermeable seal than either oil or water based primers. Professional restorers sometimes prefer BIN for fire damage restoration where smoke odor is exceptionally severe.

Shellac based primers like BIN offer slightly superior blocking power for the most extreme odor situations, but they come with application challenges that KILZ formulas avoid. BIN dries extremely fast, often within 15 to 30 minutes, which makes application difficult for inexperienced users. You have to work quickly before the primer becomes tacky. The denatured alcohol base produces intense fumes that require even more ventilation than oil based primers. Cleanup requires denatured alcohol, and the primer costs more per gallon than most KILZ formulations.

Consider switching to Zinsser BIN when KILZ Restoration or KILZ Original have been properly applied but smoke odor persists through the primer, when you’re dealing with fire damage so severe that professional restorers recommend shellac based sealing, or when you need the absolute maximum blocking power regardless of application difficulty or cost. For standard cigarette smoke odor, pet odors, or typical smoke damage scenarios, KILZ formulations provide equivalent results with easier application and lower cost.

Common Mistakes When Using KILZ for Smoke Odor

XeHmlwa-RwCYijnriPItqQ

Application errors cause most KILZ primer failures rather than the product itself being ineffective. These mistakes compromise the odor barrier that properly applied primer creates.

Skipping surface cleaning before priming leaves greasy nicotine residue that prevents primer adhesion, creating gaps where odor escapes. Inadequate ventilation during application seems counterintuitive when dealing with odor, but poor airflow extends dry times and can prevent proper curing.

Applying primer too thin by overworking it with the roller or stretching coverage beyond manufacturer specifications leaves insufficient material to block odor transmission. Painting topcoat too soon before primer fully dries traps solvents and prevents complete curing, weakening the odor barrier.

Using KILZ 2 for heavy smoke damage when KILZ Original or Restoration is needed (choosing the wrong formula for damage severity guarantees failure). Failing to address odor sources beyond wall surfaces, like smoke saturated carpet pad, insulation, or HVAC ductwork that continuously recontaminate the space even after walls are sealed.

Verify primer effectiveness by smelling the primed surface after it dries completely but before topcoating. Put your nose close to the wall in several locations. If you still detect smoke odor coming through the primer, apply a second coat or switch to a stronger formula. If odor persists after two properly applied coats of appropriate primer, the smell is coming from sources beyond the primed surfaces and you need to identify and remediate those additional contamination points.

Long-Term Effectiveness and Maintenance After KILZ Application

Properly applied KILZ primer creates a permanent odor barrier that doesn’t require reapplication or maintenance. Once the primer fully cures and you’ve topcoated it with paint, the sealed barrier remains effective indefinitely under normal conditions. The primer chemically encapsulates smoke residue and prevents odor molecule migration through the paint system for the life of the paint job.

The primer itself produces temporary odor during application and drying. This is solvent off gassing, not smoke smell. For oil based formulas, expect noticeable primer smell for several days after application. Water based KILZ Restoration produces less intense odor that typically dissipates within 1 to 2 days. Once you apply topcoat paint over the cured primer, the primer smell disappears completely and won’t return.

Smoke odor returning after proper KILZ application indicates one of three problems. Incomplete surface coverage leaving unprimed sections where odor escapes, new smoke exposure from continued smoking in the space, or moisture damage that has compromised the primer seal and allowed odor compounds to reactivate. Check for missed spots first, particularly in closets, behind doors, cabinet interiors, and other areas easily overlooked during initial priming.

KILZ offers warranty coverage for product defects but not for application errors or inappropriate product selection. If you’ve properly prepared surfaces, selected the correct formula for your damage severity, applied it according to manufacturer directions, and odor still penetrates, contact KILZ customer support with documentation of your application process and purchase information. Most performance issues trace back to application problems rather than product failure, but manufacturer support can help troubleshoot persistent issues.

Professional Application Versus DIY KILZ Projects

KILZ primer application involves accessible techniques that most homeowners can perform successfully with basic painting skills and proper safety equipment.

DIY appropriate scenarios include single room or small area smoke damage where you can complete the project in 1 to 2 days, straightforward wall and ceiling priming without extensive damage repair needed first, available time to properly prepare surfaces, apply primer carefully, and ventilate adequately, or rental property preparation or house flipping where you’re managing multiple trades and can schedule priming between other contractors.

Professional appropriate scenarios include whole house smoke damage combined with repairs to drywall, flooring, or structural components, fire damage restoration requiring assessment of which materials are salvageable versus need replacement, occupied homes where you need fast completion with minimal disruption to residents, or commercial properties with liability considerations or building code requirements for certified restoration work.

Water-related home repairs: leak-related drywall repair, ceiling and wall restoration, flooring replacement, baseboard and trim repair and Interior rebuilding and finishing: drywall hanging and finishing, texture matching, interior painting, flooring installation combine damage repair with priming application when smoke odor accompanies physical damage to surfaces.

A hybrid approach works well for extensive damage where professional contractors handle drywall replacement, subfloor repairs, or structural work, then you complete the priming and painting yourself to reduce labor costs. Alternatively, professionals can prime difficult areas like vaulted ceilings, stairwells, or spaces requiring scaffolding, while you handle straightforward room priming. Match the approach to your skill level, available time, and project complexity rather than assuming either all DIY or all professional is the only option.

Final Words

KILZ primers give you real options for blocking smoke odor when you pick the right formula and prepare surfaces correctly.

KILZ Restoration and KILZ Original handle most cigarette smoke and fire damage situations. Clean the surfaces first, apply even coats, and give the primer time to dry before painting.

If you’re dealing with fire damage that affected structure or insulation, get the repairs done right before you prime. We handle the full sequence so you don’t paint over problems that need fixing first.

Once the killz for smoke odor is sealed properly and your topcoat is on, that barrier holds. Your home can smell clean and feel normal again.

FAQ

Does KILZ block smoke smell?

KILZ blocks smoke smell when properly applied to affected surfaces. KILZ primers create a sealing barrier that prevents smoke odor molecules embedded in porous materials from penetrating through fresh paint layers.

Is there a paint that kills smoke smell?

There is no paint that kills smoke smell, but specialty primers like KILZ Restoration and KILZ Original seal smoke odors by creating an impermeable barrier. Regular paint without primer allows odor molecules to bleed through the new finish.

Does KILZ cover up odors?

KILZ covers up odors by sealing them into the surface rather than eliminating them. The primer creates a permanent barrier that traps odor molecules in the substrate, preventing them from entering your living space.

Will painting walls cover smoke smell?

Painting walls will not cover smoke smell without primer application first. Paint alone is too porous to block embedded smoke odors, which will penetrate through the new paint within days or weeks.

Which KILZ product works best for heavy cigarette smoke?

KILZ Original and KILZ Restoration work best for heavy cigarette smoke because they offer maximum odor blocking performance. KILZ 2 handles light smoke stains but lacks the sealing power needed for severe nicotine damage.

How many coats of KILZ are needed for smoke odor?

One coat of KILZ is needed for smoke odor from cigarette exposure when properly applied. Heavy fire damage or persistent nicotine staining may require a second coat if odor bleeds through after drying.

Can you use KILZ on smoke-damaged ceilings?

You can use KILZ on smoke-damaged ceilings using the same application method as walls. Ceilings often absorb more smoke than walls and benefit from KILZ Original or KILZ Restoration for complete odor blocking.

How long does KILZ smell last after application?

KILZ smell lasts a few days after application, with oil-based formulas producing stronger odor than water-based products. The primer odor completely disappears once topcoat paint is applied and dried.

Do I need to clean walls before applying KILZ for smoke?

You need to clean walls before applying KILZ for smoke to remove loose residue and ensure proper primer adhesion. Wipe surfaces with a damp cloth or TSP solution for heavy nicotine buildup.

What is the difference between KILZ Original and KILZ Restoration for smoke?

The difference between KILZ Original and KILZ Restoration for smoke is the base formula. KILZ Original is oil-based requiring mineral spirits cleanup, while KILZ Restoration is water-based with comparable performance and soap-and-water cleanup.

Can KILZ block fire damage smoke smell?

KILZ can block fire damage smoke smell from light to moderate exposure. Severe fire damage with structural compromise or heavy soot penetration requires professional restoration services before primer application.

How soon can you paint over KILZ after smoking odor treatment?

You can paint over KILZ after one hour minimum dry time following smoke odor treatment. Waiting longer in high humidity or cool temperatures ensures complete primer curing for maximum odor blocking.

Does KILZ work on third-hand smoke?

KILZ works on third-hand smoke by sealing residual nicotine and tar embedded in walls, ceilings, and trim. Proper surface preparation and complete coverage are necessary to block persistent third-hand smoke contamination.

Black Mold Exposure Symptoms: Recognize the Warning Signs

0

Could the air in your home be making you sick?
Most people shrug off a little musty smell until headaches, coughing, and strange fatigue show up.
Black mold often hides behind drywall or under flooring and its symptoms look a lot like allergies, so it gets missed.
This piece will help you recognize the warning signs, where to check, and when to call a pro.
Spotting it early stops more damage and gets repairs started sooner so you can feel safe at home again.

H2 – Full Outline Required for Review

TaRuu9SwRl6o5vb6R4lg4Q

We can’t move forward without the full article outline.

To write something useful on “Black Mold Exposure Symptoms: Recognize the Warning Signs,” we need the complete structure you’re working from. That means all H2 and H3 sections, target word counts for each part, any scraped reference material you want included, and the hyperlinks that need to go in.

Without that, there’s no way to check if the structure actually matches what people are searching for, spot sections that repeat the same point, or make sure the final piece lines up with what you’re expecting before it goes live.

Send over the outline and we’ll get it reviewed.

Final Words

Right in the action: this piece notes that no full article outline was provided for review, so we can’t move the draft forward.

Please resend the complete outline, with every H2 and H3 exactly as you want them for publication, so we can check search‑intent alignment, remove redundancy, and tighten the structure.

Once we have that, we’ll quickly draft clear, useful content that covers key details like black mold exposure symptoms and next steps. Send it over and we’ll get this ready and practical.

FAQ

Q: How do I know if mold is making me sick?

A: Mold is likely making you sick if you get persistent cough, wheeze, nasal congestion, eye irritation, headaches, fatigue, unexplained rashes, or if asthma worsens at home; see a doctor and document symptoms.

Q: How to detox from black mold exposure?

A: Detox after black mold exposure starts by stopping exposure and seeing a doctor. Then improve air with HEPA filtration (a filter that traps tiny particles), launder clothing, consider professional mold removal, and follow medical advice.

Q: How long do you have to be exposed to mold to get sick and what are the long term effects of living in black mold?

A: Time to get sick from mold varies—some react within hours, others after days or longer. Long-term exposure can cause chronic coughing, asthma, ongoing sinus problems, fatigue, and cognitive complaints; remove the mold and get medical care.

Emergency Mitigation Strategies For Loss Prevention: Fast Win

0

Did you know that just a few seconds can be the difference between a simple repair and major loss? When an emergency strikes, quick action can protect your home and give you peace of mind. We use smart sensors (small devices that alert you to problems) and quick shutoffs (tools that stop damage fast) to control the situation. In this post, we break down clear, step-by-step strategies that turn fast responses into big wins for loss prevention. Stay tuned to learn how to stop damage before it starts.

Rapid Emergency Mitigation Tactics for Immediate Loss Prevention

When every second counts, quick actions stop small issues from turning into big losses. We are ready to act fast during emergencies. Smart sensors and AI security cameras (devices that watch for problems) monitor key areas so even small changes are noticed early. We also run regular checks and audits (system reviews) to catch any hiccups before they grow into major problems.

  • Emergency shutoff protocols
  • Alarm system checks
  • Rapid asset triage
  • Temporary storm barricades
  • Area reconnaissance

These steps give you a clear plan for immediate action. Our teams know how to quickly shut off systems and sort out important equipment to prevent further damage. We mix modern technology with regular system reviews to control problems fast and keep losses to a minimum.

By linking these quick-response drills with our overall loss prevention strategy, we build a system that stops issues before they spread and handles them when they do pop up. Using smart sensors, early warning AI devices, and frequent audits creates a strong and reliable setup. This team effort makes sure everyone, from field crews to managers, is ready at the moment you need it most, reducing immediate damage and protecting your property for the long haul.

Emergency Hazard Assessment Procedures and Vulnerability Evaluation Tactics

img-1.jpg

We begin by inspecting the site to spot potential dangers. Our crew walks through the entire area, checking for water damage, loose or cracked structures, and other signs that could lead to bigger problems. We then score each risk by how likely it is to happen and how much damage it could cause. This clear risk map helps us focus on the areas that need immediate care. We document every risk so nothing is missed.

We also check for weaknesses in how the facility runs. We do regular security audits and scheduled system checks to catch any unexpected issues. Our team uses simple checklists and scans both physical spaces and digital controls (tools used for safety). This routine helps us quickly isolate problems and keep the emergency plan strong.

Emergency Asset Protection Guidelines and Structural Integrity Checks

We start by keeping your important areas safe. We use token-based access systems (devices that let only approved people in) to secure places like loading bays, stock rooms, and cash-counting zones. For more details on protecting your property, visit how to prevent future property loss after disaster. We make sure only the right people can reach high-risk areas, which lowers the chance of theft or damage.

We also boost safety with smart sensors. Smoke, flood, and motion detectors (devices that sense danger) send alerts to a central system so we can respond quickly. This early warning helps us protect the building and keep its structure strong. Our team checks and maintains all equipment regularly, ensuring that everything stays secure.

Asset Type Protection Measure Check Frequency
Loading Bays Token-based Access Weekly
Stock Rooms Security Cameras Daily
Cash Counting Areas Controlled Entry Weekly
Critical Infrastructure Smart Sensor Network Monthly

Emergency Contingency Planning Steps and Critical Supply Management

img-2.jpg

We start by mapping out every part of your supply chain. We list key vendors and resources, including main suppliers, transport routes, and storage places. This way, you know who to call if a disruption happens. Keeping clear records and regular updates makes everything easier to manage when you face an emergency.

Next, we set up backup resources to keep your essential operations running during a crisis. We create simple backup plans for power, water, and communication systems so that service continues without interruption. For example, having extra power generators, water tanks, and backup lines can make all the difference. For more details on arranging supply staging and coordination, visit emergency restoration services. We also run regular drills and checks to ensure these systems stay in top shape.

Finally, we weave these steps into your overall business plans. This makes sure every department knows its role when unexpected events occur. Standardizing backup systems and managing your supply chain together helps cut downtime and keep losses low. We review and update these plans often so your team remains ready and resilient no matter what happens.

Emergency Communication Plans for Crisis Intervention and Coordination

We set up our alert system with clear, simple instructions. We train all team members on where to find alarms and security systems so they know exactly where to go after hours. We use SMS, radios, and loudspeakers to send fast warnings when trouble appears.

Our reporting process is straightforward. When someone sees something unusual, they tell their supervisor right away using our set protocols. This quick reporting stops small issues from growing into big problems.

We keep our teams in close touch. We hold regular meetings to review each communication channel and practice our reporting drills. This way, everyone, from floor staff to managers and security, knows what to do. Clear roles and constant contact help us act fast and manage the situation before it escalates.

Emergency Scenario Simulation and Rapid Response Drills

img-3.jpg

We run regular drills to help our teams feel ready when an emergency happens. We use hands-on training so every team member knows their role and can act fast if something goes wrong. By practicing under pressure, we build trust and confidence. This method helps us spot and fix any gaps in our emergency plans.

We hold different drills for various situations. For example:

  1. In a fire drill, our team practices safe evacuations and shutting down sources that might start a fire.
  2. In a flood drill, we learn how to remove water quickly and protect essential equipment.
  3. In a power outage drill, we test backup systems and keep our communication lines open so everyone knows the plan.

We schedule these exercises often and review each one to learn what works best. This continuous improvement keeps our tools updated and our teams sharp, ready to help you quickly when you need us.

Emergency Post-Event Evaluation Methods and Recovery Timeline Estimation

After a loss, we meet as a team to review what happened. We check logs and talk through every detail so we learn what worked and what needs fixing.

We use past events to set clear timelines for recovery. Our plans include extra time for any unexpected delays, so you know what to expect while we start repairs quickly.

We follow simple audits and track key numbers to see how our work is going. Sometimes we bring in outside experts for a fresh look. Their advice helps us improve our plans. Every event teaches us how to stop damage sooner and get things back to normal faster.

Final Words

In the action, we outlined rapid emergency mitigation tactics to stop loss and reduce damage. We covered steps from quick shutoffs and asset protection to setting up strong communication channels. Our guide also discussed thorough hazard assessments, coordinated backup systems, and regular drills to keep everyone ready.

These emergency mitigation strategies for loss prevention help turn crisis into action. We believe that with clear steps and a calm approach, recovery becomes manageable and progress is just a call away.

FAQ

Q: What are free emergency mitigation strategies for loss prevention and for the workplace?

A: The free emergency mitigation strategies include quick actions like emergency shutoffs, alarm checks, rapid asset triage, and temporary barricades. In workplaces, these steps help stop incidents immediately and protect valuable assets.

Q: What does loss prevention security entail?

A: Loss prevention security involves using cameras, smart sensors, and clear protocols to protect assets. This approach deters theft and damage by providing early warnings and enabling quick intervention.

Q: What is the typical salary for loss prevention security roles?

A: Loss prevention security salary varies by industry, experience, and location. Generally, these roles offer competitive pay for professionals who protect property and manage risks in diverse settings.

Q: What are some loss prevention examples, retail strategies, and policy examples?

A: Loss prevention examples include using cameras, staff training, and secure access. Retail strategies often consist of inventory audits and clear signage, while effective policies detail procedures and responsibilities to minimize risks.

Q: What is loss prevention?

A: Loss prevention means using procedures and tools to reduce risks of theft, damage, or loss. It combines physical measures, technology, and regular audits to secure assets and maintain safe environments.

Q: What are five key methods of loss prevention?

A: The five key methods are employee training, security cameras, access control, regular audits, and alarm system checks. These practical steps help detect and deter potential incidents effectively.

Q: What are three DLP techniques?

A: Three DLP techniques include monitoring sensitive data access, applying encryption to protect data, and using endpoint protection software. These tactics help prevent unauthorized digital data breaches.

Q: What loss prevention technique is used by most clients?

A: Most clients rely on technology-based access controls combined with active surveillance. This technique integrates physical and digital measures to monitor high-risk areas and quickly address potential security issues.

Property Damage Claim Timeline: What to Expect and When

0

You might think insurance companies pay claims in days, but most homeowners wait weeks or months watching their damaged property sit unrepaired while the process crawls forward. The timeline for your property damage claim depends on how fast you document everything, how complex the damage is, and whether your insurer moves quickly or drags their feet. This guide walks you through each phase, what happens when, and how to avoid delays that keep your home in limbo longer than necessary.

Complete Property Damage Claim Timeline: Phases and Timeframes

RnzmyAknRO2TFscneCvMwg

The complete property damage claim process usually takes 2 to 8 weeks for straightforward claims and 2 to 6 months for complex ones, with certain disputed or catastrophic cases stretching well beyond that. How long your claim takes depends on damage extent, how well you document everything, how responsive your insurer is, and whether disputes or hidden damage pop up during repairs. The table below breaks down each phase with typical timeframes and what you’ll need to handle at each stage.

Phase Typical Timeframe Key Actions Required
Initial filing and first contact 0-3 days Report damage to insurer, provide basic incident details, receive claim number
Claim acknowledgment 1-30 days (state-dependent) Confirm receipt of acknowledgment letter or email, verify claim number and adjuster assignment
Adjuster assignment 2-5 days Wait for adjuster contact, prepare access to damaged areas, gather initial documentation
Documentation submission 3-7 days Submit photos, videos, inventories, receipts, and any required supporting documents
Property inspection 5-10 days after initial contact Schedule and attend inspection, provide access, answer adjuster questions
Damage assessment and estimate review 7-14 days Obtain contractor estimates, submit to insurer, respond to assessment questions
Settlement offer and negotiation 10-21 days Review settlement offer, negotiate if needed, provide additional documentation to support valuation
Approval and payment processing 5-15 days Accept settlement, complete required forms, coordinate with mortgage company if applicable
Contractor coordination and repair start 1-4 weeks (variable) Select contractor, schedule work, obtain necessary permits, coordinate start date
Repair completion and final inspection Variable by damage extent Monitor repair progress, coordinate final inspection with adjuster or contractor
Final payment release 7-14 days after completion Submit completion documentation, final invoices, photos of completed work
Claim closure 1-5 days Confirm all payments received, file final documentation, obtain closure confirmation

These timeframes represent standard scenarios where communication flows smoothly, liability is clear, and damage assessment is straightforward. Catastrophic events like hurricanes or wildfires create processing backlogs that can double or triple these timelines as hundreds or thousands of neighbors file claims at once. Complex structural damage, coverage disputes, or hidden problems discovered during repairs will push the process significantly beyond these baseline estimates. The sections that follow explain specific factors that speed up or slow down each phase and what you can do to keep things moving.

Initial Steps: Filing a Claim and First Contact

Bq7kNuG-RvGh_oEnLdHGUg

Filing your claim right after discovering damage speeds up the entire process and prevents your insurer from using delayed reporting as grounds for denial or reduced payment.

Contact your insurance company as soon as you identify damage, whether that’s calling their claims line, using their mobile app, or working through your agent. You’ll provide basic details about what happened, when it occurred, and a general description of the damage you can see. The insurer assigns a claim number during this initial contact, which you’ll use for all future communication. Within 24 to 72 hours, an adjuster gets assigned to your case and typically makes first contact by phone to schedule an inspection and confirm the information you provided.

Most insurers acknowledge your claim in writing within a few days, but state law allows up to 30 days for formal confirmation that they received your report. Natural disasters and catastrophic events delay initial contact because adjusters get overwhelmed by mass claim situations where entire neighborhoods file simultaneously. After a major storm or wildfire, you might wait a week or longer for that first adjuster call instead of the usual couple of days. That initial delay doesn’t mean your claim isn’t being processed. It just means you’re in a queue with many others.

Documentation Requirements for Your Damage Claim

txnui3y0RgO8Fv7YwUTePg

Complete documentation speeds up every phase of your claim, while missing information creates delays as the insurer requests additional evidence and waits for you to gather it. Strong documentation also supports higher settlement values because it proves the extent of damage and the value of what you lost.

Different damage types require different evidence packages. Water damage claims need photos showing the water source, affected areas, and any visible damage to floors, walls, or contents, plus documentation of the timeline if the problem developed over hours or days. Fire damage requires extensive photo documentation of charred materials, smoke staining, and structural impacts, often from multiple angles to show the full scope. Storm damage benefits from weather reports confirming the event, plus exterior and interior photos showing wind or hail impact points. Every claim type benefits from detailed inventories of damaged items with descriptions, approximate purchase dates, and estimated replacement values.

Essential documentation to gather immediately:

  • Photos and videos from multiple angles showing all damaged areas before any cleanup or repairs begin
  • Detailed inventory of damaged or destroyed items including brand names, ages, and estimated values
  • Police reports if damage resulted from theft, vandalism, or any criminal activity
  • Weather reports and official records confirming storms, wind speeds, or precipitation during the damage event
  • Receipts and invoices for any emergency repairs made to prevent further damage
  • Multiple contractor estimates for permanent repairs
  • Communication logs tracking every call, email, or conversation with your insurer
  • Witness statements from neighbors or others who observed the damage or the event that caused it

Timing matters for documentation. Taking photos before you move anything or make temporary repairs creates the strongest evidence of what actually happened. Waiting even a few days weakens your position if moisture dries, debris gets cleared, or conditions change.

The Adjuster Inspection and Damage Assessment Phase

8zFuL4W4RYqVGg0xC5piow

The adjuster inspection typically occurs 2 to 7 days after your initial claim filing for standard situations, though catastrophic events can push that timeline to several weeks when demand surges. The adjuster’s job is to verify that damage occurred, determine what your policy covers, and estimate repair or replacement costs.

During the inspection, the adjuster photographs damage, takes measurements, documents affected materials and systems, and asks questions about how the damage happened and when you discovered it. This visit usually takes 30 minutes to 2 hours depending on damage extent. Simple claims like a single broken window move quickly, while extensive water damage affecting multiple rooms or structural fire damage requires detailed documentation and may need follow-up visits. The adjuster evaluates what’s immediately visible but can’t always identify hidden damage inside walls or beneath floors at this stage. That’s why supplemental claims for additional damage happen frequently once repairs begin.

Your insurer might send a company adjuster (their employee), an independent adjuster (contracted by the insurer), or you might hire a public adjuster to represent your interests. Public adjusters work for you, not the insurance company, and they typically charge 5 to 15% of your final settlement. Hiring one may add 2 to 4 weeks to the timeline because they conduct their own detailed assessment and prepare separate documentation, but homeowners with high value or complex claims often see significantly higher settlement offers that more than offset the fee and time investment. The choice to hire a public adjuster makes most sense when damage exceeds $50,000, when you’re dealing with complex structural issues, or when your initial settlement offer seems inadequate.

Repair Coordination, Settlement, and Payment Structure

gBeNfoBuStC3802XR2_CbA

The estimate gathering, settlement negotiation, and payment coordination phases typically span 3 to 6 weeks total, though complex claims or disagreements over valuation can extend that considerably.

Obtaining multiple contractor estimates usually takes 3 to 10 days depending on contractor availability and damage complexity. Most insurers and restoration professionals recommend getting at least two or three estimates from licensed contractors who specialize in your damage type. Submit these estimates to your adjuster along with any documentation showing how contractors calculated their numbers. After the insurer receives estimates, they review them against their own assessment, which takes 7 to 21 days for standard claims. More extensive damage requiring careful cost analysis or specialized contractor input extends this review period.

Settlement negotiations happen when your contractor estimates differ significantly from the insurer’s calculated payout. Most policies pay on either actual cash value (which deducts depreciation based on age and condition) or replacement cost (which covers full repair or replacement without depreciation deductions). Understanding which coverage your policy provides affects how much you receive in initial payments. For large claims, you often get two checks: one paying actual cash value up front, then a second payment for the recoverable depreciation after you complete repairs and submit invoices proving the work was done. This structure protects the insurer from paying for repairs you never actually make.

Payment Type Timing Purpose Amount Considerations
Initial advance payment Within days of filing for emergency situations Cover immediate emergency repairs to prevent further damage Typically $1,000-$5,000, deducted from final settlement
Actual cash value payment 5-15 days after settlement approval Initial payment reflecting depreciated value Repair cost minus depreciation and deductible
Replacement cost payment after repairs 7-14 days after submitting completion documentation Recoverable depreciation paid once repairs proven complete Difference between actual cash value and full replacement cost
Final supplemental payment 1-3 weeks after additional damage identified and approved Cover legitimate additional costs discovered during repairs Based on reinspection and supplemental claim approval
Deductible responsibility You pay before insurance coverage begins Your out-of-pocket portion per policy terms Typically $500-$5,000 depending on policy selection

Making emergency repairs to prevent further damage is necessary and usually covered, but document everything and keep receipts. Waiting for full adjuster approval before all repairs protects you from paying for work your policy might not cover, but some damage worsens by the day. If you have active water intrusion or openings in your roof that expose your home to weather, make temporary repairs immediately and document the problem thoroughly. When working with qualified contractors experienced in fire damage home repairs, they understand insurance requirements and can help coordinate documentation and scope with your adjuster. Starting your home repair and restoration process with contractors who work regularly with insurance claims often speeds up the approval and payment timeline because they know what documentation insurers need and how to submit it properly.

Property Damage Claim Timelines by Damage Type

j0FdRVxSTjOSoRG1Hhz1qg

Simple claims for minor damage may close within 2 to 3 weeks, while extensive property damage or disputes over coverage can stretch the process across months. Different damage types follow different typical timelines because they involve different investigation requirements, repair complexity, and potential for hidden damage.

Water Damage Claims

Water damage claims typically process within 2 to 4 weeks for straightforward cases like a burst pipe or appliance failure with limited spread. Speed matters with water damage because moisture creates ongoing problems like mold growth, structural weakening, and odor issues that worsen each day. Insurers usually respond quickly to water damage claims because delayed mitigation costs them more money.

The timeline extends when the water source is unclear, when coverage questions arise about whether damage came from sudden events versus gradual leaks, or when mold concerns require testing and remediation. If your adjuster suspects the water damage developed over weeks or months rather than happening suddenly, expect additional investigation and possible coverage disputes that can add 3 to 6 weeks to the process. Starting water damage home repairs quickly matters both for preventing additional damage and for supporting your claim timeline, since prompt action proves you took reasonable steps to minimize loss.

Fire and Smoke Damage Claims

Fire and smoke damage claims take 4 to 8 weeks or longer because they involve complex assessment of structural safety, smoke penetration, and multiple damaged systems. Even small fires create smoke residue that travels through HVAC systems and penetrates porous materials far from the actual flames.

Adjusters inspect structural integrity, electrical systems, HVAC contamination, and the full extent of smoke damage before approving settlement amounts. This investigation period adds time but protects you from undersettlement that doesn’t account for hidden smoke damage inside walls or ductwork. Fires involving potential electrical faults or suspicious origin trigger additional investigation that extends timelines by weeks or months.

Storm, Wind, and Hail Damage Claims

Storm damage claims typically process within 3 to 6 weeks under normal circumstances, but catastrophic weather events create massive backlogs that extend timelines to several months. When severe storms damage hundreds of homes in your area simultaneously, adjusters work through claims in filing order while managing limited capacity.

Seasonal factors affect contractor availability and repair timelines even after your claim settles. Major storms in spring and summer create contractor backlogs that can delay the start of your repairs by weeks, which extends the overall time from damage to completion even though the insurance portion closed. Wind and hail damage assessment can be straightforward when impact points are clear, but disputes sometimes arise over whether damage came from the recent storm or from previous weather events, adding investigation time.

Flood Damage Claims

Flood damage requires separate flood insurance through the National Flood Insurance Program or private flood carriers, which processes claims independently from your standard homeowners policy. NFIP claims typically take 30 to 60 days from filing to payment, with that timeline extending after major flooding events when thousands of claims file simultaneously.

Coordination between flood insurance and homeowners insurance becomes necessary when a storm causes both flood damage and wind damage to the same property. You’ll work with separate adjusters and separate timelines for each coverage type, which complicates repair coordination and extends the overall process.

Factors That Delay Property Damage Claims

zltMov_KQySd2rkv3FVrJA

Understanding what causes delays helps you set realistic expectations and, in some cases, take action to prevent or minimize time extensions.

Common factors that add days or weeks to standard timelines:

  • Incomplete documentation requiring follow-up requests for photos, inventories, receipts, or supporting evidence
  • Coverage disputes over whether damage falls within policy terms or matches exclusion language
  • Liability questions when third parties may bear responsibility and investigation determines fault
  • Hidden or additional damage discovered during repairs that wasn’t visible during initial assessment
  • Seasonal contractor availability limiting how quickly approved work can actually start
  • Catastrophic event backlogs when adjusters manage hundreds of claims simultaneously
  • Extended investigation periods for high value claims or suspicious circumstances
  • Policy exclusion disputes requiring legal interpretation of contract language
  • Missing or delayed cooperation from homeowners who don’t respond promptly to requests

Prompt cooperation and providing requested information quickly moves every phase of the process forward. When your adjuster asks for additional photos, contractor estimates, or clarification about how damage occurred, responding within 24 to 48 hours keeps your claim moving. Delayed responses add days or weeks each time information sits waiting.

Complex or high value claims trigger extended review periods because insurers examine details more carefully before authorizing large payouts. Claims exceeding $50,000 often require multiple levels of approval, independent estimates, and detailed documentation review that adds 2 to 4 weeks to standard timelines. This investigation protects both you and the insurer by ensuring the settlement accurately reflects legitimate damage and necessary repairs.

Getting Your Claim Processed Faster

6sNEYDIpRum6cf9GmiFrXQ

Homeowners who stay organized and responsive can shorten their claim timeline by weeks compared to those who wait for their insurer to drive every step.

Specific ways to keep your claim moving forward:

  1. File immediately after discovering damage rather than waiting to assess the full extent yourself
  2. Respond to all adjuster requests within 24 to 48 hours with complete information
  3. Keep organized files with all photos, receipts, estimates, and correspondence in one place
  4. Make yourself available for inspections rather than requiring multiple reschedules due to conflicts
  5. Use digital tools and online portals when your insurer offers them for faster document submission
  6. Follow up every 5 to 7 days if you haven’t heard updates on your claim status
  7. Select contractors quickly after receiving settlement approval rather than delaying while you research options
  8. Submit completion documentation and invoices immediately after repairs finish

You can control how quickly you gather documentation, how promptly you respond to requests, and how available you make yourself for inspections and communication. Those factors directly impact your timeline. What you can’t control includes adjuster workload, catastrophic event backlogs, state mandated review periods, and how quickly your insurer’s internal approval processes move. Focusing your energy on what you control keeps your claim from stalling due to your own delays.

Realistic expectations matter. Even with perfect cooperation and complete documentation, you can’t force a 6 week process into 2 weeks. State regulations, approval requirements, and inspection logistics create minimum timelines that apply regardless of how prepared you are. Your goal is reaching that minimum rather than extending it with preventable delays.

Supplemental Claims and Additional Damage Discovery

ibjeY_y7Rd2bxwL9ENyzJg

Hidden damage often surfaces 2 to 4 weeks into repair work when contractors open walls, remove flooring, or access areas that weren’t fully visible during the initial inspection. Water damage inside wall cavities, structural issues behind finishes, or additional fire damage in attic spaces commonly appears only after demolition begins.

Filing a supplemental claim starts a new mini cycle of inspection, assessment, and approval that typically takes 1 to 3 weeks. Your contractor documents the newly discovered damage with photos and detailed notes, then submits this information to your adjuster. The adjuster either approves the additional work based on documentation alone or schedules a reinspection to verify the findings in person. Simple supplemental claims for obviously related damage get approved quickly, while unexpected findings that raise coverage questions require more investigation.

Recoverable depreciation payments happen after you complete repairs and submit final invoices proving the work was done. This final payment typically processes 7 to 14 days after your insurer receives completion documentation including paid invoices, photos of finished work, and any required contractor lien releases. The two payment structure means your claim doesn’t fully close until all repairs finish and final documentation gets submitted, which extends the overall timeline from initial filing to final check by whatever time your repairs require. Large restoration projects can take 2 to 3 months from start to finish, meaning your claim remains open that entire period even though the settlement amount was determined much earlier.

Additional Living Expenses and Extended Displacement

NGNkdg8LQKqJDmtO3UNwcQ

Some policies include additional living expenses coverage that pays for temporary housing, meals, and other costs when damage makes your home unlivable during repairs. This coverage activates when you can’t safely stay in your home, which happens frequently with extensive fire damage, major water damage affecting living areas, or structural issues requiring evacuation.

ALE coverage duration depends on how long repairs reasonably take, typically ranging from a few weeks for moderate damage to several months for extensive reconstruction. Your policy sets a dollar limit and a time limit for this coverage, often expressed as a percentage of your dwelling coverage or a specific number of months. Documentation requirements include receipts for hotel stays, increased food costs beyond your normal budget, storage fees for belongings, and other reasonable expenses directly caused by displacement. Submit these expenses regularly (weekly or biweekly) rather than waiting until repairs complete, as this speeds up reimbursement and prevents cash flow problems.

Mortgage companies and lienholders often require endorsement on insurance checks before you can cash them, which adds 7 to 14 days to the payment timeline. When your settlement check arrives, it may include your name and your mortgage company’s name, requiring both signatures. You’ll submit the check to your lender along with contractor estimates and a scope of work, they review everything to ensure their collateral is being properly repaired, then they endorse the check back to you. Some lenders hold funds in escrow and release them in stages as work progresses, which further extends the timeline and requires submitting progress documentation at each phase.

Claim Denials, Appeals, and Dispute Resolution

Common denial or dispute reasons include policy exclusions that bar coverage for specific damage types, coverage limitations that cap payouts below actual repair costs, and valuation disagreements where the insurer’s estimated repair cost falls significantly below contractor quotes.

The formal appeal process typically takes 30 to 60 days for internal review after you submit your appeal letter explaining why you believe the denial was incorrect or the settlement insufficient. Your appeal should include additional documentation supporting your position: independent contractor estimates, expert assessments, policy language interpretation, photos showing damage extent, or evidence that the damage cause falls within covered perils. The insurer reviews your appeal and either upholds the original decision, modifies the settlement, or approves previously denied coverage.

When internal appeals don’t resolve the dispute, most policies include an appraisal clause that allows both parties to hire appraisers who assess damage independently, then work together to reach agreement. If the two appraisers can’t agree, they select a neutral umpire who makes the final decision. This appraisal process typically takes 60 to 90 days and costs several thousand dollars, but it resolves valuation disputes without litigation. Mediation offers another option where a neutral third party helps you and your insurer negotiate, though mediation is non-binding unless both parties agree to the proposed resolution.

Hiring a public adjuster or attorney becomes necessary when settlement offers fall far short of legitimate repair costs, when your claim gets denied despite clear coverage, or when the insurer delays unreasonably without explanation. Legal representation extends the timeline because attorneys conduct their own investigation and follow formal dispute procedures, but it often results in significantly higher settlements that justify the time investment. Cases involving bad faith insurance practices, wrongful denial, or unreasonable delay may include additional compensation beyond just covering your repairs.

State Regulations and Legal Time Limits

State regulations create minimum standards for how quickly insurers must acknowledge claims, conduct investigations, and issue payment decisions. Many states require claim acknowledgment within 10 to 30 days of filing, though the specific timeframe varies. Some states mandate that insurers make coverage decisions within 40 days after receiving all necessary documentation, while others allow longer investigation periods for complex claims.

The statute of limitations for filing property damage claims varies by state and damage type, typically ranging from 1 to 6 years. This deadline marks the last date you can file a lawsuit against your insurer if settlement negotiations fail. Missing this deadline eliminates your legal right to pursue compensation through court action. Different damage types may have different filing windows. Water damage might have a shorter statute than structural damage, and contract disputes versus tort claims follow separate timelines.

Requirement Type Typical Timeframe State Variation Notes
Claim acknowledgment 10-30 days Some states require acknowledgment within 15 days, others allow up to 30
Initial coverage decision 30-60 days Many states mandate decisions within 40 days of receiving complete documentation
Appeal response deadline 30-45 days Internal appeal review periods vary by state regulation and policy terms
Statute of limitations filing window 1-6 years Varies significantly by state and whether claim is contract-based or tort-based
Payment release after approval 5-30 days State prompt payment laws often require payment within specific timeframes after approval

When to Hire Professional Help for Your Claim

Deciding whether to hire a public adjuster, attorney, or other professional representation depends on claim complexity, settlement adequacy, and your comfort level navigating the insurance process.

Situations when professional help typically makes sense:

  • High value claims exceeding $50,000 where settlement differences of even a few percentage points justify professional fees
  • Initial claim denial or settlement offers that fall significantly below reasonable repair costs
  • Complex damage requiring specialized assessment like structural engineering analysis or environmental testing
  • Liability disputes where fault determination affects coverage or involves multiple parties
  • Catastrophic loss involving total or near total property destruction
  • Policy interpretation disagreements over whether specific damage falls within coverage terms
  • Approaching statute of limitations deadlines with unresolved claims that may require legal action

Public adjusters work on contingency, typically charging 5 to 15% of your final settlement, which means they only get paid if you receive payment. They handle documentation, contractor coordination, damage assessment, and settlement negotiation on your behalf. Hiring a public adjuster may add 2 to 4 weeks to your timeline because they conduct independent assessment and prepare detailed claim packages, but policyholders with complex or high value claims often see settlement increases of 20 to 50% or more that far exceed the adjuster’s fee.

Legal representation becomes necessary when bad faith insurance practices appear, when your insurer unreasonably delays or denies legitimate claims, or when settlement negotiations reach an impasse and litigation seems likely. Attorneys add more time to the process than public adjusters because legal procedures follow formal timelines, but they provide leverage that often motivates insurers to settle more fairly. The balance between extended timeline and improved settlement outcome depends on your specific situation. Most homeowners handle routine claims without professional help while those facing denials or lowball offers benefit significantly from representation.

Final Words

Most property damage claims settle within 2-8 weeks for straightforward cases, but understanding each phase helps you stay in control when timelines stretch longer.

Quick filing, complete documentation, and prompt responses to requests keep your claim moving forward. The more organized you stay, the fewer delays you’ll face.

If repairs reveal hidden damage or your settlement feels off, you have options. Supplemental claims, appeals, and professional help exist for exactly these moments.

We handle property damage repairs while you handle the claim. That keeps both processes moving so you get back to normal faster.

FAQ

What are the 4 stages of the insurance claim cycle?

The 4 stages of the insurance claim cycle are filing and acknowledgment, investigation and assessment, settlement determination, and payment processing. After you report damage, an adjuster inspects your property, evaluates coverage, negotiates settlement amounts, and releases payment once you approve the offer.

Does your insurance go up immediately after a claim?

Your insurance rates typically do not go up immediately after a claim but may increase at your next policy renewal. Rate adjustments depend on claim severity, your claims history, and state regulations, with increases generally appearing 30 to 90 days after renewal.

What is the average settlement for property damage?

The average settlement for property damage varies widely based on damage extent, typically ranging from a few thousand dollars for minor repairs to tens of thousands for major structural damage. Settlement amounts reflect actual repair costs minus your deductible, with complex fire or flood claims often exceeding $50,000.

What is the average time for claim settlement?

The average time for claim settlement ranges from 2 to 8 weeks for straightforward claims and 2 to 6 months for complex damage. Simple water damage claims often settle within a month, while extensive fire damage or disputed coverage can extend the timeline to several months or longer.

How long does it take for an adjuster to inspect damage after filing?

An adjuster typically inspects damage within 2 to 7 days after you file a claim for standard situations. During catastrophic events affecting multiple properties, inspection scheduling may extend to 2 to 3 weeks due to high claim volume in your area.

What documentation speeds up my property damage claim?

Complete documentation speeds up your property damage claim by providing photos from multiple angles, detailed item inventories with values, receipts for emergency repairs, and contractor estimates. Submit all requested evidence within 3 to 7 days to avoid processing delays and demonstrate damage extent clearly.

When do I receive payment after settling a property damage claim?

You typically receive payment 5 to 15 days after accepting a settlement offer for standard claims. Large claims often involve multiple payments: initial actual cash value payment immediately, then replacement cost payment after completing repairs, with mortgage company endorsement adding 7 to 14 days.

How does hiring a public adjuster affect my claim timeline?

Hiring a public adjuster may add 2 to 4 weeks to your claim timeline but often results in higher settlement amounts. Public adjusters handle documentation, negotiate with insurers on your behalf, and manage complex damage assessments for extensive losses exceeding $50,000.

Can I file a supplemental claim for hidden damage discovered later?

You can file a supplemental claim for hidden damage discovered during repairs, typically within the first 2 to 4 weeks of restoration work. The supplemental claim process requires reinspection and approval, adding 1 to 3 weeks to your overall settlement timeline.

What factors delay property damage insurance claims most?

The factors that delay property damage insurance claims most include incomplete documentation, coverage disputes, liability questions involving third parties, and hidden damage discovered during repairs. Natural disasters and catastrophic events create processing bottlenecks that extend timelines by weeks or months.

Basement Wall Seepage Causes: Hidden Water Entry Points

Think your basement leak is just a crack? Think again.
Basement wall seepage usually sneaks in through hidden spots—poor grading, clogged gutters, failed drain tiles, hydrostatic pressure, or a high water table.
Those problems keep soil saturated and push moisture through tiny pores, mortar joints, and seams.
In this post we’ll show how to spot the real entry points, what each sign means, and the practical steps to stop water, document damage for insurance, and restore what got wet.
No guessing. Just clear checks and repair-first solutions.

Primary Reasons Basement Walls Experience Water Seepage

0R-icfoyQqCjqHOkkM66yg

Water seepage happens when moisture slowly works its way through foundation walls, leaving damp spots, stains, and a musty smell that won’t go away. The most common driver is hydrostatic pressure, the force created when saturated soil pushes against the foundation and shoves water through small pores, cracks, and joints. Poor drainage, failed waterproofing, improper grading, clogged gutters, and a high water table all contribute by keeping soil wet and pressure high.

Diagnosing the root cause means looking at where and when water appears. After heavy rain, does moisture show up at the floor/wall joint, around window sills, or in the middle of the wall? Is the seepage steady or does it come and go with storms? Understanding the pattern helps you find the weak point, whether it’s a crack, a drainage failure, or saturated soil pressing against the wall.

Homeowners can often spot seepage signs before the damage spreads. Early recognition stops mold growth, prevents insulation sag, and reduces the risk of structural issues down the line.

Common indicators of basement wall seepage:

  • Damp patches or wet streaks on interior walls
  • White powdery deposits (efflorescence) on concrete or block surfaces
  • Peeling paint or bubbling wall finishes
  • Musty odor that lingers even after cleaning
  • Puddles or standing water at the wall/floor junction
  • Visible cracks with moisture stains around the edges
  • Wall bowing or inward bulge at the center
  • Increased humidity and condensation on cool surfaces

Hydrostatic Pressure and Soil Saturation

9bLBjuKsTxyrHkFXHg7evA

Hydrostatic pressure builds when water saturates the soil around your foundation. Heavy rain, rapid snowmelt, or a high water table all add volume to the ground, and that water presses against the basement walls with steady force. Concrete is porous. Even small imperfections let moisture migrate through. Over time, persistent pressure finds every weak spot: tiny voids between aggregate particles, hairline cracks, mortar joints in block walls, and gaps around pipe penetrations.

You’ll see the result as slow, steady dampness that appears after storms and worsens when the ground stays wet. Common signs include a horizontal wet line at a consistent height, damp patches that grow during prolonged rain, and a cold, clammy feeling on the wall surface. If the wall starts to bow inward or you notice new cracks forming near the center, the pressure’s exceeded what the wall was designed to handle.

Quick diagnostic steps to confirm hydrostatic pressure involvement:

  1. Inspect after heavy rain to see if seepage appears or worsens.
  2. Check exterior grading and downspout discharge points for standing water or saturated soil near the foundation.
  3. Look for efflorescence (white mineral deposits) on interior walls, a sign that water’s moving through the concrete and evaporating inside.
  4. Measure any wall bowing with a level or straight edge. Inward movement indicates lateral soil pressure.

Poor Exterior Drainage and Clogged Drain Tiles

K9dUd1jeRLyEtFmYIqzM_Q

Foundation drain tiles run along the base of the footing to collect groundwater and channel it away from the basement. When these drains clog with sediment, silt, or roots, water has nowhere to go. It backs up, saturates the soil, and pushes through the wall. Poor surface drainage makes things worse by funneling roof runoff and surface water straight to the foundation perimeter instead of directing it away.

You can often trace drainage failure by walking the exterior after a storm. Look for areas where water pools near the basement wall or where the soil stays soggy long after the rain stops. Inside, seepage may appear as a damp band at the floor/wall joint or localized wet spots where the clogged drain tile no longer relieves pressure.

Drainage failure indicators around the home:

  • Standing water or mud along the foundation perimeter after rain
  • Downspouts discharging directly at the foundation wall
  • Eroded soil channels leading toward the basement
  • Window wells that fill with water and drain slowly
  • Constant dampness at the base of exterior walls even during dry weather

Foundation Cracks and Wall Defects

4KDWFSoARUS6Ixkai8wAFA

Even a hairline crack can let water in when hydrostatic pressure’s present. Vertical cracks usually form as the foundation settles and are often narrow and stable. Horizontal cracks are more serious. They signal lateral pressure from saturated soil pushing the wall inward. Stair step cracks in block walls indicate movement along mortar joints and can open wider under load.

Water follows the path of least resistance. A crack that looks dry during normal weather can weep or drip during a storm when exterior pressure spikes. You may see rust staining, mineral deposits, or damp halos around the crack, all signs that moisture’s actively moving through.

Not all cracks need immediate structural repair, but every crack that leaks needs sealing and pressure relief to prevent it from widening. The type of crack tells you what’s happening outside and helps guide the repair.

Crack Type Likely Cause Seepage Risk Level
Vertical Foundation settling or concrete shrinkage Low to moderate
Horizontal Lateral soil pressure from saturated ground High
Stair-step (block walls) Uneven settling or excessive soil load Moderate to high

Improper Grading and Negative Slope Around the Home

pUw3vqYqTh6E1WmDK_O06Q

The ground around your home should slope away from the foundation, carrying surface water out toward the yard instead of pooling at the basement wall. Negative grading does the opposite. Soil settles over time, landscaping projects change the grade, or the home was built without proper slope to begin with. Water flows downhill, and if downhill means toward your basement, saturation and seepage follow.

You can check grading with a simple walk around. Look for low spots where water collects near the foundation, areas where mulch or soil has settled below the level of the basement slab, or places where runoff from the yard funnels straight to the house. Fixing grading is often one of the most cost effective ways to reduce hydrostatic pressure and stop seepage before it starts.

Visual grading checks homeowners can perform:

  • Stand 10 feet from the foundation and look for obvious dips or depressions that direct water inward.
  • Pour a bucket of water near the foundation and watch which direction it flows.
  • Inspect for soil erosion channels or water stains on the exterior wall that suggest repeated pooling.

Gutter and Downspout Malfunctions

M7PkcBxtTHa3bTXdLeRCsA

Roof runoff carries a huge volume of water during storms. A single inch of rain on a 1,500 square foot roof produces over 900 gallons of water. If gutters are clogged, sagging, or missing, that water pours over the edge and lands right at the foundation. Short downspouts that end within a few feet of the basement wall dump concentrated flow into the soil, saturating it and spiking hydrostatic pressure.

The result is localized seepage near downspout discharge points or along sections of the basement where gutter overflow is worst. You may see water stains on the exterior wall below the roofline, soil erosion channels near downspouts, or damp basement walls directly below problem gutters.

Roof runoff indicators linked to wall moisture:

  • Water pouring over gutter edges during rain instead of flowing through downspouts
  • Downspouts discharging within 3 feet of the foundation
  • Splash stains or streaking on exterior walls below the gutter line
  • Wet basement walls in areas aligned with roof valleys or heavy runoff zones

Failed or Missing Waterproofing Layers

p0Apt5OjTQyBzZMmdjOfsg

Older homes often relied on a simple tar coating or asphalt based damp proofing on the exterior foundation wall. These materials degrade over decades, cracking and peeling as the foundation shifts and soil chemistry changes. Once the waterproof layer fails, the bare concrete’s exposed to constant moisture, and seepage begins.

You won’t always see failed waterproofing from inside. Symptoms include gradual dampness, efflorescence that appears seasonally, and a baseline level of moisture that never fully dries. Outside, peeling black coating, exposed aggregate, or visible cracks in the exterior membrane are clear signs the protection’s gone.

How to identify deteriorated waterproofing from inside and outside:

  1. Inside, look for persistent dampness even during dry weather, efflorescence on walls, and a musty smell that cleaning doesn’t remove.
  2. Outside, inspect exposed foundation (if accessible) for cracked, peeling, or missing black coating.
  3. Check for water stains or algae growth on exterior walls near grade level, indicating moisture isn’t being repelled.

High Water Table Influences

zTUNY1EOS5emYbNR2BJJFg

In low lying areas or regions with heavy seasonal groundwater, the water table can rise close to or above the basement slab level. When that happens, hydrostatic pressure is constant, not just a storm related spike. Water infiltrates through the floor/wall joint, through the slab itself, or through wall pores, creating seepage that persists even in dry weather.

High water table seepage often shows up as a damp perimeter at the base of the walls, standing water in the sump pit, or a sump pump that runs frequently even when it hasn’t rained. The issue’s harder to fix with exterior grading alone because the source is deep groundwater, not surface runoff.

Signs the issue is groundwater related:

  • Seepage or dampness that continues weeks after the last rain
  • Sump pump cycling regularly during dry periods
  • Water appearing at the floor/wall joint or through floor cracks when the exterior soil isn’t visibly wet

Preventive Measures and When to Seek Professional Help

HPXzX66iTX6mGwvi2KWypg

Prevention starts outside. Maintain gutters and extend downspouts at least 3 to 6 feet from the foundation. Regrade soil to slope away from the house, and fill low spots that collect water. Seal visible cracks with high strength epoxy or polyurethane injection, and confirm that drain tiles and sump pumps are functioning. For homes with known high water tables or recurring seepage, consider adding exterior drainage, a perimeter drain system, or a backup sump pump.

Most small, stable cracks and minor grading issues are manageable as homeowner projects if you have the right materials and tools. Larger problems require professional assessment. Structural cracks, wall bowing, recurring leaks after repairs, and seepage from multiple locations all point to issues that need excavation, drainage installation, or engineered solutions.

Situations indicating the need for a professional assessment:

  1. Visible wall bowing, horizontal cracks, or new cracks that widen over time.
  2. Seepage that returns after temporary sealant or caulk repairs.
  3. Water entering from multiple locations or through the floor/wall joint along the entire perimeter.
  4. A sump pump that fails, runs constantly, or can’t keep up with water volume during storms.
  5. Persistent musty odor, visible mold growth, or efflorescence that reappears after cleaning.

Final Words

Start by checking damp spots, efflorescence, peeling paint, and musty smells — those were the signs we walked through.

We covered the usual suspects: hydrostatic pressure, clogged drain tiles, foundation cracks, bad grading, gutter failures, failed waterproofing, and high water tables.
You also saw quick checks, when to act, and which fixes stop more damage.

Understanding basement wall seepage causes helps you prioritize repairs, document for insurance, and get your space fully restored.
You’ll be okay — act fast and you’ll limit the damage.

FAQ

Q: How to fix water seeping through basement walls?

A: Fixing water seeping through basement walls involves stopping the source, improving outside drainage, sealing cracks, installing proper exterior or interior drains, and repairing damaged drywall or trim; call a pro for structural or persistent seepage.

Q: Does homeowners insurance cover water seepage in basement?

A: Homeowners insurance usually doesn’t cover water seepage caused by long-term issues like poor drainage, rising groundwater, or lack of maintenance; it may cover sudden accidental events like burst pipes—document damage and check your policy or talk to your adjuster.

Q: How to find the source of seepage in walls?

A: Finding the source of seepage in walls means checking outside grading and gutters, inspecting foundation cracks, running a hose test to reproduce leaks, using a moisture meter, and looking for patterns during heavy rain; call pros for hidden problems.

Q: Why is my basement floor wet but no leak?

A: A wet basement floor with no obvious leak is often from groundwater seepage, condensation, a failing sump pump, or clogged drain tile; check humidity, look for damp walls or efflorescence, and test during rain or snowmelt.

Black Mold Removal: Safe DIY Steps and When to Call Pros

0

You found black mold in your bathroom, and now you’re standing there wondering if bleach and a scrub brush will actually fix it, or if you’re about to make things worse. Here’s the truth: small surface mold (under 10 square feet) on tile or glass? You can handle that yourself with the right safety gear and cleaning approach. But mold that’s traveled into drywall, spread behind walls, or covers more area than a small patch? That needs professional assessment, because DIY work on hidden growth usually just spreads spores and misses the real problem.

Identifying When DIY Black Mold Removal Is Appropriate

zMf-24ZrQWOHlLnbLd83NA

The 10 square foot rule tells you when to handle mold yourself versus calling professionals. If the affected area measures less than 10 square feet (roughly 3 feet by 3 feet), and you can reach it safely, DIY removal works for most homeowners.

You can handle small bathroom tile patches, minor ceiling spots from condensation, surface growth on shower walls, or mold on windowsills and non-porous surfaces like glass or metal. These situations involve visible surface mold on accessible areas where you can identify and fix the moisture source yourself. If the mold growth is contained, the surface is easy to clean, and you don’t have underlying health conditions that increase risk, you can tackle the removal with proper safety equipment and cleaning solutions.

Professional mold remediation becomes necessary when the contaminated area exceeds 10 square feet, mold appears in HVAC systems or ductwork, water damage came from sewage or flooding, structural materials show rot or deterioration, or toxic mold like Stachybotrys chartarum is confirmed. Hidden mold behind walls, under flooring, or in crawl spaces also requires professional assessment because you can’t see the full extent of growth. If anyone in your household has asthma, chronic respiratory conditions, weakened immune systems, or mold allergies, don’t attempt DIY removal regardless of size.

Before starting any work, consider whether you’ll need documentation for insurance claims. Professional remediation includes detailed reports, photos, and certificates of completion that insurance companies often require. DIY work may save money initially but can complicate claims if you don’t document the process properly or if the mold returns because the underlying problem wasn’t fully addressed.

Safety Gear and Preparation for Black Mold Removal Projects

I1VSKlSCTxGjf9Sb0iUGSw

Protective equipment isn’t optional when removing black mold, even for small DIY projects. Mold spores become airborne during cleaning, and inhaling them or getting them on your skin causes respiratory irritation, allergic reactions, and potential long term health effects. The “it’s just a little mold” mindset leads to exposure that could’ve been prevented with $30 worth of safety gear. DIY doesn’t mean cutting corners on protection.

Essential Safety Equipment:

  1. N95 respirator mask or HEPA rated mask that forms a seal around nose and mouth
  2. Safety goggles with side shields that seal against face to prevent spore entry into eyes
  3. Long rubber or nitrile gloves extending past wrists to prevent skin contact
  4. Disposable coveralls or old clothing dedicated to mold work that gets discarded afterward
  5. Plastic sheeting (6 mil thickness) and duct tape for sealing off the work area
  6. Box fan for creating negative air pressure and directing contaminated air outside

Setting up containment prevents mold spores from spreading throughout your home during removal. Seal the work area with plastic sheeting and tape, covering doorways and vents. Close interior doors to the space. Open a window and position a box fan facing outward to create negative air pressure, pulling contaminated air outside rather than pushing it into other rooms. This simple setup makes a real difference in preventing cross contamination.

Clear the work area of family members, pets, and anyone with respiratory sensitivities before starting. They should stay away until cleaning is complete and the area has been dried and ventilated. If you’re working in a shared space like a bathroom, arrange alternative facilities for at least 24 hours.

Understanding Health Risks From Black Mold Exposure

jFDsbBytQUq6lqO_SP576Q

Most “black mold” health fears are overstated by sensational media coverage, but real risks exist that you should understand. Not all dark colored mold is toxic Stachybotrys chartarum, and even toxic mold affects people differently based on exposure duration, concentration, and individual sensitivity. Understanding the actual risks helps you make informed decisions without panic.

Common symptoms from mold exposure include coughing, wheezing, nasal congestion, throat irritation, eye irritation and watering, skin rashes or itching, headaches, and difficulty breathing. These symptoms typically appear during or shortly after exposure and improve when you leave the contaminated area. Stachybotrys chartarum produces mycotoxins that can cause more severe reactions including persistent respiratory distress, chronic fatigue, cognitive difficulties, and neurological symptoms in individuals with prolonged exposure.

High risk individuals shouldn’t attempt DIY mold removal under any circumstances. This includes people with asthma or chronic respiratory conditions, immune compromised individuals undergoing chemotherapy or with HIV/AIDS, infants and young children whose respiratory systems are still developing, elderly individuals with reduced immune function, and anyone with documented mold allergies.

Seek medical attention and stop DIY work immediately if you experience persistent coughing that worsens during cleaning, shortness of breath or chest tightness, severe headaches or dizziness, skin reactions that spread or intensify, or symptoms that don’t improve after leaving the area. These signs indicate either sensitivity to mold exposure or concentration levels that exceed safe DIY handling. In these situations, professional remediation with industrial containment and air filtration becomes necessary, and the occupants may need to temporarily relocate during the work.

Essential Cleaning Solutions for Removing Black Mold

aiZeEqJcSfW288sVPeN9aw

Natural and chemical cleaning solutions each have specific applications based on surface type, mold severity, and household safety concerns. White distilled vinegar kills approximately 82 percent of mold species and works safely on most surfaces without toxic fumes. Hydrogen peroxide at 3 percent concentration provides similar effectiveness with the advantage of no lingering odor. Bleach solutions kill mold quickly on non-porous surfaces but release harsh fumes and lose effectiveness on porous materials like wood or drywall. For homes with children, pets, or family members with chemical sensitivities, natural options like vinegar, baking soda, and tea tree oil provide effective alternatives without respiratory irritants.

Different surfaces require different approaches because mold penetrates porous materials while remaining on the surface of non-porous materials. Bleach works well on bathroom tile and glass because these surfaces don’t absorb it, but only the water component penetrates wood, leaving the chlorine that kills mold on the surface where it evaporates without reaching embedded growth. This leads to regrowth within months. Never mix bleach with vinegar, ammonia, or other cleaning products, as the chemical reactions produce toxic gases that cause severe respiratory damage.

Solution Recipe Application Time Best For
White Vinegar Undiluted (spray directly) 15 to 60 minutes Most surfaces, particularly porous materials like wood and drywall
Hydrogen Peroxide 3% concentration (undiluted) 10 minutes minimum Colored surfaces where bleach would cause discoloration
Bleach Solution 1 part bleach to 3 parts water 10 to 15 minutes Non-porous surfaces only (tile, glass, metal)
Baking Soda 1/4 tablespoon per spray bottle of water Apply, scrub, then reapply without rinsing Mild mold on any surface, safe around children and pets
Tea Tree Oil 1 teaspoon per cup of water Extended period (let dry naturally) Natural fungicide for small areas, leave on surface
Borax 1 tablespoon per cup of water Leave on without wiping Wood surfaces as final treatment to deter regrowth

Step by Step Black Mold Removal Process for Non-Porous Surfaces

V46b2_5KQNOWhcQonaJTGA

Non-porous surfaces including ceramic tile, glass, sealed countertops, and metal are the easiest candidates for DIY mold removal because growth remains on the surface rather than penetrating the material. This surface level colonization means thorough scrubbing with appropriate cleaning solutions fully removes the mold without requiring material replacement.

Complete Removal Process for Hard Surfaces:

  1. Spray cleaning solution generously across the entire affected area, extending 12 inches beyond visible mold to catch spores you can’t see
  2. Allow proper dwell time based on your chosen solution: vinegar needs 15 to 60 minutes, hydrogen peroxide requires 10 minutes minimum, bleach solution works in 10 to 15 minutes
  3. Scrub with stiff brush using firm circular motions to break up mold colonies and lift them from the surface
  4. Rinse thoroughly with clean water to remove loosened mold and cleaning solution residue
  5. Wipe completely dry with clean cloths or paper towels, disposing of used materials in sealed plastic bags
  6. Reapply solution lightly without scrubbing this time, creating a protective layer that discourages immediate regrowth
  7. Allow area to air dry completely with fan assistance, maintaining good airflow for at least 4 to 6 hours to ensure no moisture remains

Removing Black Mold From Porous Materials Like Drywall and Wood

gXau3gbqTC6JfBP-V-v2cA

Porous surfaces present significant challenges for DIY mold removal because growth penetrates below the visible surface, colonizing the material structure itself. Drywall, unsealed wood, fabric, insulation, and similar materials absorb both moisture and mold spores, making surface cleaning insufficient for complete removal. These materials require different approaches and honest assessment about when replacement becomes necessary instead of cleaning attempts.

Wood specific cleaning requires a methodical escalation approach starting with the mildest solution and progressing to stronger treatments only if needed. Start with dish soap and warm water (1 teaspoon soap per spray bottle), scrubbing the wood surface and allowing it to dry completely. If mold returns or staining persists, escalate to equal parts vinegar and warm water, spraying generously and letting it sit for one full hour before scrubbing. For stubborn mold, mix borax solution (1 tablespoon borax per cup water) as your final treatment option. Borax penetrates wood better than other options and continues working after application, so leave it on the surface without wiping to deter future growth. Never use bleach on wood surfaces because only the water component penetrates sealed or painted wood while the chlorine that kills mold remains on the surface where it evaporates, causing regrowth within months as the moisture you introduced feeds mold deeper in the wood.

If these cleaning solutions fail to remove wood mold, sand the affected area with 100 grit sandpaper as a last resort before considering replacement. After sanding, immediately use a HEPA vacuum to capture the dust and spores you’ve released before they settle elsewhere. Test a small hidden area first to ensure sanding doesn’t damage the wood’s appearance beyond acceptability. Soft or crumbling wood, persistent musty odor after treatment, or visible staining that won’t lift indicates irreversible rot requiring complete removal and replacement. At this stage, the Water Damage Restoration Process becomes necessary because structural integrity is compromised beyond surface cleaning.

Use a HEPA filter vacuum on all porous surfaces before applying wet cleaning solutions. HEPA filters trap particles as small as 0.3 microns with 99.97% efficiency, capturing loose mold spores that would otherwise become airborne during wet cleaning and spread throughout your home. Vacuum slowly in overlapping passes, paying particular attention to textured surfaces and crevices where spores accumulate. Empty the vacuum immediately after use into a plastic bag, seal it tightly, and dispose of it outside your home.

Proper disposal procedures prevent mold spores from recontaminating your home after cleaning. Double bag all contaminated materials including rags, sponges, scrub brushes, disposable clothing, vacuum bags, and plastic sheeting used for containment. Seal each bag tightly before placing it inside the second bag. Remove these bags directly from your home to an outdoor trash receptacle, never leaving them in indoor trash cans where spores can escape. Porous materials like carpet, ceiling tiles, insulation, and upholstered furniture should be discarded rather than cleaned when moldy because effective cleaning is impossible and the risk of regrowth is nearly certain.

Addressing Moisture Sources to Prevent Black Mold Recurrence

P6OpvZSZRHS2NCZJ-TTwmQ

Removing visible mold without fixing moisture sources guarantees regrowth within weeks, making your cleaning effort completely wasted. Period. Mold removal is surface treatment, but moisture control is the actual solution. If you don’t identify and eliminate what caused the mold initially, you’re creating a cycle of repeated cleaning that never solves the problem.

Identifying water sources requires detective work because the leak location isn’t always where mold appears. Water travels along pipes, through wall cavities, and across building materials before emerging where you see damage. Check under sinks for leaking drain pipes and supply lines. Inspect areas around water heaters, dishwashers, refrigerators, and washing machines for moisture. Examine ceilings and walls for water stains indicating roof leaks or plumbing issues above. Test basement walls for dampness and foundation cracks. Look for condensation on windows, pipes, and ductwork. Fix every leak immediately with proper repairs, not temporary patches.

Common Moisture Sources That Cause Mold:

  • Leaking pipes under sinks, behind walls, and in crawl spaces that drip constantly
  • Roof leaks and missing shingles allowing rain penetration into attic spaces
  • Condensation on cold pipes and windows from temperature differentials and poor insulation
  • Basement seepage and foundation cracks admitting groundwater during rain
  • Bathroom and kitchen exhaust fan failure trapping humidity indoors instead of venting it outside

Humidity control maintains indoor levels between 30 and 50 percent, the range where mold can’t thrive. Purchase an inexpensive hygrometer to monitor humidity in problem areas like basements, bathrooms, and poorly ventilated rooms. When readings consistently exceed 50 percent, place a dehumidifier in the space and run it until humidity drops into the safe range. Empty collection tanks daily or connect a continuous drain hose to prevent the unit from shutting off. In humid climates or during summer months, you may need to run dehumidifiers constantly in vulnerable areas.

Ventilation and air circulation prevent stagnant moist air from settling on surfaces where condensation forms. Use exhaust fans in bathrooms during showers and for 30 minutes afterward to remove humidity. Run kitchen exhaust fans when cooking, especially when boiling water or using the dishwasher. Open windows when weather permits to create cross ventilation. Don’t block air vents or returns with furniture or storage. Use ceiling fans or portable fans to keep air moving in rooms that feel stuffy or show condensation. Ensure your HVAC system runs efficiently with clean filters and proper airflow.

The Emergency Water Damage Mitigation timeline is critical: dry damp areas within 1 to 2 days after water exposure to prevent mold growth. Mold spores exist everywhere but only colonize when they find moisture. If you can dry materials completely within 24 to 48 hours, mold won’t establish growth even if spores are present. This tight timeline means responding to spills, leaks, and flooding immediately with fans, dehumidifiers, and removal of saturated materials rather than waiting to see if things dry on their own.

Using Mold Test Kits and Identifying Hidden Black Mold

IOZps1-BSqqBs3JDyn0tkA

Musty odor serves as the primary indicator of hidden mold growth somewhere you can’t see. If you smell mildew but don’t see visible growth, mold is colonizing behind walls, under flooring, in ductwork, or in other concealed spaces. Other warning signs include water stains on ceilings or walls even if the leak seems fixed, peeling or bubbling paint and wallpaper, warping wood floors or baseboards, and discolored patches that appear and worsen over time. These visible changes suggest moisture problems and likely mold growth in the affected areas.

Common Hidden Mold Locations:

  • Behind wallpaper and wall paneling where trapped moisture creates ideal conditions
  • Inside wall cavities near plumbing where slow leaks go unnoticed for months
  • Under carpets and padding especially in basements and near exterior walls
  • Behind refrigerators and washing machines where condensation and minor leaks accumulate
  • In HVAC ducts and drip pans distributing spores throughout your home via airflow
  • In ceiling spaces above water damaged areas from roof leaks or upstairs plumbing
  • Crawl spaces and rim joists with poor ventilation and ground moisture intrusion

The cotton swab bleach test provides quick surface identification. Dip a cotton swab in diluted bleach, touch it to the discolored spot, and wait two minutes. If the stain lightens, you’re looking at mildew or mold. If it stays dark, it’s likely dirt, smoke staining, or other discoloration. This simple test helps you distinguish between actual mold growth and harmless staining before starting unnecessary removal work.

Home mold test kits identify presence and approximate spore counts but don’t tell you the mold type or toxicity level. These kits cost $10 to $50 and provide general information about whether mold exists in the air or on surfaces. Lab testing costs $50 to $300 and identifies specific mold species, helping determine if toxic varieties like Stachybotrys chartarum are present. If you’ve found extensive growth, have health symptoms suggesting exposure, or need documentation for insurance or legal purposes, pay for lab analysis. For small visible patches where you just need to confirm it’s mold before cleaning, home test kits provide sufficient information for DIY decisions.

Ceiling and Wall Black Mold Removal Techniques

BSt1lmioSwGAjK4Jp0WEyw

Overhead work requires extra eye protection because cleaning solution drips directly onto your face and into your eyes when spraying upward. Wear safety goggles that seal completely around your eyes, not just basic safety glasses. Mix your cleaning solution slightly thicker by reducing water content by about 10 percent to minimize dripping. Work in small sections rather than spraying large areas at once, which creates excessive liquid that runs down walls and ceilings before you can control it.

Application technique for vertical and overhead surfaces differs from floor cleaning. Spray solution from bottom to top on walls to prevent clean solution from running down through dirty areas and recontaminating them. For ceilings, spray directly upward but lightly, allowing the mist to settle rather than creating heavy streams. Work in 2 to 3 foot sections, applying solution, allowing dwell time, scrubbing, rinsing, and drying each section before moving to the next. Use a step ladder that positions you at comfortable reaching height, never overextending or working from unstable positions. Place drop cloths and plastic sheeting below your work area to catch drips and debris.

Cut out and replace drywall rather than surface cleaning when material is soft or crumbling to the touch, shows water staining that extends beyond the visible mold, smells musty even after cleaning attempts, or reveals mold growth on the back side when you peek behind it. Surface cleaning painted drywall with intact paper facing and solid structure works for small spots. Removal becomes necessary when water damage has compromised the drywall itself. Cut out damaged sections in clean squares or rectangles extending at least 12 inches beyond visible damage, inspect the wall cavity for mold on studs or insulation, treat exposed framing with antimicrobial solution, allow complete drying, then patch with new drywall.

Never paint over mold without complete removal. The paint seals moisture and mold spores behind the coating where they continue growing, eventually causing the paint to bubble, peel, and discolor as growth breaks through. Even killed mold spores create ghosting and staining that show through fresh paint. After cleaning and confirming complete mold removal, apply antimicrobial primer specifically designed to prevent mold regrowth. These primers contain mildewcides that create an inhospitable surface for new colonization. After primer dries, apply two coats of finish paint, matching sheen and texture to blend repairs invisibly into surrounding areas.

Special Considerations for Basement and Attic Black Mold Removal

vPCgudkeQ_qh4hpXWglJag

Basements and attics present unique mold challenges because both spaces experience temperature differentials with living areas, creating condensation conditions. Basements suffer from ground moisture intrusion through foundation walls and floors, poor ventilation from small or absent windows, and cooler temperatures that make humidity condense on cold surfaces. Attics experience temperature extremes, limited air circulation, and vulnerability to roof leaks that go unnoticed until significant damage occurs. These environmental factors make these spaces persistently damp even without obvious leaks.

Concrete walls require more aggressive cleaning than painted walls or drywall because concrete’s porous nature allows mold to penetrate deeply into the material structure. Standard surface cleaning leaves embedded growth that recolonizes the surface within weeks. After removing visible mold from concrete, allow the surface to dry completely for at least 48 hours. Apply a mold inhibitor or penetrating sealer specifically designed for concrete surfaces. These products soak into the concrete, killing embedded mold and creating a barrier that prevents moisture absorption and future growth. Basement floor concrete benefits from the same treatment, especially in sections that show recurring dampness.

Moldy insulation must be removed and replaced, never cleaned. Insulation materials including fiberglass batts, cellulose, and spray foam are too porous to clean effectively, and mold growth indicates water damage that has reduced insulation effectiveness anyway. Bag moldy insulation in heavy duty plastic bags as you remove it, working carefully to minimize airborne spore release. Inspect surrounding framing for mold growth and treat wood with appropriate solutions. Address the moisture source before installing new insulation. Consider mold resistant insulation products for the replacement.

Long term moisture control in basements requires foundation waterproofing if seepage occurs, proper grading around the foundation to direct water away from the building, functional gutters and downspouts extending at least 6 feet from the foundation, and continuous dehumidifier operation maintaining humidity below 50 percent. In attics, ensure adequate ventilation through soffit and ridge vents creating continuous airflow, proper roof and flashing maintenance preventing leaks, and sufficient insulation preventing warm indoor air from reaching cold roof decking where condensation forms. Installing a vapor barrier on the warm side of attic insulation blocks moisture migration from living spaces below.

Alternative Natural Black Mold Removal Methods

Natural cleaning methods appeal to homeowners with chemical sensitivities, young children, pets, or preferences for environmentally friendly products. These solutions work effectively for light to moderate mold growth without releasing harsh fumes or leaving toxic residues. Natural remedies require longer contact time than chemical cleaners but avoid respiratory irritation and chemical exposure that concern many families.

Combining natural ingredients creates enhanced effectiveness through different cleaning mechanisms working simultaneously. The vinegar, baking soda, and lemon juice paste provides a popular combination mixing equal parts of each ingredient into a thick paste consistency. The vinegar’s acetic acid kills mold, baking soda’s mild abrasion lifts it from surfaces, and lemon juice’s 5 percent natural acid content bleaches stains while adding fresh scent. The foaming action when vinegar contacts baking soda helps penetrate surface pores and crevices. Spread the paste on moldy areas, let it sit 15 to 30 minutes, scrub thoroughly, rinse, and wipe dry. Orange peel vinegar solution involves soaking orange peels in white vinegar for two weeks before straining and using the infused vinegar in a spray bottle. The citrus oils add cleaning power and pleasant scent while maintaining vinegar’s mold killing properties.

Natural Solution Mixture Ratio Contact Time Application Notes
Tea Tree Oil 1 teaspoon per cup of water Let dry naturally (extended period) Expensive but highly effective natural fungicide; leave on surface without wiping
Grapefruit Seed Extract 10 drops per cup of water 10 minutes to 1 hour based on severity Odorless alternative to tea tree oil with similar antifungal properties
Lemon Juice Undiluted or mixed 50/50 with water 15 to 20 minutes Natural bleaching for stain removal; 5% acid content kills mold and freshens air
Citrus Seed Extract 20 drops with 2 cups water Leave on without rinsing Apply and allow to air dry; repeat every few days for prevention
Combination Paste Equal parts vinegar, baking soda, and lemon juice 15 to 30 minutes Foaming action enhances penetration; combines multiple cleaning mechanisms

Preventing Future Black Mold Growth With Regular Maintenance

Prevention costs less and requires less effort than repeated mold removal, making proactive maintenance the smarter long term approach. Monthly inspection takes 15 minutes and catches small problems before they become major remediation projects. Regular attention to vulnerable areas means you’ll never face extensive growth requiring professional services.

Monthly and Seasonal Maintenance Schedule:

  1. Monthly inspection of vulnerable areas including bathrooms, basements, under sinks, around windows, and previously affected spots
  2. Quarterly HVAC filter replacement ensuring proper airflow and reducing airborne mold spores circulating through your home
  3. Annual roof and gutter inspection before rainy seasons, clearing debris and repairing minor damage before leaks develop
  4. Immediate leak repair within 24 hours of discovery, never delaying plumbing fixes or allowing “small” drips to continue
  5. Weekly bathroom ventilation running exhaust fans during showers and for 30 minutes after to remove humidity
  6. Bi-annual caulk and grout inspection around tubs, showers, sinks, and windows, replacing degraded seals before water penetrates
  7. Seasonal humidity monitoring with particular attention during summer humidity and winter condensation periods
  8. Prompt cleanup of water spills within 24 hours, drying affected areas completely rather than assuming they’ll air dry

Mold resistant materials for renovations provide long term protection in vulnerable areas. Mold resistant drywall uses fiberglass facing instead of paper, eliminating the cellulose that mold feeds on in standard drywall. These specialized panels cost 20 to 30 percent more but prevent growth even when exposed to moisture. Paint with antimicrobial additives contains mildewcides that discourage surface colonization in bathrooms, basements, and kitchens. Encapsulation products for concrete and wood seal surfaces against moisture penetration while killing existing spores. When planning bathroom or basement renovations, the Home Maintenance and Repair Services comprehensive approach to materials selection and moisture control creates lasting protection against future problems.

Seasonal maintenance priorities shift based on weather patterns. Spring inspections focus on roof and gutter systems before summer storms, checking for winter damage and ensuring drainage works properly. Summer maintenance emphasizes humidity control, testing and servicing dehumidifiers before peak humidity months. Fall inspections prepare for winter condensation issues, checking window seals and insulation to prevent cold surface condensation. Winter monitoring watches for ice dam damage, pipe condensation, and indoor humidity from heating systems.

Cost Savings and Realistic Expectations for DIY Mold Removal

DIY black mold removal costs $40 to $95 for supplies compared to professional remediation pricing of $500 to $6,000 depending on affected area size and contamination severity. For a small bathroom mold project covering 6 to 8 square feet, homeowners spend approximately $50 to $60 on protective equipment ($25 to $40 for mask, goggles, and gloves), cleaning solutions ($8 to $15 for vinegar, hydrogen peroxide, or commercial products), and basic tools ($15 to $20 for scrub brushes, spray bottles, and plastic sheeting). These supplies handle multiple small projects since you’ll reuse protective equipment and have leftover cleaning solutions.

Time commitment varies significantly based on project scope and material type. A small bathroom tile section takes 2 to 4 hours including preparation, cleaning, and drying time. Basement wall sections covering 8 to 10 square feet require 6 to 8 hours spread across multiple days to allow proper dwell times and complete drying between treatment stages. Wood mold removal averages 3 hours with intermediate skill level for accessible surfaces. These estimates assume straightforward access and no complications like hidden moisture sources or structural damage requiring repairs beyond simple cleaning.

Intermediate skill level means you can follow detailed instructions, use basic hand tools competently, work safely on a step ladder, and troubleshoot minor problems during the process. You don’t need professional trade skills, but you should be comfortable with home maintenance tasks beyond basic housekeeping. If you’ve never done more than routine cleaning, practice on a very small area first to build confidence before tackling larger visible sections.

DIY approaches have clear limitations compared to professional services. You won’t have moisture meters to measure water content inside walls and determine if materials are truly dry. Thermal imaging cameras that reveal hidden moisture and mold growth behind surfaces aren’t available to homeowners. Industrial drying equipment including commercial dehumidifiers and air movers that professionals use speeds drying times from days to hours. Mold air quality testing to confirm complete remediation and safe reoccupancy requires lab analysis. Structural assessment expertise to determine if framing, joists, or subfloors need reinforcement or replacement goes beyond most homeowners’ knowledge. These professional capabilities become necessary when mold problems extend beyond simple surface cleaning into more complex remediation scenarios.

Final Words

Small surface mold on tile or a bathroom ceiling? DIY black mold removal works when you stay under 10 square feet, use proper safety gear, and fix the moisture source feeding the problem.

But if the area’s larger, the material’s porous and crumbling, or you’re dealing with sewage contamination, that’s when you call professionals with the right equipment and containment methods.

Clean what you can see. Dry it completely. Then keep humidity under 50 percent and fix leaks fast.

That’s how you stop mold from coming back and keep your home safe.

FAQ

What kills 100% of black mold?

No single cleaning solution kills 100% of black mold, but white vinegar eliminates about 82% of mold species when applied undiluted. Hydrogen peroxide at 3% concentration and bleach solutions (1 part bleach to 3 parts water) also kill most mold. The key is proper application time, thorough scrubbing, and fixing the moisture source.

Can I safely remove black mold myself?

You can safely remove black mold yourself if the affected area is smaller than 10 square feet, on non-porous surfaces, and you wear proper protective equipment. Use an N95 respirator mask, safety goggles, long rubber gloves, and set up containment with plastic sheeting. Skip DIY if you have respiratory issues or the mold involves sewage contamination.

How do I get rid of black mold permanently?

Getting rid of black mold permanently requires removing visible growth and fixing the underlying moisture problem. Spray your cleaning solution, let it sit 10-15 minutes, scrub thoroughly, then dry the area completely with fans. If you don’t repair leaking pipes, improve ventilation, or control humidity below 50%, the mold returns within weeks.

What kills mold better, vinegar or hydrogen peroxide?

White vinegar and hydrogen peroxide work similarly on mold, with vinegar killing about 82% of species and hydrogen peroxide offering comparable effectiveness. Vinegar works well on most surfaces and doesn’t require rinsing. Hydrogen peroxide is better for brightening stained grout. Never mix them together or combine with bleach.

When should I call a professional instead of trying DIY mold removal?

Call a professional when black mold covers more than 10 square feet, appears in HVAC systems, results from sewage backup, or hides behind walls. Professional remediation is also required if you have asthma or immune system issues, if structural materials feel soft or crumbly, or when insurance documentation matters.

What protective equipment do I need for DIY black mold removal?

For DIY black mold removal, you need an N95 or HEPA-rated respirator mask, safety goggles that seal around your eyes, long rubber gloves extending past your wrists, and disposable coveralls. Add plastic sheeting and tape for containment, plus a box fan to create airflow pushing spores outward.

Why does black mold keep coming back after I clean it?

Black mold keeps coming back because the moisture source wasn’t fixed. Mold needs water to grow, so cleaning visible growth without repairing leaking pipes, improving ventilation, or controlling humidity just buys temporary relief. Dry the area within 24-48 hours after any water exposure and maintain indoor humidity between 30-50%.

Can I use bleach on wood to kill black mold?

Don’t use bleach on wood surfaces because only the water penetrates sealed wood, not the chlorine that kills mold. This actually feeds mold roots below the surface, causing regrowth within months. Instead, use dish soap and warm water first, then equal parts vinegar and warm water for stubborn spots.

When should I replace moldy drywall instead of cleaning it?

Replace moldy drywall when it feels soft or crumbly, shows persistent staining after cleaning attempts, or smells musty even after treatment. These signs indicate mold has penetrated deep into the porous material where cleaning solutions can’t reach. Surface cleaning only works on shallow, recent growth.

How long does vinegar need to sit on black mold to work?

Vinegar needs to sit on black mold for 15 minutes before scrubbing to effectively kill mold spores. Spray undiluted white vinegar directly on the affected area, wait the full 15 minutes, then scrub with a stiff brush in circular motions. For prevention, reapply after cleaning and let it air dry without wiping.

What humidity level prevents black mold growth in my home?

Maintaining indoor humidity between 30-50% prevents black mold growth in your home. Use a hygrometer to monitor levels and run a dehumidifier when humidity climbs above 50%. Turn on exhaust fans during showers, fix leaks immediately, and dry any water spills within 24-48 hours to stop mold before it starts.

Should I remove moldy insulation or can I clean it?

Remove and replace moldy insulation rather than attempting to clean it. Insulation is highly porous and absorbs mold growth throughout the material where cleaning solutions cannot reach. Seal the contaminated insulation in plastic bags before disposal to prevent spreading spores during removal and transport.

Insurance Claim Documentation Checklist For Homeowners: Ok

0

Have you ever wondered if your insurance paperwork is ready when a crisis hits? Many homeowners miss key details, which can delay recovery. This guide breaks down what you need to collect, from your policy details to photos of damage, in clear, simple steps. We explain each part so you can handle the process confidently, even when you’re stressed. Let’s streamline your claim so you can get back to what matters most.

Comprehensive Insurance Claim Documentation Checklist for Homeowners

Start by gathering all key documents. Find your insurance policy papers that show your policy number, what is covered, and any special provisions. Write down the exact date, time, and place of the incident. For example, note: "Loss occurred on 08/15/2023 at 7:45 PM at 123 Main Street." This clear record helps pinpoint when and where the incident happened.

Write a simple, clear description of the event. Use bullet points to note:

  • The exact time and address of the incident
  • A step-by-step list of what happened
  • Any emergency actions you took immediately

Take photos and videos right away. Capture all visible damage. If you need tips, look up advice on photographing damage for insurance claims. Also, check for any nearby security or doorbell cameras that might have recorded the event.

If your incident involves an auto accident, theft, or vandalism, get police or incident reports. Write down contact details for everyone involved.

Next, list all damaged or lost items. Include pictures, receipts for purchases, serial numbers, and rough estimates of each item’s worth. This list should cover furniture, electronics, clothing, and any high-value items.

Record any quick fixes or emergency repairs made to stop more damage. Save receipts, contractor estimates, and work records.

Keep all these documents organized so that when your claim is reviewed, nothing delays the process.

Reviewing Your Insurance Policy and Coverage Document Guidelines

img-1.jpg

I know dealing with insurance paperwork can feel overwhelming. Start by finding your policy declarations page. This page lists your policy number, coverage limits, and deductibles. It also shows extra details (called endorsements or riders) that might change what events like flood, fire, or wind are covered. For example, you might see: "Policy number 123456 with a $500,000 limit and a $1,000 deductible."

Next, log into your insurer’s online portal. Here you can check every policy detail, download ID cards, add drivers, or process payments. This step makes sure all your information is current before you get your claim paperwork together.

Make a list of important contact details, your insurer’s phone number, your agent’s name, and the claims hotline number. Keeping these details handy helps you reach out quickly with any questions. Verify each detail against your original documents to avoid delays when filing your claim.

Finally, review all your printed and digital documents carefully. Compare every line with your records to catch any changes that might affect your claim. Taking the time to double-check now can save you hassle later.

Documenting Incident Details: Incident Report Requirements for Homeowners

First, note the exact date, time, and address where the damage happened. For example, write: "Loss occurred on 08/15/2023 at 7:45 PM at 123 Main Street." This shows when and where the problem occurred.

Next, list the events in order using bullet points:

  • Noticed water pooling in your living room.
  • Saw a burst pipe causing the damage.
  • Called a plumber to shut off the main water valve.

If you lack direct footage, check any security or doorbell camera recordings for evidence. Also, keep a simple timeline of when you discovered the damage and when you started drying the area or doing a temporary fix.

Recording these details clearly helps your insurer review your claim quickly and prevents delays.

Building a Property Inventory and Evidence Compilation Tactics

img-2.jpg

Start by making a clear list of all your personal belongings. Write down everything, from furniture and clothing to electronics, jewelry, tools, and special items. Take a photo or video of each item and attach any purchase receipts you have. For example, you might note: "Living room sofa – photo taken after flood damage, estimated value $600." It’s okay to use rough estimates.

Also, record details like serial numbers and any unique features. These details help show what you owned and the condition before any damage. Use simple bullet points like these:

  • Furniture and appliances: include photos from different angles and note an estimated value.
  • Clothing and accessories: list brands, describe the condition, and add small photos.
  • Electronics and jewelry: write down serial numbers and include purchase receipts.
  • Tools and outdoor equipment: highlight any distinctive features and provide an estimated worth.

Keep your inventory safe by storing it in a cloud folder or printing it out and saving it in a binder away from your home. This ensures your information is safe if there is more damage. Update your list regularly, especially after new purchases or upgrades.

For example, you might record: "My silver watch: video recorded clearly, with serial number visible and a 2018 purchase receipt, estimated at $150, securely saved in my digital folder." This detailed record supports your claim and helps the adjuster see what was lost.

Capturing Repair Estimates and Recording Emergency Repairs

When damage strikes, acting fast is crucial. You should call on a licensed contractor or a trusted service provider to handle emergency fixes like boarding up windows or placing a tarp over a damaged roof. These steps help stop extra harm. Get written repair estimates from at least two vendors. Each one must list the work needed and show the costs clearly. For example, you might record that Contractor A estimated $150 to board up the front windows.

Be sure to document every repair step. Take before-and-after photos to capture the progress. Keep all invoices and receipts, and write down the date and time each repair was done. This documentation backs up your insurance claim.

Follow these steps to gather your evidence:

  • List every repair with details of what was fixed.
  • Collect written estimates from several sources.
  • Save all related receipts or invoices.
  • Snap clear before-and-after photos.
  • Note any emergency repairs made to stop further damage.

By keeping a detailed repair log, you provide solid evidence for your insurance claim and help avoid any delays in the claims process.

Organizing and Submitting Your Homeowners Claim File with File Organization Guidelines

img-3.jpg

When preparing your claim file, start by sorting your documents into different folders. Create both digital and paper folders and clearly label them by type, policy, incident report, photos, estimates, and invoices. This simple step makes it easier for your adjuster (the person checking your claim) to find what they need.

Next, store important files on a cloud drive to keep them safe, and print out your key documents to put in a binder. Add a cover sheet or index listing every document included. This cover sheet works like a table of contents, so you know exactly where to look.

Follow these steps:

  • Create both digital and paper folder systems.
  • Label each folder by document type, like policy or photos.
  • Back up your digital files on a cloud drive.
  • Print essential documents and organize them in a binder.
  • Include a cover sheet that lists every document in your file.

Keep your inventory list and receipts updated until your claim is closed. This regular updating prevents any confusion, speeds up the review process, and gives you confidence that every detail is recorded accurately.

For filing best practices, refer to the step-by-step guide for water damage claim documentation at https://firefloodrescue.com?p=step-by-step-guide-to-water-damage-claim-documentation.

Preparing for the Adjuster Inspection and Claims Process Guidance

First, schedule your adjuster visit as soon as you can. Confirm the date, time, and meeting spot so you know when they will arrive and have time to get all your paperwork ready.

Next, gather your documents in one place. Collect your property inventory, photos or videos of the damage, a detailed incident report, and estimates for any emergency repairs. This organized bundle shows the adjuster your complete record of the loss.

When you meet the adjuster, walk them around each area with damage. Point out key spots, like a broken window that was quickly boarded up or the receipt from the contractor who secured your roof. This clear evidence supports your claim.

Also, ask questions during the inspection. Check how your coverage works, what the differences are between actual cash value and replacement cost, and how depreciation (loss of value over time) is calculated. These questions help you understand the process and make sure your claim is handled fairly.

Follow this simple checklist:

Step Action
1 Confirm the meeting details
2 Organize all your documents
3 Walk the adjuster through each damaged area
4 Ask clear, focused questions

Final Words

In the action, we laid out a step-by-step plan to organize your claim details, from policy review to gathering repair estimates. We showed you how to record incident details, compile photo and video evidence (see what photos to take for insurance claims after a disaster), and build a property inventory.

By following this clear, easy-to-use guide, you’ll feel more confident when presenting your claim file. This insurance claim documentation checklist for homeowners helps you act fast, get the support you deserve, and move toward a safe, livable home.

FAQ

What is an insurance claim documentation checklist for homeowners and in which formats is it available?

The insurance claim documentation checklist for homeowners acts as a guide to collect policy details, photos, and repair estimates. It is available as a free template in PDF and Excel formats for your convenience.

How do I use a free insurance claim documentation checklist for filing my claim?

The free checklist organizes key items like incident reports, policy data, and repair receipts. It helps you quickly compile complete claim evidence so you can submit a well-documented claim.

Interior Demolition and Rebuild: What to Know Before You Start

Thinking a quick gut and rebuild will magically fix your layout and systems?
It won’t unless you plan for structure, hazmat (hazardous materials like asbestos or lead), permits, and hidden surprises.
Interior demolition strips a space to the studs while the exterior shell stays standing.
This guide shows what happens at each step, typical per‑square‑foot costs, the inspections and tests you need, and the safety and permitting traps that stall projects.
Read on so you can budget time, avoid surprises behind walls, and rebuild without costly do-overs.

Core Overview of the Interior Demolition and Rebuild Process

a42UbFjeTYyFN6jrnHZSvw

Interior demolition strips part or all of a building’s interior down to the framing while keeping the exterior shell intact. It’s different from surface renovations (paint, fixtures, cosmetic updates) and full demolition (tearing down the entire structure). You’ll see this approach when a building’s structure is solid but the layout, systems, or finishes don’t work anymore.

The process moves through several phases. First comes assessment and hazmat testing. Then you’ve got the actual demolition, where walls, floors, ceilings, and MEP components (mechanical, electrical, plumbing) get stripped out. Debris gets sorted, hauled, and recycled when possible. After the space is cleared, structural repairs or framing changes happen, followed by new MEP installation, insulation, drywall, and finishes. Final inspections make sure everything meets code before anyone can move in.

Cost for basic interior demolition runs about $4 to $8 per square foot. That’s for straightforward work like tearing out finishes and non-structural partitions. Full gutting with structural elements, selective wall removal, or heavy MEP stripping usually lands between $8 and $25 per square foot. Timeline depends on size and complexity. Small interior jobs might wrap demo and cleanup in one to four weeks, while mid-size commercial projects can stretch demolition alone into two to eight weeks. The rebuild phase adds several more months.

Here’s what you’re looking at for major phases:

  • Assessment and inspections: structural review, hazmat testing, existing condition documentation
  • Permitting and site logistics: demo permits, utility disconnect approvals, dumpster delivery, neighbor notification
  • Hazardous material abatement: professional removal of asbestos, lead paint, or mold before demo starts
  • Interior demolition and gutting: stripping walls, ceilings, floors, and MEP down to framing or structural shell
  • Structural repairs and framing: reinforcing or modifying load bearing elements, adding new partitions, shoring when needed
  • MEP installation, insulation, drywall, and finishes: rough-in for electrical, plumbing, HVAC, insulation upgrades, drywall, paint, flooring, trim

Planning an Interior Demolition and Rebuild: Assessments, Inspections, and Structural Decisions

7B_8l34DQ3-H92ZHYB8Zhw

Early inspections set up everything that follows. A structural engineer or qualified building pro should check the existing framing, foundation, and roof to spot load bearing walls, settlement problems, and hidden rot or insect damage. At the same time, testing for asbestos, lead paint, and mold is critical before any demo begins. Walls and ceilings often hide these materials, and disturbing them without proper abatement creates serious health risks and legal trouble.

Load bearing walls need careful planning. Pull one without proper support and you’re looking at sagging floors, cracked ceilings, or worse. Non-load bearing partitions usually come down with less structural worry, but even those often house electrical wiring, plumbing supply lines, vent ducts, and drain stacks. An engineered demo plan confirms which walls can be removed safely, what temporary shoring you need, and how utilities get rerouted. Skip this step and you’re inviting expensive surprises mid project. Hidden HVAC chases, unexpected beam placement, plumbing that isn’t where the plans said it would be.

Critical early assessments before demolition:

  • Structural review by a licensed engineer to identify load bearing elements and confirm framing integrity
  • Hazmat testing for asbestos, lead based paint, and any mold or contamination requiring abatement
  • Utility mapping to locate gas, water, electrical, and sewer lines running inside walls, floors, and ceilings

Permits, Regulations, and Code Compliance in an Interior Demolition and Rebuild

uOyyHQaMTeSNOr4iGfW96Q

Most jurisdictions require a demolition permit before you strip interior walls or remove structural elements. You’ll also need building permits for the rebuild phase, plus separate permits or approvals for electrical, plumbing, and HVAC work. If hazmat like asbestos or lead paint shows up, notification or clearance from environmental health authorities may be mandatory. Skip permits and you’re risking stop work orders, fines, trouble selling the property later, and insurance headaches if something goes wrong.

Code compliance goes beyond the demo itself. When you rebuild, the space has to meet current building codes. That often means upgraded fire protection, accessible routes (ADA compliance for commercial projects), smoke and carbon monoxide detectors, energy codes, and proper egress. Even if the original building was grandfathered under older standards, triggering a major renovation can force you to bring everything up to current requirements. Plan for this in your budget and timeline. Permit reviews and code driven upgrades can delay schedules by two to eight weeks or more, depending on project complexity and how efficient your local building department runs.

Permit Type Typical Purpose Potential Delay Range Notes
Demolition permit Authorization to remove interior walls, finishes, or structural components 1–4 weeks Required in most jurisdictions; may need engineered drawings for structural work
Building permit (rebuild) Covers framing, MEP rough-in, drywall, and finishing 2–8 weeks Triggers plan review; inspections at framing, rough-in, and final stages
Utility disconnect approvals Permission from gas, electric, water, or sewer utility to shut off or cap service lines 1–3 weeks Coordination required; delays if utility crews are backlogged
Asbestos/lead notification Environmental or health department clearance before disturbing hazardous materials 1–4 weeks State and local rules vary; abatement must be completed by certified contractors

Interior Demolition Methods and Safety Requirements

4CtZn7YxRbutbyXLVEg47g

Selective demolition strips specific elements (walls, ceilings, flooring) while preserving the rest of the structure. It’s common in tenant fit-outs, office reconfigurations, and historic restorations where the goal is opening space or changing circulation without losing the building shell. Full interior gutting takes everything down to the studs or structural frame, clearing the way for a complete rebuild. The method you choose depends on how much you’re keeping versus replacing, and whether structural modifications are planned.

Safety on an interior demolition site follows OSHA level standards, even if the project is residential. Workers need personal protective equipment: hard hats, safety glasses, gloves, respirators when dust or hazmat are present, and hearing protection around loud equipment. The site should have engineered shoring plans if load bearing walls are being removed or floors are compromised. Dust control is critical, both for worker health and to prevent particulates from spreading into occupied areas or neighboring units. Negative air machines equipped with HEPA filtration create controlled airflow, pulling dust into filters instead of letting it escape.

Major hazards in interior demo include confined working spaces with limited escape routes, the risk of striking hidden utilities (electrical lines, gas pipes, water supply), and the potential for floor or ceiling collapse if structural support is removed improperly. Hand strip methods using pry bars, reciprocating saws, and sledgehammers allow precise control and reduce the chance of damaging utilities or framing you want to keep. Heavy equipment like skid steers or small excavators can speed up larger gutting jobs, but they require adequate floor load capacity and access.

Protective measures that should be in place during interior demo:

  • Engineered demolition plan and site specific safety plan reviewed by a qualified professional
  • Personal protective equipment (PPE) for all workers: hard hats, eye protection, respirators, gloves, steel toed boots
  • Dust containment using plastic barriers, sealed doorways, negative air machines, and HEPA filtration
  • Temporary shoring and bracing to support floors, ceilings, or walls during selective removal

Debris Removal, Recycling, Salvage, and Waste Management During Interior Demolition

9AQCB7ORsqU67xbu0fxEA

Debris from an interior gut piles up fast. A thousand square feet of interior can generate multiple cubic yards of drywall, flooring, framing lumber, old fixtures, and scrap metal. Most contractors use roll-off dumpsters ranging from 10 to 40 cubic yards, with larger projects requiring multiple hauls or on-site sorting. Waste management isn’t just about hauling everything to the landfill. It’s about sorting materials for recycling, salvage, and disposal to reduce cost and environmental impact.

Recyclable streams include concrete and masonry (crushed for aggregate or road base), metal (steel framing, copper pipe, aluminum ductwork sold to scrap yards), and clean wood (dimensional lumber, joists, trim that can be reused or chipped for landscaping). Drywall can sometimes be recycled into new gypsum products if it’s free of paint and contaminants. Fixtures like cabinets, doors, and architectural details often have salvage value. Historic restorations may preserve original molding, hardware, or decorative elements for reinstallation, and even standard fixtures can be donated or sold to reclaim yards. Sorting on-site speeds recycling and can reduce disposal fees. Mixed loads sent to landfills cost more per ton than clean, separated materials delivered to recyclers.

  • Concrete and masonry: crushed on-site or hauled to recycling facilities for aggregate
  • Metals: steel, copper, aluminum separated and sold to scrap yards, often generating salvage credit
  • Clean wood: dimensional lumber, joists, and trim reused, donated, or processed into mulch
  • Drywall: recyclable into new gypsum board if unpainted and uncontaminated
  • Fixtures and architectural elements: cabinets, doors, molding, hardware salvaged for reuse or donation

Rebuilding After Interior Demolition: Framing, MEP, Insulation, and Finishing Stages

cPfGOE7KT2yOvHnRhzqcqw

Once the space is cleared and any structural repairs are done, the rebuild begins with framing. New partition walls go up, openings are framed for doors and windows, and any load bearing modifications are reinforced per the engineer’s drawings. Framing sets the layout for the rest of the project, so getting walls square, plumb, and at the right dimensions matters. Mistakes here ripple forward. Cabinets won’t fit, doors bind, finish trim gaps.

Next come the rough-ins for mechanical, electrical, and plumbing. Electricians run new circuits, install junction boxes, and pull wire for outlets, switches, and lighting. Plumbers route supply lines and drain stacks for sinks, toilets, and fixtures. HVAC contractors replace ductwork, install new equipment, and balance airflow. MEP rough-in is where complexity and cost can climb. Older buildings often need service upgrades, panel replacements, or entirely new distribution systems to meet current codes and loads. Coordination between trades is critical. A plumber cutting through a joist the electrician needed, or ductwork blocking a beam pocket, can cause rework and delays.

After rough-ins pass inspection, insulation goes in. This is the time to upgrade energy performance by adding spray foam, dense-pack cellulose, or high R batt insulation in walls and ceilings. Then drywall is hung, taped, mudded, and sanded smooth. Finishing stages follow: paint, flooring (tile, hardwood, carpet, LVP), trim and baseboards, cabinet and fixture installation, final electrical and plumbing connections, and any specialty finishes like backsplashes or custom millwork. The rebuild phase often costs hundreds of dollars per square foot, depending on finishes, MEP complexity, and code driven upgrades.

Rebuild Stage Main Tasks Typical Trade Required
Structural repairs and framing Reinforce foundations, install beams, frame new partitions, openings Carpenters, structural engineer oversight
MEP rough-in (electrical) Run wire, install boxes, panel upgrades, circuit distribution Licensed electrician
MEP rough-in (plumbing) Route supply and drain lines, vent stacks, fixture placement Licensed plumber
MEP rough-in (HVAC) Install ductwork, equipment, registers, balance airflow HVAC contractor
Insulation and drywall Insulate walls/ceilings, hang and finish drywall, prime surfaces Insulation installer, drywall contractor
Finishes and trim Paint, flooring, cabinets, trim, fixtures, final connections Painters, flooring installers, finish carpenters, electricians, plumbers

Cost Structure and Budgeting for an Interior Demolition and Rebuild

ATbblTn7Qhmjp9N9p2v11A

Understanding where the money goes helps you plan a realistic budget. Demolition itself (stripping walls, pulling out fixtures, hauling debris) typically runs $4 to $15 per square foot for straightforward interior work. If the project involves selective removal of structural elements, heavier debris like tile or concrete, or extensive MEP stripping, expect $8 to $25 per square foot. Hazmat abatement adds significant cost. Asbestos removal commonly ranges from $5 to $20 or more per square foot, depending on the type of material, containment requirements, and disposal regulations. Lead paint abatement and mold remediation carry similar pricing dynamics.

Permits and professional fees vary by location and project complexity. Permit fees can range from $100 for minor work up to several thousand dollars for large commercial projects, often calculated as a percentage of the project’s declared value. Structural engineering reports typically cost $500 to $2,500 or more, depending on the scope and whether you need stamped drawings for load bearing modifications. Plan review, special inspections, and impact fees in some jurisdictions add further line items.

A smart budget includes contingency for hidden conditions. Mold behind drywall, outdated wiring that needs replacement, or framing rot that wasn’t visible until walls came down. Most experienced contractors and project managers recommend holding 10 to 25 percent of the total project cost in contingency. The lower end works for well documented buildings with recent inspections. The higher end is smart for older structures or projects with incomplete records.

Primary budget categories for an interior demolition and rebuild:

  • Demolition labor and equipment (hand tools, skid steer, dumpsters, hauling)
  • Hazmat testing and abatement (asbestos, lead, mold if present)
  • Permits, engineering reports, plan review, and inspection fees
  • Structural repairs, framing materials, and temporary shoring
  • New MEP systems (electrical panel, wiring, plumbing, HVAC equipment and ductwork)
  • Insulation, drywall, finishes, flooring, paint, trim, and fixtures
  • Debris disposal and recycling fees, less any salvage credits for scrap metal or reusable materials

Timeline Expectations for Interior Demolition and Rebuild Projects

MbX4_SSBS_WZHv9V3qSQkw

Small projects (single unit apartments, small offices up to around 1,000 square feet) often complete demolition and debris removal in one to four weeks. The rebuild phase, including MEP rough-in, drywall, and finishes, typically adds one to three months, depending on finish complexity and inspection scheduling. Mid-size projects spanning 1,000 to 10,000 square feet generally take two to eight weeks for demolition and abatement, followed by three to nine months for the rebuild and fit-out. Large commercial interiors, adaptive reuse projects, or buildings with extensive structural modifications can stretch timelines to twelve months or more from start to final certificate of occupancy.

Coordination is the biggest driver of schedule reliability. Sequencing trades so electricians aren’t waiting on plumbers, or drywall crews aren’t delayed by late HVAC duct installation, requires active project management. Material lead times also matter. Custom millwork, specialty fixtures, or long-lead mechanical equipment can add weeks if not ordered early. Inspections create natural pauses. Framing must pass before insulation goes in, rough-ins must pass before drywall closes walls, and final inspections gate occupancy.

Phased scheduling can keep parts of a building operational while others are under construction, but it adds complexity. You’ll need temporary barriers, dust control between occupied and construction zones, and careful coordination of utilities to avoid shutting down active spaces. Seasonal factors can influence interior work less than outdoor construction, but in places like Arizona, summer heat can stress HVAC systems during rebuild, and monsoon season can complicate debris hauling or exterior access if tarps and openings aren’t managed. Planning buffers into your timeline (especially around permitting, inspections, and material delivery) prevents minor hiccups from becoming major delays.

Residential vs Commercial Interior Demolition and Rebuild Considerations

r62WJltJQvSPc24SzX2W1w

Residential projects often focus on selective gutting. Kitchens down to studs for new layout and appliances, bathrooms stripped to replace old tile and fixtures, or basements finished by framing new walls and adding egress windows. The goal is usually reconfiguring space, updating systems, and improving finishes while keeping the rest of the home intact. Dust and noise matter because people are living nearby or in adjacent units, so contractors use containment barriers, quieter hand tools during certain hours, and careful debris routing to minimize disruption.

Commercial interior demolition and rebuild scales up in scope and regulatory complexity. Office tenant improvements might strip an entire floor to create open workspace, private offices, and upgraded conference rooms. MEP systems are often entirely replaced to meet higher loads and modern efficiency standards. Retail fit-outs must move fast to minimize lost revenue, which means tight schedules, after hours work, and aggressive dust control to protect merchandise and neighboring tenants. Warehouse and industrial interiors involve heavier structural considerations: removing old mezzanines, dock equipment, or refrigeration systems, and reinforcing floors for new racking or machinery loads. Accessibility (ADA), fire egress, and life safety codes are stricter in commercial work, often requiring sprinkler upgrades, accessible restrooms, compliant doorways, and illuminated exit signs even if the original building predated those rules.

Key differences between residential and commercial interior demolition and rebuild:

  • Residential: selective room by room gutting, focus on layout optimization and finish upgrades, noise/dust sensitivity for occupied homes, smaller crew sizes, shorter project durations
  • Commercial: larger scale strip-outs, strict ADA and fire code compliance, phased work to keep business operating, coordination with property management and neighboring tenants, heavier MEP and structural modifications
  • Permitting and inspections: commercial projects face more rigorous code enforcement, including accessibility reviews, fire marshal sign-offs, and special inspections for structural changes
  • Timeline and coordination: residential projects can often pause for homeowner decisions; commercial deadlines are driven by lease terms, tenant move-in dates, and revenue loss, demanding tighter schedules and formal project management

Choosing a Contractor for an Interior Demolition and Rebuild

xbzEkPGJSlSEK8DjGDoaug

Hiring the right contractor starts with verifying credentials. Confirm the contractor holds a valid general contractor or demolition contractor license in your jurisdiction. Ask for proof of general liability insurance (commonly a minimum of $1 million coverage) and workers’ compensation insurance to protect you if someone is injured on-site. If hazmat is present, the contractor must either hold abatement certification or subcontract to a certified abatement firm. Doing asbestos or lead work without proper credentials is illegal and dangerous.

Experience with projects similar in type and scale matters. A contractor who’s completed office fit-outs will understand coordination with building management, after hours access, and dust control protocols for occupied spaces. One with adaptive reuse or historic restoration work will know how to salvage architectural elements and work around unpredictable conditions. Ask for references and photos of comparable projects, and follow up with past clients to confirm the contractor met schedule, stayed on budget, communicated clearly, and handled surprises professionally.

  1. Verify contractor license, general liability insurance (minimum $1M), and workers’ compensation coverage.

  2. Confirm certifications for hazmat abatement if asbestos, lead, or mold is present.

  3. Request a portfolio of similar interior demolition and rebuild projects, with references you can contact.

  4. Review a detailed written scope of work, timeline, and pricing (fixed price or clearly phased cost breakdowns).

  5. Evaluate communication style and responsiveness. Projects always hit surprises, and you need a contractor who explains options clearly and keeps you informed.

  6. Check that the contractor has relationships with qualified subcontractors (electricians, plumbers, HVAC) and a plan for coordinating trades and inspections.

Common Challenges in Interior Demolition and Rebuild Projects

Hidden conditions are the most frequent source of budget overruns and schedule delays. Walls that look solid can conceal mold from old roof leaks, framing weakened by termites, or asbestos containing drywall joint compound that wasn’t visible until demo started. Once hazmat is discovered, work must stop until certified abatement is complete, adding cost and time. Structural issues (settlement cracks, undersized beams, or rotted sill plates) can require engineering, shoring, and repairs that weren’t in the original scope.

Supply chain delays have become more common in recent years. Long-lead items like custom cabinetry, specialty HVAC equipment, or even standard electrical panels can push schedules out by weeks if not ordered early. Neighbor and utility impacts also create friction. Dust drifting into adjacent units, noise during early mornings, or accidental utility shutoffs can generate complaints, stop work orders, or damage claims. Coordination breakdowns between trades (electricians and plumbers both needing the same wall cavity at the same time, or drywall crews showing up before rough-in inspections pass) stall progress and cost money.

Mitigation strategies for common interior demolition and rebuild challenges:

  • Early testing and inspections: invest in hazmat testing and structural review before signing contracts; budget 10–25% contingency for hidden conditions
  • Permitting buffer: add two to eight weeks of schedule float for permit reviews, plan corrections, and inspection scheduling
  • Proactive communication: notify neighbors, coordinate utility shutoffs in advance, and establish site rules for dust, noise, and access
  • Lead time planning: order long-lead materials and equipment early; track deliveries and have backup suppliers identified for critical items

Final Words

Start by stopping active damage, documenting what you see, and getting the right inspections and estimates. Early checks catch hidden problems so you can plan repairs without surprises.

Then move through controlled demolition, debris sorting and salvage, structural fixes, MEP rough-ins, insulation and drywall, and finishes. Keep contingency and timing in your budget and track permits and timelines.

With clear planning, trusted contractors, and solid documentation, your interior demolition and rebuild becomes a steady path back to a comfortable, finished home. You’ll get the space repaired right and ready to use.

FAQ

Q: What is the average cost for interior demolition?

A: The average cost for interior demolition is about $4–$15 per sq ft; selective demo often falls near $4–$8, while full gutting ranges $8–$25 per sq ft depending on scope and hazards.

Q: Is it cheaper to renovate or demolish and rebuild?

A: Renovating is usually cheaper than demolishing and rebuilding, unless the structure needs major repairs, you want a completely new layout, or long‑term value and code upgrades justify a full rebuild.

Q: What is typically included in interior demolition?

A: Interior demolition typically includes removing finishes, cabinetry, fixtures, non‑load partitions, disconnecting utilities, debris hauling, dust containment, and preserving the building’s structural framing for the rebuild.

Q: How much does it cost to demolish and build a home?

A: The cost to demolish and build a home varies widely: demolition $4–$25 per sq ft; rebuilding commonly runs $150–$400+ per sq ft, driven by size, finishes, site work, and MEP complexity.

Best Practices For Contents Cleaning After A Disaster!

Have you ever seen your home in chaos after a disaster? It can feel scary when your treasured items are at risk. We have clear steps to help you protect what matters most.

In our guide, we explain three key tasks:

  1. Fast pack-out (quickly moving items to safety).
  2. Thorough hazard checks (carefully looking for dangers).
  3. Choosing the right cleaning methods for each situation.

These steps not only save you time, but they also help keep your valuables safe from further damage. Read on to learn how to keep your home secure and your memories protected.

Disaster Contents Cleaning: Step-by-Step Best Practices

We begin with a quick on-site check and pack-out. Our team is on the way fast, often within two hours. When we arrive, we immediately pack your belongings to shield them from further damage. For example, we quickly move fragile items like photo albums and electronic devices to a safe, clean area. This first step sets up the entire cleaning process.

Next, we check for hazards. Our experts look over every item and area for things like water, sewage, pet waste, fire debris, or chemicals (pesticides). Identifying these hazards early keeps harmful substances from spreading and helps protect you and your home.

Then, we choose the right cleaning method. Depending on what needs cleaning, we use techniques tailored for each situation. For delicate items such as fabrics and documents, we might use ultrasonic cleaners (machines that use sound waves to gently remove dirt). For tougher items, we may use solvent-based treatments to remove smoke, soot, or other residues. Using the correct method lets us clean effectively without harming your items.

After cleaning, we work on deodorization and disinfection. We use strong agents that target lingering smells and any remaining contaminants like mold spores or bacteria. We also run HEPA-filtered dehumidifiers (machines that pull moisture from the air and capture very small particles) to keep the air clean and safe.

Finally, we store your items in a controlled space until they are ready to be returned safely. Every step is carefully documented to support any insurance claims, ensuring your belongings are restored with care and precision.

Safety Protocols for Contents Cleaning After a Disaster

img-1.jpg

When a disaster strikes, safety starts with setting up clear zones and keeping harmful areas contained. We mark off spots where water damage has mixed with sewage, pesticides, chemicals, or pet waste. This blocking keeps dangerous substances isolated from clean areas. For example, our team quickly creates decontamination zones (areas set aside for thorough cleaning) to stop the spread and protect both your home and its occupants.

Our technicians follow strict personal protection rules when handling toxic mold and other hazardous materials. We gear up our crew with gloves, masks, and protective suits to shield them from dangerous chemicals and biohazards (substances that are harmful to living things). We stick to clear, safe procedures when selecting and using this equipment. This method keeps everyone safe while we perform quick, emergency cleanup work.

We also use decontamination and cleaning practices that meet OSHA (workplace safety) standards and industry certifications. We work with EPA-approved disinfectants and treat every affected item with care. Our cleaning steps are performed in every work zone and carefully documented to show compliance with safety rules. This organized approach helps reduce exposure and keeps the work area safe during disaster restoration.

Contents Cleaning Methods for Water, Fire, and Mold Damage

After a disaster, we pick cleaning methods that match the type of damage. When water damage occurs, harmful substances like raw sewage, pesticides, or added chemicals can spread fast. For fire damage, our specialized equipment quickly removes soot, ash, and stubborn smells. If smoke is a problem, we use cleaning solvents, dry-ice blasting (a method that uses frozen carbon dioxide), and ozone treatments to clear residues from fabrics and hard surfaces. When dealing with mold damage, we carefully contain the spores and use HEPA vacuuming (a machine that traps tiny mold particles) along with antimicrobial treatments. Each method uses the right tools and techniques to clean safely and thoroughly.

Damage Type Cleaning Method Key Equipment
Water Damage Extraction, decontamination, and chemical cleaning to remove sewage or additives Water extractors, dehumidifiers, industrial cleaners
Fire Damage Removal of soot and ash using specialized machinery and chemical treatments for odors Soot vacuums, thermal foggers, air scrubbers
Smoke Damage Application of solvent cleansers, dry-ice blasting, and ozone treatments on surfaces Solvent applicators, dry-ice blasters, ozone generators
Mold Damage Containment of spores, HEPA vacuuming, and antimicrobial treatments to inhibit further growth HEPA vacuums, mold inhibitors, air scrubbers

Looking at these methods, water damage cleaning focuses on removing liquids and harmful contaminants to avoid long-term structural issues. Fire and smoke damage require careful cleaning for both what you see and what you might not notice, like lingering odors. Mold cleaning works to trap and remove spores quickly to keep indoor air safe. For example, using a HEPA vacuum after a flood can greatly reduce airborne mold, helping to make your home safer as we work to restore it.

Specialized Contents Decontamination Techniques for Electronics, Fabrics, and Furniture

img-2.jpg

Delicate items like electronics, fabrics, and furniture need extra care. If cleaned incorrectly, these high-value items can lose their function or beauty. We know that even small mistakes can damage sensitive circuits or fade treasured textiles. That’s why we treat each item with a method that fits its needs. For example, we use gentle ultrasonic cleaners on photos and documents to remove dirt without causing further harm.

Every item brings its own challenge. Electronics need dry cleaning (a method that avoids water damage) to protect their circuits. Fabrics often require special enzyme or solvent treatments (chemicals that remove residues) so the fibers stay intact. Wood furniture is cleaned with conservation-grade solvents that remove contaminants while keeping its natural finish. We focus on cleaning thoroughly while keeping each material in top condition.

  • Electronics: We use controlled dry cleaning and precise cleaning tools along with special solvents.
  • Clothing: We handle fabrics manually with enzyme detergents and gentle rubbing to avoid stress.
  • Upholstery: We apply solvent-based treatments paired with ozone deodorization (using a gas to remove bad smells) so materials stay fresh without getting too wet.
  • Rugs: We use carefully measured solvent cleaners and enzyme detergents with low-pressure tools to protect the rug’s texture.
  • Documents: We restore photos and papers with gentle ultrasonic cleaning that lifts dirt off fragile surfaces.
  • Wood Furniture: We clean wood using conservation-grade solvents and refinishing tools that remove residues while preserving its finish.

Hazardous Substance Neutralization and Compliance in Contents Cleaning

We start by selecting the right neutralizers to handle biohazard risks. Our team uses disinfectants approved by the EPA (the Environmental Protection Agency – the group that makes sure products are safe) to deactivate bacteria and other harmful germs. We also use specific chemical formulas that balance acids, alkalis (substances that reduce acidity), and petrochemical residues. This careful selection stops harmful chemical actions that could damage your belongings during restoration.

Next, we separate all hazardous waste from safe materials. By sorting out contaminated items, we lower the risk of spreading contaminants to clean areas. We mark each type clearly and treat it with the careful steps it needs, which helps protect your home and other items.

We follow all federal and local rules for disposing of hazardous waste. Every bit of chemical residue is recorded and removed using approved waste management practices. Sticking to these guidelines keeps your property safe and helps protect our environment.

Before we pack out your belongings, we use a line-of-sight environmental deactivation sequence. This means we closely inspect and neutralize any remaining hazards. By doing this, we make sure your items are safe to bring back home.

Contents Cleaning Documentation, Insurance Coordination, and Cost Management

img-3.jpg

We begin by assessing the damage to your belongings. Our team makes a list of each damaged item and notes details like type, condition, and repair or replacement costs. We use a standard checklist so nothing is overlooked. For example, when checking a water-damaged bookshelf, we record every mark and break so you have a clear record for your insurance claim.

Next, we document the cleaning process with photos and checklists. We take before and after pictures to show the full extent of the damage and the progress made. We tie each photo to a specific checklist entry, ensuring every step is noted. This record helps support your claim and is shared with the insurance adjuster. You can review our insurance claim documentation checklist for homeowners at https://firefloodrescue.com?p= for guidance on how we record each step.

Finally, we work closely with your insurance company to manage budgets and reimbursements. We share detailed service logs and cost estimates to make the insurance review clear and smooth. We maintain open communication with claims adjusters so that every restoration cost is tracked correctly and funds are released quickly.

Expert Tips for Prolonged Hygiene and Mold Prevention in Contents Cleaning After a Disaster

After we clean your items, we move them to a safe staging area. This controlled spot keeps each piece separate so hidden contaminants don’t spread. For example, we carefully set aside delicate fabrics from other belongings to maintain a clean look.

Next, we control the air quality with HEPA air scrubbers (machines that trap tiny particles) and activated carbon filters (devices that absorb pollutants). These tools work like a deep clean for your indoor air. They help lower the chances of mold spores settling on your items.

We also focus on getting rid of unwanted smells. During our final check, we treat your items with microbial sanitizers (germs-killing sprays) and odor neutralizers (smell-cancelling agents). For instance, treating upholstery and stored clothing gets rid of odors and leaves your belongings fresh.

Lastly, we schedule regular follow-up checks to keep your space safe. These inspections spot early signs of mold or leftover contaminants. That way, your items and the air in your home stay clean as you move forward with recovery.

Quick-Reference Checklist for Contents Cleaning After a Disaster

img-4.jpg

A clear checklist can make your cleanup easier and safer. Our free one-page guide shows you eight simple steps to follow:

  1. Start with an inventory. Write down every item that has been affected.
  2. Do a hazard check. Look for risks like unstable surfaces or water issues.
  3. Confirm you have the right protective gear (like gloves, masks, and special clothing) to keep you safe.
  4. Choose the proper cleaning method to match the type of damage.
  5. Review local rules to ensure you meet all legal requirements.
  6. Record your work. Take notes and photos to document every step.
  7. Inspect your cleanup. Check that every task is done correctly.
  8. Schedule regular maintenance checks to help prevent future problems.

Visit our resource page to download this free checklist and keep your recovery process on track.

Final Words

In the action, we walked through every step of disaster contents cleaning, from the initial pack-out and hazard checks to tailored cleaning methods and detailed documentation. We detailed safety measures, equipment, and expert tips to keep your belongings safe and your home secure. Using the best practices for contents cleaning after a disaster helps you stop damage and begin recovery quickly. Your safe, livable space is within reach, and every effort brings you closer to restoring comfort and peace of mind.

FAQ

What is natural disaster cleanup?

The natural disaster cleanup process means quickly removing debris and contaminants after floods, fires, or storms. Experts use emergency services and advanced cleaning techniques to restore your home quickly and safely.

What do disaster cleanup companies do?

The disaster cleanup companies perform mitigation, content decontamination, and restoration. They use trained teams and strict safety protocols to help you restore your home to a safe living condition.

What are disaster cleanup jobs like?

The disaster cleanup jobs involve restoring homes after water, fire, or mold damage. Workers follow safety protocols, use specialized equipment, and document every step to support insurance claims.

How do you clean up a flooded floor?

The flooded floor cleaning involves removing water, using dehumidifiers (machines that pull moisture from the air), and sanitizing surfaces to prevent mold growth. The process is guided by clear, safe steps.

How do you sanitize after a flood?

The sanitizing after a flood includes disinfecting surfaces, deodorizing affected areas, and cleaning contaminated items. Professionals use EPA-approved disinfectants while following OSHA safety guidelines for a thorough cleanup.

What should I know about FEMA after a fire?

The FEMA after the fire process involves working with the Federal Emergency Management Agency to help cover restoration costs. It is key to document your damage for insurance and claim support.

What guidance does the CDC offer for natural disasters?

The CDC natural disasters guidance provides health and safety recommendations, including proper use of personal protective equipment and hygiene practices to reduce risks during cleanup.

What is the best natural disaster website for cleanup resources?

The natural disaster website acts as a centralized resource for emergency services, clear cleanup tips, and safety protocols. It offers homeowners step-by-step, compassionate guidance during overwhelming times.

Foundation Crack Repair to Prevent Leaks: Materials and Methods That Work

0

Most foundation cracks start small and stay quiet until one heavy rain turns your basement into a wading pool. By then, that hairline crack you ignored has let gallons of water soak into your walls, and the repair just got a lot more complicated. The good news? Fixing foundation cracks the right way stops leaks before they flood your space, and the materials matter more than the size of the crack. We’ll walk you through epoxy injection, polyurethane foam, hydraulic cement, and waterproofing systems so you know what works, when to use it, and what “done right” looks like.

Assess Your Foundation Crack Type for Proper Repair Selection

tUm_rR-nQseDcsZcQAR_Yg

Getting the crack diagnosis right is everything. Different crack patterns mean different problems underneath, and they don’t respond to the same fixes. That hairline crack from normal concrete settling? It’s nothing like a horizontal crack from serious soil pressure.

Crack Characteristics Severity Level Recommended Action
Hairline vertical cracks less than 1/8 inch Low Monitor for 2-3 months; repair with epoxy if stable
Vertical cracks 1/8 to 1/2 inch Moderate Professional epoxy or polyurethane injection recommended
Vertical cracks wider than 1/2 inch High Immediate professional evaluation required
Horizontal or stair-step cracks any width Critical Stop and call foundation specialist immediately
Multiple cracks appearing suddenly High Structural assessment needed before any repairs

Grab a ruler and measure the crack at its widest point. Take photos from the exact same spot every month for a few months. If that crack grows even 1/16 inch, you’ve got active movement that needs professional attention before you do anything else.

Epoxy Injection Methods for Foundation Crack Repair

s0bfrkfwR_mggq5JyZKzMQ

Epoxy injection works for most vertical and hairline cracks in poured concrete. It creates a permanent bond that brings structural integrity back while stopping water from getting through.

Here’s how it works. You start by cleaning the crack and the area around it, getting rid of loose concrete, dirt, anything that’s in the way. Next, you drill injection ports every 10 inches or so along the crack from top to bottom. The crack surface gets sealed with hydraulic cement or epoxy paste so the injectable stuff you’re about to use gets forced deep into the crack instead of just leaking out the front. Then you inject the epoxy resin under pressure, starting at the bottom port and working up. Gravity helps fill everything completely. As each port overflows with resin, you move to the next one above. After the epoxy cures (usually 24 to 72 hours), you grind the surface ports flush and you can paint over the whole thing.

The choice between rigid epoxy and flexible polyurethane matters more than most people think. Flexible resins move with the foundation. Every foundation shifts a little from temperature changes and what’s happening in the soil. Flexibility keeps the seal watertight longer, and you typically get 5 year warranties. Rigid epoxy cures rock hard, which is good for structural bonding but can crack again when the foundation shifts. For cracks that need waterproofing and a little give, flexible polyurethane wins.

Polyurethane Foam Injection for Active Leaking Cracks

UGjg-RYrRiOe-L0zhcxUog

Polyurethane foam expands, and that’s what makes it different. When you inject it, the foam reacts with water and expands up to 20 times its original size. It forces itself into every gap and cavity connected to the crack. Great for cracks that branch out or have paths through the concrete you can’t see.

You’d use it when you’ve got active water coming through the crack, when the crack leaks during heavy rain but stays dry otherwise, when you need repairs done during wet seasons and drying out the crack just isn’t happening, or when you can’t get the area completely dry. It also works when the exact crack path is uncertain or when you think the crack connects to other voids in the wall. You can apply it in any weather, any season. When you need to stop water right now instead of waiting for dry conditions, this is what you reach for.

Compared to epoxy, polyurethane handles wet environments better and works when time’s critical. The foam sets fast, sometimes within minutes, and stops active leaks almost immediately. But it’s got limits. The foam can compress over time if you’ve got extreme water pressure, and it costs more than epoxy. For dry, stable cracks, epoxy gives you better long term structural bonding. For actively leaking cracks, polyurethane is the practical pick.

Hydraulic Cement and Concrete Patching for Minor Foundation Cracks

rL3Wki-qQ4GchkrVgDP-Aw

Hydraulic cement sets fast and it’s waterproof. It sets and hardens even when it’s wet, which makes it useful for quick repairs and as backing material in more complete crack repair systems.

You start by routing the crack, which means using a chisel or grinder to widen it into a V shape that’s wider on the inside than the outside. This creates a mechanical lock that keeps the patch in place. After routing, clean everything out. Wire brush and vacuum all the debris, dust, and loose concrete. Mix the hydraulic cement per the package directions (usually just add water) and work fast since it sets in 3 to 5 minutes. If the crack’s deep, apply the cement in layers, pressing hard to get rid of air pockets. Finish the final layer flush with the wall and smooth it while you still can.

Hydraulic cement works best for hairline and small vertical cracks as a DIY temporary fix or as surface backing before injection repairs. Don’t count on it as a permanent solution for structural cracks or ongoing water problems. It doesn’t bond to concrete the way injection resins do. The patch can shrink a bit as it cures, creating new paths for water around the edges. Think of it as a quick stopgap until you can get professional injection repair done, or as the surface seal that holds injectable materials in place during proper repairs.

Interior Waterproofing Systems to Prevent Foundation Leak Recurrence

cG9_HATMSralkgxjro3MLQ

Interior waterproofing addresses the actual root cause, which is water pressure in the soil, instead of just sealing visible cracks. Even after you repair cracks, the water pressure keeps pushing against your walls and can create new cracks over time.

The system needs two things working together: a perimeter drainage channel and a sump pump. You install the drainage channel along the foundation walls at floor level. That means breaking out a 12 inch strip of basement floor next to the wall, creating a trench, and installing perforated pipe surrounded by drainage stone. You leave a thin gap between the floor and wall (covered with a flange) to let water enter. This collected water flows by gravity to a sump basin. The sump pump then pushes the water out through a discharge line that carries it away from the foundation, at least 10 feet from the house.

Installation takes 2 to 4 days for a typical basement and then works continuously. Water that would otherwise build up against your walls gets intercepted at the footer level and removed before it can get into your living space. This prevents future basement flooding even if new cracks show up, and it relieves the water pressure that causes cracks in the first place. The system runs automatically, only firing up the sump pump when water collects in the basin.

Waterproofing Component Function
Perimeter drainage channel Collects water at foundation footer level before it can penetrate walls or floor
Sump pump Automatically removes collected water from basement and discharges it away from foundation
Discharge line Carries pumped water at least 10 feet from foundation to prevent recirculation
Backup battery system Keeps sump pump operational during power outages when risk is highest

Exterior Waterproofing and Crack Repair from Outside Foundation Walls

fjWfZ4xVRDuiPaHwtniJkg

Exterior repair makes sense in specific situations. When cracks are behind pipes, electrical panels, or near chimneys where you can’t get to them from inside. When you’ve got a finished basement and interior work would wreck drywall, flooring, or built-ins. For block foundations where interior injection doesn’t work as well. Or when you need comprehensive exterior waterproofing to handle widespread moisture problems.

The excavation process is the biggest part. Contractors dig down to the footer level (typically 6 to 8 feet deep) along the affected wall, exposing the full height of the concrete. You need heavy equipment. It tears up landscaping. And you’ve got to plan carefully around utilities, HVAC units, decks, or anything else near the foundation. The excavation needs to be wide enough (3 to 4 feet from the wall) so technicians can work safely.

Once the wall’s exposed, you get a multi-layer protection system. Workers clean the foundation with wire brushes and pressure washers, getting rid of all dirt, old coatings, and debris. Cracks get repaired with hydraulic cement, filled and smoothed flush. Next, a thick rubberized asphalt coating goes on the entire excavated surface, extending at least 12 inches beyond any crack on all sides. This coating is your primary waterproof barrier. Finally, a waterproof membrane (spray applied or sheet membrane) gets installed over the asphalt coating, covering the entire excavated foundation surface from footer to grade level. Some systems also add drainage board installation and exterior footer drains before they backfill.

Expect to pay about 3 times what interior methods cost. Excavation labor, equipment rental, and landscape restoration add up. Installation takes 1 to 2 weeks for a single wall and depends on weather since you can’t excavate or apply coatings during rain or freezing temps. Budget for landscape restoration too, including sod, plantings, sidewalks, or patio sections that had to be removed for access.

Common Causes Behind Foundation Cracks and Moisture Problems

O5fqu2WfTWyk5MbeTriV4A

Water pressure in the soil is what drives crack formation and water seepage. When soil around your foundation gets saturated, that water has weight and creates pressure against the walls. The pressure pushes inward on the concrete, looking for weak spots. Over time, this constant pressure causes cracks or widens existing small ones. The same pressure then forces water through those cracks into your basement. Clay soils make it worse because they expand when wet and contract when dry, creating a push-pull cycle that stresses foundation walls year after year.

Environmental stuff speeds up crack development. Freeze-thaw cycles do real damage in cold climates. Water that seeps into small concrete cracks expands when it freezes, widening the crack slightly. When it thaws, more water gets in the now larger crack, and the cycle repeats. Expansive clay soils in many regions swell up to 10% when saturated and shrink when dry, constantly shifting the ground around your foundation. Seasonal wet and dry conditions create similar movement. Water table levels that fluctuate put varying pressure on foundation walls throughout the year. High water table areas see constant pressure against foundation walls.

Then you’ve got the human causes. Poor construction like inadequate concrete mixing, not enough rebar reinforcement, or improper curing during the original foundation pour. Drainage systems that don’t work fail to move water away from the foundation, letting it pool and saturate the soil. Grading that slopes toward the house instead of away from it directs water straight at your foundation walls. Soil compaction problems during building leave loose soil that settles unevenly under the foundation weight, creating uneven settling that cracks concrete. Gutters that dump water next to the foundation instead of 10 feet away concentrate water exactly where you don’t want it.

Preventive Measures to Protect Foundations from Future Cracks and Leaks

2Crh0eeQTRqsPQZgxp7IrA

Crack repair fixes existing damage, but prevention protects your foundation long term and stops new problems. You can seal every crack you see today, but if the conditions that caused those cracks continue, new ones will show up.

Water management around the foundation is the single most important thing. Water is the enemy. Everything else is just controlling where water goes and how much pressure it creates against your walls.

Gutter cleaning twice a year minimum (spring and fall, more if you’ve got trees overhead) prevents overflow that dumps water directly alongside your foundation instead of into downspouts.

Downspout extensions carrying water at least 10 feet from the foundation stop the concentrated flow from gutters from saturating soil next to basement walls.

Proper grading with soil sloped away from the house (6 inches of drop in the first 10 feet) uses gravity to move surface water away from the foundation before it can soak in.

Landscape drainage improvements like swales (shallow drainage channels), dry creek beds, or regraded planting beds redirect water flow across your yard instead of toward your foundation.

French drain installation where needed on uphill sides intercepts groundwater before it reaches your foundation. Critical on sloped lots or in areas with high water tables.

Regular foundation inspection (twice yearly, inside and outside) catches new cracks while they’re still small, monitors existing repairs, and spots drainage problems before they cause damage.

Structural Reinforcement for Serious Foundation Cracks and Bowing Walls

uGJpiaivRhCkCKULNW_C0Q

You need to know the difference between cosmetic cracks that need sealing and structural cracks that require wall stabilization before any waterproofing can work. If your foundation wall is bowing inward, leaning, or showing horizontal cracks, sealing the crack alone won’t fix anything because the wall itself is failing.

Carbon Fiber Reinforcement Systems

Carbon fiber straps are what you want for walls bowing or leaning less than 2 inches inward. Installation bonds vertical carbon fiber strips to the interior foundation wall using high strength epoxy. Each strap is typically 4 inches wide and runs from the basement floor to the top of the foundation wall (or to floor joists). You space straps 3 to 4 feet apart along the affected wall. Carbon fiber has tensile strength comparable to steel but it’s thinner, lighter, and doesn’t rust. Once the epoxy cures, the straps prevent further inward movement and stabilize the wall where it is. You can paint over the repair for a finished look. Carbon fiber installations typically carry lifetime structural warranties, meaning the repair is guaranteed to prevent further movement for as long as you own the home.

Wall Anchors and Steel I-Beams for Severe Foundation Movement

For walls displaced more than 2 inches or walls showing active, ongoing movement, you need more aggressive stabilization. Wall anchor systems involve excavating outside the foundation at strategic points and installing earth anchors 10 to 12 feet away from the wall. Steel rods connect through the foundation wall to interior wall plates, creating a tension system that pulls the wall back toward its original position and holds it there permanently. You need both interior and exterior access and it takes 2 to 4 days.

Steel I-beam installation is an interior only option where vertical steel beams get anchored to the basement floor and floor joists above, then hydraulically tightened against the bowing wall to stop further movement and sometimes pull the wall back slightly. I-beams are visible in the basement unless you build walls around them. Both systems need structural engineering assessment before installation to figure out spacing, beam sizing, and whether the wall can be pulled back or just stabilized in place.

Comprehensive Cost Analysis for Foundation Crack Repair and Waterproofing

ev7KbjEmQK-DY7GCSRQ1mg

The national average foundation repair cost is $5,857, but the range runs from $250 for minor crack repairs to $100,000 or more for extensive structural work. That wide spread shows you how much variation there is in crack severity and repair scope.

Here’s how costs break down. DIY materials for minor hairline crack repairs run $50 to $200 for hydraulic cement, caulk, and basic tools. Professional epoxy or polyurethane injection typically ranges $300 to $800 per crack depending on length and depth, with most homes needing repair of 2 to 5 cracks. Full interior waterproofing systems including perimeter drainage and sump pump installation cost $3,000 to $8,000 for an average sized basement. Exterior excavation and waterproofing ranges $8,000 to $15,000 or more, with costs rising significantly for deep foundations or difficult access. Carbon fiber reinforcement for wall stabilization runs $4,000 to $8,000. Wall anchors or steel I-beams for severe bowing cost $10,000 to $15,000 or more.

Accessibility challenges, multiple crack locations, foundation type, structural reinforcement needs, and where you live all push costs higher. A simple vertical crack in an open, unfinished basement costs way less to repair than multiple cracks behind finished walls or in tight crawl spaces. Block foundations often cost more than poured concrete because repair methods are more complex. Homes needing both waterproofing and structural reinforcement obviously cost more than those needing only crack sealing. Labor rates in major cities run higher than rural or suburban markets.

Standard homeowners insurance typically doesn’t cover gradual settling and age related cracks. They consider them maintenance issues rather than sudden covered damage. But policies may cover sudden water damage from covered events like burst pipes or storms, including foundation cracks that result directly from those events. Documentation matters for any potential claims. Take photos of damage immediately, keep records of when cracks appeared, note any sudden changes after storms or plumbing incidents, and get professional inspection reports that establish timeline and cause. Most foundation crack claims get denied, but sudden catastrophic damage sometimes qualifies for coverage of resulting repairs.

Repair Method Typical Cost Range Best For
DIY hydraulic cement $50-$200 Temporary fix for small hairline cracks with no active leaking
Professional epoxy injection $300-$800 per crack Stable vertical cracks in poured concrete foundations
Polyurethane foam injection $400-$1,000 per crack Actively leaking cracks or repairs during wet conditions
Interior waterproofing system $3,000-$8,000 Comprehensive moisture control and pressure relief
Exterior waterproofing $8,000-$15,000+ Inaccessible interior cracks, finished basements, block foundations
Structural reinforcement $4,000-$15,000+ Bowing walls, horizontal cracks, ongoing wall movement

Identifying Warning Signs of Foundation Cracks That Leak

Regular foundation inspection and early detection prevent water damage that turns a $500 crack repair into a $15,000 foundation and mold remediation project. Catching cracks while they’re small and dry beats waiting until water pours through during heavy rain.

Do a basic visual inspection every three months. Check all basement walls and crawl space areas you can get to from the inside, then walk the exterior foundation looking at the concrete visible above grade. Bring a flashlight and get close to the walls. Look at corners and around any penetrations (pipes, vents, old service entries) where cracks often start. Check the same spots each time so you notice changes.

Watch for these specific warning signs:

Water stains on foundation walls, especially horizontal lines showing previous high water marks.

Efflorescence, that white powdery or crusty mineral deposit where water has seeped through concrete and evaporated, leaving minerals behind.

Active seepage during or right after heavy rain, even if it’s just dampness rather than flowing water.

Musty odors in the basement or crawl space indicating moisture even when you don’t see standing water.

Mold growth on walls, particularly along cracks or in corners where moisture builds up.

Doors and windows that suddenly stick or won’t close properly because of foundation shift.

Wall bowing visible as an inward curve when you sight down the wall length from one corner.

Floor cracks that widen or develop sudden height differences between sides.

When to Call Professional Contractors Versus Attempting DIY Foundation Repairs

DIY repairs work in limited situations. Hairline cracks less than 1/8 inch wide that aren’t actively leaking. Stable vertical cracks showing no signs of widening over 3 months of watching them. Situations where you need a temporary measure to reduce water seepage until professional help shows up. Hydraulic cement or concrete crack filler from the hardware store can handle these simple cases if you’re comfortable with basic home repairs.

But you need professional contractors immediately for these: any crack wider than 1/2 inch regardless of location or pattern, horizontal or stair-step crack patterns which signal serious structural movement, active water coming in where you see moisture during rain or notice dampness, any bowing or displacement of foundation walls visible as an inward curve or lean, multiple cracks appearing suddenly within a few weeks or months, or cracks that keep widening after you mark and monitor them for a month. These conditions mean problems beyond simple sealing and require diagnostic equipment, professional materials, and techniques that DIY can’t provide.

When you’re selecting contractors, look for foundation specific experience rather than general handyman services. Ask how many foundation crack repairs they complete yearly. Established companies handle dozens to hundreds. Check warranty offerings. 5 year warranties are typical for injection repairs and lifetime warranties are common for structural reinforcement like carbon fiber. Confirm proper licensing and insurance coverage including liability and workers comp. Get detailed written estimates that specify repair method, materials, timeline, and warranty terms rather than vague price quotes. Ask for references from similar repair projects completed within the past year, and follow up by calling those homeowners about their experience.

Foundation Type Considerations: Block Versus Poured Concrete Repair Strategies

Poured concrete and block foundations develop different crack patterns and need different repair strategies for best results. Understanding your foundation type helps you evaluate what contractors recommend and avoid repair methods that won’t work long term for your specific situation.

Poured Concrete Foundation Repair Approaches

Poured concrete foundations are solid concrete walls formed by pouring wet concrete into forms during construction. They tend to develop vertical or diagonal cracks as the concrete cures and settles or when soil movement creates stress points. These solid walls respond well to injection methods using epoxy or polyurethane because the injectable material can fully penetrate through the wall thickness and bond to concrete on both sides of the crack. Interior only repair approaches work for most poured concrete cracks because the wall structure is uniform, meaning a repair from one side stabilizes the entire wall thickness. Injection repairs typically get you permanent results without exterior excavation, keeping costs lower and installation faster.

Block and Masonry Foundation Special Requirements

Block foundations consist of hollow concrete blocks stacked and mortared together during construction. They create unique challenges because cracks often follow mortar joints in stair-step patterns, climbing along the weakest paths between blocks. Injection methods are less effective with block foundations because the hollow cores mean injectable material can flow into voids without fully sealing the crack path. The material might fill one block cavity but not seal the crack through the next block above or below. Exterior waterproofing is often necessary for permanent solutions on block walls because it seals the entire outside surface regardless of crack pattern.

Encapsulation becomes especially critical for brick or stone foundations in crawl spaces because of porous materials that absorb moisture even without visible cracks. Brick and stone foundations with mortar joints act like sponges, wicking water through the entire wall structure. An encapsulation system installs an inorganic waterproof liner from floor to ceiling, creating a moisture barrier that covers the walls completely. The liner doesn’t attach directly to the foundation wall but instead creates a small gap that allows water to pass through the porous wall and then channel down behind the liner to a perimeter drainage system at the footer level. This approach accepts that water will penetrate the porous foundation material and manages it rather than trying to seal hundreds of mortar joints and porous surfaces. Block foundations showing structural movement may also need additional methods like parging (applying a cement coating to seal the surface) or complete wall stabilization using carbon fiber or steel supports if the wall is bowing or leaning.

Warranties, Guarantees, and Long-Term Maintenance After Foundation Crack Repair

Warranty expectations vary a lot by repair type. Injection repairs using epoxy or polyurethane typically carry 5 to 10 year warranties covering repair failure or water coming through the specific crack that was repaired. Structural reinforcement like carbon fiber straps often comes with lifetime structural warranties that guarantee the repair prevents further wall movement for as long as you own the home. Full waterproofing systems usually offer 10 to 25 year warranties or lifetime coverage on certain components like sump pump liners, though mechanical parts like pump motors typically carry shorter 3 to 5 year warranties.

Warranties typically cover repair failure, meaning if the crack reopens or water seeps through the repaired crack during the warranty period, the contractor comes back to fix it at no charge. They also cover water coming through the specific repaired area. But warranties don’t cover new cracks in different locations (those are separate problems), damage from external factors like plumbing leaks or major landscape changes that alter drainage patterns, and failure to maintain systems like sump pumps or gutters that protect the foundation. Structural warranties usually don’t cover cosmetic crack reopening if the wall remains structurally stable.

Curing times before warranty activation matter because repairs need time to reach full strength. Epoxy injection repairs typically need 24 to 72 hours of curing before the warranty takes effect, though contractors often recommend waiting 7 days before testing with water. Polyurethane foam sets faster, often within hours. Carbon fiber systems require 7 to 10 days for the epoxy bonding to cure fully. Things that may void warranties include painting over repairs before they fully cure, drilling into or damaging the repair area during remodeling, or failing to maintain drainage systems and allowing new water pressure problems to develop.

Follow these maintenance practices to protect your investment:

Annual foundation inspection of both interior and exterior walls to catch new cracks early and verify existing repairs remain intact.

Gutter and downspout maintenance including cleaning twice yearly and making sure extensions remain in place and drain at least 10 feet from the foundation.

Monitor crack width if new cracks appear by marking the ends with pencil, measuring width, and taking photos monthly to detect active movement.

Address grading and drainage issues quickly when you notice water pooling near the foundation, soggy soil alongside basement walls, or erosion that changes yard slope.

Keep repair documentation including contracts, invoices, warranty certificates, and before/after photos for future warranty claims or home sale disclosures.

Final Words

Foundation crack repair to prevent leaks protects your home from water damage and structural problems.

Start by measuring your cracks with a ruler and watching them for a few months. Hairline vertical cracks under 1/8 inch might work as DIY projects with hydraulic cement, but anything wider than 1/2 inch needs professional eyes on it.

Horizontal cracks and stair-step patterns mean you’re past simple fixes.

Most homeowners get the best results with epoxy or polyurethane injection for poured concrete foundations, especially when paired with interior waterproofing systems that handle hydrostatic pressure long-term. Block foundations often need exterior work.

Keep your gutters clean, extend those downspouts at least 10 feet out, and check your foundation yearly. Catch problems early, and you’ll save yourself serious money and stress down the road.

FAQ

Can you seal foundation cracks yourself?

You can seal small foundation cracks yourself if they’re hairline vertical cracks (less than 1/8 inch wide) showing no active water seepage. Use hydraulic cement or epoxy repair kits available at hardware stores. These DIY repairs work as temporary fixes but aren’t recommended for cracks wider than 1/2 inch, horizontal patterns, or structural damage. For lasting protection and warranty coverage, professional injection methods provide better results. Most contractors offer 5 to 10 year warranties on crack repairs, which DIY approaches can’t match.

How am I getting water in my basement when my cement walks aren’t cracked?

Water enters your basement through underground pathways even when visible surfaces look fine. Hydrostatic pressure from saturated soil pushes moisture through tiny foundation cracks, porous concrete, mortar joints in block walls, and floor-wall seams you can’t see from outside. Poor drainage around your foundation, high water tables, and inadequate guttering create pressure that forces water through the smallest openings. The leak source may be hairline cracks behind finished walls, along the footer, or through block wall cores.

Is it better to repair foundation cracks from inside or outside?

Interior foundation crack repair is better for most situations because it costs one-third less than exterior work, installs faster, works in any weather, and avoids landscape disruption. Inside repairs using epoxy or polyurethane injection effectively seal cracks in poured concrete foundations with 5 to 10 year warranties. Choose exterior repair when cracks hide behind pipes or electrical panels, your basement is finished and you want to avoid interior wall damage, or you have block foundations where injection methods work less effectively.

How long do foundation crack repairs last?

Professional foundation crack repairs last 5 to 10 years for standard epoxy or polyurethane injection methods, with some companies offering lifetime warranties on structural carbon fiber reinforcement. Repair longevity depends on using flexible resins that move with seasonal foundation shifts, addressing the underlying water pressure through drainage systems, and maintaining proper grading around your home. Rigid epoxy hardens and may crack again over time, while flexible polyurethane accommodates foundation movement and maintains water-tight seals longer.

Basement Flood Cleanup Steps: Fast Action Saves Your Home

Think a few inches of water in your basement is no big deal?
That’s the risky mistake that turns a small cleanup into a mold nightmare.
In the first 24 to 48 hours mold spores settle and repairs get much more costly.
This guide gives clear, practical steps you can take right now:
shut off electricity safely, stop the water if you can, check contamination, remove standing water, and set up drying and documentation for insurance.
Act fast and smart to stop more damage and make repairs simpler.

Immediate Basement Flood Cleanup Actions for Fast, Safe Recovery

JW96atgIQHaZxvVWPUnNKA

When water floods your basement, the first 24 to 48 hours decide whether you’re dealing with a manageable cleanup or an expensive mold disaster. Mold spores settle on wet surfaces within a day. Once they take hold, remediation becomes a bigger, costlier job. Speed matters, but safety always comes first. Before you step into standing water, you need to eliminate electrical hazards, confirm the water source is stopped, and understand what kind of contamination you’re dealing with.

Stopping the water source depends on what caused the flood. If a burst pipe or a leaking water heater is the problem, shut off the main water supply or the valve feeding that fixture. If heavy rain overwhelmed your drainage or a sump pump failed, you won’t be able to stop the source directly. You can only prevent more water from entering by clearing drains, tarping openings, or restarting the pump. Stormwater and municipal sewer backups require professional help to stop safely.

Not all floodwater is the same. Clean water from a broken supply line is Category 1. It’s less dangerous but still needs rapid removal. Gray water from a washing machine overflow or sump pump failure is Category 2. It can carry detergents and dirt. Black water from a sewer backup or outside stormwater is Category 3, and it contains bacteria, chemicals, and waste. If you see or smell sewage, don’t enter the basement. If the water depth is more than a few inches or if electrical equipment is submerged, call a professional before you go in.

Here are the eight immediate actions that keep you safe and start the cleanup correctly:

  1. Shut off electricity at the main breaker only if you can reach it from dry ground. If the panel is in the flooded area, call an electrician.
  2. Stop the water source by closing supply valves or clearing blockages if it’s safe to do so.
  3. Evaluate water depth and contamination level before entering. Measure depth and check for odors or debris.
  4. Put on waterproof boots, heavy rubber gloves, and eye protection. For sewage situations, add an N95 respirator.
  5. Don’t enter if you see structural damage like bowing walls, sagging ceilings, or large cracks.
  6. Check if your sump pump is running. If not, confirm it has power and isn’t clogged.
  7. Identify signs of sewage backup. Dark water, strong odor, or visible waste in the flood.
  8. Prepare the workspace by clearing pathways to floor drains and access points for extraction equipment.

Safe Water Extraction Techniques for Basement Flood Cleanup

kJqRCC-ITiGf-mXfaVO2dA

The faster you remove standing water, the less damage it does to floors, walls, and anything stored below grade. For shallow flooding, one or two inches, a wet/dry shop vacuum works. You’ll empty the canister many times, but it gets the job done if you start right away. For deeper water, three inches or more, you need a pump. Submersible pumps and portable sump pumps can move large volumes quickly. If you don’t own a pump, hardware and tool rental stores carry them. The rental cost is small compared to the damage standing water causes.

After you’ve pumped out the bulk of the water, check your basement floor drains. If they’re clogged, the last shallow layer won’t drain away. Use a plunger or a drain snake to clear debris. A squeegee helps push remaining water toward the drains. If your sump pump stopped working during the flood, inspect the float switch and the discharge line. Sometimes the pump gets overwhelmed or the line freezes or clogs. Restart it if possible, or call for a replacement if it’s dead.

The six core tools for water extraction are:

Wet/dry vacuum: Works for small amounts. Portable and easy to control.

Submersible pump: Sits in the deepest water. Handles larger volumes than a vacuum.

Portable sump pump: Battery or electric. Designed for temporary flood situations.

Squeegee: Directs shallow water toward drains. Speeds up final cleanup.

Drain snake or plunger: Clears floor drain blockages so water flows out.

Rental pump: Available at tool rental stores if you need high capacity extraction for one job.

Basement Drying and Dehumidification Steps After Water Removal

Do-BpU4MQbSaC4dB0DDUjQ

Once the standing water is gone, drying begins. Wet concrete, drywall, and wood still hold moisture inside. That moisture feeds mold, warps floors, and creates a damp smell that won’t leave. Industrial air movers push large volumes of air across surfaces, speeding evaporation from floors, walls, and furniture. Professional grade dehumidifiers pull water vapor out of the air so it doesn’t just move from one surface to another. Running both at the same time creates controlled drying that prevents secondary damage.

You can’t trust your eyes alone. A surface can look dry while the material underneath stays wet. Moisture meters measure water content inside drywall, wood, and concrete. Thermal imaging cameras show cold spots where moisture is trapped behind baseboards, under flooring, or inside wall cavities. Hygrometers measure the relative humidity in the room. If humidity stays above 60 percent, mold risk remains high. Keep dehumidifiers running until readings drop to 50 percent or lower and hold steady.

Drying times vary by material. Concrete wicks moisture slowly. Wood swells and takes time to release it. Insulation almost never dries properly once soaked. You’re not done when things feel dry to the touch. Hidden moisture inside walls or under floors can linger for weeks if airflow and dehumidification stop too soon.

Material Typical Drying Time
Drywall (½ inch) 3 to 5 days with forced air
Concrete floors (slab) 7 to 14 days depending on saturation
Wood floors (hardwood/engineered) 5 to 10 days; may warp if not dried quickly
Insulation (fiberglass batts) Rarely dries fully; usually requires removal

Basement Cleanup, Sanitizing, and Mold Prevention Steps

rZ0Y8bbYRO28cYPDSsrfMA

After drying, every surface that touched floodwater needs cleaning. Water carries dirt, bacteria, and organic material that mold feeds on. The EPA recommends a two step process: scrub surfaces with detergent and water first to remove dirt, then disinfect with an EPA registered antimicrobial or a diluted bleach solution. This combination removes contamination and kills spores before they establish colonies. Skipping the cleaning step leaves a film that protects mold from the disinfectant.

Sewage contaminated water requires stronger sanitizing. Black water contains bacteria like E. coli and pathogens that standard household cleaners don’t eliminate. For Category 3 floods, use commercial grade antimicrobials rated for sewage cleanup. Consider calling a restoration company that has the training and equipment to handle biohazards safely. HEPA air scrubbers help by filtering airborne mold spores and particles during and after cleaning. They reduce the chance that spores settle on newly dried surfaces.

Mold Prevention Essentials

Mold can start growing within 24 hours of a flood, sometimes faster in warm, humid conditions. The goal is to dry materials before that window closes and to sanitize everything that stayed wet. HEPA filtration traps particles as small as 0.3 microns, including mold spores, so the air you’re breathing during cleanup stays cleaner. If you smell a musty odor even after cleaning, moisture is still present somewhere. Behind a wall or under flooring. Mold may already be growing.

Use detergent to scrub surfaces first. Disinfectant works better on clean material.

Choose EPA registered antimicrobials for confirmed effectiveness against bacteria and mold.

Run HEPA air scrubbers during drying and cleaning to capture airborne spores.

Address odor by locating hidden moisture, not just masking the smell with sprays.

Treat sewage exposure with commercial biocides and dispose of porous materials that contacted black water.

Handling Damaged Materials and Salvaging Items After Basement Flooding

tji8RAB8R7iDOdPVLqeysQ

Wet carpet and padding act like sponges. They hold water against the floor and slow drying, and they rarely dry thoroughly enough to avoid mold or odor. Remove carpet within 24 to 48 hours. If hardwood or engineered wood floors were installed in the basement, check them with a moisture meter. Surface drying isn’t enough. The boards themselves need to release moisture or they’ll cup, warp, or develop mold underneath. Drywall wicks water up from the floor. If it stayed wet for more than a day, cut it out at least 12 inches above the highest water line. Soaked insulation inside walls loses its R value and becomes a mold farm. Pull it out, bag it, and dispose of it.

Furniture, boxes, and personal belongings can sometimes be saved if you act quickly. Move them to a dry, ventilated area and set up fans. Hard surfaces like metal, glass, and sealed wood can be cleaned and dried. Upholstered furniture and mattresses are harder to salvage. The fabric and foam trap moisture and dry slowly. Paper items, photos, and books can be frozen temporarily to halt mold growth while you arrange professional document recovery, but that only buys time. Timing makes the difference. Not everything will be ruined. Many items can be saved if cleanup starts quickly.

Watch for structural signs during cleanup. Cracks in the foundation walls, uneven floors, doors that suddenly stick, or gaps along baseboards can indicate movement or settling caused by water pressure or soil saturation. If you see these signs, or if walls appear to bow inward, stop work and call a structural engineer or a foundation specialist. Water doesn’t just damage finishes. It can compromise the bones of the house.

Insurance Documentation Steps for Basement Flood Cleanup

UadzfjVEQDeZDVTzsm81vw

Before you haul anything to the curb, document the damage. Take wide shots of the entire flooded area showing the water line on walls and the extent of the affected space. Take close up photos of damaged items, equipment, and building materials. Capture serial numbers on appliances, brand names on furniture, and any visible mold or staining. Video walkthroughs work well because they show the layout and the scale of the loss in a way that a few photos can’t.

Your insurance adjuster will ask for proof of what was damaged and what you spent to fix it. Keep every receipt: water extraction rentals, cleaning supplies, replacement materials, contractor invoices, and even mileage if you’re hauling debris. If Fire Flood Rescue or another restoration company provides a written estimate or scope of work, save that too. The more documentation you provide up front, the faster the claim moves.

The five core documentation steps are:

  1. Photograph all damaged areas, items, and structural elements before you remove or repair anything.
  2. Record video walkthroughs that capture room layout, water lines, and the overall condition.
  3. Create an inventory list with descriptions, approximate ages, and replacement values for damaged belongings.
  4. Save all receipts for cleanup, drying equipment rentals, disposal fees, and repair materials.
  5. Obtain written estimates from contractors and keep records of all communications with your insurer.

When to Call Professionals for Advanced Basement Flood Cleanup

EXPwEIu3SvG511n2hjdw6A

If water depth is more than a couple of inches, or if the source is sewage or stormwater, call a restoration company. DIY extraction and drying work for minor leaks and small spills, but large volume flooding overwhelms household equipment. Professionals bring truck mounted extractors, industrial dehumidifiers, and thermal imaging cameras that locate hidden moisture you can’t see or measure on your own. They dry the space faster and more completely, which reduces the chance of long term mold or structural damage.

Electrical hazards and sewage contamination require professional help. If the circuit breaker is underwater, or if you can’t safely shut off power, an electrician and a restoration crew work together to make entry safe. Black water from a sewer backup contains pathogens that require specialized cleaning agents, disposal protocols, and protective equipment beyond basic PPE. Structural damage, like bowing walls or cracked foundation slabs, also exceeds the scope of DIY. Restoration pros coordinate with structural engineers, plumbers, and electricians to stabilize the building and prevent further harm.

Six situations that require a restoration company:

Water depth greater than a few inches or flooding that covers a large area

Sewage backup or black water contamination

Electrical hazards that prevent safe entry or power shutoff

Structural damage including foundation cracks, wall movement, or ceiling sag

Persistent moisture or suspected hidden water inside walls, floors, or HVAC ducts

Visible mold growth covering more than a few square feet or recurring mold after cleaning

Long Term Basement Flood Prevention and Waterproofing Steps

K7Xtc-PzRPidylWjrZ13ig

Once the cleanup is done and repairs are complete, the next flood is already on its way unless you address the root causes. Sump pumps fail when float switches stick, discharge lines freeze, or power goes out during storms. Test your pump every few months by pouring water into the pit until the float rises and the pump starts. Install a battery backup system so the pump keeps running when the power doesn’t. If your pump is more than seven years old, consider replacing it before it fails during the next heavy rain.

Foundation cracks let groundwater seep in, especially when the soil outside becomes saturated. Seal visible cracks with hydraulic cement or polyurethane injection. For persistent seepage, exterior waterproofing (excavating around the foundation and applying a membrane and drainage board) stops water before it reaches the wall. Interior perimeter drains and French drains capture water that enters below the slab and route it to the sump basin. Vapor barriers on walls and floors reduce moisture transmission through concrete.

Grading and drainage improvements outside the house make a big difference. Gutters and downspouts should carry roof water at least six feet away from the foundation. Regrade soil so it slopes away from the house, not toward it. If your yard is flat or the water table is high, consider adding a dry well or extending underground drainage lines to a lower area of the property. These steps reduce hydrostatic pressure and the volume of water that tries to enter your basement during storms.

Seven prevention tasks that reduce repeat flooding:

Test and maintain sump pumps quarterly. Install battery backup.

Seal foundation cracks and apply waterproofing coatings to walls.

Install interior perimeter drains or French drains to capture groundwater.

Extend downspouts and ensure gutters drain away from the foundation.

Regrade exterior soil to slope away from the house at least six inches over ten feet.

Add a vapor barrier to basement walls and floors in areas with high moisture.

Inspect and clear floor drains regularly to prevent blockages during floods.

Final Words

Stop the water and shut off power if it’s safe. Those first steps keep you out of danger and slow mold growth.

Extract standing water, wear proper PPE, and size up contamination before you go in. Dry with air movers and dehumidifiers and verify dryness with meters.

Document damage with photos and receipts for insurance. Follow these basement flood cleanup steps, call pros for sewage or structural risks, and know quick action makes repair simpler and faster.

FAQ

Q: How to properly clean a flooded basement?

A: To properly clean a flooded basement, stop the water and power, extract standing water, remove soaked materials, run air movers and dehumidifiers, disinfect surfaces, check hidden moisture, and document damage for insurance.

Q: What to do after a basement flood is cleared of water?

A: After a basement flood is cleared of water, dry and dehumidify the space, remove damp materials, sanitize surfaces, take moisture readings, photograph damage, watch for mold, and plan repairs or a pro inspection.

Q: How to get 3 inches of water out of a basement?

A: To get three inches of water out of a basement, use a wet/dry vac or small submersible pump, push shallow water to a drain with a squeegee, wear PPE, then finish drying and disinfecting.

Q: Should I wear a mask while cleaning up a flooded basement?

A: You should wear a mask while cleaning up a flooded basement when there’s dust, mold, or sewage; use an N95 for spores/dust and a respirator for heavy sewage or mold, plus gloves and boots.

Smoke And Soot Health Risks After A House Fire: Hope

0

Ever worry that danger might still be in the air long after the fire is out? Even when the flames have died down, tiny soot particles and leftover gas (chemicals that can be harmful) can hurt your body. These hidden pollutants can slip into your lungs and cause health issues before you even notice. In this article, we explain how smoke and soot can affect your breathing and overall health. We’ll also show you why acting fast is important to keep your home safe and your family healthy.

Overview of Smoke and Soot Health Risks After a House Fire

After a house fire, hidden dangers from smoke and soot can still be in your home. Soot is a fine, dark powder that forms when fuel does not burn completely. Its tiny particles float in the air and settle on walls, vents, and your belongings. Smoke carries chemicals like carbon, tar, and carbon monoxide (a gas that lowers the oxygen in your blood, which can be very dangerous).

Breathing in these particles can harm you almost immediately. They easily get deep into your lungs and even enter your bloodstream. This can cause coughing, a tight chest, and trouble breathing. The chemicals, including volatile organic compounds (toxic substances released during fire damage), not only affect your lungs but can also weaken your overall health.

These harmful particles can travel through air ducts and other hidden spaces, spreading the risk throughout your home. Even a light, almost unnoticeable layer of soot can continue to lower your indoor air quality. If soot is on your furniture or in your vents, it may mean that your home still holds dangerous pollutants.

If you notice a persistent ashy smell or stale, heavy air, this is a clear sign that residues remain. We know how stressful this can feel, and we are here to help. Taking quick action by contacting professionals can reduce further exposure and keep you safe.

Inhalation Hazards and Acute Lung Injuries from Smoke and Soot

img-1.jpg

When a house fire occurs, tiny soot particles are released into the air. These microscopic particles settle on every surface in your home. They carry acids, chemicals, metals, and dust that can be harmful when you breathe them in. Imagine a light dusting covering your furniture after a kitchen mishap, except this residue is toxic.

During a fire, materials may burn incompletely. This incomplete combustion releases toxic gases called volatile organic compounds (gases that can harm your body when breathed in) along with fine particles. These substances can make your lung tissues swell and become inflamed, a bit like a scald from a hot drink. The irritation to your airways can begin within hours.

Burn fumes also include other hazardous gases that stress your lungs. Even a brief exposure may harm lung tissue and raise the risk of acute lung injury. Acute lung injury is when the tiny air spaces in your lungs become inflamed, which makes it harder to get enough oxygen, similar to struggling to breathe during a vigorous workout. People with existing breathing issues are especially vulnerable.

Symptoms like a persistent cough, shortness of breath, or chest tightness may be signs that these toxic particles have reached deep into your lungs. If you experience these signs, it is important to get help quickly to prevent further damage.

Short-Term Respiratory and Cardiovascular Effects from Smoke and Soot Exposure

After a house fire, the air is full of tiny particles and toxic gases that can harm your lungs and heart. You might start coughing heavily, feel a tight chest, or even notice wheezing right after exposure. These effects happen because the soot (fine ash particles) and chemicals irritate the delicate tissues in your airways, much like a mild asthma attack.

Breathing in these pollutants can also worsen bronchitis, making it hard to breathe or clear your airways. Carbon monoxide (a colorless, odorless gas that takes the place of oxygen in your blood) may lead to low oxygen levels. This can cause headaches, dizziness, and force your heart to work harder. In some cases, these effects begin within hours after the fire.

Whether you already have lung or heart problems, or not, these symptoms can affect anyone. If you notice any of these signs after a fire, please get help immediately to avoid further health issues.

Long-Term Health Implications of Smoke and Soot Exposure

img-2.jpg

Smoke and soot left from a house fire can cause long-lasting harm. Breathing in these tiny particles can inflame your lungs and, over time, lead to problems like COPD (a group of lung diseases that make breathing hard) and chronic bronchitis (ongoing swelling of the airways).

When soot reaches deep into your lungs, it brings with it dangerous chemicals and acids. One of these chemicals is polycyclic aromatic hydrocarbons (tiny compounds linked to lung and skin cancers). Even if you don’t feel symptoms right away, years of exposure can quietly increase your risk of cancer by weakening your lungs’ natural defenses.

The ongoing lung inflammation can also lower your immune system’s ability to fight off problems. As your body works to repair the damage, it may become more vulnerable to infections and other health issues. This stress might not show up immediately but can eventually make it harder for your body to fend off illness.

Even if you feel fine after exposure, the effects over months and years are a serious concern. Continuous contact with these particles can cause lasting scarring in your airways and a slow decline in lung function. Being aware of these dangers means you can seek medical advice early and take steps to reduce further exposure.

Recognizing Symptoms and When to Seek Help for Smoke and Soot Exposure

After a fire in your home, smoke and soot can affect your body. You might notice signs that your lungs or heart are having trouble handling the harmful particles and gases. If you see these changes, it is important to get help right away. For example, if your breathing seems different or you feel very tired, this could mean you were exposed to something dangerous.

Key signs to look for include:

  • Ongoing coughing or wheezing
  • Chest pain or a feeling of tightness
  • Difficulty breathing even when you are resting
  • Headaches or confusion (changes in brain function)
  • Fast or irregular heartbeats and feeling dizzy
  • Upset stomach with nausea or vomiting

If you or a loved one, especially children, seniors, or anyone with existing heart or lung issues, experiences these symptoms, please see a doctor as soon as possible. Quick, professional care can help prevent more serious problems from the lingering smoke and soot.

Preventive and Cleanup Measures to Reduce Smoke and Soot Health Risks

img-3.jpg

After a house fire, you need to cut down on harmful smoke and soot right away. We begin by cleaning surfaces that have picked up contaminants and using machines to improve the air. You can use a HEPA vacuum (a machine that traps tiny harmful particles) and air scrubbers (devices that clean the air) to lower your exposure and keep soot from settling again.

It’s important to wear proper protective gear during cleanup. Items like N95 or N100 respirators (masks that filter out harmful particles), gloves, and safety goggles help protect your face, hands, and eyes. Always work in a space with plenty of fresh air to avoid breathing in lingering toxic fumes.

When cleaning, use solutions that are made for toxic residues. These cleaners remove soot that could continue to harm air quality if left behind. A steady flow of fresh air helps push pollutants out and lowers their concentration.

Keep these tips in mind and use the right equipment before you start cleaning. Taking these steps now can help protect you from dangerous airborne toxins and lower long-term health risks.

Protective Gear Purpose
N95 or N100 Respirator Filters 95–99% of airborne particles
Nitrile/Leather Gloves Prevents skin contact with toxic residues
Safety Goggles Shields your eyes from harmful particles
HEPA Vacuum & Scrubber Removes settled soot and cleans the air

Professional Restoration and Safety Assessments for Smoke and Soot

After a fire, hidden pollutants can threaten your home. We step in quickly with certified technicians who test for carbon monoxide (a dangerous, toxic gas) and tiny particles in your air. Our team performs simple on-site air tests and checks for chemicals to make sure no harmful fumes remain.

We also handle tasks like cleaning structural surfaces, working on HVAC systems (heating, ventilation, and air conditioning ducts), and deep cleaning to remove soot and smoke. We follow clear emergency steps to clear even the smallest traces and then recheck with follow-up tests to ensure your home is safe to live in again.

Count on us for fast fire damage cleanup and emergency restoration services. We work efficiently to restore air quality and provide all the documentation you need for insurance and peace of mind.

Our experienced team makes sure every step meets strict safety standards.

Final Words

In the action, we broke down the dangers of smoke and soot health risks after a house fire. We looked at how toxic particles affect breathing, discussed immediate and long-term impacts, and shared steps you can take to shield your home. We also explained when to seek help and how experts can restore your property. Every step is meant to keep you safe and help you make informed decisions. Stay positive and remember that professional help is always ready to step in when you need it.

FAQ

What to throw away after smoke damage

You should remove porous items like heavily soot-damaged carpets, drapes, clothing, and insulation. These items can harbor toxins and persistent smoke odors.

Wood smoke vs cigarette smoke

Wood smoke comes from burning natural materials and contains particulate matter and chemicals, while cigarette smoke includes nicotine and additional toxins, each posing its own set of health risks.

Wood fire health risk

Inhalation of wood fire emissions can cause respiratory irritation and systemic effects due to fine particles, carbon monoxide, and volatile organic compounds produced during combustion.

How to test air quality after a fire

You should use professional air quality monitors to measure levels of carbon monoxide, particulates, and volatile chemicals to determine when the indoor air is safe.

Harmful effects of burning wood

Burning wood releases fine particulate matter, acidic compounds, and volatile organic compounds that can irritate the lungs, worsen asthma, and trigger allergy symptoms in some individuals.

Toxic fumes after house fire

Toxic fumes contain carbon monoxide, chemicals, and fine particulates from incomplete combustion, which can immediately affect respiratory and cardiovascular health upon exposure.

Wood smoke allergy symptoms

Exposure to wood smoke may cause coughing, sneezing, itchy and watery eyes, and sometimes breathing difficulties, as the immune system reacts to irritant particles.

Is the smell of smoke after a fire harmful and can it make you sick?

While the odor itself is not directly harmful, it signals lingering toxins and chemicals that can irritate the respiratory system, so prolonged exposure should be avoided.

How toxic is smoke from a house fire?

Smoke from a house fire is highly toxic as it contains fine particles, carbon monoxide, and harmful chemicals from burned materials that can severely affect lung and heart health.

Can breathing in soot make you sick and what are the symptoms of smoke contamination?

Inhaling soot can lead to irritation, coughing, and chest tightness. Common symptoms include a persistent cough, wheezing, and fatigue, and if severe, prompt medical evaluation is recommended.

Electrical Shock Hazard Prevention: Essential Safety Protocols That Save Lives

0

Could a slipped wire or a wet floor be the difference between a close call and a life lost?
Electricity causes thousands of injuries and hundreds of deaths each year, and most of those are preventable.
This post gives clear, step-by-step safety protocols you can use right away.
Verify de-energization, use GFCIs, follow lockout/tagout, keep equipment grounded, and wear the right protective gear.
No guesswork.
We’ll show what to do now, how to stop more damage, and how to document it for safety and insurance.

Essential Measures for Preventing Electrical Shock Incidents

bFgRq_2XQwK-p1JYiYaSJQ

Electricity causes thousands of workplace injuries and hundreds of deaths every year across the United States. OSHA identifies electrical hazards as one of the leading causes of serious workplace injuries, with most incidents coming from contact with energized parts, equipment failures, or bad installation work. The human body conducts electricity easily, and when current passes through the hands to feet pathway, it can disrupt heart rhythm and lung function. That leads to burns, severe muscle contractions, and death.

NFPA 70E sets detailed requirements for electrical safety in the workplace. This includes approach limits, arc flash boundaries, and specific PPE categories matched to the voltage and energy levels workers might face. Together with OSHA regulations covering equipment installation (29 CFR 1910.303) and lockout/tagout practices (29 CFR 1910.147), these standards define clear expectations: de-energize circuits before work begins, protect workers with proper grounding and insulation, and verify system safety before contact. Core prevention principles rely on isolating energy sources, maintaining physical barriers around live parts, and using protective devices like ground fault circuit interrupters.

Effective shock prevention combines engineering controls, administrative practices, and personal protective equipment. The following measures provide essential protection in any setting where electrical hazards exist.

  1. Verify de-energization before starting work. Use a voltage tester to confirm circuits are truly off, even after switching breakers or pulling disconnects. Meters can fail, and assumptions kill.

  2. Ensure all circuits and equipment are properly grounded. Grounded tools and systems provide a low resistance path for fault current, tripping breakers before current can reach dangerous levels in a person’s body.

  3. Use GFCI protection for wet locations, outdoor circuits, and portable tools. GFCIs detect leakage current as small as 5 milliamps and shut off power in a fraction of a second, preventing lethal shocks.

  4. Inspect cords, plugs, and tools before every use. Damaged insulation, exposed conductors, and cracked plugs are primary causes of shock. Tag out and remove defective equipment immediately.

  5. Match PPE to the task and voltage level. Follow NFPA 70E tables for voltage rated gloves, insulating mats, face shields, and arc rated clothing when working on or near energized parts.

  6. Apply lockout/tagout procedures during maintenance. Physically disconnect power, apply personal locks, and verify isolation to prevent accidental re-energization by another person.

  7. Keep electrical equipment and work areas dry. Wet skin has approximately 100 times lower electrical resistance than dry skin, which dramatically increases shock severity. Moisture on tools, surfaces, or clothing multiplies the hazard.

  8. Maintain proper clearances around overhead and underground power lines. Identify and mark energized lines before starting work. Always treat all lines as live until the utility confirms de-energization.

Identifying Electrical Shock Hazards in Work and Home Settings

NEJRHYOWR6SngxtuxwuSSw

Electrical shock hazards exist wherever current flows. Most incidents stem from equipment failure, improper maintenance, or environmental conditions that degrade protective barriers. Frayed extension cords, overloaded circuits, and damaged outlets are common in both residential and commercial settings. Exposed wiring behind missing wall plates, ungrounded appliances, and jury rigged connections create pathways for current to reach the body instead of returning safely through the grounding system.

Environmental factors elevate risk significantly. Moisture lowers skin resistance and turns ordinary tools into conductors. Metal surfaces, concrete floors, and confined spaces with limited egress all increase the likelihood that a worker or homeowner will complete an electrical circuit through their body. Work in damp basements, outdoor construction, or areas near water sources requires additional precautions and circuit protection.

Signs of electrical system degradation often appear before a failure causes shock. Repeated breaker trips, flickering lights, warm outlet covers, burning smells near panels or receptacles, and tactile shocks when touching appliances or metal fixtures all signal faults that need immediate attention.

Common electrical shock hazards include:

  • Damaged cords and extension cables. Insulation cracks, pinched conductors, or cuts that expose internal wiring.
  • Overloaded circuits and multi plug adapters. These exceed outlet capacity, overheat wiring, and create fire and shock risks.
  • Missing or broken wall plates. They expose live terminals and increase accidental contact, especially in low light.
  • Ungrounded or improperly grounded tools and appliances. Fault current has no safe path and instead flows through the operator.
  • Wet conditions and contact with water. This dramatically lowers body resistance and increases severity of shocks.
  • Exposed conductors and open junction boxes. These allow direct contact with live parts during routine work or movement.

Safe Work Practices and Required PPE

hS5IF4QJSRqz_fPqP10cSg

NFPA 70E establishes arc rated personal protective equipment categories matched to specific tasks and energy exposure levels. Workers performing energized electrical work must wear voltage rated insulating gloves appropriate to the system voltage, along with leather protectors to prevent punctures. Face shields, arc rated clothing, insulating footwear, and hard hats form layers of defense against both shock and arc flash events. PPE must be inspected before each use for cracks, tears, contamination, or other damage that compromises protection.

Safe work practices begin with the assumption that all circuits are energized until proven otherwise. Use a properly rated voltage tester to verify absence of voltage on all conductors before making contact. Maintain the approach distances outlined in NFPA 70E tables. Limited approach boundaries define how close unqualified persons may come, while restricted and prohibited boundaries apply to qualified workers performing specific tasks. When energized work is unavoidable, a written energized electrical work permit documenting hazard analysis, required PPE, and emergency procedures must be completed and approved.

Insulated tools add another protective layer. Use only tools rated for the voltage present, and inspect handle insulation for chips, cuts, or wear. Metal ladders, scaffolding, and conductive materials must stay clear of energized parts and overhead lines. Keep one hand in your pocket or behind your back when working near live circuits to prevent hand to hand current flow across the chest.

Do not work alone on energized equipment. Do not wear conductive jewelry, including rings, watches, and metal framed glasses near electrical work. Do not assume that tripped breakers or open disconnects mean circuits are safe. Verify with testing. Do not bypass interlocks, remove equipment guards, or disable ground fault protection to make a task easier. Each shortcut traded for convenience opens the door to a shock incident that could have been prevented with a few extra seconds of caution.

Lockout/Tagout Procedures for Electrical Systems

9ypoZFhPQ8ajvrhXzUC48Q

OSHA standard 29 CFR 1910.147 requires lockout/tagout (LOTO) whenever maintenance, repair, or servicing could expose workers to unexpected energization or stored energy release. LOTO physically isolates electrical circuits and equipment so that only the authorized worker who applied the lock can restore power. This prevents another person from closing a breaker, throwing a switch, or plugging in equipment while someone is in contact with conductors or internal components.

A formal LOTO procedure isn’t optional. Each worksite must have written, equipment specific procedures that identify all energy sources, describe isolation steps, and define verification methods. Workers performing LOTO must be trained and authorized. The person who applies the lock is the only person who removes it at the end of the task.

Required LOTO steps for electrical systems:

  1. Notify all affected workers. Alert anyone who may be impacted that equipment will be shut down and locked out. Explain the scope and expected duration.

  2. Shut down equipment using normal procedures. Power off machinery and tools as designed before attempting to disconnect circuits.

  3. Disconnect and isolate all energy sources. Open circuit breakers, pull fuses, or operate disconnects to interrupt power. For complex systems, isolate control circuits and backup power as well.

  4. Apply lockout devices and personal locks. Attach hasps, breaker locks, or plug lockouts. Each authorized worker applies their own lock and tag.

  5. Relieve or block stored energy. Discharge capacitors, block mechanical parts, and confirm that pneumatic or hydraulic pressure is released.

  6. Verify isolation with a voltage tester. Test all conductors and equipment terminals to confirm absence of voltage before making contact.

  7. Perform the work, then restore safely. After completing the task, remove tools, reinstall guards, verify all workers are clear, remove locks in reverse order, and restore energy following normal startup.

Grounding, Bonding, and Use of GFCI Protection

CHkL6KbtR9ShVrwCADYtlQ

Grounding directs fault current safely into the earth and stabilizes voltage across an electrical system. When insulation fails or a live wire contacts a metal equipment frame, the grounding conductor provides a low resistance path back to the panel, allowing enough current to flow to trip the breaker almost instantly. Without grounding, that metal frame stays energized, waiting for a person to complete the circuit.

Bonding eliminates voltage differences between conductive parts that people might touch simultaneously. Metal raceways, enclosures, piping, and structural steel are bonded together so fault current flows evenly without creating a shock hazard between two surfaces. Effective bonding ensures that if one part becomes energized, all connected parts rise to the same potential, preventing current flow through a worker’s body.

Ground fault circuit interrupters (GFCIs) add a faster layer of protection. A GFCI constantly monitors current flow in the hot and neutral conductors. If even 5 milliamps of imbalance appears, indicating leakage through a person or damaged insulation, the GFCI trips in as little as 1/40 of a second, well before the shock can cause ventricular fibrillation or respiratory arrest. GFCIs are required in wet locations, outdoor receptacles, construction sites, and anywhere temporary power is used.

Method Purpose Key Benefit
Grounding Provides a low resistance path for fault current to return to the source and trip overcurrent devices Prevents metal parts from staying energized after insulation failure; allows breakers to open quickly
Bonding Connects conductive parts to eliminate voltage differences between surfaces a person may touch Stops current from flowing through the body between two metal objects at different potentials
GFCI Detects current imbalance and interrupts the circuit within milliseconds Protects against shocks too small to trip a standard breaker but large enough to cause injury or death

Inspection and Maintenance of Electrical Equipment

zyUu_ztzSNujWKLgLrX9qw

Routine inspection catches deteriorating insulation, loose connections, and damaged components before they cause shock or fire. Electrical equipment degrades over time from heat, vibration, moisture, and physical wear. A cord that looked fine last month may have developed internal breaks from repeated flexing, or a plug may have loosened to the point where arcing begins. Hidden faults stay hidden only until the moment someone makes contact.

Inspect cords, plugs, and portable tools before every use. Look for cracked or missing insulation, exposed conductors, bent or missing grounding pins, and any sign of overheating such as discolored plastic or burn marks. Check that strain reliefs are intact and that cords aren’t pinched, kinked, or running under furniture or through doorways. If a tool gives even a slight tingle when you touch the housing, tag it out immediately and have it evaluated by a qualified person.

Larger equipment requires scheduled inspections based on use and environment. Verify that grounding connections are tight, enclosures are secure, and labels are legible. Test GFCIs monthly by pressing the test button. If the device doesn’t trip, replace it. Document inspection results and track recurring issues. Patterns of failure often point to upstream electrical problems or improper use.

When unsafe conditions appear, remove the equipment from service immediately. Lock out circuits, tag the equipment clearly, and store it where no one can accidentally use it. Don’t attempt repairs unless you’re trained and authorized. The few dollars saved by ignoring a frayed cord aren’t worth the injury, the workers’ compensation claim, or the liability that follows a preventable shock incident.

Emergency Actions After Electrical Shock Exposure

mEt76w16SRiIPRoCfBEnAg

When someone suffers an electrical shock, the first priority is to disconnect the power source without making yourself the second victim. Don’t touch the person if they’re still in contact with an energized conductor. You’ll complete the same circuit. Shut off the power at the breaker, unplug the equipment, or use a non-conductive object like a dry wooden board to separate the victim from the source. Only after the power is off should you approach and begin assessment.

Call emergency services immediately for any electrical shock, even if the person appears uninjured. Electrical current can disrupt heart rhythm hours after initial contact, and internal burns may not be visible on the skin. While waiting for emergency responders, check for breathing and pulse. If the victim is unconscious and not breathing, begin CPR. Electrical shock can cause cardiac arrest, and prompt chest compressions significantly improve survival.

Emergency response steps following electrical shock:

  1. Disconnect power safely. Turn off the circuit breaker or unplug the device. Use a non-conductive object if necessary to separate the victim from the source.

  2. Call 911 or emergency services. Provide location, nature of the injury, and victim status. Stay on the line for instructions.

  3. Assess breathing and circulation. Check for responsiveness, breathing, and pulse. Begin CPR if the victim is unresponsive and not breathing.

  4. Treat visible burns. Cover electrical burns loosely with clean, dry cloth. Don’t apply ointments or attempt to clean the wound.

  5. Monitor and document the incident. Keep the victim still and warm. Observe for delayed cardiac symptoms. Document the incident for OSHA reporting and internal review.

Final Words

In the action, we walked through spotting common risks, the safety rules from OSHA and NFPA 70E, and the practical steps to stop shocks: inspect cords, verify de-energization, use the right PPE, and keep grounding and GFCIs working.

We also covered lockout/tagout, routine maintenance, and what to do if someone is shocked so you can respond safely.

Keep practicing electrical shock hazard prevention. Small checks and quick repairs prevent big problems and help keep your home safe.

FAQ

Q: How to prevent electric shock hazards?

A: The way to prevent electric shock hazards is to stop the power, verify de‑energization, use lockout/tagout, wear proper PPE, keep areas dry, use GFCIs and grounding, and inspect cords and tools regularly.

Q: What to use to prevent electric shock?

A: To prevent electric shock, use voltage‑rated gloves, insulated tools, GFCI protection, grounding and bonding, insulating mats, and lockout/tagout devices; always test for absence of voltage before working.

Q: What are the 5 main electrical hazards?

A: The five main electrical hazards are frayed or damaged cords and exposed wiring, wet conditions, overloaded circuits or equipment, lack of grounding or bonding, and contact with energized parts.

Q: What PPE is required for electrical shock hazard?

A: The PPE required for electrical shock hazards includes arc‑rated clothing, voltage‑rated rubber gloves, insulating sleeves, face shield, dielectric footwear, and insulating mats; final selection follows NFPA 70E risk assessment and voltage level.

Interior Restoration After Smoke Damage: Step-by-Step Recovery Process

Smoke doesn’t just disappear when the fire’s out. It soaks into walls, settles into fabrics, and keeps releasing acidic compounds that corrode metal and eat through finishes every single hour you wait. The smell isn’t the worst part. The worst part is watching smoke residue destroy surfaces you could have saved if you’d moved faster. Interior restoration after smoke damage follows a specific sequence: stop the contamination from spreading, get the air clean, remove residues the right way, seal what’s affected, and rebuild anything that’s too far gone. Skip a step or do them out of order, and you’ll chase problems that don’t go away.

The Complete Smoke Damage Restoration Workflow
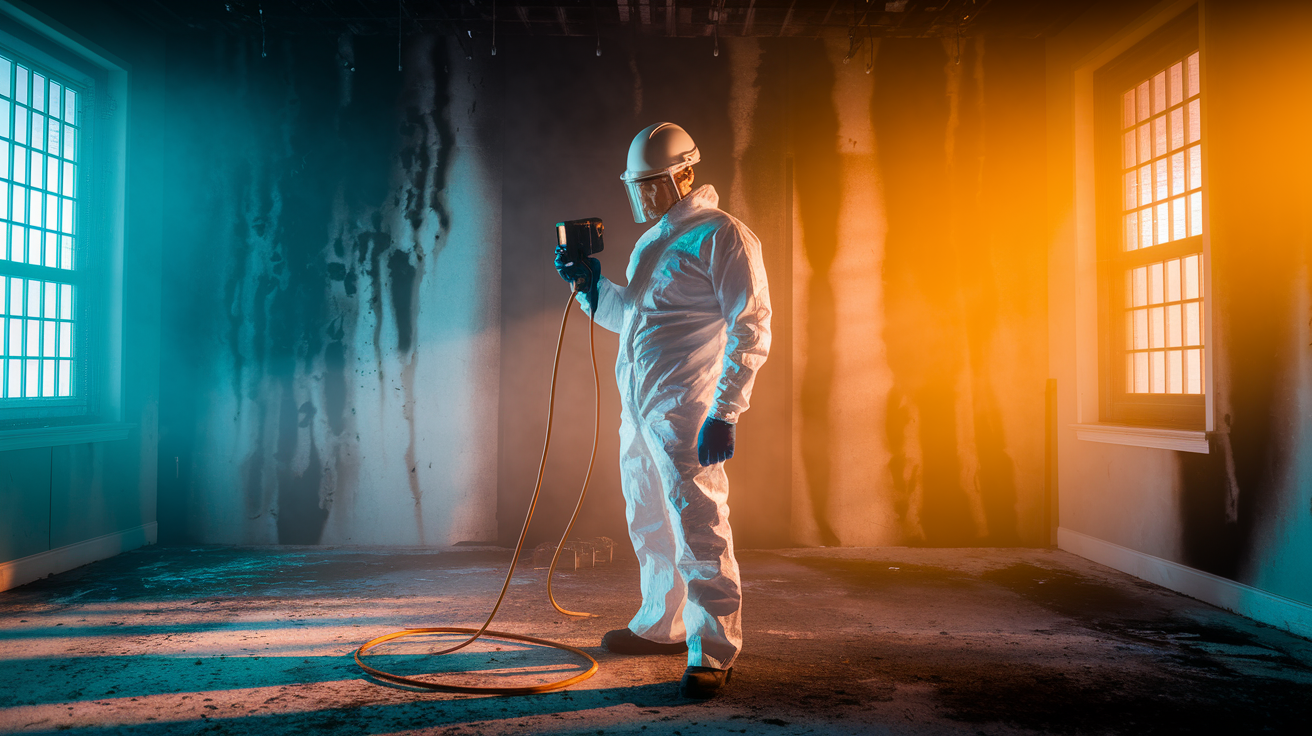
Kjq-DKAdQ2m3ITGCiY_EIQ

Smoke damage gets worse every hour you wait. Acidic residues start eating away at metal, smoke particles work their way deeper into anything porous, and the smell becomes nearly impossible to get rid of. Moving fast stops all of that and saves what can still be saved.

Professional restoration starts with damage inspection and figuring out if the structure is safe. Certified techs go room by room, taking photos of affected surfaces and using thermal imaging to find smoke that’s hidden where you can’t see it. They check whether it’s even safe to work inside before anything else happens. This assessment figures out how bad things are, what needs to happen next, and how long it’s all going to take. The inspection also creates documentation with photos and detailed notes for your insurance company, building the foundation for accurate estimates.

The core restoration sequence follows specific steps: ventilation and air purification with HEPA filters, containment barriers so contamination doesn’t spread, systematic soot removal from everything that’s affected, deep cleaning with specialized products, odor elimination using thermal fogging or hydroxyl generators, material restoration including drywall replacement and repainting when you need it, and a final walkthrough to make sure everything’s done right. Each phase builds on the one before it. You can’t clean surfaces effectively until the air quality is under control. You can’t eliminate odors until residues are gone. The order matters.

Assessment takes one to two days for most homes. Cleaning and getting rid of odors requires three to seven days depending on how severe the damage is and how much square footage you’re dealing with. Material restoration takes one to three weeks, sometimes longer when reconstruction involves multiple trades or custom finish work. Total timeline depends on how deep the smoke went and whether you need structural repairs. Smoke damage restoration runs between $200 and $1,200 per room, with variables like residue type, what materials got hit, and whether your stuff needs to be packed out and cleaned somewhere else. Heavy soot removal adds $2,000 to $6,000 to the total cost.

Final inspection confirms that all surfaces are clean, indoor air quality is safe, odors are gone, and repairs match what your home looked like before. Pros conduct follow-up inspection to catch anything that might pop up later and make sure the restoration meets both industry standards and what you expected.

Safety Protocols and Health Hazards During Smoke Restoration

v2ERdforQgqGdfEadNhrVA

Smoke residue isn’t just dirty. It’s toxic. Living in a home with untreated smoke damage exposes everyone in the house to respiratory irritation, skin contact risks, and chemical compounds that cause serious health problems over time.

Soot contains acidic compounds that eat through surfaces, carbon monoxide left over from incomplete combustion, volatile organic compounds released when synthetic materials burn, and protein residue that creates stubborn odor and health hazards. These toxic compounds soak into porous materials like drywall, insulation, and upholstery, creating buildup that keeps releasing harmful particles into your indoor air. Respiratory irritation starts right away. Long-term exposure leads to worse problems, especially for kids, elderly family members, and anyone with existing respiratory conditions. This is why DIY restoration is dangerous. Without proper training and protective gear, homeowners expose themselves to these hazards while often spreading contamination instead of removing it.

Certified technicians wear full protective equipment during restoration: respirators with filters rated for smoke particles and chemical vapors, heavy duty gloves designed for chemical contact, eye protection against residue and cleaning agents, and full body coverage to prevent skin exposure. They follow safety protocols that include air monitoring, controlled ventilation, and decontamination procedures when leaving work areas. This isn’t optional equipment. It’s the minimum required to work safely around smoke residue. Trained experts understand which cleaning methods work for specific types of residue and how to handle toxic compounds without creating additional exposure risks.

Assessing Smoke Damage Severity and Restoration Scope

TBsNo7egQuWEDjhooO015g

Professionals use thermal imaging cameras during room-by-room evaluation to find hidden smoke inside wall cavities, above ceilings, and throughout HVAC components. Smoke travels through the smallest gaps, which means areas not directly affected by fire often show significant contamination. Thermal imaging reveals temperature differences that show where smoke particles collected, even when surfaces look clean to the naked eye. This technology identifies the true scope of damage rather than just the obvious discoloration.

Porous materials absorb smoke differently than non-porous surfaces, and that determines how you approach restoration and what it costs. Drywall, insulation, ceiling tiles, upholstered furniture, and carpeting act like sponges, pulling smoke particles and acidic residues deep into their structure. These materials often need replacement when damage goes beyond what surface cleaning can handle. Non-porous surfaces (glass, metal, sealed countertops, tile) are easier to clean because smoke sits on top instead of soaking in. Hardwood floors fall somewhere in between, depending on finish condition and how long smoke sat on them. Structural assessment looks at each material type separately to figure out whether cleaning, sealing, or replacement gives you the best outcome.

Damage Severity Affected Materials Typical Restoration Approach
Light smoke exposure Surface soot on walls, ceilings, hard surfaces; minimal penetration HEPA vacuuming, dry sponging, chemical cleaning, odor treatment; no replacement
Moderate smoke damage Penetration into drywall surface layer, upholstery staining, HVAC contamination Deep cleaning, sealing with specialized primers, contents pack-out, duct cleaning; selective replacement
Heavy smoke and heat damage Charred surfaces, saturated insulation, destroyed finishes, structural compromise Complete material removal, structural repairs, full reconstruction; extensive replacement required

Comprehensive evaluation extends to areas homeowners usually miss: inside closets, behind appliances, under sinks where gaps let smoke migrate, attic spaces above affected rooms, and crawl spaces below. Smoke follows air currents and pressure differences throughout your home. A fire in one room often creates contamination three rooms away. Professional assessment identifies all affected areas so restoration addresses the complete problem instead of just visible damage.

Ventilation, Air Purification, and Contamination Control

k4d5yjJvT6CW1OBA6o4RBw

Smoke particles stay suspended in the air long after flames go out, settling slowly onto every surface while continuing to circulate through rooms. Cleaning surfaces while contaminated air keeps depositing new particles creates an endless loop. That’s why air quality has to be addressed first.

Air scrubbers with HEPA filters capture fine smoke particles down to 0.3 microns, removing airborne contamination before cleaning starts. These industrial units pull huge volumes of air through multiple filtration stages, trapping both visible soot and microscopic particles you can’t see. HEPA filters meet specific efficiency standards, removing 99.97% of particles at the most penetrating particle size. Professionals position multiple air scrubbers throughout affected areas, calculating placement based on room volume and how bad the damage is. The equipment runs continuously during early restoration phases, sometimes for several days, until air quality testing confirms that smoke particles are gone from the breathing zone. This step protects restoration workers and prevents recontamination of surfaces as they’re being cleaned.

Containment barriers and negative air pressure systems prevent smoke particles from spreading into unaffected areas during restoration work. Technicians seal doorways with plastic sheeting, creating isolated work zones. Negative air pressure machines exhaust air from the contained space to the outside, making sure airflow moves from clean areas toward contaminated zones rather than the other way around. This controlled environment is critical when restoration happens while homeowners are living in other parts of the building. Without containment barriers, restoration activities stir up settled particles that spread throughout the property, expanding damage scope and increasing costs. Professional contamination control means cleaning happens in a sealed work zone where every particle can be captured by filtration systems instead of deposited somewhere new.

Ongoing air quality monitoring throughout the restoration process verifies that indoor air meets safety standards before moving to the next phase. Technicians use air quality meters that measure particulate levels, letting them confirm that ventilation and filtration have reduced contamination to acceptable thresholds. This testing happens multiple times: after initial air scrubbing, during cleaning phases, and before final clearance. The goal is measurable improvement, not guesswork.

Soot and Residue Removal Techniques by Surface Type
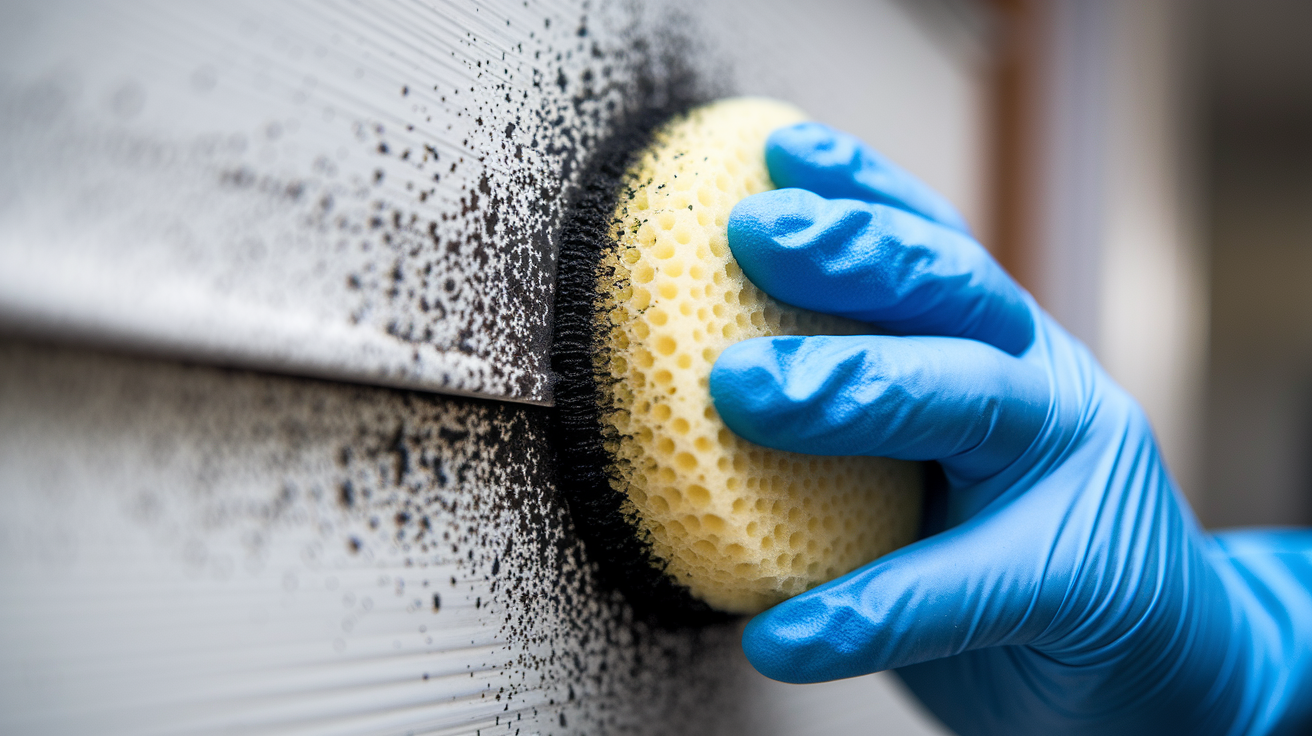
QwzJFyyPS-OWlt0pEfdsyg

Water spreads soot and creates permanent staining if you skip dry removal first. Smoke residue contains oily components that, when mixed with water, drive deeper into porous surfaces and smear across painted walls, leaving discoloration that no amount of scrubbing removes. Professional soot removal always starts dry. HEPA vacuum systems pull loose particles from surfaces without grinding them in, and dry cleaning sponges (specialized rubber sponges that lift residue through friction) remove surface deposits before any wet cleaning begins. This sequence prevents the most common DIY mistake that turns fixable smoke damage into a staining disaster requiring complete repainting or replacement.

Different residue types need matched cleaning methods. Protein residue from burned natural materials (wood, cotton, food) creates a sticky, nearly invisible film that discolors surfaces and generates intense odor. It responds to alkaline cleaning solutions. Synthetic smoke residue from plastics, electronics, and modern furnishings leaves oily, black deposits that require degreasing agents and sometimes solvent products. Heavy soot buildup with visible charring needs mechanical removal before chemical cleaning can reach the underlying surface. Certified technicians identify residue type during assessment because using the wrong cleaning approach either fails to remove contamination or damages the surface you’re trying to save.

Surface specific soot removal techniques:

Drywall and painted walls: HEPA vacuum loose soot, dry sponge remaining residue, chemical clean with TSP solution or commercial alkaline cleaner, rinse if appropriate for paint type, seal with odor blocking primer before repainting.

Wood paneling and trim: Vacuum dust and loose particles, dry sponge to lift surface deposits, clean with wood appropriate degreasing agents, refinish or reseal after cleaning to restore appearance and seal in any residual odor.

Hardwood floors: Vacuum with soft brush attachment, dry sponge or microfiber mop for residue, damp clean with pH neutral wood cleaner, inspect finish condition and refinish if smoke penetrated through worn areas.

Tile, countertops, and non-porous surfaces: HEPA vacuum, degreasing agents for oily residue, alkaline cleaners for general soot, acidic cleaners only if needed for specific mineral deposits, thorough rinsing to remove cleaning residue.

Metal surfaces: Vacuum loose particles, solvent cleaners for persistent residue, immediate drying to prevent water spotting or corrosion, polish or protective coating application to restore appearance.

Upholstered furniture and textiles: HEPA vacuum all surfaces including seams and crevices, dry cleaning sponges on accessible surfaces, professional contents cleaning or pack-out services for items requiring specialized treatment.

Baseboards, door frames, and millwork: Vacuum accumulated soot (these horizontal and detailed surfaces collect heavy deposits), dry sponge, chemical cleaning with appropriate product for finish type, touch-up or refinishing to match pre-loss condition.

Cabinet surfaces: Vacuum including top surfaces and edges where soot settles, degrease with appropriate cleaner, clean and degrease hardware separately, refinish or repaint if cleaning leaves persistent discoloration.

Chemical Cleaners and Specialized Restoration Products
zK5tbAOESiSm-p9b2HCGHg

TSP solution (trisodium phosphate mixed with water) serves as the standard alkaline cleaner for wall cleaning and general residue buildup on painted surfaces. It cuts through smoke film effectively, doesn’t require excessive scrubbing that damages paint, and rinses clean without leaving its own residue. Professional grade alkaline cleaners offer similar chemistry with additives that improve performance on specific residue types: surfactants that help solution penetrate oily deposits, chelating agents that prevent minerals in rinse water from leaving new stains, and deodorizing compounds that begin odor neutralization during cleaning. Alkaline cleaners work best on protein residue and general soot but struggle with heavy grease or certain synthetic residues that need different chemistry.

Acidic cleaners handle specific challenges that alkaline products can’t address: mineral deposits from firefighting water, certain discoloration patterns on tile and grout, and residual staining after initial cleaning removes most contamination. Degreasing agents target oily smoke residue common with synthetic material fires, using solvent action or specialized surfactants to break down and emulsify residues that water cleaners leave behind. The choice between product types depends on residue type and surface material. Using acidic cleaners on alkaline sensitive surfaces or applying strong degreasers to delicate finishes causes damage, which is why product selection requires knowledge of both smoke chemistry and material compatibility.

Solvent products work on metal surfaces, glass, sealed tile, and other non-porous materials where water cleaners prove ineffective against stubborn residue. These products evaporate quickly, reducing moisture exposure risks, and cut through the most persistent oily deposits. Certified technicians maintain a range of specialized restoration products because no single cleaner handles every situation. They test products in inconspicuous areas before full application, making sure they’re compatible with surface materials and confirming that the selected cleaner delivers results without creating new damage.

Odor Elimination Methods: Thermal Fogging and Advanced Deodorization

ACXqwtwaQJu9SeAgI73F4A

Cleaning removes visible residue, but smoke particles penetrate deep into porous materials where brushes and cleaning solutions don’t reach. Lingering smell comes from these embedded particles continuing to off-gas odor compounds. Surface cleaning alone never eliminates odor completely.

Thermal fogging technology generates heated deodorizing fog (microscopic droplets of deodorizing solution suspended in a heated vapor) that penetrates materials at the molecular level, reaching the same depths that smoke particles reached during the fire. The fog travels through wall cavities, into upholstery padding, throughout carpet backing, and into every crevice where smoke settled. The deodorizing compounds neutralize odor at its source rather than masking smell with fragrance. Technicians operate thermal fogging equipment throughout affected areas, sometimes requiring multiple applications depending on damage severity. The property has to remain unoccupied during treatment and for several hours afterward while fog settles and deodorizing action completes. Thermal fogging addresses odor that cleaning can’t reach, handling the embedded contamination that causes lingering smell weeks or months after restoration appears complete.

Ozone treatment works differently. Ozone molecules (O₃) are highly reactive oxidizers that break down odor molecules by chemically altering their structure. Ozone generators flood unoccupied spaces with ozone gas that penetrates materials and oxidizes odor compounds. The treatment effectively eliminates organic odors but requires complete evacuation because ozone at treatment concentrations is hazardous to people, pets, and plants. Hydroxyl generators offer safer alternatives for occupied spaces or situations where complete evacuation isn’t practical. Hydroxyl radicals (OH) attack odor molecules through similar oxidation but at lower concentrations that don’t require evacuation. Hydroxyl treatment takes longer than ozone but allows phased restoration where some areas remain in use. Both technologies break down odor molecules rather than covering them, providing true elimination instead of temporary masking.

Carbon filtration systems provide ongoing air purification after initial odor elimination treatments, capturing any residual odor compounds released as materials continue off-gassing during the weeks following restoration. Portable air scrubbers with activated carbon filters supplement HEPA filtration, targeting odor molecules specifically. This ongoing treatment makes sure that lingering smell doesn’t return as materials adjust to post-restoration conditions.

Contents Cleaning, Furniture Salvage, and Pack-Out Services
5zXMsGCLSxe5d6wGgd9xeA

Non-porous materials (glass, hard plastics, sealed ceramics, most metals) are typically salvageable because smoke sits on the surface instead of penetrating. These items respond well to specialized cleaning techniques. Heavily smoke damaged porous materials often require replacement: upholstered furniture with saturated padding, mattresses and bedding directly exposed to smoke, soft toys and fabric items belonging to children (health precaution), and carpeting in rooms with heavy smoke exposure. Decision criteria include depth of smoke penetration, whether odor elimination is achievable, structural integrity for furniture and cabinets, and whether restoration cost approaches replacement value. Items are unsalvageable when structural parts are destroyed (interior wood frames in upholstered furniture, cabinet joinery compromised by charring), excessive charring makes refinishing impossible, surface damage extends too deep for stripping and sanding to reach clean material, or when restoration involves hazardous materials like asbestos in older items.

Pack-out services remove contents to a storage facility for off-site cleaning when on-site restoration work would damage items or when specialized cleaning equipment is needed. Technicians inventory every item photographed and documented, pack contents using appropriate materials and methods, transport to secure climate controlled storage facility, perform specialized cleaning, and store items until property restoration is complete. This protects valuable and sentimental belongings during demolition, reconstruction, and finish work. It also allows thorough property restoration without working around furniture and contents. Pack-out particularly benefits situations with extensive reconstruction, homes requiring extended restoration timeline, or valuable items needing specialized treatment.

Specialized contents cleaning techniques:

Ultrasonic cleaning: Submerging items in solution filled tanks where ultrasonic waves create microscopic bubbles that gently lift contamination from intricate surfaces, ideal for jewelry, small decorative items, and delicate objects.

Dry-cleaning methods: Solvent cleaning for textiles and upholstery that can’t tolerate water exposure, removing smoke residue and odor without moisture damage risks.

Ozone chambers: Sealed cabinets where concentrated ozone treatment eliminates odor from clothing, small furniture pieces, and porous items in a controlled environment.

Thermal deodorization: Heating items in controlled chambers while applying deodorizing treatments, accelerating odor elimination for salvageable upholstered pieces.

Precision cleaning for electronics: Specialized cleaning of sensitive electronic components, circuit boards, and interior mechanisms using appropriate solvents and compressed air.

Sentimental value plays a big role in furniture salvage decisions. Professional restorers work harder to save heirlooms and irreplaceable items than generic furnishings, even when restoration cost exceeds replacement value for comparable pieces. They help homeowners understand what’s technically achievable, provide honest assessment of likely outcomes, and support informed repair versus replace decisions that consider both practical restoration capability and emotional significance. A family dining table may be worth extensive refinishing that wouldn’t make economic sense for a mass produced piece. Restoration companies recognize this and adjust recommendations accordingly.

Material Restoration and Reconstruction After Smoke Penetration
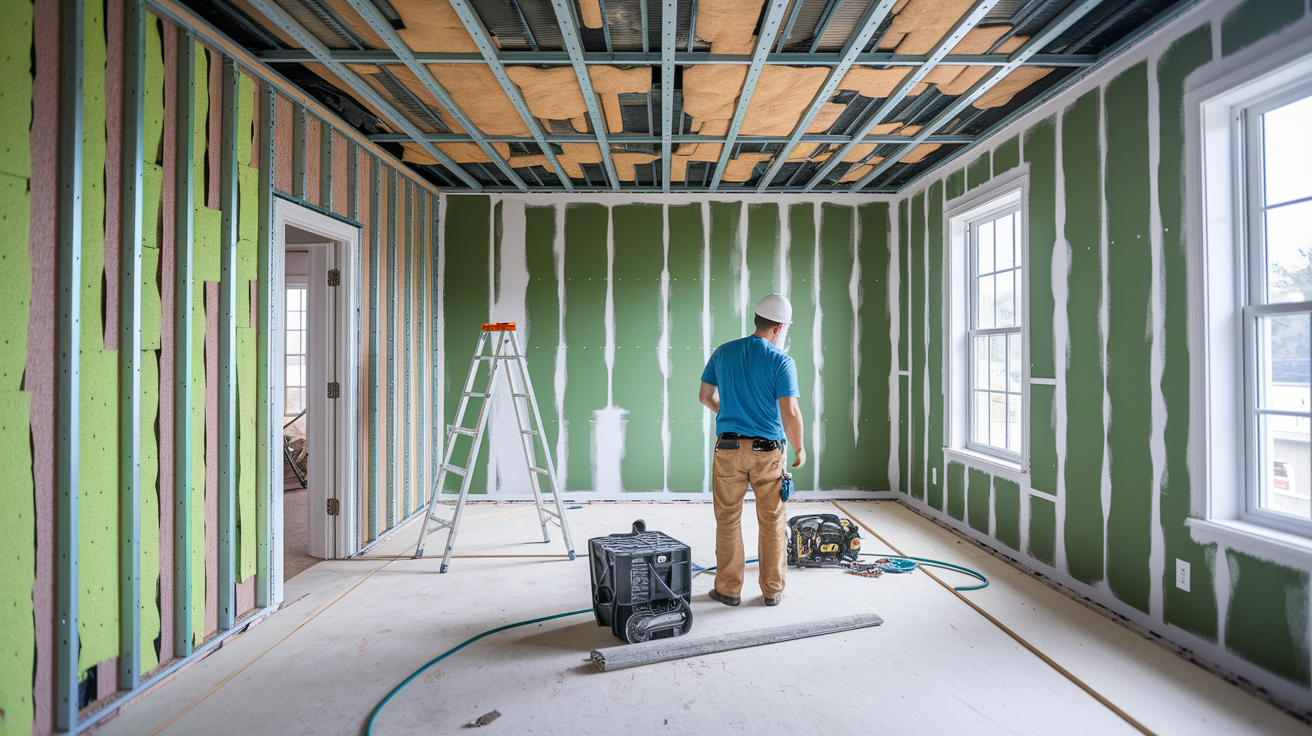
r7b3eWNLTcWH-Xsw3Gbhww

Sometimes cleaning isn’t enough. When smoke saturates porous materials too deeply for cleaning and sealing to eliminate odor or when structural damage extends beyond surface repair capability, replacement becomes necessary for complete restoration.

Drywall replacement happens when smoke penetrated through paint and paper surface into the gypsum core, creating persistent odor that sealing primers can’t block. Technicians remove affected drywall sections, often cutting to the nearest studs for clean edges. They inspect wall cavities for insulation damage because insulation acts like a filter, trapping massive amounts of smoke particles. Insulation removal becomes necessary when discoloration, odor, or contamination is present. New insulation goes in before drywall replacement, making sure you have proper R-value and creating a clean barrier. Drywall installation, taping, mudding, and texturing follow standard construction practices, with the critical addition that all new surfaces receive odor blocking primer before final painting. This reconstruction phase transforms heavily damaged areas back to clean, functional spaces.

Sealing surfaces with specialized primers forms a barrier that locks in any residual odor molecules and prevents staining from bleeding through new paint. Standard primers don’t block smoke odor effectively. Professionals use shellac or synthetic shellac primers specifically formulated for smoke damage (products like BIN or Kilz Original that create impermeable barriers). These primers seal wood, drywall, and previously painted surfaces before finish coats. Repainting walls requires color matching to blend repaired areas with undamaged spaces, texture matching when ceilings or walls have knockdown or other decorative finishes, and attention to sheen levels so patched areas don’t stand out under lighting. The goal is making repairs invisible, restoring your home to pre-loss condition instead of creating obvious patched zones.

Subflooring inspection addresses hidden damage from firefighting water and smoke that traveled through floor penetrations. Technicians check subfloor for warping, staining, or moisture damage that threatens new flooring installation. Structural repairs happen before finish work: replacing damaged floor joists, sister reinforcing weakened framing members, addressing roof decking if attic spaces showed smoke damage. These hidden repairs make sure the structure supporting visible finishes is sound, preventing future problems that surface repairs alone wouldn’t address.

Specialized Restoration for HVAC, Appliances, and Fixed Components
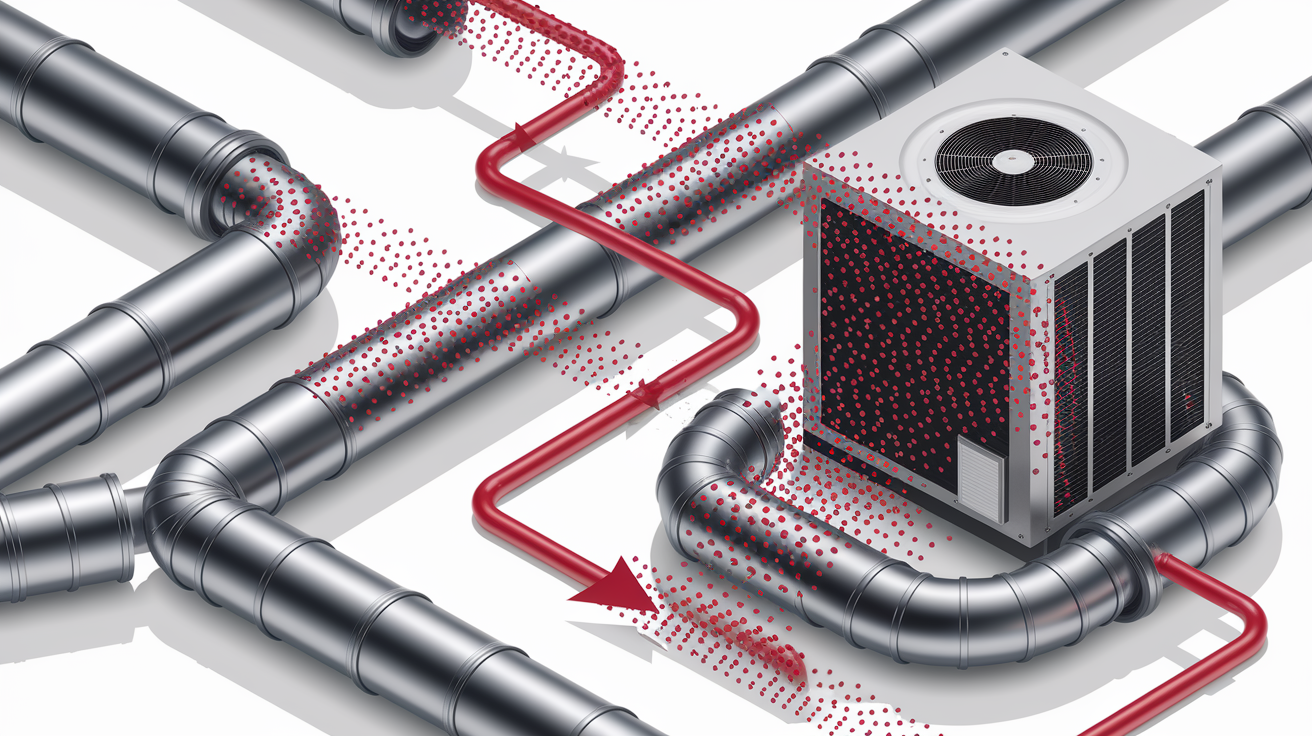
m2iBNo6rRoO47DhBw9Jamw

HVAC system cleaning ranks as one of the most critical restoration steps because the system circulates air throughout your entire property. Smoke particles infiltrate ductwork during the fire, settling on interior duct surfaces, in return grilles, on the evaporator coil, throughout the blower assembly, and inside the air handler cabinet. Every time the system runs after a fire, it distributes smoke particles from these contaminated components back into rooms, recontaminating cleaned surfaces and creating persistent odor despite thorough room cleaning. This circulation problem explains why some homes smell fine until the heating or cooling kicks on, then suddenly smell like smoke again.

Comprehensive HVAC restoration starts with ductwork inspection using cameras that reveal contamination extent inside supply and return ducts. Professionals clean ventilation ducts using rotary brush systems, compressed air tools, and HEPA vacuum collection that physically removes deposited particles from duct interiors. They access ducts through existing registers when possible or cut temporary access panels for thorough cleaning. Filter replacement is obvious. Filters after a fire are saturated with smoke particles and have to be discarded. Evaporator coil cleaning requires removing the coil assembly or accessing it through service panels, then cleaning fins and surfaces with appropriate coil cleaner that removes smoke residue without damaging delicate aluminum fins. Blower components get disassembled and cleaned individually: the squirrel cage blower accumulates heavy residue, motor housings show contamination, and the cabinet interior needs HEPA vacuuming and cleaning before reassembly. Some systems require duct sealing with specialized sealants that encapsulate any remaining particles, particularly in flex duct that’s difficult to clean thoroughly. Complete HVAC restoration makes sure the system distributes clean air instead of redistributing smoke contamination.

Ventilation ducts act as distribution networks during fires. Smoke follows the path of least resistance, and that path often includes open supply ducts, return air grilles, and transfer ducts between spaces. A fire in one room can deposit smoke particles in ductwork serving rooms three floors away. This explains why smoke damage assessment has to include areas with no direct fire exposure. Professional cleaning with specialized equipment addresses these hidden contamination sources that homeowners can’t reach and often don’t know exist.

Electrical components and light fixtures require careful evaluation. Light fixtures directly exposed to heat may have compromised wiring insulation or damaged sockets that create safety hazards. Professionals test electrical components instead of assuming they’re safe, replacing fixtures when necessary. Many light fixtures retain odor in porous shades, fabric components, or fixtures with internal insulation, making replacement more practical than cleaning. Appliance exterior restoration focuses on removing smoke film from refrigerators, ranges, dishwashers, and other kitchen equipment. Non-porous appliance surfaces clean successfully with appropriate degreasers, though care is required around control panels, vents, and areas where cleaning solution intrusion could damage electronics.

Cabinet surfaces, window treatments, and door frames require on-site restoration because they’re fixed components. Cabinets receive the same cleaning sequence as other wood surfaces: vacuum, dry sponge, chemical cleaning, and refinishing when necessary. Cabinet removal procedures may be required for heavily damaged units, with countertops requiring temporary bracing for support during restoration work. Window treatments made from fabric typically go to contents cleaning specialists, while blinds and hard surface treatments clean on-site. Door frames and baseboards often show the most visible discoloration because they’re at boundaries where smoke deposits heavily. They require careful color matching during refinishing to blend with adjacent trim and maintain your home’s finish quality.

Documentation, Insurance Claims, and Cost Estimation

Thorough documentation photos protect homeowners during insurance claim processes. Restoration companies photograph damage before beginning work: overall room conditions showing smoke discoloration patterns, close-up shots of heavily damaged areas, contents requiring cleaning or replacement, and damage to fixed components like cabinets and flooring. These images establish baseline conditions, support scope of damage arguments when insurance adjusters question claim extent, and provide visual evidence for disputed items. Comprehensive damage inventory accompanies photos (itemized lists of affected contents with descriptions, estimated replacement values, and restoration recommendations). Professional damage assessments document technical findings: smoke penetration depth in porous materials, HVAC contamination extent, structural concerns requiring repairs, and material testing results when contamination levels need verification.

Cost estimates vary based on multiple factors: room size and number of affected spaces, residue type and depth of smoke penetration, contents requiring pack-out services, reconstruction scope when materials need replacement, and timeline constraints. Smoke damage restoration costs $200 to $1,200 per room, with small bedrooms at the lower end and large open plan spaces or rooms with extensive built-ins at the higher end. Heavy soot removal adds $2,000 to $6,000 depending on square footage and residue depth. Full fire damage restoration (combining smoke restoration with structural repairs, water damage mitigation, and complete reconstruction) ranges from $3,000 to $50,000. These broad ranges reflect the enormous variation in damage severity. Light smoke in three rooms differs dramatically from heavy smoke throughout a multi-story home requiring HVAC replacement and extensive reconstruction.

Restoration Scope Typical Cost Range Key Cost Factors
Single-room smoke cleaning $200 – $1,200 Room size, residue type, contents volume, whether odor elimination treatments are needed
Heavy soot removal (multiple rooms) $2,000 – $6,000 Square footage, soot depth, surface types affected, whether reconstruction is required
Whole-home smoke restoration $5,000 – $15,000 Home size, HVAC cleaning, contents pack-out, material replacement scope, timeline urgency
Complete fire and smoke restoration with reconstruction $3,000 – $50,000+ Structural damage extent, materials requiring replacement, custom finish matching, permit requirements, temporary relocation duration

Insurance coverage variations depend on policy type, fire cause, and specific policy language about smoke damage. Standard homeowners policies typically cover smoke damage from sudden and accidental fires, including restoration costs, temporary relocation expenses during uninhabitable periods, and replacement items when cleaning proves insufficient. Coverage may be limited or denied if the fire resulted from neglect, intentional acts, or excluded causes. Professionals help establish pre-loss condition documentation by comparing damaged areas against unaffected spaces, using photos from before the fire when homeowners have them, and documenting original finishes to support restoration scope arguments. Restoration companies assist with documentation for insurance claims throughout the process: initial assessment reports with damage descriptions and photos, itemized scope of work with labor and material breakdowns, progress documentation showing work completion, and final paperwork submission after project completion. This support helps homeowners navigate claim processes, makes sure documentation meets insurance company requirements, and speeds approval and payment timelines.

Hiring Certified Restorers: IICRC Standards and Professional Qualifications

IICRC standards (established by the Institute of Inspection, Cleaning and Restoration Certification) provide the certification framework that separates trained restoration professionals from general contractors or cleaning services. IICRC certifies technicians in specific disciplines: fire and smoke restoration, water damage restoration, odor control, contents cleaning, and other specialized areas. Certification requires classroom training, technical knowledge testing, and ongoing education to maintain credentials. When restoration companies employ certified technicians, homeowners gain professionals who understand smoke chemistry, know which cleaning methods work for specific residue types, follow industry protocols that insurance companies recognize, and use equipment properly. Certification matters because improper restoration techniques cause additional damage, leave contamination that creates long-term problems, or fail to eliminate odor despite appearing clean.

Full service restoration covers emergency response through follow-up inspection: 24-hour availability for fire aftermath situations requiring immediate stabilization, complete damage assessment identifying all affected areas and systems, mitigation steps that stop damage progression, coordinated cleaning using appropriate techniques for different surfaces and materials, reconstruction services when materials require replacement, project management that coordinates multiple trades and keeps work sequenced properly, and follow-up inspection after homeowners reoccupy to verify satisfaction and address any emerging concerns. This comprehensive approach means one team manages the entire restoration instead of homeowners juggling separate contractors for cleaning, repairs, HVAC work, and finish carpentry. Single point contact simplifies communication, clear timelines reduce uncertainty, and coordinated work prevents the gaps that occur when multiple contractors work independently.

When vetting restoration companies, ask about IICRC certification status and specific credentials held by technicians who will work on your property, equipment capabilities including air scrubbers, thermal foggers, and moisture detection tools, experience with insurance claims and whether they provide documentation support, warranty coverage on completed restoration work, and references from recent smoke damage projects. Ask whether they perform all work with their own crews or subcontract portions of restoration, how they handle contents cleaning and whether pack-out services are available, what their typical timeline looks like for projects similar to yours, and how they communicate progress updates during multi-week restoration projects. Professional restoration companies answer these questions clearly and provide documentation of their capabilities.

Moisture Control, Dehumidification, and Preventing Secondary Damage

Fire aftermath typically includes significant water damage from firefighting efforts (thousands of gallons from fire hoses, water from sprinkler systems, and moisture from steam and smoke combining during extinguishment). This creates dual restoration challenges: smoke damage requiring specialized cleaning plus water intrusion requiring drying and moisture control. Ignoring the moisture component while focusing only on smoke creates mold growth risks, structural deterioration, and material damage that compounds original fire losses.

Dehumidification systems and moisture control measures run at the same time as smoke restoration from day one. Commercial dehumidifiers extract moisture from air and materials, reducing relative humidity to levels where microbial growth cannot occur (typically below 60% relative humidity). Air movers position strategically to promote evaporation from wet materials: hardwood floors, drywall, insulation, and structural framing all require controlled drying. Moisture meters track progress, with technicians documenting moisture content readings in affected materials daily until readings reach dry standards. This systematic moisture control prevents secondary damage that often exceeds original smoke damage costs when left unaddressed. Dehumidification continues throughout cleaning phases because wet cleaning methods introduce additional moisture that has to be managed.

Mold prevention strategies center on speed and thoroughness. Mitigation steps addressing moisture begin within 24 to 48 hours of the fire, before mold growth establishes. Professionals remove wet porous materials that can’t be dried effectively: saturated insulation, wet drywall that’s delaminating or showing moisture wicking, and carpeting soaked by firefighting water. Quick action on both smoke damage and water intrusion prevents further damage beyond the original loss. Delays create cascading problems: smoke residue corrodes while moisture promotes mold growth, restoration costs increase as damage expands, and insurance coverage may be affected if preventable secondary damage occurs due to mitigation delays. Professional restoration addresses smoke and water issues in coordinated mitigation steps (simultaneous air purification and dehumidification, concurrent surface cleaning and structural drying, integrated approaches that handle both damage types efficiently instead of treating them as separate problems requiring separate solutions).

Final Words

Interior restoration after smoke damage isn’t something you tackle with household cleaners and hope.

Smoke penetrates deep. It corrodes. It keeps causing problems until you address it properly.

The right team stops the damage, cleans it correctly, and rebuilds so your home looks whole again.

If you’re dealing with smoke damage now, you don’t have to figure this out alone.

We’ll assess what happened, explain what needs fixing, and finish it right. One team, start to finish.

FAQ

What materials can typically be saved after smoke damage?

Materials that can typically be saved after smoke damage include non-porous surfaces like glass, metal, hard plastics, and sealed countertops. Painted walls often respond well to specialized cleaning, and many wood surfaces can be restored through stripping and refinishing. Porous materials like upholstery, carpets, and drywall may require replacement if smoke penetration is extensive or cleaning proves inadequate.

Is smoke damage repairable or does everything need replacement?

Smoke damage is repairable in most cases through professional restoration methods including soot removal, deep cleaning, odor elimination, and surface sealing. Replacement becomes necessary when structural components are destroyed, porous materials are saturated beyond effective cleaning, or surface damage penetrates too deeply for refinishing. Certified technicians assess each material to determine the most effective approach.

How should walls be cleaned after smoke exposure?

Walls should be cleaned after smoke exposure by first using HEPA vacuums and dry cleaning sponges to remove surface soot before applying any liquid. Once dry residue is removed, professionals apply specialized alkaline cleaners like TSP solution to address remaining discoloration. Heavily damaged drywall may require sealing with odor-blocking primer or complete replacement if smoke penetration is extensive.

What products do professional restoration companies use to eliminate smoke odor?

Professional restoration companies use thermal fogging systems that disperse heated deodorizing fog to penetrate materials, hydroxyl generators that break down odor molecules at the molecular level, and ozone treatment for unoccupied spaces. These advanced deodorization methods work alongside HEPA filtration and carbon filtration systems to address lingering smell that surface cleaning alone cannot eliminate.

Why does smoke damage require immediate professional attention?

Smoke damage requires immediate professional attention because acidic residues cause progressive corrosion and permanent staining that worsens over time. Smoke particles penetrate porous materials, HVAC systems, and hidden structural areas, creating health hazards and spreading contamination. Quick response prevents further damage, reduces restoration costs, and protects indoor air quality throughout your home.

How long does complete smoke damage restoration typically take?

Complete smoke damage restoration typically takes between one and four weeks depending on severity. Assessment and safety evaluation require one to two days, cleaning and deodorization span three to seven days, and material restoration takes one to three weeks. Timeline variations depend on damage extent, required reconstruction, and whether contents need pack-out services.

What health risks exist when living in a smoke-damaged home?

Living in a smoke-damaged home creates serious health risks from toxic compounds, acidic residues, respiratory irritants, and volatile organic compounds that remain in materials and air. Exposure causes respiratory irritation, skin reactions, and long-term health concerns. Professional restoration with proper protective equipment and certified techniques is necessary to eliminate these hazards safely.

How do restoration professionals determine what can be saved versus replaced?

Restoration professionals determine salvageability through room-by-room evaluation using thermal imaging to detect hidden smoke penetration, material porosity assessment, and structural integrity inspection. Non-porous items generally clean successfully while porous materials with deep saturation often require replacement. Decision factors include restoration costs versus replacement value, structural soundness, and surface damage depth.

Why must HVAC systems be cleaned during smoke restoration?

HVAC systems must be cleaned during smoke restoration because smoke particles infiltrate ductwork and circulate throughout the property, recontaminating cleaned areas if the system remains dirty. Professional cleaning includes duct inspection, HEPA vacuuming, filter replacement, and component decontamination. Neglecting ventilation ducts undermines all other restoration efforts by continuously spreading smoke particles.

What documentation is needed for smoke damage insurance claims?

Documentation needed for smoke damage insurance claims includes initial assessment photos showing all affected areas, comprehensive damage inventory with itemized contents lists, and professional cost estimates detailing restoration scope. Restoration companies assist with documentation throughout the process and help submit final paperwork. Thorough records of pre-loss condition support fair claim settlements and coverage for restoration costs.

How does firefighting water damage complicate smoke restoration?

Firefighting water damage complicates smoke restoration by creating moisture intrusion that requires concurrent dehumidification and mold prevention measures alongside smoke cleaning. Fire aftermath typically involves dual restoration challenges requiring coordinated mitigation steps. Delays in addressing moisture lead to secondary damage including microbial growth, making quick professional response essential for complete restoration.

What certifications should smoke damage restoration companies have?

Smoke damage restoration companies should have IICRC certification, which provides industry-standard training for certified technicians in proper restoration protocols. Look for companies offering full-service restoration from emergency response through follow-up inspection, specialized equipment like HEPA filtration and thermal fogging systems, and experience coordinating insurance claims. Proper certification ensures safe, effective restoration using proven methods.

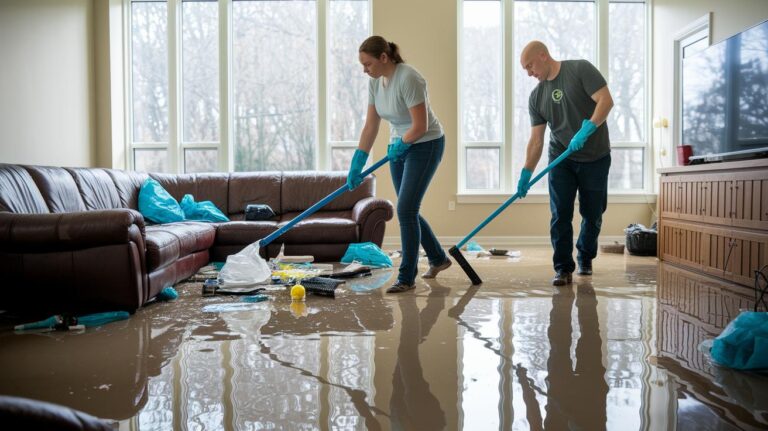
Roof Tarp Replacement Timeline: When to Schedule Permanent Repairs

Think a roof tarp can hold you over for months? Think again.
A tarp stops water right after storm damage, but it’s only a short-term fix.
Aim to schedule permanent repairs within 30 days after tarping when you can, and treat 90 days as the outer limit only with documented delays and insurer approval.
Fast repairs stop decking rot, mold, and costly interior damage, and they keep your claim from getting messy.
Here’s a practical timeline and the documentation you should gather so you move from emergency tarp to a finished roof with less stress.

Understanding the Safe Roof Tarp Replacement Timeline

n5C1XVpATnOInqEbsG5hug

A roof tarp stops water intrusion right after storm damage, fallen trees, or sudden failures. It’s an emergency measure, not a long term fix. The maximum safe duration is commonly accepted as 90 days, but that’s an outer limit, not something you should aim for. The recommended target is permanent repair within 30 days after tarping when you can make it happen.

Insurance carriers expect you to act fast. Most require you to install mitigation measures like tarps immediately and move toward permanent repairs within 60 to 90 days. Some policies permit up to 180 days depending on circumstances and documented delays, but you need to verify your policy’s exact language. That 30 day target helps you avoid decking rot, mold growth, and secondary interior damage that drive repair costs higher and complicate your claim.

The practical replacement timeline from the moment you discover roof damage to the day permanent repairs finish typically follows this pattern:

  • Emergency tarping: Ideally within 24 to 48 hours after damage occurs
  • Initial roof inspection and contractor estimate: 7 to 14 days after tarping
  • Insurance notification and adjuster inspection: Within 24 to 72 hours of discovery; adjuster visit typically 1 to 2 weeks out
  • Material selection and ordering, plus permit applications: 1 to 3 weeks combined
  • Permanent roof installation: 1 to 10 days once started (most asphalt shingle roofs complete in 1 to 3 days)
  • Total elapsed time from tarp to finished roof: Aim for 30 days; maximum 90 days without documented insurer approval

Contractor scheduling often adds 2 to 12 weeks depending on season and local demand. Permit processing can add another 1 to 3 weeks in many jurisdictions. These overlapping timelines mean the total calendar days from tarping to completed repairs can stretch to several weeks even when every step moves quickly. Weather delays, material shortages, and hidden structural damage discovered during tear off can extend the schedule further.

Factors That Influence Your Roof Tarp Lifespan and Replacement Schedule

a2U0DHX1RtyFZ9Vfq5yS3A

The lifespan of a temporary roof tarp depends primarily on tarp quality, local weather conditions, and how well it was installed. Thin blue polyethylene tarps, the kind sold at most hardware stores, begin degrading under direct sunlight in just weeks. Practical outdoor life for these tarps is often 2 to 6 weeks in direct sun before UV exposure starts causing brittleness, tears, and reduced water resistance.

Heavy duty woven or UV treated tarps fare better and can last 2 to 6 months in moderate conditions, but they’re still temporary and aren’t designed to serve as a permanent roofing membrane. Even a properly installed, high quality tarp in mild conditions may approach the 90 day outer limit but shouldn’t be relied upon beyond that in exposed, windy, or UV intense locations.

Tarp Type Typical Lifespan Estimate Environmental Sensitivity
Thin blue polyethylene (standard hardware store) 2 to 6 weeks High; rapid UV degradation, tears in wind
Heavy duty woven polyethylene 6 to 12 weeks Moderate; better wind resistance, moderate UV tolerance
UV treated reinforced tarp 2 to 6 months Lower; designed for extended outdoor use, but still temporary
Shrink wrap or specialty membrane 3 to 9 months (interim solution only) Varies; some specialty systems tolerate longer exposure

Direct sunlight, high winds, repeated heavy rain or snow, thermal cycling, poor fastening methods like staples that tear out, and ponding water on the tarp surface all accelerate failure. Mold can begin growing within 24 to 72 hours after moisture intrusion starts, so any leak under a tarp becomes a biological and structural problem quickly.

Signs Your Roof Tarp Needs Immediate Replacement or Reinforcement

ljZKEtp_RGqMHP01sd7NrA

You should inspect your roof tarp every 7 to 14 days and after every major storm. During these inspections, look for visible signs that the tarp isn’t doing its job anymore. Catching failures early reduces the risk of interior water damage, mold growth, and compromised roof decking.

Signs that demand immediate tarp replacement or reinforcement:

  • New tears or rips in the tarp fabric, especially along fastener lines or folds
  • Excessive flapping in wind, which shows loose attachment points
  • Visible exposed sheathing or underlayment where the tarp has pulled away
  • Sagging or pooling water on the tarp surface, which adds weight and accelerates tearing
  • Water intrusion inside the home, shown by new ceiling stains, drips, or damp insulation
  • Visible mold or mildew growth on attic surfaces, underlayment, or interior ceilings
  • Loose or missing fasteners, sandbags, or boards that were used to secure the tarp

If you notice any of these conditions, contact your roofing contractor immediately to schedule tarp reinforcement or replacement. Roof decking and framing can start to rot or delaminate over weeks to months when moisture is allowed to persist, increasing the scope and cost of the final repair. Delaying action also raises the risk that your insurer may reduce payout or deny the claim if mitigation isn’t timely and documented.

Emergency Roof Tarp Timeline: From Damage Occurrence to Permanent Repairs

b5RSqVY2Shq16jOk412kzA

The moment roof damage occurs, the clock starts on your emergency response and documentation timeline. Speed matters because water can travel along rafters and decking, soaking insulation and drywall in hours. Mold begins colonizing within 24 to 72 hours. The goal is to stop further damage immediately and then move toward permanent repairs as quickly as practical.

The emergency to permanent repair process follows this sequence:

  1. Day 0 to 2: Tarp installation and immediate damage documentation. Install the tarp within 24 to 48 hours after damage is identified. Take date stamped photographs of the damage, the tarp in place, and any visible interior water intrusion. These photos are the foundation of your insurance claim.

  2. Day 0 to 3: Notify your insurance carrier. Call your insurer within 24 to 72 hours of discovering the damage. Report the loss, provide initial photos, and ask when an adjuster will be assigned. Keep records of every call and email.

  3. Day 3 to 14: Obtain contractor estimates and schedule adjuster inspection. Contact two to three licensed roofing contractors to inspect the damage and provide written estimates. Most contractors can respond within 7 to 14 days depending on local demand. Your insurance adjuster will typically schedule a visit within 1 to 2 weeks as well.

  4. Day 7 to 21: Material selection, permit applications, and scheduling. Once you have estimates and the adjuster’s initial assessment, select your roofing material and submit permit applications if required by your jurisdiction. Permits commonly take 1 to 3 weeks to issue. Start this process early so it doesn’t delay the installation window.

  5. Day 14 to 30: Contractor confirms start date and materials arrive. Depending on material lead times and contractor availability, your roofing crew will lock in a start date. Asphalt shingles are typically in stock; specialty materials like metal panels or tile may take weeks to arrive.

  6. Day 30 to 90: Complete permanent repairs. The actual roof replacement typically takes 1 to 10 days once started, depending on roof size, material type, and weather. The total elapsed calendar time from tarping to completed repairs should ideally fall within 30 days and must not exceed 90 days without documented reason and insurer approval.

Contractor scheduling is often the largest variable in this timeline. During busy seasons or in high demand areas following widespread storm events, contractor wait times can extend from 2 weeks to 12 weeks. Communicating with your insurer about these delays and keeping written documentation of your efforts to schedule repairs helps protect your claim if the timeline stretches.

Insurance Timing Requirements That Affect Your Roof Tarp Replacement Timeline

GyF_wdc2QdGXMU4yFfLQaA

Insurance carriers require you to take reasonable steps to stop damage immediately after a loss. Installing a tarp is considered essential mitigation. Failing to tarp promptly, or allowing a tarp to fail without replacement, can result in denial of secondary damage claims like interior mold or rot that developed after the initial loss.

Most insurance policies expect you to move from emergency mitigation to permanent repairs within 60 to 90 days. Some carriers allow up to 180 days if documented delays like permitting backlogs, material shortages, or contractor availability issues exist. Always check your policy’s specific language and communicate in writing with your adjuster if delays are unavoidable.

Your insurer will require clear documentation at every stage:

  • Date stamped photos of the initial damage and tarp installation
  • Receipts for emergency tarp work (typically $150 to $800)
  • Contractor estimates with detailed scope and timeline (obtained within 7 to 14 days)
  • Inspection notes and photos from every tarp inspection (every 7 to 14 days)

Keep copies of all communications with your insurer, adjuster, and contractors. If hidden damage is discovered during tear off, such as extensive decking rot or compromised rafters, document it immediately with photos and a written supplement to your contractor’s scope. Submit these to your adjuster promptly so the claim can be adjusted and repairs can proceed without financial holdups.

Coordination with your adjuster often takes 1 to 2 weeks from initial notice to inspection. Some adjusters approve emergency tarp costs on the spot; others require receipts and formal claim submission. If your carrier is slow to respond or assign an adjuster, send a written follow up every few days and keep a log of all attempts to reach them. This paper trail protects you if the timeline stretches and secondary damage occurs.

Scheduling Permanent Roof Repairs After Tarping

WwaKqYPtSvOw2_G5IUT37Q

Once your tarp is in place and your insurance claim is filed, the next step is locking in a contractor and scheduling the permanent replacement. Contractor availability is the variable that most often extends the overall timeline from emergency tarping to completed repairs.

Expect contractor scheduling to range from 2 to 12 weeks depending on the season, local demand, and the scope of your project. Roofing contractors book out quickly after widespread storm events. In normal conditions, a reputable contractor can often start within 2 to 4 weeks. During peak busy seasons, that window can stretch to 8 to 12 weeks or longer.

Permits add another 1 to 3 weeks to the timeline in many jurisdictions. Some municipalities issue permits quickly; others have backlogs that push approvals out by weeks. Start your permit application as soon as you have a contractor estimate and insurer approval so this step doesn’t delay the installation window. Many contractors handle permit applications on your behalf as part of their service.

How Seasonal Demand Extends Repair Timelines

Roofing demand spikes after major storms, during dry weather windows in late spring and summer, and in the weeks before winter weather sets in. In these periods, contractor scheduling can expand from the typical 2 to 3 weeks to 6 to 12 weeks. Material lead times also increase during busy seasons, especially for specialty products like metal panels, tile, or slate.

If you’re tarping during a peak demand period, communicate with your contractor and insurer early. Document in writing that you’re actively pursuing permanent repairs and that contractor availability, not your inaction, is causing the delay. Most insurers will extend the repair window if you can show you made prompt, reasonable efforts to schedule the work.

Once the contractor arrives on site, the actual roof replacement typically takes 1 to 3 days for a standard asphalt shingle roof and up to 10 days for larger or more complex roofs using heavier materials. Weather delays during installation can add days to this window, but the contractor will typically reschedule quickly to finish the work.

Safety Considerations During Roof Tarp Replacement and Removal

Jv6KBp37QY6g-Kzj1xikeA

Roof tarp installation, inspection, and removal all involve significant fall hazards. You should never attempt to install, adjust, or remove a tarp on a steep or high roof without proper safety equipment and experience. Professional roofing contractors use fall protection harnesses, proper ladders, and crew coordination to manage these risks.

Wind uplift is a major concern during tarp installation and while the tarp remains in place. Loose tarps flap violently in wind, tearing fasteners out and exposing the roof deck to water and further damage. Contractors secure tarps using boards nailed or screwed through the tarp into solid roof framing, sandbags on low slope roofs, or a combination of methods depending on roof pitch and weather conditions.

Key safety precautions during tarp work:

  • Use of OSHA compliant fall protection when working above six feet
  • Proper ladder setup with secure footing and three point contact
  • Inspection of roof deck stability before walking on damaged areas
  • Monitoring weather forecasts to avoid tarp work during high winds or storms
  • Clearing debris and loose shingles before securing the tarp to prevent punctures

If your tarp begins flapping or showing signs of failure between contractor visits, don’t climb onto the roof yourself unless you have proper training and equipment. Contact your roofing contractor immediately to schedule emergency reinforcement. Many contractors offer 24 hour emergency response for tarp failures, especially if you’re an existing customer with a scheduled replacement.

Cost Timeline Comparison: Temporary Tarp vs. Full Roof Replacement

eN6nR9EcRQ-_O84Ik0tFkg

Emergency tarp installation typically costs between $150 and $800 depending on roof size, height, complexity, and local labor rates. Most homeowners pay around $300 to $600 for a typical emergency tarp job. This cost is almost always covered by insurance as part of immediate mitigation, but you should keep receipts and submit them with your claim.

Full roof replacement costs vary widely by size, material, and complexity. A typical asphalt shingle roof for a 1,500 to 2,000 square foot home commonly ranges from $7,000 to $12,000. Metal roofs or premium materials like tile or slate can range from $15,000 to $30,000 or more depending on the roof’s pitch, number of penetrations, and local labor costs.

Expense Type Typical Cost How Timing Affects Cost
Emergency tarp installation $150 to $800 Prompt installation prevents secondary damage; delays increase interior repair costs
Full roof replacement (asphalt) $7,000 to $12,000 Extended tarp duration increases risk of hidden decking rot, raising final replacement cost by 10 to 30%
Full roof replacement (metal/premium) $15,000 to $30,000+ Long delays can compromise structural framing; additional repairs add thousands to final bill

Extended tarp use increases the risk of mold growth, decking rot, and interior water damage. Mold remediation can add $1,500 to $5,000 or more to your total repair bill depending on the scope of contamination. Replacing rotted roof decking adds labor and material costs, commonly $2 to $4 per square foot of affected area. If water intrudes into walls or ceilings, drywall replacement, insulation removal, and electrical repairs can add thousands more.

The financial case for moving to permanent repairs quickly is clear. A $500 emergency tarp that remains in place for 90 days without reinforcement or replacement can easily lead to $3,000 to $10,000 in additional interior and structural repairs. Scheduling permanent repairs within 30 days minimizes these risks and keeps your total claim cost lower.

Long Term Alternatives When Roof Tarp Replacement Timelines Are Extended

VW6SeYjrSYe_QIb7uxcbUg

In some situations, documented delays like permitting backlogs, contractor shortages following widespread storm events, or material supply chain issues can push the repair timeline beyond 90 days. When this happens, you and your contractor may consider intermediate protective measures that offer better durability and weather resistance than standard tarps.

Shrink wrap roofing systems, for example, provide a tighter seal and better UV resistance than standard tarps and can last 3 to 9 months in some conditions. Synthetic underlayment coverings, though not designed for long term weather exposure, offer better water and UV resistance than polyethylene tarps. Temporary membrane systems using self adhering materials can bridge longer timelines but still require eventual removal and full roof replacement.

Building codes in many jurisdictions enforce a 25 percent damage rule: if more than 25 percent of your roof area is damaged, local code may require full replacement rather than repairs. This can complicate temporary covering strategies because the scope of work is already determined and delaying only increases secondary damage risk. Always check with your local building department before planning extended temporary coverings.

Alternatives to standard tarps when timelines extend:

  • Shrink wrap roofing systems with heat sealed seams
  • Heavy duty synthetic underlayment secured with cap nails
  • Self adhering membrane patches over damaged sections
  • Temporary metal panel coverings for large exposed areas

If you’re facing an extended timeline due to documented, unavoidable delays, communicate with your insurer in writing and ask for approval to extend the temporary covering period. Keep records of all efforts to schedule contractors, obtain materials, and secure permits. This documentation protects your claim and demonstrates that you took reasonable steps to move toward permanent repairs as quickly as practical conditions allowed.

Final Words

You acted fast: tarped the roof, documented damage, and started the call chain, contacting inspector, contractor, and adjuster.

We covered the safe windows, aiming for permanent repair in 30 days and no later than 90 without approval, what wears tarps down, signs a cover is failing, and how insurers and seasons affect scheduling.

Plan inspections every 7-14 days, get estimates in 7-14 days, and push for repair within the recommended roof tarp replacement timeline.

Stay steady. Quick action now keeps costs lower and your home dry.

FAQ

Q: What is the 25% rule in roofing?

A: The 25% rule in roofing means insurers or building codes often require a full roof replacement when damage covers 25% or more of the roof, guiding repair versus replacement decisions.

Q: How long should a roof tarp last?

A: A roof tarp should last long enough for permanent repairs, typically 30–90 days; heavy-duty UV-treated tarps may last several months, but UV, wind, and pooled water can cause failure in weeks.

Q: How often should I replace my roof underlayment?

A: You should replace roof underlayment when you reroof or if it’s wet or damaged; underlayment isn’t meant to stay exposed and can deteriorate in weeks, so replace during permanent repairs.

Q: What is the average cost to tarp a roof?

A: The average cost to tarp a roof runs about $150–$800, depending on roof size, pitch, access, materials, and emergency response; insurers often cover emergency tarping as mitigation.

Water Extraction Machine Empowers Peak Efficiency

Ever wonder how a water extraction machine works during a flood? Think of it as a powerful vacuum that quickly pulls water from wet carpets, walls, and floors. It uses suction (pulling water out), pressure (forcing water away) and warm cleaning solutions to fight water damage fast. We rely on this tool to restore homes and offices quickly. In this article, we break down the basics in simple, clear steps so you can see how it speeds up the clean-up process.

How Water Extraction Machines Work: Core Principles and Applications

A water extraction machine is built to quickly remove water from damaged areas. It uses suction (a pulling force) and pressure (a pushing force) to pull excess water from carpets, floors, walls, and even industrial spaces. Even if some suppliers show these machines as not available online, they are trusted tools for flood cleanup, deep carpet cleaning, and keeping large spaces dry.

The machine has a few key parts. A motorized pump creates a strong vacuum that pulls water from the area. A recovery tank holds the water for a short time. A built-in filter (a system that catches small particles) stops dirt from reaching the pump. Flexible hoses let the machine reach different spots quickly. Some models even use a heated solution (warm water mixed with cleaning chemicals) to help loosen tough moisture and contaminants.

The process works by combining vacuum suction with pressure to move water out of porous materials and into the recovery system. In some cases, a warm solution is applied to loosen dried residues and speed up water removal. This method works well whether you are dealing with a sudden flood or performing regular deep cleaning.

Common methods used include:

  • Vacuum Suction: The machine creates low pressure with a motor to pull water and moisture out.
  • Pressure-Assisted Flow: Extra pressure is applied to help remove water faster.
  • Heated Solution Application: Warm water or cleaning chemicals are used to boost cleaning effectiveness.
  • Sub-Surface Extraction: This targets water trapped under flooring or carpets for more complete drying.
  • Combination Systems: Multiple methods are used together to achieve the best water extraction results.

Each method can be adjusted based on the job. This means both small spills and major water damage can be treated with care. With simple, clear processes, these machines help restore your space to a safe and livable condition.

Water Extraction Machine Empowers Peak Efficiency

img-1.jpg

When picking an extraction machine, we look at a few key features that make a real difference. Even though competitors offer many options like Portable Extractors, Truck Mount Systems, and various Flood Water Extraction tools, understanding the details helps you choose the best system for your needs. This is especially true when comparing hydro extraction systems (water-based systems that pull out water) and electric pump extractors (machines with an electric-powered pump).

Here are 6 key points to check:

  1. Motor power (HP): A strong motor pulls water quickly. More horsepower means faster extraction on big jobs, reducing downtime.

  2. Tank capacity (gallons): A larger tank holds more water before needing emptying. This saves time and effort on jobs with heavy water exposure.

  3. Hose diameter (inches): A wider hose moves more water with each pass. This is vital when you are treating very wet areas or large surfaces.

  4. Filtration grade: A high-quality filter stops debris from reaching the pump. This reduces clogs and keeps the machine working well even with dirty water.

  5. Pump type: The type of pump affects the machine's durability and efficiency. Electric pump extractors are known for being reliable in many settings.

  6. Heating options: Some machines feature heated cleaning solutions that break down tough residues. This helps deep clean carpets and surfaces where extra moisture might lead to mold.

Each point is important for choosing a machine that works well for both small spills and major water damage repairs.

Portable Wet Vacuums

These portable wet vacuums are built for quick action during home flood events. They are light and easy to move, making them perfect for cleaning up water spills or small flooded areas. Their small size helps our technicians reach tight spaces in busy homes, so they work well for car detailing and minor water cleanups.

Sub-Surface Extractors (e.g., Water Claw)

Sub-surface extractors work underneath carpets and floors to remove water that may not be visible. We use these machines during flood restorations to reach moisture hidden in hard-to-get areas. They are trusted by many professionals for commercial carpet cleaning and severe water damage because they get to the water that other machines might miss.

Truck-Mount Systems

Truck-mount systems are heavy-duty machines designed for big jobs. They deliver strong, steady water removal in places like office buildings or hotels. With high-powered motors and large recovery tanks, these systems can work continuously to reduce downtime in high-pressure water damage situations.

Battery-Operated Units

Battery-operated units are ideal when you don’t have easy access to power. They are easy to move from one job to another and can be set up quickly in areas that lack a fixed power source. These units are great for small restoration jobs and routine drying in commercial or emergency settings, keeping work on track even in tough conditions.

Renting vs Buying Water Extraction Machines: Making the Right Choice

img-2.jpg

When you need to remove water quickly, you have two clear options. Renting a water extraction machine is a great choice for one-time jobs. With renting, you only pay for the time you use the machine, and the rental company usually takes care of the upkeep. This option is ideal when you have a short-term need and don’t want to invest in a machine you won’t use often.

Buying a water extraction machine is the better option if you face water removal projects frequently. When you own a machine, you benefit from long-term savings and can choose a tool that fits your exact needs. Ownership also lets you customize and secure a warranty (a promise to cover repairs) for future use. While the initial cost might be higher, owning the machine saves money over time and provides consistent performance for every job.

Rental details like pricing and policies are often discussed one-on-one, making renting a flexible option that can adjust to your project’s size and frequency. In contrast, buying gives you direct control over your equipment and ensures it’s always ready when you need it, especially for larger or recurring tasks.

Criterion Rent vs Buy
Cost Rent for occasional jobs; buy for long-term savings
Maintenance Rental includes upkeep; ownership means you handle it
Availability Rentals offer quick access; buying guarantees you have the tool ready
Performance Rentals provide modern models; buying lets you pick a machine for heavy use

Maintenance and Troubleshooting for Your Water Extraction Machine

Regular upkeep helps your water extraction machine work smoothly and avoids costly repairs. When used often, the machine needs simple care to stay reliable. We suggest a few easy tasks to keep it in top shape.

  • Clean the filter after each use so it doesn’t clog.
  • Lubricate the pump (add oil to make it run smoothly) as recommended.
  • Check the hoses and connections for any wear or damage.
  • Look over the recovery tank for cracks or leaks.
  • Test all electrical parts and wiring before long use.

Fixing small issues right away can stop bigger problems later. Here are two quick tips:

  1. Loss of suction: Look at the filter and hose first for blockages. If these are clear, inspect the pump for wear or any problems.
  2. Motor overheating: Make sure the machine isn’t working continuously without breaks. Check if any debris is blocking the airflow or water flow.

These simple checks help extend your machine’s life and keep water extraction running fast when every minute counts.

Price Ranges and Budget-Friendly Water Extraction Machine Options

img-3.jpg

Water extraction machines come in different sizes and prices to meet your needs. Portable entry-level units usually cost between $200 and $500. They are great for cleaning up at home, handling small spills, or dealing with minor floods. These machines work fast and keep costs low.

For larger areas or commercial jobs, mid-range units have more capacity and stronger parts for regular use. They often include extra features to boost performance, making them a smart choice for businesses or property managers.

For the toughest water damage jobs, professional truck-mounted systems range from $5,000 to $15,000. These heavy-duty machines are built for long hours in extreme conditions. Many suppliers now offer flexible financing and payment options, and pricing is clear at checkout so there are no surprises.

Tier Price Range Typical Use
Entry-Level $200–$500 Home cleanups, small spills
Professional $5,000–$15,000 Commercial truck-mounted systems, severe water damage

Safety and Installation Guidelines for Water Extraction Machines

Before you start water extraction, take a moment to follow these safety tips to protect you and your equipment. Check that the electrical grounding is secure and use a GFCI outlet (a plug that quickly cuts power if there is a problem) to help avoid any shocks. Wear gloves and goggles to shield yourself from splashes and flying debris. Set the recovery tank on a stable, level surface so it won’t tip over or spill. Make sure all hoses are attached tightly so they do not leak while you work. Clear the area around the machine so you can move quickly if an emergency happens.

Here are 6 steps for safe equipment deployment and shutdown:

  1. Check the electrical supply and grounding to make sure power is safe.
  2. Attach all hoses carefully and confirm every fitting is secure.
  3. Place the recovery tank in a stable and level spot, away from heavy foot traffic.
  4. Put on your safety gear, such as gloves and goggles, for extra protection.
  5. Ensure there is enough space around the machine for safe operation.
  6. After you’re done, turn off the machine by disconnecting the power, removing the hoses, and storing your equipment safely.

Following these steps helps keep everyone safe while ensuring your equipment is ready to extract water reliably.

Final Words

in the action, we reviewed how water extraction machines work and the key parts that make them effective in a crisis. We broke down the core components, compared features, and explored uses, from home flood response to industrial cleanup. We also weighed the pros and cons of renting versus buying and covered maintenance essentials. A water extraction machine stands out as a vital tool for fast emergency restoration. With clear steps and practical advice, you have a roadmap to make informed choices and get your property back to a safe, livable space.

FAQ

What is a water extraction machine?

The water extraction machine is a tool that uses suction and pressure to pull water out of surfaces. It’s used for flood cleanup, carpet cleaning, and moisture control in homes, cars, and commercial spaces.

Can I buy or rent a water extraction machine for home, commercial, or car use?

The water extraction machine is available for sale or rental. Buying is ideal for long-term needs, while renting fits one-off jobs. Choose a model that suits your water damage scale and specific area.

What type of water extraction tool should I use for cleaning carpets or car interiors?

The water extraction tool for carpets and cars comes with specialized attachments and smaller hoses for tight spaces. It quickly pulls out water, making cleaning and drying surfaces more efficient.

How do I clean up a lot of water quickly?

Cleaning up water quickly calls for a high-suction water extraction machine. It removes excess water fast, so you can follow up immediately with fans and dehumidifiers to dry the area thoroughly.

Is an extractor better than a carpet cleaner?

An extractor removes excess water rapidly, which is key in preventing mold and further damage. A carpet cleaner mainly applies cleaning solutions, making the extractor the better choice for drying out wet surfaces.

What Does Flood Damage Restoration Include: Services and Steps

Standing water in your home is one thing. Knowing what happens next is another. Most homeowners think flood damage restoration means pumping out water and running some fans. The real process involves eight connected phases, from initial assessment and emergency extraction through structural drying, sanitization, mold treatment, contents restoration, odor removal, and complete reconstruction. Each phase builds on the one before it, and skipping steps or rushing through them sets up hidden problems that appear months later. Here’s what actually happens when a professional restoration team shows up, and why the sequence matters as much as the services themselves.

Complete Flood Damage Restoration Services Overview

XDaVWcD3Rd-MGb5HSRQtGg

Flood damage restoration is a multi-phase process that brings water damaged properties back to safe, livable condition.

Professional restoration includes these core services:

  • Initial assessment and documentation – Evaluating water source, damage extent, and creating a restoration plan with detailed photos and moisture readings
  • Emergency water extraction – Removing standing water using professional pumps and vacuums
  • Structural drying and dehumidification – Eliminating moisture from building materials with industrial dehumidifiers and air movers
  • Antimicrobial treatment and sanitization – Addressing health hazards from contaminated water with EPA registered solutions
  • Mold remediation (when needed) – Containing and removing mold growth, then applying preventative treatments
  • Contents cleaning and restoration – Evaluating, cleaning, and salvaging personal belongings
  • Odor elimination – Using advanced extraction techniques and equipment to remove persistent smells
  • Reconstruction and repairs – Rebuilding from minor drywall replacement to complete structural restoration

Professional restoration services coordinate all these phases as one connected plan. You’re not juggling separate contractors or managing a complicated timeline. The restoration team handles scheduling, works directly with your insurance company to document the process, and keeps you updated from first response through final walk through. That single point of contact makes a stressful situation manageable.

Each service builds on the previous phase. Water extraction clears the way for drying. Complete drying allows safe sanitization. Verified sanitization permits reconstruction to start. Skip a step or rush through one, and you’re setting up future problems. Hidden moisture leads to mold, incomplete sanitization creates health risks, and poor documentation complicates insurance claims. The sequence matters.

Emergency Response: Assessment and Water Extraction

4SvD0bbMRcCNE4nRXumopw

Accurate assessment and rapid water removal must happen together during the first 24 to 48 hours. The assessment determines what equipment to use, where to focus extraction efforts, and what materials face immediate risk. Water extraction can’t wait for a perfect plan, but it also can’t proceed blind. Both happen in tandem because every hour of water contact increases damage severity.

The assessment process identifies the water source. Burst pipe, roof leak, external flooding. And it classifies the damage category. Category 1 is clean water from supply lines or rain. Category 2 is gray water from appliances, toilets (urine only), or washing machines, carrying some contamination. Category 3 is black water from sewage backups, rising floodwater, or long standing water that’s grown bacteria. That classification tells the team what protective gear to wear, how aggressive sanitization needs to be, and which materials can be saved. Technicians evaluate affected materials. Hardwood floors respond differently than concrete, drywall soaks up water faster than tile. And they measure moisture levels with specialized meters. Pin type meters probe into materials. Pinless meters scan surfaces without damage. Both create a moisture map showing where water traveled beyond visible wet spots.

Documentation requirements start immediately. Detailed photos capture room conditions from multiple angles. Video walkthroughs record the full scope before any demolition. Moisture readings document baseline conditions. This wall reads 28% moisture content, that subfloor reads 19%. Creating objective proof of damage severity. Written reports itemize affected materials, square footage impacted, and preliminary repair scope. This evidence package supports your insurance claim and protects you if questions arise later about what was damaged and what needed replacement.

Extraction methods vary based on water contamination level and affected materials. Submersible pumps handle deep standing water in basements and crawlspaces, moving hundreds of gallons per hour. Truck mounted extractors pull water from carpets and porous materials with powerful suction. Picture a giant wet vacuum permanently installed in a van parked outside. Wet vacuums reach tight spots around furniture, inside cabinets, and along baseboards. For Category 3 black water, extraction equipment gets sanitized between uses to prevent cross contamination. Hard floors get squeegeed and extracted. Carpets receive weighted extraction where a heavy tool presses water up from padding. The approach adjusts to what you’re removing. Clean rainwater requires less caution than sewage contaminated floodwater.

This combined assessment and extraction phase creates your restoration roadmap and cost estimate while preventing damage from escalating. Water wicks into adjoining rooms, seeps down into lower floors, and climbs up walls through capillary action if you don’t stop it fast. Get the bulk water out, understand what you’re dealing with, and document it properly. That sets up everything that follows.

Structural Drying and Dehumidification in Flood Restoration

4CDDIGTPR8OtI-zVN1L2bw

Surface drying isn’t sufficient. A floor might feel dry to the touch while the subfloor underneath holds moisture. Drywall can look fine while saturated insulation inside the wall cavity breeds mold. Structural moisture must be eliminated from every building material, or you’re leaving problems waiting to appear.

The equipment used creates a controlled drying environment. Commercial air movers, not household fans, position strategically to create airflow across wet surfaces and through building cavities. They look like oversized floor fans tilted at angles, moving hundreds of cubic feet of air per minute. Refrigerant dehumidifiers pull moisture from the air like oversized versions of the small unit you might use in a basement, dumping extracted water into floor drains or collection tanks. Desiccant dehumidifiers handle challenging conditions. Very low temperatures, extremely high humidity, or situations requiring ultra dry air. They use silica gel or other moisture absorbing materials and work when refrigerant units struggle. The combination of air movement and moisture removal turns your property into a giant drying chamber.

The monitoring process involves daily moisture meter readings in walls, floors, and ceilings. Technicians track drying progress by testing the same spots repeatedly. Tuesday the wall reads 22% moisture, Wednesday it’s 18%, Thursday it drops to 14%. When progress stalls or certain areas dry slower than expected, equipment gets repositioned. Air movers redirect toward stubborn wet spots. Additional dehumidifiers get added. Sometimes small holes get drilled to insert warm air into wall cavities where moisture hides. The monitoring tells the team what’s working and what needs adjustment.

Material Type Typical Drying Time
Hardwood floors 3 to 5 days
Drywall 2 to 4 days
Carpet and padding 1 to 3 days
Subfloors 4 to 7 days
Wall cavities 5 to 10 days

Drying continues until moisture readings in affected areas match readings from unaffected areas. If undamaged drywall in your upstairs bedroom reads 8% moisture content, the flood damaged drywall downstairs needs to reach that same level before drying equipment gets removed. Close enough isn’t good enough. Complete drying prevents every problem that comes next.

Sanitization, Disinfection, and Mold Remediation

ggUF_EijTc60bG_trVfZHg

Floodwater carries bacteria, viruses, chemicals, and sewage requiring professional grade sanitization. It’s not just dirty. It’s contaminated with whatever it touched on its journey into your property. Mold begins growing within 24 to 48 hours of water exposure, making it a common flood damage complication even when initial cleanup moves quickly.

The sanitization process applies EPA registered antimicrobial solutions to all affected surfaces, structural components, and remaining building materials. These solutions eliminate pathogens. Bacteria like E. coli and salmonella, viruses, fungi. And prevent microbial growth during the drying phase. Hard surfaces get wiped down or sprayed. Porous materials that are staying get treated with penetrating antimicrobials. Structural wood framing, concrete foundations, and subflooring all receive treatment. The goal is killing what’s there now and creating an environment hostile to new growth.

Sanitization intensity varies by water category. Category 1 clean water from a supply line requires standard cleaning. Think thorough housecleaning with antimicrobial products. Category 2 gray water from a washing machine overflow or toilet backup (urine only) needs antimicrobial treatment because it carries some contamination. Category 3 black water from sewage backups or external flooding demands aggressive disinfection and often requires removing porous materials entirely because they can’t be adequately sanitized. You don’t lightly clean materials that touched raw sewage. You dispose of them.

Mold assessment happens during the drying phase. Visual inspection identifies active growth. Fuzzy spots, discoloration, musty appearance. Air quality testing measures airborne spore counts, comparing affected areas to outdoor baseline levels. Moisture mapping with infrared cameras and meters identifies high risk areas where conditions favor mold growth even if visible growth hasn’t started. If the assessment finds mold, the process expands beyond standard sanitization.

Mold Containment and Removal Process

Physical containment barriers seal off affected areas from the rest of your property. Heavy plastic sheeting creates walls and airlocks. Negative air pressure systems use fans and HEPA filters to pull air from the containment area and exhaust it outside, preventing spores from drifting into clean spaces. Anyone entering wears protective gear. Respirators, gloves, coveralls. Because disturbing mold releases spores into the air.

Removal methods start with HEPA vacuuming to capture loose spores from surfaces. Antimicrobial application treats remaining mold on salvageable materials like framing lumber or concrete. Disposal removes heavily contaminated porous materials. Drywall with visible growth, soaked insulation, carpet padding that sat in water. Because cleaning them adequately isn’t possible. Those materials get bagged inside the containment area and carried out through the airlock to prevent spore spread.

Post Remediation Prevention

Preventative treatments get applied to restored surfaces. Wood framing, concrete, any salvageable material that stays. These create an inhospitable surface chemistry that resists future mold growth. Final air quality testing verifies safe conditions by measuring post remediation spore counts and comparing them to pre remediation baseline and outdoor levels. When counts return to normal ranges, containment comes down.

Moisture control measures prevent future mold growth. That means confirming complete drying, improving ventilation in previously problematic areas, and sometimes adding vapor barriers or upgrading insulation to prevent condensation.

Mold remediation requires certified technicians following IICRC standards in most states. It’s regulated work requiring specific training, and your insurance company typically wants to see proper credentials. Ongoing air quality considerations include cleaning or replacing HVAC filters, sanitizing ductwork if it circulated contaminated air, and sometimes treating the entire HVAC system to prevent spreading residual contamination throughout your property once heating or cooling kicks back on.

Contents Restoration and Salvage Evaluation

HCeGu-nhRrSjXT7LN2iOKw

Restoration teams balance two priorities: protecting your belongings whenever possible while removing items that can’t be safely restored. Not everything survives floodwater contact, especially if the water was contaminated or if items sat wet for days.

The evaluation criteria include water contamination category, exposure duration, material type, and sentimental or replacement value. Clean Category 1 water damages items less than black water sewage. A few hours of exposure is survivable for many materials. Days of soaking ruins most things. Porous materials absorb contamination and hold moisture. They’re harder to restore than hard, non porous items. And sometimes an item’s sentimental value justifies extraordinary restoration efforts even when replacement would cost less.

Commonly unsalvageable flood damaged materials include:

  • Carpet padding (absorbs water and contamination, impossible to adequately dry and clean)
  • Mattresses and box springs (porous materials that harbor bacteria and mold)
  • Stuffed toys, pillows, and cushions (retain moisture and contamination)
  • Books, papers, and cardboard (disintegrate or become permanently warped)
  • Particle board furniture (swells and crumbles when wet, lacks structural integrity after drying)
  • Compromised food items (anything exposed to floodwater or power outage temperature fluctuations)

Pack out services handle salvageable contents by removing them to climate controlled facilities for specialized cleaning, drying, deodorizing, and storage. Your furniture, clothing, dishes, electronics, and other belongings get transported out while demolition and reconstruction happen. Each item gets cleaned using appropriate techniques. Upholstery gets extracted and treated, hard goods get wiped and sanitized, electronics get carefully dried and tested, documents get freeze dried if they’re important. Items stay in storage until your property restoration completes, then they come back clean.

Inventory documentation supports insurance claims by photographing and listing every item removed, its condition, and its restoration status. That detailed record prevents disputes about what was damaged, what got saved, and what required replacement.

Structural Repairs and Reconstruction in Flood Restoration

q-bvBdrARM2OCCuhE3cIVg

Reconstruction begins only after complete drying and sanitization verification. You don’t rebuild on top of moisture or contamination. Moisture readings confirm materials reached safe levels. Sanitization confirms surfaces are treated. Then permanent repairs start.

Typical structural repairs involve removing and replacing water damaged drywall. Cutting out the wet section, usually to four feet high if water wicked up the wall, disposing of it, then installing new drywall. Installing new insulation in walls and floors happens before closing them back up, replacing soaked batts that lost their insulating value. Removing and reinstalling baseboards and trim creates access to wall cavities for drying and allows replacement of damaged wood. Replacing compromised subflooring addresses structural concerns where moisture caused swelling, warping, or delamination. If the subfloor (the layer under your finished flooring) failed, it gets cut out and replaced with new plywood or OSB rated for the installation.

Finish work makes repairs blend into your existing home. Matching drywall texture, whether it’s smooth, orange peel, knockdown, or something custom, requires skill and sometimes several attempts to get right. Painting affected areas to blend with existing surfaces means matching sheen (flat, eggshell, satin) and color, often requiring painting entire walls rather than just patches to avoid obvious differences. Installing new flooring comes in hardwood, tile, carpet, or vinyl depending on what was damaged and what you choose for replacement. Replacing damaged cabinets or fixtures becomes necessary when floodwater reached kitchens, bathrooms, or utility areas.

Restoration scope varies dramatically. Single room repairs might take a few days. Cut out drywall, dry the wall cavity, install new drywall, tape and texture it, prime and paint, reinstall baseboards. Whole house reconstruction requiring weeks involves gutting multiple rooms, replacing subflooring throughout, rebuilding walls, installing new flooring in every space, repainting the entire interior, and replacing all trim and finish work. Coordination of multiple trades determines timeline and final results. Drywall installers, flooring specialists, painters, and carpenters work in sequence, and scheduling those phases efficiently makes the difference between a smooth project and one that drags on with gaps between work crews.
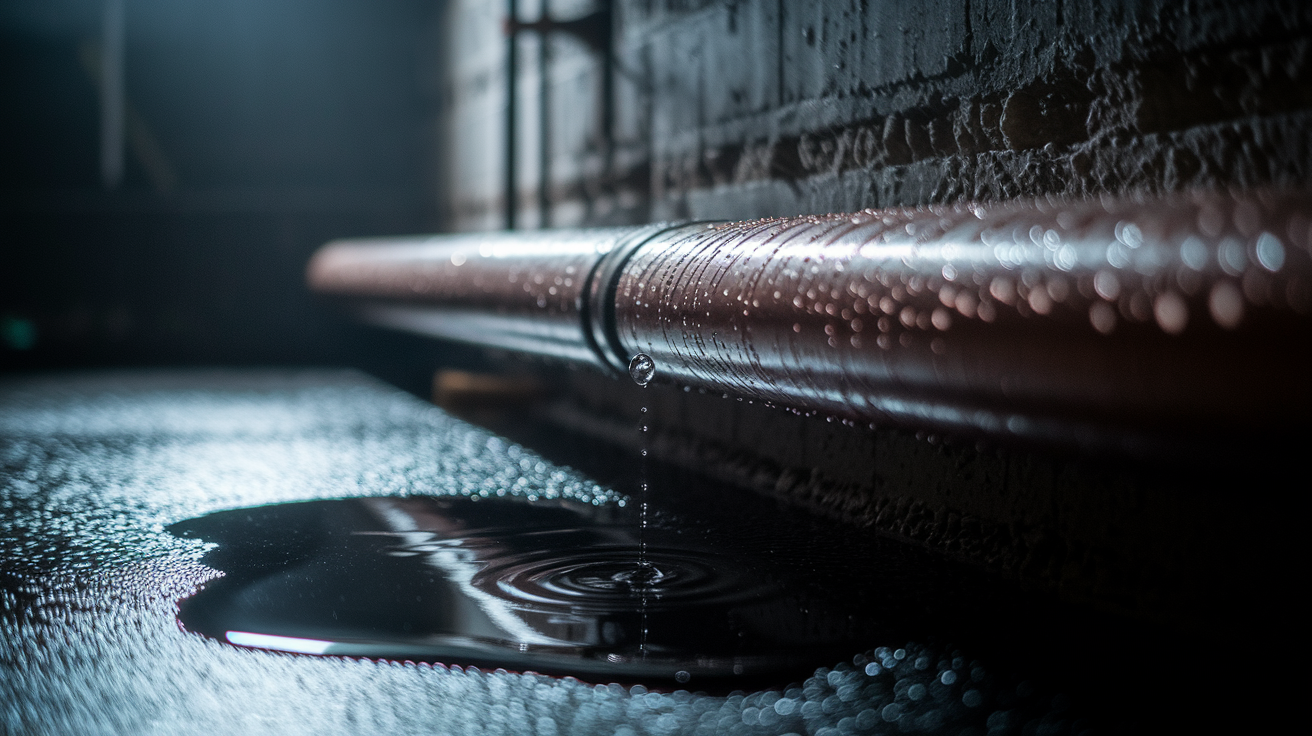
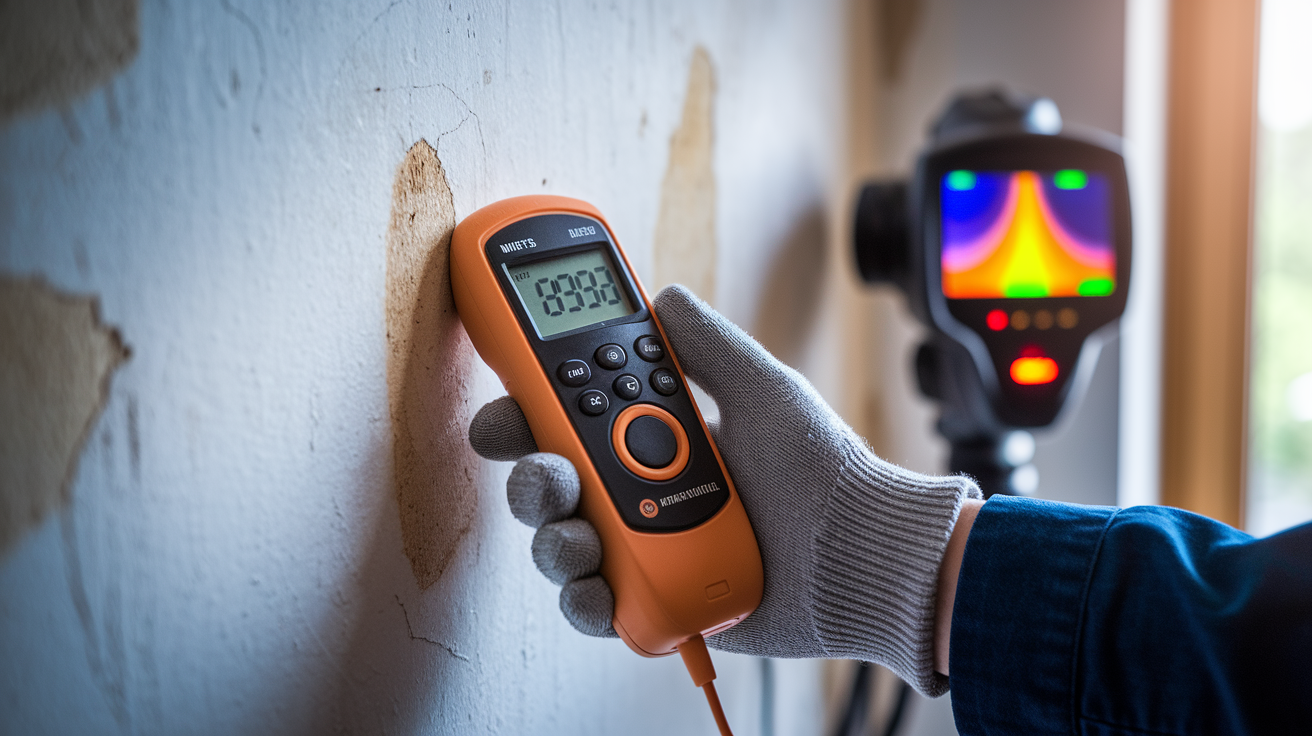
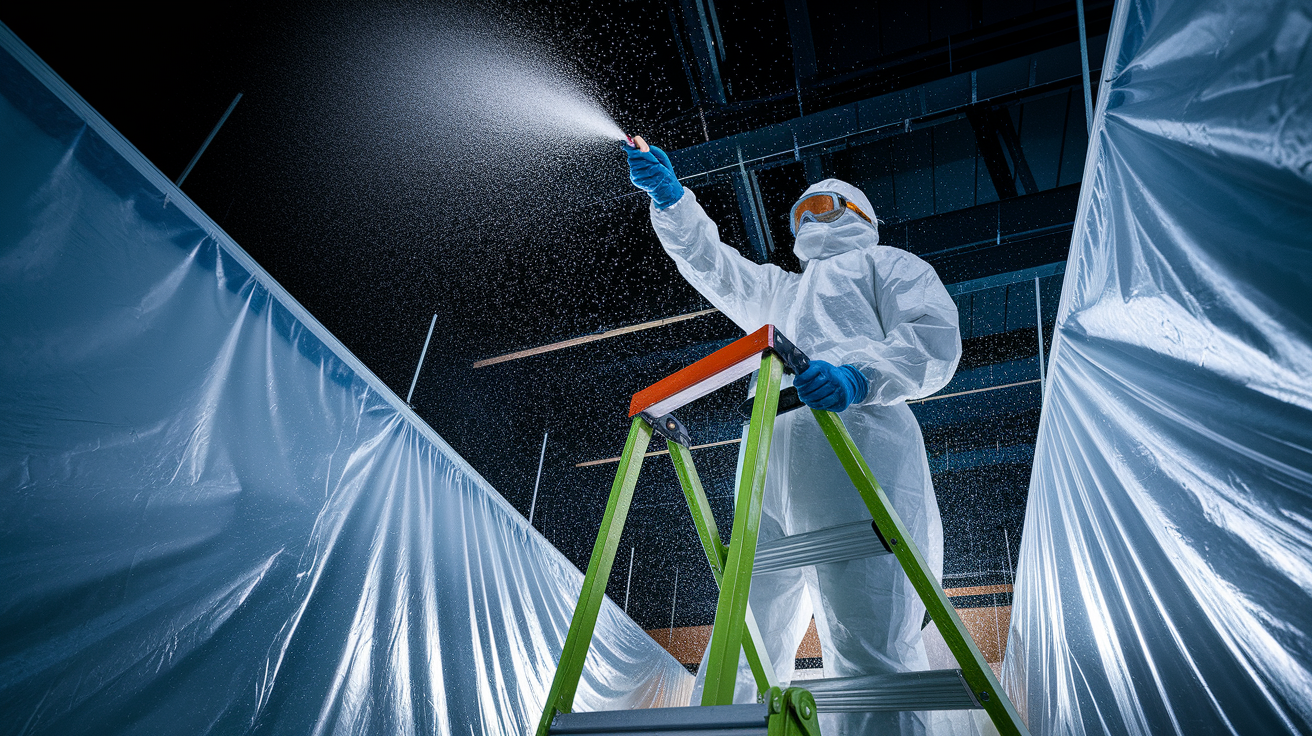
For a complete look at the water damage repair services that handle everything from minor fixes to complete rebuilding, professional restoration companies coordinate the entire scope. The transition from emergency water damage response to permanent repairs happens smoothly when one team manages both phases.

Timeline and Cost Factors for Flood Restoration

mJNRdSzKTaOwxnQSdipLcA

Timeline and cost depend on damage extent, property size, water category, and materials affected. A small Category 1 clean water leak in one bathroom costs and requires less time than Category 3 sewage flooding an entire first floor.

Typical phase durations break down this way. Emergency response and assessment happen on day one. Technicians arrive, evaluate damage, document conditions, and begin extraction. Water extraction takes one to two days for most residential properties, though extensive flooding or difficult access can extend that. Structural drying runs three to ten days depending on materials affected, humidity levels, and how much moisture soaked in. Repairs and reconstruction take three to twenty one days depending on scope. A single room with minor drywall replacement sits at the short end, whole house reconstruction with new flooring and full repainting stretches toward the long end. Severe damage requiring structural work, extensive mold remediation, or major rebuilding can require four to six weeks total from first call to final completion.

Cost factors stack up quickly. Water contamination level drives sanitization requirements. Category 3 sewage costs significantly more to handle than Category 1 clean water because of disposal requirements, protective gear, aggressive disinfection, and material replacement. Square footage affected multiplies labor and material costs. Materials requiring replacement vary widely in price. Luxury vinyl plank costs less than hardwood flooring, basic drywall costs less than custom plaster. Mold remediation needs add containment setup, specialized labor, and air quality testing. Contents restoration requirements depend on how much you own and what percentage can be salvaged versus replaced.

Insurance coverage varies by policy and damage cause. Most homeowner policies cover sudden flooding from internal sources. Burst pipes, appliance failures, roof leaks. But specifically exclude external flood events like rising water from storms or rivers. External flooding requires separate flood insurance through the National Flood Insurance Program or private carriers. Read your policy or call your agent to understand what’s covered before damage happens.

Faster initial response reduces both timeline and total cost by preventing secondary damage. Water that sits for days wicks farther, affects more materials, and creates mold growth requiring expensive remediation. Water removed within hours limits damage to immediately affected areas and materials. The difference between a three day project and a three week project often comes down to how quickly extraction and drying started.

Professional Equipment Used in Flood Damage Restoration

GqqFbdAnTmi_UEz6cKkJ6w

Household fans and shop vacuums can’t match commercial grade restoration equipment in power, capacity, or effectiveness. The difference shows up in drying time, thoroughness, and final results.

Extraction equipment includes truck mounted water extractors with powerful suction pulling hundreds of gallons from carpets, pads, and upholstery in minutes. These units sit permanently installed in service vehicles, running off the truck engine, generating suction consumer machines can’t approach. Submersible pumps rated for hundreds of gallons per hour drop into standing water in basements, crawlspaces, or flooded rooms, moving water out fast. Weighted extraction tools press down on carpets while vacuuming, squeezing water up from padding and backing that regular vacuuming misses.

Drying and monitoring tools create and verify the controlled drying environment. Axial air movers sit low and direct high velocity airflow across floors and up walls, shaped like oversized floor fans angled for maximum surface coverage. Centrifugal air movers handle tighter spaces and direct airflow into wall cavities or under cabinets where axial movers don’t fit. Refrigerant dehumidifiers remove moisture from air continuously, dumping gallons of extracted water daily into drains or collection tanks. Desiccant dehumidifiers work in cold conditions or extremely wet environments where refrigerant units struggle, using moisture absorbing materials that get regenerated with heat. Infrared cameras detect hidden moisture behind walls, under floors, or in ceilings without demolition. Wet materials show up as cooler spots on the thermal image. Pin type moisture meters probe into materials with metal pins, measuring electrical resistance to calculate moisture content. Pinless moisture meters scan surfaces without leaving holes, using radiofrequency or electromagnetic signals to detect moisture depth.

Air quality equipment protects health during and after restoration. HEPA air scrubbers capture mold spores, dust particles, and airborne contaminants, filtering air continuously throughout the drying process. Negative air machines prevent contamination spread by pulling air from work areas and exhausting it outside through HEPA filters, creating lower air pressure in the contained space so air flows in rather than out.

Insurance Documentation Support During Flood Restoration

u8UH6o6ZS9Gjp3zNmRdDqQ

Emergency repairs must proceed quickly, but documentation must be thorough. That tension between speed and detail creates stress, but experienced restoration companies handle both at the same time.

Documentation practices start before any demolition. Comprehensive photo evidence captures room conditions from multiple angles. Wide shots showing overall damage, close ups of specific problems, detail shots of moisture staining or material failure. Video walkthroughs record the full scope, narrating what the camera shows and why it matters. Detailed moisture mapping and readings document exactly where water traveled, how deeply it penetrated, and which materials absorbed it. Written scope of loss itemizes all damaged materials. Square footage of affected drywall, linear feet of wet baseboard, number of doors requiring replacement. Creating an objective damage inventory. Daily progress photos throughout restoration show work completed, materials removed, and conditions improving, creating a timeline of the repair process.

Adjuster coordination happens throughout the project. Restoration companies provide industry standard estimates using software insurance companies recognize, pricing line items the same way adjusters expect to see them. Meeting with insurance adjusters on site allows walkthroughs where the restoration project manager explains technical details, shows affected areas, and answers questions about repair necessity. Answering technical questions about necessary repairs draws on experience. Explaining why subflooring replacement is required, why certain materials can’t be salvaged, or why drying took longer than estimated. Supplying supporting documentation for contested items means providing moisture readings that prove the extent of saturation, photos showing contamination levels, or industry standards that specify when replacement is required versus when cleaning is adequate.

Experienced restoration companies understand insurance processes because they work with adjusters regularly. They speak the language. Talking about Xactimate pricing, IICRC standards, and coverage provisions in ways adjusters recognize. They help homeowners navigate coverage questions while keeping the project moving forward, explaining what’s likely covered versus what might require out of pocket payment, and documenting everything to support the strongest possible claim.

Final Words

Flood damage restoration starts with urgent water extraction and assessment, then moves through structural drying, sanitization, and mold prevention before reaching permanent repairs.

Each phase builds on the one before it. Skip the drying step, and mold shows up. Rush past sanitization, and health risks stick around. Cut corners on finish work, and the repairs look obvious for years.

Professional teams coordinate the entire sequence so you’re not juggling contractors or guessing what happens next. They document everything for insurance, use industrial equipment that actually dries hidden moisture, and handle what does flood damage restoration include from first response to final paint.

The goal is simple: get your home safe, dry, and back to normal.

FAQ

What are the main steps in water damage restoration?

The main steps in water damage restoration include initial assessment and documentation, emergency water extraction, structural drying with dehumidifiers and air movers, antimicrobial sanitization, mold remediation when needed, contents cleaning, odor removal, and reconstruction repairs to return your property to pre-loss condition.

Is water damage restoration worth it?

Water damage restoration is worth it because professional services prevent secondary damage like mold growth and structural deterioration, coordinate all repair phases under one team, work directly with insurance companies for claims support, and ensure your home is safely dried, sanitized, and rebuilt to livable condition.

What’s the difference between remediation and restoration?

The difference between remediation and restoration is that remediation focuses on stopping active damage and removing hazards like water, mold, or contaminants, while restoration involves the complete rebuilding process including drywall replacement, flooring installation, painting, and returning your property to its original or better condition.

How long does water damage restoration take?

Water damage restoration takes anywhere from one week for minor damage to four to six weeks for severe flooding, depending on property size, water contamination category, extent of structural damage, and whether mold remediation is required, with emergency response beginning within one to two hours.

What type of water damage requires professional sanitization?

Professional sanitization is required for Category 2 gray water from appliances and Category 3 black water from sewage or flooding, as these contain bacteria, viruses, chemicals, and pathogens requiring EPA-registered antimicrobial treatment and possible material removal to protect health and prevent microbial growth.

Can carpet and furniture be saved after flood damage?

Carpet and furniture can sometimes be saved after flood damage depending on water contamination category, exposure duration, and material type, but carpet padding, mattresses, stuffed items, and particle board furniture are typically unsalvageable and require disposal regardless of cleaning attempts.

What equipment do professionals use for structural drying?

Professionals use truck-mounted water extractors, submersible pumps rated for hundreds of gallons per hour, axial and centrifugal air movers creating high-velocity airflow, refrigerant and desiccant dehumidifiers, infrared cameras detecting hidden moisture, and moisture meters tracking drying progress throughout affected building materials.

Does homeowners insurance cover flood damage restoration?

Homeowners insurance typically covers flood damage from internal sources like burst pipes or appliance failures but excludes external flooding from storms or rising water, which requires separate flood insurance policies, though restoration companies help document claims and coordinate with adjusters regardless of coverage type.

Crawlspace Drying Equipment That Eliminates Moisture Fast

0

Think a box-store dehumidifier will save a wet crawlspace? Think again.
Crawlspace wood and subfloor must be below 20% moisture before mold and joists warp.
That takes LGR or desiccant dehumidifiers, high-volume air movers, pumps, lay-flat ducting, vapor barriers, and daily moisture checks.
This post walks you through the right equipment, where to place it, and the simple steps we use to stop more damage, finish repairs, and document everything for insurance.

Core Overview of Crawlspace Drying Equipment and What You Need to Know

jLE-NZWzTmm2oLCKwphfag

Crawlspace drying equipment pulls moisture out of wood framing, subfloors, and insulation after leaks, floods, or plumbing failures. You’re trying to get structural materials below 20% moisture content before mold sets in or joists start warping. This takes commercial grade dehumidifiers, high volume air movers, pumps for standing water, and monitoring tools to track progress every day. A residential unit made for a bedroom won’t cut it. The equipment needs to handle tight spaces, high humidity, and sometimes cold temps where consumer models just shut down.

IICRC S500-2021 standards tell you to focus on drying structural wood and building materials, not the soil under a vapor barrier. Many crawlspaces qualify as confined spaces under OSHA 29 CFR 1926 Subpart AA, which means you need negative pressure established before you enter, proper PPE, and photos of any hazards before work starts. Negative pressure gets created by placing an air mover in front of an exterior vent to pull air out, not by running a filtration machine. Once it’s safe to go in, you pump out standing water, pull wet debris and insulation, then set up dehumidification and airflow equipment aimed at the wood above.

Here’s what you need for a real crawlspace drying job:

Dehumidifiers: low grain refrigerant (LGR) or desiccant units rated 50 to 200+ pints per day, picked based on temperature and how wet things are

Air movers and fans: centrifugal or axial models pushing 1,000 to 4,000 CFM to move moisture off surfaces and into dehumidifier intakes

Submersible and condensate pumps: to pull standing water out and handle dehumidifier discharge when gravity drains aren’t an option

Monitoring tools: penetrating moisture meters, digital hygrometers, infrared thermometers to document moisture content and humidity daily

Ducting and distribution gear: lay flat ducting with perforations to deliver dry air where dehumidifiers can’t physically fit

Vapor barrier materials: 6 to 20 mil polyethylene sheeting, tape, and fasteners to control evaporation from wet soil

Choosing the Right Crawlspace Dehumidifier and Capacity Ratings

aXdma0aKTxeV7uJA-FQYEQ

You’ve got three main dehumidifier types. Standard refrigerant, low grain refrigerant (LGR), and desiccant. Standard refrigerant units work fine in warm, humid conditions but lose steam below 65°F. LGR dehumidifiers use a second coil pass to pull more moisture from the air and handle cooler crawlspaces better, which is why restoration contractors lean on them. Desiccant dehumidifiers use a rotating wheel of moisture absorbing material and function in temps as low as 33°F. That makes them your best bet for unheated crawlspaces in winter or cold climates where refrigerant units would ice up and quit.

Capacity gets measured in pints per day, rated under standardized AHAM test conditions (usually 80°F and 60% RH). A 50 pint unit will pull roughly 50 pints of water in 24 hours under those conditions, but real world performance changes with temperature, airflow, and starting humidity. For crawlspace sizing, figure 1 dehumidifier per 500 to 1,000 square feet of wet area, depending on how bad it is. Light dampness in a 600 square foot crawlspace might dry with a 50 pint LGR unit and a few air movers in 3 to 5 days. Severe saturation in that same space may need a 120 pint commercial unit or two smaller LGRs running at once, plus pulling standing water and yanking wet insulation. That could take 1 to 3 weeks to hit safe moisture levels.

When you’re picking a dehumidifier, confirm these five specs before you deploy it:

Operating temperature range and automatic defrost features

Condensate handling method (gravity drain port, internal reservoir size, or condensate pump connection)

Amperage draw so you know your power circuit can handle it without tripping breakers

AHAM or manufacturer pints per day rating, ideally tested at crawlspace type conditions

Filter type and replacement schedule (washable filters cut operating costs on long jobs)

Dehumidifier Type Ideal Conditions Typical Capacity Range
Standard Refrigerant Warm, high humidity spaces above 65°F 30–70 pints/day
Low Grain Refrigerant (LGR) Cool to moderate temps, faster drying required 70–150 pints/day
Desiccant Cold crawlspaces below 60°F, winter jobs 50–200+ pints/day

Air Movers, High CFM Fans, and Evaporation Enhancement in Crawlspaces

MBOMH7JmS96RIgeyOl6mhw

Air movers create airflow across wet wood surfaces, which speeds up evaporation by moving moisture loaded air toward the dehumidifier intake. Without airflow, a dehumidifier alone pulls moisture slowly because the air near the wet surface gets saturated and stops evaporating. Industry guidelines say one air mover per room (in this case, one per crawlspace) plus one more for every 100 to 150 square feet of wet subfloor or joist surface. CFM ratings (cubic feet per minute) run from 1,000 to 4,000 depending on fan type and speed setting. Axial fans deliver high CFM in a focused column of air and work well in crawlspaces with clear sight lines. Centrifugal air movers produce pressure and throw air in multiple directions, making them better for low clearance or obstructed spaces where you need airflow to wrap around posts and ductwork.

Placement matters just as much as CFM. Position air movers so airflow runs parallel to the vapor barrier and pushes moisture toward the dehumidifier. Don’t aim fans at foundation walls where airflow just bounces back. In long or divided crawlspaces, place units every 8 to 15 linear feet to prevent dead air pockets where moisture hangs around. If the dehumidifier sits outside the crawlspace because of clearance limits, use lay flat ducting with holes cut every 2 feet to distribute dry air along the subfloor and joists. Check that total air mover CFM doesn’t overwhelm dehumidifier intake capacity. Running four high speed air movers on a single 70 pint unit forces the dehumidifier to process more air than it can dehumidify, which slows moisture removal instead of speeding it up.

Pumps, Condensate Handling, and Drainage Planning for Crawlspace Drying

q5E_f3bNRXiTbykBEHJkxQ

Standing water has to come out before drying equipment can do anything. Submersible utility pumps move 2,000 to 4,000 gallons per hour and handle pooled water from burst pipes, heavy rain, or failed sump systems. Pick a pump with a float switch so it shuts off automatically when the water level drops, and run discharge hoses to a sump pit, exterior drainage point, or storm drain. Never back into the crawlspace itself. For debris filled water, use a solids handling or trash pump rated for small particles.

Once standing water’s cleared, you still need to manage condensate from the dehumidifier. If the unit sits above a sump pit or floor drain, gravity drainage works. Run a hose from the dehumidifier drain port to the pit. If gravity drainage isn’t possible because the dehumidifier is lower than the drain or separated by distance, install a condensate pump. These small pumps cost $120 to $400, connect to the dehumidifier’s drain port, and lift condensate up to 15 vertical feet through narrow tubing. Most include a float switch to prevent overflow.

Here’s how to set up safe and reliable drainage:

  1. Pump out all standing water using a submersible pump, starting at the lowest point in the crawlspace.
  2. Route pump discharge hoses outside the foundation and away from the building to prevent water coming back in.
  3. Connect the dehumidifier’s condensate drain to a gravity line or condensate pump, depending on elevation and access.
  4. Secure all hoses with zip ties or clamps to prevent disconnection during operation.
  5. Check condensate flow daily and clean float switches or pump intakes if flow slows or stops.

Vapor Barriers, Encapsulation Materials, and Crawlspace Insulation Drying

Vk_vUwKJQ-igE2aiiD8HSQ

A vapor barrier limits moisture evaporation from wet soil, which matters because you’re drying the wood structure above, not the ground below. If an intact 6 mil or thicker polyethylene barrier already covers the soil, leave it in place and repair any tears or gaps with waterproof construction tape. Don’t remove or puncture a working vapor barrier during drying. If no barrier exists or the current one’s badly damaged, install a temporary 6 mil sheet, overlapping seams by at least 6 inches and taping them to reduce soil moisture entering the air. After drying wraps up, upgrade to a 12 to 20 mil crawlspace grade liner for long term protection.

Wet batt insulation between floor joists holds moisture for weeks and becomes a mold source if you don’t pull it. Yank down any fiberglass or cellulose insulation that’s visibly wet, compressed, or stained. Bag it and dispose of it properly. Closed cell spray foam insulation on rim joists can usually stay put unless it’s saturated or contaminated. Once the crawlspace is dry, you can re-insulate with new batts or switch to foam board or spray foam for better moisture resistance.

Vented crawlspaces complicate drying because outdoor air brings in humidity that fights your dehumidification. If you’re running a dehumidifier, block foundation vents temporarily with foam board or plastic sheeting to create a controlled drying environment. After drying, many contractors recommend permanent encapsulation. That involves sealing vents, installing a continuous vapor barrier, insulating the foundation walls instead of the floor, and conditioning the crawlspace with a permanent dehumidifier or HVAC tie in. This approach prevents recurring moisture issues and improves energy efficiency.

Barrier Type Recommended Thickness Use Case
Temporary poly sheeting 6–10 mil Short term drying jobs, emergency moisture control
Permanent encapsulation liner 12–20 mil Long term moisture prevention, sealed crawlspace systems

Monitoring Tools: Moisture Meters, Hygrometers, and Remote Alerts

lRbwNfr6TK2GsVu9CQEhpQ

You can’t confirm drying progress without measuring it. A penetrating moisture meter with pins or probes reads moisture content inside wood joists, subfloors, and sill plates. Readings above 20% tell you the material’s still too wet. Take readings in at least four quadrants of the crawlspace, each covering roughly 100 to 150 square feet, and label them A, B, C, D on your moisture map. Document readings every 12 to 24 hours and photograph the meter display with date and time stamps visible.

A digital hygrometer tracks relative humidity and temperature in the crawlspace air. You want relative humidity between 30% and 50% during active drying, ideally 30% to 45% for long term mold prevention. Many hygrometers also calculate dew point and grains per pound (GPP), which help you understand vapor pressure and drying efficiency. Place hygrometers near the dehumidifier and at the far end of the crawlspace to confirm airflow is distributing dry air evenly. Some units offer Bluetooth or Wi-Fi connectivity so you can monitor conditions remotely and get alerts if humidity spikes or equipment stops.

You need these monitoring tools for crawlspace drying:

Penetrating moisture meter with calibrated scales for wood and concrete

Digital hygrometer or psychrometer with data logging or remote access

Infrared thermometer to check surface temps when using heat drying

Manometer to document negative pressure if contaminated water is present

Installation and Placement Best Practices for Crawlspace Drying Equipment

H9llaYWdQzyDFlzKislDrA

Power all equipment using GFCI protected circuits to prevent shock hazards in wet conditions. Run extension cords from outdoor outlets or a panel inside the home, routing them through access hatches or crawlspace vents. Don’t lay cords directly on wet vapor barriers. Use cable clips or suspend cords from joists to keep them dry. If multiple dehumidifiers and air movers exceed 15 amps total, split the load across separate circuits or use a power distribution box to prevent breaker trips.

Elevate dehumidifiers and air movers off the vapor barrier using cinder blocks, plastic platforms, or equipment stands. This keeps intakes and motors clear of residual water and prevents damage from accidental splashing. Place the dehumidifier on the warmer side of the crawlspace if you can, since warmer air holds more moisture and improves removal efficiency. Position air movers to aim airflow along the subfloor and joists, directing moist air toward the dehumidifier intake. If the crawlspace is too low for the dehumidifier to fit, set it outside the access opening and duct dry air into the space using 6 to 12 inch lay flat ducting with perforations or holes cut every 2 feet to distribute airflow.

Establish negative pressure before opening crawlspace access by placing an air mover in front of an exterior vent to exhaust air out. This prevents mold spores, odors, and contaminated air from flowing into living spaces. Confirm negative pressure with a manometer if sewage or category 3 water is involved. Once the space is safe to enter, proceed with equipment setup.

Here’s the safe and effective installation process:

  1. Confirm crawlspace meets confined space safety requirements and establish negative pressure before entry.
  2. Route GFCI protected power from a dedicated circuit or distribution box to avoid overloads.
  3. Elevate all equipment on blocks or platforms to keep motors and intakes above residual water.
  4. Position the dehumidifier centrally or on the warmer side, with clear access to its condensate drain.
  5. Place air movers every 8 to 15 feet, directing airflow parallel to vapor barriers and toward dehumidifier intakes.
  6. Install ducting if equipment can’t fit inside the crawlspace, and cut holes every 2 feet for even air distribution.

Rental vs Purchase: Cost Ranges and ROI for Crawlspace Drying Equipment

JjyXRPezRyyUcIHP5yCe_g

Rental rates for commercial crawlspace drying equipment typically run $40 to $150 per day for LGR or desiccant dehumidifiers, depending on capacity and local market. Air movers rent for $10 to $30 per day, and submersible pumps cost $20 to $60 per day. Weekly rates usually equal three to five times the daily rate, so a one week job renting one LGR dehumidifier, two air movers, and one pump might total $400 to $700 before tax and delivery fees. For a single emergency job, renting makes sense because you avoid the upfront cost of buying equipment you may never use again.

Purchase prices vary widely based on quality and capacity. Residential dehumidifiers rated 30 to 70 pints per day cost $200 to $700 and work for light moisture control, but they lack the durability and low temperature performance needed for heavy or cold crawlspace jobs. Commercial LGR units range from $1,000 to $3,500 and are built for continuous operation, faster drying, and colder conditions. Professional air movers cost $100 to $500 each. Submersible pumps run $80 to $400, and condensate pumps cost $120 to $400. If you’re a contractor running multiple drying jobs per year, purchasing pays for itself in 3 to 10 jobs depending on rental rates in your area.

Equipment Type Average Rental Cost Average Purchase Price
LGR/Commercial Dehumidifier $40–$150/day $1,000–$3,500
Air Mover/Fan $10–$30/day $100–$500
Submersible/Condensate Pump $20–$60/day $80–$400

For homeowners dealing with recurring moisture problems, buying a permanent crawlspace dehumidifier rated 50 to 70 pints per day and installing it with a condensate pump and vapor barrier system prevents future damage and reduces energy loss. The equipment investment of $500 to $1,200 plus installation labor typically pays back in 2 to 4 years through avoided repair costs and lower HVAC bills.

Troubleshooting and Common Mistakes When Using Crawlspace Drying Equipment

7jiOS-QQR8yj0tN3wFTCWw

Undersizing the dehumidifier is the most common mistake. A 30 pint residential unit can’t keep up with a 1,200 square foot crawlspace that has standing water and wet insulation. The unit runs continuously but makes little progress because it was designed for a bedroom, not a high moisture confined space. Match dehumidifier capacity to the square footage and moisture severity, and use LGR or desiccant models for crawlspaces below 65°F.

Using air movers without a dehumidifier moves moisture around but doesn’t remove it. The crawlspace feels drier temporarily because air is circulating, but humidity stays high and materials remain wet. Always pair airflow equipment with dehumidification. On the flip side, running too many high CFM air movers on a single dehumidifier overwhelms its intake capacity and reduces moisture removal efficiency. Balance airflow with dehumidifier capacity.

Failing to remove wet insulation or debris extends drying time and increases mold risk. Wet fiberglass batts, cardboard boxes, wood scraps, and organic debris all hold moisture and release it slowly into the air. Remove contaminated or saturated materials before starting equipment. Improper condensate routing is another frequent error. Discharging dehumidifier condensate into the crawlspace or onto the vapor barrier defeats the purpose of drying. Always route condensate to a sump pit, exterior drain, or condensate pump that lifts water outside the foundation.

Errors to avoid during crawlspace drying:

Choosing consumer grade dehumidifiers for commercial scale moisture loads

Running air movers without dehumidifiers in humid climates

Failing to remove wet insulation, debris, or standing water before starting equipment

Discharging condensate into the crawlspace instead of routing it to a drain or sump

Final Words

You set the dehumidifier and aim an air mover along the joists, feeling the room start to change. We covered what gear to use: dehumidifiers (LGR vs desiccant), air movers, pumps, and vapor barriers, plus how to size, place, and drain them safely.

We also walked through monitoring, installation steps, rental vs purchase choices, and common mistakes.

Use documented moisture readings, photos, and a clear plan. With the right crawlspace drying equipment, you’ll stop hidden moisture and get the space back to normal.

FAQ

Q: What is the best way to dry out a crawl space?

A: The best way to dry out a crawl space is to stop the water source, extract standing water, then run commercial dehumidifiers and air movers, install or repair a vapor barrier, and monitor moisture until wood is below 20%.

Q: Are crawlspace dehumidifiers worth it?

A: Crawlspace dehumidifiers are worth it when humidity risks mold, rot, or musty smells; they protect framing and insulation. Pair with a vapor barrier or encapsulation and proper sizing for efficient, long-term results.

Q: Can I put a dehumidifier in my crawl space without encapsulation?

A: You can put a dehumidifier in a crawl space without encapsulation, but it’ll work harder and costs more. Moisture from soil and vents may persist. Encapsulation or at least a ground liner improves effectiveness.

Q: What is the average cost of a crawl space dehumidifier?

A: The average cost of a crawl space dehumidifier ranges widely: $200–$700 for residential units, $1,000–$3,500 for commercial LGR models. Renting runs about $40–$150 per day depending on unit size.