Home Blog Page 8

Mold Exposure Symptoms And When To See A Doctor: Stay Well

0

Have you noticed a cough that just won't go away or constant congestion that feels worse indoors? It might be mold exposure (the growth of mold in your home that can cause health issues). When your symptoms get worse inside, it could be a sign that something isn’t right with your health. In this post, we list the common signs of mold exposure and explain when you should see a doctor. We’ll help you spot these clues early so you can act quickly and keep your family safe.

Recognizing Mold Exposure Symptoms and Doctor Visit Triggers

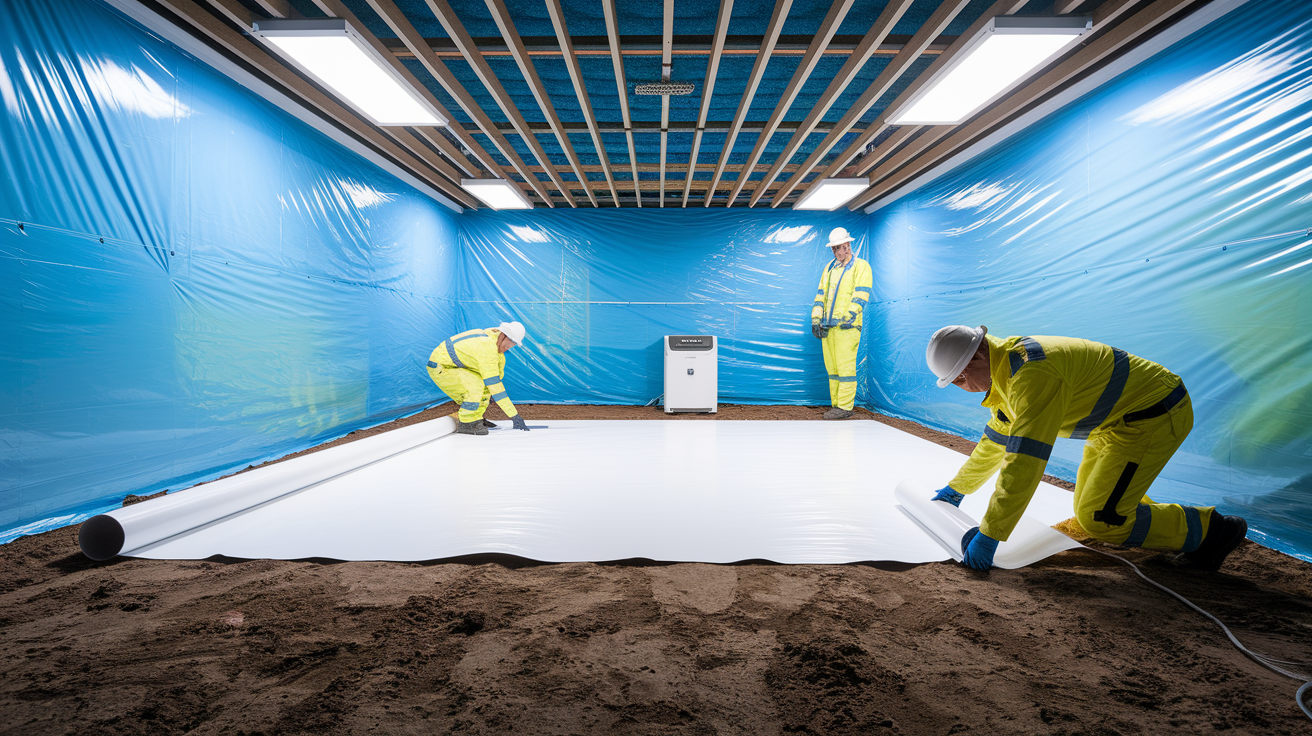
Mold in your home can affect your health in many ways. You might notice a little congestion or a cough at first. When you go outside, symptoms may lessen, only to return when you step back indoors. This pattern could mean that mold is the cause. Recognizing these signs early can help you act before the problem grows.

Here are some symptoms to watch for:

  • Constant stuffy nose that just won't clear
  • Coughing that keeps you up at night or affects your day
  • Frequent headaches without a clear reason
  • Itchy, red, or watery eyes
  • Trouble breathing or a tight feeling in your chest
  • A sudden high fever
  • Feeling confused or out of it when indoors
  • Unexplained tiredness or mood changes

If you or a loved one begins to have strong symptoms like trouble breathing, a high fever, or confusion, please get medical help right away. Quick treatment not only protects your health, but it also helps you decide what to do about the mold in your home.

Respiratory Distress Markers and Allergic Signals from Mold Exposure

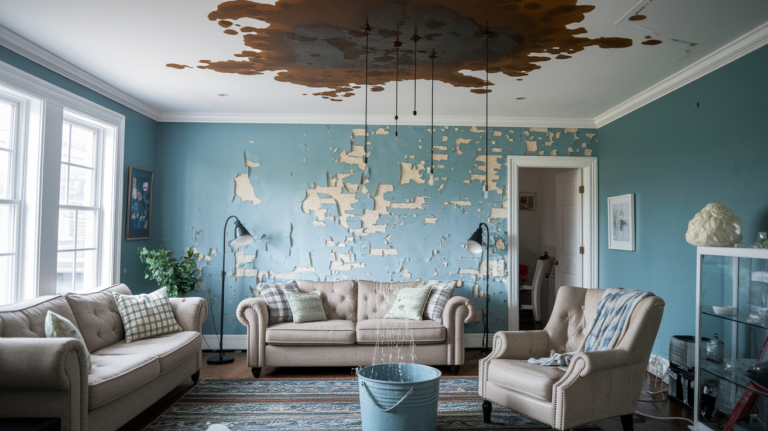
img-1.jpg

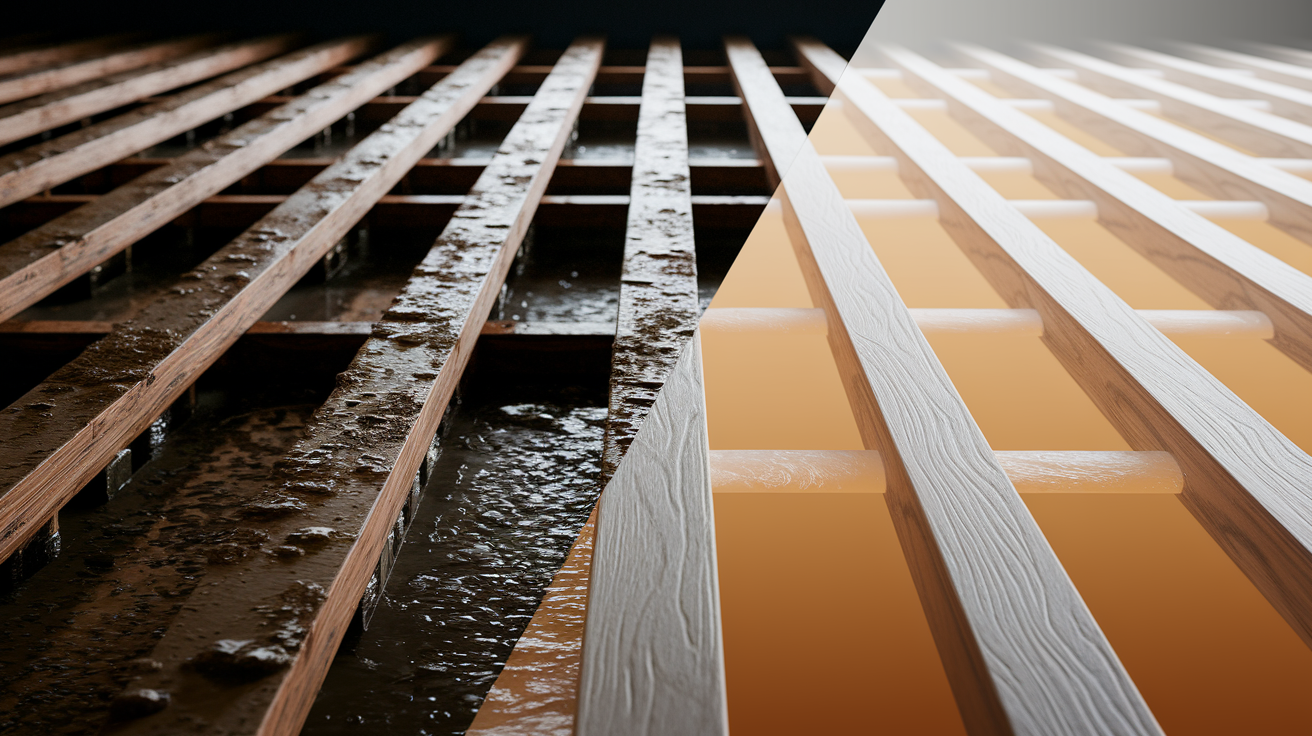
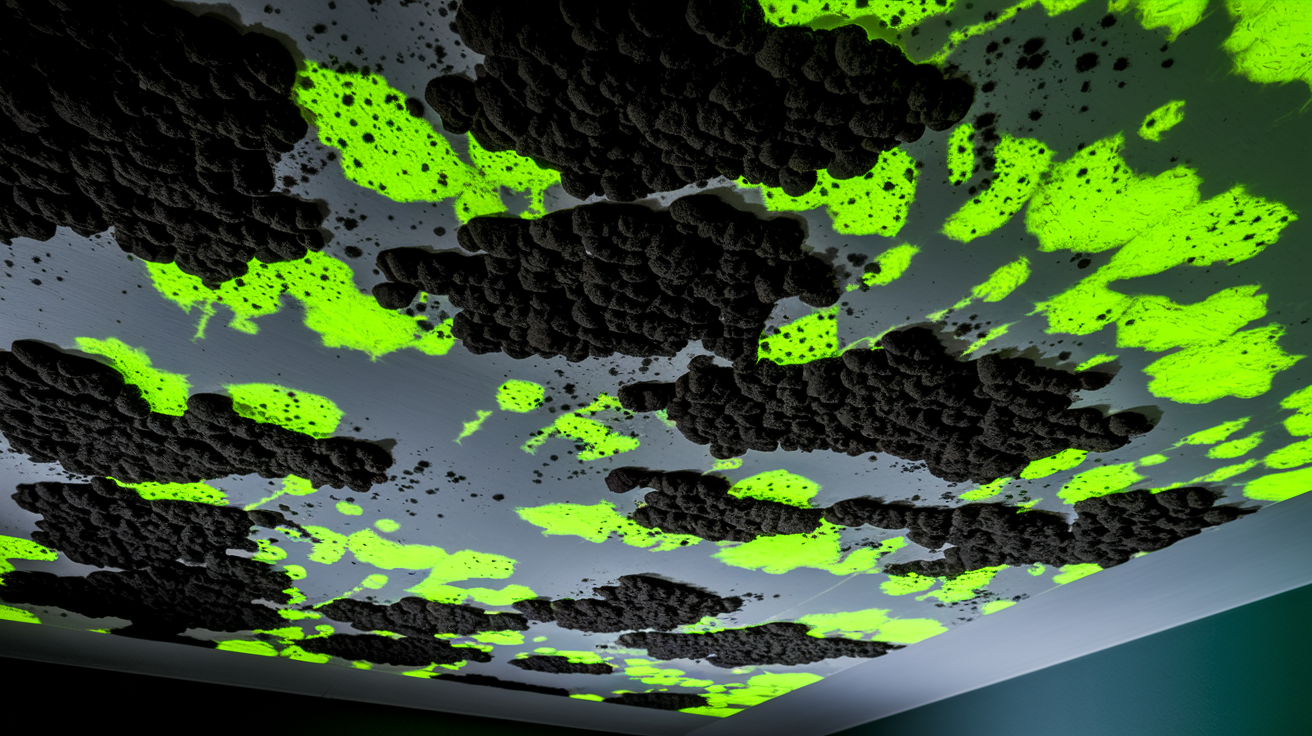
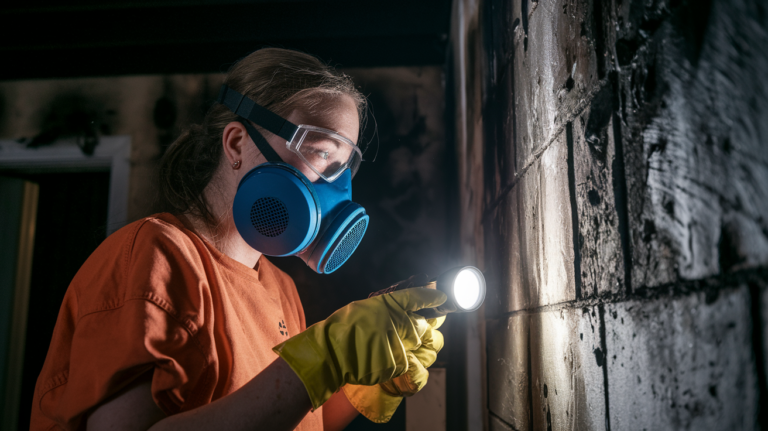
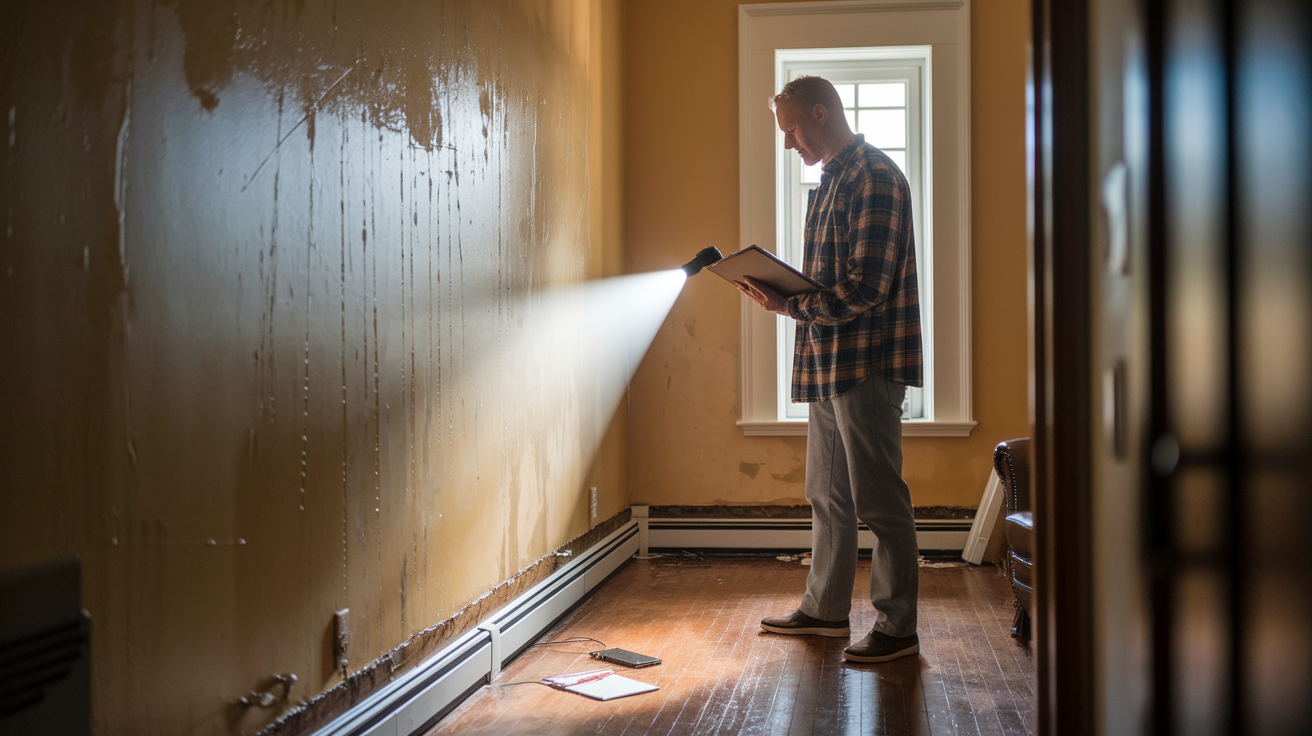
Indoor mold can irritate your airways and make breathing difficult. You may start sneezing a lot, feel like your nose is blocked, or sense pressure around your sinuses that makes your face feel heavy. A dry, lingering cough might stop you from sleeping well. When these signs happen often, they are more than just a seasonal cold, they suggest that mold in your home is affecting your breathing.

You might also notice your eyes becoming red, itchy, or watery. Some people feel a fullness in their ears or hear a slight ringing, which can happen when the lining inside your nose (mucosa) swells. Unlike typical seasonal allergies that come and go, these eye and ear issues tend to stick around with constant mold exposure. Recognizing the difference between common allergies and mold-related reactions is key to getting the proper care.

Systemic Fungal Toxicity Signs and Severe Health Indicators

Breathing in a lot of mold spores can do more than just affect your lungs. You might feel very tired, get strong headaches, feel dizzy (vertigo), or notice changes in your memory and mood. These signs happen because your body is reacting to mycotoxins (toxic substances made by mold). When you see these symptoms, it is a warning that mold exposure may be harming you.

Mycotoxins can also make other parts of your body inflamed. You might experience joint pain or a foggy mind that makes daily tasks hard. Your muscles may ache and your thoughts may feel cloudy. Catching these signs early can help prevent more damage. If your symptoms continue or get worse, please get help from a doctor immediately.

High-Risk Demographics and Long-Term Mold Exposure Consequences

img-2.jpg

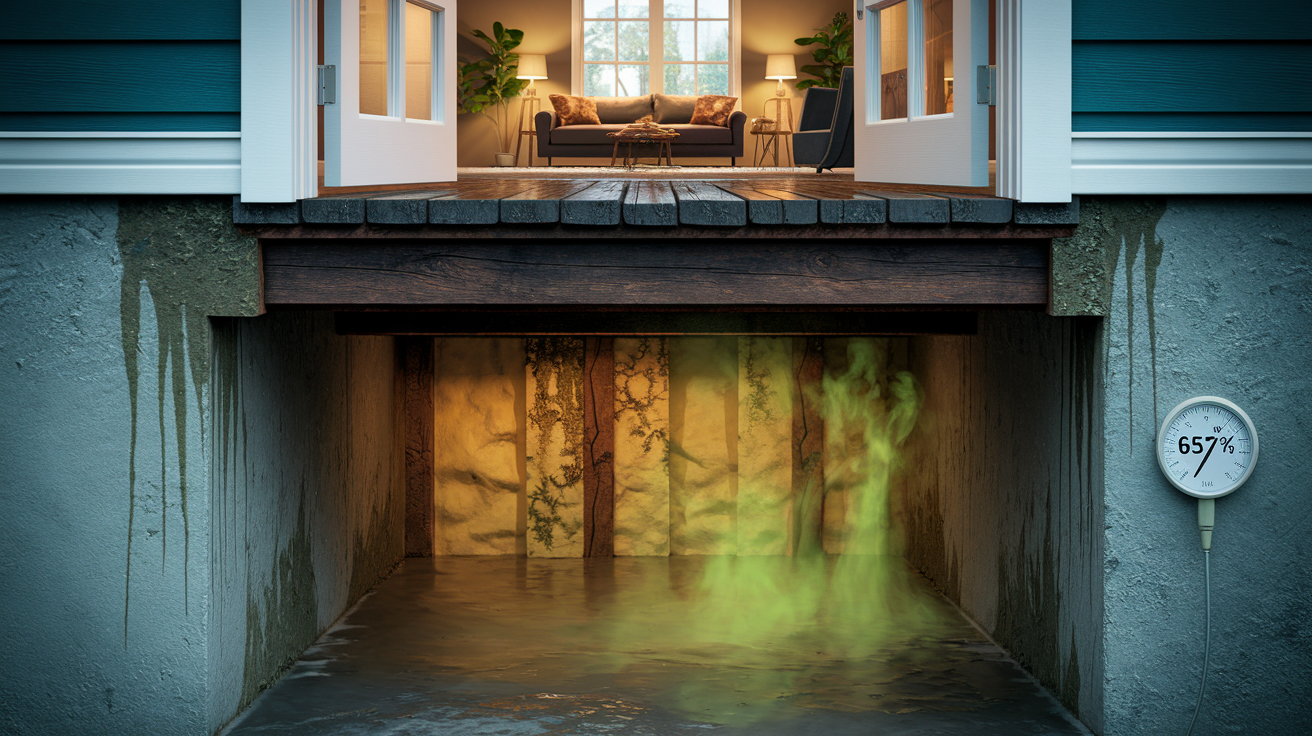
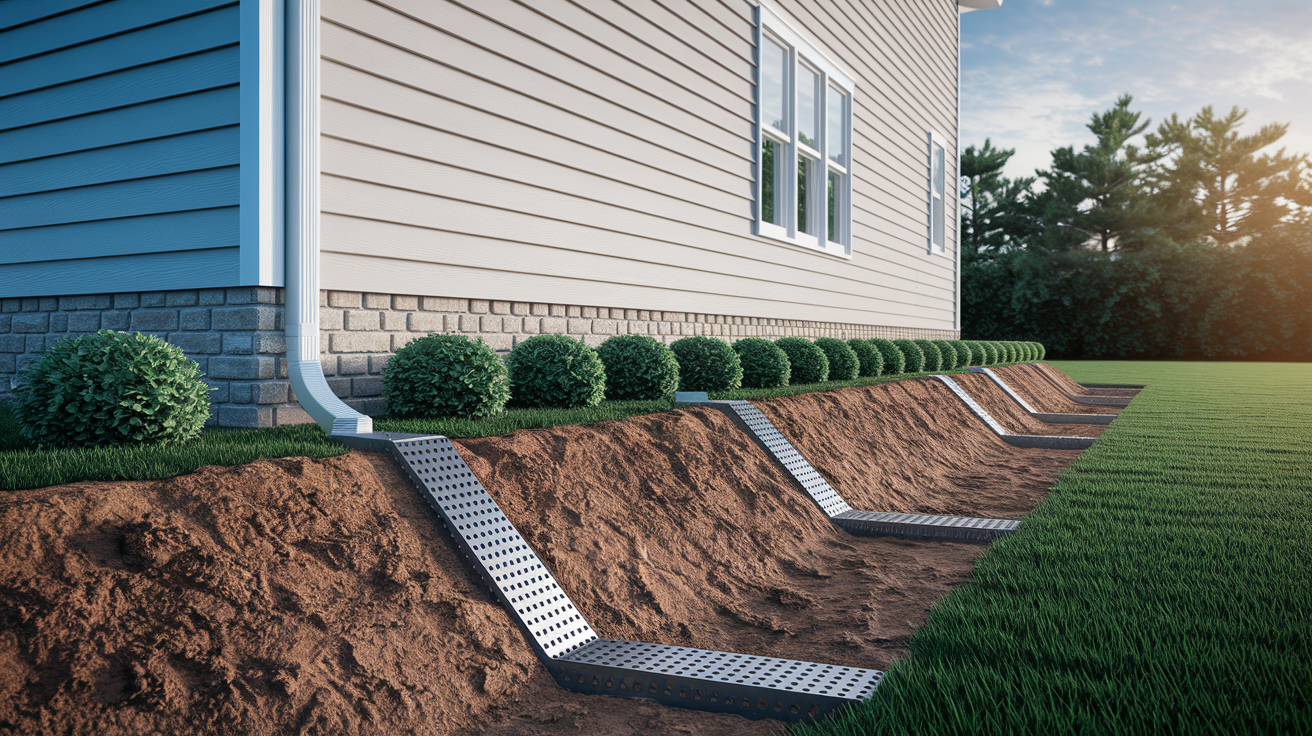
Mold can be especially dangerous for some people. Children, older adults, and those with breathing problems like asthma (sensitive airways) or COPD (trouble breathing) are more likely to have a strong reaction. Even a little mold can cause more than just a simple allergy.

Here are some high-risk groups to watch for:

  • Young children with developing immune systems
  • Older adults with lower immunity and lung strength
  • People with asthma whose airways are already sensitive
  • Individuals with COPD who already face breathing challenges
  • Anyone with a weak immune system (body defense) prone to mold infections
  • Those who have had frequent respiratory infections

Being around mold for a long time can make breathing problems worse. Over time, breathing in mold spores might lead to repeated bronchitis and can harm lung function further. This lasting exposure may make everyday activities feel more difficult. It’s important to address mold quickly to keep your home safe and protect your health.

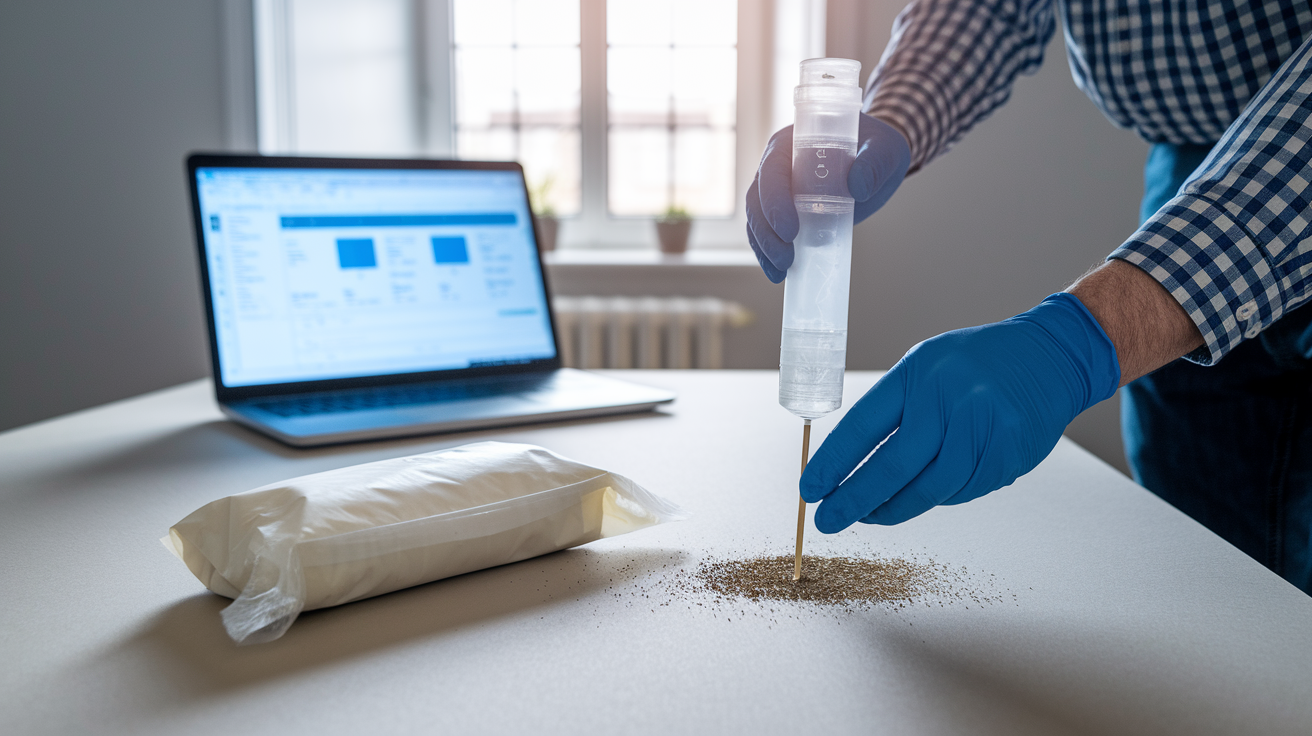
If you start feeling symptoms that may be linked to mold, you might visit an urgent care center first. These centers generally do not offer the special blood tests for mold (like mold-specific IgE or mycotoxin tests) that can identify toxic exposures. Instead, doctors begin with simple allergy tests.

They may run a total IgE panel to check your overall allergic reaction, perform a skin prick test (a test where a tiny bit of allergen is placed on your skin), or use spirometry (a test that measures how well your lungs work). These tests help show if your body is reacting to mold.

Sometimes, if the initial tests raise concerns, further checkups with indoor air or environmental hazard tests are done to see how many mold spores are around. In more complex cases, specialists might use an ELISA mycotoxin test (a lab test that looks for toxic substances) but only after the first tests suggest it is needed.

Test Purpose Setting
Total IgE Panel Checks your overall allergic reaction Urgent Care/Clinic
Spirometry Measures lung function Respiratory Clinic/Hospital
Skin-Prick Test Detects sensitivity to mold Allergy Clinic

If these early tests indicate an issue, you may be referred to a specialist like an allergist or lung doctor. They will use more detailed tests to confirm how mold is affecting you and decide if additional treatment is needed.

Mold Remediation Practices and When to Consult Professionals

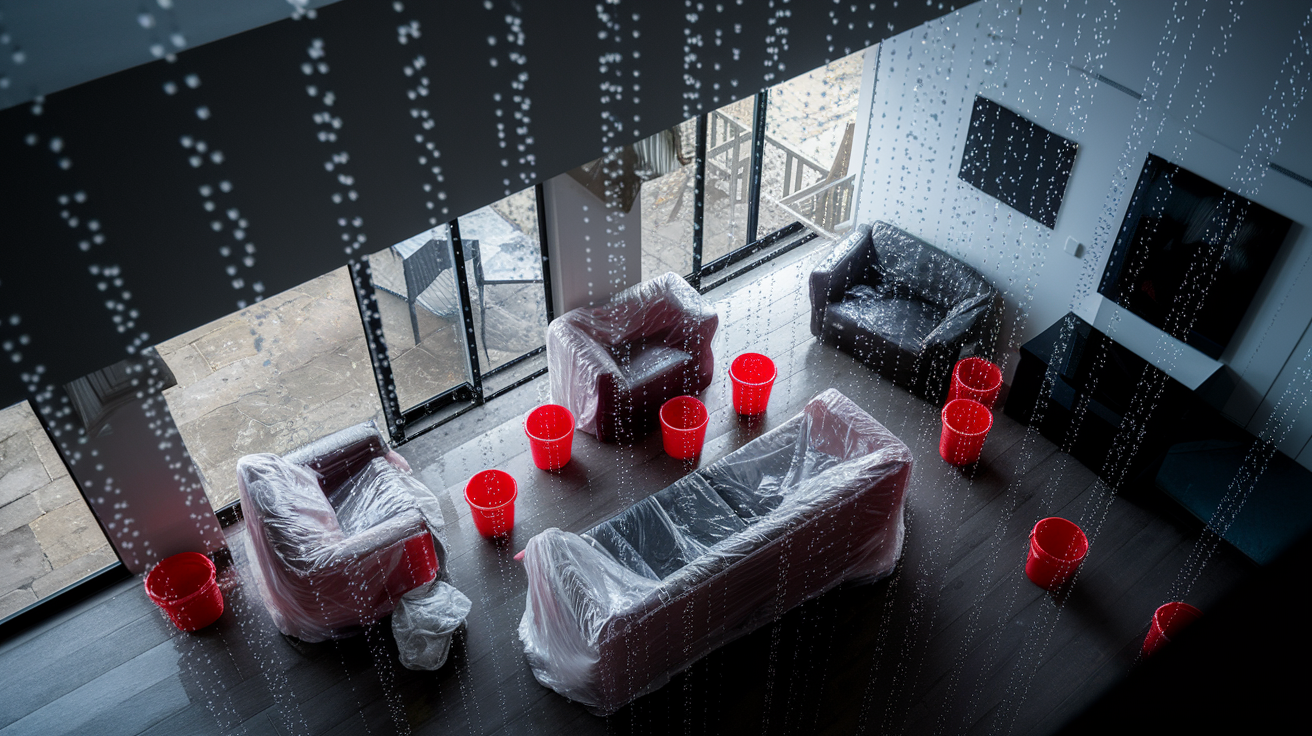
img-3.jpg

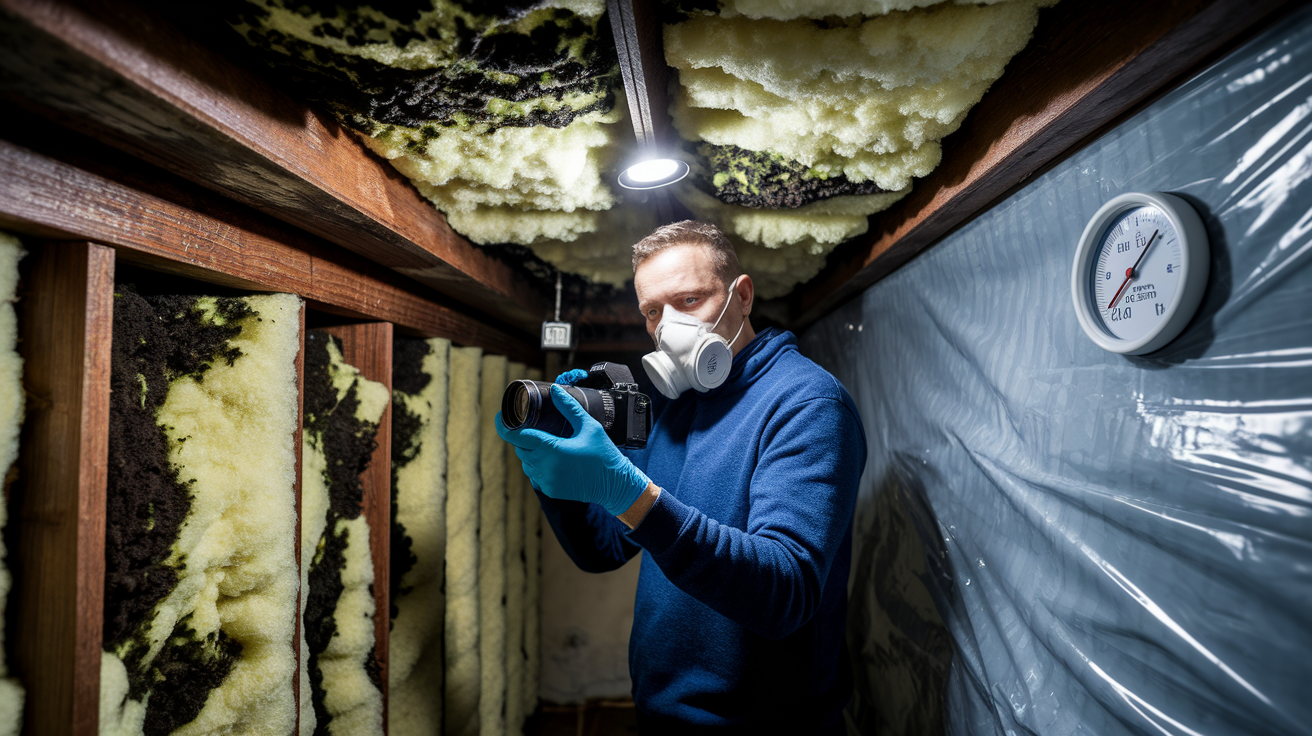
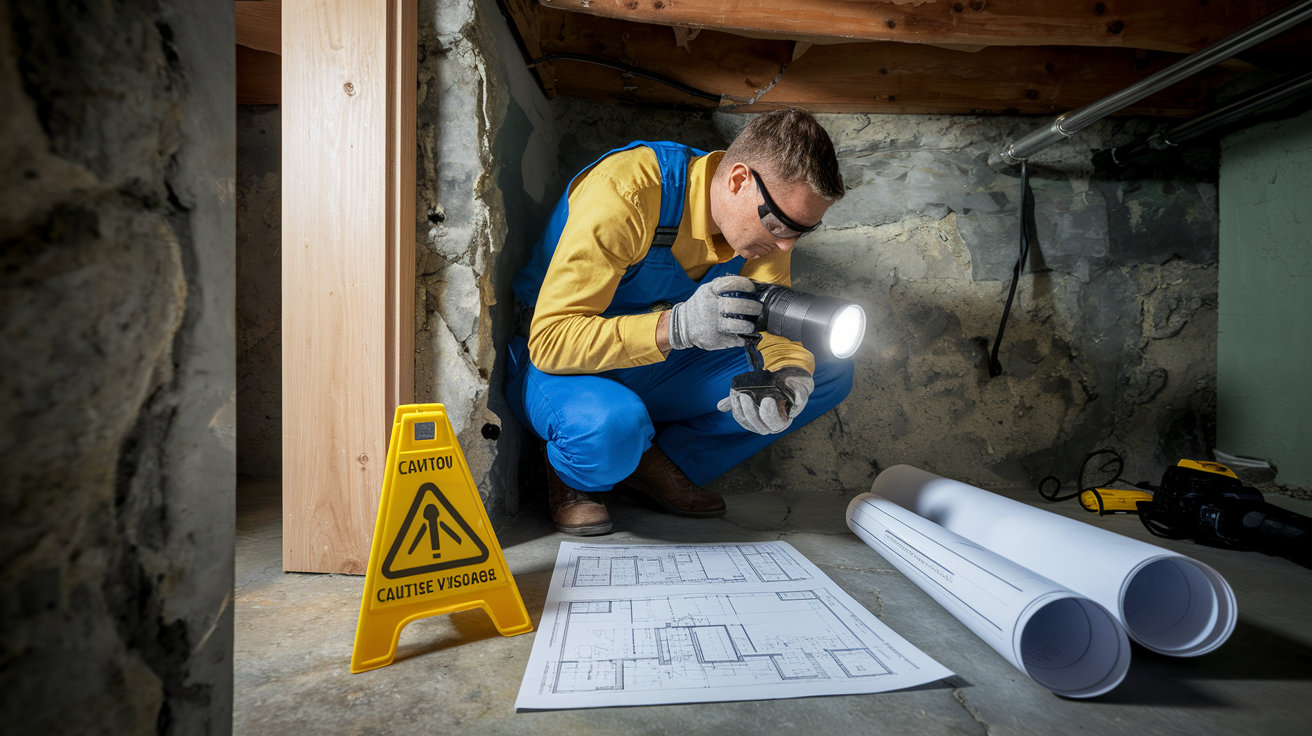
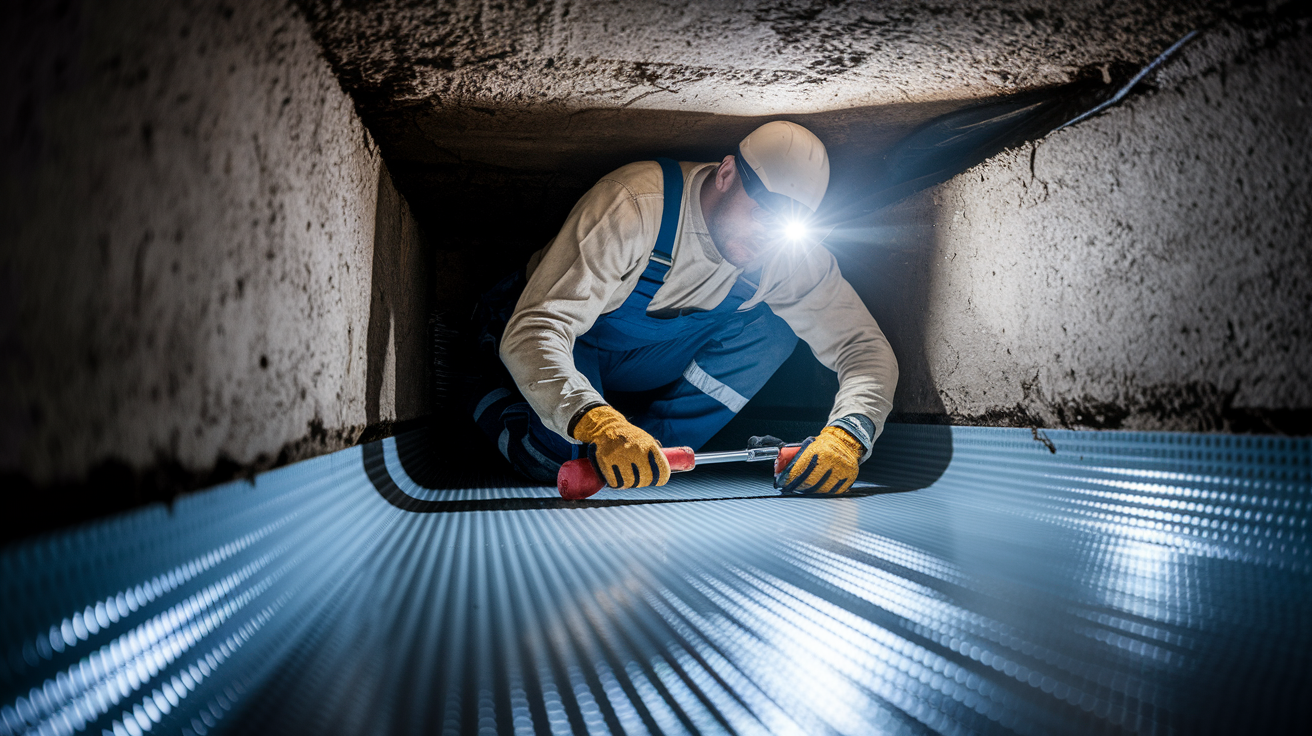
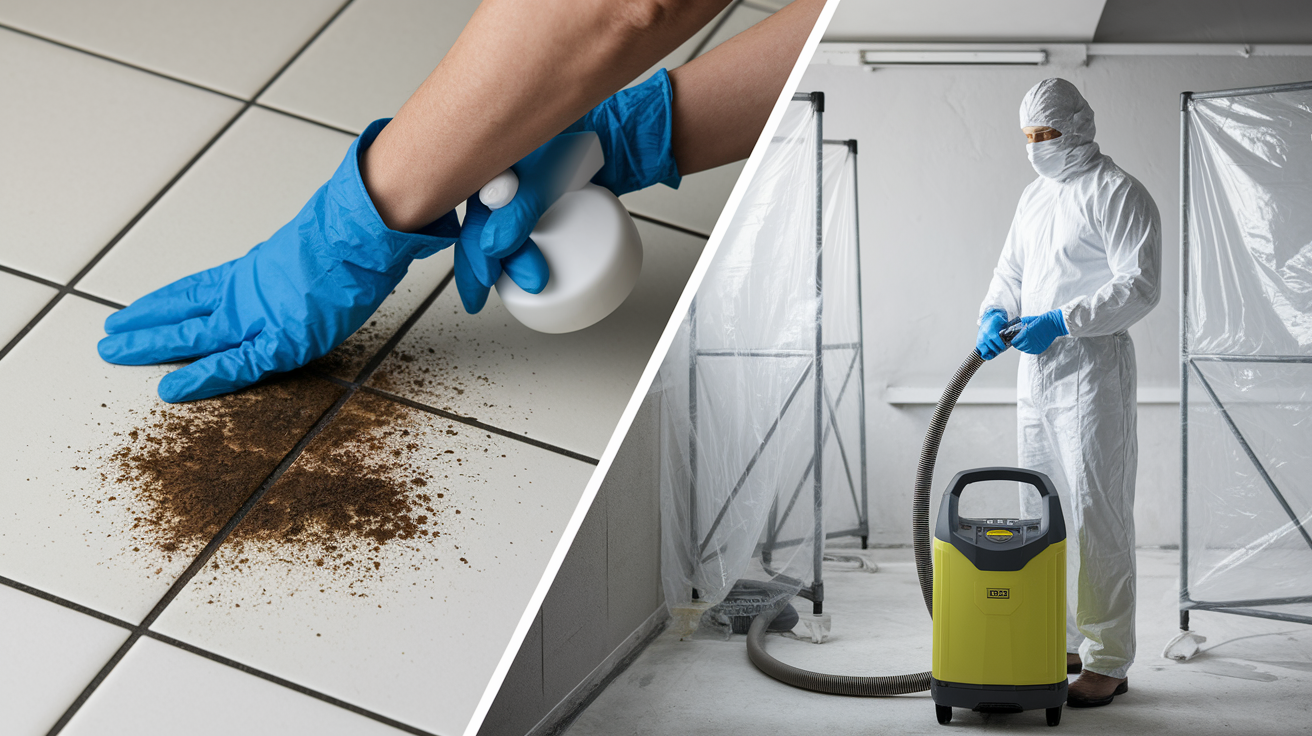
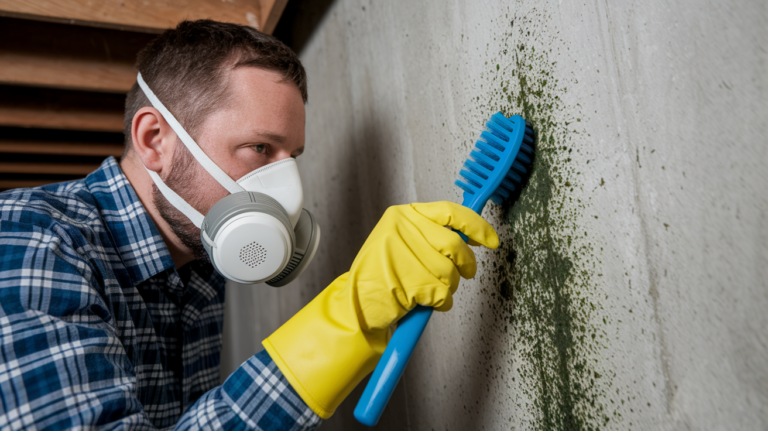
Preventing mold starts with simple steps. Fix leaks right away, keep indoor humidity below 50% (the level at which moisture is too low for mold to thrive), and ensure proper airflow. Regular checks behind appliances and in basements help spot mold before it becomes a big problem and leads to costly repairs.

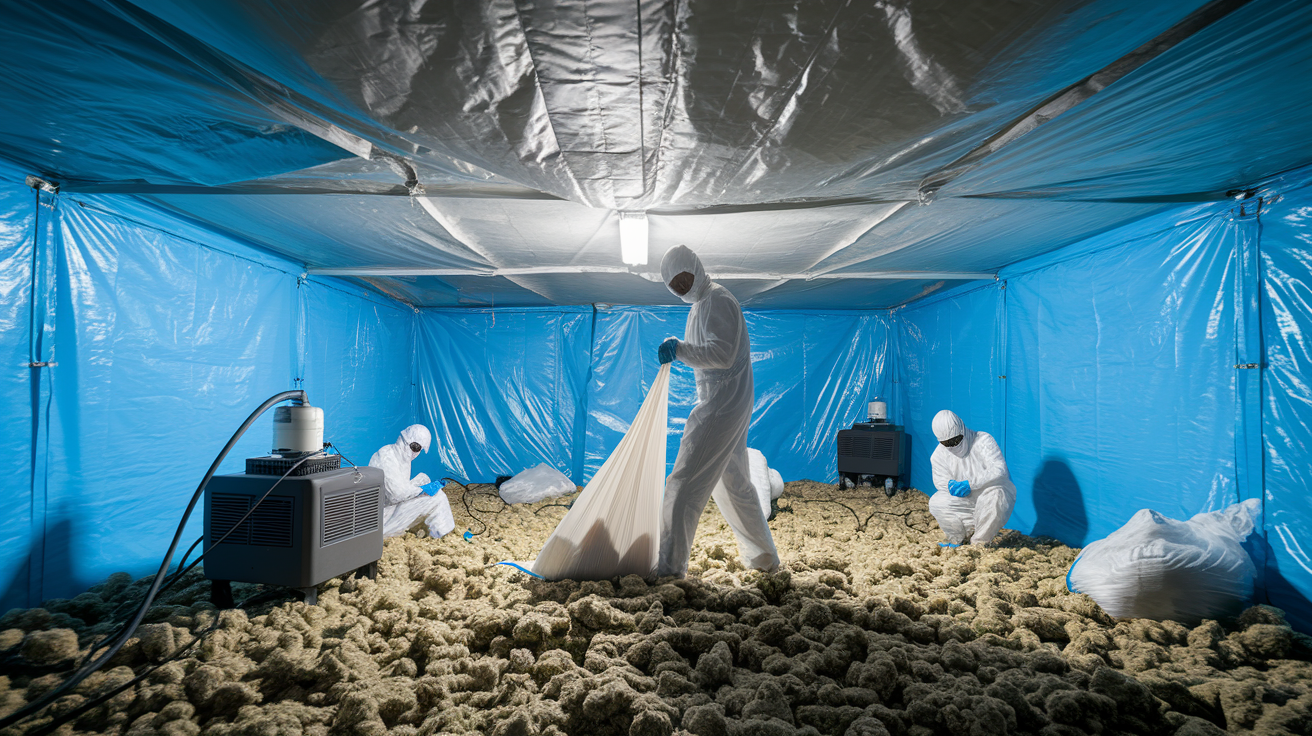
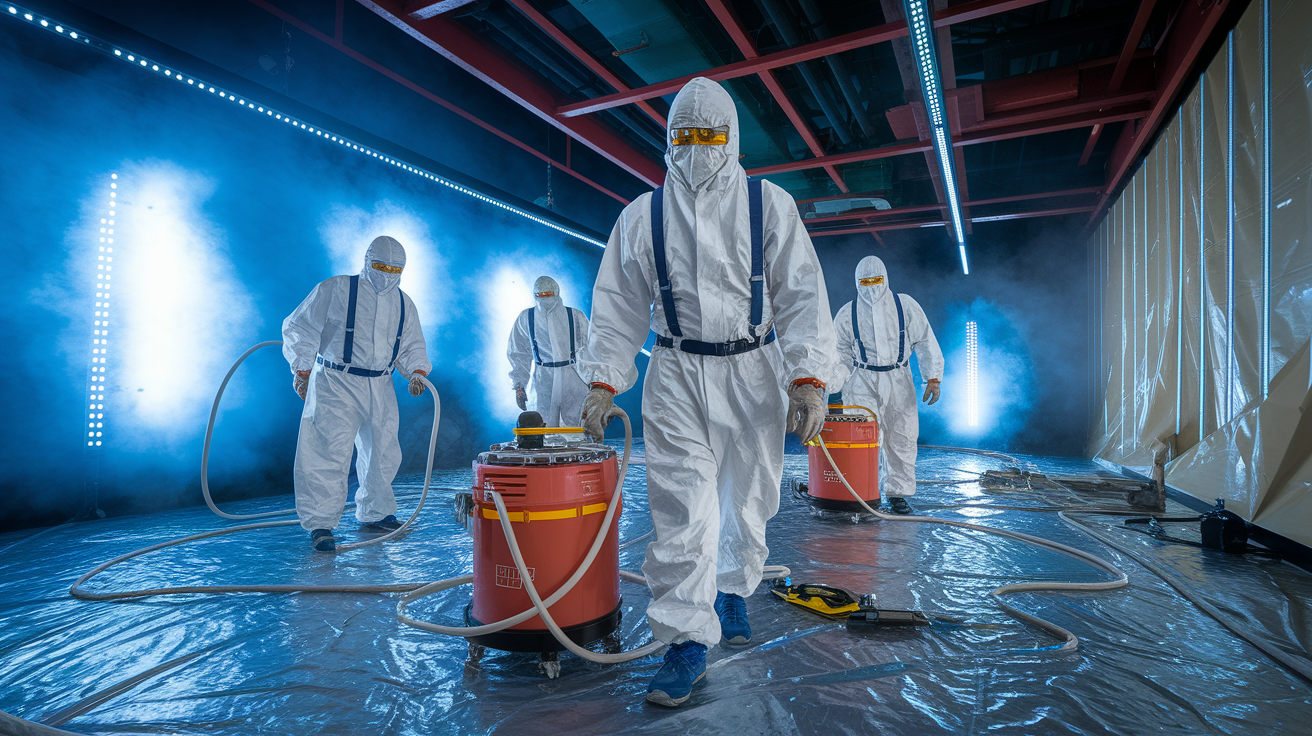
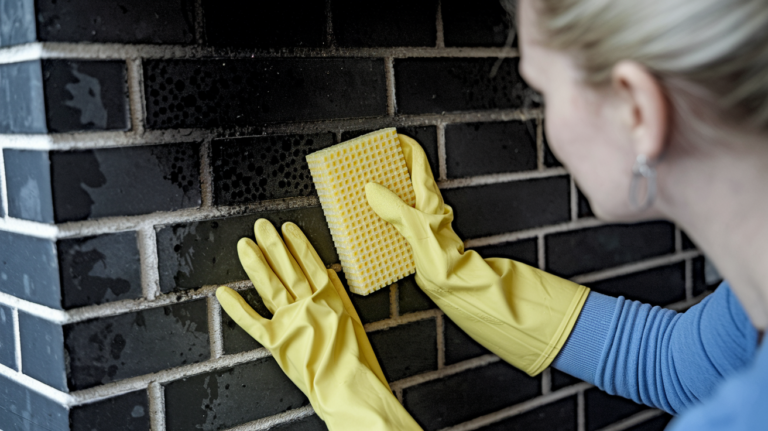
When you see mold or smell a musty odor, it’s best to call certified experts. They use special equipment to remove mold, clean the surfaces, and improve the air you breathe. Quick action can stop further damage and prevent issues like breathing problems.

If you notice symptoms such as a constant cough, sneezing, or a blocked nose when you’re indoors, it might be time to seek help. If you feel unwell in a specific space but better when you leave, please talk to a mold specialist and consult a doctor. This dual approach helps ensure your home stays safe and your health is protected.

Final Words

In the action, we surveyed early mold signs, breathing trouble, and overall health shifts. We spotted common issues and signals that should prompt quick help.

Our post broke down everything from mild hints like nasal congestion to severe signs that require urgent evaluation. We explained tests, risks, and safe cleanup steps.

Keep an eye on mold exposure symptoms and when to see a doctor. We trust this overview helps you take swift, sure steps toward a healthier home.

FAQ

What are the warning signs of mold toxicity and illness?

The warning signs include nasal congestion, coughing, headaches, and fatigue that improve outdoors but worsen indoors. These signals suggest mold exposure and warrant professional advice if they continue.

What neurological symptoms can result from mold exposure?

Neurological symptoms include confusion, mood changes, vertigo, and memory lapses. These issues may appear with significant mold exposure and should prompt an evaluation to prevent further health challenges.

What mold exposure symptoms are common in adults?

Adult symptoms typically include persistent coughing, sinus pressure, watery eyes, and respiratory distress. These signs can indicate indoor mold problems that need prompt remediation and possibly a medical review.

How do I test for mold exposure?

Testing for mold exposure often involves air quality diagnostics and specific blood tests for mold sensitivity. Professionals use these methods along with environmental assessments to verify mold presence.

What treatment options are available for mold exposure?

Treatment focuses on removing the mold source, alleviating allergy-like symptoms with medications, and improving ventilation. In some cases, professional mold remediation is needed to prevent further exposure.

What are the symptoms of black mold exposure?

Black mold exposure can lead to severe respiratory issues, persistent coughing, headaches, and fatigue. These symptoms suggest the need for prompt remediation and a consultation with a healthcare provider.

Should I see a doctor after mold exposure?

Seeing a doctor is recommended if you experience severe symptoms such as trouble breathing, confusion, or high fever. A medical evaluation ensures that you receive the proper treatment and advice for safety.

When should I be concerned about mold exposure, and how soon do symptoms appear?

Concern is warranted if symptoms continue or worsen, often appearing within hours or a few days after exposure. Persistent signs may indicate a need for immediate medical evaluation.

How do I check if mold is making me sick?

Checking involves monitoring if symptoms like congestion and coughing persist indoors while easing outdoors. Consulting a doctor or mold testing service can help confirm if mold is affecting your health.

Interior vs Exterior Basement Waterproofing: Which Works Best for You

0

You’ve probably heard that waterproofing your basement is important, but here’s what nobody tells you upfront: the method you choose affects whether you’re stopping water problems or just managing them after they happen. Interior systems work from inside your basement, collecting water after it enters. Exterior systems dig around your foundation to block water before it touches your walls. The right choice depends on your water problem severity, your budget, and how much disruption you can handle.

Comparing Waterproofing Methods: Which Approach Fits Your Basement Needs

w2U1oZXuSqCmadg6V284sw

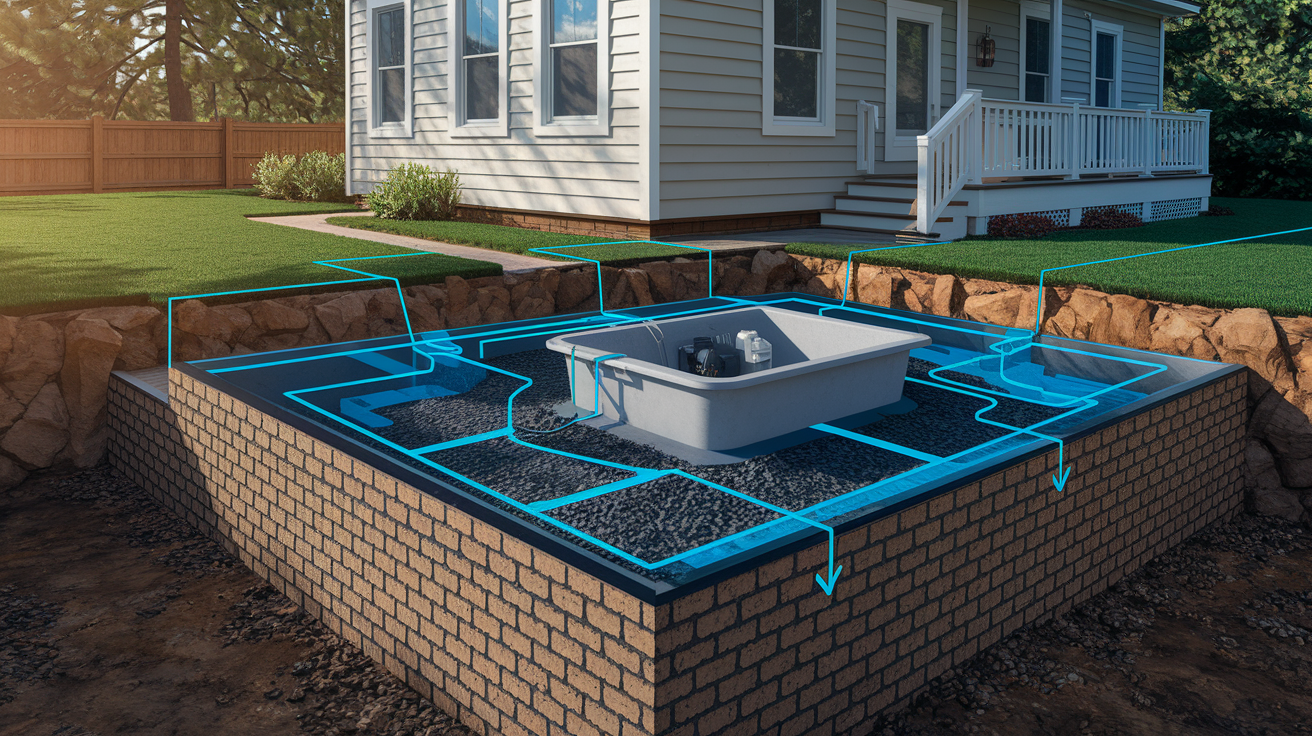
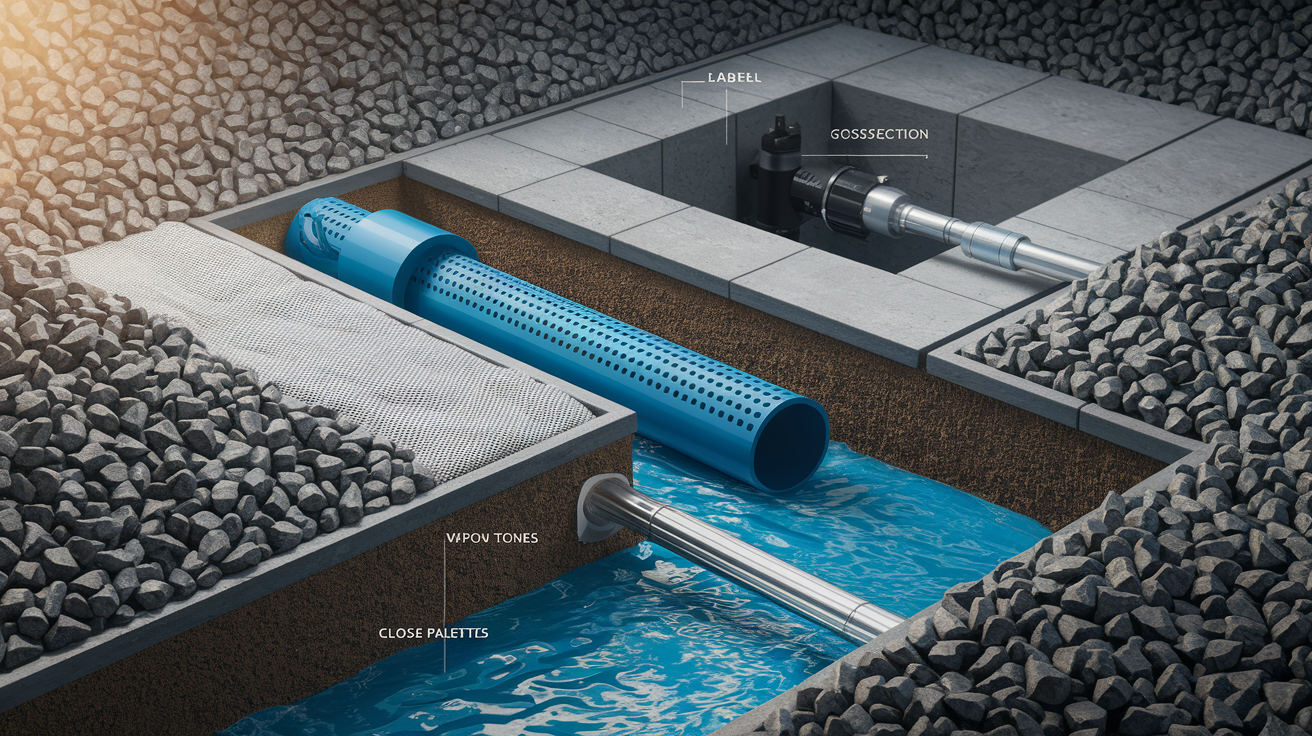
Interior waterproofing is reactive. It manages water after it’s already penetrated your foundation. The method uses drainage systems installed along your basement floor perimeter, sump pumps that remove collected water, and vapor barriers controlling moisture on interior walls. The system channels water away after it enters, not before.

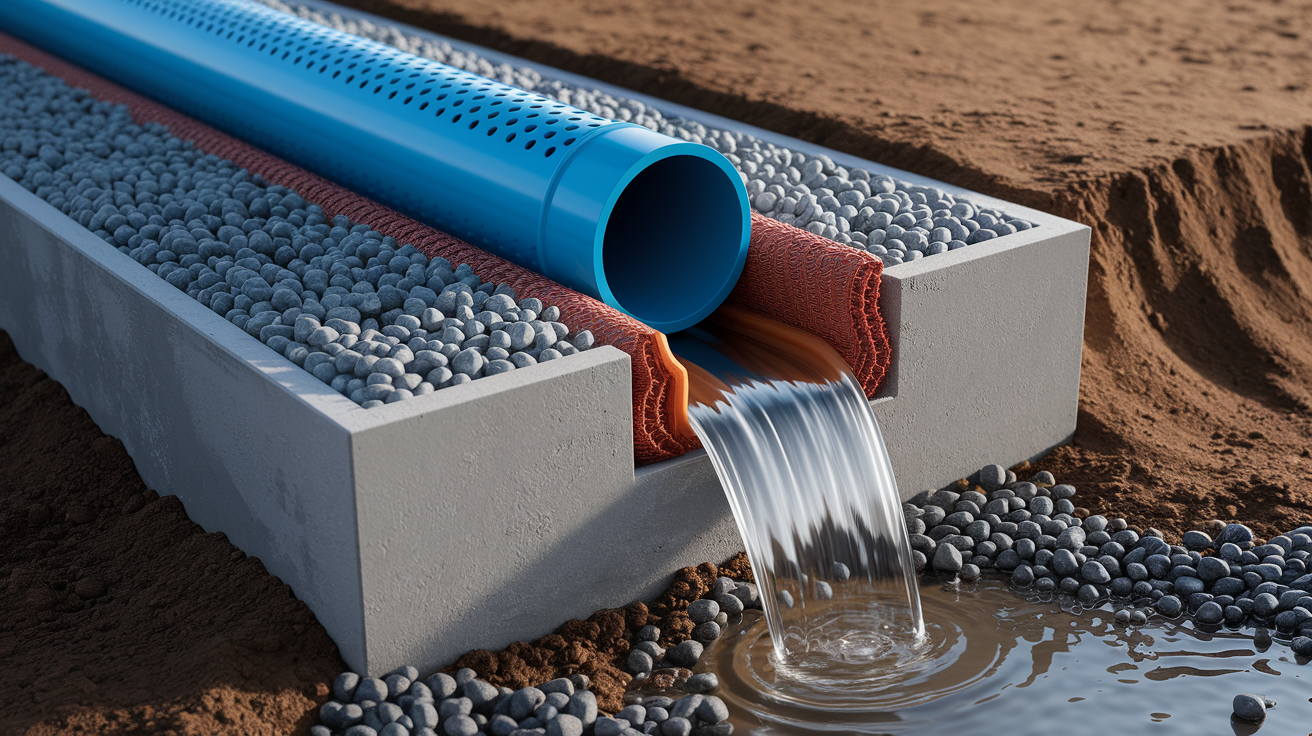
Exterior waterproofing stops water before it contacts your foundation walls. This approach involves excavating soil around your foundation, applying waterproof membranes directly to exterior foundation walls, and installing drainage systems at the footer level. You’re creating a barrier between surrounding soil and your foundation.

Cost differences are significant. Interior waterproofing typically runs $1,000 to $5,500 with installation taking one to two days. Exterior waterproofing costs between $8,000 and $15,000 because of excavation requirements, with projects often taking a week or longer depending on property size and weather.

The right choice depends on your situation. Severe water problems with high hydrostatic pressure often require exterior solutions addressing the root cause. Budget conscious homeowners managing moderate water issues may find interior systems adequate. Think about your soil conditions, whether your basement is finished, how accessible your foundation perimeter is, and whether you need immediate management or long term prevention. Some properties benefit most from combining both approaches.

Interior Waterproofing: Advantages and Limitations

Ej-uTqk8TRKoVcX9sjfa_g

Interior waterproofing offers practical advantages. Installation happens quickly, usually within one to two days, without digging up your yard or disrupting landscaping. You can schedule the work year round since it’s not weather dependent. The system components remain accessible inside your basement, making maintenance and repairs straightforward when issues arise. This approach effectively manages minor to moderate water issues by channeling moisture to a sump pump before it spreads across your basement floor. The cost stays reasonable compared to exterior methods. You won’t face unexpected expenses from discovering hidden foundation problems during excavation.

But the limitations matter. Interior waterproofing is reactive, not preventive. Water still contacts your foundation walls before the system manages it. This ongoing contact can gradually affect structural integrity over time. The system requires a sump pump that needs electricity to function and regular maintenance to stay reliable. Power outages create flooding risk unless you install a battery backup system. You’ll need to move furniture and stored items away from walls during installation. The approach doesn’t protect the exterior foundation or address the source of water entry, so moisture continues affecting the foundation even though it’s managed before reaching your living space.

Advantage Description
Cost-Effective $1,000 to $5,500 range makes it accessible for most homeowner budgets
Quick Installation Typical completion in 1 to 2 days minimizes disruption to household routine
Minimal Disruption No excavation required means landscaping, driveways, and porches remain intact
Accessible Maintenance All system components located inside basement for easy inspection and repair
Effective for Moderate Issues Successfully manages water infiltration before it causes visible basement flooding

Exterior Waterproofing: Advantages and Limitations

lIvDNZpzTamRTQUFZeP0wA

Exterior waterproofing provides several strong advantages. The method prevents water from entering your foundation by addressing the problem at its source, keeping moisture away from foundation walls entirely. This protection preserves your overall structural integrity by preventing water related foundation damage and cracking. The system typically lasts longer than interior methods since it stops water before penetration rather than managing it after entry. Properties with high water tables or persistent hydrostatic pressure benefit most from this preventive approach. Your basement space stays fully usable without internal drainage channels or sump pump systems taking up floor area. Properly installed exterior waterproofing increases property value by demonstrating solid structural protection to potential buyers.

The challenges are considerable. Exterior installation requires extensive excavation around your foundation perimeter, disrupting your property significantly. Landscaping, gardens, walkways, patios, and driveways may need removal and restoration, adding to total costs. The work depends on weather conditions, with rain or frozen ground causing delays and potential complications. Projects take longer due to labor intensive excavation and installation. Excavation sometimes reveals unexpected foundation issues like severe cracking or deterioration, increasing both project scope and expense. Once buried, the waterproofing membrane becomes difficult to access for future maintenance or repairs, unlike interior systems you can inspect anytime.

Advantage Description
Prevents Water Entry Stops moisture before it contacts foundation walls, eliminating problem at source
Structural Protection Preserves foundation integrity by preventing water infiltration and related damage
Long-Term Solution Typically outlasts interior systems with properly installed membranes lasting decades
High Water Table Effectiveness Handles persistent hydrostatic pressure better than interior management systems
Preserves Basement Space No interior drainage channels or sump pumps required, keeping full usable area

Basement Waterproofing Cost Comparison and ROI

UeG042EkS7ejBq_eDfs0vg

Interior waterproofing costs break down into drainage materials, sump pump system (including basin, pump, discharge line, and often a backup battery system), labor for one to two days of work, and concrete restoration over drainage channels. The $1,000 to $5,500 range covers most standard basement perimeters. Exterior waterproofing requires excavation equipment rental or contractor fees, waterproofing membranes or coatings for all exterior foundation walls, French drain or weeping tile systems at the footer level, proper drainage stone for backfill, soil replacement and compaction, landscaping restoration, and multi-day labor costs. These components push costs to $8,000 to $15,000 or higher for larger properties.

Several factors affect your final price. Basement size directly impacts material quantities and labor hours. Water problem severity determines system complexity, with minor seepage requiring less extensive solutions than active flooding. Your material choices matter, from basic waterproofing paint to premium membrane systems. Regional labor rates vary significantly, with urban areas typically charging more than rural locations. Foundation accessibility affects excavation difficulty and cost for exterior work.

Long term value considerations differ between methods. Exterior waterproofing provides better structural protection and typically adds more to resale value since it prevents foundation damage rather than managing it. Buyers recognize the superior protection when considering homes. Interior systems offer immediate cost savings and work well for moderate issues, making them practical when budget constraints are significant. Both methods prevent costly damage from mold growth, foundation deterioration, and repeated flooding. A properly functioning waterproofing system, whether interior or exterior, saves money compared to ongoing water damage repairs, mold remediation, and progressive foundation problems. Prevention costs less than repeated restoration.

Waterproofing Installation Process: What to Expect

wwOcL7NHRua-6Xhfo71Law

Understanding the installation process helps you prepare your property, set realistic timeline expectations, and know what level of disruption to anticipate during the project.

Interior Waterproofing Installation Steps

The process starts with a thorough basement inspection to assess moisture sources, measure humidity levels, and identify water entry points. You’ll need to move furniture, storage items, and anything along the walls away from the work area. Contractors then jackhammer the concrete floor perimeter, creating a trench typically 12 to 18 inches from the wall and about 6 inches deep. They install drainage channels or perforated tiles in this trench, sloping them toward a sump basin location they excavate at the lowest point. The drainage system connects to the sump basin, and contractors install the sump pump with discharge piping that routes water away from your foundation. They test the entire system to verify proper water flow and pump operation. Fresh concrete gets poured over the drainage channels, restoring the floor perimeter. If needed, they install vapor barriers on walls to control moisture transmission through concrete. The typical project completes in one to two days. You can schedule installation any time of year since weather doesn’t affect interior work.

Exterior Waterproofing Installation Steps

Contractors begin with a property assessment to plan excavation access, identify underground utilities, and protect existing landscaping where possible. They may need to remove or relocate plants, shrubs, walkways, or portions of patios and driveways. Excavation equipment digs down to the foundation footer level, typically 6 to 8 feet deep, exposing the entire exterior foundation wall. Workers clean the foundation surface, removing soil, roots, and debris. They repair any foundation cracks using epoxy or polyurethane injection before waterproofing application. Next comes the waterproofing membrane or coating, applied directly to clean, dry foundation walls. This might be spray applied rubberized asphalt, rolled on self adhesive sheets, or liquid rubber coatings. At the footer level, contractors install a French drain system or weeping tiles surrounded by drainage stone to collect and redirect water away from the foundation. They backfill the excavation using proper drainage materials that won’t retain water or crush the drainage system. Final grading ensures water flows away from your foundation. Weather significantly affects this work, with rain delaying progress and frozen ground making winter installation impossible in cold climates. Most exterior projects take several days to over a week depending on property size and conditions. When working with professionals experienced in water damage restoration services, they can assess whether existing water damage needs repair before waterproofing installation begins.

Combined Waterproofing Approaches for Maximum Protection

iocnmSm9QH-eHXKcrZzgzw

Some properties need both interior and exterior waterproofing working together. Homes with severe water problems benefit from the combined approach, addressing water at the source while also managing any moisture that penetrates. Properties in flood prone areas or regions with extremely high water tables gain peace of mind from redundant protection. When both prevention and active management are priorities, particularly in finished basements with living spaces, combining methods makes sense despite higher upfront costs.

Interior and exterior systems complement each other effectively. The exterior waterproofing prevents most water from reaching your foundation, significantly reducing the volume your interior system must handle. If the exterior membrane develops a small breach or extreme weather overwhelms the exterior drainage, your interior system catches and removes that breakthrough moisture before it damages your basement. This redundancy means you’re protected even if one system experiences temporary issues. You gain confidence knowing multiple barriers stand between groundwater and your living space.

Supplementary techniques enhance both waterproofing types. Proper yard grading that slopes away from your foundation forms the first line of defense, directing surface water away before it saturates soil near walls. Regular gutter maintenance and downspout extensions (6 to 10 feet from foundation) prevent roof runoff from pooling near your basement. Sealing minor foundation cracks promptly stops them from widening into major entry points. Landscaping adjustments matter too. Avoid water hungry plants near your foundation that keep soil constantly moist. Trim vegetation to allow air circulation that dries foundation walls. Use mulch rather than soil directly against foundation walls.

Maintenance Requirements for Basement Waterproofing Systems

hMbyD-sXQR-s2r53y2qDMw

Interior waterproofing systems need regular attention to stay effective. Test your sump pump quarterly by pouring water into the basin until the float triggers the pump, verifying it activates and discharges properly. Clean drainage channels annually to remove any sediment or debris that might slow water flow. Monitor basement humidity levels, keeping them below 50% to prevent moisture problems even with functioning waterproofing. Check backup battery systems twice yearly, replacing batteries according to manufacturer schedules to ensure power outage protection. Inspect discharge lines for blockages from leaves, ice, or collapsed sections, especially after winter. The advantage is that all these components stay accessible inside your basement, making inspection and maintenance straightforward without digging or special equipment.

Exterior waterproofing maintenance focuses on supporting systems and visible elements since the buried membrane stays inaccessible. Clean gutters and downspouts at least twice yearly, more often if you have trees nearby, to prevent overflow near your foundation. Monitor yard grading annually, adding soil where settling has created low spots that direct water toward your foundation rather than away. Check for new foundation cracks in visible above grade sections, addressing them promptly before water finds new entry paths. Ensure your landscaping hasn’t redirected water flow toward your foundation as plants mature and soil settles. Keep downspout extensions in place and functioning, replacing damaged sections. Verify proper drainage away from your home after heavy rains, watching for standing water or soggy soil against foundation walls. The buried waterproofing membrane itself is difficult to inspect without excavation, so maintaining the surrounding drainage systems becomes essential.

System Type Maintenance Tasks Frequency
Interior Sump pump testing and operation verification Quarterly
Interior Drainage channel cleaning and debris removal Annually
Exterior Gutter and downspout cleaning Twice yearly
Exterior Yard grading inspection and correction Annually
Interior Basement humidity monitoring and dehumidifier operation Monthly
Exterior Downspout extension inspection and replacement Twice yearly

Common Signs Your Basement Needs Waterproofing

ykEwDPlES7u8Zd4eCyUggQ

Recognizing early warning signs lets you address moisture problems before they escalate into extensive water damage, mold growth, and expensive foundation repairs.

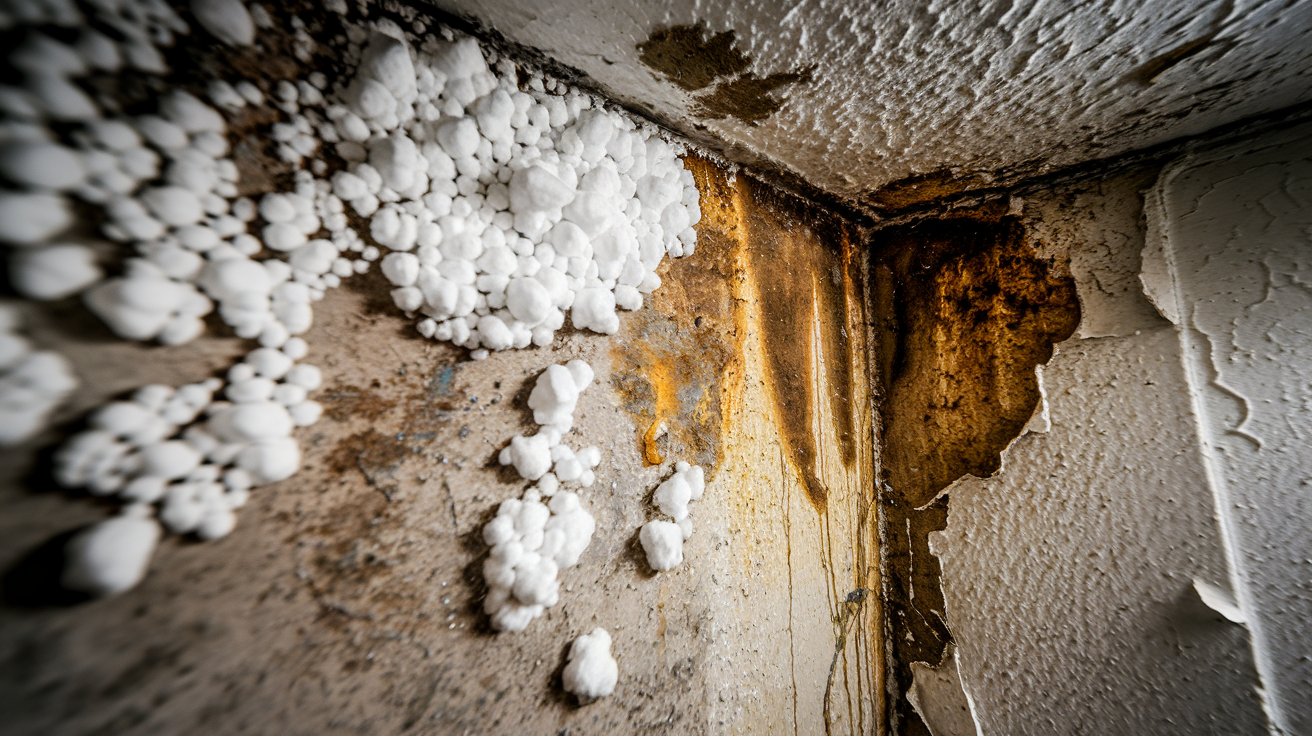
Standing water or puddles on basement floor after rain. Wet spots on walls or floors that appear and disappear with weather changes. White chalky residue (efflorescence) on masonry walls where water evaporates and leaves mineral deposits. Damp or musty odors that persist even with ventilation. Mold or mildew growth on walls, floors, stored items, or in corners. Water stains or discoloration on walls showing previous water contact. Peeling paint or wallpaper indicating moisture behind wall surfaces. Warped wood paneling or baseboards from moisture absorption. Rust on metal fixtures, support posts, or furnace components from high humidity.

Addressing these signs promptly prevents structural damage that worsens over time. Water infiltration weakens foundation walls, damages framing and floor systems, ruins stored belongings, and creates ideal conditions for mold that affects indoor air quality throughout your home. Early intervention with appropriate waterproofing costs less than dealing with progressive foundation failure, extensive mold remediation, and replacing damaged building materials. If you’re seeing multiple warning signs or water appears frequently, getting a professional assessment helps you understand the severity and choose the right waterproofing approach before the problem escalates.

DIY vs Professional Waterproofing: Making the Right Choice

2MhqIpu0Sw-RMdfJA3cJiw

Some waterproofing tasks suit homeowner DIY skills when you have the necessary tools and experience. Applying interior waterproofing paint or sealants to walls requires basic painting skills and can reduce minor moisture transmission. Installing small vapor barriers using plastic sheeting and proper tape gives you moisture control on limited wall sections. Basic crack filling using hydraulic cement, epoxy, or polyurethane foam works for small, non structural cracks. Improving gutters by cleaning them regularly, adding extensions to downspouts, and adjusting yard grading away from your foundation are within most homeowner capabilities and make real differences.

Professional help becomes essential for complex or severe situations. Installing complete drainage systems with perimeter channels requires cutting concrete, proper slope calculation, and connecting multiple components correctly. Sump pump installation involves electrical work that needs permits and code compliance. All exterior waterproofing requiring excavation is beyond DIY scope due to safety risks, equipment needs, and the potential for causing more damage if done incorrectly. Foundation crack repairs that are structural or actively leaking need professional assessment and specialized injection equipment. Situations with severe water intrusion indicate underlying problems that require expert diagnosis to identify root causes. Building permits and code compliance requirements for major waterproofing work need professional knowledge and licensing.

When selecting contractors, verify current licenses and insurance coverage that protects you if problems occur during installation. Check references from recent customers and read online reviews to understand their work quality and customer service. Obtain multiple detailed quotes that break down labor, materials, and timeline so you can compare accurately. Ask specifically about warranty coverage, what it includes, how long it lasts, and what actions void the warranty. Discuss their experience with your local soil conditions and climate patterns since regional factors affect waterproofing effectiveness.

The cost benefit analysis matters. DIY waterproofing saves labor costs, which often represent 50% or more of professional quotes, but risks improper installation that fails to solve your water problem. Professional installation ensures systems function correctly, typically includes warranties covering both materials and workmanship, and often completes faster than DIY attempts. Incorrect DIY waterproofing can lead to more expensive repairs later when the inadequate solution fails and water causes additional damage during the time you thought you were protected.

Climate and Soil Considerations for Basement Waterproofing

vZ7vqGQjQd-X50WUyaThHw

Soil type significantly affects waterproofing needs and system selection. Clay soil, common in areas like St. Louis, retains water rather than draining freely, creating persistent high hydrostatic pressure against foundation walls even days after rainfall. This pressure demands more robust waterproofing solutions, often requiring exterior systems that prevent water contact rather than just managing interior seepage. Sandy soil drains much better, reducing hydrostatic pressure but potentially shifting and settling, which can create foundation movement and new cracks that need attention. Expansive soils swell considerably when saturated, then shrink during dry periods, creating cyclical stress on foundations that causes cracking and requires both crack repair and waterproofing to address effectively.

Climate patterns determine water volume your waterproofing must handle. Regions with heavy rainfall or rapid spring snow melt need drainage systems with sufficient capacity to manage peak water flow, not just average conditions. Areas with high water tables face constant groundwater pressure against foundation walls, making exterior waterproofing particularly valuable since it prevents water contact rather than continuously pumping it out after entry. Freeze thaw cycles in colder climates worsen existing foundation cracks, as water enters cracks, freezes and expands, then thaws repeatedly, widening gaps with each cycle. This requires addressing cracks during appropriate seasons when materials cure properly and weather permits complete installation.

Grading and drainage patterns around your property affect water accumulation near foundations. Improper slope that directs water toward rather than away from your home concentrates moisture exactly where you don’t want it. Regional soil saturation levels vary, with some areas staying damp year round while others dry between rain events, affecting how much continuous pressure your waterproofing faces. Below grade basement walls on downhill property slopes experience more pressure than uphill sides, sometimes requiring different waterproofing intensity on different walls. Landscaping must account for climate. Use drought tolerant plants in dry regions that won’t require irrigation near foundations. Select plants for wet climates that won’t hold excessive moisture against basement walls.

Waterproofing Materials and Technologies Explained

Interior waterproofing relies on several material types. Hydraulic cement sets quickly even in damp conditions, making it useful for filling small cracks and holes where water actively seeps through. Epoxy and polyurethane injection systems fill cracks from inside, with epoxy providing structural bonding for stable cracks and polyurethane foam expanding to fill voids and stop active leaks. Waterproofing paints and sealants create moisture barriers on interior walls, though they work best for dampness rather than active water pressure. Vapor barriers using thick plastic sheeting control moisture transmission through concrete, reducing humidity but not stopping water under pressure. Crystalline waterproofing penetrates into concrete pores and forms crystals that block water passage while still allowing the concrete to breathe. Drainage tiles and channels, made from perforated plastic pipe or formed plastic channels, collect and redirect water to sump basins.

Exterior materials provide varied approaches to water exclusion. Rubberized asphalt membranes, applied as spray coatings or rolled sheets, create flexible waterproof barriers that move with minor foundation settling without cracking. Self adhesive waterproofing sheets stick directly to foundation walls, offering easy application and good adhesion when walls are properly prepared. Liquid rubber or tar coatings brush or spray onto foundations, forming seamless barriers but requiring careful application for complete coverage. Dimple membranes (drainage boards) create air gaps between foundation walls and soil, allowing water to drain down rather than pressing against the wall continuously. Bentonite clay panels absorb water and swell to form impermeable barriers, self sealing around any fasteners or small breaches. Spray applied waterproofing creates thick protective coatings quickly but requires professional equipment and expertise.

Material performance varies by application. Some materials last 20 to 30 years or longer with proper installation, while others need reapplication or maintenance within 10 to 15 years. Application requirements range from simple DIY painting to complex professional spray systems. Cost differences are significant, with basic sealants costing much less than premium membrane systems, though more expensive materials often perform better under challenging conditions. Effectiveness depends on matching the material to your specific situation, like using flexible membranes where foundation movement occurs or choosing breathable systems where interior humidity control matters.

Material Application Lifespan Best Use
Rubberized Membrane Exterior foundation walls 20 to 30 years Comprehensive exterior waterproofing with foundation movement tolerance
Crystalline Waterproofing Interior or exterior concrete Permanent when properly applied Penetrating protection that allows concrete to breathe while blocking water
Bentonite Clay Exterior foundation walls 20 to 25 years Self sealing barrier in areas with consistent moisture exposure
Dimple Membrane Exterior foundation walls 25+ years Drainage and protection where water volume is high
Hydraulic Cement Interior crack repair 10 to 15 years Quick repair of active leaks and small cracks
Vapor Barrier Interior walls Indefinite when protected Humidity control and moisture transmission reduction

Foundation Crack Repair as Part of Waterproofing

Foundation cracks fall into different categories that indicate severity. Hairline cracks less than 1/8 inch wide typically result from normal concrete curing and minor settling, rarely indicating serious problems. Structural cracks wider than 1/4 inch, especially those that continue widening, may signal foundation issues needing immediate attention. Vertical cracks usually come from minor settling and are less concerning than horizontal or stair step cracks that can indicate soil pressure or foundation failure. Floor cracks often result from slab settling independent of walls, though they can allow moisture entry. When cracks show displacement where one side sits higher than the other, or when horizontal cracks appear, serious structural problems may exist requiring professional evaluation beyond just waterproofing.

Repair methods match crack types and conditions. Epoxy injection provides structural repair for non leaking cracks, bonding concrete back together with strength often exceeding the original concrete. This method works best for stable cracks that aren’t actively leaking. Polyurethane foam injection handles active water leaks, as the foam expands on contact with water to fill voids and create flexible seals that accommodate minor movement. Hydraulic cement works for surface repairs and small cracks, setting quickly even in wet conditions, though it doesn’t provide structural bonding like epoxy. Exterior crack sealing during waterproofing installation addresses cracks from the outside, preventing water entry at the source. Whether to repair cracks before, during, or after waterproofing installation depends on crack severity and water activity, with active leaks often needing immediate attention before full waterproofing proceeds.

Professional assessment becomes critical for determining crack severity and appropriate response. Experts identify whether cracks result from normal settling or indicate progressive foundation problems needing structural repair. They determine if cracks are stable or actively widening, which affects repair method selection. Working with contractors experienced in foundation repair services ensures repairs integrate properly with your waterproofing system rather than treating them as separate issues. Professionals can identify underlying causes like poor drainage or soil problems that must be addressed to prevent future crack development. Proper crack repair before or during waterproofing installation ensures your waterproofing system performs as intended rather than fighting against structural problems.

Preventing Future Water Problems After Waterproofing

Waterproofing systems work best when combined with ongoing prevention efforts and regular property maintenance that reduces water volume reaching your foundation in the first place.

Clean gutters quarterly, removing leaves, twigs, and debris that block water flow and cause overflow near your foundation. Extend downspouts 6 to 10 feet from foundation, using solid extensions or underground drainage that carries roof water away from basement walls. Maintain proper yard grading that slopes away from home, adding soil where settling has created depressions that collect water near the foundation. Trim landscaping to allow air circulation near foundation walls, removing dense vegetation that keeps soil constantly damp. Use a dehumidifier to control basement humidity below 50%, preventing condensation and moisture accumulation even with functioning waterproofing. Inspect and repair foundation cracks promptly, addressing small issues before they widen into major water entry points. Monitor sump pump function regularly by testing it and listening for unusual sounds that indicate developing problems. Avoid planting water hungry vegetation near foundation, choosing drought tolerant species that won’t require irrigation that saturates soil near basement walls.

These prevention strategies reduce the total water volume your waterproofing system must handle, which extends system lifespan by reducing wear on components like sump pumps. Keeping water away from your foundation protects your waterproofing investment by preventing overwhelming moisture that might breach even good systems. Prevention controls humidity that leads to mold growth, even in waterproofed basements, by limiting moisture sources. Simple maintenance like gutter cleaning costs almost nothing compared to repairing water damage from preventable overflow. Think of these practices as protecting the protection you’ve already installed through waterproofing.

Waterproofing Failures: Common Mistakes to Avoid

Learning from common waterproofing failures helps you avoid wasting money on solutions that won’t work for your specific situation.

Sealing cracks alone without addressing hydrostatic pressure that forces water through concrete even without visible cracks. Improper French drain installation at wrong depth or incorrect slope that prevents effective water collection. Inadequate sump pump capacity for actual water volume, leading to overwhelmed pumps during heavy rain. Poor backfill material selection using clay soil that retains water or improper compaction that crushes drainage systems. Ignoring exterior drainage while relying only on interior systems, allowing continuous foundation water contact despite interior management. Applying waterproofing paint over actively leaking walls where water pressure prevents proper adhesion. Failing to address root causes like improper grading, clogged gutters, or poor drainage, treating symptoms instead of underlying problems.

Consequences of these mistakes include repeated flooding despite your waterproofing investment, as inadequate systems fail during the heavy rains when you need them most. Progressive foundation damage continues when exterior moisture contact persists because interior only solutions don’t prevent wall deterioration. Mold growth develops when moisture gets trapped behind improperly applied coatings or inadequate systems allow persistent dampness. You face expensive rework costs to remove failed waterproofing and install effective solutions, essentially paying twice for the same protection.

Getting professional assessment before committing to waterproofing helps identify actual causes rather than just treating visible symptoms. Experts determine whether your problem stems from surface water, groundwater pressure, poor drainage, foundation cracks, or combinations requiring multi faceted solutions. They can calculate proper drainage capacity for your property size and typical rainfall, ensuring systems handle real world conditions. Professional assessment costs less than failed DIY attempts that leave you still dealing with water problems.

Insurance, Permits, and Legal Considerations

Permit requirements for waterproofing work vary by location and project scope. Many jurisdictions require building permits for installing complete drainage systems that involve cutting concrete and installing sump basins. Electrical permits are typically needed for sump pump installation since it involves running dedicated circuits to code compliant outlets. Local building codes specify requirements for drainage system installation, sump pump discharge locations, and vapor barrier installation. Some areas require inspections at various project stages to verify code compliance. Unpermitted work can create problems when selling your home, potentially preventing sale completion or requiring expensive removal and reinstallation to code, plus penalties from building departments.

Insurance considerations affect coverage and claims. Standard homeowner policies typically exclude gradual water damage from seepage or long term moisture problems, covering only sudden incidents like burst pipes. Flood insurance covers surface water entering your home but often excludes groundwater seepage, which is how most basement water enters. Documenting your waterproofing installation with receipts, photos, and contractor information helps if you need to file future claims by demonstrating you’ve taken preventive measures. Some insurers offer premium discounts for homes with proper waterproofing, recognizing reduced claim risk. When water damage occurs despite waterproofing, documentation shows you’ve maintained your property responsibly, which can affect claim handling.

Warranty expectations need clear understanding before installation begins. Typical contractor warranties run from 1 to 10 years depending on system type and contractor, with exterior systems often carrying longer warranties than interior installations. Read what warranties actually cover, as many exclude issues caused by improper maintenance, foundation movement, or situations beyond the waterproofing system’s design capacity. Material manufacturer warranties often differ from installation warranties, sometimes offering longer coverage on specific components. Get warranty terms in writing, including what actions void coverage, required maintenance to maintain warranty status, and how to file claims if problems develop.

Properly documented waterproofing becomes a selling point when marketing your home, demonstrating proactive maintenance and structural protection to potential buyers. Disclosure requirements in most states mandate revealing known water problems, so waterproofing documentation shows you’ve addressed issues rather than hiding them. Some buyer financing programs require water problem resolution before loan approval, making waterproofing potentially necessary to complete sales. Professional waterproofing with permits and warranties provides verification that work meets standards, which reassures buyers and their lenders compared to undocumented DIY attempts.

Final Words

Both interior vs exterior basement waterproofing serve different purposes in protecting your home. Interior systems offer fast, affordable management for moderate moisture. Exterior methods prevent water at the source with longer-lasting results.

Your choice depends on your water problem severity, budget, and how long you plan to stay in the home.

Start with a professional assessment. We’ll show you what’s causing the moisture, explain your options clearly, and help you pick the approach that fits your situation and goals.

A dry basement protects your foundation, your belongings, and your peace of mind.

FAQ

What are the disadvantages of interior waterproofing?

The disadvantages of interior waterproofing include that it manages water after it penetrates foundation walls rather than preventing entry, requires ongoing sump pump maintenance and electricity, needs furniture relocation during installation, and doesn’t protect exterior foundation walls from water contact or damage.

What type of basement waterproofing is best?

The best type of basement waterproofing depends on your water problem severity, budget, and property conditions. Exterior waterproofing offers superior prevention and structural protection for severe issues and high water tables, while interior waterproofing provides cost-effective management for minor to moderate moisture problems.

How much does it cost to waterproof a 1200 sq ft basement?

Waterproofing a 1200 sq ft basement typically costs between $1,000 and $5,500 for interior systems with drainage and sump pumps, or $8,000 to $15,000 for exterior waterproofing requiring excavation, membranes, and foundation drainage installation.

Is it better to fix a leaky basement from the inside or outside?

Fixing a leaky basement from the outside is better for severe water issues, high water tables, and long-term structural protection. Interior fixes work well for moderate problems, offering faster installation, lower costs, and adequate moisture management when prevention isn’t critical.

How long does interior waterproofing installation take?

Interior waterproofing installation takes 1 to 2 days for most basements, including jackhammering floor perimeter, installing drainage channels, connecting sump pump systems, and pouring new concrete, with year-round installation availability regardless of weather.

How long does exterior waterproofing installation take?

Exterior waterproofing installation typically takes several days to over a week, depending on foundation size and excavation complexity. The process includes digging to footer level, applying membranes, installing drainage systems, backfilling, and restoring landscaping, with weather-dependent scheduling.

Can you combine interior and exterior waterproofing methods?

You can combine interior and exterior waterproofing methods for maximum protection, especially in homes with severe water issues or flood-prone locations. The exterior system prevents most water entry while interior drainage manages any breakthrough moisture.

How often should you maintain basement waterproofing systems?

You should maintain basement waterproofing systems quarterly for sump pump testing, annually for drainage cleaning and gutter maintenance, and monitor humidity levels regularly. Interior systems offer easier access for maintenance than buried exterior components.

What are the early signs your basement needs waterproofing?

The early signs your basement needs waterproofing include standing water, wet spots on walls or floors, white chalky efflorescence on masonry, musty odors, mold growth, water stains, peeling paint, and warped wood indicating moisture intrusion.

Should you hire a professional for basement waterproofing?

You should hire a professional for basement waterproofing when installing complete drainage systems, sump pumps, or any exterior work requiring excavation. Professional installation ensures proper function, code compliance, warranty coverage, and prevents costly mistakes from improper DIY attempts.

What waterproofing materials last longest?

Waterproofing materials that last longest include rubberized asphalt membranes, crystalline waterproofing that penetrates concrete, and properly installed dimple membranes. Exterior systems generally outlast interior treatments when correctly applied with proper drainage and foundation protection.

Do foundation cracks need repair before waterproofing?

Foundation cracks need repair before or during waterproofing to prevent continued water entry and structural damage. Epoxy injection fixes non-leaking structural cracks, while polyurethane foam seals active leaks, with repair methods integrated into comprehensive waterproofing systems.

How do you prevent basement water problems after waterproofing?

You prevent basement water problems after waterproofing by cleaning gutters quarterly, extending downspouts away from foundation, maintaining proper yard grading, controlling humidity below 50 percent, monitoring sump pump function, and promptly repairing new cracks.

What are common basement waterproofing mistakes?

Common basement waterproofing mistakes include sealing cracks without addressing hydrostatic pressure, improper French drain installation, inadequate sump pump capacity, poor backfill crushing drainage systems, ignoring exterior drainage, and applying paint over actively leaking walls.

Does homeowner insurance cover basement waterproofing?

Homeowner insurance typically does not cover basement waterproofing installation as preventive maintenance. Policies may cover sudden water damage from specific events but generally exclude groundwater seepage, requiring separate flood insurance for comprehensive protection.

Cost to Rebuild Interior After Fire: 2024 Price Ranges

0

Most homeowners underestimate fire restoration costs by 40 to 60 percent because they only calculate visible damage. Here’s what really drives the bill: smoke spreads everywhere flames didn’t, HVAC systems circulate contamination throughout your home, and code upgrades often get triggered during rebuild work. A small kitchen fire might cost $4,000 to clean up, while whole-home restoration averages $20,470 and can hit $42,665 when structural damage, electrical repairs, and smoke remediation stack up. This guide breaks down actual 2024 pricing by damage type, room, and restoration task so you can budget realistically and evaluate contractor estimates.

Interior Fire Rebuild Pricing Overview and Key Line Items

VvlqAPfiSC-ITw_Vfb9SCQ

Interior fire rebuild costs typically run $4,000 to $27,000 for most residential projects. Minor localized damage might start around $200, while extensive whole-home restoration can hit $42,665 or higher. Per square foot pricing averages $4 to $7, with $5.50 being a typical mid-range rate. A 2,600 square foot home at this rate would cost approximately $14,300 to restore. The national average for complete fire and smoke damage restoration sits at $20,470, with most homeowners spending between $2,900 and $38,325 depending on damage severity and scope.

These wide cost ranges exist because every fire creates unique damage patterns. A small kitchen grease fire might require only cabinet replacement and surface cleaning. An electrical fire spreading through walls demands structural repairs, complete rewiring, and extensive smoke remediation throughout the home.

Major Restoration Task Typical Cost Range Cost Driver
Demolition and debris removal $2,000–$5,000 Volume of damaged materials, disposal fees, hazardous waste handling
Structural framing repairs $3,000–$12,000 Extent of charring, load-bearing requirements, accessibility
Drywall removal and replacement $1,500–$6,000 Square footage affected, texture matching, number of rooms
Flooring installation $2,000–$8,000 Material choice, subfloor condition, room size
Electrical system repair $1,500–$7,000 Wiring replacement extent, panel upgrades, code compliance
HVAC cleaning and restoration $500–$3,500 Ductwork contamination level, system component damage

These itemized costs represent the foundation of any rebuild estimate. Most projects require multiple line items working together, with actual totals depending on your specific damage pattern, material selections, and local labor rates. Additional specialized work like hazardous material abatement, extensive smoke remediation, or code upgrade requirements adds to these baseline figures. Understanding these core cost components helps you evaluate contractor estimates and plan your budget realistically.

Complete Interior Fire Damage Restoration Cost Breakdown

BkInA6q-TUm4yC_8p8_1yg

Understanding each restoration task’s individual cost helps you evaluate estimates, track insurance claims, and make informed decisions about where to prioritize spending or find savings.

Restoration Task Cost Range Notes
Demolition and debris removal $2,000–$5,000 Includes hazardous waste disposal, dumpster rental, labor
Structural framing repairs $3,000–$12,000 Varies by extent of charred lumber, load-bearing modifications
Drywall removal and replacement $1,500–$6,000 Based on square footage, texture matching, multiple rooms
Insulation replacement $2,130–$6,700 Labor $1–$5.65 per square foot depending on access and type
Electrical system repair $1,500–$7,000 Includes rewiring, panel upgrades, fixture replacement
Plumbing restoration $1,200–$4,500 Pipe replacement, fixture reinstallation, water testing
Flooring installation $2,000–$8,000 Material-dependent, includes subfloor repair if needed
Ceiling repair $800–$3,500 Texture matching, structural reinforcement, insulation access
Interior door replacement $600–$2,400 Per-door costs vary by style, hardware, fire-rating requirements
Trim and molding $800–$3,200 Crown, base, window, and door casing throughout affected areas
Painting and primer $1,500–$5,000 Includes smoke-sealing primer, multiple coats, trim work
Cabinet replacement $2,500–$12,000 Kitchen and bathroom cabinets, hardware, installation

Labor typically represents 40 to 60 percent of total restoration costs, with the remainder covering materials. Your choice between standard-grade and premium materials significantly impacts final expenses. Basic laminate countertops cost $20 to $40 per square foot installed, while granite or quartz runs $60 to $150 per square foot. Similarly, contractor-grade carpet costs $2 to $5 per square foot, while hardwood flooring runs $8 to $15 per square foot installed.

These line items form the basis for contractor estimates and insurance claims documentation. Detailed breakdowns allow you to identify where costs concentrate and where you might adjust specifications to fit your budget or insurance coverage limits.

Cost Factors by Fire Damage Type and Affected Areas

F6y6HQDSSR2ltpKv38CiZA

Both the type of fire and the specific rooms affected create unique cost variables that dramatically influence your final restoration bill. A grease fire concentrated in the kitchen creates different challenges than an electrical fire that spreads through wall cavities into multiple rooms.

Fire Classification Common Cause Restoration Cost Range Key Cost Drivers
Class A Wood, paper, cloth, ordinary combustibles $9,000–$14,000 Structural damage extent, smoke penetration depth
Class B Flammable liquids, gasoline, oil-based paint $14,000–$20,000 Hazardous material cleanup, contamination spread
Class C Electrical equipment, wiring, appliances $12,000–$23,000 Complete rewiring needs, hidden wall damage assessment
Class K Cooking oils, grease, commercial kitchen equipment $12,000–$20,000 Appliance replacement, ventilation system restoration, cabinet work
Class D Combustible metals (rare in residential settings) $16,000–$25,000 Specialized cleanup equipment, containment requirements

Most residential fires fall into Class A or Class K categories, with Class C common in older homes with outdated electrical systems. Class B and D fires occur less frequently in residential settings but carry higher restoration costs when they do happen.

Room Type Size Range Rebuild Cost Range Complexity Factors
Kitchen 150–250 sq ft $8,000–$25,000 Cabinets, appliances, plumbing, electrical, ventilation
Bathroom 40–100 sq ft $4,000–$12,000 Plumbing fixtures, tile work, ventilation, moisture protection
Bedroom 120–200 sq ft $3,000–$8,000 Flooring, drywall, trim, closet systems
Living room 200–400 sq ft $5,000–$15,000 Open space finishing, ceiling height, built-in features
Dining room 120–180 sq ft $3,500–$9,000 Flooring matching, lighting fixtures, finish details
Home office 100–150 sq ft $3,000–$7,500 Electrical capacity, built-in shelving, network wiring
Basement 600–1,200 sq ft $12,000–$35,000 Moisture control, egress requirements, access challenges

Open-concept spaces may require addressing adjacent areas even if they didn’t sustain direct fire damage. Smoke travels through connected spaces, and matching finishes across continuous flooring or wall surfaces often means extending work beyond the immediately damaged zone. Built-in features like custom shelving, wainscoting, or coffered ceilings add significant labor and material costs compared to simple painted drywall rooms. Premium finish materials in specific rooms, particularly custom cabinetry, granite countertops, or hardwood flooring, dramatically affect final costs compared to standard laminate, vinyl, or carpet alternatives.

Smoke, Soot, and HVAC Restoration Costs

PwvNwUeRj-wt6G_jDIt9w

Smoke penetrates porous materials like drywall, insulation, upholstery, and wood. It circulates through HVAC systems and ductwork, settles in hidden spaces throughout your home, often reaching areas that never saw flames. This invisible contamination requires specialized treatment that extends far beyond cleaning visible surfaces.

Remediation Service Cost Range Application
Thermal fogging treatment $200–$585 Heated solution that penetrates materials to neutralize odor molecules
Ozone treatment $235–$465 Ozone generator breaks down odor-causing compounds at molecular level
Dry soot removal $400–$700 Fine powder residue from burned paper, wood, and fabric
Oily soot cleanup $1,000–$1,700 Sticky residue from petroleum products, grease, or plastics
Supply and return duct cleaning $275–$490 Professional cleaning of contaminated ductwork system
HVAC unit internal cleaning and filter replacement $200–$600 Cleaning evaporator coils, blower assembly, and replacing all filters

Smoke circulates through ductwork and HVAC components during a fire, depositing soot and odor-causing compounds throughout the system. When you turn on heating or cooling after a fire, contaminated ducts redistribute smoke particles and odors into cleaned living spaces, essentially recontaminating your home. Professional HVAC cleaning prevents this cycle by removing all residue from duct interiors, registers, and system components before you resume normal operation. Hard-to-reach areas like attics and crawl spaces where ductwork runs increase labor intensity and raise costs. But skipping these areas leaves contamination sources that compromise your restoration work.

Untreated smoke damage leads to long-term odor issues that worsen in humid conditions. It compromises indoor air quality that affects respiratory health and causes material degradation as acidic smoke residue slowly corrodes metals and breaks down finishes. Professional remediation is necessary even in rooms without visible fire damage because smoke travels through wall cavities, seeps under baseboards, and settles on surfaces throughout your home. The question isn’t whether you need smoke remediation, but how extensive the treatment must be to fully address contamination.

Water Damage Restoration Costs from Firefighting Efforts

QxoVtOqpQd2B-cgV86KQ2w

Firefighting water causes secondary damage that requires immediate attention to prevent mold growth, wood rot, and structural weakening. Fire hoses deliver hundreds of gallons of water into your home within minutes, saturating floors, walls, insulation, and contents that survived the flames.

Water Category Description Cost Per Sq Ft
Category 1 (Clean Water) From clean water sources like supply lines or fire hoses $3.30–$4.05
Category 2 (Gray Water) Contains some contamination from appliances or minor sewage $4.10–$7.00
Category 3 (Black Water) Heavily contaminated with sewage or chemical exposure $7.00–$7.50

Timeline urgency for water extraction and drying directly impacts costs through mold remediation needs. Mold begins growing within 24 to 48 hours in wet conditions, transforming a straightforward water damage job into a more expensive combined water and mold remediation project. Professional water damage restoration starts with water extraction using truck-mounted equipment, followed by dehumidification, air movement, and moisture monitoring over several days. Delays of even a few days multiply costs because mold remediation requires containment barriers, specialized cleaning solutions, and disposal of contaminated materials that can’t be saved.

Insurance typically covers water damage from firefighting efforts under your fire damage claim, but documentation is critical. Photograph all water damage areas, keep detailed records of affected items, and document moisture readings that contractors take during the drying process. This evidence supports your claim and prevents disputes about whether damage came from the fire or from delayed water mitigation.

Structural Repairs and Building Code Compliance Costs

WhTEN-CATHSIcimIQ5Kr6w

Fire damage often reveals code deficiencies that must be corrected during restoration, particularly in older homes built before modern safety standards took effect. When you open walls for fire repairs, building departments require bringing exposed systems up to current code even if those areas weren’t directly damaged.

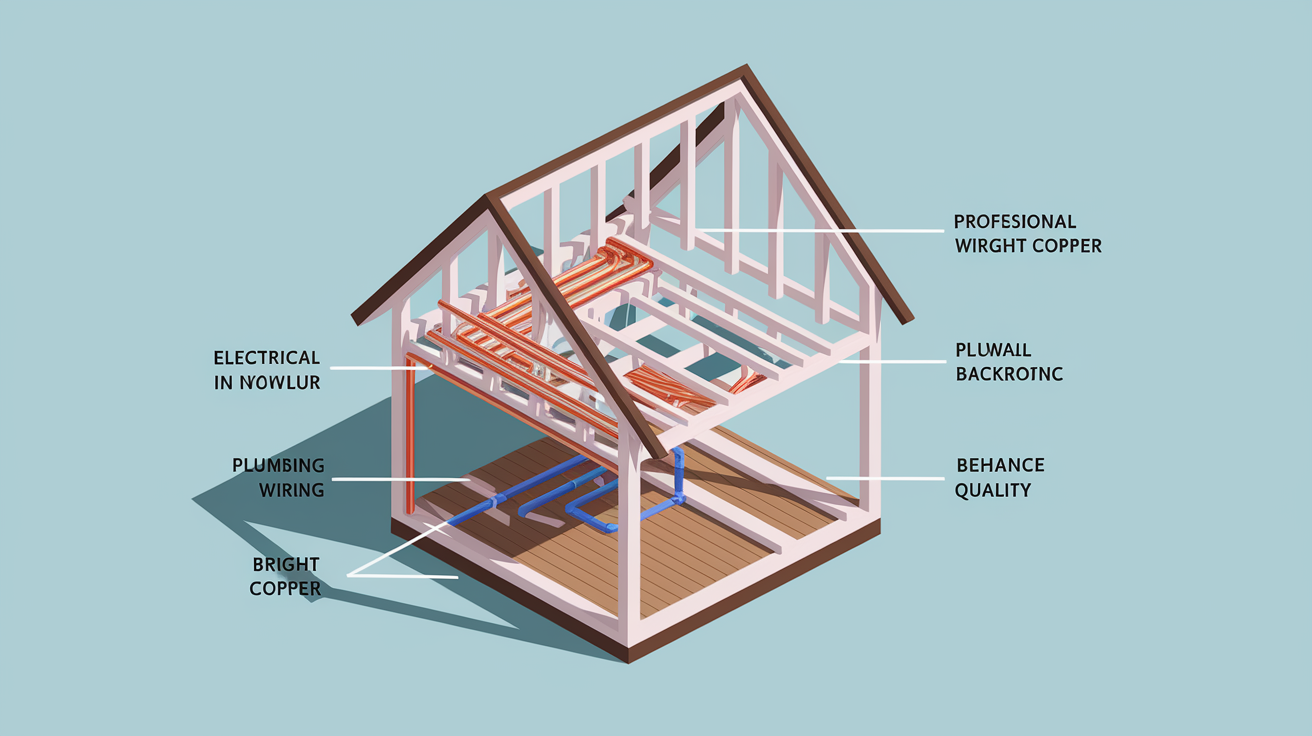
Electrical system modernization includes upgrading from outdated fuse boxes to modern circuit breaker panels, adding required GFCI outlets in bathrooms and kitchens, and replacing aluminum wiring with copper. Costs run $1,500 to $4,000 depending on home size.

Fire-rated drywall installation may be required by code between living spaces and garages, around furnace rooms, or between multi-family units. This adds $0.50 to $1.50 per square foot over standard drywall.

Upgraded insulation requirements under current energy codes mandate higher R-values than older homes contain. Bringing attic insulation from R-19 to R-38 costs $1.50 to $3.50 per square foot.

Smoke detector placement under modern codes requires interconnected smoke detectors in every bedroom, outside sleeping areas, and on every level. Installing hardwired interconnected units costs $100 to $200 per detector.

Egress window requirements mean bedrooms need windows meeting minimum size and height requirements for emergency escape. Enlarging windows costs $2,500 to $5,000 per opening including framing modifications.

GFCI outlet installation is required within six feet of water sources in kitchens, bathrooms, laundry areas, and outdoor locations. GFCI outlets cost $15 to $25 each plus installation labor.

Permit costs typically range from $500 to $2,000 depending on project scope and local jurisdiction, with larger rebuilds requiring multiple permits for electrical, plumbing, mechanical, and structural work. Inspection fees add $100 to $300 per inspection, with most projects requiring at least three to five inspections at rough-in, insulation, and final stages. Some municipalities charge percentage-based permit fees calculated from total project cost, which can reach several thousand dollars on extensive rebuilds.

Code compliance upgrades, while adding cost, improve home safety and value. Modern electrical systems reduce fire risk, upgraded insulation lowers utility bills, and proper egress windows provide life-safety protection for occupants.

Interior Flooring Replacement Costs After Fire Damage

d5hkhUo2T56XzFRtKdIzkw

Flooring often sustains both direct fire damage from flames and heat, plus secondary water damage from suppression efforts that soaks through to subfloors. This combination frequently requires complete removal and replacement rather than surface repairs.

Flooring Type Removal Cost Installation Cost Per Sq Ft Total Avg Cost (300 sq ft room)
Carpet $0.50–$1.00 per sq ft $2.00–$5.00 $750–$1,800
Vinyl/Laminate $1.00–$2.00 per sq ft $3.00–$6.00 $1,200–$2,400
Tile $2.00–$4.00 per sq ft $5.00–$10.00 $2,100–$4,200
Engineered Hardwood $1.50–$2.50 per sq ft $6.00–$9.00 $2,250–$3,450
Solid Hardwood $2.00–$3.00 per sq ft $8.00–$15.00 $3,000–$5,400
Luxury Vinyl Plank $1.00–$2.00 per sq ft $4.00–$7.00 $1,500–$2,700

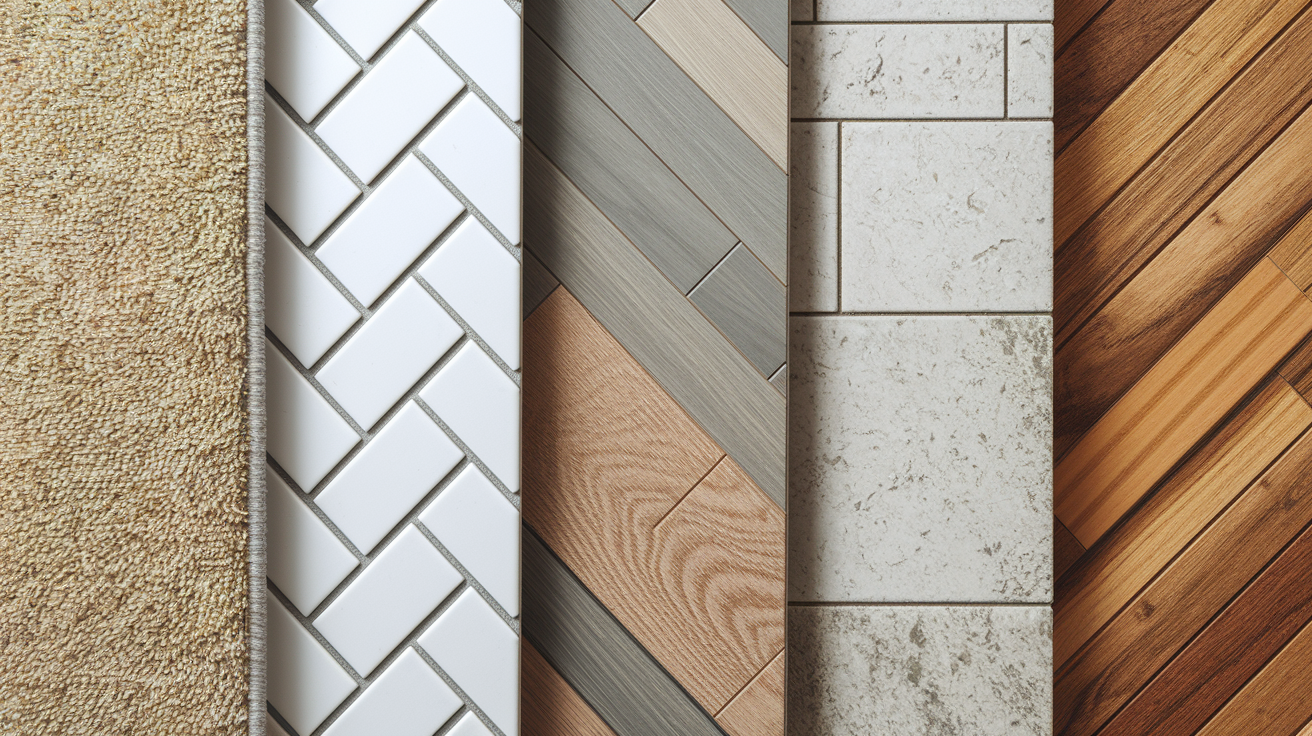
Subfloor assessment and replacement adds $2 to $7 per square foot when needed, which is common after water-saturated fires. Plywood subfloors absorb water quickly, swell, delaminate, and lose structural integrity. Contractors remove damaged subfloor sections, inspect joists for moisture damage or charring, and install new plywood before proceeding with finish flooring. Skipping this step creates squeaks, soft spots, and premature finish floor failure within months.

Matching existing flooring in undamaged areas versus full-room replacement for consistency presents a practical decision. Exact matching is difficult because flooring products change over time, wear patterns differ between old and new sections, and slight color variations become obvious in good lighting. Many homeowners choose to replace entire rooms or continuous spaces rather than create visible patch jobs. This adds cost but ensures uniform appearance.

Insurance Coverage and Claim Process for Interior Fire Rebuilds

88WPqLk_QjaccpwdPlf6WA

Standard homeowners policies typically cover fire damage but with important limitations, deductibles, and coverage caps that affect your out-of-pocket rebuild costs. Understanding your policy before damage occurs helps set realistic expectations and avoid financial surprises during restoration.

Dwelling coverage for structural repairs covers your home’s structure including walls, roof, built-in appliances, and permanently installed fixtures. Most policies cover actual damage costs up to policy limits, typically at your home’s replacement cost value.

Personal property coverage for contents covers furniture, clothing, electronics, and belongings damaged by fire, smoke, or water. It’s usually set at 50 to 70 percent of dwelling coverage and may have per-item limits for high-value items like jewelry or art.

Additional living expenses during reconstruction covers hotel, temporary rental, meals, and increased living costs while your home is uninhabitable. Time limits typically range from 12 to 24 months, with dollar limits often 20 to 30 percent of dwelling coverage.

Actual cash value versus replacement cost policies differ significantly. ACV policies pay depreciated value of damaged items, while replacement cost policies pay to replace items new. This difference dramatically affects payout amounts on older homes and contents.

Typical deductibles range from $500 to $2,500, though some policies carry percentage-based deductibles of 1 to 5 percent of dwelling coverage. A $300,000 home with 2 percent deductible means you pay the first $6,000 of repairs.

Policy limits and how they affect large losses matter when your dwelling coverage is $250,000 but repairs cost $300,000. You’d pay the $50,000 difference. Guaranteed replacement cost endorsements remove this cap but cost more in premiums.

The claims process requires immediate notification when safe to do so, typically within 24 to 48 hours of discovering damage. Your insurer assigns an adjuster who inspects damage, estimates repair costs, and determines coverage. Document everything before cleanup begins if safely possible, including photos, videos, and written lists of damaged items with approximate values and purchase dates. Restoration contractors provide detailed damage reports and scope of work documents that support your claim by explaining what repairs are necessary and why.

Common coverage gaps include code upgrade costs since policies typically cover restoring your home as it was, not upgrading to current code. Landscaping coverage is limited, often capped at $500 to $1,000 per tree or shrub with 5 percent of dwelling coverage maximum for all landscaping. Outbuildings like detached garages or sheds may have separate, lower coverage limits. When your claim approaches policy limits or gaps exist, you may need supplemental out-of-pocket expenses to complete restoration fully. Extended replacement cost endorsements provide buffer room by increasing coverage 25 to 50 percent above policy limits for an additional premium cost.

Regional Cost Variations for Interior Fire Restoration

YzONS2GcTvKBW9q7SmDiGw

Identical fire damage can cost 30 to 50 percent more in high-cost metropolitan areas compared to rural regions, affecting your budget regardless of damage extent. These regional differences stem from labor markets, material logistics, and local regulatory environments that vary dramatically across the country.

Labor rate differences show up clearly. Coastal cities and major metros like San Francisco, New York, and Seattle see restoration labor rates of $75 to $125 per hour, while Midwest and Southeast markets average $45 to $75 per hour for the same work. Rural areas may drop to $35 to $60 per hour.

Material transportation costs hit remote locations harder. They pay premium prices for materials due to shipping distances and smaller supplier competition. A sheet of drywall costing $12 in suburban areas might run $18 to $22 in rural mountain or island communities.

Permit and inspection fees by municipality vary widely. Large cities charge higher permit fees and require more inspections than small towns. A kitchen rebuild permit might cost $250 in a rural county but $1,500 in a major city, with inspection fees adding hundreds more.

Contractor availability and demand affects pricing too. High-demand markets with construction booms see longer wait times and higher contractor rates. Post-disaster areas where multiple properties need restoration simultaneously face severe contractor shortages and price spikes.

Local building code stringency adds costs in certain regions. California seismic requirements, Florida hurricane codes, and wildfire-prone area regulations add costs that don’t exist in less-regulated regions. These requirements increase material specs and installation complexity.

Rough regional multipliers help estimate how national averages translate to your area. West Coast and Northeast markets typically run 1.2 to 1.5 times baseline national averages, meaning a $20,000 national average project costs $24,000 to $30,000 in these regions. Southeast and Midwest markets hover around 0.8 to 1.0 times baseline, bringing that same project to $16,000 to $20,000. Rural areas in any region tend toward 0.7 to 0.9 times baseline, or $14,000 to $18,000 for the example project.

Get multiple local estimates rather than relying solely on national averages. Three to five quotes from licensed contractors in your specific area provide accurate pricing that reflects your local market conditions, code requirements, and competitive environment.

Timeline and Project Management Costs for Fire Rebuilds

h70O2NquR1CAhJRvnVdfug

Realistic timeline expectations help you plan temporary housing, understand carrying costs, and avoid frustration during the rebuild process. Most interior fire restorations progress through distinct phases with specific durations.

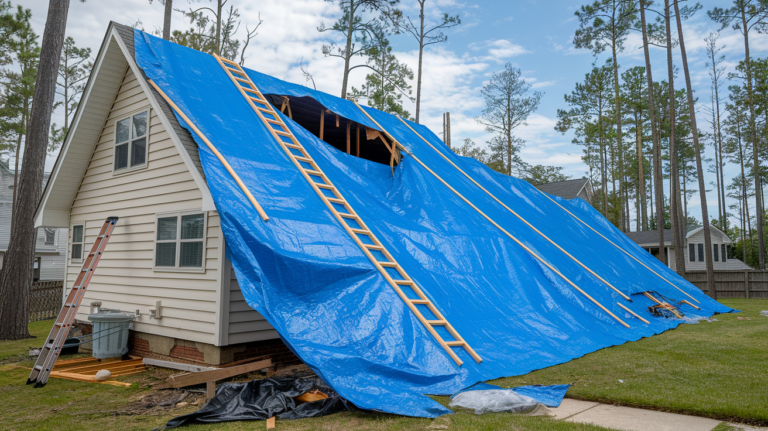
Emergency stabilization takes 1 to 3 days and includes boarding up openings, tarping damaged roof areas, shutting off utilities, and securing the property against weather and unauthorized entry. Damage assessment and planning requires 3 to 7 days for professional inspection, moisture testing, scope development, and estimate preparation. Demolition and cleanup spans 1 to 2 weeks depending on damage extent, requiring removal of all burned materials, smoke-damaged surfaces, and contaminated insulation. Structural repairs take 2 to 4 weeks for framing work, roof repairs, and major system replacements before closing walls. Finish work requires 2 to 4 weeks for drywall, flooring, painting, trim, and final details.

Permit approval delays matter because building departments take 2 to 6 weeks to review and approve plans in busy jurisdictions. This adds timeline even before work starts. Expedited review costs extra but cuts wait time.

Material backorders affect availability of specific flooring, cabinets, fixtures, and appliances due to supply chain disruptions. Custom or specialty items may carry 8 to 16 week lead times.

Insurance approval processes take time as claim adjusters review contractor estimates, approve work scopes, and issue payment. Disputes over coverage require additional back-and-forth that delays starting work.

Inspection scheduling works on fixed schedules with limited availability. Missing an inspection slot delays progress by days or weeks until the next available appointment.

Contractor availability means reputable contractors book weeks or months in advance during busy seasons. Starting work may wait for your contractor’s schedule to open up.

Carrying costs during reconstruction add to your financial burden even while making no visible progress on repairs. Temporary housing runs $1,500 to $3,000 per month for apartments or extended-stay hotels comparable to your home. Storage for belongings costs $100 to $300 per month depending on the amount of furniture and items you need to protect during construction. You continue paying mortgage, property taxes, and insurance on your damaged home even while living elsewhere, creating double housing cost pressure.

Project management fees reach 10 to 20 percent of total cost when hiring general contractors to coordinate multiple trades. This percentage covers scheduling subcontractors, ordering materials, obtaining permits, coordinating inspections, and managing the job site daily. While this adds to your cost, experienced general contractors prevent delays, catch problems early, and ensure quality work that saves money over the long term.

Choosing Between Professional Restoration and DIY Fire Rebuild

Minor, isolated surface damage like a small wall area or single cabinet section might be DIY-appropriate if you have construction skills and proper safety equipment. Structural work, electrical repairs, plumbing, and extensive smoke damage require licensed fire damage restoration professionals with specialized equipment, training, and insurance coverage.

Task DIY Feasible? Professional Recommended? Risk Level
Smoke odor removal No Yes High, requires specialized equipment and chemicals
Drywall replacement Maybe For large areas Medium, finishing requires skill for professional appearance
Electrical repair No Yes, required by code High, life safety hazard, permit required
Structural assessment No Yes High, critical for safety and code compliance
HVAC cleaning No Yes High, requires specialized equipment, impacts air quality
Flooring installation Maybe For complex patterns Low to Medium, mistakes are visible but not dangerous
Plumbing restoration No Yes, permit required High, water damage from leaks, code compliance
Final finishing Maybe For best results Low, cosmetic impact only

Cost-versus-risk tradeoffs favor professional work in most fire restoration scenarios. You might save $2,000 doing your own drywall but create $5,000 in problems if you miss hidden moisture, fail to seal smoke odor properly, or violate code requirements that cause issues during sale. Insurance may require licensed contractors for covered work, with policies specifically excluding damage caused by homeowner work or unqualified contractors. Your insurer won’t pay to fix problems you create through DIY attempts that go wrong.

Verify contractor qualifications before hiring. Look for a valid state contractor license showing proper classification for fire restoration work, IICRC (Institute of Inspection Cleaning and Restoration Certification) certification demonstrating training in fire and smoke damage restoration, liability insurance with minimum $1 million coverage protecting you from job site injuries or property damage, workers compensation insurance covering their employees, and verifiable references from recent fire restoration projects you can contact.

Cost-Saving Strategies for Interior Fire Rebuilds

Fire rebuilds are expensive but strategic choices reduce costs significantly without compromising quality or safety.

Final Words

The cost to rebuild interior after fire depends on damage severity, affected areas, and finish quality you choose.

Most projects fall between $4,000 and $27,000, but your specific scope drives the final number.

Start with professional assessment, get detailed estimates from licensed contractors, and document everything for insurance.

Act fast to prevent water and smoke damage from spreading. That saves money.

We coordinate the full rebuild sequence so you’re not juggling multiple contractors. One team, clear plan, finished look that matches your home.

Ready to move forward? We’ll walk you through next steps.

FAQ

How much does it cost to rebuild after a house fire?

The cost to rebuild interior after a house fire typically ranges from $4,000 to $27,000 for most homes, with minor incidents starting around $3,000 and severe cases exceeding $50,000. Per square foot pricing averages $4 to $7, depending on damage severity, materials selected, and the scope of structural repairs required. Factors like fire classification, affected rooms, smoke penetration depth, and water damage from firefighting efforts all impact final costs.

Does insurance pay for housing after a fire?

Insurance typically pays for temporary housing after a fire through additional living expenses (ALE) coverage included in most standard homeowners policies. This coverage reimburses costs like hotel stays, rental housing, meals, and storage during reconstruction, usually ranging from $1,500 to $3,000 monthly. Coverage limits and duration vary by policy, so review your specific terms and notify your insurer immediately to activate this benefit.

How long do toxic fumes last after a fire?

Toxic fumes and smoke odor last indefinitely after a fire without professional remediation, as smoke particles penetrate porous materials, circulate through HVAC systems, and settle in hidden spaces. Professional treatments like thermal fogging and ozone treatment eliminate smoke odor within days, but untreated homes continue releasing odor and compromising indoor air quality long-term. HVAC duct cleaning and thorough surface remediation prevent recontamination of cleaned spaces.

What is the most expensive thing to repair on a house after fire damage?

Structural framing repairs represent the most expensive component of fire rebuilding, typically costing $3,000 to $12,000 depending on damage extent and load-bearing element involvement. Class C electrical fires requiring complete rewiring can reach $12,000 to $23,000, while Class B flammable liquid fires cost $14,000 to $20,000 due to hazardous cleanup requirements. Combined structural, electrical, and finish work in severely damaged homes often exceeds $50,000.

What tasks can homeowners handle themselves during fire restoration?

Homeowners can handle minor tasks like removing smoke-damaged belongings, light demolition of non-structural elements, and basic cleaning of hard surfaces without professional help. However, structural assessment, electrical repairs, plumbing restoration, extensive smoke remediation, HVAC cleaning, and drywall replacement require licensed professionals due to safety risks, code requirements, and insurance coverage conditions. DIY work on critical systems risks costly mistakes and insurance claim complications.

How does fire classification affect restoration costs?

Fire classification directly affects restoration costs through cleanup requirements and material hazards, with Class A ordinary combustible fires costing $9,000 to $14,000, while Class D combustible metal fires reach $16,000 to $25,000 due to specialized equipment needs. Class B flammable liquid fires require hazardous material cleanup protocols, increasing costs to $14,000 to $20,000, and Class C electrical fires demand extensive rewiring at $12,000 to $23,000.

What building code upgrades add cost during fire rebuilds?

Building code upgrades commonly required during fire rebuilds include electrical system modernization, fire-rated drywall installation, upgraded insulation to current R-values, properly placed smoke detectors, egress window requirements, and GFCI outlet installation. Older homes may need substantial work to meet modern safety standards, with permit costs ranging $500 to $2,000 and inspections adding fees. These upgrades improve home safety and value despite increasing immediate costs.

How much does smoke and soot remediation cost separately from structural repairs?

Smoke and soot remediation costs $200 to $1,700 depending on soot type and treatment method, with dry soot removal running $400 to $700 and oily soot cleanup reaching $1,000 to $1,700. Thermal fogging for odor removal costs $200 to $585, while ozone treatment runs $235 to $465. Air duct cleaning after fire damage adds $275 to $490, necessary to prevent recontamination of cleaned living spaces.

What percentage of fire rebuild costs come from water damage?

Water damage from firefighting efforts often represents 20 to 40 percent of total fire restoration costs, with remediation ranging from $1,270 to $5,375 based on damage extent and water category. Category 1 clean water costs $3.30 to $4.05 per square foot, Category 2 gray water runs $4.10 to $7 per square foot, and Category 3 black water reaches $7 to $7.50 per square foot for professional extraction and drying.

Should you match existing materials or upgrade during fire rebuilds?

Whether to match existing materials or upgrade depends on budget, insurance coverage, and long-term home plans, with matching often more affordable but upgrades adding value and safety features. Strategic upgrades like fire-resistant drywall, improved insulation, and moisture-resistant materials in kitchens and bathrooms add minimal cost when incorporated during active construction. Some energy-efficiency and fire-safety upgrades qualify for tax credits or insurance discounts offsetting initial expenses.

How much should you budget for contingencies in fire restoration?

Budget 15 to 25 percent above initial estimates for contingencies in fire restoration to cover hidden costs discovered during demolition, like concealed structural damage, hazardous materials requiring abatement, mold from delayed water damage, and code upgrade requirements. Hard-to-reach areas like attics or crawl spaces increase labor costs, and material price fluctuations during extended projects add unexpected expenses requiring financial flexibility.

What qualifications should fire restoration contractors have?

Fire restoration contractors should hold active state licensing, IICRC certification demonstrating industry standard adherence, general liability and workers compensation insurance, and verifiable references from recent fire restoration projects. Experienced contractors provide detailed written estimates with itemized costs, clear timelines, payment schedules, warranty information, and transparent exclusions. Verify credentials before hiring and obtain multiple estimates for cost and scope comparison.

Flood Damaged Subfloor Replacement: When to DIY or Hire Pros

0

Think you can save big by replacing a flood-damaged subfloor yourself?
Sometimes you can, but a bouncy floor, stubborn musty smell, or hidden joist rot can turn a weekend fix into an expensive rebuild.
This post walks you through the immediate safety steps, moisture checks, demo and replacement basics, tools, drying tips, and cost ranges.
You’ll get clear red flags, like when joists need repair, when mold or sewage is involved, and when an expert should take over, so you can decide confidently and stop more damage fast.

Step‑by‑Step Guide to Replacing a Flood‑Damaged Subfloor

erel3g8RTHamjJIP0MYQ9A

Before you start tearing up flooring, shut off the water source and make sure the floor is actually safe to walk on. If there’s standing water or the floor feels like a trampoline when you step on it, stay off until you know the joists aren’t compromised.

Next up, kill the electrical power in that room at the breaker panel. Floodwater gets into outlets and wiring, and wet hands on wet tools can kill you. If you need to run equipment, use GFCI-protected power.

Put on your PPE. Waterproof gloves, safety glasses, knee pads, and an N95 or P100 respirator if you see mold or smell anything musty. If sewage or gray water is in the mix, add boots and full sleeves.

Use a moisture meter to check the subfloor in several spots. Readings above 15 to 18 percent mean the wood is still soaked and needs replacing, not just drying. Write down the numbers in case insurance asks later.

Pull baseboards carefully and label them if you’re planning to reuse them. Roll back carpeting, pull up laminate or engineered boards, or cut vinyl into sections. You need the subfloor fully exposed so you can see what you’re dealing with.

Cut out and remove all saturated subflooring. Set your circular saw to the panel thickness so you don’t bite into the joists, then finish corners with a jab saw or oscillating tool. Pry up the damaged panels with a pry bar. Bag everything and haul it to a dumpster or disposal trailer right away to stop mold from spreading.

Inspect every joist in the exposed area. Look for rot, soft spots, or black staining. If a screwdriver sinks into a joist when you press it, that joist needs replacing or sistering with new lumber of the same size. This is where you call a design professional if you find damage.

Measure and cut new plywood or OSB panels to fit. Leave a 1/8 inch gap between old and new subflooring for expansion. Apply construction adhesive in a zigzag pattern along each joist where the new panel will sit.

Lay the replacement panel and fasten it with deck screws or ring shank nails. Drive fasteners every 6 to 8 inches along the edges, placed 3/8 inch back from the edge, and every 8 to 12 inches in the field. Work from the center out to avoid buckling.

Let the adhesive cure and the subfloor dry for at least 24 to 72 hours before installing underlayment or finish flooring. Run dehumidifiers and air movers during that window. Check moisture levels again before you close up the floor.

How to Assess the Extent of Subfloor Water Damage

mx4mJkTJSIqfeGHq8H9wmg

Walk across every part of the wet area and feel for soft spots, sagging, or flexing that wasn’t there before. If your foot sinks slightly or the floor feels bouncy, the subfloor underneath has absorbed water and lost its structural stiffness. That’s a replacement indicator.

Pull back a corner of carpet or peel up a plank if you can. Look for discoloration, staining, or swelling at the seams of the subfloor panels. Dark streaks or fuzzy white or black patches mean mold growth. If you see that, the panel needs to come out.

Use a moisture meter on the exposed subfloor. Readings above 15 to 20 percent mean the wood is still wet enough to support rot and mold. Test in several spots, including near walls and under appliances, because those areas hold moisture longer.

Check for persistent odors. Musty or sour smells that don’t go away after surface drying usually mean hidden moisture trapped in subflooring or between layers. An infrared camera can show you cold spots where water is pooled or wicking up from below.

Soft or spongy feel underfoot, especially near walls or under appliances. Visible cupping, warping, or buckling of the flooring surface above the subfloor. Dark stains, waterlines, or white fuzzy mold growth on exposed panel edges. Moisture meter readings consistently above 15 percent after 48 hours of drying. Persistent musty or rotten smell even after cleaning and ventilating.

Tools and Materials Needed for Subfloor Replacement

luuW6pDRTnmV-7l584-SOg

You’ll need cutting tools, fastening tools, moisture testing equipment, and safety gear to complete this project safely and correctly. Most items are available at home centers or tool rental shops.

Circular saw with a fresh blade for clean cuts through wet plywood or OSB. Reciprocating saw or jab saw for cutting panel corners and tight spots. Pry bar and hammer to lift damaged subflooring without damaging joists. Moisture meter, pin or pinless, to confirm moisture content before and after installation. Drill or impact driver for driving screws through panels into joists. Tape measure, chalk line, and carpenter’s square for measuring and marking cuts. Safety glasses, N95 or P100 respirator, waterproof gloves, knee pads. Dehumidifier and air movers, rental or purchase for controlled drying. 3/4 inch tongue and groove plywood or OSB panels. Choose exterior rated or pressure treated for flood prone areas. Construction adhesive compatible with the panel type, one tube per 12 to 20 linear feet of joist contact. #8 x 2 1/2 inch or 3 inch deck screws or 8d galvanized ring shank nails. Vapor barrier or moisture blocking membrane if required by local code or manufacturer spec.

Mold Prevention and Remediation Before Installing New Subflooring

mzv4UU55RzeDPKUhBDSrcA

Mold spores can colonize wet wood in 24 to 48 hours, so speed matters. The moment you cut out saturated subflooring, bag it and get it out of the house. Leaving it to dry in place just gives mold more time to spread into the joists and insulation.

Before you install replacement panels, treat any exposed framing with a borate or antimicrobial solution if you saw visible mold or suspect hidden growth. Follow the product label for mixing ratios and dwell time. Spray or brush it onto the joist faces and the underside of the subfloor that remains, then let it dry completely.

Run HEPA air scrubbers or high efficiency air movers in the work area while the framing dries. These machines capture airborne spores that get kicked up during demolition. Vent them outside if possible, or at least run them continuously until moisture levels drop below 15 percent and the smell clears.

If mold coverage exceeds 10 square feet or you see black staining deep into the wood grain, call a certified mold remediation contractor before you proceed. At that point, containment and HEPA vacuuming are necessary to avoid spreading contamination into ductwork or living spaces.

Cost Breakdown for Replacing a Water‑Damaged Subfloor

8eaO1YsJSe2rOwZGP3GrTw

Material and labor costs vary widely depending on the size of the damaged area, the type of subflooring you choose, and whether joists or framing need repair. In most cases, you’ll pay between $3 and $10 per square foot for professional replacement, including tear out, disposal, new panels, adhesive, fasteners, and basic prep. Smaller jobs with minor joist repairs fall near the lower end. Larger jobs involving structural work, mold remediation, or sewage contamination push costs higher.

Area Size Typical Cost Range Factors Affecting Cost
Small room (100–200 sq ft) $400–$2,000 Material grade, moisture meter rental, disposal fees, minimal joist repair
Medium room (300–500 sq ft) $900–$5,000 Extent of mold, joist sistering, number of panels, adhesive and fastener quantity
Whole floor or multi-room (1,000+ sq ft) $3,000–$12,000+ Structural repairs, sewage contamination, professional remediation, permit requirements
DIY materials only (per sq ft) $2–$8 Panel type (OSB, CDX, T&G plywood, pressure-treated), adhesive brand, fastener choice

How Long Subfloor Replacement Takes After Flooding

nGA7CkyMRNCeFsUlfj4yKw

Drying is the longest part. Even after you remove standing water, subflooring and joists can hold moisture for 24 to 72 hours or longer depending on airflow, humidity, and the thickness of the material. Plan to run dehumidifiers and air movers continuously during that window, and check moisture readings twice a day until they drop below 15 percent.

Demolition and installation move faster once the structure is dry. Removing damaged panels, cutting and fitting replacement sheets, and fastening them down typically takes one to two days for a single room. If you discover rotted joists or need to sister new framing, add another day or two. Larger projects or whole floor replacements can stretch to a full week or more when you factor in drying time, structural repairs, and final moisture verification before you install underlayment or finish flooring.

When to Hire a Professional vs DIY

TxM8C7zpSbeP2EJez4J17Q

You can handle small, straightforward subfloor replacements yourself if the damage is limited to one or two panels, the joists are solid, and you’re comfortable using a circular saw and drill. If you have access to a moisture meter, dehumidifier, and basic carpentry tools, the job is manageable.

Call a professional in these situations.

Joist rot or structural sagging that requires sistering or replacement of framing members. Mold contamination covering more than 10 square feet or black staining deep into the wood grain. Sewage or gray water flooding, which requires containment and biohazard disposal protocols. Large area replacement spanning multiple rooms or an entire floor system. Radiant heating, plumbing, or HVAC components embedded in or under the subfloor. Insurance claims requiring documentation, moisture logs, and professional estimates for adjuster review.

Even if you plan to DIY the installation, consider hiring a licensed contractor for the initial assessment and structural inspection. That step alone can catch hidden damage that would otherwise cause the floor to fail or the claim to be denied later.

Filing an Insurance Claim for Water‑Damaged Subflooring

F1_ZGgrYQ8OJd8q2oWZhgA

Homeowners insurance often covers sudden and accidental water damage from burst pipes, appliance failures, or ice maker leaks. It typically doesn’t cover flooding from rivers, storm surge, or ground saturation unless you carry a separate flood policy through the National Flood Insurance Program or a private carrier. Read your policy declarations page to confirm what’s covered before you file.

Start documentation the moment you discover the damage. Take time stamped photos of the wet flooring, the subfloor once exposed, any visible mold or rot, and moisture meter readings. Photograph the water source if you can identify it. Keep receipts for emergency mitigation expenses like dehumidifier rentals, disposal fees, and temporary repairs to prevent further damage.

To file your claim, contact your insurer within 24 to 48 hours of discovering the damage. Most policies require prompt notice to avoid denial for delayed reporting. Request a claims adjuster inspection and ask when they can visit the property. Don’t begin major demolition until the adjuster documents the loss, unless waiting would cause additional damage. Provide written estimates from licensed contractors for tear out, disposal, structural repairs, and subfloor replacement. Include line item pricing so the adjuster can see the scope clearly. Submit all supporting documentation. That includes photos, moisture logs, receipts for mitigation equipment, and any professional mold or structural reports if the damage is extensive.

If the adjuster’s initial settlement offer doesn’t cover the full scope of hidden damage, submit a supplement request with additional photos, contractor estimates, and moisture readings that justify the extra work. Keep copies of everything you send.

Final Words

If water’s still in the room, stop the source and cut power to wet areas if it’s safe. Pull up wet flooring, use a moisture meter to find soaked spots, remove saturated subfloor panels, and inspect joists before installing new plywood or OSB with adhesive and screws.

Drying matters — aim for readings under 15% and allow 24–72 hours of drying. Treat mold before you close the floor and document photos and readings for the insurer.

Flood damaged subfloor replacement is a steady process: act fast, measure carefully, and repair right.

FAQ

Q: Can a water-damaged subfloor be repaired?

A: A water-damaged subfloor can often be repaired if damage is limited to a few panels or surface rot. We test moisture, remove the bad wood, dry framing, then patch or replace panels.

Q: How much does it cost to replace a water-damaged subfloor?

A: The cost to replace a water-damaged subfloor typically runs $3 to $10 per square foot, rising with structural repairs, material choice, and labor, with joist fixes or mold work increasing totals.

Q: Will homeowners insurance cover rotted subfloors?

A: Homeowners insurance may cover rotted subfloors if rot results from a sudden, covered event like a burst pipe. Policies usually exclude long-term neglect and flood damage without a flood policy.

Q: What does water damage subfloor look like?

A: Water-damaged subfloor looks like cupped or warped flooring, soft or spongy spots, musty odors, dark stains, bubbling finish, visible mold, or sagging where moisture meter readings are high.

Arc Flash Hazard: Understanding the Deadly Electrical Phenomenon

0

Think electricity is safe until it isn’t? An arc flash can reach about 35,000°F, roughly four times the surface of the sun.
It’s a sudden, explosive release of electrical energy that vaporizes metal, throws molten shrapnel, and burns skin in milliseconds.
This post explains what causes arc flashes, how incident energy and the arc flash boundary translate into real danger, and which steps actually reduce risk on site.
Read on to learn how to prevent, measure, and repair the damage so workers go home safe.

Core Concept Breakdown: Understanding an Arc Flash Hazard

MyYgFno7SNOlco3Np6rrEQ

An arc flash is a sudden, violent release of electrical energy through air when current jumps between conductors or from a conductor to ground. This isn’t some gentle spark. It’s an explosive event that creates a fireball of superheated plasma, molten metal droplets, and a pressure wave powerful enough to knock workers off their feet. The arc forms when something breaks down the normally insulating properties of air, creating a low resistance path that allows thousands or tens of thousands of amperes to flow in a fraction of a second.

The physical effects are immediate and extreme. Temperatures at the arc core reach approximately 35,000°F, roughly four times hotter than the surface of the sun. That heat vaporizes metal conductors, ignites nearby materials, and burns exposed skin in milliseconds. The arc also emits blinding ultraviolet and infrared light that can damage eyes. The explosive expansion of air and vaporized metal creates a pressure blast with sound levels exceeding 140 decibels. All of this happens faster than a person can react.

Incident energy is the measure that determines how dangerous an arc flash will be at a given distance. It’s expressed in calories per square centimeter (cal/cm²) and represents the thermal energy delivered to a surface. A threshold of 1.2 cal/cm² is commonly used to define the arc flash boundary, the distance at which an unprotected person could suffer a second degree burn. Higher incident energies mean more severe burns, wider hazard zones, and more robust protective equipment required. Understanding incident energy is essential because it translates abstract electrical faults into concrete safety decisions: how far to stand back, what clothing to wear, and whether the work can proceed at all.

Detailed Look at Arc Flash Causes and Contributing Factors

QR99aU5ZRE2IKNs5mEy_Dg

Arc flashes don’t appear out of nowhere. They’re the result of a fault condition, an unintended electrical path that allows current to flow outside its designed circuit. These faults typically occur when insulation fails, conductive objects bridge live parts, or equipment degrades to the point where air gaps can no longer prevent breakdown. Voltage stress, mechanical wear, and thermal cycling all contribute to the gradual weakening of insulation and connections. When the breakdown finally happens, the available fault current in the system determines how violent the arc will be.

Environmental factors make arc incidents more likely. Dust and dirt can settle on bus bars and terminals, creating conductive layers that encourage tracking and flashover. Corrosion eats away at protective coatings and connection points, raising resistance and heat. Moisture and condensation bridge gaps between conductors or compromise insulation, especially in outdoor switchgear or humid environments. Even a small amount of moisture on a contaminated surface can trigger an arc.

Six specific contributors frequently show up in arc flash investigations:

Conductive dust or debris that accumulates inside enclosures and creates low resistance paths. Corrosion on terminals, bus bars, and fasteners that weakens electrical connections. Condensation or moisture intrusion from weather, humidity, or failed seals. Worn, damaged, or improperly rated components such as cracked insulators or undersized breakers. Human error including dropped tools, accidental contact with live parts, or incorrect switching sequences. Lack of preventive maintenance allowing loose bolts, oxidized connections, and degraded insulation to go undetected.

Arc Flash Hazard Effects on People and Equipment

Si5xzTumT-iTuLazQ6DLgQ

The injuries from an arc flash are severe and often life changing. Thermal burns are the most common, with temperatures high enough to ignite clothing and melt skin in less than a second. Burns can be second or third degree, covering large areas of the body even several feet from the arc. Radiant energy from the flash can burn exposed skin and eyes without direct contact, and the intense ultraviolet light can cause flash blindness or permanent retinal damage. Workers report seeing the afterimage of the arc for hours or days.

The pressure wave, sometimes called the arc blast, adds blunt force trauma to the thermal injuries. The explosive expansion of superheated gases creates a shock wave that can throw a person across a room, rupture eardrums, collapse lungs, or cause traumatic brain injury. Flying molten metal and shrapnel from destroyed equipment become projectiles. Panels blow off their hinges, and metal fragments embed in walls, ceilings, and human tissue. Acoustic energy alone can exceed 140 decibels, causing immediate and permanent hearing loss. Inhalation of vaporized metal fumes and burning insulation adds toxic exposure to an already deadly event.

The worst physical outcomes from arc flash incidents include severe full thickness burns requiring skin grafts and months of recovery, permanent vision or hearing loss from light intensity and acoustic trauma, and fatal cardiac arrest from electrical shock traveling through the body during the fault.

Equipment damage is often total. The heat vaporizes copper and aluminum conductors, leaving behind charred remnants and clouds of conductive soot. Insulation on cables and bus bars disintegrates, and plastic components melt or catch fire. Circuit breakers and relays may be destroyed before they can interrupt the fault, and the pressure wave can warp metal enclosures, crack circuit boards, and contaminate sensitive electronics throughout the facility. Repairing or replacing a damaged switchgear lineup can cost tens of thousands to hundreds of thousands of dollars. The downtime required for investigation, cleanup, and reconstruction often exceeds the direct repair costs.

Incident Energy, Boundaries, and Measured Arc Flash Hazards

OLOQYUjTS9aeTuSfpY9IPw

Incident energy is the single most important number in arc flash hazard assessment. It tells you how much thermal energy will strike a worker’s body at a specific distance if an arc occurs. The calculation depends on system voltage, available fault current, the time it takes for protective devices to clear the fault, and the distance from the arc source. Higher fault currents and longer clearing times produce higher incident energies. A modern arc flash study uses IEEE 1584 equations to model these variables and produce cal/cm² values at different working distances.

The arc flash boundary is drawn at the point where incident energy drops to 1.2 cal/cm², the threshold for a curable second degree burn on bare skin. Inside that boundary, unprotected workers face serious burns. Outside it, the thermal hazard is below the second degree threshold, though other hazards like flying debris, sound, and light may still exist. Boundaries aren’t fixed. They expand and contract depending on the equipment, the fault level, and how fast breakers or fuses operate. In low voltage panels with slow overcurrent protection, the boundary might extend four or five feet. In medium voltage switchgear with high fault current and slower clearing, it can reach ten feet or more.

Threshold Level Incident Energy (cal/cm²) Typical Risk Description
Arc flash boundary 1.2 Distance where unprotected skin may receive a second degree burn
Moderate hazard 8 Significant burn risk; multilayer arc rated clothing required
Severe hazard 40+ Extreme energy; full arc flash suit, face shield, and insulated gloves mandatory

Standards That Define Arc Flash Safety Requirements

7BxYbLIMRaWqynYc1S9Z-g

NFPA 70E is the foundational standard for electrical safety in the workplace. It lays out risk assessment procedures, defines arc flash boundaries, specifies PPE requirements, and establishes safe work practices including lockout/tagout and the concept of an electrically safe work condition. The standard organizes PPE into categories based on incident energy or task based tables, and it requires employers to label equipment, train workers, and document procedures. NFPA 70E is updated every three years, and the 2024 edition reflects current best practices for hazard analysis and PPE selection. Employers in industries where workers interact with energized equipment rely on NFPA 70E to structure their arc flash programs and demonstrate compliance.

IEEE 1584 provides the mathematical framework for calculating incident energy and arc flash boundaries. The standard includes empirical equations derived from controlled arc tests, accounting for variables like system voltage, gap between conductors, fault current, and clearing time. IEEE 1584 also offers guidance on equipment configurations, electrode arrangements, and correction factors for different enclosure types. The 2018 edition expanded the model to cover a wider range of voltages and introduced updated formulas for low voltage systems. An arc flash study performed according to IEEE 1584 produces the cal/cm² values and boundary distances that go onto equipment labels and drive PPE decisions.

OSHA doesn’t publish its own arc flash calculation methods, but it enforces general electrical safety requirements under 29 CFR 1910 Subpart S and references consensus standards like NFPA 70E. Employers have a legal obligation to assess electrical hazards, provide appropriate PPE, train workers, and maintain safe working conditions. OSHA citations for electrical incidents often point to failures in hazard assessment, inadequate PPE, lack of training, or missing lockout/tagout procedures. What is arc flash and how can you stay safer?

Key contributions of each standard:

NFPA 70E establishes work practices, PPE categories, boundary definitions, and employer program requirements. IEEE 1584 delivers formulas and data for incident energy calculations and boundary modeling. OSHA regulations create the legal framework and enforcement mechanism for electrical safety in U.S. workplaces.

Arc Flash Risk Reduction Methods Using the Hierarchy of Controls

0oYwZVq2RF2-Kjb-hKCcnw

The hierarchy of controls places the most effective protections first and relies on PPE only as a last resort. Engineering controls change the equipment or system to reduce or eliminate the hazard at the source. Administrative controls set rules, procedures, and boundaries that limit exposure. PPE protects the worker when exposure can’t be avoided. All three layers should be in place, but the goal is always to engineer out the hazard before relying on human behavior or protective clothing.

Engineering Controls

Engineering controls physically reduce arc flash energy or remove workers from the hazard zone. Remote racking tools allow operators to insert or remove circuit breakers from outside the arc flash boundary, keeping hands and face away from live bus. Arc resistant switchgear is designed to redirect the energy and pressure of an internal arc away from the operator, venting gases and flame through dedicated channels. Current limiting fuses interrupt faults in less than a half cycle, drastically reducing incident energy. Arc flash relays detect light and current signatures of an arc and trip breakers in milliseconds, cutting fault clearing time and lowering the cal/cm² exposure. Insulated bus systems, better grounding, and proper spacing between phases all reduce the likelihood and severity of arcs.

Administrative Controls

Administrative controls include lockout/tagout (LOTO), work permits, hazard assessments, and documented safe work procedures. The single most effective administrative control is de-energizing equipment and verifying an electrically safe work condition before work begins. When energized work is unavoidable, a written energized electrical work permit documents the justification, the hazards, the required PPE, and the names of qualified workers and supervisors. Training ensures workers can recognize arc flash labels, understand boundaries, select correct PPE, and follow procedures. Scheduling inspections, updating arc flash studies after system changes, and restricting access to electrical rooms all fall under administrative controls.

PPE as Final Protection

Personal protective equipment is the last line of defense when engineering and administrative controls can’t eliminate exposure. Arc rated clothing, face shields, insulated gloves, and hearing protection are selected based on the incident energy shown on equipment labels. PPE must be worn whenever work occurs inside the arc flash boundary on energized parts. It doesn’t prevent the arc, but it can mean the difference between survivable burns and fatal injuries. PPE programs require proper selection, inspection, care, and replacement of worn garments. Workers must understand that PPE protects only if it’s worn correctly, is rated for the hazard, and is maintained in good condition.

Arc Flash PPE Ratings, Clothing Types, and Selection Criteria

rlSJr3ReS-OmKzZMmc5GSw

PPE for arc flash protection is rated in cal/cm² based on laboratory testing. Each garment, face shield, glove, and helmet carries an Arc Thermal Performance Value (ATPV) or an Energy of Break Open Threshold (EBT) that represents the maximum incident energy the item can withstand before it fails or allows a second degree burn. Workers compare the incident energy on the equipment label to the ratings on their PPE and choose garments with equal or higher protection. Historical PPE categories, Category 1 through Category 4, correspond roughly to 4, 8, 25, and 40 cal/cm². Modern practice uses the actual calculated incident energy and selects PPE with a matching or higher arc rating.

Arc rated clothing is made from fabrics that resist ignition, don’t melt onto skin, and self extinguish when the heat source is removed. Common materials include treated cotton, modacrylic blends, and aramid fibers. Garments range from lightweight shirts and pants for low energy tasks to heavy multilayer flash suits with hoods and face shields for high energy work. Each layer adds thermal protection, and the total system rating is the sum of all layers worn together. A typical low energy kit might include an 8 cal/cm² shirt and pants. High energy protection often requires a base layer, a coverall, and an outer flash suit, pushing total costs to $1,000 to $2,000 per worker.

Four core PPE components for arc flash protection:

Arc rated shirt and pants or coveralls providing base thermal protection for torso and limbs. Arc rated face shield and hood protecting the head, face, neck, and ears from radiant heat and debris. Insulated leather gloves with arc rated outer protectors to shield hands from heat and electrical contact. Hearing protection and safety glasses to guard against acoustic trauma and flying particles.

ATPV vs. EBT

ATPV and EBT both measure the thermal performance of arc rated materials, but they describe different failure modes. ATPV is the incident energy level at which a fabric transfers enough heat to cause a second degree burn on the skin beneath it, with a 50 percent probability. EBT is the energy level at which the fabric physically breaks open, creating a hole that exposes skin to direct arc energy. Most fabrics fail by heat transfer (ATPV) rather than breakage, so ATPV is the more common rating. When a material’s EBT is lower than its predicted ATPV, the manufacturer reports the EBT instead. For PPE selection, workers use whichever value is listed and ensure it meets or exceeds the incident energy on the label.

Arc Flash Label Requirements and How to Interpret Them

Bdq1cpdKQ3uZRFVA9W7v3Q

Arc flash labels are the primary communication tool between the arc flash study and the worker in the field. They’re placed on equipment doors, panel covers, and switchgear lineups to identify hazards and required protections before anyone opens an enclosure or performs work. A complete label provides all the information a qualified worker needs to assess the risk, select PPE, and establish safe boundaries. Missing or outdated labels are a compliance failure and a serious safety gap.

Labels typically display the nominal system voltage because higher voltage often correlates with higher fault current and greater arc energy. The incident energy in cal/cm² tells the worker how severe the thermal hazard is at the defined working distance, usually 18 inches for low voltage equipment. The arc flash boundary distance marks the outer limit where unprotected skin could be burned. Some labels list a PPE category (1 through 4), while others specify the minimum arc rating required for clothing and the type of face protection. The date of the arc flash study or the most recent update is included so workers and supervisors know whether the data is current. Any major system change, new transformers, different breakers, added loads, can invalidate the label and require a new calculation.

Five required label elements:

Nominal system voltage to indicate the electrical class of the equipment. Incident energy in cal/cm² at the defined working distance. Arc flash boundary distance beyond which unprotected personnel should not approach. Required PPE either by category number or by minimum arc rating and gear type. Date of the arc flash study so labels can be verified for currency.

Arc Flash Studies: What They Include and When Updates Are Required

p6OmJzU0TA2jDEYVgBRcDw

An arc flash study is a comprehensive electrical engineering analysis that models the power system, calculates fault currents, evaluates protective device performance, and determines incident energy at every point where workers might perform tasks. The study begins with a short circuit analysis that finds the maximum fault current available at each bus, panel, and motor control center. Next, a protective device coordination study checks whether breakers, fuses, and relays will operate in the correct sequence and time to isolate faults. Finally, using IEEE 1584 formulas, the engineer calculates incident energy and arc flash boundaries for defined working distances at each location.

The deliverables include a one line diagram marked with fault currents and protective device settings, a report documenting assumptions and calculation results, and a set of arc flash labels ready to affix to equipment. The engineer also provides recommendations for reducing incident energy, such as faster trip settings, current limiting devices, or zone selective interlocking. Studies must be updated whenever the electrical system changes. New utility service, added transformers, replaced breakers, load expansions, or when equipment labels become unreadable or are missing. Many facilities update studies every three to five years even without system changes, to align with current standards and verify that protective devices still operate as modeled.

Step Purpose Key Data Needed
Data collection Gather system details and equipment ratings Single line diagrams, transformer nameplates, breaker settings, cable sizes, utility fault data
Short circuit analysis Calculate maximum fault current at each bus Impedances of transformers, cables, and utility source; system voltage and configuration
Protective device coordination Verify breakers and fuses operate in correct order and time Time current curves, trip settings, fuse ratings, clearing times
Incident energy calculation Determine cal/cm² exposure and arc flash boundaries using IEEE 1584 Fault current, clearing time, working distance, electrode configuration, enclosure type

Training, Worker Qualifications, and Safe Work Practices

MOl-hGmATzSRLlxDrT22mA

Arc flash training begins with hazard recognition. Workers learn what an arc flash is, how it starts, and what the physical effects look like: heat, light, pressure, debris. They study real incident photos and videos that show damaged equipment and injuries, making the abstract risk concrete. Training covers how to read arc flash labels, interpret incident energy and boundary distances, and select PPE that matches the hazard level. Qualified workers also learn the difference between shock hazards and arc flash hazards, and why both must be controlled before work begins.

Hands on practice is essential. Workers demonstrate how to verify de-energization, apply lockout/tagout devices, test for absence of voltage, and don arc rated clothing and face shields correctly. Supervisors review written procedures, energized work permits, and emergency response plans. Retraining should occur at least every three years, or sooner if the worker’s job changes, an incident occurs, or the electrical system is modified. New employees and contractors must complete training before they’re allowed near energized equipment. Documentation of training dates, topics covered, and individual competency assessments is required for compliance.

Four core training topics:

Hazard recognition and arc flash physics including temperature, pressure, incident energy, and boundary concepts. Label interpretation and PPE selection so workers can match protective gear to the cal/cm² rating on the equipment. Safe work procedures covering lockout/tagout, voltage verification, energized work permits, and establishing an electrically safe work condition. Emergency response and first aid for arc flash injuries, including how to shut down equipment, call for help, and provide initial burn care.

Maintenance, Testing, and Inspection to Prevent Arc Flash Events

Preventive maintenance is the frontline defense against arc flash incidents. Loose connections generate heat, increase resistance, and create conditions for arcing. A single loose bolt on a bus bar can raise local temperature enough to degrade insulation, oxidize conductors, and eventually trigger a fault. Scheduled inspections find and correct these problems before they escalate. Infrared thermography scans detect hot spots in panels, breakers, and terminations, revealing issues invisible to the naked eye. Thermography should be performed annually or more often in critical systems, and any temperature rise above baseline warrants investigation and repair.

Electrical testing verifies that circuit breakers and fuses will operate within their rated clearing times. Breakers can drift out of calibration, and contacts can pit or corrode, slowing their response. Time overcurrent testing uses precision instruments to trip breakers at various current levels and measure how long they take to open. If actual clearing time exceeds the value used in the arc flash study, incident energy calculations are no longer valid and must be recalculated. Insulation resistance testing on cables and equipment checks for degradation that could lead to ground faults or phase to phase shorts. Maintenance records, test results, and thermography reports should be kept and reviewed as part of arc flash program audits.

Five item maintenance and inspection checklist:

Torque all bolted electrical connections to manufacturer specifications and re-check annually. Perform infrared thermography scans of energized equipment to detect hot spots and failing components. Test circuit breakers and relays for correct operation and clearing time, comparing results to study assumptions. Inspect insulation and enclosures for cracks, wear, contamination, moisture intrusion, and physical damage. Clean and remove conductive dust, corrosion, and debris from bus bars, terminals, and interior surfaces.

Emergency Response, First Aid, and Post-Incident Investigation Steps

When an arc flash occurs, the first priority is to shut down power if it’s safe to do so and call for emergency medical help immediately. Arc flash burn victims require rapid transport to a hospital with a burn unit. Thermal injuries covering more than a small area are medical emergencies. Don’t remove clothing stuck to burned skin. Cover burns loosely with clean, dry cloth to reduce contamination and heat loss. If the victim is unconscious or not breathing, begin CPR if you’re trained, but be aware that electrical shock may have caused cardiac arrest or internal injuries.

Hearing damage from the pressure wave may not be immediately obvious, and victims often report confusion, disorientation, or temporary blindness from the intense light. Keep the person calm, away from further hazards, and under observation until medical personnel arrive. Document the scene with photos if safe to do so, noting the position of equipment, visible damage, and the location where the worker was standing. Don’t disturb evidence or reset breakers until investigators have assessed the scene.

Three steps for post-incident investigation:

Secure the area and preserve evidence by locking out all power sources, photographing damage, and restricting access until the investigation team arrives. Interview witnesses and the injured worker (when medically cleared) to reconstruct the sequence of events, tasks being performed, and any deviations from procedures. Conduct a root cause analysis to identify equipment failures, procedural gaps, or system conditions that contributed to the arc, then update studies, labels, training, and procedures to prevent recurrence.

Final Words

Sparks jump, light flashes, and a blast pushes out. That’s an arc flash, and it happens in a heartbeat with extreme heat, pressure, and molten metal.

You saw what causes them, how incident energy and boundaries work, the role of standards and labels, and why PPE, maintenance, and studies matter. We covered training, emergency steps, and documentation so you can act with purpose.

This kept arc flash hazard explained plainly so you know what to do next. With the right controls and checks, you can cut risk and get systems back to work.

FAQ

Q: What does an arc flash hazard consist of?

A: An arc flash hazard consists of a rapid electrical discharge that creates extreme heat (up to 35,000°F), intense light, molten metal, and a blast pressure wave that throws shrapnel and hot gases.

Q: What is the 2 second rule for arc flash?

A: The 2 second rule for arc flash treats 2 seconds as a conservative maximum clearing time when device operation is unknown; longer arc duration raises incident energy and greatly increases injury risk.

Q: Who’s responsible for protecting you from arc flashes?

A: The employer or facility owner is responsible for protecting you from arc flashes by assessing hazards, providing training, PPE, labels, and safe procedures; workers must follow controls and supervisors enforce them.

Q: Can you survive an arc flash?

A: You can survive an arc flash depending on incident energy, distance, and protective gear; low-energy events may cause minor injuries, while high-energy arcs can cause severe burns, blunt trauma, or death.

Temporary Roof Cover Materials That Actually Protect Your Home

0

Think a blue tarp will always save your home?
Not always.
The right temporary roof cover stops water from getting into the structure and prevents mold, warping, and further interior damage while you wait for permanent repairs.
Polyethylene tarps, vinyl, canvas, reinforced mesh, shrink wrap, and metal sheets each behave very differently in wind, sun, and rain.
This post walks you through what works fast, what lasts, and which choice actually protects your house so you avoid more damage and insurance headaches.

Overview of the Most Reliable Temporary Roof Cover Material Options

iFM-jCxnRKyvGgGWJzDsOw

When your roof’s damaged or exposed, the right temporary cover stops water from getting into the structure and prevents mold, warping, and further interior damage while you wait for permanent repairs.

The main material categories include polyethylene tarps and sheeting, vinyl tarps, canvas covers, reinforced mesh barriers, shrink wrap plastic, and corrugated iron or metal sheets. Each one uses different fastening systems, offers different levels of durability, and suits different project sizes and weather conditions.

Choosing the right temporary roof cover depends on how quickly you need protection, how long the cover will stay up, the weather conditions you expect, and whether you need to allow visual inspections without removing the material. Some materials are lightweight and quick to deploy in an emergency. Others are heavier, longer lasting, and built to resist severe wind, UV exposure, or repeated handling.

Polyethylene tarps and sheeting are lightweight, waterproof, UV resistant covers for short term emergency use. Vinyl tarps are heavy duty, abrasion resistant covers for longer exposure and harsh conditions. Canvas covers are breathable, moisture repelling material that allows airflow while shedding water. Reinforced mesh barriers are high shade mesh with perforations to allow controlled drainage and debris blocking in high winds. Shrink wrap plastic sheeting is large format film that’s heat welded and heat shrunk for drum tight, sealed coverage. Corrugated iron (CI) or metal sheets are reusable, rigid panels installed in smaller sections for scaffolding or construction projects.

Material by Material Comparison of Temporary Roof Cover Choices

ojrhsxPpTlGfJCM3Aq3MOQ

Polyethylene tarps are the most common emergency roof cover. They’re described as “100% waterproof,” resist UV rays, and don’t rot, mildew, or tear easily under normal handling. Poly tarps come in multiple colors, thicknesses, and specialty variants including fire retardant, string reinforced, and clear options. The classic “blue tarp” is a poly tarp. They’re lightweight, inexpensive, and fast to deploy, but they degrade faster than vinyl or metal covers when exposed to sun and wind for weeks or months.

Vinyl tarps offer higher durability and strength. They resist abrasion, tears, mold, mildew, and sunlight better than polyethylene. Vinyl’s available in multiple grades, material weights, and specialty treatments such as fire retardant and camouflage finishes. Vinyl’s best when the cover will remain in place for an extended period or in environments where the material may be scraped, walked on, or exposed to debris. The trade off is higher cost and slightly more weight during handling.

Canvas tarps are waterproof but breathable. They repel moisture while allowing air circulation underneath, which helps prevent condensation and trapped humidity. Canvas is useful when you need to protect against rain but allow the roof deck or interior to breathe and dry out. Canvas is heavier and less flexible than poly or vinyl, and it requires more care during storage to prevent mildew when damp.

Reinforced mesh tarps feature a shade closure weave around 95% with small perforations that allow controlled airflow and drainage. Mesh tarps block debris and driving rain while reducing wind load because air can pass through the perforations. They’re recommended for high wind areas and storm protection where a solid tarp might catch wind and lift or tear. Mesh doesn’t provide full waterproofing, so it’s used when partial ventilation and debris blocking are priorities.

Plastic sheeting is sold in rolls and comes in thicknesses of 5 mil, 6 mil, and 10 mil, with widths commonly at 15 feet, 20 feet, and 40 feet, and roll lengths of 100 or 200 feet. Options include flame retardant treatments and string reinforcement. Plastic sheeting allows you to cover large areas quickly by rolling out continuous film. It’s fast and cost effective but less durable than tarps with grommets and reinforced edges. Shrink wrap plastic is a specialized form of sheeting installed in large sections, typically around 7 meters by 15 meters (approximately 105 square meters per sheet). Shrink wrap is heat welded at the seams and then heat shrunk drum tight using a handheld propane hot air gun. This creates fewer joints and leak points compared to overlapping tarps, and the tight finish resists wind uplift when properly battened.

Material Strengths Limitations Best Use Case
Polyethylene tarps Waterproof, UV resistant, lightweight, inexpensive, tear/rot/mildew resistant Degrades faster under prolonged sun and wind, lower abrasion resistance Emergency storm coverage, short term protection (days to weeks)
Vinyl tarps Highest abrasion/tear/mildew resistance, long lifespan, multiple weight grades Higher cost, heavier to handle and transport Long term temporary coverage, high traffic or debris prone areas
Canvas covers Moisture repelling with airflow, breathable, durable if maintained Heavier, requires dry storage to prevent mildew, more expensive than poly Situations where breathability and moisture control are needed
Reinforced mesh Wind load reduction, debris blocking, controlled airflow/drainage Not fully waterproof, allows some water and light penetration High wind zones, debris protection, storm barrier where ventilation helps
Plastic sheeting Fast roll out coverage, large continuous areas, low cost, flame retardant options No grommets or reinforced edges, tears more easily, shorter lifespan Quick full area coverage, construction enclosures, temporary sealing
Shrink wrap plastic Heat welded seams, minimal leak points, drum tight finish, large section coverage Requires training, propane heat gun, battens, and calm weather for installation Scaffolding roofs, awkward/small roofs, rapid deployment with long term seal

Installation Methods for Popular Temporary Roof Cover Materials

Uru4SQYVTY6M8TLhP-hxiQ

Most temporary roof covers are secured using grommets, ropes, bungee cords, zip ties, sandbags, or anchor boards. Grommets are metal reinforced holes along the edges of tarps and sheeting that accept fasteners. Bungee cords and ropes tie the tarp to solid anchor points on the roof structure, such as rafters, fascia boards, or scaffold frames. Zip ties work for quick attachment to chain link, scaffold tubes, or temporary framing. Sandbags anchor edges and prevent wind from getting underneath the cover. For more secure or long term installations, use 2 x 4 anchor boards placed over the tarp edge and fastened to the roof deck with nails or screws. This sandwiches the tarp between the board and the roof surface.

Shrink wrap installation requires different preparation. First, secure perimeter handrails for fall protection and anchor any fall protection lines if working at height. Install scaffold boards as battens to hold the film in place, running them in a pattern three boards wide to create safe access while you work. Space battens approximately every 2 meters to resist wind uplift and suction under the film. Before you shrink the film, heat weld all overlaps and seams using a propane heat gun. After sealing the seams, heat shrink the entire sheet drum tight. Install a self adhesive foam strip between the battens and the shrink wrap to act as a gasket and prevent water from entering through screw holes. Don’t attempt shrink wrap installation in wet or windy conditions because moisture or wind during fitting reduces the strength and seal of the finished cover.

When working with any temporary roof cover, prioritize safety. Wear rubber soled shoes with good grip to reduce slip risk on smooth or wet surfaces. Inspect the roof for loose shingles, debris, or objects that could be dislodged during installation and become flying projectiles in wind. Secure all fasteners to solid structure, not to damaged or weak sections of the roof. Avoid installing covers during high winds, heavy rain, or icy conditions. If you’re not confident working at height or handling large sheets in wind, call a professional.

Measure the damaged or exposed area and select a cover size that provides at least 2 feet of overlap on all sides. Inspect the roof surface for loose materials, sharp edges, and weak structure before placing the cover. Position the cover over the area, ensuring it extends beyond the damage and overlaps any adjoining tarps by at least 2 feet. Secure one edge first using grommets and fasteners (rope, bungee, or anchor boards) to prevent the cover from blowing away. Pull the cover tight across the area to remove slack and wrinkles, which reduce wind resistance and water shedding. Fasten the remaining edges and corners, working systematically around the perimeter. Inspect all seams, overlaps, and fasteners to confirm the cover’s tight, sealed, and won’t lift in wind.

Weather Resistance, Durability, and Mil Thickness Across Roof Cover Materials

UHzrHxRAQJWlyZm3HH8z5g

Mil thickness measures the gauge of plastic sheeting and poly tarps. Common options are 5 mil, 6 mil, and 10 mil. Higher mil numbers mean thicker material, which generally increases puncture resistance, tear strength, and lifespan. A 6 mil reinforced polyethylene sheet offers a balance of flexibility, strength, and cost for short term emergency coverage. A 10 mil sheet is heavier and more resistant to punctures from hail, debris, or foot traffic, making it better for longer exposure or rough handling. Vinyl tarps are rated by material weight in ounces per square yard or grams per square meter (gsm), not mil thickness. Heavier vinyl (higher gsm) resists abrasion and tearing better and lasts longer under UV exposure.

Waterproofing performance depends on the material and how it’s installed. Polyethylene and vinyl tarps are described as “100% waterproof” when seams and fasteners are properly sealed. Shrink wrap sheeting has fewer joints than overlapping tarps because sections are heat welded, which reduces leak points. Canvas repels water but isn’t fully waterproof in prolonged heavy rain. Mesh tarps allow controlled water passage and aren’t designed for full rain protection. Plastic sheeting without reinforced edges can tear at fastener points during wind or rain, creating new leak paths.

Wind resistance is determined by material strength, fastening density, and cover shape. Shrink wrap and tightly battened sheeting resist wind better than loose tarps because they’re pulled drum tight and mechanically anchored at regular intervals. Temporary roofs face uplift from low pressure forming under the film during wind events. Mitigate uplift by securely clipping scaffold boards or anchor boards and spacing battens approximately every 2 meters. Vinyl and reinforced poly tarps perform better in sustained wind than lightweight, non reinforced plastic. Mesh tarps reduce wind load by allowing air to pass through perforations instead of catching and lifting the entire cover.

Rain protection varies. Shrink wrap and heat welded seams offer the fewest leak points. Poly and vinyl tarps are fully waterproof when fastened correctly. Canvas sheds light rain but not prolonged downpours. Wind resistance improves with tight installation, mechanical battening, and material weight to reduce uplift. Mesh allows airflow to prevent wind catch. Loose or oversized tarps flap and tear in high winds. UV exposure breaks down materials at different rates. Vinyl and UV treated poly tarps resist sun degradation for weeks to months. Untreated plastic sheeting breaks down faster. Multi year reinforced films (like 4 year greenhouse sheeting) offer extended UV stability. Hail and debris impact resistance is better with 10 mil plastic, vinyl tarps, and corrugated metal compared to thin sheeting. Reinforced mesh blocks debris while allowing drainage. Freeze and snow load conditions favor rigid covers like corrugated iron that shed snow. Flexible tarps can sag and pool water or snow, requiring frequent inspection and clearing.

Cost Considerations and Sizing Guidelines for Temporary Roof Cover Materials

Mu3IUaOaQ52tjh6hb42VmA

Measure the area you need to cover before purchasing materials. Avoid tarps that are excessively large because they create extra surface area that can flap in wind or become a safety hazard during installation. Provide at least 2 feet of overlap on all edges to ensure water sheds away from the damaged area and doesn’t flow under the cover. If you’re covering an area with multiple tarps or sheets, overlap adjoining pieces by at least 2 feet and secure the overlap with fasteners or heat welding to prevent separation.

Plastic sheeting is sold in rolls with widths of 15 feet, 20 feet, and 40 feet, and lengths of 100 or 200 feet. This format allows fast, continuous coverage of large areas but requires careful handling to prevent tearing at edges and fastener points. Shrink wrap sections cover approximately 105 square meters (roughly 1,130 square feet) per installed sheet, which is much faster than installing corrugated iron sheets at approximately 2 square meters per piece after overlaps. Cost efficiency improves when you can cover more area per section and reduce labor time.

Corrugated iron and keder track systems have higher upfront material costs and require more labor for lifting, positioning, and securing each piece. Vinyl tarps cost more per square foot than polyethylene but last longer and resist damage better, reducing replacement frequency. Budget for fasteners, anchor boards, bungee cords, ropes, sandbags, and any specialty tools like heat guns for shrink wrap. If you’re renting equipment or hiring labor, calculate the total installed cost per day or per project, not just material cost.

Material Typical Size/Format Coverage Efficiency
Polyethylene tarps Pre cut sizes (e.g., 10’x12′, 20’x30′) with grommets Moderate, multiple tarps needed for large areas, fast deployment
Vinyl tarps Pre cut sizes and custom orders, heavier material Moderate, fewer replacements due to durability
Plastic sheeting rolls 15′, 20′, 40′ widths, 100–200 ft lengths High, continuous coverage over large areas with minimal seams
Shrink wrap sections ~7 m x 15 m per section (~105 m² or ~1,130 sq ft) Very high, heat welded seams and drum tight finish reduce labor per area
Corrugated iron sheets ~2.0 m x 1.0 m per piece (~2 m² installed after overlaps) Low, individual lifting and fastening, reusable but labor intensive

Safety Requirements and Compliance for Temporary Roof Cover Work

L5K6OWJdST6eaGgzrZvn3g

Fall protection is the most critical safety requirement when installing temporary roof covers. Use perimeter edge protection such as guardrails or toe boards on all open sides of the roof. Anchor fall protection lines to solid structure and wear a full body harness if working near edges or on sloped surfaces. For shrink wrap installation on scaffolding, install scaffold boards in runs three boards wide to create safe access paths and reduce the risk of stepping through gaps or onto unsupported film.

Avoid installing temporary covers in wet, windy, or icy conditions. Wet surfaces increase slip risk. Wind makes large sheets difficult to control and can pull fasteners out of weak structure or rip the material during installation. Ice reduces traction and creates fall hazards. If conditions are unsafe, delay installation until weather improves or call a professional crew with proper equipment and training.

Wear rubber soled shoes with good grip to reduce slip risk on smooth or wet roof surfaces. Inspect ladders and scaffolding for stability, missing rungs, loose joints, or damaged components before climbing. Secure all tools and fasteners in a tool belt or bucket to prevent them from falling and becoming projectiles. Check the roof for loose shingles, debris, sharp edges, or weak decking that could shift or collapse under your weight. Use proper lifting techniques when handling heavy tarps, vinyl rolls, or corrugated sheets. Get help for large or awkward materials.

Temporary Roof Cover Materials for Insurance, Claims, and Emergency Mitigation

MNuvMJXJR2CaZsFbr3lRkw

Most homeowners insurance policies include a “duty to mitigate” clause, which requires you to take reasonable steps to prevent further damage after a covered loss. Promptly covering exposed areas with tarps or sheeting is considered reasonable mitigation. Tarp costs, fasteners, and professional installation fees are commonly reimbursable after you file a claim, but you should verify coverage details and limits with your insurer before starting work.

Clear reinforced polyethylene sheeting allows insurance adjusters and inspectors to view and document roof damage without removing the cover. This speeds the inspection process and reduces the risk of additional water intrusion during claim evaluation. Take photographs of the damage before covering it, then photograph the installed cover and all fastening points. Keep receipts for materials and labor. Wind and hail account for more than 40% of property damage insurance claims, and over 5 million residential roofs are replaced annually in the U.S., so thorough documentation helps your claim move faster.

You can install temporary covers yourself if you’re confident working at height and have the right tools and materials. DIY installation saves labor costs and allows faster response in an emergency. Professional installation is recommended if the roof is steep, high, or structurally unstable, or if you lack experience with fall protection and fastening systems. Professionals carry liability insurance, use code compliant anchoring methods, and often provide documentation that satisfies insurance requirements. If you choose professional installation, confirm that the contractor is licensed, insured, and familiar with your local building codes and insurance procedures.

Long Term and Short Term Material Selection Strategy for Temporary Roof Protection

HUu9utXwQNmVDwmEiXfBAQ

Short term temporary covers are designed for days to weeks of exposure while you wait for insurance approval, contractor availability, or favorable weather for permanent repairs. Use 6 mil clear reinforced polyethylene sheeting (such as Clear Dura Skrim) for short term emergency coverage. It’s lightweight, quick to deploy, waterproof, and allows visual inspection without removal. Polyethylene tarps in various colors and thicknesses also work well for short term use, especially when speed and cost are priorities.

Long term temporary covers must resist UV degradation, temperature cycling, wind, and repeated weather exposure for weeks to months. Use multi year reinforced films such as SolaScrim 4 Year clear reinforced greenhouse sheeting for extended UV stability and durability. Vinyl tarps are the longest lasting flexible cover option because they resist abrasion, tearing, mold, mildew, and sunlight better than polyethylene. Corrugated iron and keder track systems are reusable and durable for construction projects or scaffolding roofs that remain covered for extended periods.

Consider environmental exposure when selecting materials. Roofs in full sun degrade poly and untreated plastic sheeting faster than shaded areas. High wind zones require heavier materials, tighter fastening, and mechanical battening to resist uplift. Snow and ice loads can sag flexible tarps and pool water, so rigid covers or frequent inspection and clearing are necessary in winter climates. Coastal or high humidity areas accelerate mildew and corrosion, so choose mildew resistant materials and galvanized or stainless fasteners.

Reusable and recyclable materials reduce waste and long term costs. Corrugated iron sheets can be lifted, stored, and reused on multiple projects. Vinyl tarps can be cleaned, folded, and stored for future use if handled carefully. Shrink wrap can be cut off in sections and bundled for recycling on site or at a yard, making dismantling faster and waste handling simpler than stacking and transporting rigid sheets. Polyethylene tarps and sheeting degrade over time and are less reliably reusable, but some specialty poly products are labeled as recyclable.

Expected lifespan of cover matters. Days, weeks, or months of exposure before permanent repairs affects your choice. UV exposure intensity is another factor. Full sun requires UV treated or multi year films, while shaded areas allow untreated poly. Wind and debris load in high wind zones need heavier materials, reinforced edges, and mechanical battening. Breathability needs vary too. Canvas or mesh if airflow and moisture control are required, solid tarps for full waterproofing. Reusability and sustainability play a role. Corrugated iron and vinyl can be reused, shrink wrap and poly are recyclable but degrade faster. Budget and labor availability round out the decision. Poly is lowest cost and fastest DIY, vinyl and metal require more investment but last longer.

Final Words

Stop the water first, then pick a cover that fits the opening and how long you’ll need it. Do the immediate work that keeps the home from getting worse.

This guide walked through the main cover types, material comparisons, installation steps and safety, mil thickness and sizing, cost estimates, and insurance tips. We also covered short‑ vs long‑term choices so you can pick something that holds until repairs.

Photo everything, secure proper anchors, and get help if you’re unsure. With the right temporary roof cover materials in place, you’ll stop more damage and move forward to a solid repair.

FAQ

Q: What is the best material for a temporary roof?

A: The best material for a temporary roof and the cheapest way to cover a roof is reinforced polyethylene (poly) tarps. They’re affordable, waterproof, and quick to install; basic poly sheeting works for very short-term fixes.

Q: How to cover a roof temporarily?

A: To cover a roof temporarily, stop flowing water if safe, clear loose debris, lay a tarp with at least 2 ft overlap, secure edges with 2×4 battens and screws, and weigh corners with sandbags.

Q: Does peel-and-stick roofing work?

A: Peel-and-stick roofing can work, but it’s designed as an underlayment and for planned repairs. It needs clean, dry surfaces and time to bond, so it’s often not the best choice for emergency, wet installs.

Flood Damage Restoration vs Water Damage Restoration: Key Differences and When to Call Pros

0

Most homeowners think all water damage is the same until they’re standing in their kitchen wondering why their insurance company keeps asking, “Did the water come from inside or outside your house?” That distinction isn’t insurance paperwork nonsense. It changes everything about cleanup, safety, timeline, and cost. Water damage from a burst pipe and flood damage from a storm surge require completely different restoration approaches because floodwater carries contamination that interior water leaks don’t. Understanding which problem you’re facing helps you call the right professionals and protect your family from serious health risks during cleanup.

Key Differences Between Flood and Water Damage Restoration

M2meCA47TWioP6wXnTLJlA

The core difference between flood damage restoration and water damage restoration comes down to a simple question: where did the water come from? Water damage handles problems from internal sources. Burst pipes, leaky water heaters, washing machine overflows, roof leaks. Flood damage addresses water from external environmental sources like heavy rainfall, river overflow, storm surges, and flash flooding. If the water came from inside your home, it’s water damage. If it came from outside, it’s flood damage.

This source distinction matters because it affects everything else. Water damage typically affects individual homes in isolation, often just a single room or section. Flood damage is more severe and extensive, frequently covering entire floors and impacting multiple properties simultaneously across a neighborhood. Water damage from sources like plumbing failures usually involves clean or gray water, which presents minimal contamination risk. Floodwaters are classified as Category 3 black water, containing sewage, chemicals, pathogens, debris, and mud that create significant health risks from bacteria, viruses, and potential mold exposure.

Aspect Water Damage Restoration Flood Damage Restoration
Water Source Internal household sources (pipes, appliances, roof) External environmental sources (storms, rivers, rainfall)
Contamination Level / IICRC Category Category 1 (clean) or Category 2 (gray water) Category 3 (black water with sewage, chemicals, pathogens)
Affected Area Scope Localized to specific rooms or sections Extensive, often entire floors or multiple properties
Typical Severity Moderate, usually contained damage Severe, widespread structural and contamination issues
Common Causes Burst pipes, appliance malfunctions, roof leaks, plumbing failures Heavy rainfall, hurricanes, river overflow, storm surges, flash flooding
Health Risk Level Low to moderate (depends on water category) High (contaminated with bacteria, viruses, chemicals)

Comprehensive Water Damage Restoration: Process, Timeline, and Equipment

Bp6SJZQCSrS-6vg8KUuCtg

Water damage refers to destruction caused by unwanted or excessive water from internal household sources. It can happen suddenly when a pipe bursts or a washing machine hose fails. It can also develop gradually through a slow roof leak that goes unnoticed for weeks. Common water damage sources include roof leaks from storm damage, plumbing failures in supply lines or drain pipes, washing machine malfunctions, dishwasher overflows, water heater leaks, HVAC system condensation issues, and sewage backups from clogged lines.

Professional assessment is critical even for seemingly minor water damage. Certified technicians identify hidden moisture trapped in wall cavities, subflooring (the layer under your flooring), and insulation where homeowners can’t see it. The clock starts immediately because mold can start growing within 24 to 48 hours if affected areas aren’t dried properly.

The water damage restoration process follows these steps:

Emergency contact and rapid response. Professional teams respond within hours of your call, arriving with extraction and drying equipment ready to deploy immediately.

Source identification and water shut off. Technicians locate the leak or failure point and stop water flow at the source, whether that means closing supply valves, shutting off the main water line, or coordinating emergency plumbing repairs.

Standing water extraction. Truck mounted or portable extraction units remove standing water from floors, carpets, and other surfaces using powerful vacuum systems.

Moisture detection and damage assessment. Moisture meters measure hidden dampness levels inside walls, floors, and ceilings while thermal imaging cameras detect water presence behind surfaces without invasive investigation.

Structural drying. Industrial fans promote rapid air circulation across wet surfaces while commercial dehumidifiers pull humidity from the air and materials, creating optimal drying conditions.

Damage repair, antimicrobial treatment, and final moisture verification. After drying, technicians apply antimicrobial treatments to prevent mold growth, repair damaged materials like drywall and flooring, and verify with moisture meters that all affected areas have returned to normal levels.

The specialized equipment makes the difference between proper restoration and ongoing problems. Moisture meters measure dampness levels inside materials that look dry on the surface. Thermal imaging detects temperature variations that indicate water presence in walls and ceilings. Industrial fans move thousands of cubic feet of air per minute to accelerate evaporation. Commercial dehumidifiers continuously remove moisture from the air and pull it out of saturated materials.

Water damage can take 3 to 5 days to dry out completely, depending on the extent of saturation and materials affected. During this period, dehumidifiers run continuously, fans stay positioned on wet areas, and technicians monitor moisture levels daily. Antimicrobial treatments prevent mold growth during the critical drying window. Final verification ensures that all affected areas have returned to normal moisture levels before equipment is removed and repairs begin. Minor water damage caught early might resolve in three days, while significant saturation affecting multiple rooms could require the full five days or slightly longer.

Comprehensive Flood Damage Restoration: Process, Timeline, and Safety Protocols

YNwZ8euySBWb8d1SEA6Xrg

Flood damage occurs when water from external environmental sources submerges a home, typically from large scale natural events. According to the National Flood Insurance Program (NFIP), a flood is defined as excess water covering at least two acres of normally dry land or affecting two or more properties. Primary causes include heavy rainfall that overwhelms drainage systems, hurricanes and tropical storms bringing storm surge, river overflows (called riverine flooding), and flash flooding from sudden intense rainfall. Flooding can range from just a few inches to several feet of standing water. Even a few inches can cause severe structural damage to flooring, drywall, and building materials.

Floodwaters are classified as Category 3 black water, the most contaminated and hazardous classification. They contain sewage from overwhelmed municipal systems, chemicals from industrial runoff and household products, pathogens including bacteria and viruses, debris like soil and vegetation, and mud that penetrates porous materials. Safety protocols and personal protective equipment (PPE) are mandatory during flood restoration because direct contact with contaminated water creates serious health risks. Before any cleanup begins, flood damage requires inspection and documentation by insurance adjusters, so restoration teams must coordinate timing carefully.

The intensive flood damage restoration process follows these steps:

Documentation and insurance adjuster assessment. Property owners photograph all damage from multiple angles while waiting for the insurance adjuster to inspect, assess, and document the full scope before authorizing cleanup.

Contaminated water extraction. Specialized pumps remove standing floodwater, often requiring submersible pumps for deeper water and truck mounted extraction units for final removal from saturated materials.

Removal of porous materials. Carpeting, padding, insulation, and drywall up to the flood line must be removed and disposed of because they absorb contaminated water and can’t be adequately sanitized.

Deep cleaning with industrial grade antimicrobial disinfectants. All remaining surfaces, including framing, concrete, and unaffected materials, receive thorough cleaning with EPA registered disinfectants that kill bacteria, viruses, and mold spores.

Structural drying using heavy duty dehumidifiers and air movers. Commercial grade equipment runs for extended periods to dry structural elements like studs, joists, and subflooring that will remain as part of the rebuilt home.

Comprehensive mold remediation and prevention treatments. Technicians treat all surfaces with mold inhibiting solutions and inspect thoroughly for any signs of microbial growth (unwanted growth from moisture) before reconstruction begins.

Reconstruction and rebuilding. Removed drywall, insulation, flooring, baseboards, and other materials are replaced, returning the property to its pre loss condition.

Porous materials like drywall, insulation, and carpeting must be removed during flood restoration because they absorb contaminated water deep into their structure where disinfectants can’t reach. These materials become permanent hosts for bacteria and mold spores. Industrial grade antimicrobial disinfectants are applied to all structural surfaces that remain, including wood framing, concrete foundations, and subfloors. Heavy duty dehumidifiers run continuously for days or weeks to pull moisture from structural elements that dry much slower than surface materials.

Flood damage restoration typically takes weeks rather than days. Contamination concerns require extensive disinfection time beyond simple drying. Necessary demolition of affected materials adds days to the timeline. Structural elements like floor joists and wall studs require prolonged drying to reach safe moisture levels. Comprehensive mold remediation adds inspection and treatment time. Reconstruction work to replace removed drywall, insulation, and flooring extends the timeline further. The critical need for proactive mold prevention given the high contamination risk means no shortcuts, because flooded properties face significant risk for mold growth if any moisture or contamination remains trapped in building materials.

Insurance Coverage: Water Damage vs Flood Damage

tPdUya4AQ_SP7hBZzDsoRg

Standard homeowners insurance covers sudden, accidental water damage from internal household sources. This includes burst pipes during freezing weather, washing machine supply line failures, dishwasher overflows from mechanical malfunctions, and roof leaks caused by storm damage like missing shingles. Your policy typically covers both the water removal and repairs to damaged materials like drywall, flooring, and personal belongings.

Flood damage is specifically excluded from standard homeowners insurance policies. It doesn’t matter if your home floods from a hurricane, overflowing river, or flash flooding from heavy rainfall. If the water came from outside your property, your homeowners policy won’t cover it. Separate flood insurance is required through the National Flood Insurance Program (NFIP) or private insurance companies that offer flood coverage.

NFIP is federally backed and available even in high risk flood zones where private insurers might decline coverage. The program offers standardized coverage limits and rates based on flood risk mapping. Private flood insurance has become more available in recent years and may offer higher coverage limits, additional protection for items NFIP excludes, and sometimes lower premiums depending on your property’s risk profile and coverage needs.

Verify your coverage before damage occurs. Review your homeowners policy to confirm what water damage scenarios are covered and what exclusions apply. Check whether you have flood insurance if you live in a flood prone area or near bodies of water. Review policy exclusions, deductibles (the amount you pay before insurance coverage begins), and coverage limits annually to ensure adequate protection. Many homeowners discover their coverage gaps only after damage occurs, when it’s too late to add protection.

Restoration Costs and Timeline Comparisons

L4udn9lnSs6euwCRnlH8gQ

Water damage restoration typically costs $1,500 to $5,000 for localized damage affecting one or two rooms. The 3 to 5 day timeline covers water extraction, drying with industrial equipment, moisture verification, and minor repairs like drywall patching or flooring replacement in the affected area. Factors affecting water damage costs include the square footage impacted, the water category (clean Category 1 water costs less to remediate than gray Category 2 water), and which materials sustained damage. Hardwood flooring replacement costs more than carpet, for example.

Flood damage restoration typically costs $7,000 to $30,000 or more depending on severity and the extent of required demolition and reconstruction. The multi week timeline includes contaminated water extraction, removal and disposal of porous materials, deep disinfection of remaining surfaces, extended structural drying, comprehensive mold remediation, and complete reconstruction of removed materials. Flood cost factors include contamination level requiring intensive disinfection protocols, structural damage extent affecting foundations or framing, the scope of required demolition (partial room versus entire floors), rebuilding scope from basic drywall replacement to complete interior reconstruction, and mold remediation needs if growth developed before restoration began.

Factor Water Damage Restoration Flood Damage Restoration
Typical Cost Range $1,500 to $5,000 $7,000 to $30,000+
Typical Timeline 3 to 5 days for drying and minor repairs Multiple weeks including drying, demolition, and reconstruction
Primary Cost Drivers Affected square footage, water category, materials damaged Contamination level, structural damage, demolition scope, rebuilding extent, mold remediation
Complexity Level Moderate, focused extraction, drying, and localized repairs High, requires demolition, deep disinfection, structural drying, and reconstruction

When to Call Professional Restoration Services

dASATfGhQzi6JFDORKm4mQ

The decision between DIY cleanup and professional restoration depends on contamination level, extent of damage, and safety concerns. Small spills from clean water sources might be manageable with household equipment, but most water intrusion requires professional assessment and specialized drying equipment.

Call professional restoration services immediately for these situations:

Any Category 2 (gray water from appliances or fixtures) or Category 3 (black water from sewage or flooding) contamination. Flood damage from external environmental sources. Standing water exceeding 2 inches deep anywhere in the home. Water affecting multiple rooms or covering multiple floors. Structural damage visible in walls, ceilings, or floors including sagging, warping, or soft spots. Water exposure lasting more than 24 hours before discovery or initial response. Visible mold growth appearing as dark spots or patches, or musty odors indicating hidden mold. Water damage affecting electrical systems, outlets, appliances, or any area near electrical panels.

IICRC certified technicians bring proper training in water damage restoration standards and contamination protocols. Their 24 hour emergency availability means rapid response during the critical window before mold growth begins. Professional extraction and drying equipment works faster and more thoroughly than household fans and dehumidifiers. Detailed documentation throughout the restoration process supports insurance claims with photos, moisture readings, and scope of work reports that adjusters require for claim approval.

Insurance Claims Process for Water and Flood Restoration

cl1g-0b5S52Hw7pZQWyiSQ

Proper documentation is critical for claim approval and maximum reimbursement. Insurance companies require proof of damage extent, affected materials, and restoration necessity before authorizing payment. The more thorough your initial documentation, the smoother your claims process.

Follow these steps when filing water damage or flood damage insurance claims:

Document all damage immediately. Take photos and videos from multiple angles showing standing water, water lines on walls, damaged flooring, saturated materials, and affected belongings before any cleanup begins.

Create detailed inventory. List all damaged items including furniture, electronics, clothing, and building materials with purchase dates and estimated values when possible to support replacement cost claims.

Contact insurance company within 24 to 48 hours. Report the claim immediately by phone and follow up with written notice if required by your policy terms.

Prevent further damage with emergency mitigation. Take reasonable steps like shutting off water sources, placing tarps over roof leaks, or extracting standing water, but save all receipts because mitigation costs are usually reimbursable.

Wait for insurance adjuster inspection. Especially critical for flood damage, don’t remove damaged materials or begin major cleanup until the adjuster documents everything, or you risk claim denial for lack of evidence.

Obtain multiple restoration estimates. Get written estimates from licensed restoration contractors detailing scope of work and costs, then proceed after receiving claim approval and understanding your coverage limits.

Professional restoration companies often streamline the claims process significantly. They provide claims assistance by communicating directly with adjusters in the technical language insurance companies understand. Their detailed damage assessment documentation includes moisture readings, material testing, and photographic evidence that supports claim validity. Many offer direct billing options where they bill the insurance company directly after you pay your deductible. They can communicate progress updates to adjusters throughout restoration, reducing the back and forth homeowners would otherwise manage themselves.

Selecting a Qualified Restoration Contractor

Xm8-OarsQ3GFKWxwWJ8BKA

Contractor choice directly impacts restoration quality, how quickly your home returns to normal, and whether your insurance claim processes smoothly. Emergency situations require immediate decisions when you’re stressed and your home is damaged, but certain qualifications are non negotiable regardless of urgency.

Verify these contractor selection criteria before signing any agreement:

IICRC certification and ongoing technician training. Industry recognized certification ensures technicians follow proper protocols for water extraction, structural drying, and contamination handling.

Proper licensing and liability insurance. State contractor licenses and current liability coverage protect you if additional damage occurs during restoration work.

24 hour emergency response availability. Water and flood damage worsen by the hour, so immediate response capability matters.

Positive customer reviews and verifiable references. Check online reviews and ask for references from recent projects similar to your damage situation.

Experience with both water damage and flood damage restoration. Contamination protocols, safety requirements, and restoration processes differ significantly between water and flood scenarios.

Direct insurance billing and claims assistance services. Simplifies the payment process and ensures proper documentation for claim approval.

Written estimates and restoration guarantees. Clear scope of work, timeline expectations, and quality guarantees protect you from surprise costs or incomplete work.

FireFloodRescue.com provides qualified restoration partnership with rapid emergency response within hours of contact. We coordinate comprehensive damage assessment using moisture detection equipment and thermal imaging to identify all affected areas, including hidden moisture. Our restoration services run from initial water extraction through structural drying, demolition of contaminated materials when necessary, and final repairs that blend seamlessly into your home. We bring expertise in both water damage and flood damage restoration with full understanding of contamination protocols, insurance documentation requirements, and claims support to help you navigate the process from emergency call through final walk through.

Final Words

Water damage and flood damage restoration both return your home to safe, livable condition, but the path depends on where the water came from and what it carried with it.

Water damage from internal sources typically means faster timelines, localized repairs, and standard homeowners insurance coverage.

Flood damage from external sources requires extended restoration, intensive contamination protocols, and separate flood insurance.

Both situations need fast professional response to prevent secondary damage and mold growth. The right certified restoration team assesses the situation, coordinates the full scope of work, and handles everything from emergency stabilization through final repairs.

When damage happens, call professionals who understand the difference and have the equipment, training, and experience to handle either scenario correctly.

FAQ

Is water damage the same as flood damage?

Water damage is not the same as flood damage. Water damage comes from internal sources like burst pipes or appliance leaks, while flood damage originates from external environmental sources like storms or river overflow.

What is water damage restoration called?

Water damage restoration is called by several names including water mitigation, water extraction services, emergency water cleanup, or moisture remediation, depending on the specific stage of the restoration process being performed.

What is water damage restoration?

Water damage restoration is the process of removing unwanted water from inside a home, drying affected areas, and repairing damage caused by internal sources like plumbing failures, roof leaks, or appliance malfunctions.

Is a flood-damaged car worth buying?

A flood-damaged car typically is not worth buying because contaminated floodwater causes extensive hidden damage to electrical systems, engines, and interiors that often leads to ongoing mechanical failures and safety hazards.

How long does water damage restoration take?

Water damage restoration typically takes 3 to 5 days for complete drying and minor repairs, depending on the extent of affected areas, moisture levels, and the category of water involved.

How long does flood damage restoration take?

Flood damage restoration takes multiple weeks due to contaminated water requiring extensive disinfection, necessary demolition of porous materials, structural drying, comprehensive mold remediation, and reconstruction of removed building materials.

What is Category 3 water?

Category 3 water is highly contaminated black water from external sources like floods, sewage backups, or rising rivers that contains harmful bacteria, viruses, chemicals, and pathogens requiring specialized safety protocols during cleanup.

Does homeowners insurance cover water damage?

Homeowners insurance typically covers water damage from sudden, accidental internal sources like burst pipes, appliance malfunctions, and roof leaks, but specifically excludes flood damage from external environmental sources.

Does homeowners insurance cover flood damage?

Homeowners insurance does not cover flood damage. Separate flood insurance through the National Flood Insurance Program or private insurers is required to protect against water damage from external environmental sources.

When should I call a professional restoration company?

You should call a professional restoration company immediately for contaminated water, flood damage, standing water over 2 inches, damage affecting multiple rooms, structural damage, water exposure exceeding 24 hours, or mold growth.

What causes water damage in homes?

Water damage in homes is caused by internal sources including roof leaks, burst pipes, plumbing failures, washing machine overflows, dishwasher leaks, water heater malfunctions, HVAC issues, and sewage backups.

What causes flood damage to homes?

Flood damage to homes is caused by external environmental sources including heavy rainfall, hurricanes, storm surges, river overflows, flash flooding, and other natural disasters affecting multiple properties simultaneously.

How much does water damage restoration cost?

Water damage restoration typically costs $1,500 to $5,000 for localized damage, depending on affected square footage, water category classification, damaged materials, and the extent of necessary repairs and drying.

How much does flood damage restoration cost?

Flood damage restoration typically costs $7,000 to $30,000 or more, depending on contamination severity, structural damage extent, required demolition scope, rebuilding needs, and comprehensive mold remediation requirements.

Can I clean up water damage myself?

You can clean up minor water damage yourself only if it involves clean water affecting a small area for less than 24 hours, but professional restoration is recommended to prevent hidden mold growth and structural issues.

What equipment is used for water damage restoration?

Water damage restoration uses specialized equipment including moisture meters for hidden dampness detection, thermal imaging cameras, industrial air movers, commercial dehumidifiers, truck-mounted water extractors, and antimicrobial treatment solutions.

How do I file an insurance claim for water damage?

To file an insurance claim for water damage, document all damage with photos and videos, create a detailed inventory, contact your insurance company within 24-48 hours, prevent further damage, and wait for adjuster inspection before major cleanup.

What is the NFIP definition of a flood?

The NFIP defines a flood as excess water covering at least two acres of normally dry land or affecting two or more properties, typically caused by heavy rainfall, hurricanes, or river overflow.

How quickly does mold grow after water damage?

Mold can start growing within 24 to 48 hours after water damage if affected areas are not properly dried, making rapid professional response critical to prevent microbial growth and health risks.

What is IICRC certification for restoration?

IICRC certification is the industry standard credential for restoration technicians, indicating proper training in water damage restoration, contamination handling, drying techniques, and adherence to professional restoration protocols and safety standards.

Electrical Hazard Safety-Toe Shoes That Meet ASTM Standards

0

Most workers don’t think about electrical shock protection until they’re standing near live circuits or energized equipment. If your job puts you around electrical hazards, regular work boots won’t cut it. You need footwear that meets ASTM F2413 electrical hazard standards. These boots provide a critical insulation barrier between your feet and the ground when you contact energized surfaces. We’ll walk you through ASTM-certified EH safety-toe shoes, what the ratings actually mean, and how to match the right boot to your workplace hazards without overpaying for features you don’t need.

Top Brands and Product Comparisons for EH Safety-Toe Footwear

wety1ssWQcCEksI_aQhCag

You’ve got over 200 EH-rated safety-toe styles to pick from right now. Athletic work shoes, traditional boots, specialized designs. All kinds of stuff. Major manufacturers have built out whole product lines for different workplaces, from construction sites to hospitals. The selection breaks down to 147 men’s styles and 71 women’s styles across different categories.

Product lines mix EH protection with other features like cushioning systems, tactical durability, or lightweight athletic construction. Some target fatigue reduction for people standing all day. Others go after rugged outsoles for outdoor environments.

Product Line Style Category Key Features
Sublite Cushion Work Athletic work shoe Lightweight cushioning, running shoe design, shock absorption
Rapid Response RB Tactical boot Quick response design, side zipper, tactical durability
BB4500 Work Athletic work shoe Basketball-inspired design, ankle support, court traction pattern
All Terrain Work Outdoor work boot Aggressive tread, outdoor durability, varied surface traction
Nano Tactical Tactical athletic Crossfit-inspired design, flexibility, low-profile construction
Trailgrip Tactical Outdoor tactical Trail running design, grip pattern, terrain versatility
Zig Kinetica Edge II Work Athletic work shoe Energy return sole, zigzag cushioning, forward motion design

Compare models based on toe protection type, extra safety certifications, comfort tech, and style preferences. That’s how you match footwear to workplace requirements and what you actually need. Athletic work shoes make up 122 styles, the biggest category. Traditional work boots include 33 styles for people who want higher ankle coverage. Look at how each model stacks multiple protections. Some combine EH rating with slip resistance and metatarsal guards in one boot.

What to compare:

  • Toe cap material (steel, composite, alloy) and weight. Composite runs lightest. Steel offers traditional proven protection.
  • Additional certifications like slip resistance, metatarsal guards, puncture resistance. 137 styles add slip-resistant soles.
  • Style category. Athletic, traditional boot, dress shoe. Determines whether the boot fits your workplace dress code.
  • Comfort features. Cushioning, arch support, fatigue reduction. Matters for 8-hour shifts and longer.
  • Price point and warranty coverage. Higher cost often brings advanced cushioning or specialized features.

Buying Guide: Selecting the Right EH Safety-Toe Shoes

lXieDIYTTmmOKUw6HhZP2A

Match footwear features to specific workplace hazards and job requirements. Prevents you from overpaying for stuff you don’t need while making sure you get the certifications your employer actually requires.

How to select:

  1. Verify your workplace requires EH-rated footwear through hazard assessment. Ask your supervisor or safety manager about documented electrical exposure risks.
  2. Figure out what toe protection type you need based on impact hazard levels. Composite for 135 available styles, steel for 17 styles, or alloy for 21 styles.
  3. Identify additional safety features you actually need. Slip resistance, metatarsal guards, waterproof construction. Many jobs need more than just EH protection.
  4. Select style category that matches workplace dress requirements. Athletic shoes work in some settings. Traditional boots required in others.
  5. Choose correct size and width from available range. Men’s 6-14, women’s 4-8.5. 218 styles come in common sizes 8 through 11.
  6. Evaluate comfort features for how long you’ll be wearing them. Cushioning matters way more for all-day standing than occasional wear.

When you need multiple safety certifications, start with your employer’s required minimums. Then add features based on actual workplace conditions. The 191 EH styles offer different combinations of protection for industries from construction to healthcare. A nurse might go for slip resistance and comfort cushioning. A utility worker might need waterproof construction and metatarsal guards. Match the boot to what you actually face during your shift.

Fit evaluation means trying on footwear with the work socks you’ll actually wear. Make sure you’ve got proper toe room, about a thumb’s width from your longest toe to the boot’s end. Heel should stay secure without slippage. Walk around. Stand on your toes. Squat down. Most safety footwear requires a short break-in period, but the boot shouldn’t cause pain or pressure points even on day one.

Popular Styles and Design Options in EH Safety Footwear

YN2Cczp2Tr6UnEwaenKF5g

EH footwear’s evolved from traditional heavy work boots to all kinds of style options. Athletic-inspired designs that look more like running shoes than industrial boots. Workers don’t have to sacrifice comfort or modern looks to get electrical protection anymore.

Athletic work shoes now represent the largest category with 122 styles. Lightweight protection with modern aesthetics that fit in warehouses, healthcare facilities, and light manufacturing environments. These designs borrow cushioning technology and flexible construction from running shoes and training sneakers.

What’s available:

  • Athletic work shoes and sneakers, 122 styles. Low-cut designs with athletic cushioning and breathable uppers.
  • Traditional 6-inch work boots, 33 styles. Ankle support and durability for construction and outdoor work.
  • Slip-on Romeo and Chelsea styles. Easy on and off for workers who remove boots frequently.
  • Oxford and dress shoe designs. Professional appearance for utilities, postal service, and public-facing roles.
  • Boat shoes and casual hikers. Versatile options that transition from work to off-duty wear.
  • Slip-resistant booties and chukkas. Mid-height coverage without full boot weight.

Understanding EH-Rated Standards and Certification

VQg-7qYCRrKmC0cqEIdLqQ

ASTM F2413 certification standards verify the footwear’s electrical resistance capabilities. Class 75 rating requirements confirm the boot can withstand exposure to specific voltage levels when tested under controlled laboratory conditions. The certification process measures the footwear’s ability to resist electrical current passing through the sole and into your body. Boots must show they provide adequate insulation between your foot and the ground when contacting energized electrical equipment.

EH-rated footwear works as secondary protection, not primary safeguard, when you contact live electrical circuits or energized conductors. These boots won’t save you if you grab a live wire with your bare hands. But they can prevent electrical shock from traveling up through your feet if you step on an energized surface while working.

Testing procedures that qualify footwear for EH certification include controlled voltage resistance specs. Boots get placed on conductive plates, exposed to specific voltage levels, and monitored for current leakage. The footwear must limit electrical current to less than 1.0 milliampere under these controlled conditions. Temperature and humidity factors are regulated during testing to ensure consistent results across different manufacturers.

Certification ensures footwear can withstand specific voltage limits and prevents electrical current from passing through to you when properly maintained. But the protection degrades if the sole gets compromised by cuts, embedded metal objects, or excessive wear.

Safety-Toe Options in Electrical Hazard Footwear

jqMNAvGpQqen1-SS63flMA

EH protection can be combined with different toe cap materials. Each offers different benefits for impact and compression protection based on ASTM standards.

Toe protection types:

  • Steel toe. Traditional protection, magnetic properties, weight characteristics, durability. 17 styles available. Provides proven impact resistance but adds weight and conducts temperature. Makes your feet colder in winter and hotter in summer.
  • Composite toe. Non-metallic, lightweight, non-conductive, temperature advantages. 135 styles available. Most common option because it passes through metal detectors, doesn’t conduct heat or cold, and weighs less than steel.
  • Alloy toe. Lighter than steel, similar strength, thinner profile. 21 styles available. Offers a slimmer toe box than steel while maintaining impact protection for workers who need extra room for toe movement.
  • Carbon toe. Lightweight alternative, flexibility benefits. 1 style available. Provides impact protection with more flex than composite or steel, though less common in current inventory.
  • Soft toe. No safety toe cap, for environments without impact hazards. 44 styles available. Works when your employer requires EH protection but doesn’t have falling object risks.

Select toe type based on workplace hazard assessment, metal detector requirements, and comfort preferences. What actually happens at your job site matters. If you walk through security checkpoints, composite avoids the metal detector hassle. If you’re working around heavy equipment or falling materials, steel or alloy provides maximum impact resistance. If your workplace just has electrical exposure without impact hazards, soft toe keeps weight down and gives your toes more room to move.

Essential Construction and Protection Features

aL2sYWqgQCuNtKaz-K0saQ

Insulated sole construction is the primary EH feature. Non-conductive materials in midsoles and outsoles create an electrical barrier between your foot and any energized surface you might step on. The rubber outsole composition stays non-conductive while providing traction and durability for various surfaces. Manufacturers build multiple layers into the sole system. A cushioning midsole, a shank for arch support, and an outsole with tread pattern. Each layer must maintain electrical resistance throughout the boot’s life.

Upper material considerations include leather construction that provides durability and some water resistance. Waterproof membranes in 29 styles keep feet dry in wet conditions. Breathable materials maintain comfort without compromising electrical protection. The upper doesn’t carry the electrical protection (that’s all in the sole), but it affects overall comfort during long shifts.

Safety Feature Protection Benefit Available Styles
Slip resistant Prevents falls on wet, oily, or smooth surfaces 137 styles
Metatarsal guard Protects top of foot from falling objects and compression injuries 26 styles
Puncture resistant Prevents sharp objects from penetrating through sole Varies by model
Waterproof Keeps feet dry in wet environments and outdoor conditions 29 styles
Static dissipative Safely dissipates static electricity in controlled environments 6 styles
Oil/chemical resistant Outsole resists degradation from petroleum products and chemicals Varies by model

Modern EH footwear combines multiple certifications and protective features in a single boot. Lets workers address several hazards without wearing different boots for different tasks. Figure out which combination matches specific job requirements by starting with your employer’s required certifications, then look at actual workplace conditions. A maintenance worker in a food processing plant might need EH rating, slip resistance, and waterproof construction. An electrician on outdoor job sites might go for EH rating, puncture resistance, and metatarsal guards. Make sure additional features don’t compromise EH protection. Static dissipative boots serve different purposes than standard EH boots and shouldn’t be substituted without understanding the difference.

Industries and Workplace Applications for EH Protection

bR7Ypi1PRES4YqiA9oJ7kA

EH protection is required wherever workers may contact energized electrical equipment or work near electrical circuits. Even in industries that don’t primarily focus on electrical work.

Who needs EH protection:

  1. Electricians and electrical contractors. Install, maintain, and repair electrical systems in residential, commercial, and industrial settings.
  2. Utility and power line workers. Work on overhead lines, underground cables, and substation equipment.
  3. Construction and building trades. Encounter electrical circuits during framing, installation, and renovation work.
  4. Manufacturing and industrial maintenance. Service machinery and equipment that may have electrical exposure points.
  5. HVAC technicians. Work around electrical components in heating, ventilation, and air conditioning systems.
  6. Telecommunications installers. Handle powered equipment and work near electrical infrastructure.
  7. Plant and facility maintenance. Maintain buildings with exposure to electrical panels and circuits.
  8. Equipment service technicians. Repair industrial equipment with electrical components.

OSHA requires employers to conduct hazard assessments and provide appropriate PPE compliance when electrical hazards are identified. Your employer must evaluate the workplace, identify electrical hazards, determine what level of protection workers need, and supply footwear that meets those requirements. This applies beyond obvious electrical jobs. Food service workers near industrial kitchens, healthcare workers around medical equipment, and warehouse workers operating powered material handling equipment all work in environments where EH protection may be required based on the facility’s electrical systems.

You’ve got rights as an employee. You’re entitled to proper training on when EH-rated footwear is necessary and understanding the role of EH footwear as secondary protection. It supplements, but doesn’t replace, primary electrical safety protocols like lockout/tagout procedures and de-energization. You’re entitled to know what hazards exist at your workplace and what protection your employer requires. EH boots won’t protect you if you’re working directly on live circuits. That requires specialized training, tools, and primary electrical safety equipment. The boots protect against accidental contact with energized surfaces while performing other work tasks.

Care and Replacement Guidelines

eGdqozH2SmO0o14FIpVdFA

Regular inspection matters since electrical protection can degrade with wear, damage, or contamination that compromises the sole’s ability to resist electrical current.

Inspection checklist:

  1. Examine outsoles for cracks, punctures, or worn areas that expose inner materials. Any break in the rubber outsole creates a path for electrical current.
  2. Check for sole separation or delamination at the upper junction. The sole must stay fully attached to maintain the electrical barrier.
  3. Inspect for embedded conductive materials. Metal shavings, staples, nails. Even a small piece of metal stuck in the tread can conduct electricity.
  4. Verify waterproof integrity hasn’t been compromised. Water inside the boot can create a conductive path.
  5. Look for chemical contamination or oil saturation that affects insulation. Some chemicals break down rubber compounds.
  6. Check that safety toe protection hasn’t been crushed or damaged. A crushed toe cap indicates the boot took an impact and may have hidden damage.
  7. Assess overall wear patterns and sole tread depth. Replace when wear indicators show damage that compromises electrical protection. Typically when tread depth is less than half the original depth or when the sole shows visible cracks.

Price Ranges and Value Considerations for Electrical Hazard Work Boots

V2e5DiqATs27Z-jlvHcLCg

Typical price ranges for EH-rated safety-toe footwear span from budget-friendly options around $80 to $120 to premium models with advanced features reaching $180 to $250. Entry-level boots meet the same ASTM F2413 certification as premium models. They differ in comfort technology, additional safety features, and expected durability.

Value factors to look at:

  • ASTM certification and testing. Baseline requirement across all price points. Every EH-rated boot meets the same electrical resistance standards regardless of cost.
  • Additional safety certifications. Slip resistance, metatarsal guards, puncture resistance. Combining multiple protections in one boot adds cost but eliminates buying separate footwear.
  • Comfort technology and cushioning systems. Premium cushioning matters for workers on their feet 8 to 12 hours daily.
  • Durability features and warranty coverage. Better materials and construction extend the boot’s working life.

Brand comparisons show how to assess whether premium features justify higher costs based on workplace demands, wear frequency, and specific hazard exposure. A worker who wears EH boots daily for standing work gets more value from advanced cushioning and fatigue-reduction features than someone who wears them occasionally. Someone working in wet conditions benefits from waterproof construction even at a higher price. The 200 styles currently in stock across major manufacturers include options at various price points with different feature combinations.

Total cost of ownership includes replacement frequency and injury prevention value beyond the initial purchase price. A $90 boot that wears out in 6 months costs more over two years than a $160 boot that lasts 18 months. More importantly, proper protection that prevents a single electrical shock injury or slip-and-fall accident pays for itself immediately. Calculate what you actually spend per month of use, not just the upfront cost.

Final Words

Over 200 EH-rated styles give you real choices across athletic work shoes, traditional boots, and specialized designs that match your job site needs.

Electrical hazard safety-toe shoes now combine voltage protection with features like slip resistance, cushioning systems, and lightweight construction.

Compare toe cap materials, additional certifications, and comfort technologies to find footwear that handles your specific workplace hazards.

Check outsoles regularly for damage that compromises protection, and replace boots when you spot cracks, separation, or embedded conductive materials.

The right pair keeps you protected, comfortable, and focused on the work ahead.

FAQ

What are electrical hazard safety toe shoes?

Electrical hazard safety toe shoes are work boots or shoes that combine electrical shock protection with reinforced toe caps to protect against impact and compression hazards. These shoes meet ASTM F2413 standards for both electrical insulation and toe protection, creating a barrier between your feet and live electrical circuits while safeguarding toes from falling objects.

What is the OSHA standard for electrical safety shoes?

The OSHA standard for electrical safety shoes requires footwear to meet ASTM F2413 specifications for electrical hazard protection when workplace hazard assessments identify electrical shock risks. OSHA mandates that employers provide appropriate protective footwear when workers may contact energized equipment, requiring EH-rated shoes as secondary protection in electrical environments.

What are the OSHA rules for steel-toe shoes?

The OSHA rules for steel-toe shoes require employers to provide protective footwear meeting ASTM F2413 standards when workplace hazards include risk of foot injuries from falling objects, crushing, or electrical hazards. Employers must conduct hazard assessments to determine when safety toe protection is necessary and ensure provided footwear matches identified workplace risks.

Can electricians wear steel-toe shoes?

Electricians can wear steel-toe shoes if the footwear also carries an EH rating that meets ASTM F2413 electrical hazard standards. Steel toe protection combined with electrical hazard certification is available in 17 styles, providing both impact protection and electrical insulation, though composite toe options offer non-metallic alternatives that avoid magnetic properties.

Musty Smell from Crawl Space: Causes and Fast Fixes

0

What if the musty smell in your house is actually coming from the dark space under your floors?
A damp crawl space feeds mold and odors into your home, and up to half your indoor air can come from that space.
Left alone, moisture leads to rot, allergy triggers, and a house that never smells right.
This post shows quick safety steps you can take now, how to find and stop the moisture source, and the fast fixes that dry, clean, and repair so the smell doesn’t come back.

Understanding Why a Musty Smell Forms in a Crawl Space

IOeEJi3PRgyH5oj8Ik-RMg

A musty smell from a crawl space almost always points to moisture. When water vapor or liquid water gets into the space under your home, it creates exactly what mold and mildew need to grow. Those organisms produce volatile organic compounds (VOCs) as they break down damp wood, insulation, and whatever else is down there. That chemical release is what you’re smelling.

Moisture finds its way in through several paths. Groundwater can seep through dirt floors or cracks in concrete. Poor grading around the foundation sends rainwater toward your house instead of away from it. Leaking plumbing or condensation from cold pipes adds humidity. Roof runoff that lands too close to the foundation soaks into the ground and works its way into the crawl space. Once relative humidity climbs above 60 percent, mold growth speeds up. Standing water makes it even worse.

That musty air doesn’t stay trapped below. Up to 50 percent of your home’s indoor air can come from the crawl space, rising through gaps around plumbing penetrations, ductwork openings, and floor seams. When the crawl space smells, the whole house can start to smell. Wood rot, sagging insulation, and odors from decaying materials or pest activity make everything worse. Fixing the smell means stopping moisture at the source and getting rid of what’s already growing.

Identifying Crawl Space Mold, Moisture, and Odor Sources

lmJlwBsKQW-xre4hBoiyPw

Before you fix anything, confirm what’s causing the smell. Grab a flashlight, an N95 mask, gloves, and a camera. Crawl spaces are tight, dark, and often unpleasant to enter, but you need to see what’s actually happening.

Start by mapping the smell. Stand near floor vents, closets, and low rooms. The strongest odor usually points toward the nearest crawl space entry. Once you’re inside, look for visible problems and measure conditions with tools.

Key areas to check:

  • Mold growth on floor joists, subfloor, or insulation. Black, green, or white patches. Small spots under 10 square feet may be cleanable. Larger areas need professional help.
  • Standing water. Any pooling is a problem. An inch or more is serious and needs immediate removal.
  • Damp soil or puddling means groundwater intrusion or poor drainage.
  • Torn or missing vapor barrier. Gaps in thin 6 mil polyethylene let soil moisture evaporate directly into the space.
  • Soggy insulation. Fiberglass that’s wet, sagging, or discolored should be removed. It holds moisture and grows mold.
  • Pest evidence. Droppings, nests, or carcasses add their own odors and attract moisture.

Use a hygrometer to measure relative humidity. Readings above 60 percent mean elevated mold risk. Use a moisture meter on wood surfaces. Dry wood reads below 16 percent. 16 to 20 percent is borderline. Anything over 20 percent means high moisture content and active rot or mold risk.

Health Risks Linked to a Musty Crawl Space

jPKlJ5GXTSOZKeKhZzmrgA

Mold spores become airborne and travel through your home’s ventilation system. When you breathe them in, they can irritate your respiratory system, trigger allergy symptoms, and make asthma worse. People with existing respiratory conditions, children, and older adults are especially vulnerable.

Beyond mold, a damp crawl space produces volatile organic compounds. These chemicals create that musty, earthy smell and contribute to poor indoor air quality. High humidity also encourages dust mites, another common allergen. If your crawl space has standing water or sewage contamination, bacteria and pathogens add another health risk.

Because up to half of the air in your home can come from the crawl space, problems below don’t stay below. Fixing the odor improves the air you breathe every day, reduces allergy flare ups, and helps protect long term respiratory health.

DIY Methods to Reduce a Musty Smell From the Crawl Space

99AxyjDUQJeXuplvkYI1Tg

If the crawl space is accessible and the problem isn’t too severe, you can take immediate steps to reduce the odor and slow moisture damage. These fixes won’t solve everything permanently, but they buy time and prevent further harm while you plan longer term repairs.

Wear an N95 mask, gloves, and eye protection anytime you enter the crawl space. Mold spores and dust become airborne easily. Work in daylight or bring a portable work light. Crawl spaces are dim and hazardous.

Step by step short term fixes:

  1. Remove standing water. Use a wet vacuum, sump pump, or buckets. Any pooling needs to go immediately.
  2. Dry wet surfaces. Set up box fans or portable air movers aimed at damp areas. Open crawl space access doors to improve airflow if outdoor humidity is low.
  3. Clean small mold patches. For areas under 10 square feet, scrub with detergent and water or a commercial mold cleaner. Avoid bleach on porous materials like wood. It doesn’t penetrate and can make things worse.
  4. Remove wet insulation. Fiberglass that’s soaked or discolored should come out. Bag it and dispose of it properly.
  5. Check plumbing and HVAC ducts. Look for leaking pipes, condensation drips, or disconnected ducts. Repair what you can reach.
  6. Run a dehumidifier. Place a portable crawl space rated unit and aim to keep relative humidity below 50 percent. Units rated for 30 to 50 pints per day work in smaller, moderately damp spaces. Larger or wetter crawl spaces need 70 to 140 pints per day.
  7. Improve temporary ventilation. If your crawl space has vents, open them during dry weather. If it’s humid outside, keep them closed and rely on mechanical dehumidification instead.

Monitor humidity daily with a hygrometer. If readings stay above 60 percent after these steps, you’ll need more permanent fixes.

Long Term Fixes for Eliminating Crawl Space Odors

eENVQTY6QD63avCiQSVYhA

Short term fixes reduce symptoms. Permanent solutions stop moisture from entering in the first place and control the environment long term. The most effective approach combines vapor barriers, encapsulation, dehumidification, and proper insulation.

Crawl space encapsulation seals the space from the ground and outside air. A thick vapor barrier (12 to 20 mil polyethylene is recommended) covers the dirt floor and is sealed to the foundation walls. Vents are sealed or closed to prevent humid outdoor air from entering. Rim joists are insulated with spray foam to prevent condensation. A crawl space dehumidifier maintains stable humidity year round.

Solution Description Typical Benefit
Encapsulation Full sealing of crawl space with vapor barrier, vent closure, and insulation Eliminates moisture intrusion, prevents mold, stabilizes indoor air quality
Vapor Barrier (12–20 mil) Thick polyethylene sheet sealed over dirt floor and foundation walls Blocks soil moisture evaporation, protects wood framing
Vent Sealing Closing or sealing foundation vents to prevent outdoor humid air from entering Reduces humidity fluctuations, prevents condensation
Dehumidifier System Crawl space rated unit (30–140+ pints/day) maintaining RH below 50% Controls humidity after encapsulation, prevents mold recurrence

Encapsulation typically costs $5 to $15 per square foot. A 1,000 square foot crawl space might run $5,000 to $15,000 depending on access, moisture severity, and included features. Dehumidifier units range from $400 to $2,500, plus installation labor if needed. Installed systems with drainage lines and automatic controls add to the total but reduce maintenance.

Drainage, Leak Repair, and Moisture Control Strategies

JggyzLYYQ3WsTGZLMzs4vg

Even with a sealed crawl space, water can still enter if drainage around your home is poor. Gutters, downspouts, grading, and subsurface drainage all play a role in keeping water away from the foundation.

Start with gutters and downspouts. Clean gutters twice a year and extend downspouts 5 to 10 feet away from the foundation. If water lands within a few feet of the house, it soaks into the soil and migrates toward the crawl space. Check exterior grading next. The ground should slope away from the foundation at least 6 inches over the first 10 feet. If grading is flat or slopes toward the house, regrade with clean fill dirt.

If groundwater is the issue, a sump pump removes water that collects in a basin. Sump pumps typically cost $800 to $2,500 installed, depending on pump capacity and labor. French drains (perforated pipes buried in gravel) intercept groundwater and route it away from the foundation. French drain installation ranges from $1,000 to $6,000 or more depending on system length and excavation difficulty. Both systems require maintenance. Check sump pumps annually and clean discharge lines. Inspect French drains after heavy rain to confirm they’re flowing properly.

Mold Remediation Steps for Severe Musty Odors

7Hg_wT6ATCuWRssLjrlqaw

When mold covers more than 10 square feet, or when it’s growing on structural framing, professional remediation is the safer choice. Large infestations release more spores, and disturbing them without containment spreads contamination through the house.

Professional remediation starts with containment. Crews seal off the crawl space with plastic sheeting and create negative air pressure using HEPA filtered air scrubbers. This prevents spores from migrating into living areas. They remove contaminated materials (insulation, vapor barriers, and sometimes sections of damaged wood). Surfaces are treated with anti microbial solutions and HEPA vacuumed. After removal, moisture sources are addressed to prevent recurrence.

Professional remediation process includes:

  • Containment setup. Plastic barriers and negative air pressure to isolate the work area.
  • HEPA air filtration. Machines continuously filter airborne spores during the job.
  • Material removal. Contaminated insulation, vapor barriers, and deteriorated wood are bagged and disposed of.
  • Surface cleaning and treatment. Remaining wood and concrete surfaces are cleaned, treated, and verified dry.
  • Post remediation verification. Moisture readings and visual inspections confirm the space is safe to seal and encapsulate.

Costs range from $500 to $3,000 for moderate contamination (10 to 100 square feet) and $3,000 to $10,000 or more for severe cases involving structural damage, large areas, or hazardous conditions. Timelines vary from one day for small jobs to a week or more for extensive remediation and repairs.

Costs and Timelines for Fixing Musty Crawl Spaces

WpPd6ttATxyg-Gh4I_8EGA

Understanding what fixes cost and how long they take helps you prioritize and plan. Some repairs happen in hours. Others take days or weeks depending on scope and access.

Immediate fixes like removing standing water, running fans, and placing a portable dehumidifier can happen the same day. Small mold cleaning takes one day if you’re doing it yourself. Installing a crawl space dehumidifier usually requires one to two days including electrical work if a dedicated circuit is needed. Full encapsulation and drainage work typically takes two to five days depending on crawl space size, condition, and access difficulty.

Repair Type Cost Range Typical Timeline
DIY mold cleaning (under 10 sq ft) $20–$200 (materials and PPE) Same day to 1 day
Crawl space encapsulation (1,000 sq ft) $5,000–$15,000 2–5 days
Professional mold remediation (10–100 sq ft) $500–$3,000 1–3 days
Sump pump installation $800–$2,500 1 day

Major structural repairs, extensive mold remediation, or foundation drainage overhauls can take weeks and run $10,000 or more. Get written estimates from licensed contractors and confirm scope, timeline, and warranty before work starts.

When a Musty Crawl Space Requires Professional Help

hDmYWso5TeqQavJHtVr1wQ

Some crawl space problems are too big, too dangerous, or too technical for DIY fixes. Knowing when to call a professional protects your health, your home’s structure, and your time.

If mold covers more than 10 square feet, professional remediation is recommended. Large infestations require containment, HEPA filtration, and safe material removal that most homeowners can’t do safely. Structural damage (sagging floors, wood rot, or cracked foundation walls) needs a licensed contractor to assess and repair. Sewage contamination or black water from backups introduces bacteria and pathogens that require specialized cleanup.

Clear signs you need professional help:

  • Widespread mold. Visible growth over 10 square feet or recurring mold after DIY cleaning.
  • Persistent high humidity. Relative humidity stays above 60 percent even after running dehumidifiers and improving ventilation.
  • Structural rot or sagging floors. Wood framing that’s soft, crumbling, or visibly damaged.
  • Standing water that won’t drain. Pooling that returns after removal or flooding during storms.
  • Sewage or hazardous contamination. Black water, chemical odors, or suspected asbestos/lead materials.
  • Inaccessible or unsafe entry. Tight clearances, unstable ground, or spaces where you can’t safely move or breathe.

Professionals have the tools, training, and safety equipment to handle these conditions. They can also document findings for insurance claims and ensure repairs meet local building codes.

Preventing Future Musty Smells in the Crawl Space

q-aZRBfwR1itFi4TsVRF0Q

Once the smell is gone and the crawl space is dry, ongoing maintenance keeps it that way. Prevention is simpler and cheaper than repeated remediation.

Keep crawl space relative humidity below 50 percent year round. Check readings monthly during humid months and weekly if you’ve had problems before. Inspect the vapor barrier twice a year (spring and fall) for tears, gaps, or pooling water. Service your crawl space dehumidifier annually. Change filters every 3 to 12 months depending on the manufacturer’s recommendation. Clean the coils and check the condensate drain line to confirm it’s flowing.

Maintain exterior drainage. Extend downspouts 5 to 10 feet from the foundation and keep gutters clean. Check grading annually and add fill dirt if low spots form near the foundation. Keep vegetation and mulch at least 12 to 24 inches away from foundation vents and walls. Plants hold moisture and block airflow.

Long term prevention checklist:

  1. Monitor humidity monthly. Keep RH below 50 percent with hygrometer checks.
  2. Inspect vapor barrier twice yearly. Look for tears, water pooling, and seam failures.
  3. Service dehumidifier annually. Change filters, clean coils, check drain lines.
  4. Clean gutters and extend downspouts. Maintain 5 to 10 feet of clearance from foundation.
  5. Check exterior grading. Ensure 6 inch drop over first 10 feet away from house.
  6. Test sump pump before rainy season. Pour water into basin and confirm pump activates and discharges properly.

If you notice new odors, rising humidity, or visible moisture, address it immediately. Small problems caught early stay small. Ignored moisture turns into mold, rot, and expensive repairs.

Final Words

The moment you smell damp, musty air under the house, act. This post showed what causes that odor, how to pinpoint it with simple checks, and safe DIY steps to remove water and start drying.

We covered long-term fixes like vapor barriers, encapsulation, and better drainage, when to call a pro, cost ranges, and timelines so you know what to expect.
Addressing a musty smell from crawl space quickly prevents mold, protects your home, and gets you back to normal with a clear plan.

FAQ

Q: How do you get rid of musty smell in crawl space?

A: Getting rid of a musty smell in a crawl space means stopping water entry, extracting standing water, removing wet materials, cleaning mold, installing a vapor barrier and dehumidifier, and sealing vents or calling a pro.

Q: At what age does nonenal smell start?

A: The nonenal smell typically starts in middle age, often appearing in your 40s as skin oils change and produce more 2-nonenal.

Q: Is it normal for a crawl space to have a smell?

A: A crawl space having a faint damp or earthy smell is common, but a strong musty, moldy, or rotten odor is not normal and signals moisture, mold, pests, or drainage problems.

Q: Is it safe to live in a house with mold in the crawl space?

A: Living in a house with mold in the crawl space may be unsafe for people with allergies, asthma, or weakened immune systems; fix moisture sources, remediate mold professionally if widespread, and test indoor air.

Emergency Roof Covering Options: Fast Protection After Storm Damage

0

When your roof gets ripped open during a storm, you’ve got maybe hours before water starts wrecking your ceilings, insulation, and walls. The difference between a roof repair and a full-blown interior disaster comes down to how fast you stop the water from getting inside. Emergency roof coverings aren’t permanent fixes, but they buy you time to coordinate real repairs without watching damage spread through your home. This guide walks you through exactly what materials work, how to install them safely, and when to call professionals instead of climbing up yourself.

Quick-Action Emergency Roof Protection Guide

NbhIvZiESNqADaorEBNTsg

The second you spot roof damage after a storm, the clock starts ticking. Water doesn’t wait around. It’ll destroy your ceilings, trash your insulation, and soak straight through your walls in just a few hours.

Here’s what you need to do right now:

Step 1 Walk around your house and check the damage from the ground. Grab any loose debris, branches, or busted shingles you can reach safely without getting on the roof.

Step 2 Round up your emergency stuff: a heavy duty tarp that’s at least 6 mil thick, some wooden boards (2x4s work great), roofing nails or screws with washers, either a hammer or power drill, and roofing cement for sealing things up.

Step 3 Start your tarp at the highest point of the damaged spot and let it drape down over everything. Make sure it extends at least 4 feet past the damage on every side so you’ve got complete coverage.

Step 4 Lock down the top edge first. Use those wooden boards nailed into the roof deck every 6 to 8 inches. Pull everything tight, secure the sides with more boards, then seal all the edges and every single nail hole with roofing cement to keep water out.

This stops active water from getting inside immediately. The next part gets into detailed installation, but if you follow these four steps right now you’ll prevent interior damage while you figure out proper repairs.

Now let’s talk about emergency covering materials, because what you pick depends on your damage type, what the weather’s doing, and how long you need temporary protection to hold up.

Material Type Thickness/Durability Estimated Cost Expected Duration Best Used For Primary Advantages
Heavy-Duty Polyethylene Tarp 6+ mil, reinforced mesh $50-$150 2-3 months Most common roof damage, general storm protection Lightweight, fully waterproof, easy to handle, affordable
Vinyl Tarp 12-20 mil, heavy-duty $100-$300 3-6 months Extended protection, severe weather regions, large damaged areas Superior durability, excellent UV resistance, tear-resistant
Canvas Tarp 10-12 oz weight $75-$200 1-2 months Areas needing breathability, humid climates, attic ventilation concerns Prevents condensation buildup, reduces interior moisture accumulation
Roof Membrane Various mil ratings $150-$400 4-6 months Flat roofs, commercial buildings, professional installations Self-adhesive options, superior water barrier, professional-grade
Plywood Sheeting 1/2″ – 3/4″ thick $30-$60 per sheet 6+ months (with tarp over) Large holes, structural damage, tree punctures, reinforcement needs Structural support, rigid protection, additional security layer

These materials work because they create a water barrier between your damaged roof deck and whatever weather’s coming. Water can’t reach your ceiling joists, insulation, or the inside of your house when you’ve got proper emergency coverings in place. That’s what stops the secondary damage that turns a $2,000 roof repair into a $15,000 interior restoration nightmare. What you pick depends on how big the damage is, whether you need structural backup, and how long it’ll be before real repairs can start.

You’ve got to balance immediate cost against how long the protection needs to last. A 6 mil polyethylene tarp costs less but breaks down faster when the sun hits it. A 20 mil vinyl tarp runs more money upfront but keeps water out longer and handles wind way better. Think about your timeline. If permanent work starts in two weeks, go cheap. If insurance claims or contractor scheduling mean you’re waiting two months, spend the money on durability and UV protection that won’t fail halfway through.

Step-by-Step Tarp Installation for Roof Coverage

snFIew4yRK6RwXY7fGWaXw

Before you climb anywhere, walk around your house and figure out how bad the damage really is. You need to see where it starts and where it stops so your tarp covers everything with extra room.

Here’s how you do this:

Step 1 Check the damage from ground level and clear whatever loose debris, broken shingles, or branches you can safely grab without getting on the roof. Look for sagging spots that might not hold your weight.

Step 2 Measure the damaged area edge to edge. Add 4 feet in every direction when you’re cutting your tarp. If damage runs 6 feet across, your tarp needs to be at least 14 feet wide to give you proper overlap and stop water from sneaking underneath.

Step 3 Start positioning the tarp from the highest point of damage and drape it down following the roof slope. If damage is near the peak, run the tarp over the ridge to the other side so water flows over it instead of under it.

Step 4 Secure the top edge first. Lay a 2×4 board along the upper edge of the tarp and nail it into the roof deck every 6 to 8 inches. Use roofing nails or screws long enough to bite into solid wood, not just whatever’s already damaged.

Step 5 Pull the tarp tight toward the sides and bottom to get rid of wrinkles and saggy spots where water pools. Secure the side edges with more wooden boards nailed the same way. Tension matters here. Loose tarps flap around in wind and tear right at the fastener points.

Step 6 Weigh down the bottom edge with sandbags or bricks if you can’t safely nail into that section. Put roofing cement along all edges, over every nail hole, and anywhere the tarp meets a roof thing like a vent or chimney. Seal it completely.

Walk around your house and check the tarp from the ground. You shouldn’t see gaps, loose sections, or spots where the tarp’s pulling away from the roof surface. Wind’s your enemy. Even small loose sections turn into flapping tears during the next storm. If the tarp balloons or ripples, add more fasteners in those areas. Complete edge sealing with roofing cement stops water from wicking underneath, which defeats the whole point of emergency coverage.

Safety Precautions During Emergency Roof Repairs

VvsasqO6QkSWseioiI6GHg

Your safety matters way more than preventing a ceiling stain. Seriously.

Wait for clear weather before you climb up. A wet roof is slippery, and active storms create wind gusts that can knock you off balance or yank tools right out of your hands.

Here’s what you’ve got to do before attempting any roof work:

Wait for completely clear weather with no rain, wind gusts, or storm activity in the forecast for at least the next three hours.

Position your ladder at the correct angle with the top sticking at least 3 feet above the roof edge so you’ve got something to grab when stepping on and off.

Wear a safety harness anchored to something secure if your roof’s steep or if you’re working more than one story up.

Have somebody on the ground to hold the ladder, hand up materials, and call for help if something goes wrong.

Don’t touch any roof with a slope greater than 6/12 pitch (that’s 6 inches of rise for every 12 inches going across) unless you’re an experienced roofer.

Never work on wet, icy, or frost covered surfaces where your footing isn’t completely solid.

Don’t work during active storms, high winds, or when weather’s changing fast.

Most homeowners don’t have professional roofing experience. That’s fine. But steep roofs, multiple story homes, and extensive damage create risks that training and equipment can’t fix if you’re not physically ready for that work. If you feel unstable, if the damage area puts you near the edge, or if you’re honestly not confident, stop and call a professional. Emergency roofing contractors offer 24 hour response specifically for situations where homeowners can’t safely do the work themselves.

You’re also taking on liability if someone gets hurt helping you. Professional services carry insurance that covers worker injuries and property damage during emergency repairs. That protection matters when you’re asking a neighbor to hold a ladder or help haul materials onto a roof.

Common Roof Damage Scenarios Requiring Coverage

J_hLguD_Q2KOHS_KrNT5SA

Different damage needs different coverage strategies. A few missing shingles don’t require the same approach as a tree branch that punched straight through your roof deck.

Here’s what you’re dealing with and how to cover it:

Wind lifted or missing shingles. The roof deck underneath is exposed but intact. Cover with a single layer polyethylene tarp secured directly over the exposed area. No structural reinforcement needed.

Hail impact damage creating punctures. Small holes or cracks in shingles let water through. A standard tarp works, but slap extra roofing cement around any visible holes before laying the tarp to seal the immediate leak points.

Fallen tree branches causing holes. You need plywood sheeting first to cover the actual hole and give you structural support, then tarp over the plywood to waterproof it. The plywood keeps the tarp from sagging into the hole.

Storm debris penetration. Check whether the damage went through just the shingles or through the roof deck. If you can see into your attic, use plywood reinforcement before tarping.

Hurricane or severe weather preparation. Install tarps over vulnerable sections before the storm hits if you’ve already got damaged areas. Secure them extra well with additional fasteners every 4 to 6 inches instead of 6 to 8 inches.

Aging material deterioration. Multiple weak spots across a large area need one oversized tarp that covers the entire section rather than multiple small tarps with seams where water sneaks through.

How bad it is determines your materials. Minor damage (a patch of missing shingles smaller than 4 feet across) is a tarp only job. Moderate damage (multiple damaged sections or a hole through the decking) requires plywood plus tarp. Extensive damage (large holes, multiple penetrations, or structural concerns) needs professional assessment before you try covering anything because you might be dealing with compromised support beams or unsafe roof deck sections.

Think about weather exposure too. A small damaged section gets immediate coverage to stop active leaks, but if your forecast shows heavy rain for the next 48 hours, prioritize getting that tarp on fast over getting it perfect. You can add extra fasteners and sealing later once the immediate rainfall threat passes.

DIY Installation Versus Professional Roof Covering Services

btU6oe6HSlWgXt96ctMCQQ

You need to honestly figure out whether you can safely handle this work or whether the situation needs professional help from the start.

When DIY Roof Covering Makes Sense

Single story homes with accessible roof areas and minor damage are realistic DIY projects if you’re physically capable and have basic tool experience. We’re talking about damage you can reach from a standard extension ladder, where the roof pitch isn’t so steep you’re sliding around, and where the damaged area sits at least 3 feet from any roof edge. If you’ve done basic home maintenance before (cleaned gutters, replaced deck boards, handled a power drill), you probably have the skills needed to position and secure a tarp safely.

When to Call Emergency Roofing Professionals

Steep roofs create serious fall risks even for experienced workers. Multiple story buildings put you at dangerous heights where a mistake means hospital level injuries. Extensive damage, especially anything involving structural concerns, large holes, or areas near roof valleys and peaks, requires professional assessment before you start covering things. If you’re looking at the damage and feeling uncertain, that uncertainty is telling you something. Time constraints matter too. If you’re dealing with active leaks during a storm and can’t wait for weather to clear, emergency contractors have the equipment and experience to work in marginal conditions you shouldn’t attempt. Look for contractors with proper licensing for your state, current liability and worker’s compensation insurance, positive reviews from recent emergency jobs, and 24 hour availability for true emergencies.

Professional installation also matters for insurance claims and code compliance. Some places require permits even for temporary roof coverings, and lots of insurance policies require professional documentation of emergency mitigation work to approve those costs. If your damage is extensive enough that you’re filing a claim anyway, having a licensed contractor handle the emergency covering creates a paper trail that supports your claim and makes sure the work meets any code requirements that apply to temporary structures.

Insurance Claims and Damage Documentation for Roof Coverage

W4SfZkJ4Sja0RVwXM2X8jA

Before you touch anything, grab your phone and start taking pictures. Insurance companies want to see what happened before you started fixing it.

Follow this sequence:

Step 1 Take photos of all visible damage from multiple angles before you move any debris or start any covering work. Shoot wide shots showing the overall damage area and close ups of specific broken shingles, holes, or impact points.

Step 2 Document the cause if it’s visible. Photograph the fallen tree branch, the debris that hit your roof, or the area where wind lifted shingles. Insurance adjusters need to verify that covered stuff caused the damage.

Step 3 Photograph the emergency covering installation process as you work. Show the materials you’re using, how you’re securing them, and the completed temporary protection from multiple angles.

Step 4 Keep every receipt for materials and professional services. Your tarp, wooden boards, roofing cement, nails, and contractor labor are all potentially reimbursable as emergency mitigation costs.

Step 5 Take final photos showing the completed temporary protection and how it covers the damaged areas. These prove you took reasonable steps to prevent further damage.

Emergency roof covering qualifies as damage mitigation, which most insurance policies require you to perform after a loss. That means the cost of materials and reasonable labor to install temporary protection should be covered under your policy, separate from your actual roof repair costs. The key word is “reasonable.” A basic tarp installation to stop active leaks is covered, but upgrading to premium materials beyond what’s needed for temporary protection might not be.

Proper documentation protects your claim by showing the insurance company exactly what was damaged, what caused it, and what steps you took to prevent the damage from spreading to interior spaces. That matters because if your roof leaks for three days before you cover it and your ceiling gets destroyed, the insurance company can argue you failed to mitigate and deny coverage for the ceiling damage.

Contact your insurance company within the timeframe specified in your policy (usually 24 to 72 hours after discovering damage). Report the loss, explain what happened, and tell them you’ve installed or are installing emergency roof covering to prevent further damage. Ask specifically whether they cover emergency mitigation costs and what documentation they need for reimbursement.

Specialized Roof Features and Emergency Coverage Techniques

Ekd_jvRpTq-_9nvGVtOJAg

Roof penetrations and architectural features are where most emergency coverings fail because homeowners just lay tarps over them without addressing the gaps and weak points they create.

Here’s how to handle the problem spots:

Flat roof water pooling prevention. Don’t just lay the tarp flat. Create slight drainage channels using extra lumber underneath the tarp edges so water flows toward drains or off the roof edge instead of pooling in one spot and sagging through damaged decking.

Pitched roof peak protection. When damage is near the ridge, run your tarp completely over the peak to the other side and secure it on both slopes. Water flows down, so coverage that stops at the peak line lets water run under the tarp.

Valley area reinforcement. Valleys channel water flow, which means more water volume hits that section. Use extra fasteners every 4 inches along valley areas and apply a thick bead of roofing cement along the entire valley tarp edge.

Ridge cap coverage methods. If the ridge cap itself is damaged, fold the tarp over the peak and secure wooden boards on both sides of the ridge to sandwich the tarp and prevent wind from lifting it at the highest point.

Roof vent sealing techniques. Cut an X pattern in the tarp over each vent pipe, slip the tarp down around the pipe, and seal the cut edges to the pipe with roofing cement. Don’t cover vents completely. Attic ventilation prevents moisture buildup.

Chimney base wrapping. Run the tarp up to the chimney base, cut the tarp to fit around it, and seal the cut edges where tarp meets chimney with multiple layers of roofing cement. The chimney roof intersection is a common leak point.

Skylight protection strategies. If the skylight itself is damaged, cover it from the outside with plywood first for impact protection, then tarp over the plywood. If damage is around the skylight, cut the tarp to fit against the skylight curb and seal heavily with roofing cement.

The flashing around these features (the metal or rubber strips that seal penetrations) is where water intrusion happens most often during normal weather, and it’s definitely where emergency coverings fail. Every spot where your tarp meets a roof penetration or architectural feature needs roofing cement applied generously. We’re talking about a bead of cement at least a half inch wide that completely seals the tarp edge to the feature.

Use extra fasteners in high stress areas where wind catches edges or where water naturally flows in heavy volume. On flat roofs or in regions with strong prevailing winds, double your fastener density (every 4 inches instead of every 8 inches) along edges and near penetrations. But watch weight distribution on damaged roof deck sections. If you’re fastening into wood that’s already compromised, you might punch through or create new weak points. When in doubt, distribute fasteners across a wider area using longer boards that spread weight to undamaged sections.

Duration Limits and Maintenance of Emergency Roof Coverings

kyFqOWQ6QZmE8m00ProhBw

Even quality materials properly installed won’t last forever. You’re buying time, not creating a permanent roof.

Count on these realistic protection windows. Heavy duty tarps in good conditions provide solid coverage for several weeks to maybe three months. That timeline shrinks fast if you’re dealing with extreme weather, constant sun exposure, or freeze thaw cycles that stress the material daily.

Check your emergency covering weekly using these procedures:

Inspect the entire tarp surface for tears, holes, or thin spots where UV degradation is weakening the material and you can see light coming through.

Make sure all fasteners are still tight and that wooden boards haven’t loosened or shifted position from wind stress.

Check for water pooling or sagging sections where the tarp has stretched or where weight has created low spots that collect rainfall.

Remove debris buildup. Leaves, branches, dirt, all that stuff holds moisture against the tarp and speeds up breakdown.

Look for UV degradation signs including color fading, material brittliness, and surface cracking that show the tarp is approaching failure.

Check edge sealing to make sure roofing cement hasn’t cracked or pulled away from tarp edges or roof penetrations.

Weather throws specific challenges that speed up the deterioration process. Summer heat and constant sun exposure degrade polyethylene and vinyl through UV breakdown. The material literally becomes brittle and cracks. Winter snow loads add hundreds of pounds of weight that stress fastener points and can tear tarps or pull boards loose. Ice formation along edges creates sharp pressure points that puncture tarp material. Freeze thaw cycles repeatedly expand and contract the materials, which loosens fasteners and cracks roofing cement seals.

Watch for these replacement timing signals. Material fading from bright blue or silver to a pale washed out color means UV damage that’s weakened the waterproof coating. Visible tears or holes obviously mean water’s getting through. Reduced water resistance shows up as dark wet spots on the tarp surface after rain instead of water beading and running off. That’s the waterproof layer failing. When you see any of these signs, plan tarp replacement within days, not weeks.

The absolute maximum you should expect from emergency roof covering is a few months, and that’s with quality materials, proper installation, and regular maintenance in moderate weather. If you’re approaching that timeline and permanent repairs aren’t scheduled yet, you need to either replace the temporary covering or seriously push your contractor to start work. A failed emergency tarp during a rainstorm dumps all that delayed damage into your home at once.

Final Words

When your roof takes damage, knowing your emergency roof covering options makes the difference between quick protection and escalating interior damage.

Tarps, plywood, and proper installation techniques stop water intrusion immediately while you arrange permanent repairs.

Whether you handle installation yourself or call emergency professionals, the goal stays the same: protect your home’s interior, prevent structural deterioration, and maintain a dry, safe living space until complete repairs happen.

Document everything, check your covering weekly, and remember that these solutions buy you time, not permanence. Get those permanent repairs scheduled before your temporary protection wears out.

FAQ

What is the best way to temporarily cover a roof?

The best way to temporarily cover a roof is to use a heavy-duty polyethylene or vinyl tarp (minimum 6 mil thick) secured with wooden boards nailed every 6-8 inches along edges, extending 4 feet beyond the damaged area on all sides, and sealing with roofing cement.

What are the options for a temporary roof cover?

Temporary roof cover options include heavy-duty polyethylene tarps (6+ mil), vinyl tarps (12-20 mil), canvas tarps (10-12 oz), roof membrane materials, and plywood sheeting (1/2″ to 3/4″), each selected based on damage severity, weather exposure, and expected repair timeline.

How long does peel and stick roofing last?

Peel and stick roofing typically lasts several weeks to a few months depending on weather conditions and UV exposure, which gradually degrades the material’s waterproof properties and requires regular inspection for tears, fading, and reduced water resistance.

How to temporarily cover missing shingles?

To temporarily cover missing shingles, position a heavy-duty tarp over the exposed area extending 4 feet past the damage, secure edges with 2×4 boards nailed every 6-8 inches into solid roof deck, and seal all fastener points with roofing cement.

When should I call a professional instead of installing a roof tarp myself?

You should call a professional for roof tarp installation when dealing with steep roofs (greater than 6/12 pitch), multiple-story homes, extensive damage requiring structural assessment, wet or icy conditions, or when lacking proper safety equipment like harnesses.

Do I need to document roof damage before installing emergency covering?

You need to document roof damage before installing emergency covering by taking photos from multiple angles, capturing the damage cause if visible, and photographing the installation process, as proper documentation supports insurance claims for both temporary and permanent repairs.

How do I cover roof penetrations like vents and chimneys during emergency repairs?

To cover roof penetrations during emergency repairs, wrap tarps around vent bases and chimney structures, use extra fasteners in these high-stress areas, and apply additional roofing cement along seams to prevent water intrusion at common leak points.

What maintenance does an emergency roof tarp require?

Emergency roof tarp maintenance requires weekly inspections for tears or holes, verifying fasteners remain secure, checking for water pooling or sagging, removing debris accumulation, and monitoring UV degradation signs like fading or brittleness before material failure occurs.

What causes most emergency roof damage requiring temporary covering?

Emergency roof damage requiring temporary covering is caused by severe weather (high winds, heavy rain, hail), fallen trees and debris during storms, wind-lifted shingles exposing roof deck, hail punctures weakening shingle integrity, and aging materials deteriorating over time.

Will my insurance cover emergency roof tarping costs?

Insurance typically covers emergency roof tarping costs as required damage mitigation, but you must document damage thoroughly with photos before and after installation, keep all receipts for materials and professional services, and contact your insurance company within required timeframes.

How to Find Source of Ceiling Leak Fast

0

Don’t start by climbing on the roof.
It’s often the worst first move.

The fastest way to find a ceiling leak is to watch when it happens, read the stain, and check what’s directly above the wet spot.
Timing and pattern tell you if it’s the roof, a pipe, or the HVAC.

This post gives simple, step-by-step checks you can do in minutes: document when it drips, note stain color and shape, listen for running water, and take a quick attic peek if it’s safe.
You’ll narrow the source fast and know the right next step.

Immediate Steps to Locate the Source of a Ceiling Leak

0X6-PuObRJmmELbKoj9lNw

The fastest way to figure out where a ceiling leak comes from? Watch when it happens, look at what the stain looks like, and check which rooms sit directly above the wet spot. A leak that only shows up during heavy rain points to your roof. Flashing, shingles, valleys. A leak that drips no matter the weather usually means a plumbing pipe, fixture, or HVAC condensate line. Timing and pattern help you narrow things down before you’re climbing into the attic or picking up the phone.

Stain behavior tells a story. A clean, wet ceiling dripping clear water often signals a pipe leak. Dark brown or yellow stains suggest water came in from the roof and picked up dirt or algae on the way down. Peeling paint or bubbling wallpaper can mean moisture’s been hanging around for a while. Mold spots indicate prolonged dampness, either from a slow leak or lousy ventilation.

Before you start moving insulation or pulling down ceiling panels, run through a quick diagnostic checklist. You can often rule out half the possible sources in five minutes just by looking and thinking.

  1. Document when the leak appears. Note whether it drips during rain, after someone showers upstairs, or all the time.

  2. Look at the stain pattern. A round, isolated stain often means a single drip point. Long trails or streaks mean water traveled along a joist or pipe before it dripped.

  3. Check directly above the wet spot. Is there a bathroom, kitchen sink, water heater, or HVAC unit overhead?

  4. Make a quick attic glance if you have safe access. Just stick your head up and shine a light. You don’t need to move anything yet. Just look for obvious wet spots, discolored wood, or dripping water.

  5. Notice any smells. A musty odor means moisture’s been there longer than a day. A sewage smell could mean a drain line, not a supply pipe.

  6. Feel the ceiling around the stain if it’s safe. Soft, sagging drywall means water has saturated the material and it may collapse. Don’t poke or stand under it.

This rapid assessment keeps you from tearing into the wrong area. If you see a steady drip, hear running water, or smell mold, move to the next level of inspection. If you see a bulging ceiling or water near electrical fixtures, turn off the breaker to that room and call a professional right away.

Inspecting Attics and Crawlspaces to Trace Ceiling Leak Sources

YHzpb-EaR5qPzcb42NrjRw

Once you’ve confirmed the general area and ruled out obvious fixture leaks, the attic is where you confirm the source. Grab a bright flashlight or headlamp, wear gloves, and put on a dust mask. Attic insulation releases fibers and dust. Step only on joists or solid boards, never between them. Drywall ceilings won’t hold your weight.

Start by scanning the underside of the roof sheathing directly above the wet ceiling spot. Look for dark stains, water trails, or mold on the wood. Shine your light along rafters and beams. Water can travel several feet before it drips onto insulation or drywall. If you see wet or compressed insulation, gently pull it back to expose the ceiling joists and any pipes running through the area. Wet insulation loses its effectiveness and can hide the real entry point, so move it aside carefully.

Check these five targets methodically:

Roof sheathing and rafters for dark streaks, rot, or soft spots that indicate long term moisture exposure.

Insulation for wetness, discoloration, or a matted down appearance. Dry insulation is fluffy.

Pipes and supply lines running through the attic. Feel along their length for moisture, corrosion, or dripping joints.

HVAC ducts and drain lines for condensation, disconnected fittings, or clogged drains that overflow.

Penetrations in the roof such as vent pipes, electrical conduits, or chimney chases where flashing may have failed.

If you find pooled water on the attic floor or soaked ceiling joists, mark the spot with a piece of tape or take a photo so you can describe the exact location to a roofer or plumber. Water doesn’t always drip straight down. It follows the path of least resistance along wood grain, nail lines, or pipe surfaces.

Roof-Related Causes When Tracking the Ceiling Leak Source

EmA7Ti6HSD6Lii01c0-PnA

If your leak only shows up during or shortly after rain, the roof is the likely entry point. Roof leaks commonly begin at transitions and penetrations. Places where different materials meet or something punctures the waterproof layer. Skylights, chimneys, plumbing vents, and roof valleys are the usual suspects because flashing around these features can crack, lift, or corrode over time.

From inside the attic, dark stains on the underside of roof sheathing usually align with a breach somewhere above. If you can safely access the attic during a rain event, you may see active dripping or a wet trail forming along a rafter. When you find a hole or crack in the sheathing, one old trick is to push a single plastic straw or a thin wire up through the hole so it pokes out above the roofline. That marker makes it much easier to find the exact spot when you’re standing on the roof or talking to a roofer.

Don’t climb onto a wet, steep, or damaged roof yourself. Instead, look for these clues from the ground or through binoculars after the storm passes:

Missing, cracked, or curled shingles near the area above your ceiling stain.

Gaps or rust around roof flashing at chimneys, vents, or where two roof planes meet.

Clogged or damaged valleys where leaves and debris can dam water and force it under shingles.

Loose or deteriorated caulk around skylight frames or vent boots.

Storm damage often leaves visible debris, lifted shingles, or dented flashing. If you recently had high winds or hail, those are additional reasons to suspect the roof. Mark the suspected area on a simple sketch or take a photo of the exterior so a roofer knows exactly where to start.

Plumbing Sources Above the Ceiling and How to Identify Them

TH_3tAltSZSvnrl_w4895A

Plumbing leaks drip regardless of weather. They can be slow and steady or sudden and heavy, depending on whether a joint is weeping or a pipe has burst. Common signs include sagging ceilings, persistent musty smells, rising water bills with no obvious cause, and reduced pressure at nearby fixtures. If the room above your stain contains a bathroom, kitchen, laundry area, or water heater, plumbing is the first place to look.

Go upstairs and check every fixture in the room directly above the wet ceiling. Run the sink, flush the toilet, and turn on the shower one at a time while someone watches the stain from below. If the drip starts or gets worse during one of those tests, you’ve found your source. Don’t forget to check under sinks, around toilet bases, behind washing machines, and near dishwasher supply lines. Small leaks there can travel down through the floor.

Use a measuring tape to record the distance from the ceiling stain to the nearest wall, vent, or light fixture. That measurement helps you map the stain’s location to the plumbing layout above. If you hear faint dripping or running water inside the ceiling, press a drinking glass against the drywall and put your ear to the bottom of the glass. It amplifies sound and can help you trace the noise to a specific spot.

Using Sound and Fixtures to Identify Plumbing Leaks

Listening for water movement is surprisingly effective. A stethoscope works even better than a glass, letting you move along walls and ceilings to follow the sound of dripping or flowing water. Mark the loudest point with a pencil dot. If the sound moves when you turn a faucet on or off, that fixture is involved.

Check these typical plumbing related leak sources methodically:

Toilet wax rings and supply lines. Look for water pooling around the base or dampness on the floor near the bowl.

Shower and tub drain connections, especially older installations where caulk has dried out or grout has cracked.

Sink trap joints and supply hoses. Feel along the pipes under sinks for moisture or corrosion. Green patina on copper means long term slow leaks.

Water heater relief valves and drain connections. Check the floor around the tank and any overflow pans.

Washing machine hoses and drain standpipes. Rubber hoses can crack. Standpipes can overflow if clogged.

Water can travel down the outside of a pipe from a leak several feet away, so don’t assume the drip point is the leak point. Trace wet pipes back to their fittings and joints. Intermittent small drips might be fixable with a new washer or tightened joint, but larger leaks, especially from cracked pipes or failed valves, require a plumber and possibly drywall removal to access the damaged section.

HVAC and Condensation Issues That Can Mimic a Ceiling Leak Source

1iVymU88TMiDKJvPsA8EBQ

Sometimes what looks like a leak is actually condensation from an air conditioning system. HVAC units produce moisture as they cool air, and that water is supposed to drain through a condensate line into a floor drain or outside. If the drain line clogs with algae or dirt, water backs up into the drip pan. When the pan overflows, it spills onto the attic floor or ceiling below, creating a wet stain that can look identical to a roof or plumbing leak.

HVAC leaks often show up during summer when the system runs frequently, and they tend to form slow, spreading stains rather than sudden drips. You may notice a musty smell but no mold growth yet, and the ceiling may feel damp rather than soaked. Check the air handler or furnace in the attic. Look for a rectangular metal or plastic pan underneath the unit. If it’s full of water or has rust stains, the condensate system isn’t draining properly.

Compare these symptoms to help distinguish condensation from structural leaks:

HVAC condensation usually appears during cooling season, forms gradually, and stops when the system is off for a few days.

Roof leaks appear during or shortly after rain, show dark staining, and often include visible water trails on rafters.

Plumbing leaks occur regardless of season or weather, can happen suddenly, and often produce clear water with no discoloration unless it’s a drain line.

If you find a clogged condensate line or overflowing drip pan, you can often clear the line with a wet/dry vacuum or a small bottle brush. Pour a cup of white vinegar down the drain line every few months to prevent algae buildup. For recurring problems or if the line is inaccessible, call an HVAC technician.

Using Tools to Trace and Confirm the Ceiling Leak Source

7Wk03mj6TBCPiv6X4CRV8Q

Basic tools can turn guesswork into certainty. A moisture meter measures how much water is trapped inside drywall, wood, or insulation. Readings above 15 to 20 percent usually mean active moisture. An infrared or thermal imaging camera shows temperature differences that reveal hidden wet areas. Cooler spots on a ceiling often indicate evaporation from moisture. These tools help you confirm the leak’s exact boundaries and avoid tearing into dry areas by mistake.

For plumbing fixture leaks, a dye test isolates the source. Add food coloring to a toilet tank, sink, or tub drain, then watch the stain below. If colored water appears, you’ve confirmed which fixture is leaking. For roof leaks, a controlled hose test simulates rain. Have one person spray water on a suspected section of roof while another watches the attic or ceiling for new drips. Start low on the roof and work upward to avoid flooding the attic.

Professional leak detection uses advanced equipment when the source remains hidden. Plumbers and restoration companies deploy pipe cameras, electronic acoustic sensors, and gas tracer systems to locate leaks inside walls or under slabs without demolition.

Tool Primary Use Best For
Moisture Meter Measures water content in materials Confirming drywall, insulation, or wood dampness before cutting
Infrared Camera Displays temperature variations Finding hidden wet zones behind finished surfaces
Dye Test Kit Traces fixture drain leaks Isolating toilet, sink, or tub leaks by color coding water
Hose and Timer Simulates rainfall on roof sections Reproducing intermittent roof leaks in dry weather
Pipe Camera Inspects inside drain and supply lines Locating cracks, blockages, or joint failures without opening walls

Moisture meters and infrared cameras are available at hardware stores or online for under one hundred dollars. If the leak is elusive or you’re dealing with multiple wet areas, hiring a leak detection specialist with professional grade equipment often saves time and prevents unnecessary demolition.

Safety Procedures to Follow When Tracking a Ceiling Leak Source

mvkxPbxlTAq1a6MH6MTaug

Water and electricity are a dangerous combination. Before you touch a wet ceiling, climb into an attic, or inspect plumbing, turn off the circuit breaker to any room with visible moisture. Water can travel along wiring inside walls and ceilings, creating shock hazards even if the wet spot looks far from an outlet or light fixture. If you’re not sure which breaker controls the affected area, shut off the main breaker temporarily while you investigate.

Wet ceilings can sag and collapse without warning, especially drywall that’s absorbed water for hours or days. Don’t stand directly under a bulging ceiling, and don’t poke or press on soft spots. If you need to drain a bulge, puncture the lowest point gently with a screwdriver while holding a bucket underneath, but only if the ceiling is stable enough that it won’t fall on you.

Follow these safety rules during any leak inspection:

Wear gloves, safety glasses, and a dust mask or respirator when handling insulation, cutting drywall, or inspecting moldy areas.

Use a stable ladder with non slip feet and have someone hold it if you’re climbing into an attic or reaching overhead.

Never step between ceiling joists in an attic. Step only on solid framing or lay down plywood to distribute your weight.

Avoid roof work in wet, icy, or windy conditions. If you must inspect the roof, use proper fall protection or hire a professional.

If you smell sewage, see visible mold covering more than a small patch, or encounter structural damage such as cracked beams or sagging floors, stop and call a professional. Some situations aren’t safe for DIY troubleshooting.

When a Ceiling Leak Source Requires a Professional

bBxyBAHpRBu9GXqlb6417A

Not every leak needs a service call, but some do. If you’ve checked the obvious sources (fixtures, attic, and nearby roof areas) and still can’t find where the water is entering, it’s time to bring in a roofer, plumber, or water damage restoration company. Professionals use high definition pipe cameras that travel inside drain lines and supply pipes, electronic listening devices that detect water movement behind walls, and infrared scanners that map moisture through finished surfaces.

Certain situations always warrant expert help. A ceiling that sags or bulges significantly can collapse, especially if drywall is soaked. Any leak near electrical panels, outlets, or light fixtures creates fire and shock risks that require licensed electricians and restoration crews. Persistent leaks that reappear after you think you’ve fixed them often indicate hidden damage or multiple entry points that need systematic diagnosis.

Call a professional when you encounter these scenarios:

You can’t safely access the suspected area. Steep roofs, high ceilings, or confined crawlspaces.

The leak involves structural components like cracked rafters, rotted joists, or compromised load bearing walls.

Mold growth is visible or widespread, or the smell is strong and persistent.

Repair timelines vary. A simple plumbing fixture repair or small roof patch can be completed in a few hours. Complex issues (such as replacing rotted roof sheathing, rerouting corroded pipes inside walls, or drying out saturated framing) can take several days and often require coordination between multiple trades. Professionals will also document the damage with photos and moisture readings, which supports insurance claims and helps prevent disputes over scope.

After Locating the Leak Source: Drying, Repair, and Prevention

wGoDCphHTXOeDa9G6Mm8Ww

Once you’ve stopped the water, the clock starts on drying. Mold can begin to grow within 24 to 48 hours of saturation, so don’t wait. Set up fans to circulate air across wet surfaces, and run a dehumidifier in the affected room and attic if needed. Open windows if outdoor humidity is lower than indoor humidity. Pull back or remove soaked insulation. It won’t dry effectively in place and will stay damp long enough to promote mold and odors.

Cut out any drywall that feels soft, sags, or shows dark staining. Wet drywall loses structural integrity and traps moisture inside the gypsum core even after the surface feels dry. Use a utility knife to score a square or rectangle around the damaged area, then snap it out along ceiling joists so you have solid backing for the patch. If insulation above the ceiling is wet, bag it and dispose of it. Wet fiberglass and cellulose don’t regain their insulating value.

After everything is dry, repair the ceiling and take steps to prevent the next leak:

Patch drywall by cutting a piece to fit the opening, screwing it to the joists, taping the seams, and applying joint compound in three coats.

Prime stains with a stain blocking primer before painting, or the discoloration will bleed through your topcoat.

Replace insulation with new material rated for your climate zone, and make sure it sits evenly without gaps.

Schedule annual roof inspections to catch damaged shingles, loose flashing, and clogged valleys before they leak.

Clean gutters twice a year and check that downspouts direct water away from the foundation. Clogged gutters can force water under roof edges.

Monitor attic ventilation. Poor airflow can cause condensation that mimics a leak, especially in winter. Make sure soffit vents and ridge vents are clear, and consider adding baffles between rafters if insulation blocks airflow. Preventative maintenance is faster and cheaper than emergency repairs, and it keeps small problems from becoming ceiling stains.

Final Words

Start by acting fast: note when the leak happens, how the stain behaves, and any musty smells. That quick info narrows whether it’s roof, plumbing, or HVAC.

Next, take safe, simple steps — a careful attic peek, check nearby fixtures, and use basic tools or a moisture reader if you have one. Stay off joists and turn power off if anything looks risky.

Following those steps is how to find source of ceiling leak. You’ll limit damage, make repairs clearer, and get your home back to normal.

FAQ

Q: How to figure out where a leak in the ceiling is coming from?

A: To figure out where a ceiling leak is coming from, track when it appears, follow stain patterns, check nearby fixtures and the attic; plumbers add moisture meters, dye tests, thermal cameras, and listening tools.

Q: How do plumbers find the source of a leak?

A: Plumbers find the source of a leak by using moisture meters, thermal imaging, pipe cameras, dye or pressure tests, and listening techniques to trace hidden drips back to the exact pipe or fixture.

Q: How to find a water leak that isn’t visible?

A: To find a water leak that isn’t visible, use timing clues, infrared or moisture meters, listen for dripping, inspect adjacent rooms and attic spaces, and run dye or pressure tests on suspect lines.

Q: Can I ignore a small ceiling water leak?

A: You can’t ignore a small ceiling water leak because it can cause mold, sagging, and hidden damage; stop the source, document for insurance, and schedule an inspection before materials worsen.

Soot Cleaning Solution That Actually Removes Stubborn Stains

0

Think all soot cleaners work the same? They don’t. Soot is oily, acidic, and will etch metal, stain walls, and keep smelling if you don’t remove it the right way. The right soot cleaning solution lifts stubborn stains without smearing or driving particles deeper into surfaces. This post shows the top solutions, when to use solvent-based removers, dry-cleaning sponges, TSP, and odor neutralizers, and the exact cleaning order so you stop more damage fast, remove the stain, and get the space ready for repairs.

Top Soot Cleaning Solutions That Deliver Fast, Effective Results

Rtj-OOwTRPyprHVJPPMcdw

Soot is acidic and leaves oily, powdery residue that etches metal, stains walls, and carries particles that affect breathing. The right soot cleaning solution stops further damage and lifts stains without smearing or driving particles deeper into surfaces.

Commercial soot removers work faster and reach deeper than household cleaners. Solvent-based agents break down the oils and carbon that bind soot to surfaces. Professional-grade formulas are designed for heavy smoke damage, eliminating odor-causing residue in one or two passes. DIY options exist and we’ll cover them later, but when time matters or the damage is widespread, ready-to-buy solutions deliver consistent results with less trial and error.

Here are six soot cleaners that remove stubborn stains and work across multiple surfaces:

Solvent-based soot removers are formulated with petroleum distillates or glycol ethers that dissolve oily soot. They’re ideal for walls, ceilings, and painted surfaces.

Heavy-duty degreasers cut through thick, sticky soot from cooking fires or incomplete combustion. They’re effective on metal and hard surfaces.

Trisodium phosphate (TSP) concentrate is an industrial-strength powder mixed with water (4 to 6 tablespoons per gallon) for large wall and ceiling cleaning jobs.

Dry-cleaning sponges (chemical sponges) are vulcanized rubber sponges designed to lift dry soot without water. Use them before any liquid cleaner to prevent smearing.

Smoke and soot odor neutralizers use enzyme-based or encapsulating formulas that neutralize odor molecules instead of masking them. They’re often used after surface cleaning.

HEPA-filtered cleaning equipment rental kits include HEPA vacuums and air scrubbers for controlling airborne soot during cleanup.

Choose solvent-based removers for oily, sticky soot from incomplete combustion or cooking fires. Use dry-cleaning sponges and TSP for dry, powdery soot from fireplaces or candles. If soot has spread through HVAC ducts or embedded in porous materials, professional equipment and formulas are necessary to prevent recontamination and lingering odors.

Understanding Soot and How It Affects Your Choice of Cleaning Solution

FnEfWgVJTe2kVslNATBHEQ

Soot isn’t just carbon. It’s a mix of tiny carbon particles, acids, oils, and chemical residue from incomplete combustion. Those particles are small enough to settle into fabric fibers, behind baseboards, and inside walls, where they continue to corrode metal, discolor surfaces, and release odors.

Different fires produce different soot types. Dry, powdery soot comes from wood or paper fires and can usually be vacuumed and wiped with mild cleaners. Oily, sticky soot comes from synthetic materials, plastics, or cooking fires and requires solvents to break down the greasy film.

If you use water or dish soap on oily soot before using a dry sponge or solvent, you’ll smear the residue and lock it into the surface. If you skip ventilation and leave HVAC running, soot will circulate through ducts and redeposit on clean surfaces. The type of soot determines which cleaner works and which order you use it in.

Type of Soot Common Source Cleaning Solution Type Risk Level
Dry, powdery soot Wood, paper, candle fires Dry-cleaning sponge, TSP, vinegar Moderate (staining, odor)
Oily, sticky soot Plastic, synthetic materials, cooking fires Solvent-based removers, degreasers High (etching, persistent odor, toxicity)
Protein-based residue Kitchen fires, burned food Enzyme cleaners, degreasers, odor neutralizers High (invisible film, strong odor)
Coal or fuel soot Coal stoves, furnaces, oil heaters Dry-cleaning solvents, oil-based cleaners (no water) Very high (toxicity, deep staining)

Step-by-Step Guide: Using a Soot Cleaning Solution Correctly

f_K3xD1LTOWAErWo0WqRWQ

The order you clean in determines whether soot lifts or smears. Using liquid cleaners before dry methods will drive particles deeper and turn a removable stain into a permanent one.

Open all windows and doors, even in winter. Fresh air dilutes airborne particles and speeds drying. Turn off HVAC at the thermostat and breaker to stop soot from circulating through ductwork.

Put on personal protective equipment before touching anything. Wear a respirator (not a dust mask), long sleeves, long pants, gloves, and eye protection. Soot particles are fine enough to irritate lungs and eyes.

Remove or protect undamaged items. Move furniture, rugs, and objects that aren’t affected by soot. Cover floors with plastic sheeting or drop cloths to catch falling debris.

Vacuum loose soot gently with a HEPA vacuum and upholstery attachment. Use light suction and don’t press hard or scrub. Work from top to bottom so falling particles don’t recontaminate clean areas.

Use a dry-cleaning sponge (chemical sponge) on all surfaces before applying any liquid. Wipe in straight lines and flip or replace the sponge as it darkens. Don’t use water, soap, or solvents yet.

Apply your chosen soot cleaning solution to a clean rag, not directly to the surface. For commercial solvent-based removers, soak the rag and wipe in small sections. For TSP solution, mix 4 to 6 tablespoons TSP plus 1 cup household cleaner per gallon of warm water, then apply with a wrung-out sponge.

Wipe surfaces a second time with warm water and a small amount of dish soap or degreaser. This step removes solvent residue and any remaining oily film. Rinse the rag frequently to avoid streaking.

Dry surfaces immediately with fans or air movers. Don’t leave walls, wood, or carpets damp. Moisture trapped in porous materials can lead to mold, warping, or bubbling paint.

Never skip the dry-cleaning sponge step. Never use a stiff brush or scrubbing pad on soot. Never apply heat or put soot-stained fabrics in the dryer until the stain is completely gone.

DIY Soot Cleaning Solutions for Budget-Friendly Cleanup

m7nGwYtwTGWYI9LZFnhfcQ

Homemade cleaners work well on light to moderate soot when you follow the correct application order. Always test any DIY formula on a hidden spot first to confirm it won’t discolor or damage the surface.

Here are four DIY soot cleaning recipes with precise measurements:

White vinegar solution. Mix 1 cup white vinegar with 1 gallon warm water. Use on finished wood, painted walls, and nonporous surfaces after dry-sponge cleaning. Vinegar cuts through acidic residue and neutralizes odors.

Baking soda paste. Mix 3 tablespoons baking soda with 1 tablespoon water to form a thick paste. Apply to stubborn soot spots on metal, tile, or brick. Let sit 5 minutes, then wipe with a damp rag.

Rubbing alcohol wipe. Pour rubbing alcohol (isopropyl alcohol, 70% or higher) onto a microfiber cloth. Use on light bulbs, glass, mirrors, and electronics. Alcohol evaporates quickly and doesn’t leave streaks.

Dish soap and warm water rinse. Mix 1 tablespoon dish soap (unscented, no lotion) with 1 gallon warm water. Use as a final rinse after solvent or vinegar cleaning to remove oily film and cleaning residue.

Don’t use baking soda or vinegar as your first step. They work after you’ve removed loose soot with a vacuum and dry-cleaning sponge. Don’t use rubbing alcohol on colored or printed surfaces without testing first, as it can lift dyes or finishes.

If DIY methods leave streaks, smears, or lingering odor after two passes, the soot has likely penetrated beyond the surface. At that point, sealing with a specialized primer or calling a restoration professional is more effective than repeating the same steps.

Choosing the Right Soot Cleaning Solution for Each Surface Type

kNSvurAIQcyewyB3hV1AfA

Different materials hold soot in different ways. What works on drywall can damage wood, and what’s safe for metal can ruin electronics.

Walls and Ceilings

Use a TSP solution (4 to 6 tablespoons TSP plus 1 cup household cleaner per gallon of warm water) on painted drywall and plaster. Work from the ceiling down in small sections. Wring out your sponge well to avoid oversaturating the wall. Rinse each section with plain warm water to prevent white streaks or residue buildup. If soot has soaked into unpainted drywall or the paper backing has darkened, sealing with a smoke-blocking primer is often necessary before repainting.

Fireplaces and Brick

Vacuum brick and stone surfaces first with a soft brush attachment. Use a dry-cleaning sponge in straight lines to lift surface soot. For embedded stains, apply a baking soda paste (3 tablespoons baking soda, 1 tablespoon water) and scrub gently with a nylon brush. Rinse with warm water and wipe dry. Avoid acidic cleaners like vinegar on natural stone or unsealed masonry, as they can etch the surface.

Carpets and Rugs

Sprinkle a generous layer of cornstarch or baking soda over the soot-affected area. Brush lightly without scrubbing and let sit for at least one hour to absorb oils. Vacuum with a HEPA vacuum using the hose attachment, not the brush head. Mix 1 tablespoon hydrogen peroxide with 3 tablespoons warm water (for light-colored carpets) or use rubbing alcohol on a cloth (for colored carpets). Blot the stain, don’t rub. Follow with a damp microfiber cloth to remove cleaning solution, then dry with fans.

Upholstery and Curtains

Shake fabric items outdoors to release loose particles. Vacuum gently with a soft-brush attachment. Soak washable fabrics in cold water (never hot) and wash on the highest safe setting with baking soda or white vinegar added to the cycle. Don’t use a dryer until the soot is completely removed, as heat will set the stain. Send delicate or dry-clean-only items to a professional cleaner and tell them the fabric was exposed to smoke.

Electronics and Appliances

Unplug all devices before cleaning. Use compressed air to blow soot out of vents and ports. Wipe external surfaces with isopropyl alcohol on a microfiber cloth. Don’t use water, soap, or spray cleaners. If soot has entered the internal components of computers, televisions, or appliances, have them inspected by a professional before powering them on. Internal soot can cause short circuits or overheating.

Safety Precautions When Using Any Soot Cleaning Solution

ztlxhdl0Twi4rBtvUQMPQg

Soot contains acids, carbon particles, and chemical residue that can irritate skin, eyes, and lungs. Proper protection and ventilation aren’t optional.

Wear a respirator rated for fine particles, not a simple dust mask. Soot particles are small enough to pass through cloth and paper filters.

Keep all windows and doors open during cleaning. Even in cold weather, ventilation removes airborne particles and helps surfaces dry faster.

Turn off HVAC systems at the thermostat and breaker. Running air handlers will spread soot through ductwork and redeposit it on cleaned surfaces.

Never rub or scrub soot with dry rags or brushes. Rubbing drives particles deeper into fibers and porous surfaces, turning a surface stain into a permanent one.

Don’t overwet carpets, upholstery, or drywall. Excess moisture can cause mold growth, warping, or paint bubbling. Wring out sponges and rags until they’re barely damp.

Test every cleaning solution on a hidden spot first. Solvents, peroxide, and even vinegar can discolor fabrics, lift paint, or dull finishes.

Preventing cross-contamination is just as important as cleaning. Don’t walk from soot-covered rooms into clean areas without changing shoes or removing protective clothing. Soot particles cling to clothing, hair, and skin and will transfer to other surfaces. Place disposable plastic mats or tarps at doorways to contain debris. Bag and seal soot-contaminated rags, sponges, and vacuum filters immediately after use.

Professional Soot Cleaning Solutions and When to Use Them

7iz3WZLpRm-SMCCiUaiksQ

Professional restoration teams use HEPA-filtered vacuums that capture particles as small as 0.3 microns, air scrubbers to remove airborne soot during cleaning, and specialized chemical formulas designed to neutralize acidic residue without damaging surfaces. They follow IICRC (Institute of Inspection, Cleaning and Restoration Certification) standards to document the work for insurance claims and verify air quality after cleanup.

Call a licensed restoration contractor when soot has spread beyond surfaces you can reach or when DIY cleaning doesn’t remove odors or stains.

Here are five situations where professional soot cleaning solutions are necessary:

Soot in HVAC ducts or air handlers. Ductwork must be vacuumed with HEPA equipment and sanitized to prevent recontamination. Standard home vacuums can’t reach or filter these areas.

Soot inside walls, behind baseboards, or in ceiling cavities. Porous materials like insulation and drywall absorb smoke and soot. Cleaning may require material removal, sealing, or replacement.

Lingering smoke odor after thorough cleaning. Persistent odors indicate embedded soot or chemical residue that surface cleaning can’t reach. Professionals use thermal fogging, ozone treatment, or hydroxyl generators to neutralize odor molecules.

Large areas with heavy soot coverage. Whole-home or multi-room cleanup requires industrial equipment, trained crews, and proper containment to avoid spreading particles during work.

Insurance requirements for certified documentation. Many homeowner policies require professional assessment, photos, moisture readings, and detailed scopes before approving coverage for cleanup, repairs, or content restoration.

Professional teams also handle content pack-out (removing and cleaning furniture, clothing, and belongings off-site) and coordinate repairs after cleanup, including drywall replacement, painting, and sealing.

Preventing Soot Buildup After Cleaning and Maintaining Cleaner Surfaces

7MuD2sqhQMa0QfQT1Tnw0w

Once soot is removed, preventing new buildup protects your work and keeps air quality better. Regular maintenance around heat sources, ventilation systems, and combustion appliances stops soot from forming in the first place.

Schedule annual chimney sweeping and fireplace inspections. Creosote and soot buildup inside chimneys can ignite and cause chimney fires. A certified sweep removes deposits before they become a hazard.

Install glass doors or fireplace inserts to contain soot. Physical barriers stop soot and ash from escaping into living areas during fires or when the damper is left open.

Use HEPA air purifiers in rooms with fireplaces, wood stoves, or candles. Portable air scrubbers capture airborne particles before they settle on walls, furniture, and fabrics.

Apply a carpet fiber protector around fireplaces and high-traffic areas. Protectants create a barrier that makes soot easier to vacuum and reduces staining.

Avoid masking smoke odors with candles, sprays, or plug-ins. Fragrances don’t remove soot particles or neutralize odor molecules. They can trap smells in fabrics and make it harder to identify recurring soot sources.

HVAC maintenance is critical after any soot event. Have ducts inspected and cleaned if soot circulated through the system. Replace all air filters immediately after a fire or smoke event, even if they look clean. Soot particles are too small to see but will continue to circulate and redeposit if filters aren’t changed.

FAQs About Choosing and Using a Soot Cleaning Solution

sNEFlSx6SfefHtrTQ_JGQQ

What’s the most important step when cleaning soot? Always use a dry-cleaning sponge before any liquid cleaner. Using water or solvents first will smear oily soot and drive particles deeper into surfaces, making stains permanent.

Can I use dish soap and water to clean soot? Only after you’ve vacuumed loose particles and used a dry-cleaning sponge. Dish soap works well as a final rinse to remove solvent residue and oily film, but it should never be your first cleaning step.

Will hydrogen peroxide damage my carpet? Hydrogen peroxide (1 tablespoon diluted with 3 tablespoons warm water) is safe for most light-colored, colorfast carpets, but always test on a hidden area first. Don’t use it on colored carpets without testing, as it can bleach dyes.

Why does smoke smell come back after cleaning? Soot and smoke particles are embedded in porous materials like insulation, drywall, and HVAC ducts. If odor returns, professional air scrubbing, sealing, or material replacement is needed to stop the source.

What’s the difference between a HEPA vacuum and a regular vacuum? HEPA vacuums filter out particles as small as 0.3 microns, capturing soot and preventing it from being blown back into the air. Regular vacuums lack fine filtration and will recirculate soot during cleanup.

Final Words

Soot is acidic and it stains and smells, so the first move is to stop more harm.

We focused on ready-to-buy commercial cleaners, like solvent-based removers, degreasers, and pro-grade products, while also covering tested DIY recipes and the right order: vacuum, dry sponge, solvents, rinse, dry.

Pick cleaners that match the soot type and surface, follow safety steps, and call professionals when soot reaches HVAC or porous materials.

Choose the right soot cleaning solution and you’ll get the space clean and ready to live in again.

FAQ

Q: What is the best solution for cleaning soot?

A: The best solution for cleaning soot is a professional solvent-based soot remover used with HEPA vacuuming and dry-cleaning sponges, followed by a degreaser rinse to tackle oily, acidic soot and stop stains and odors.

Q: Will Dawn dish soap remove soot?

A: Dawn dish soap can remove some soot but is mainly for light, oily residues; use it as a rinse after dry cleaning and solvents, not as the first step on heavy or embedded soot.

Q: Does vinegar dissolve soot?

A: Vinegar can help dissolve some soot and neutralize acidic residues on nonporous surfaces, but it’s weaker than commercial solvents; test first and use vinegar only in light DIY rinses.

Q: Which chemical dissolves soot?

A: Chemicals that dissolve soot include solvent cleaners like mineral spirits, commercial degreasers, and TSP (trisodium phosphate); choose solvent-based formulas for oily soot and use PPE and ventilation when applying them.

Crawlspace Ventilation vs Encapsulation: Which Protects Your Home Better

0

For decades, building codes required open vents in crawl spaces to fight moisture. Turns out that advice has been making things worse in most climates. In humid areas, those foundation vents pull in wet outside air that condenses on cool surfaces, feeding mold and rotting floor joists. Encapsulation flips the approach completely: seal everything tight, block ground moisture with heavy barriers, and run a dehumidifier to control what’s left. One method invites problems in. The other locks them out.

How These Two Methods Compare: What You Need to Know

85VAPd97TXaTHYYLXAa6iw

Ventilation uses foundation vents to let outside air flow through your crawl space, while encapsulation seals everything shut with heavy vapor barriers and runs a dehumidifier.

Factor Ventilation Encapsulation Best For
Moisture Control Introduces outside humidity, often makes problems worse Blocks ground moisture and humid air completely Encapsulation in all climates except desert-dry regions
Energy Performance Cold air in winter, hot air in summer increases HVAC costs Creates thermal boundary, reduces heating and cooling loads Encapsulation for year-round efficiency
Initial Cost Low, simple vent installation Higher, professional materials and labor needed Ventilation for immediate budget, encapsulation for value
Climate Suitability Only viable in consistently arid climates Works in humid, mixed, and most climates Encapsulation unless you live in a desert climate
Maintenance Needs Minimal, occasional vent cleaning Dehumidifier filter changes, drainage checks Depends on willingness to monitor equipment

Crawlspace ventilation is the old way. Back in the 1940s and 1950s, building codes required foundation vents to let air circulate. The thinking was simple: moving air dries out ground moisture naturally. That worked better in theory than in real life. In humid climates, you’re pulling in outside air that’s often wetter than what’s already down there.

Encapsulation is different. It seals your crawl space completely. You install thick polyethylene plastic barriers, usually 20 mil, over the dirt floor and up the walls. Every seam gets taped tight. Vents get closed. A dehumidifier runs to keep humidity controlled. This creates an airtight envelope that blocks ground moisture and humid outside air from getting in. The system keeps relative humidity stable year-round, typically between 40 and 60 percent, which prevents mold and protects the wood structure.

Here’s what separates them:

Moisture management is the big one. Ventilation tries to dry things by introducing outside air. Encapsulation blocks moisture at the source with barriers and active dehumidification.

Air quality matters more than most people think. About 50 percent of your first-floor air comes from the crawl space. If your crawl space is musty, that’s what you’re breathing. Encapsulation keeps contaminated air separated.

Energy performance shows up on your utility bills. Vented crawl spaces let cold winter air and hot summer air mess with your floor and utility lines. Encapsulation creates a stable temperature zone that cuts heating and cooling costs.

Structural protection is simple. Ventilation exposes floor joists and sill plates to humidity swings and condensation. Encapsulation maintains dry conditions that prevent wood rot.

Pest control gets easier with encapsulation. Open vents give insects and rodents easy access. Sealed encapsulation eliminates most entry points, though you’ll need inspection ports for termite checks.

Operating costs tell the story. Ventilation has no operating costs but wastes energy through thermal losses. Encapsulation adds 10 to 50 bucks monthly for dehumidifier operation but saves on heating and cooling.

Traditional Crawl Space Ventilation Methods and Limitations

BLoBQqfoSsGp2kKBRJhlzA

Vented crawl spaces became standard in the United States during the 1940s and 1950s. Building codes required multiple foundation openings to promote air circulation. The thinking was straightforward: moving air prevents moisture buildup. Codes recommended installing vapor barriers over the soil and adding screened vents on opposite walls to create cross-ventilation. Builders did it that way for decades because that’s what the code said.

Research from the American Society of Heating, Refrigerating and Air-Conditioning Engineers later found something interesting. Foundation vents actually bring unwanted moisture into homes. In summer, warm humid air flows through the vents into the cooler crawl space. When that warm air hits cold pipes, ductwork, or cool foundation walls, condensation forms. Water droplets collect on surfaces. Wood stays damp. Mold starts growing. The ventilation system designed to dry things out is making them wetter.

Winter creates a different problem. Cold outside air rushes through those same vents, cooling your hot water pipes, water heater, furnace, and heating ducts. Your HVAC system works harder to maintain temperature because it’s constantly fighting cold air infiltration from below. Energy gets wasted heating the first floor while cold air pools underneath. Open vents also provide convenient entry points for insects, mice, rats, and other pests looking for shelter. Seasonal changes make ventilation effectiveness swing wildly. It might help slightly in spring and fall but causes problems during summer humidity and winter cold.

Modern Crawlspace Encapsulation Systems Explained

QtW084eOSK2zEo4EQYwTXg

Encapsulation turns your crawl space into a controlled environment. Instead of hoping air movement will solve moisture problems, you’re creating a space that actively manages humidity. It becomes part of your home’s thermal envelope rather than an uncontrolled zone underneath.

The primary material is heavy-duty vapor barrier, typically 20 mil thick polyethylene plastic similar to pool liners. This barrier gets installed over the dirt floor, up the foundation walls, and around piers and columns. All seams get taped with specialized waterproof tape to create a continuous moisture seal. A dehumidifier runs as needed to maintain stable humidity levels.

Here’s the seven-step process professional installers follow:

  1. Cleaning and sanitizing. Remove debris, old insulation, and contaminated materials from the crawl space.
  2. Rodent prevention. Seal gaps around pipes, wires, and rim joists where pests could enter.
  3. Sealing gaps and cracks. Fill foundation cracks and seal penetrations with spray foam or appropriate sealants.
  4. Installing stem wall foam board insulation. Attach rigid foam insulation to foundation walls to create a thermal barrier.
  5. Installing 20 mil thick vapor barrier. Cover the floor and walls with heavy polyethylene, overlapping seams and taping everything tight.
  6. Installing dehumidifier. Mount a commercial-grade dehumidifier sized for your crawl space volume.
  7. Routing condensation drainage. Run the dehumidifier’s condensate line to a drain or sump pump for automatic water removal.

The sealed system works by blocking moisture before it enters. Ground moisture can’t evaporate through the vapor barrier. Humid outside air stays outside because the vents are closed and sealed. The dehumidifier removes any moisture that enters through minor air leaks or gets introduced from plumbing or HVAC systems. You get a stable, dry environment that protects your home’s structure and improves the air quality in your living space.

Performance Comparison: Moisture, Energy, Structure, and Health

8M208B3vRAm2yHmUN2E1Mw

The way these systems perform affects your home’s condition, your monthly utility bills, the air you breathe, and whether pests move in.

Moisture Control and Structural Protection

Encapsulation blocks ground moisture with a continuous barrier that prevents water vapor from rising through the soil into your crawl space. The sealed system also stops humid outside air from entering through vents. That’s critical in humid climates where outdoor humidity levels often exceed 70 or 80 percent. The dehumidifier actively removes any moisture that does get in, maintaining relative humidity between 40 and 60 percent. That controlled environment prevents mold growth on floor joists, keeps wood moisture content low enough to stop rot, and eliminates the condensation that forms on cold pipes and ductwork.

Ventilation tries to dry out ground moisture by introducing outside air. In humid climates, that doesn’t work. The outside air contains more moisture than the crawl space air. When warm humid air flows through foundation vents into the cooler crawl space, it causes condensation on every cool surface. Water droplets collect on pipes, sill plates, and floor joists. Wood stays damp. Mold grows. The ventilation system designed to control moisture is actually introducing it, especially during summer months when outdoor humidity peaks.

Energy Efficiency and Thermal Performance

Vented crawl spaces create significant energy losses by allowing outside air to flow directly under your home. In winter, cold air enters through the vents and cools your floor, hot water pipes, water heater, furnace, and heating ducts. Your HVAC system runs longer trying to maintain comfortable temperatures upstairs while fighting constant cold air infiltration from below. In summer, hot humid air enters and forces your air conditioning to work harder removing both heat and humidity. The thermal losses happen continuously whenever outside temperatures differ from your indoor settings.

Encapsulation creates a thermal boundary by sealing the crawl space and insulating the foundation walls with rigid foam board. The sealed space maintains a more stable temperature closer to your home’s conditioned air. Your HVAC system’s workload decreases because it’s not constantly compensating for temperature swings from below. The utility lines in your crawl space stay warmer in winter and cooler in summer, improving their efficiency. The dehumidifier does add operating costs, typically 10 to 50 bucks per month depending on crawl space size and local humidity levels. Those costs are usually offset by reduced heating and cooling expenses.

Indoor Air Quality and Health Impact

About 50 percent of the air on your first floor comes from the crawl space below through the stack effect. Warm air rises and creates a pressure difference that pulls air upward through floor penetrations, gaps, and cracks. If your crawl space contains mold spores, musty odors, allergens, and dust mites from high moisture levels, you’re breathing that contaminated air in your living space. Mold exposure can trigger respiratory problems, allergic reactions, and asthma symptoms, especially in children and people with existing health conditions.

Encapsulation improves indoor air quality by sealing off the moisture source that feeds mold growth and controlling humidity levels that prevent new mold from forming. The barrier also blocks soil gases and odors from entering your home. Some homeowners notice stale air or off-gassing odors from the plastic vapor barrier itself or from construction materials that were sealed in. Those concerns are typically addressed by ensuring the dehumidifier runs regularly to provide some air circulation and by choosing low-VOC materials during installation.

Pest Control Considerations

Open foundation vents provide direct access for insects, spiders, mice, rats, and other pests seeking shelter, food, or nesting sites. The vents can’t be screened small enough to block all insects without restricting airflow, so the screen mesh becomes a minor barrier at best. Rodents gnaw through screening or find gaps around the vent frames.

Encapsulation eliminates most pest entry points by sealing vents and gaps. The installation process includes rodent prevention steps like sealing penetrations around pipes and wires with spray foam. But vapor barriers do create a challenge for termite inspections. Pest control companies need to see exposed wood and soil contact points to check for termite activity. Many companies cancel termite bonds when crawl spaces get fully encapsulated because they can’t perform required inspections. The solution is installing inspection ports or creating removable sections in the vapor barrier that allow inspectors to check critical areas without compromising the moisture seal.

The performance advantages stack heavily toward encapsulation across moisture control, energy efficiency, structural protection, and air quality. Ventilation’s only advantages are lower initial costs and simpler termite inspections. In practice, the ongoing problems caused by vented crawl spaces often cost more to fix than the upfront investment in proper encapsulation. Mold growth, wood rot, energy waste, and pest entry add up fast.

Performance Factor Ventilation Encapsulation
Moisture Control Poor, introduces humidity in most climates Excellent, blocks moisture at source
Energy Efficiency Poor, allows thermal losses year-round Good, creates thermal boundary
Structural Protection Weak, exposes wood to humidity cycles Strong, maintains dry stable conditions
Air Quality Poor, allows mold and odors to spread Good, prevents mold growth and contamination
Pest Control Weak, vents provide entry points Good, seals most access points
Overall Effectiveness Limited, only viable in arid climates High, works in all climates

Cost Analysis: Initial Investment, Ongoing Expenses, and Maintenance

ObLPgoz4QDqatuK8l82wDQ

Ventilation costs less upfront because you’re just installing screened vents in foundation walls. That’s why it became the historical standard. It was cheap and met code requirements. Typical material costs for foundation vents run 15 to 40 bucks per vent. Labor for installation is simple enough that many builders included it as basic construction work.

Encapsulation requires significant material investment. A 20 mil vapor barrier costs 0.50 to 1.50 dollars per square foot depending on quality and thickness. Dehumidifiers sized for crawl spaces run 1,200 to 2,500 dollars for commercial-grade units. Rigid foam insulation, sealing materials, tape, and drainage components add to the total. Labor costs are substantial because installation is meticulous work. Cleaning the space, installing barriers without tears, taping every seam, sealing penetrations, and setting up drainage takes time. Professional installation typically costs between 5,000 and 15,000 dollars depending on crawl space size, access difficulty, and existing condition.

Expense Category Ventilation Encapsulation
Initial Materials $200 – $600 for vents and screens $2,000 – $6,000 for barriers, dehumidifier, insulation
Installation Labor $300 – $800 for vent cutting and installation $3,000 – $9,000 for professional installation
Monthly Operating Costs $0 direct costs, higher HVAC expenses $10 – $50 for dehumidifier operation
Annual Maintenance $50 – $150 for vent cleaning $200 – $400 for filters, drainage checks, inspection
10-Year Total Cost $1,500 – $3,500 plus repair costs from moisture damage $8,000 – $20,000 including operation and maintenance

Dehumidifier maintenance includes changing or cleaning filters every few months, checking the condensate drainage line to make sure it’s not clogged, and verifying the unit runs properly. Most commercial dehumidifiers last 8 to 12 years before needing replacement. The vapor barrier needs periodic inspection to check for tears, separations at seams, or areas where the barrier has pulled away from walls. Small repairs like patching tears with tape or resecuring loose edges prevent moisture intrusion and keep the system working.

Specific maintenance tasks break down like this:

Ventilation cleaning means removing debris from vent screens twice yearly, checking for pest damage to screens, and verifying airflow isn’t blocked by vegetation or stored items.

Encapsulation dehumidifier maintenance involves replacing or cleaning filters quarterly, emptying or checking condensate drainage monthly, and verifying humidity readings stay in target range.

Vapor barrier inspection means checking for tears or punctures annually, inspecting seam tape for separation, and looking for areas where barrier has detached from walls.

Foundation wall insulation needs verification that foam board remains attached, checking for moisture intrusion behind insulation, and looking for pest damage.

Drainage system maintenance includes clearing condensate lines if clogged, testing sump pump operation if installed, and verifying water routes away from foundation.

General crawl space checks mean looking for standing water, new leaks, pest activity, or equipment malfunction during seasonal inspections.

The return on investment for encapsulation comes through two paths: lower energy bills and prevented repair costs. Reduced heating and cooling expenses typically save 10 to 20 percent on utility bills. More importantly, encapsulation prevents expensive moisture damage repairs like mold remediation (3,000 to 10,000 dollars), floor joist replacement (5,000 to 15,000 dollars), and structural repairs from wood rot (10,000 dollars and up). The investment often pays for itself over time through those combined savings, especially in homes where moisture problems would have required repeated repairs.

Alternative Systems: Dew Point Controlled Ventilation

cl_tdT-3TlSJ2wpw9N3Fnw

You’re not stuck choosing between simple vents that cause problems or full encapsulation with dehumidifiers. A third approach uses sensor technology to get ventilation benefits without introducing moisture.

Dew point controlled ventilation systems monitor both interior crawl space humidity and exterior outdoor humidity continuously. When outside air is drier than crawl space air, meaning it can actually absorb moisture, the system opens vents or turns on fans to bring that dry air in. When outside air is more humid, the vents stay closed. This prevents the main problem with traditional ventilation: introducing humid air that makes things worse. The system uses controllers with interior and exterior sensors plus strategically placed fans, including dead corner fans that move air to areas with poor circulation.

Modern systems contrast sharply with older ventilation controls that don’t work properly. Older fan systems used barometric control, temperature control, or humidistat control. None of those approaches open and close at the correct times because they don’t compare interior versus exterior moisture levels. A simple humidistat might run fans when crawl space humidity hits 70 percent. But if outside humidity is 80 percent, you’re making the problem worse. Atmox is the primary provider of true dew point control technology in the United States, using smart sensors that calculate whether air exchange will help or hurt based on moisture content, not just humidity percentages.

The benefits include preventing hot humid air entry during summer and cold air entry during winter. The system only operates when conditions favor drying, which eliminates the need for dehumidifiers in most cases. You need only contractor-grade staked liners covering the soil surface, not full encapsulation barriers on walls and piers. That reduces installation complexity and material costs.

Dew point controlled systems typically cost less than full encapsulation because you’re using existing vents with added fans, sensors, and a controller rather than sealing everything and installing a commercial dehumidifier. Long-term maintenance costs are lower than encapsulation since you don’t have dehumidifier filters to change or condensate drainage to monitor. The system works best in climates with variable humidity where dry periods allow effective ventilation. You get automated control that captures those opportunities without the constant dehumidifier operation.

DIY Feasibility vs Professional Installation

lWZCZXFJQPWjvt-Lm2DFLg

Ventilation is a straightforward DIY project if you’re comfortable cutting foundation wall openings and installing screened vents.

Ventilation as a DIY Project

Installing foundation vents requires basic masonry tools, a template for marking vent openings, and care when cutting through concrete or block foundations. You mark the locations, cut the openings, install the screened vent frames, and seal around them with mortar or caulk. The work is manageable for homeowners with moderate DIY skills and the right tools. The limitation isn’t the installation difficulty. It’s that ventilation offers limited moisture control effectiveness, especially in humid climates. You can do the work yourself, but the system won’t solve moisture problems and might make them worse.

Encapsulation Installation Complexity

Encapsulation is labor-intensive work that demands meticulous attention to detail. The vapor barrier must cover every inch of exposed soil, wrap foundation piers, extend up the walls, and seal completely around all penetrations. Seams get overlapped and taped with specialized waterproof tape that bonds permanently. Any gaps, tears, or poorly sealed areas compromise the entire system by allowing ground moisture to escape into the crawl space. Common mistakes include missing penetrations around utility lines, failing to seal barrier edges to foundation walls properly, leaving wrinkles that later tear, and not securing the barrier so it stays in place long-term.

Professional installation provides specialized knowledge about vapor barrier placement, proper taping techniques, foundation wall insulation attachment, dehumidifier sizing, and drainage routing. Pros have the tools needed for crawl space work in tight spaces. Specialized tape rollers, cutting tools, and equipment for moving materials through small access openings make the job go faster. High-quality materials that last 20 to 30 years cost more but prevent the failures that happen with lighter barriers. Professional contractors also assess existing issues during installation. If they find mold growth, wood rot, or water damage, they can address it properly before sealing everything up.

Professional help is worth the investment when moisture problems already exist, when the crawl space has difficult access or extensive penetrations to seal, or when you want warranty coverage on materials and labor. DIY might be acceptable if you have a small, accessible crawl space with no existing moisture problems and you’re willing to invest significant time learning proper installation techniques and sourcing commercial-grade materials.

Drainage and Water Management Integration

iF1ItE9lRKyjlKl0cKhxsQ

Standing water in your crawl space will defeat either ventilation or encapsulation before you start. Water sitting on the ground means your site has drainage problems that need fixing first.

You need perimeter drain tile or a French drain system that collects water before it enters the crawl space. Drain tile gets installed around the foundation’s interior or exterior perimeter, sloped toward a collection point. The tile routes water to a sump pump basin, and the pump pushes water away from the foundation when the basin fills. Without proper drainage, ground water will pool under your vapor barrier or sit on exposed soil in vented crawl spaces. That creates ongoing moisture problems no ventilation or encapsulation system can fix.

Encapsulation systems generate condensate from the dehumidifier that needs routing to a drain or sump pump. Most installations include a condensate pump that automatically removes water when the collection pan fills. The condensate line gets routed outside, to a floor drain if available, or to the sump pump basin. That automatic drainage prevents water from backing up if the dehumidifier runs continuously during humid periods.

One risk with encapsulation is trapped water beneath the vapor barrier from plumbing leaks or foundation cracks. If a pipe leaks or water seeps through a foundation crack, it collects under the barrier where you can’t see it. Detection gets difficult because you won’t notice puddles, moisture stains, or obvious water until the problem becomes severe. Prevention strategies include installing the vapor barrier in sections that can be lifted for inspection, adding moisture sensors beneath the barrier in problem areas, and checking for soft spots or bulging areas during routine crawl space inspections. Waterproofing integration with encapsulation means sealing foundation cracks before installing the barrier and adding exterior waterproofing if your site has consistent water intrusion issues.

Building Codes and Compliance Requirements

atLYtbYtTl2-4XaBMo9CcA

Building codes have shifted dramatically from requiring ventilation to now preferring encapsulation for most new construction and renovations. That change reflects research showing ventilation creates more problems than it solves.

The original codes from the 1940s through the 1990s required ventilated crawl spaces with minimum vent area calculations based on square footage. A typical requirement was one square foot of vent opening for every 150 square feet of crawl space area when a vapor barrier covered the ground. Modern codes now include provisions for unvented crawl spaces that meet specific requirements for vapor barriers, conditioning, and moisture control. The International Residential Code added unvented crawl space provisions recognizing that sealed spaces with proper moisture management outperform vented ones.

Permit requirements vary by jurisdiction. New construction typically requires permits and inspections for either approach. Existing home retrofits converting vented crawl spaces to encapsulated systems often require permits, especially when HVAC modifications are involved. The permit process ensures work meets code requirements for vapor barrier specifications, insulation placement, and mechanical ventilation if required. Some jurisdictions require crawl spaces to have conditioned air supply from the home’s HVAC system or a separate mechanical ventilation system to meet air quality and moisture control standards.

HVAC and combustion appliance safety requirements matter when sealing crawl spaces containing furnaces, water heaters, or other equipment with combustion processes. Sealed crawl spaces can create negative pressure that affects draft and venting. Code requires sealed combustion appliances or adequate ventilation to provide combustion air. Converting a vented crawl space containing atmospheric-draft appliances to an encapsulated space may require upgrading to sealed combustion units, which adds significant cost. Code compliance verification happens through scheduled inspections at different installation stages, ensuring work proceeds correctly before getting covered or sealed.

Warranty Coverage and Contractor Selection

W5Y0Ji2aTVaRJ7Ya0mvMvQ

Typical warranty coverage for encapsulation projects includes materials warranties ranging from 15 to 25 years on vapor barriers and 3 to 7 years on dehumidifiers, plus labor warranties covering installation workmanship for 1 to 5 years depending on the contractor.

The industry has seen an explosion of manufacturer-franchisee relationships over the last 10 years, where contractors become exclusive dealers for specific product lines. These arrangements often push overpriced encapsulation products because the contractor’s business model depends on selling proprietary materials at markup. Franchisees may recommend encapsulation even when simpler solutions would work because that’s what they sell. The high-pressure sales approach focuses on fear. They show you mold, point out moisture stains, and insist immediate action prevents disaster.

Independent noncommissioned consultants educated in crawl space science provide unbiased recommendations because they don’t profit from product sales. These consultants assess your specific situation, measure moisture levels, check for structural issues, and recommend appropriate solutions whether that’s encapsulation, drainage improvements, simple repairs, or doing nothing. Paying for an independent inspection upfront, typically 300 to 600 dollars, can save thousands by preventing unnecessary work or overpriced solutions.

Contractor qualification factors matter when you decide to proceed with encapsulation. Look for licensed general contractors or specialized crawl space contractors with proper insurance including general liability and workers compensation. Verify they specialize in crawl space work rather than treating it as a side service. Specialists understand moisture dynamics, proper material selection, and installation details that prevent failures. Check references from recent projects, ask to see photos of completed installations, and verify they’ll handle existing problems like mold remediation or structural repairs if discovered during installation.

Dehumidifier warranties typically cover the compressor for 5 to 7 years and other components for 1 to 3 years. Commercial crawl space dehumidifiers last 8 to 12 years with proper maintenance. Expect equipment replacement as a planned expense rather than a failure. Higher-quality units with better warranties cost more upfront but reduce the likelihood of mid-life failures that leave your crawl space unprotected during humid periods.

Making Your Decision: Climate, Codes, and Evaluation Framework

Your climate determines whether ventilation or encapsulation makes sense before considering any other factors.

Climate and environmental factors that influence your decision:

Regional humidity patterns matter. Humid climates with average summer outdoor humidity above 60 percent need encapsulation because ventilation introduces more moisture than it removes.

Soil moisture levels create constant challenges. High water tables, clay soils that hold moisture, and sites with poor drainage create constant ground moisture that requires barriers.

Water table proximity is critical. Shallow water tables within 12 to 18 inches of crawl space floor need encapsulation plus drainage systems regardless of climate.

Seasonal weather variations complicate things. Mixed climates with humid summers and dry winters might benefit from encapsulation or dew point controlled ventilation rather than constant open vents.

Desert-dry arid climates are the exception. Only consistently arid regions where outdoor humidity stays low year-round allow ventilation to work without introducing moisture. Even those locations increasingly favor encapsulation.

Building science experts now recommend against vented crawl spaces regardless of climate. Research consistently shows that even in moderate climates, vented crawl spaces create more problems than they solve through condensation issues, energy losses, and air quality impacts. The stack effect pulls contaminated crawl space air into your living space, making moisture and mold problems a health concern that affects your family daily.

Existing moisture problems serve as clear indicators that encapsulation is needed. Musty odors coming from floor vents or noticeable when you open the crawl space access door mean mold is already growing. Visible mold on floor joists, insulation, or foundation walls shows humidity levels have stayed high long enough for growth to establish. Damp or compressed insulation that’s lost its fluffy texture indicates ongoing moisture exposure. Condensation on pipes, ductwork, or plastic vapor barriers shows humid air is reaching cool surfaces and depositing water. Water stains, efflorescence (white mineral deposits on foundation walls), and soft spots in wood framing all signal moisture problems that ventilation can’t fix.

Here’s your decision checklist:

Assess your climate type. Humid, mixed, or arid determines baseline suitability for each approach.

Check for existing moisture issues. Musty smells, visible mold, damp insulation, condensation, and wood damage all point toward encapsulation.

Evaluate budget including return on investment. Compare upfront costs against long-term energy savings and prevented repair expenses.

Consider long-term goals. Planning to stay 5 to 10 years or longer makes encapsulation investment more worthwhile.

Review local code requirements. Verify what your jurisdiction requires for vented versus unvented crawl spaces and permit processes.

Inspect for existing structural damage. Address mold growth, wood rot, or foundation issues before sealing anything.

Determine DIY capability realistically. Ventilation is DIY-friendly but limited effectiveness. Encapsulation demands professional skills.

Get professional assessment. Independent inspection identifies specific needs and prevents oversold solutions.

Get a professional inspection before making final decisions, especially if you see any signs of moisture problems or existing damage. An experienced inspector or consultant can measure moisture levels, assess structural condition, check for mold growth, and evaluate drainage around your foundation. That expert assessment provides the specific information you need about your home rather than general recommendations. Encapsulation resolves moisture problems in humid and mixed climates. The investment often pays for itself through energy savings and prevented repair costs from structural damage and mold remediation. The upfront expense protects your home’s value and your family’s health by creating a controlled, dry environment under your living space.

Final Words

Crawlspace ventilation vs encapsulation comes down to performance, climate, and long-term goals.

Ventilation might cost less upfront, but it often brings more moisture problems than it solves, especially in humid regions.

Encapsulation provides superior moisture control, better energy efficiency, and improved indoor air quality by sealing out ground moisture and humid outside air.

If you’re dealing with musty odors, condensation, or visible mold, encapsulation addresses those problems at the source.

Get a professional inspection to evaluate your crawl space conditions. The right approach protects your home, saves energy, and prevents costly repairs down the road.

FAQ

Should I encapsulate or ventilate my crawl space?

You should encapsulate your crawl space rather than ventilate it if you live in a humid climate, since outside air typically contains more moisture than crawl space air, making traditional ventilation counterproductive for moisture control.

How much does it cost to encapsulate a 2000 square foot crawl space?

Encapsulating a 2000 square foot crawl space typically requires professional labor, materials including thick vapor barriers, dehumidification equipment, and sealing work. While initial costs exceed ventilation expenses, the investment often pays for itself through energy savings and prevented moisture damage repairs.

What are the drawbacks of crawlspace encapsulation?

The drawbacks of crawlspace encapsulation include higher initial costs, monthly dehumidifier operating expenses ranging from 10 to 50 dollars, termite inspection challenges requiring special access ports, and potential for trapped water beneath vapor barriers if plumbing leaks occur.

Can you dehumidify a crawl space without encapsulation?

You can dehumidify a crawl space without full encapsulation using dew point controlled ventilation systems that monitor interior and exterior humidity, introducing outside air only when conditions are drier outside, typically requiring only basic ground liners instead of complete vapor barriers.

What is the difference between vented and unvented crawl spaces?

The difference between vented and unvented crawl spaces is that vented systems use foundation wall openings to circulate outside air, while unvented (encapsulated) systems seal all openings and use vapor barriers with controlled dehumidification to manage moisture.

Does crawl space encapsulation improve energy efficiency?

Crawl space encapsulation improves energy efficiency by creating a thermal boundary that prevents cold winter air and hot humid summer air from entering, reducing heating and cooling system workload and lowering utility bills despite dehumidifier operating costs.

How does crawl space air quality affect my home?

Crawl space air quality affects your home significantly because approximately 50 percent of air on the first floor rises from the crawl space, meaning residents breathe whatever moisture, mold, or allergens exist in that space.

Will encapsulation prevent mold growth in my crawl space?

Encapsulation will prevent mold growth in your crawl space by blocking ground moisture and humid outside air from entering, maintaining stable low humidity levels that inhibit mold development on wood surfaces and floor joists.

Can I install crawl space encapsulation myself?

You can install crawl space encapsulation yourself, but DIY installation is complex and labor-intensive, requiring meticulous vapor barrier installation, proper vent sealing, and wall insulation work where mistakes can compromise effectiveness by trapping moisture.

What maintenance does an encapsulated crawl space require?

An encapsulated crawl space requires dehumidifier filter changes, condensation drainage monitoring, periodic vapor barrier inspections for tears or separations, and eventual dehumidifier equipment replacement based on manufacturer lifespan specifications.

Do building codes allow crawl space encapsulation?

Building codes allow crawl space encapsulation and now prefer closed or encapsulated crawl spaces over vented ones, reversing earlier requirements from the 1940s and 1950s that mandated foundation ventilation openings.

Will encapsulation affect my termite inspection?

Encapsulation will affect your termite inspection by covering soil and foundation areas with vapor barriers, making visual inspection difficult and potentially causing pest control companies to cancel termite bonds unless proper inspection ports are installed.

Carpet Padding Replacement After Water Damage: When and How to Act Fast

Think a quick vacuum and a fan will save soaked carpet?
Not always.
Carpet padding replacement after water damage is often the step homeowners skip, and it’s the step that prevents mold, lingering odors, and bigger repairs.
In this post we’ll show you how to tell when padding is ruined, why timing matters, and the fast, practical steps to take right now to stop contamination and protect the subfloor.
Read on so you can act fast and avoid a larger bill later.

Immediate Guidance for Handling Water‑Damaged Carpet Padding

wbckQSxdQ9W73_pAWr7M_w

Carpet padding absorbs water faster than most homeowners realize. Once saturated, the dense foam or fiber core traps moisture deep inside, creating conditions where bacteria and mold can thrive in less than two days. If your padding’s been soaked by grey water (appliance overflow, washing machine drain) or black water (sewage backup, toilet overflow, flood), replacement isn’t optional. The contamination can’t be safely cleaned out, and the health risk to your family grows every hour the wet padding remains in place.

Clean water events, like a burst supply line or a quick spill, sometimes allow you to salvage padding if you act within the first 24 hours. The key is complete extraction and aggressive drying with professional grade air movers and dehumidifiers. Even then, if the padding stays damp for more than 48 hours, mold spores begin colonizing the organic binders and fibers. Once that musty smell sets in or you see discoloration on the underside, the pad’s lost. Trying to dry moldy padding only spreads spores into your living space and subfloor.

Most water damage jobs require full padding replacement because the material can’t release moisture quickly enough to stay safe. Foam and rebond pads are designed to cushion and insulate, not to breathe. When they get wet, they act like a sponge that never fully wrings out. Wait too long to decide and you risk damaging the subfloor beneath, facing a much larger repair bill.

Here are the immediate steps to take as soon as you discover wet carpet:

  1. Stop the water source. Turn off the valve, shut down the appliance, or call a plumber if the leak’s still active.
  2. Extract standing water. Use a wet/dry vacuum to pull as much liquid as possible from the carpet surface and edges.
  3. Identify the contamination category. Clean supply line water is Category 1, grey water from appliances is Category 2, sewage or flood water is Category 3.
  4. Lift the carpet edges. Pull back a corner to expose the padding and check for saturation, odor, and visible staining.
  5. Remove furniture and ventilate. Clear the room and open windows. Start fans to increase airflow across wet surfaces.
  6. Document the damage. Take photos of the wet area, the padding, and any visible mold or staining for your insurance claim.

How to Assess the Extent of Water Damage

VlRFcanQQ9WiH1b6AK_lzA

Not all water is the same. The category of contamination determines your next move. Category 1 water comes from a clean source, supply lines, rainwater that hasn’t contacted soil or waste. If you can start drying within hours and the padding shows no signs of breakdown, salvage is possible. Category 2 water’s been in contact with washing machines, dishwashers, or similar grey water sources. It carries bacteria and organic matter that padding can’t shed. Category 3 is sewage, toilet backflow, or any floodwater that’s mixed with soil and waste. Both Category 2 and Category 3 exposures require immediate padding removal and disposal.

Use a moisture meter to measure the saturation level of the carpet, padding, and subfloor. Pin style meters work well on wood subfloors. Readings above 15 percent moisture content mean the floor’s still too wet to reinstall padding. For concrete slabs, a relative humidity probe or surface meter helps confirm drying progress. If you don’t own a meter, press firmly on the carpet in several spots. If water wells up or the padding feels cold, spongy, or heavy, it’s still saturated.

Smell is another reliable indicator. A sharp, musty odor that doesn’t fade after extraction points to organic breakdown or early mold growth inside the pad. Peel back the carpet and look at the padding surface. Staining, delamination (layers separating), or any visible fuzzy growth means the pad’s ruined. Even if the top looks clean, flip a corner and check the subfloor contact side. That’s where contamination and moisture pool.

When assessing damage, check for these key criteria:

  • Water category (clean, grey, or black)
  • Hours since initial exposure (under 24 hours, 24 to 48 hours, or more than 48 hours)
  • Moisture meter readings on padding and subfloor (dry vs. saturated)
  • Presence of odor, staining, or visible mold

Safe Removal Steps for Water‑Damaged Padding

1pXLeEw0SJ-eKegbMEH2OA

Before you start pulling up carpet, clear the room completely and protect yourself. Wet padding’s heavier than dry padding, and contaminated material can carry bacteria or mold spores. Wear nitrile gloves, an N95 respirator (upgrade to P100 if there’s visible mold or sewage exposure), and eye protection. If the subfloor’s wet or you’re working in a basement, wear rubber boots to avoid tracking contamination into clean areas of the home.

Start by peeling the carpet back from one corner of the room. Most residential carpet is secured along the edges by tack strips, narrow wooden strips with angled pins. Use a pair of pliers or a small pry bar to gently lift the carpet edge off the pins, working slowly to avoid tearing the backing. Roll the carpet toward the center of the room to expose the full padding layer. If the carpet’s glued down (common on stairs or concrete), you may need a floor scraper and solvent, but that’s rare in standard installations.

Once the padding’s visible, cut it into manageable sections using a utility knife. Wet padding tears easily, so cut strips about two feet wide and roll them up as you go. Dispose of each roll immediately into heavy duty trash bags. Double bag any material exposed to grey or black water. Check your local waste regulations. Some jurisdictions require special handling for mold contaminated or sewage soaked materials. Don’t leave wet padding sitting in the garage or yard. The longer it sits, the more it off gasses odor and moisture into surrounding spaces.

Follow these steps for complete removal:

  1. Turn off power to the room if there’s any risk of electrical contact with wet flooring.
  2. Remove all furniture, rugs, and stored items from the affected area.
  3. Lift one corner of the carpet and detach it from the tack strips using pliers.
  4. Roll the carpet toward the center, exposing the full padding layer.
  5. Cut the padding into two foot wide strips with a utility knife.
  6. Roll each section tightly and place it into heavy duty trash bags. Seal and remove immediately.
  7. Inspect the subfloor for standing water, staining, mold, or soft spots. Document what you see.
  8. Clean and disinfect the subfloor if salvageable, or mark damaged sections for replacement before installing new padding.

How to Install New Carpet Padding After Damage

BI0_j_FVQsG8wn1nuqsYZQ

Wait until the subfloor’s completely dry before installing new padding. Use a moisture meter to confirm wood subfloors are below 12 to 15 percent moisture content. For concrete slabs, follow manufacturer guidance, often 75 percent relative humidity or lower measured with an in situ probe. Rushing installation traps residual moisture under the new pad and restarts the mold cycle.

Choose padding appropriate for your traffic level and moisture risk. Standard rebond padding (7/16 inch thick, 6 to 8 pound density) works for most living areas. In basements or rooms prone to dampness, use a closed cell or rubber pad that resists moisture absorption. Lay the padding smooth side up if there’s a film face. Some pads have a moisture barrier integrated on one side. Butt seams together without overlapping. Overlaps create lumps that telegraph through the carpet. Secure the padding with staples every 12 to 18 inches along seams and edges, or use manufacturer approved adhesive if working over concrete.

Here’s the full installation process:

  1. Confirm the subfloor’s dry using moisture meter readings and visual inspection.
  2. Sweep or vacuum the subfloor to remove debris, dust, and old staples.
  3. Lay out the new padding, starting along the longest wall and working toward the door.
  4. Trim padding to fit the room, leaving about half an inch of clearance at walls and tack strips.
  5. Butt seams tightly and tape them with padding seam tape. Don’t overlap sections.
  6. Staple the padding every 12 to 18 inches along edges and seams (wood subfloor) or apply adhesive per manufacturer instructions (concrete).
  7. Reposition the carpet, stretch it with a knee kicker or power stretcher, and reattach it to tack strips. Trim excess and tuck edges.

Costs of Replacing Water‑Damaged Carpet Padding

lkUwejokRFGwmy27AWhJsg

Replacing water damaged padding costs less than replacing the entire carpet, but the final bill depends on room size, contamination level, and whether you hire professionals. Material cost for standard rebond padding runs $0.20 to $0.60 per square foot. Premium rubber or moisture barrier pads can reach $0.80 to $1.50 per square foot. Labor for removal, disposal, and reinstallation typically adds $0.50 to $2.00 per square foot, with higher rates when mold remediation or subfloor drying’s required.

A typical 12 by 12 foot bedroom (144 square feet) might cost $100 to $200 for materials and $150 to $400 for labor, bringing the total to $250 to $600. If the job involves grey or black water contamination, add charges for antimicrobial treatment, subfloor cleaning, and disposal fees. Renting equipment (air movers, dehumidifiers, and a carpet stretcher) can add another $100 to $200 for a multi day drying period.

Cost Factor Typical Range
Padding material (per sq ft) $0.20–$1.50
Removal and disposal labor (per sq ft) $0.20–$0.60
Carpet re‑stretching and reinstall (per sq ft) $0.50–$1.50
Total replacement cost for 144 sq ft room $250–$600

DIY vs. Professional Water Damage Restoration

npweNr_NQx2_yvNdMSr0Yg

Small, clean water incidents in a single room can often be handled yourself if you’ve got the time, tools, and physical ability to lift furniture and pull carpet. Renting a wet/dry vacuum, a few air movers, and a dehumidifier is affordable, and the work’s straightforward if the padding isn’t glued and the subfloor is sound. DIY makes sense when the affected area’s under 100 square feet, you caught the water within hours, and you’re confident identifying mold or contamination.

Professionals bring commercial grade extraction equipment, thermal imaging to find hidden moisture, and experience with carpet stretching that prevents ripples and buckling. They also carry liability insurance and can document moisture readings in a format your insurance adjuster will accept. When grey or black water’s involved, or when the affected area spans multiple rooms, the speed and thoroughness of a certified crew often prevents secondary damage that costs more than the service itself.

Call a professional restoration company if any of these apply:

  • Water is Category 2 (grey) or Category 3 (black/sewage).
  • The affected area’s larger than 200 square feet or spans multiple rooms.
  • You see or smell mold, or the padding’s been wet longer than 48 hours.
  • The subfloor shows soft spots, staining, or structural concerns.
  • You need documented moisture readings and a written scope for an insurance claim.

Drying Times and Mold Prevention After Water Damage

ca_biY9LTB63DMEBOT_rpA

Mold can begin growing within 24 to 48 hours when relative humidity stays above 60 percent and temperatures sit between 60 and 86 degrees Fahrenheit. Once mold colonies establish, they release spores into the air and penetrate porous materials like drywall, wood trim, and carpet backing. Preventing mold means drying everything (carpet, padding, and subfloor) within that first 48 hour window.

Professional drying equipment can pull bulk moisture out in 24 to 72 hours. Air movers create high velocity airflow across wet surfaces, while dehumidifiers extract water vapor from the air. Position air movers to blow under lifted carpet edges and across the subfloor. Run dehumidifiers continuously and empty the collection tank or connect a drain hose. Monitor humidity with a hygrometer. Aim to bring indoor relative humidity below 50 percent. If you’re drying with household box fans and a portable dehumidifier, expect the process to take three to five days and check moisture levels daily with a meter.

To prevent mold during and after drying:

  1. Start extraction and drying within the first 24 hours of water exposure.
  2. Lift carpet edges and remove wet padding immediately if it can’t dry in time.
  3. Run air movers and dehumidifiers continuously until moisture meter readings are safe (wood subfloor below 15 percent, room RH below 50 percent).
  4. Discard any padding, carpet, or building materials that remain damp after 48 hours or show visible mold.
  5. Treat the subfloor with an EPA registered antimicrobial if contamination or early mold growth’s present.

Preventing Future Water Damage to Carpet Padding

YSCQM3A9SjOXfZtIs_-BLQ

Once you’ve replaced damaged padding, take steps to reduce the chance of another water event. In basements and ground floor rooms, consider upgrading to closed cell or rubber padding that resists moisture absorption. Install a 4 to 6 mil polyethylene vapor barrier under the padding on concrete slabs to block ground moisture from wicking up. In areas near water heaters, washing machines, or sinks, place waterproof mats or pans under appliances and check supply hoses and drain lines every few months.

Improve drainage around your home by grading soil away from the foundation and keeping gutters clean. Inside, maintain indoor humidity between 30 and 50 percent using exhaust fans in bathrooms and kitchens. Install water leak alarms near high risk appliances. They cost less than $20 and give you early warning before a slow drip becomes a soaked floor.

Key prevention upgrades include:

  • Closed cell or rubber carpet padding in basements and moisture prone rooms
  • Polyethylene vapor barrier (4 to 6 mil) under padding on concrete slabs
  • Water leak alarms positioned near water heaters, washing machines, dishwashers, and sump pumps
  • Regular maintenance of supply hoses, drain lines, and sump pumps. Replace rubber hoses every five years.

Final Words

Stop the water, extract standing moisture, and lift the carpet to check the padding. That’s the action that prevents mold and bigger fixes.

This post walked through quick assessment steps, when padding must be removed, safe pull-up and disposal, installation basics, cost expectations, DIY vs. pro choices, drying times, and prevention tips. Use tools and photos so you’re not guessing.

If the pad can’t be saved, prompt, documented carpet padding replacement after water damage gets the job done and helps with claims. You’ll get to a dry, healthy home again.

FAQ

Q: Does carpet padding need to be replaced after water damage?

A: The carpet padding usually needs to be replaced after water damage, especially if contaminated (grey or black water) or still damp after 24–48 hours. Clean-water cases can be saved if dried very quickly.

Q: Can carpet be saved after water damage?

A: Carpet can be saved after water damage when the water is clean, extraction and drying start within 24–48 hours, and backing or fibers aren’t delaminated or contaminated. Quick action prevents mold and odors.

Q: What happens if carpet padding gets wet?

A: When carpet padding gets wet it soaks up water, holds moisture under the carpet, and can lose shape or delaminate. It also breeds mold and odor within 24–48 hours, often forcing replacement.

Q: How much does it cost to replace padding under carpet?

A: Replacing padding under carpet typically costs $1 to $3 per square foot for the padding itself; total cost rises with labor, disposal, drying equipment, and carpet re-stretching, and is higher for large or contaminated jobs.

Ceiling Leak Repair Near Me: Fast Local Experts

0

When you spot water dripping from your ceiling, every minute counts. That dark stain spreading across your drywall isn’t just cosmetic damage, it’s active destruction happening inside your ceiling cavity right now, soaking insulation, weakening framing, and creating conditions for mold growth you can’t see yet. The good news: qualified local ceiling leak repair contractors operate in your area with emergency response teams ready to arrive within hours, stop the damage, identify the source, and start permanent repairs before a small problem becomes a major renovation.

Local Ceiling Leak Repair Contractors: Get Help Now

xtGepmFzS8Omzsi-k5wcnw

If you’re staring at a wet ceiling right now, here’s what you need to know: qualified local contractors are available in your area with emergency response capabilities, often arriving within hours of your call.

Professional ceiling leak repair services typically offer 24/7 emergency response for active leaks, same day service for urgent situations, and scheduled appointments for non-emergency repairs. When you first contact a contractor, expect questions about your location to confirm they service your specific area, your availability for on-site inspection, and the nature of the damage. Most reputable contractors offer free inspections where they assess the damage extent, identify the leak source, and provide detailed written cost estimates before any work begins. This initial visit helps you understand what you’re dealing with and what it’ll take to fix it properly.

When selecting local ceiling leak repair contractors, verify these essential qualifications:

• Active state licensing and full insurance coverage (liability and workers’ compensation)
• Emergency availability with clear response time commitments for urgent situations
• Specific service area confirmation for your exact location or zip code
• Free on-site inspection and detailed written estimates with no obligation
• Customer reviews and verifiable local references you can check
• Transparent pricing structure with itemized costs and no hidden fees
• Written warranty or guarantee on completed repair work

Typical price ranges for ceiling leak repairs vary based on damage extent and complexity. Small patch jobs covering limited areas generally run $200 to $500. Moderate repairs addressing larger sections or multiple damage areas cost $500 to $1,500. Extensive damage requiring structural work, large scale drywall replacement, or mold remediation can reach $1,500 to $5,000 or more. Factors affecting your specific cost include the leak source complexity (simple plumbing fixture versus hidden pipe), ceiling height and accessibility, materials needed, texture matching requirements, and whether structural framing repairs are necessary.

When contacting contractors, have ready your complete street address, photos or video of the visible damage, description of the leak source if you know it (bathroom above, roof area, plumbing fixture), and your homeowners insurance information if you plan to file a claim.

For non-emergency situations where you have time, request quotes from two to three contractors to compare their pricing approach, repair methodology, timeline estimates, and communication style. This comparison helps you make an informed decision and ensures competitive pricing.

Emergency Response and Immediate Actions for Active Ceiling Leaks

H9U3xcEPRj6_ef1_kpslmA

Quick action during active ceiling leaks minimizes damage spread and reduces your repair costs, but it requires both immediate homeowner response and professional emergency services to handle it right.

While waiting for emergency professionals to arrive, take these immediate actions:

  1. Move furniture, electronics, and belongings away from the leak area to prevent property damage
  2. Place buckets, containers, or plastic bins to catch actively dripping water
  3. Turn off the water supply at the main shutoff valve if the leak appears plumbing related
  4. Turn off electricity to the affected room at the breaker panel if water is dripping near light fixtures, outlets, or electrical components
  5. Poke a small controlled hole in the center of sagging ceiling areas to release pooled water before ceiling collapse occurs
  6. Document all damage with date stamped photos and video from multiple angles
  7. Contact a 24/7 emergency ceiling leak repair service immediately
  8. Call your homeowners insurance company to report the damage and start the claim process

Don’t delay calling professionals hoping the leak will stop on its own. Don’t attempt DIY repairs on active leaks before identifying and stopping the water source. Don’t ignore small leaks thinking they’re not serious, since hidden damage spreads behind visible symptoms. Don’t stand or place belongings directly under sagging ceiling sections that could collapse.

Professional emergency response typically follows this sequence. Phone consultation where you describe the situation and receive an estimated arrival time (usually one to four hours for true emergencies). Immediate on-site assessment upon arrival. Source identification and water shutoff. Emergency stabilization measures to prevent further damage. Water extraction from affected areas and materials. Temporary containment with plastic sheeting or tarps if needed. And scheduling the permanent repair timeline once stabilization is complete. Emergency teams prioritize stopping active water intrusion and preventing damage spread, then address the restoration work.

Emergency ceiling leak repair services operate 24/7 including nights, weekends, and holidays for urgent situations. After hours contact typically occurs through emergency phone lines with live operators or on-call technicians. Emergency service fees may apply for immediate response outside normal business hours, generally adding $100 to $300 to standard rates depending on time and day, but this premium cost prevents exponentially more expensive damage from hours of continued water intrusion.

Common Causes of Ceiling Leaks and Damage Assessment

3hEJjrJITLOSGZP30prP5g

Identifying the leak source before starting ceiling repairs matters because fixing visible ceiling damage without addressing the water source means you’ll be calling contractors back in weeks or months when the leak returns.

Ceiling leaks in residential properties typically stem from several common categories, each requiring different repair approaches and expertise.

Plumbing Related Ceiling Leaks

Plumbing failures cause many ceiling leaks, particularly in homes with bathrooms, kitchens, or water heaters located above ceiling spaces. Burst pipes from freezing temperatures or age related deterioration release large volumes of water quickly. Bathroom fixture leaks develop around toilets, showers, and bathtubs when wax rings fail, caulking deteriorates, or drain connections loosen. Water heater failures occur when tanks corrode or pressure relief valves malfunction. HVAC condensation problems happen when air conditioning drain lines clog or condensate pans overflow, particularly in attic mounted units.

Roof and Exterior Related Leaks

Roof damage represents another major ceiling leak category. Missing, cracked, or lifted shingles allow water penetration during rain events. Ice dams form along roof edges in winter, forcing melting snow under shingles and into attic spaces. Clogged gutters and downspouts cause water to back up under roof edges rather than draining properly away from the house. Storm damage from high winds or fallen branches can puncture roofing materials. Flashing failures around chimneys, skylights, and roof penetrations create entry points for moisture.

Structural and Condensation Issues

Attic condensation occurs when warm moist air meets cold surfaces, creating moisture that drips onto ceiling materials below. Poor ventilation in attics prevents moisture escape, leading to accumulated dampness. Structural settling over time can create small separations where water finds its way through. Missing or inadequate vapor barriers allow moisture migration through building assemblies.

Professional contractors use moisture assessment tools including infrared thermal imaging cameras that detect temperature differences indicating wet areas, pin type and pinless moisture meters that measure moisture content in building materials, and visual inspection of attic spaces, plumbing fixtures, and roof areas to pinpoint exact water sources before beginning repairs. This diagnostic process ensures repairs address the actual problem rather than just covering symptoms.

Warning Signs Your Ceiling Needs Immediate Repair

ykxC_MbLTIG13Hs67EeaCw

Recognizing ceiling leak symptoms early prevents costly extensive repairs, stops damage from spreading to larger areas, and addresses potential safety concerns before they become dangerous.

Ceiling water damage progresses from minor discoloration to serious structural compromise. What starts as a small water stain can hide extensive hidden damage behind drywall, including saturated insulation, weakened framing, and developing mold growth. The visible symptoms you see represent only part of the actual damage extent.

Watch for these specific warning signs indicating your ceiling needs professional repair:

• Water stains or brown spots appearing on ceiling surfaces
• Paint bubbling, blistering, or peeling away from ceiling materials
• Visible sagging or bowing sections that weren’t there before
• Musty or moldy odors in rooms even when surfaces appear dry
• Ceiling texture flaking or falling in pieces
• Visible cracks running across ceiling surfaces or along wall junctions
• Soft or spongy spots when you gently press ceiling areas
• Mold or mildew growth appearing as dark spots or fuzzy patches

Hidden damage behind visible ceiling leak symptoms often exceeds what you can see from below. Water follows paths of least resistance through ceiling cavities, spreading laterally through insulation and along framing members before appearing at visible points. This means a small visible stain might indicate water damage affecting a much larger ceiling area. Electrical concerns make ceiling leaks particularly dangerous since water conducts electricity, creating shock risks around light fixtures, ceiling fans, and electrical junction boxes located in ceiling spaces.

When any of these warning signs appear in your home, schedule immediate professional inspection rather than waiting to see if symptoms worsen. Early intervention stops damage progression and costs significantly less than repairs after months of continued moisture exposure.

Complete Ceiling Leak Repair Process: From Assessment to Restoration

p6f4pyMAQi6VEjhvnhO55g

Professional ceiling leak repair follows a systematic approach ensuring permanent solutions rather than temporary patches that fail in months.

The complete ceiling leak repair process includes these coordinated steps:

  1. Source identification and complete water stoppage addressing the actual leak cause
  2. Moisture assessment using professional meters to determine wet material extent and required drying period (typically 48 to 72 hours before repairs can begin)
  3. Damaged material removal and proper disposal of wet drywall, insulation, and compromised framing
  4. Structural repair if water damage has affected ceiling joists, framing members, or load bearing components
  5. Drywall replacement or patching depending on damage extent and existing material condition
  6. Texture matching and professional application replicating your existing ceiling finish
  7. Primer application plus paint restoration to blend repairs invisibly with surrounding areas

Typical repair timelines depend on several factors. Minor patch repairs might be completed in one to two days once materials are dry. Moderate repairs requiring drywall replacement usually take three to five days including drying time. Extensive damage needing structural work, mold remediation, or large scale restoration can require one to two weeks. The required drying time before repairs begin, material availability from suppliers, complexity of matching existing textures, and contractor scheduling all affect your specific timeline.

Patching works when damage is limited to small areas (under two feet across), existing drywall remains structurally sound around damaged sections, and moisture exposure was brief without material deterioration. Complete drywall section replacement becomes necessary when damage covers large areas, moisture has saturated materials for extended periods causing deterioration, existing drywall has lost structural integrity and feels soft or crumbly, or multiple previous patches exist making it nearly impossible to blend things in properly.

Drywall installation for ceiling repairs requires precise techniques. Contractors secure new drywall panels directly to ceiling joists using appropriate fastener spacing, ensuring firm attachment that won’t sag over time. Taping and mudding seams involves applying paper tape or fiberglass mesh over joints, then covering with multiple coats of joint compound. Multiple coats (typically three) allow proper buildup and feathering. Sanding between coats creates smooth transitions, and final sanding achieves an invisible blend where new material meets existing ceiling. The goal is making repairs disappear completely.

Texture matching presents significant challenges requiring professional skill. Small variations in application technique, material consistency, or timing create noticeable differences. Professional contractors replicate existing ceiling finishes by analyzing your current texture, matching materials and application methods, testing techniques on scrap material first, and applying texture in patterns and densities matching surrounding areas. This skill level separates quality ceiling restoration from obvious patch jobs.

Ceiling Texture Type Application Method Matching Difficulty
Flat/Smooth Multiple coats of joint compound, sanded smooth Moderate, requires perfect sanding
Orange Peel Spray application with specific tip size and pressure Moderate, consistent pattern needed
Knockdown Spray texture then trowel to flatten peaks High, timing and pressure critical
Skip Trowel Hand applied joint compound in random patterns High, requires artistic technique
Popcorn Spray application of specialized acoustic material Very High, material availability and blending challenges
Swirled Hand applied with brush or trowel in circular patterns Very High, consistent pattern replication difficult

Primer application matters critically for water stained ceiling areas. Stain blocking primers seal discoloration preventing it from bleeding through new paint. These specialized primers bond to both new drywall and existing painted surfaces. Proper surface preparation before priming including cleaning, light sanding, and dust removal ensures strong primer adhesion and smooth final results.

Paint matching involves complexities beyond simple color selection. Age related color shifts mean your existing ceiling paint has likely faded or yellowed compared to the original color. Sheen differences (flat, eggshell, satin) affect light reflection and appearance even with identical colors. Professional ceiling restoration typically requires multiple paint coats for even coverage and color consistency. Sometimes painting entire ceiling sections rather than just repaired spots becomes necessary for truly invisible repairs and consistent appearance, particularly when existing paint has aged significantly or when repaired areas are large or centrally located.

Preventing Mold Growth After Ceiling Water Damage

wfOU0hvQQja7TApgS-n86w

Ceiling water damage creates ideal conditions for mold growth by providing moisture, organic material (drywall paper, wood), and often dark hidden spaces where colonies develop unnoticed, making prevention critical for health and safety.

Professional mold prevention during ceiling leak repairs includes complete drying of all affected materials using commercial dehumidifiers and air movers, typically running 48 to 72 hours minimum. Dehumidification reduces ambient moisture levels preventing condensation on surfaces. Air circulation with high velocity fans prevents stagnant conditions where mold thrives. Moisture barrier installation when replacing insulation prevents future moisture migration. Antimicrobial treatments applied to framing and surfaces in severely affected areas inhibit mold development even if minor moisture recurs.

Mold remediation specialists become necessary when visible mold growth covers areas larger than ten square feet, when mold has developed in HVAC systems requiring ductwork cleaning, when occupants experience respiratory symptoms suggesting widespread contamination, or when testing reveals toxic mold species requiring specialized removal protocols. Standard ceiling repair contractors handle mold prevention through proper drying and materials replacement, but active mold remediation requires additional certification and procedures.

Signs that mold may be present after ceiling water damage include:

• Persistent musty or earthy odors that don’t dissipate after cleaning
• Visible dark spots, discoloration, or fuzzy growth on ceiling materials or in attic spaces
• Respiratory symptoms including coughing, sneezing, or difficulty breathing that improve when away from home
• Continued moisture or dampness in materials even after repairs
• Deteriorating building materials including crumbling drywall or soft wood framing

Air quality testing conducted by certified professionals measures airborne mold spore concentrations, identifies specific mold species present, and determines whether levels exceed safe thresholds. Safe insulation replacement in ceiling water damage situations requires removing all wet material since saturated insulation loses effectiveness and harbors moisture even after apparent drying. Ventilation improvements prevent future moisture accumulation and mold risks by ensuring adequate attic airflow, proper bathroom exhaust fan operation, and controlled humidity levels throughout the home.

Understanding Ceiling Leak Repair Costs and Pricing

4t2HcemjQXGNYoQSz93aog

Ceiling leak repair costs vary significantly based on damage extent, leak cause complexity, accessibility of affected areas, and specific restoration requirements for your situation.

The main cost components in ceiling leak repairs include emergency service fees if immediate response is required (typically $100 to $300 additional), leak source repair costs varying widely (plumbing repairs $150 to $1,000 or more, roofing repairs $300 to $2,000 or more), water damage restoration including drying and material removal ($500 to $3,000), drywall materials and installation ($2 to $4 per square foot), texture matching ($1 to $3 per square foot depending on complexity), and painting ($150 to $500 for ceiling sections).

Typical pricing structures vary by contractor and project type. Hourly rates for ceiling leak repair labor generally run $50 to $100 per hour, used primarily for small repairs or when damage extent is uncertain. Project based pricing provides fixed costs for defined scope of work, preferred for moderate to large repairs with clear parameters. Square footage pricing applies primarily to material calculations including drywall, texture, and paint coverage. Most contractors provide project based estimates after on-site inspection since ceiling leak repair involves multiple variables affecting final cost.

Factors affecting your total repair costs include:

• Damage extent and ceiling area affected (small patch versus multiple rooms)
• Accessibility challenges including high ceilings, vaulted designs, or difficult to reach locations
• Material type and texture complexity requiring specialized matching techniques
• Structural repairs needed when joists, framing, or load bearing elements are compromised
• Mold remediation requirements adding specialized labor and containment procedures
• Premium finishes or matching custom hand applied textures requiring advanced skills

Free inspection offerings from reputable contractors allow damage assessment and cost estimation without obligation. Detailed written estimates should itemize labor, materials, and additional services separately so you understand cost breakdown. Ask about warranty coverage including duration, what’s covered, and any exclusions or conditions. Reputable contractors stand behind their work with guarantees typically ranging from one to five years depending on repair type and company policy.

Financing options, payment plans, and available discounts help manage costs for larger ceiling leak repair projects. Some contractors offer payment plans allowing costs spread over several months, financing through third party providers for qualified homeowners, and discounts for seniors, military veterans, or first time customers that can reduce total costs by five to fifteen percent.

Insurance Claims for Ceiling Leak Damage

6rib8XSVSEmk4tU2Lps2xw

Homeowners insurance typically covers ceiling leak damage from sudden and accidental water discharge including burst pipes, appliance hose failures, and storm related roof damage, but excludes damage from gradual leaks, maintenance neglect, or flooding (which requires separate flood insurance).

Immediate steps when discovering ceiling leak damage matter for successful claims. Stop the water source if safely possible to prevent continued damage. Document everything thoroughly with date stamped photos and video showing damage extent, water source if visible, and affected belongings. Protect your belongings by moving them away from damaged areas and placing tarps over furniture if needed. Notify your insurance company immediately, typically within 24 to 48 hours of discovery, since delayed reporting can complicate claims or lead to coverage denial.

Working with insurance on ceiling repairs follows these steps:

  1. Contact your insurance company immediately to report the claim and receive a claim number for reference
  2. Document all damage thoroughly with photos, video, and written descriptions from multiple angles and perspectives
  3. Obtain professional damage assessment and detailed written repair estimates from licensed contractors
  4. Save all receipts, correspondence, and documentation related to the damage and repairs
  5. Understand your deductible amount and coverage limits before approving repair work to avoid unexpected out of pocket expenses

Reputable contractors assist with insurance claims by providing detailed damage documentation with photos and measurements, written damage assessment reports explaining cause and extent, itemized repair estimates breaking down labor and materials, direct communication with insurance adjusters when homeowners provide authorization, and supplemental estimates if initial assessments underestimate needed repairs. This contractor support streamlines the claims process and helps ensure adequate coverage for complete restoration.

Warranty coverage from contractors provides protection after completed ceiling leak repair work. Standard warranties typically cover workmanship for one to two years, meaning if repairs fail due to installation errors the contractor returns to fix issues at no additional charge. Material warranties vary by product but often run five to ten years for drywall, paint, and related materials. Get warranty terms in writing, understand what specific issues are covered versus excluded, note the duration and any maintenance requirements, and keep contractor contact information for future warranty service if needed.

Choosing Between Plumbers and General Contractors for Ceiling Leaks

pwlGaO9zS6G5P0ijJLBIGA

Ceiling leak repair often requires coordinated expertise since water damage involves both source repairs (plumbing, roofing) and restoration work (structural repair, drywall, painting), sometimes needing specialists from multiple trades working in sequence.

Call plumbers first when you have active plumbing leaks from visible pipes, recent pipe bursts requiring immediate shutoff, bathroom or kitchen fixture failures with water actively flowing, or water heater malfunctions. Plumbers handle the source repair, stopping water and fixing plumbing components, but typically don’t perform drywall, texture, and paint restoration. After plumbers complete source repairs, general contractors or restoration companies handle ceiling restoration work. Call roofers followed by contractors when ceiling leaks occur during or after rain, when you see roof damage or missing shingles, or when leaks appear near roof penetrations like chimneys or skylights. HVAC technicians followed by contractors address condensation issues from air conditioning systems, clogged drain lines, or poorly maintained equipment causing ceiling moisture.

Leak detection specialists use thermal imaging cameras, moisture meters, acoustic listening devices, and video inspection equipment to identify hidden water sources when leak origin isn’t obvious from visual inspection. These specialists pinpoint exact leak locations before invasive investigation or repair work begins, particularly valuable for hidden plumbing leaks in walls or under slab foundations.

Contact the appropriate professional based on your specific situation:

• Visible pipe leak with active water flow: Plumber immediately
• Roof damage causing leaks during rain: Roofer for source repair, then contractor for ceiling restoration
• HVAC condensation creating ceiling moisture: HVAC technician for system repair, then contractor for affected ceiling
• Unknown leak source with no obvious origin: Leak detection specialist for diagnosis, then appropriate trade for repairs
• Extensive water damage affecting multiple areas or systems: Restoration company coordinating all necessary trades and repairs

Integrated restoration companies handle complete ceiling leak repair from source identification through final restoration, providing a single point of contact that simplifies the process for homeowners. These full service companies typically have plumbers, carpenters, drywall specialists, painters, and project coordinators on staff or under contract, allowing them to manage the entire repair sequence. This approach streamlines scheduling, ensures proper sequencing of repair stages, provides unified warranty coverage, and reduces homeowner stress by eliminating the need to coordinate multiple contractors independently.

Structural Damage Assessment and Ceiling Safety Concerns

oNb3l1erRLSx9yUR4suILQ

Water damaged ceilings can compromise structural integrity by saturating and weakening ceiling joists and framing, adding significant weight from pooled water, and causing material deterioration that affects load bearing capacity, making professional structural assessment critical for safety.

Visible signs of structural ceiling damage requiring immediate professional evaluation include pronounced sagging with obvious bowing or drooping sections, separation from walls where ceiling pulls away at edges, visible warping or twisting of ceiling joists when viewed from attic spaces, and areas feeling distinctly soft or spongy when gently pressed from below indicating material deterioration. These symptoms suggest the ceiling has lost structural integrity and poses collapse risk.

Electrical safety concerns occur when ceiling leaks develop near light fixtures, ceiling fans, recessed lighting, or exposed electrical junction boxes located in ceiling cavities. Water conducts electricity, creating serious shock risks. If water drips near electrical components or you see sparking, buzzing, or flickering lights related to ceiling leak areas, turn off power to affected circuits immediately at your breaker panel and contact licensed electricians before addressing ceiling repairs. Never touch electrical fixtures, switches, or outlets with wet hands or while standing in water.

Hidden dangers of ceiling water damage extend beyond visible symptoms:

• Compromised insulation effectiveness reducing energy efficiency and comfort even after visible repairs
• Weakened ceiling joists and framing that may not show obvious sagging but have reduced load capacity
• Electrical short circuit risks in wiring running through ceiling spaces and junction boxes
• Mold growth developing in hidden wall and ceiling cavities undetectable from visible surfaces
• Pest attraction to moisture and deteriorating materials creating secondary infestation problems
• Progressive deterioration continuing even after visible water stops if materials remain damp

Professional structural assessment procedures examine the full extent of ceiling damage. Moisture meter testing identifies wet areas in ceiling materials, framing, and insulation. Joist inspection from attic spaces checks for warping, cracking, or deterioration in load bearing members. Load capacity evaluation determines whether structural support remains adequate or requires reinforcement. Assessment results determine whether ceiling sections need complete replacement with new framing versus targeted repairs to sound structural members, and whether temporary support installation is needed during repair work.

Sagging ceilings represent imminent collapse risk requiring immediate professional evaluation and potential evacuation of rooms below until stabilization occurs. Ceiling collapses happen suddenly, creating injury risks from falling materials and debris. If ceiling sections sag noticeably or show rapid progression, don’t enter affected rooms, contact emergency repair services immediately, and follow professional guidance about temporary support installation if repairs can’t begin immediately.

Service Area Coverage and Contractor Availability

Reputable ceiling leak repair contractors typically serve defined geographic areas allowing them to maintain specific response time commitments, manage travel costs efficiently, and serve local markets with established reputations, which is why verifying service area coverage before requesting services prevents scheduling issues and ensures appropriate response times.

Contractor availability factors affect when repairs can begin in your home. Emergency after hours service availability means some contractors respond 24/7 for active leaks and urgent situations while others operate standard business hours only. Typical scheduling wait times for non-emergency ceiling repairs range from same day availability during slow periods to one to two weeks during peak demand seasons. Seasonal demand affects contractor availability significantly, with spring storms, winter pipe freezes, and summer storm seasons creating higher call volumes and longer scheduling delays.

Booking methods vary by contractor and urgency. Phone consultation for urgent ceiling leak issues provides immediate contact with contractors who can ask questions, provide initial guidance, and dispatch emergency teams. Online scheduling for non-emergency appointments allows convenient booking through contractor websites, though urgent situations always warrant phone contact. Video assessment options some contractors now offer involve homeowners providing phone or tablet video of damage for initial evaluation, helping contractors prepare appropriate equipment and materials before arrival.

Questions to ask when contacting ceiling leak repair contractors include:

• Do you service my specific address or zip code with standard response times?
• What’s your typical response time for my type of issue (emergency versus scheduled)?
• Do you offer free on-site inspection or estimate, or is there an assessment fee?
• What’s your current scheduling availability for non-emergency repairs?
• Do you provide written satisfaction guarantees or warranties on completed work?

Checking customer reviews and local reputation verifies contractor reliability and service quality before scheduling. Google reviews show recent customer experiences and overall ratings. Better Business Bureau ratings and accreditation indicate complaint history and resolution practices. Neighborhood referrals from local homeowners who’ve used specific contractors provide firsthand accounts of communication, workmanship, and reliability. Verify license status through state contractor licensing boards to confirm credentials remain current and in good standing.

Preventive Maintenance to Avoid Future Ceiling Leaks

Preventive maintenance costs significantly less than emergency ceiling leak repairs by identifying vulnerabilities before they cause damage, protecting home value through proactive care, and preventing the disruption and expense of major restoration projects.

Recommended inspection schedules help homeowners catch problems early. Annual roof inspections by qualified professionals check for damaged shingles, worn flashing, and potential leak sources, ideally scheduled in spring or fall. Seasonal gutter cleaning twice yearly (spring and fall) prevents water backup under roof edges. Regular attic checks for moisture, ventilation issues, or insulation problems, particularly after severe weather events, identify developing concerns. Periodic plumbing fixture examinations in bathrooms and kitchens above ceiling spaces catch small leaks before they cause visible ceiling damage. These routine checks create opportunities to address minor issues before they escalate.

Preventive measures homeowners can take include:

• Clean gutters and downspouts twice yearly removing leaves, debris, and blockages that force water under roof edges
• Inspect roof after severe storms checking for lifted or missing shingles, damaged flashing, or storm debris
• Check attic for proper ventilation and insulation ensuring adequate airflow prevents moisture buildup
• Seal bathroom and kitchen plumbing fixtures properly maintaining caulking around tubs, showers, and sinks
• Test plumbing supply lines for corrosion or wear inspecting exposed pipes, hose connections, and shutoff valves
• Maintain HVAC systems with regular filter changes and annual professional service preventing condensation issues
• Address small ceiling cracks before moisture intrusion by sealing with appropriate caulk or filler
• Ensure proper grading around home foundation directing water away from the structure prevents basement moisture migrating upward

Professional annual inspections catch small issues before they become major ceiling leak problems. During preventive assessments, qualified contractors check roof condition including shingles, flashing, and penetrations, examine attic spaces for moisture signs, ventilation adequacy, and insulation condition, inspect plumbing fixtures and supply lines in areas above ceiling spaces, evaluate HVAC systems for proper drainage and operation, and review gutters, downspouts, and exterior drainage patterns. This comprehensive evaluation identifies vulnerabilities requiring attention.

Permanent solutions to identified vulnerabilities prevent recurring ceiling damage and eliminate the frustration of repeated repair needs. Addressing root causes rather than symptoms means you’re not calling contractors back in months when the same problem returns, protecting your home investment through proactive care.

Final Words

Ceiling leaks need fast action and the right local help.

Finding qualified ceiling leak repair near me services means checking licenses, reading reviews, and getting clear estimates before work starts. Most contractors offer free inspections and transparent pricing.

Stop the water first. Then let professionals handle source repair, drying, drywall work, and finish details that match your home.

Whether it’s a pipe burst, roof damage, or slow leak, the goal stays the same: get it dry, make it safe, and finish it right so you’re back to normal.

FAQ

How much does ceiling leak repair cost?

Ceiling leak repair costs typically range from $200 to $500 for small patches, $500 to $1,500 for moderate repairs, and $1,500 to $5,000 or more for extensive water damage requiring structural work, complete drywall replacement, and full restoration.

Does homeowners insurance cover ceiling leaks?

Homeowners insurance typically covers ceiling leaks caused by sudden incidents like pipe bursts or storm damage, but excludes gradual leaks from poor maintenance or neglect. Coverage depends on the water source and whether damage was preventable through normal upkeep.

Should you call a plumber or roofer for a ceiling leak?

You should call a plumber for visible pipe leaks or plumbing fixture failures, a roofer for exterior damage causing leaks, and a general contractor or restoration company for unknown sources or extensive water damage requiring coordinated multi-trade repairs.

What factors affect ceiling leak repair costs?

Ceiling leak repair costs are affected by damage extent and ceiling area affected, accessibility challenges, material type and texture complexity, structural repairs needed, mold remediation requirements, and premium finishes or custom texture matching that requires specialized skill.

How long does ceiling leak repair take?

Ceiling leak repair timelines depend on damage extent, required drying time before repairs begin (typically 48 to 72 hours), material availability, texture matching complexity, and contractor scheduling. Small patches may take one day while extensive repairs require several days.

What are the warning signs of ceiling water damage?

Warning signs of ceiling water damage include water stains or brown spots, paint bubbling or peeling, visible sagging or bowing, musty odors, texture flaking or falling, visible cracks, soft spots when touched, and mold or mildew growth requiring immediate attention.

When should you replace ceiling drywall versus patching?

You should replace ceiling drywall when damage covers large areas, moisture exposure was prolonged, existing drywall has compromised structural integrity, or sagging indicates joist damage. Small isolated damage under one square foot typically allows simple patching instead.

How do contractors match existing ceiling texture?

Contractors match existing ceiling texture by identifying the specific type (orange peel, knockdown, skip trowel, popcorn, swirled), using appropriate application tools and techniques, applying sample areas for approval, and sometimes texturing entire ceiling sections for consistent appearance.

What immediate actions should you take during an active ceiling leak?

During an active ceiling leak, move furniture away from the area, place buckets to catch water, turn off water supply if plumbing-related, shut off electricity to the affected room, poke small holes in sagging areas to release pooled water, and contact emergency repair services.

Can ceiling leaks cause mold growth?

Ceiling leaks create ideal conditions for mold growth within 24 to 48 hours of water exposure. Professional moisture removal, complete drying, dehumidification, air circulation, and addressing hidden dampness in insulation prevent mold development after water damage repairs.

Do ceiling leak repair contractors offer emergency services?

Most professional ceiling leak repair contractors offer 24/7 emergency services for active leaks with typical response times of one to four hours. Emergency service fees may apply for after-hours calls, but immediate response minimizes total damage and repair costs.

How do you document ceiling leak damage for insurance claims?

Document ceiling leak damage by taking date-stamped photos and video of all affected areas, damaged belongings, and water source if visible. Save all receipts, obtain professional damage assessments with itemized estimates, and notify your insurance company immediately after discovery.

Best Cleaner for Soot Removal: Top Products Compared

0

Grab the wrong cleaner for soot and you’ll just smear that greasy black film into a bigger mess. Soot isn’t regular dirt. It’s oily carbon particles that stick hard to walls, ceilings, and fabric, and most household cleaners can’t break that bond. Some products lift it clean in one pass. Others push it deeper or leave streaks that won’t budge. We tested commercial degreasers, dry sponges, TSP, enzyme cleaners, and DIY mixes to see what actually works on brick, drywall, upholstery, and glass. Here’s what cuts through soot fast, what wastes your time, and how to match the right product to your surface.

Top-Rated Soot Cleaners: Commercial and DIY Product Comparison

S1VnlPcGT_etwvcvn-w74A

Cleaner Type Effectiveness Rating Best For Approx. Price Range Key Features
TSP (Trisodium Phosphate) 9/10 Hard surfaces, walls, masonry $8-$15 per box High alkaline pH, cuts oily residue, requires dilution (1 tbsp per gallon)
Dry Chemical Sponge 8/10 Initial surface cleaning, painted walls $4-$12 per sponge Absorbs particles without water, prevents spreading, reusable until saturated
Commercial Degreasers 9/10 Heavy carbon deposits, brick, stone $12-$35 per bottle Surfactant-based, breaks down oily soot, fast-acting formula
Enzyme Cleaners 7/10 Organic soot components, odor removal $10-$25 per bottle Breaks down carbon compounds biologically, eco-friendly, ammonia-free
Oxygen Bleach Solution 8/10 Fabric, carpet, light surface deposits $8-$18 per container Color-safe, gentler than chlorine bleach, requires warm water activation
Alkaline Cleaners 8/10 Non-porous surfaces, glass doors $9-$22 per bottle High pH neutralizes acidic soot, leaves minimal residue
Magic Erasers (Melamine Foam) 6/10 Light candle soot, spot treatment $3-$8 per pack Micro-abrasive action, water-activated, single-use
Baking Soda Paste 6/10 Carpet, upholstery, light deposits $2-$5 per box Absorbs oily residue, odor neutralizer, pH neutral, safe for most surfaces
Vinegar and Dish Soap Solution 5/10 Light soot on non-porous surfaces $3-$7 total Mild acidity cuts grease, readily available, biodegradable
Cornstarch Treatment 5/10 Fresh soot on fabric, carpet $2-$4 per container Absorbs oil before it sets, safe for delicate materials
Warm Water and Detergent 4/10 Pre-soaking fabric, initial rinse $5-$12 per bottle Basic surfactant action, works overnight for fabric soaking
Specialized Wall Cleaners 7/10 Painted drywall, ceiling surfaces $8-$20 per spray bottle pH-balanced for paint, no-rinse formulas available, streak-free finish

What makes soot cleaners work comes down to chemistry. TSP and commercial degreasers hit hard with pH levels between 11 and 13, breaking apart the oily carbon compounds that glue soot to your walls. The surfactants in these products act like tiny bridges connecting water and oil, grabbing greasy residue and pulling it loose.

Dry chemical sponges work differently. They’re made from porous rubber that absorbs particles instead of pushing them deeper or spreading them around. Enzyme cleaners take their time but go after the organic stuff in soot, breaking down carbon molecules while killing the smell that regular cleaners leave behind. Oxygen bleach releases hydrogen peroxide when you mix it with warm water, creating lifting action that’s strong enough for carbon stains but won’t wreck colored fabrics like chlorine bleach does.

DIY options like baking soda, vinegar, and cornstarch run under $10 per session, but they only handle fresh, light deposits. Commercial products cost more upfront, anywhere from $10 to $35 per container, but they tackle stubborn buildup and oily residue that household items can’t touch. Got light candle soot on painted walls? A $4 dry sponge plus vinegar and dish soap usually does it. Fireplace brick covered in months of buildup? You’ll need TSP or a commercial degreaser mixed right.

The cost benefit flips when you’re dealing with more than 50 square feet or soot that’s been sitting for weeks. DIY methods take three times longer and might not get the stain out completely. Commercial products finish the job in one, maybe two applications.

You can find most commercial cleaners at home improvement stores or online, though specialized enzyme cleaners and pro-grade degreasers might need ordering ahead. TSP used to be everywhere, but some states restrict it now because of phosphate concerns. Check local availability or grab TSP-alternative products that use different alkaline compounds. Store liquid cleaners somewhere cool and dry, away from kids and pets. Keep TSP powder sealed tight since it pulls moisture from the air. Dry chemical sponges last forever if you leave them in their packaging, but once you start using them, they fill up with soot and need replacing after 100 to 150 square feet.

Surface-Specific Cleaning Methods with Step-By-Step Instructions

6gfYOVqNSGOKaZpDE1qqrA

Different surfaces need different approaches because soot doesn’t interact the same way with everything. Porous stuff like brick and drywall traps carbon particles deep in the texture. Non-porous materials like glass keep soot on top but show streaks. Painted walls handle mild cleaners fine but get damaged by harsh alkaline solutions that strip the finish. Match your cleaner to the material or you’ll end up with permanent discoloration, surface damage, or a repair project instead of a cleaning project.

Walls and Painted Surfaces

  1. Vacuum loose soot with a brush attachment. Go gentle to avoid grinding particles into the paint.

  2. Test your cleaner somewhere nobody looks, like behind furniture or inside a closet. Wait 10 minutes to see if the paint softens or changes color.

  3. Mix 1 tablespoon TSP or specialized wall cleaner per gallon of warm water, or make a milder mix with 1 tablespoon dish soap per quart of warm water for lighter deposits.

  4. Start at the bottom and work up. This prevents drip marks that are harder to clean on soot-covered surfaces.

  5. Scrub one 3-foot-by-3-foot section at a time using circular motions with a microfiber cloth or soft sponge. Apply decent pressure without grinding.

  6. Rinse right away with a separate cloth dampened in clean water. Wring out excess to avoid soaking the drywall.

  7. Let each section air dry completely before moving to the next. Check for missed spots once it’s dry, since soot shows up better on dry walls.

Brick, Stone, and Masonry

  1. Dry brush the surface with stiff bristles to knock off loose particles without adding moisture that drives residue deeper.

  2. Apply TSP at 1 tablespoon per gallon or use commercial masonry degreaser at the strength listed on the bottle. Spray or sponge onto a small test area first.

  3. Let the cleaner sit 5 to 10 minutes so it can penetrate and break down oily carbon.

  4. Scrub with a stiff-bristle brush using firm, circular motions. Reapply cleaner to sections that dry before you finish.

  5. Rinse thoroughly with clean water. Use a hose for outdoor surfaces or multiple rinse buckets for indoor fireplace brick.

  6. For stubborn deposits on outdoor brick, consider renting a low-pressure sandblaster. Use the lowest setting to avoid spreading soot or damaging mortar.

  7. Let masonry dry completely, which takes 24 to 48 hours for porous stone. Apply penetrating sealer if the surface was sealed before, since cleaning strips old sealant.

Upholstery and Carpet

  1. Vacuum the entire area thoroughly with a HEPA-filter vacuum and upholstery attachment. Make multiple slow passes to grab surface particles.

  2. Sprinkle baking soda or cornstarch all over remaining stains, covering the whole area with a light coating.

  3. Wait 15 minutes, or up to 30 for heavy deposits, while the powder soaks up oily residue.

  4. Vacuum again, making slow overlapping passes to remove all the powder and absorbed oils.

  5. Mix a mild solution, either 1 tablespoon dish soap per 2 cups cool water or use upholstery cleaner at labeled dilution.

  6. Blot stained areas with a clean microfiber cloth dampened in the solution. Press down and lift instead of rubbing.

  7. Rinse your cloth frequently in cool water, wringing it almost dry before continuing.

  8. Repeat blotting with clean water only to remove soap residue that attracts dirt later.

  9. Let upholstery and carpet air dry completely. Use fans to speed drying and prevent mildew.

Fabric and Textiles

  1. Take items outside and shake them gently to release loose particles without grinding them deeper.

  2. Rinse under cool running water, letting it flow through from the back side of the stain to push particles out.

  3. Soak overnight in a large container or washing machine filled with warm water and detergent. Use 1.5 times your normal detergent amount for soot-stained loads.

  4. Wash on the hottest water setting safe for the fabric. Add chlorine bleach for whites or oxygen bleach for colors.

  5. Inspect the fabric carefully after washing while it’s still damp. Soot staining should be completely gone before drying.

  6. Never put it in a dryer until the stain’s completely gone. Heat permanently sets carbon staining, making removal impossible.

Glass, Ceilings, and Non-Porous Surfaces

For glass fireplace doors, use commercial glass cleaner or equal parts white vinegar and warm water in a spray bottle. Wipe with vertical then horizontal strokes to kill streaking. Ceiling cleaning takes extra care since working overhead with liquids creates drip risks. Use a dry chemical sponge first to remove as much as possible, then lightly mist small sections with cleaner instead of soaking them. For glossy surfaces like tile or sealed wood, simple dish soap and warm water works well since these materials don’t absorb staining. Always wipe in straight lines on glass and glossy surfaces to prevent visible swirl marks. Dry immediately with a clean microfiber cloth to avoid water spots.

Preventing permanent damage boils down to three things: always vacuum or dry sponge before introducing liquid, test every cleaner on a hidden spot first, and never apply heat through dryers or direct sunlight until staining’s completely gone. Skip the test patch and you’ll discover your cleaner strips paint, discolors fabric, or etches stone after you’ve already covered the entire surface. Soot that looks gone when wet often reappears as things dry, so inspect after complete drying and repeat if needed.

Common Soot Removal Mistakes to Avoid

PLJLx2BRS-CeKv_kP4ZOBw

Soot needs special handling compared to regular dirt because it’s fine carbon particles mixed with oily residue. That combination spreads easily and sets permanently if you use the wrong approach. What works for everyday spills often makes soot worse.

Common mistakes that worsen the damage:

  • Using water first without vacuuming or dry-sponging turns dry soot into muddy paste that drives deeper into surfaces
  • Rubbing or scrubbing hard instead of blotting spreads the stain outward and grinds particles into the material
  • Applying heat through hair dryers, direct sunlight, or clothes dryers before complete removal permanently bonds carbon to surfaces
  • Using the wrong cleaner for the surface, like harsh TSP on painted drywall or acidic vinegar on natural stone
  • Skipping patch tests and discovering too late that your cleaner discolors or damages the finish across large visible areas
  • Working in poorly ventilated spaces without respiratory protection, inhaling fine carbon particles
  • Mixing incompatible cleaners like ammonia-based and bleach products, creating toxic fumes
  • Rushing the drying process or assuming surfaces are clean while damp, since soot reappears as moisture evaporates

These mistakes cause permanent staining when heat or aggressive rubbing bonds carbon molecules to surface fibers, turning removable soot into discoloration that penetrates material structure. Harsh cleaners strip paint, etch stone, or bleach fabric dyes. Spreading soot during cleaning turns a contained problem into wall-to-wall contamination that requires treating the entire room. Poor ventilation lets fine particles resettle on surfaces you already cleaned. Mixing certain chemicals creates health hazards worse than the soot itself.

If you’ve already made these mistakes, the fix depends on what went wrong. For soot paste from early water use, let it dry completely, then vacuum gently before starting over with proper dry-then-wet sequencing. For heat-set stains in fabric, enzyme cleaners or oxygen bleach with extended soaking offers the only shot at removal, though success isn’t guaranteed. For surface damage from harsh cleaners, you’re usually looking at repainting walls, refinishing wood, or replacing damaged materials since chemical etching and finish stripping rarely reverse. Damage becomes unfixable when carbon molecules bond at a molecular level with surface materials (happens with heat), when cleaner reactions permanently alter surface chemistry (acid on stone), or when aggressive scrubbing physically damages material texture (crushed carpet fibers, scratched paint). At that point, replacement or professional restoration becomes necessary.

Soot Prevention and Regular Maintenance

318Fj0xKRUq_u_hknFMXkQ

Prevention saves hours of scrubbing and hundreds in supplies or professional services. A basic maintenance routine catches buildup when it’s still light and easy to remove, rather than waiting until carbon deposits turn into stubborn staining projects.

Prevention strategies that minimize future buildup:

  • Schedule annual chimney inspections and professional cleanings before heavy winter use, removing creosote buildup before it becomes a fire hazard
  • Keep fireplace dampers fully open during fires and slightly open between uses to maintain proper draft and prevent smoke backdraft
  • Burn only seasoned hardwood with moisture content below 20%. Wet or softwood creates excessive smoke and soot.
  • Trim candle wicks to 1/4 inch before each use, preventing tall flames that produce black smoke
  • Maintain proper ventilation with windows cracked or exhaust fans running when burning candles or using fireplaces
  • Replace HVAC air filters every 30 to 60 days during heavy fireplace season to capture airborne particles before they settle
  • Address soot spots immediately when you first notice them, since fresh deposits wipe away easily but set stains require aggressive treatment

Your maintenance schedule depends on how often you use soot-producing items. Burn fires daily and you’ll need monthly quick-wipes of surrounding surfaces plus professional chimney service twice yearly. Use candles occasionally and a quarterly check of walls and ceilings near candle locations catches problems early. The rhythm that works: vacuum or dry-sponge surfaces weekly during active fireplace season, thoroughly clean fireplace surrounds monthly, and inspect less visible areas like ceilings and upper walls every six weeks since soot rises and accumulates where you don’t naturally look.

You can perform basic inspections yourself by running a clean white cloth along walls near fireplaces, across ceiling areas above candles, and inside fireplace openings to check for black residue transfer. Look for gray or brown discoloration on painted surfaces, especially in corners where soot piles up. Check behind and around wood stoves for heat-driven carbon deposits. When you spot heavy black buildup inside chimneys visible from below, flaky creosote deposits, soot falling from chimney openings when you tap walls nearby, or smoke backing into rooms during fires, those signs mean you need professional inspection and cleaning rather than DIY maintenance.

Safety Precautions for Soot Cleanup

du3P77s-SgeQQLmNEt581Q

Soot cleanup poses real health risks. You’re handling fine carbon particles, oily residue that irritates skin, and often harsh chemical cleaners that damage tissue on contact. Soot particles lodge in lung tissue and cause respiratory irritation. Prolonged exposure links to more serious breathing problems.

Personal protective equipment you need for soot removal:

  • N95 or P100 respirator mask, not a basic dust mask, to filter particles small enough to reach deep lung tissue
  • Rubber dishwashing gloves or chemical-resistant work gloves to protect hands from cleaner burns and prevent skin absorption of soot oils
  • Safety glasses or goggles to keep particles and cleaning solution splashes out of eyes
  • Long-sleeved shirt and long pants in materials you can wash immediately after, covering skin that would otherwise absorb oily residue
  • Closed-toe shoes or work boots, since soot on floors transfers to bare feet and tracks through the house
  • Old clothing you don’t mind discarding if heavily contaminated, since soot staining rarely comes completely out

Ventilation matters as much as protective gear. Open all windows and doors in the cleaning area, creating cross-breeze that pushes contaminated air outside. Run box fans facing outward in windows to actively exhaust particle-filled air. For large jobs, rent or buy a HEPA air purifier running continuously during and for several hours after cleaning. Never clean soot in enclosed spaces with poor airflow, especially basements or rooms with closed doors, since particle concentration builds quickly. Take items outdoors for cleaning whenever possible.

Dispose of soot-contaminated materials by sealing them in plastic bags before tossing in regular trash, preventing particles from escaping. When handling TSP or other harsh cleaners, never pour concentrated product down drains without diluting heavily with running water. Check local regulations since some areas restrict phosphate disposal. Wear gloves during the entire mixing and application process. If cleaner contacts bare skin, rinse immediately under running water for several minutes. Store chemical cleaners in original containers with intact labels, in locked cabinets away from children, pets, and heat sources.

Removing Soot from Fireplaces and Wood Stoves

7NDGV6bKTjSb0WERt9pepA

Fireplace and wood stove soot differs from candle deposits or light smoke residue because it combines heavy carbon with creosote, a tar-like substance that forms when wood smoke condenses on cooler chimney surfaces. Regular soot wipes away with proper cleaners, but creosote requires more aggressive treatment.

Specialized techniques for fireplace soot removal:

  • Start with dry chemical sponges to remove loose surface soot from brick and stone without adding moisture that turns ash into paste
  • Mix TSP at 1 tablespoon per gallon of warm water for brick fireplace fronts, applying with stiff-bristle brushes that reach into mortar joints
  • Use commercial degreasers specifically labeled for fireplace cleaning, which contain surfactants designed to break down oily wood smoke residue
  • Apply enzyme-based cleaners to areas with odor problems, letting them sit 15 to 20 minutes to break down organic compounds before scrubbing
  • For exterior brick with heavy carbon deposits, rent low-pressure sandblasting equipment, starting with the lowest velocity setting
  • Test sandblasting on an inconspicuous area first since even low pressure can damage soft brick or aging mortar
  • Work in small sections when sandblasting, keeping the nozzle moving to prevent concentrated spray from etching brick

Heavy carbon deposits that resist TSP and degreasers often mean creosote mixed with soot, which requires different handling. Creosote appears as shiny, tar-like coating in black or brown, sometimes with a puffy or flaky texture. Stage 1 looks like black soot but feels slightly sticky. Stage 2 forms shiny, hardened patches. Stage 3 creates thick, dripping deposits that concentrate near the top of chimneys. Surface soot on fireplace fronts responds to standard cleaning, but once you see creosote buildup inside the firebox or visible in the chimney, you’re beyond DIY territory. Professional chimney sweeps use specialized rotary brushes, chemical treatments rated for creosote, and proper disposal methods. They’ll also inspect for chimney damage, blockages, and fire risk that homeowners miss.

Regular maintenance prevents excessive buildup that requires professional help. Burn hot fires rather than smoldering ones, since incomplete combustion at low temperatures creates more creosote. Have chimneys inspected annually and cleaned when deposits reach 1/8 inch thickness. Clean fireplace fronts monthly during active burning season using dry sponges followed by appropriate cleaner for your specific brick or stone.

Smoke Damage Cleanup and Odor Elimination After Fire Incidents

n4npS6LTRV25u6Xcydp0Bg

Smoke damage goes way beyond visible soot on surfaces. Even small fires spread microscopic particles through ventilation systems, into wall cavities, and deep into porous materials where they keep releasing odor long after you’ve wiped down walls.

Damage Level DIY Appropriate Professional Recommended Typical Timeline
Light surface soot from candles or small contained fire Yes – surface cleaning with TSP or specialty cleaners Optional for odor concerns 1-3 days DIY
Moderate smoke damage with soot on multiple room surfaces Maybe – depends on affected area size and material types Yes for thorough treatment and odor elimination 3-7 days DIY / 2-4 days professional
Heavy smoke penetration with structural material contamination No – requires specialized equipment and techniques Strongly recommended 1-3 weeks professional
Fire damage with burned materials, water damage from suppression No – safety hazards and specialized restoration needed Required for safe remediation 2-6 weeks professional

Once smoke damage extends beyond cleanable surfaces into ductwork, insulation, wall cavities, or structural materials, coordination becomes critical. Professionals assess what can be cleaned versus what needs removal and replacement. They document damage for insurance claims with detailed photos, moisture readings, and material testing. They sequence the work properly: damaged material removal first, then structural cleaning and odor sealing, followed by reconstruction once all contamination’s addressed. Attempting DIY on heavy damage risks missing hidden contamination that continues causing odor problems and health concerns long after visible surfaces look clean. When considering Fire Damage Restoration Services, contact professional restoration teams once smoke damage affects multiple rooms, penetrates HVAC systems, or includes water damage from fire suppression.

Professional restoration provides equipment and expertise DIY can’t match: thermal foggers that penetrate porous materials with odor-counteractant chemicals, hydroxyl generators that break down odor molecules at a molecular level, negative air machines that prevent cross-contamination during cleaning, and commercial-grade sealers that lock residual odors inside materials. They know which materials clean successfully and which need replacement, preventing wasted effort on items too contaminated to salvage. They handle hazardous material disposal following regulations most homeowners don’t know exist. They understand how smoke travels through structures, checking areas you wouldn’t think to inspect.

Smoke smell persists after visible residue removal because microscopic particles lodge deep in porous materials where surface cleaning can’t reach. Drywall, carpet padding, insulation, upholstery foam, and wood all absorb smoke particles that slowly release odor molecules over time. Surface cleaning removes the top layer but leaves deeper deposits untouched. The difference between surface cleaning and true odor elimination is sealing or replacing affected porous materials rather than just wiping them down.

Proven odor elimination techniques for smoke-affected homes:

  • Apply enzyme cleaners to all porous surfaces, allowing 20 to 30 minutes dwell time for biological breakdown of odor-causing compounds
  • Place activated charcoal bags throughout affected rooms, replacing every two weeks as charcoal saturates with absorbed odor molecules
  • Sprinkle baking soda on carpets and upholstery, leaving overnight before vacuuming to absorb odors from surface fibers
  • Mix white vinegar solution, 1 cup per gallon of water, for hard surface cleaning since vinegar’s acidity neutralizes alkaline smoke residue
  • Run HEPA air purifiers continuously for 2 to 4 weeks, placing units in central locations with good airflow
  • Consider ozone treatment only in unoccupied spaces with professional guidance, since ozone irritates lungs but effectively breaks down persistent odor molecules
  • Maintain constant ventilation with windows open and fans running, exchanging indoor air completely several times daily

Treating porous materials requires more aggressive methods than hard surfaces. Carpets need deep extraction cleaning that pulls contaminated water from backing and padding, not just surface shampooing. Upholstery often needs professional cleaning with specialized equipment that injects solution deep into cushion foam then extracts it. Drywall that absorbed heavy smoke may need primer-sealer before repainting, or removal and replacement if contamination’s severe. Bare wood requires sanding to remove surface layer before sealing and refinishing.

Timeline expectations for complete odor removal range from two weeks for light smoke exposure to three months for heavy contamination in porous materials. Insurance documentation should include photos of all damage before cleaning, itemized lists of cleaning supplies and equipment rentals, and dated records of professional services. Signs that professional odor sealing may be necessary include smell that returns after thorough cleaning and ventilation, odor that intensifies in humidity or heat, and persistent smell concentrated in specific areas like closets or ductwork despite surface treatment.

Cleaning Candle Soot from Walls and Ceilings

rJbB07qoQpagqM2QZtdUJQ

Candle soot creates different challenges than fireplace residue because it typically shows up as light gray or black shadowing rather than heavy deposits, but it covers larger areas since air currents carry the fine particles across rooms. The oily carbon floats on warm air from candle flames and settles on cooler surfaces like upper walls and ceilings.

Start by understanding that candle soot bonds less aggressively than fire damage soot, making it easier to remove if you catch it early and use proper technique. The carbon particles haven’t been heated to the extreme temperatures of house fires, so they sit on surfaces rather than embedding deeply.

For walls, proper technique prevents the streaking that makes the problem look worse. Begin at the bottom of the affected area even though that seems backward, because drips from cleaning solution running down over soot create permanent streak marks that resist removal. Work in 3-foot-wide sections, using a dry chemical sponge first to lift as much soot as possible without adding liquid. The sponge absorbs particles through its porous rubber texture. Wipe in straight horizontal lines with light pressure, rotating to a clean area of the sponge as it darkens. Once the dry sponge stops picking up visible residue, mix a mild solution of 1 tablespoon dish soap per quart of warm water. Dampen, don’t soak, a microfiber cloth in the solution, wring it nearly dry, then wipe the wall using overlapping horizontal strokes. Rinse your cloth frequently in clean water, wringing thoroughly before continuing. Immediately wipe each cleaned section with a separate cloth dampened only in clean water to remove soap residue. Let the section air dry before moving up.

Ceiling cleaning requires modified technique since working overhead with liquid creates drip risks and physical strain. Use a dry chemical sponge attached to an extension pole for initial removal, working in 2-foot-by-2-foot sections with gentle pressure to avoid damaging textured finishes. For remaining residue, lightly mist small sections with cleaning solution in a spray bottle rather than soaking, immediately wiping with a barely damp microfiber cloth. Work quickly so solution doesn’t drip, and wear safety glasses since particles and liquid tend to fall on your face. For flat ceilings, use straight back-and-forth strokes following the direction of any visible texture. For popcorn or heavily textured ceilings, dab rather than wipe to avoid crushing or removing texture material.

Best cleaners specifically for candle soot on painted surfaces:

  • Mild dish soap solution, 1 tablespoon per quart warm water, for light deposits on latex paint
  • Magic erasers dampened with plain water for spot treatment of small areas, using very light pressure to prevent paint damage
  • Dry chemical sponges as first treatment on any painted surface
  • Specialized wall cleaners in spray bottles formulated for painted surfaces, following label instructions
  • White vinegar solution, 1/4 cup per quart warm water, for walls with semi-gloss or high-gloss paint that resists soap streaking
  • TSP-alternative cleaners at reduced strength, 1 teaspoon per quart, for stubborn deposits on durable paint

Prevention tips keep candle soot from reappearing on freshly cleaned walls. Trim candle wicks to exactly 1/4 inch before every lighting, since longer wicks create taller flames that produce more carbon particles. Place candles away from air vents, fans, and drafts that make flames flicker and smoke. Burn candles in properly sized holders that protect flames from air movement. Avoid burning candles for more than three hours continuously, since extended burning creates larger, sootier flames. Choose high-quality candles made from natural waxes rather than petroleum-based paraffin, which tends to produce more black smoke. Keep wicks centered in the wax and extinguish candles by dipping the wick into melted wax rather than blowing them out, since blowing creates a final puff of smoke that deposits fresh soot.

Final Words

Picking the best cleaner for soot removal comes down to matching the product to your surface and the damage level you’re facing.

TSP works fast on hard surfaces. Dry sponges handle walls without spreading residue. Baking soda and enzyme cleaners tackle fabrics and upholstery safely.

Test first. Work from the bottom up. Don’t rush the drying.

If you’re staring at heavy buildup, stubborn smoke smell, or damage beyond surface cleaning, professional help saves time and prevents mistakes that lock stains in permanently.

Clean it right the first time, and your home comes back.

FAQ

What’s the best cleaner to remove soot?

The best cleaner to remove soot depends on the surface you’re treating. For hard surfaces like walls and brick, TSP (trisodium phosphate) cleaner mixed at 1 tablespoon per gallon of warm water works effectively. For upholstery and carpet, baking soda or cornstarch absorbs soot when sprinkled on, left for 15 minutes, then vacuumed. Dry chemical sponges work well on painted walls through absorption rather than scrubbing.

What chemical breaks down soot?

The chemical that breaks down soot is trisodium phosphate (TSP), which tackles both the dusty and oily components of soot effectively. Alkaline cleaners and degreasers also break down carbon deposits by cutting through the greasy residue. Enzyme cleaners work on organic soot components and help eliminate odors. Oxygen-based cleaners provide a gentler alternative while still breaking down soot particles.

How do professionals remove soot?

Professionals remove soot by first vacuuming loose particles to prevent spreading, then applying appropriate cleaners matched to each surface type. They use dry chemical sponges on walls, TSP solutions on hard surfaces, and specialized equipment like low-pressure sandblasters for brick and masonry. Professionals also coordinate proper ventilation, seal odor sources, and replace damaged materials when cleaning alone isn’t enough.

What cleaner cleans soot effectively?

The cleaner that cleans soot effectively includes TSP for hard surfaces, dry chemical sponges for painted walls, and baking soda paste for upholstery and carpet. Commercial degreasers and alkaline cleaners work on heavy carbon deposits. For fabric, warm water with laundry detergent and oxygen bleach removes soot stains. Always test cleaners in an inconspicuous area first to prevent damage or discoloration.

Can I use household items to clean soot?

You can use household items to clean soot, including baking soda, white vinegar, dish soap, and cornstarch for lighter deposits. Mix dish soap with warm water for painted surfaces, or create a baking soda paste for stubborn spots. These cost-effective options work well for small areas, though commercial cleaners handle heavy buildup more efficiently.

Should I vacuum soot before cleaning?

You should vacuum soot before cleaning to prevent particles from settling on other surfaces and spreading the oily residue. Use a HEPA vacuum to capture fine soot particles without releasing them back into the air. Vacuuming first makes the cleaning solution more effective by removing loose deposits before applying liquid cleaners.

How do I remove soot from painted walls without damage?

To remove soot from painted walls without damage, start from the bottom and work upward, scrubbing one section at a time with a mild TSP solution. Test a small patch in an inconspicuous area first to ensure the cleaner won’t discolor or damage the paint. Use a microfiber cloth and gentle circular motions, rinsing the cloth frequently.

When should I call professionals for soot removal?

You should call professionals for soot removal when dealing with heavy smoke damage from fire incidents, extensive ceiling and wall coverage, or when DIY cleaning doesn’t eliminate odors. Professional restoration teams coordinate material removal, odor sealing, and reconstruction phases that go beyond surface cleaning, ensuring complete smoke damage resolution and proper insurance documentation.

Shellac Based Primer Smoke Odor Blocking That Actually Works

0

Think a coat of paint will make smoke odor vanish? Not usually.
A shellac based primer actually locks smoke odor in place.
It creates a vapor-tight seal over drywall, trim, and plaster, trapping nicotine, soot, and tar so they can’t off-gas back into the room.
Shellac works where latex and oil primers often fail.
This post shows why shellac primers stop nicotine and fire smoke, which products pros use, and how to apply them so the smell stays gone.
Fast drying means you can topcoat sooner, but ventilate while it cures.

Effectiveness of Shellac Primers for Eliminating Smoke Odor

zX31dWApTpK7kgi0dDxnLA

Shellac primer is the most reliable way to permanently seal fire and tobacco smoke odors inside a home. It creates a vapor tight barrier over contaminated surfaces, physically locking smoke residue and odor molecules beneath a hard, impermeable layer. Unlike paint or water based sealers that allow gas exchange, shellac forms a cross linked film that blocks odor transmission. When you apply shellac primer to smoke damaged drywall, wood trim, or plaster, you’re not masking the smell. You’re entombing the contamination so it can’t migrate into the air. Zinsser BIN is the most commonly referenced shellac primer for smoke remediation because it combines alcohol dissolved shellac resin with pigments that also block stains.

Shellac blocks even severe nicotine contamination, protein based fire smoke, and the musty smell left after water used to extinguish a fire. Nicotine is water soluble, which means it can bleed through latex paint and even some oil based primers over time. Shellac is alcohol based, so it repels water based contaminants and encapsulates them permanently. Fire smoke leaves behind acidic soot and tarry residues that penetrate porous materials like bare drywall, unsealed wood, and old plaster. Shellac seals those porous surfaces and prevents continued off gassing. The primer works on ceilings, walls, subflooring, and trim. Any interior surface that absorbed smoke.

Common scenarios where shellac outperforms other primers include post fire restoration where soot and char odor have soaked into framing, drywall, and cabinets. Heavy tobacco smoke damage in rental properties or inherited homes where decades of smoking left yellow stains and tar buildup. Basement or attic spaces exposed to smoke intrusion where porous wood and insulation absorbed contaminants. Rooms with lingering cigarette smell after initial cleaning, where nicotine remains embedded in wall cavities or subfloor plywood.

Once shellac primer is fully cured, odor cannot return unless the sealed surface is breached or unless odor sources outside the sealed area continue to emit smell. If you prime the walls but leave contaminated carpet, insulation, or HVAC ducts untreated, you’ll still smell smoke. But it’s not coming through the primed surface. Shellac’s barrier is permanent as long as the coating remains intact. Scratches, water damage, or incomplete coverage can expose underlying contamination, but that’s a coverage issue, not a primer failure.

How Shellac Primer Works to Block Smoke Smell

zIKzX3tdRvaKsC2kE8hrPg

Drywall and wood are porous. When smoke fills a room, nicotine vapor, soot particles, and tar droplets settle on surfaces and soak into the tiny air pockets inside drywall paper, gypsum, wood grain, and plaster. Even after you scrub visible staining, those contaminants remain embedded below the surface and continue to off gas. That’s why cleaning alone doesn’t eliminate smoke smell.

Shellac primer uses an alcohol carrier (denatured alcohol or ethanol) that evaporates rapidly after application. As the alcohol flashes off, the dissolved shellac resin hardens into a dense, cross linked film. This film fills the surface pores and creates a vapor barrier. The shellac layer is thin but extremely tight, preventing odor molecules from migrating from the contaminated substrate into the room air.

The sealed film also stops nicotine bleed through. Nicotine stains can reappear through latex paint months after application because water in the paint reactivates the nicotine, allowing it to migrate. Shellac’s alcohol base doesn’t reactivate nicotine, and once cured, the resin is insoluble. The result is a stable, odor blocking surface that you can safely topcoat with any finish paint. The mechanism is simple: shellac dries fast, seals tight, and won’t dissolve or soften after curing, so smoke contamination stays locked in place.

Comparing Shellac, Oil Based, and Water Based Primers

Uhmj-8ugTsi55mXdh7TgMw

Shellac, oil based, and water based primers all claim stain blocking or odor sealing properties, but they perform very differently when you’re dealing with smoke damage. Shellac is the strongest odor blocker because it forms a true vapor barrier and cures into an alcohol resistant, water resistant film. Oil based primers like KILZ Original use alkyd resins and mineral spirits. They seal moderately well and block some odors, but they off gas solvents for weeks and still allow some odor transmission. Water based primers are the weakest option for smoke. They may hide light stains, but nicotine and smoke residue bleed through because water reactivates nicotine and the primer film remains semi permeable.

Type of Primer Odor Blocking Ability Recommended Use Cases Drawbacks
Shellac Based (e.g., Zinsser BIN) Excellent. Creates vapor tight seal, blocks nicotine, fire smoke, pet urine, and severe odors Fire and smoke restoration, heavy tobacco contamination, pet odor on subfloors, sealing before selling a smoked in home High alcohol fumes during application, requires good ventilation, can be difficult to spray without shellac compatible equipment
Oil Based (e.g., KILZ Original) Moderate. Seals some odors and stains, but allows limited odor transmission and long solvent off gassing (30+ days) Light to moderate smoke damage, stain blocking on wood, subfloor prep before new flooring if shellac is unavailable Slow cure, toxic solvent fumes for weeks, less effective than shellac on severe nicotine or fire smoke
Water Based (e.g., latex stain blocking primer) Poor. May hide light stains but does not block odors; nicotine and smoke bleed through over time Natural wood tannins, minor cosmetic staining, low odor repaints in non contaminated spaces Not effective for smoke odor, nicotine reactivates and migrates through the film, semi permeable to odor gases

Recommended Shellac Primers for Smoke Odor

QwZ4DAttS_6fgSN8vD5iLg

Choosing the correct shellac primer ensures reliable odor blocking and long term performance. All shellac primers share the same core mechanism (alcohol dissolved shellac resin that dries into a vapor barrier) but pigmentation, viscosity, and formulation details affect coverage, hide, and ease of application. White pigmented shellac primers provide better stain coverage and a neutral base for topcoat colors, while clear shellac works well on wood or when you plan to leave the natural grain visible. The right choice depends on the surface, the severity of contamination, and whether you’ll be painting or staining afterward.

Top performing shellac primers for smoke odor include Zinsser B-I-N Shellac Based Primer, the most widely used fire and smoke damage primer. It’s white pigmented, adheres to wood, drywall, plaster, metal, and most previously painted surfaces. Blocks nicotine, fire smoke, water stains, and pet odors. Dries in 15 to 45 minutes and can be recoated quickly. Best for whole room smoke remediation and post fire cleanup.

BIN Advanced Synthetic Shellac Primer (water based) is a hybrid shellac primer with lower alcohol fumes. Still blocks odors and stains effectively but uses a water carrier and cures in 7 to 10 days instead of 3. Initial VOC around 96 g/L. Adheres to tile, glass, laminates, and glossy surfaces without sanding. Best when occupants are sensitive to alcohol fumes but still need strong odor blocking.

Clear or pigmented pure shellac, mixed from dewaxed shellac flakes and denatured alcohol or high proof ethanol (Everclear), is always slightly amber or yellow toned. Works on wood, vinyl, and most porous substrates. Use dewaxed shellac if you plan to paint over it. Best for natural wood surfaces or when you’re sealing cabinets, trim, or subfloors and want maximum flexibility in topcoat choice.

All alcohol based shellac primers produce strong fumes during application and early cure. Ventilate aggressively. Open windows, use box fans, and keep HVAC systems off to avoid circulating fumes. If you or building occupants are chemically sensitive, have someone else apply the primer and allow the full 3 day cure before re entry. Rapid dry time is an advantage for scheduling, but the alcohol smell is intense for the first few hours.

Application Steps for Using Shellac Primer to Seal Smoke Odor

g_p9apy_QJyx6eeualMdnw

Proper application ensures full odor sealing and prevents bleed through or reappearance of smoke smell. Follow these steps for reliable results.

Remove loose soot and surface contamination first. Wipe walls, ceilings, and trim with a damp rag or TSP substitute to remove greasy soot, nicotine film, and loose tar. Let surfaces dry completely. You’re not trying to eliminate all staining. You’re removing bulk contamination so the primer can adhere and seal what remains.

Inspect and remove damaged materials. If drywall is heavily charred, saturated with fire suppression water, or covered in tar that won’t wipe off, remove and replace it. Shellac seals odor, but it can’t stabilize structurally compromised materials. Pull up carpet and pad in smoked rooms. Those materials hold odor and can’t be sealed effectively.

Mask and protect. Cover floors, windows, and any surfaces you don’t want primed. Shellac dries fast and is difficult to clean up once cured. Wear gloves, eye protection, and a respirator rated for organic vapors if ventilation is limited.

Apply the first coat of shellac primer using a brush, roller, or airless sprayer (shellac compatible tips required). Work in sections and maintain a wet edge to avoid lap marks. Coverage is typically 300 to 400 square feet per gallon depending on surface porosity. Shellac will dry to the touch in 15 to 45 minutes. The goal is full, even coverage with no holidays (bare spots).

Inspect for thin spots or missed areas once the first coat is dry. Look for any areas where the substrate shows through or where coverage looks inconsistent. Nicotine stains or soot shadows that are still visible indicate you need a second coat in those areas.

Apply a second coat if needed. Most smoke damaged surfaces need two coats of shellac primer for complete odor blocking and stain coverage. Wait until the first coat is dry to the touch (usually under an hour), then apply the second coat the same way. Two thin coats seal better than one heavy coat.

Topcoat with finish paint once the shellac primer is fully cured (3 days for alcohol based BIN, 7 to 10 days for BIN Advanced). You can apply any latex or oil based topcoat. The shellac base is compatible with all common architectural paints. Use two finish coats for best hide and durability.

Coverage, Dry Time, and Performance Expectations

TGa9RVexQgmxVI_r38JcMw

Shellac primer typically covers 300 to 400 square feet per gallon on sealed or previously painted drywall. Coverage drops on raw wood, unsealed plaster, or porous masonry because those substrates absorb more primer. If you’re sealing fire damaged drywall or nicotine stained plaster, expect to use closer to 300 square feet per gallon for the first coat. A second coat usually goes further because the first coat seals the porosity.

Shellac dries faster than any other primer type. Alcohol based BIN is dry to the touch in 15 to 45 minutes depending on temperature, humidity, and airflow. You can recoat as soon as the surface feels dry and doesn’t transfer when you touch it lightly. In most conditions, you can apply two coats in the same day. Full cure (meaning the shellac has hardened completely and all alcohol has evaporated) takes about 3 days. That’s when you can safely topcoat or return occupants to the space if fume sensitivity is a concern.

Temperature and humidity affect dry time and film quality. Shellac cures best between 50°F and 80°F. Below 50°F, the alcohol evaporates more slowly and the film may remain tacky longer. Above 80°F, the primer can dry too fast and cause lap marks or poor leveling. Humidity has less effect on shellac than on water based products, but high humidity can slow the final cure slightly. If you’re working in a damp basement or during humid weather, add a couple of hours to your recoat window and allow an extra day before topcoating.

Will Smoke Odor Come Back After Using Shellac Primer?

5uw8HsI2S2uGzzxIgpRz2Q

When shellac primer is applied correctly (full coverage, no missed spots, proper cure time), smoke odor will not return through the sealed surfaces. The shellac film is permanent and does not break down, soften, or become permeable over time. Odor molecules trapped beneath the barrier stay trapped. If walls, ceilings, and trim have been primed with two coats of shellac and allowed to cure, those surfaces will not emit smoke smell again.

Odor may still be present in the home if contamination remains in materials that were not sealed or removed. Carpet, upholstery, insulation in walls or attics, HVAC ductwork, and personal belongings all absorb smoke. Shellac primer only seals the surfaces you coat. It doesn’t clean the air or treat hidden sources. If you prime the walls but leave smoke saturated carpet in place, you’ll still smell smoke, but it’s not coming through the primer. This is why thorough remediation includes removing soft materials, cleaning ducts, sealing all exposed framing and sheathing, and confirming that no odor sources remain before final topcoating.

Final Words

Sealing smoke-soaked walls with a shellac primer stops the odor fast and keeps it from coming back when applied right.

We covered why shellac works, how it outperforms oil and water primers, top picks like Zinsser BIN, and a clear step-by-step so you get full coverage and quick drying. We also looked at when smells can return, usually from soft goods or missed spots, and how to confirm with moisture readings and simple smell checks.

Using a shellac based primer smoke odor properly means the smell stays sealed and you’ll move on to repairs with confidence.

FAQ

Q: What primer gets rid of smoke smell?

A: The primer that gets rid of smoke smell is a shellac-based primer, like Zinsser BIN. It seals smoke and nicotine into a vapor-tight film so odor won’t bleed through painted surfaces.

Q: Does shellac cover smoke smell?

A: Shellac does cover smoke smell. Shellac-based primers form a hard, quick-drying barrier that blocks nicotine, protein, and fire smoke from migrating through drywall, wood, and trim.

Q: Does shellac-based primer stink?

A: Shellac-based primer can stink while it’s wet. The primer’s alcohol solvent has a strong odor during application, but it dries fast; ventilate the area and use a mask to reduce exposure.

How to Repair Smoke Damaged Walls Successfully

0

Painting over smoke damage without the right prep work just traps the odor and brings the stains right back through. You need a specific sequence: vacuum loose soot with HEPA equipment, dry-clean with chemical sponges, wet-clean with TSP or degreaser, rinse and dry completely, seal with stain-blocking primer, then repaint. Skip a step or rush the drying time and you’re redoing it in six months. This guide walks you through the full process so the repair actually lasts.

Safety Precautions and Protective Equipment Setup

0CuBIRc9S7O2RkwNqHIXWg

Smoke damage isn’t just messy. It’s toxic. Burned materials, plastics, and household chemicals leave behind particles and carcinogens that you really don’t want in your lungs or on your skin.

You need an N95 or P100 respirator mask, not some flimsy dust mask from the hardware store clearance bin. Safety goggles protect your eyes from soot that’ll make them burn and tear up. Heavy-duty rubber gloves prevent your skin from absorbing toxic residue and getting chemical burns from soot acids. Long sleeves and closed-toe shoes minimize contact with contaminated surfaces.

Set up ventilation before you touch anything. Open every window and door in the affected space. Position box fans facing outward so they pull contaminated air out and bring fresh air in. Place HEPA filter air purifiers around the space to catch airborne particles that get stirred up during cleaning. Seal off doorways to unaffected areas with plastic sheeting and painter’s tape so you’re not spreading contamination throughout your entire home. Cover furniture, floors, and anything you’re not actively cleaning with drop cloths because disturbed soot settles everywhere.

Complete Wall Restoration Process: From Assessment to Painting

PF0ni9B3SxiefJQP9Jkd3Q

Smoke damage repair follows a specific sequence. Skip steps or do them out of order and you’ll either spread the damage or waste your time doing work that doesn’t last. The whole process typically takes 3 to 7 days depending on how bad things are and how thoroughly you complete each step.

Assess Damage Severity and Document Conditions

Start with a thorough visual inspection. Check for soot coverage, smoke stains, charring, discoloration, blistered or peeled paint, and wallpaper separating from the wall. Examine walls carefully for cracks, warping, or bulges that signal the structure itself got compromised. Use a moisture meter to detect hidden moisture trapped within walls from firefighting water, which leads to mold growth if you don’t address it.

Categorize what you’re dealing with. Light damage shows surface soot, wipeable stains, and intact paint that’s just discolored. Moderate damage means deep staining, yellowing that won’t wipe clean, and paint starting to separate. Heavy damage includes charring, heat discoloration that’s baked into the surface, and smoke penetration into the drywall itself.

Document everything with photos from multiple angles for insurance purposes. Check ceiling damage patterns because smoke rises and often causes worse damage overhead. Inspect HVAC vents for contamination since smoke travels through ductwork. Determine if walls can be restored or need replacement. When synthetic materials or chemicals were involved in the fire, professional assessment becomes critical because toxic residue requires specialized handling.

Vacuum Loose Soot with HEPA-Filtered Equipment

Use a vacuum with a HEPA filter held 1 to 2 inches above the wall surface. Never press the nozzle against the wall. Work top to bottom in overlapping vertical passes, moving slowly and methodically. Gentle suction removes loose ash particles and carbon deposits without smearing them deeper into the paint or drywall texture.

Don’t use a regular vacuum. It spreads microscopic particles through the exhaust and contaminates your entire home. This dry method must come before any wet cleaning to prevent soot from becoming permanent stains when moisture locks it in. Cover about 100 square feet at a time, emptying the vacuum frequently to maintain suction power.

Dry-Clean with Chemical Sponges

Apply chemical sponges in single-pass motions working top to bottom across the wall. These dry cleaning sponges made of vulcanized rubber lift soot through dry adhesion without water. Never scrub back and forth or use circular motions because this smears soot deeper into porous surfaces.

Use straight overlapping strokes, flipping the sponge to a clean side when one surface becomes saturated with soot. Replace sponges completely when both sides are saturated. Coverage expectation is one sponge handles 50 to 100 square feet depending on damage severity. This step removes surface soot that vacuuming missed and prepares the wall for wet cleaning without making things worse.

Wet-Clean with TSP Cleaner or Degreaser Solution

After dry cleaning removes loose material, address embedded stains with wet cleaning. Mix TSP cleaner at 1/4 cup per gallon of warm water for heavy smoke damage and nicotine stains that penetrated the paint. Apply with a soft sponge using a bottom-up technique in 3×3 foot sections to prevent streaking down the wall.

For lighter damage, use equal parts white vinegar and water that neutralizes odor while cleaning. For oily residue common after kitchen fires, use a commercial degreaser solution. For stubborn stains that won’t lift with liquid cleaners, create a baking soda paste with water and gently scrub with a soft brush.

Test all cleaning solutions on a small, hidden wall section first to prevent discoloration or paint damage you can’t reverse. Rinse each section with clean water before moving to the next area so cleaner doesn’t dry on the surface. Alternative cleaning solutions include pH-neutral enzyme cleaners, and choose products based on painted versus unpainted surfaces and ammonia-free formulas for sensitive areas.

Rinse and Dry Completely

Rinse cleaned walls with clean water using soft sponges, making multiple passes to remove all cleaner residue. Residue buildup interferes with primer adhesion and causes finish problems later. Avoid over-saturating drywall during rinsing because too much water damages the paper facing and gypsum core.

Towel-dry immediately after each section. Position fans for cross-ventilation and air circulation to accelerate drying time. Allow at least 24 hours drying time, extending to 48 or 72 hours in humid conditions or during damp weather. Use dehumidifiers in moisture-prone areas for mold prevention, especially in basements or rooms without windows.

After complete drying, lightly sand rough areas with 120-grit sandpaper to smooth the surface. Fill cracks or holes with patching compound, let it cure fully, then sand again after patching dries for a smooth finish. Remove all dust with microfiber cloths before priming. Complete drying before applying primer is critical to prevent mold growth and adhesion failure that leads to peeling paint.

Apply Stain-Blocking Primer

Use shellac-based primer for severe damage because it provides the best odor elimination and blocks nicotine stains most effectively. Oil-based primer offers excellent sealing for moderate damage. Water-based stain blocker works only for light damage with minimal penetration.

Work in 50 to 85°F temperature with low humidity for proper drying. Cut in edges with an angled brush around the ceiling line, baseboards, and corners first to create clean boundaries. Roll primer in a W-pattern for even coverage on main wall surfaces, which prevents roller marks and ensures consistent coating. Apply thin, even coats rather than one thick coat that takes forever to dry and may sag.

Allow proper curing time between coats, typically 2 to 4 hours but check manufacturer specifications because formulations vary. Apply at least 2 coats for moderate damage, 3 coats for heavy smoke penetration where staining goes deep. Test coverage by checking for bleed-through after drying. If you see yellowing or brown spots showing through, you need another coat.

Primer is the most critical step in the entire process. Skip it or use the wrong type and you’ll get stain bleed-through and recurring odors that ruin all your work. Total primer phase takes 1 to 2 days including drying time between coats.

Repaint with Interior Paint

After proper priming seals the damage, select appropriate paint for your finish. Latex paint offers ease of use and low odor for occupied homes. Oil-based paint provides better durability and washability in high-traffic areas. Choose your finish based on the room. Flat finish for low-traffic areas and ceilings where you don’t need washability, semi-gloss for kitchens and bathrooms where moisture resistance matters, satin for living spaces that balance appearance and cleanability.

Apply painter’s tape for edge protection along trim, ceiling lines, and baseboards to keep paint off surfaces you’re not refinishing. Use a W-pattern rolling technique with consistent pressure, maintaining a wet edge so sections blend seamlessly. Paint entire walls or rooms rather than spot-painting to ensure even finish and color matching. Trying to touch up just damaged areas creates obvious patches.

Apply at least 2 coats for full coverage that hides primer and provides uniform color. Allow 4 to 6 hours drying between coats for latex paint, 24 hours for oil-based formulas. Remove painter’s tape while the final coat is slightly tacky to prevent pulling up dried paint edges. Allow complete drying for 48 to 72 hours before final inspection and moving furniture back. Touch up any missed spots or thin areas with a small brush.

Each step builds on the previous one and shortcuts compromise your results. Following this complete sequence ensures both visual restoration and odor elimination instead of just covering up problems. Timeframe varies. 3 to 5 days for light damage in a single room, 5 to 7 days for moderate damage affecting multiple walls, 7+ days for heavy damage requiring multiple primer coats and extended drying. When damage is too severe with structural concerns, widespread charring, or persistent chemical smells, professional restoration becomes necessary because the work exceeds DIY capabilities and safety limits.

Essential Tools and Materials for Smoke Damaged Wall Repair

prHr3YbdQ-2IMoWPn_j7Ug

Having all materials ready before you start prevents workflow interruptions that extend your timeline and create uneven results. Specialized products designed for smoke damage deliver better results than trying to make household substitutes work.

Phase Required Items Purpose
Cleaning Phase HEPA vacuum, chemical sponges, microfiber cloths, spray bottles Soot removal and cleaning
Washing Phase TSP cleaner, degreaser solution, buckets, soft sponges Deep cleaning and residue removal
Preparation Phase Drop cloths, painter’s tape, sandpaper (120-grit), patching compound Surface prep and protection
Priming Phase Stain-blocking primer (shellac or oil-based), primer brushes, roller and tray Sealing and odor blocking
Painting Phase Interior paint (latex or oil-based), paint brushes, rollers, extension pole Final restoration

Estimated total cost for DIY materials runs $150 to $400 depending on room size and damage severity. Source specialized items like chemical sponges and shellac-based primers at hardware stores or restoration supply companies. Big box stores carry these products but selection varies by location. You’ll also need ladder safety equipment for ceiling work and overhead sections, including a stable step stool for areas within 8 feet and an extension ladder for higher walls. Make sure your ladder has non-slip feet and set it on stable, level ground.

Eliminating Smoke Odors and Deodorizing Methods

vnLmvKp3QL6nTiSrZoEyQA

Odor elimination requires a different approach than visual restoration because smell molecules penetrate porous materials beyond wall surfaces. Smoke odors travel through insulation, ductwork, carpeting, and anything fabric in the affected space.

Extended ventilation means continuous fresh air circulation for 5 to 7 days minimum with windows open and fans running to keep contaminated air moving out. Activated charcoal placement in bowls throughout affected rooms absorbs odor molecules from the air. Replace every 3 to 4 days as charcoal becomes saturated. White vinegar bowls as natural deodorizer help eliminate lingering smells. Change daily for best results. Commercial enzyme cleaners break down smoke molecules at the source rather than just masking odor. HEPA air purifiers running 24/7 during and after restoration capture airborne particles that carry smell. HVAC cleaning including air duct inspection and filter replacement prevents contaminated air from recirculating through your entire home.

Advanced methods handle persistent odors that basic approaches don’t eliminate. Thermal fogging uses heated deodorizing solution that penetrates surfaces the same way smoke did, neutralizing odor at the molecular level. Ozone treatment requires vacating your home and professional application because ozone is dangerous to breathe, but it breaks down odor molecules in places you can’t physically reach. These air treatments penetrate insulation, ductwork, and ventilation systems beyond surface-level restoration that only addresses what you can see and touch. Safety considerations for ozone mean you cannot be present during treatment and must air out the space thoroughly before reoccupying.

Recurring odors troubleshooting starts with identifying the source. If smell returns after you think you’ve eliminated it, the source may be in your HVAC system, inside wall cavities, or in areas you didn’t clean thoroughly. Timeline for odor dissipation with proper methods runs 2 to 4 weeks as trapped molecules gradually release and air out. When lingering smells persist beyond a month despite your best efforts, it signals need for professional intervention with industrial equipment you can’t rent or buy.

Handling Ceiling Damage and Specialized Wall Surfaces

9DnYvCZbQ7C1JtWHNxwPnQ

Standard drywall techniques don’t work for all surfaces you’ll encounter. Ceiling damage and specialty materials need adapted approaches that account for different absorption rates, textures, and structural properties.

Ceiling Damage Restoration

Overhead work requires proper ladder placement and extension poles for safe access without overreaching. Set your ladder at the correct angle and never stand on the top two rungs. Use extension poles for rolling to eliminate constant climbing and repositioning.

Ceilings require increased primer requirements compared to walls because gravity causes more stain bleed-through as molecules try to work their way through the coating. Plan on at least 3 coats of primer for ceiling smoke damage even when walls only need 2. Ceilings almost always require flat finish paint because any sheen highlights imperfections and looks wrong overhead.

Working overhead causes neck and shoulder fatigue quickly. Take breaks every 20 to 30 minutes to avoid strain injuries and maintain quality work. Rushing through ceiling work when you’re tired leads to drips, missed spots, and uneven coverage.

Brick, Concrete and Masonry Walls

Porous materials absorb smoke more deeply than sealed drywall surfaces because they have no protective coating to limit penetration. Soot and smoke particles soak into the material structure itself.

Use specialized masonry cleaners and adjust TSP dilution ratios for unsealed surfaces, typically 1/2 cup per gallon for heavy-duty cleaning on brick or concrete. Work in small sections because these surfaces absorb liquid quickly. Scrub with stiff nylon brushes rather than soft sponges because you need mechanical action to pull contamination from porous textures.

Seal surfaces after cleaning to prevent future absorption and make subsequent cleaning easier. Masonry sealers create a protective barrier without changing appearance. Texture matching isn’t an issue with brick or concrete, but color restoration is challenging because smoke often permanently stains light-colored masonry. Sometimes paint becomes the only solution for uniform appearance.

Wallpaper, Trim and Baseboards

Wallpaper removal becomes necessary after smoke damage because you cannot clean it adequately and it traps odors underneath. The paper absorbs smoke and holds smell even after wall cleaning. Strip all affected wallpaper, clean the wall underneath thoroughly, then decide whether to re-paper or paint.

Trim restoration and baseboard cleaning require detail work with small brushes and cotton swabs to get into grooves, corners, and decorative elements. Use the same cleaning sequence. Dry sponge first, then wet clean, then rinse. Decide whether trim should be removed, cleaned separately, then reinstalled versus cleaned in place. Removal allows more thorough cleaning but requires carpentry skills for proper reinstallation.

After trim cleaning, inspect caulk lines and paint for damage. Touch up caulk gaps with fresh sealant and paint edges where cleaning removed coating. Small detail work makes the difference between restoration that looks professional and work that looks patched together.

Professional Restoration Versus DIY Smoke Damage Repair

KkIn7UntSU2q0Pdt3d6pbg

Not all smoke damage is DIY-appropriate even if you have time and willingness. Proper assessment of what you’re facing determines the best approach for your situation and capabilities.

Scenario DIY Appropriate Professional Recommended
Single room, light soot Yes Not typically needed
Multiple rooms, moderate damage Possible with time/skill Faster, more thorough results
Structural concerns, heavy charring No Required for safety
Persistent odors after DIY attempts No Specialized equipment needed

Professional advantages include industrial equipment you can’t rent, thermal fogging capability, ozone treatment systems, and experience assessing structural integrity beyond surface appearance. Restoration companies coordinate both fire damage and water damage work comprehensively, addressing the mold growth that often follows firefighting efforts. They assist with insurance claim documentation by providing detailed reports and damage estimates that help you get proper compensation. Warranty considerations matter too. Professional work typically includes guarantees on odor elimination and finish quality. Emergency response capability means immediate stabilization to prevent damage from spreading while you wait to start repairs.

DIY cost estimation runs $200 to $500 for materials and supplies when you’re handling a single room with light to moderate damage. Professional cost estimation ranges from $2,000 to $10,000+ depending on extent including room count, damage severity, and total square footage affected. Timeframe expectations differ. DIY takes 5 to 10 days working part-time around your schedule, professional crews complete most jobs in 3 to 7 days working full-time with multiple technicians. When to call professionals immediately includes confirmed health hazards from materials that burned, compromised structure with sagging or unstable walls, smell of chemicals or plastics that indicates toxic residue, or synthetic material involvement that creates dangerous contamination beyond typical wood smoke.

Common Mistakes and Troubleshooting Smoke Wall Repair

oUAFN5tdTZecGE6ZcoDZVQ

Awareness of common mistakes saves time, money, and the frustration of redoing work that didn’t turn out right. Many failures stem from rushing the process instead of allowing proper time for each phase.

Starting wet cleaning before removing loose soot creates permanent smearing as moisture locks particles into the surface. Using regular household sponges instead of chemical sponges for dry cleaning smears rather than lifts soot. Scrubbing in circular motions instead of single-direction passes pushes contamination deeper into porous surfaces. Over-wetting walls during cleaning phase causes water damage and drywall deterioration that creates bigger problems than you started with. Skipping primer or using wrong primer type allows stains to bleed through and ruins your paint finish. Painting before complete drying traps moisture that causes adhesion failure, promotes mold growth, and leads to peeling. Spot-painting instead of full wall coverage creates obvious color and texture mismatch that looks unprofessional.

Troubleshooting guide for problems that appear after you think you’re done starts with identifying what went wrong. If yellowing walls appear after painting, your primer was insufficient or you used the wrong type for the severity of damage. If recurring odors persist after restoration is complete, the source may be in your HVAC system, trapped in insulation, or in areas that weren’t cleaned at all. If paint peels or bubbles within days or weeks, the surface wasn’t dry or wasn’t properly prepared before coating. Solutions for each scenario include adding additional primer coats using shellac-based formula, calling for professional odor treatment with equipment you don’t have access to, or stripping failed paint and restarting preparation from the beginning.

Final inspection checklist before you consider the job complete includes uniform color with no visible variation across surfaces, no visible stains bleeding through from underneath, no residual odor when you walk into the room, and smooth texture without rough patches or obvious repairs. Long-term maintenance means monitoring for any returning discoloration in the first 30 days as trapped contamination occasionally works its way back to the surface. A thorough quality check ensures lasting restoration instead of cosmetic cover-up that fails within months.

Final Words

Smoke damage repair is methodical work that rewards patience and proper sequencing. When you assess damage severity, remove soot carefully, clean with the right products, dry completely, prime with stain blockers, and repaint with quality materials, you’re rebuilding protection for your home.

The steps matter. Rushing through or skipping phases leads to stains bleeding back through and odors that won’t leave.

If you’re facing heavy damage, structural concerns, or persistent smells after your best efforts, that’s when professional restoration makes sense. We handle the sequence from stabilization through finish work so you get back to normal faster.

Your walls can look clean and feel safe again.

FAQ

Can I paint over smoke-damaged walls?

You can paint over smoke-damaged walls only after proper preparation, but you cannot skip the cleaning and priming steps. Painting directly over smoke damage causes stains to bleed through, odors to persist, and paint adhesion to fail completely within weeks.

What’s the best paint for smoke damage?

The best paint for smoke damage is applied after stain-blocking primer, not instead of it. Use latex paint for most interior walls or oil-based paint for high-durability needs, but the primer does the actual smoke-blocking work, not the topcoat.

Will Kilz cover smoke damage?

Kilz stain-blocking primer will cover smoke damage when you use their oil-based or shellac-based formulations, not their basic water-based versions. You still need to clean walls thoroughly before applying Kilz, then finish with two coats of interior paint for complete restoration.

Can smoke damage be repaired?

Smoke damage can be repaired through a complete sequence: vacuuming loose soot, dry-cleaning with chemical sponges, wet-washing with TSP cleaner, rinsing and drying completely, applying stain-blocking primer, and repainting. Light to moderate damage is DIY-repairable in 3-7 days.

Do I need to remove wallpaper before repairing smoke damage?

You need to remove wallpaper before repairing smoke damage because wallpaper traps smoke particles and odors that cannot be cleaned adequately. Smoke penetrates behind wallpaper into the adhesive layer, making proper restoration impossible without complete removal.

How long does it take for smoke odors to disappear after cleaning?

Smoke odors disappear 2-4 weeks after proper cleaning when you combine surface restoration with air treatment methods like activated charcoal, extended ventilation, and HEPA filtration. Persistent smells beyond four weeks indicate incomplete cleaning or hidden contamination requiring professional treatment.

Should I clean walls from top to bottom or bottom to top?

You should vacuum and dry-clean walls from top to bottom to prevent soot from falling onto cleaned areas, but wet-clean from bottom to top to prevent streaking. Rinse each section immediately after washing, then towel-dry before moving to the next area.

When should I hire professionals instead of doing DIY smoke damage repair?

You should hire professionals when facing structural damage like cracks or warping, widespread heavy charring, persistent chemical smells, or when DIY cleaning attempts fail to eliminate odors. Professional restoration becomes necessary for multi-room damage or when synthetic materials burned.

How many coats of primer do I need for smoke-damaged walls?

You need minimum 2 coats of stain-blocking primer for moderate smoke damage and 3 coats for heavy smoke penetration or nicotine staining. Test coverage after drying by checking for bleed-through, then add another coat if any discoloration shows through.

Can I use a regular vacuum to remove soot from walls?

You cannot use a regular vacuum to remove soot from walls because standard vacuums exhaust fine smoke particles back into the air through their filters. Use only HEPA-filter vacuums held 1-2 inches above wall surfaces without pressing against them.

What’s the difference between chemical sponges and regular cleaning sponges?

Chemical sponges differ from regular sponges because they’re made of vulcanized rubber that lifts soot through dry adhesion without water or chemicals. Regular sponges smear soot when used dry and require moisture that can damage walls before proper cleaning sequence.

Why does my paint keep peeling after repairing smoke damage?

Your paint keeps peeling after smoke damage repair because walls weren’t completely dry before priming, cleaning residue wasn’t fully rinsed, or you skipped proper surface preparation. Strip failed areas, allow 48-72 hours drying time, then restart from the preparation phase.

How to Document Property Damage for Insurance Claims

0

Think a few snapshots will make an insurance claim easy? Think again.
Insurance adjusters make decisions from what you show them, not what you remember.
This guide walks you through the fast, practical steps that matter: checking safety before you enter, taking wide and close photos and timestamped videos, making an itemized inventory of damaged drywall, floors, furniture, and electronics, collecting receipts and estimates, and logging every call with your insurer.
Follow these steps and you’ll build a clear, verifiable record that supports your claim.

Immediate Actions for Safely Documenting Damage

kF6LhjgdTCynrEPx9Hgqiw

First, make sure the building’s actually safe to enter. Look for visible cracks in walls or ceilings, sagging floors, exposed electrical wires, gas odors, or standing water near outlets. If you spot any of these, stay outside and call the fire department or your utility company.

If the structure looks stable, put on closed-toe boots, heavy gloves, long pants, and a dust mask or respirator if there’s dust or mold around. Bring a flashlight even during daylight because power might be out or unsafe.

Once you’ve confirmed it’s safe to enter, start documenting damage right away. Delays make it harder to prove what happened and when. Insurers want evidence captured before cleanup, repairs, or weather changes.

  1. Turn off the main water supply if pipes are broken or leaking.
  2. Photograph every hazard you see before touching or moving anything.
  3. Take wide shots of each room and the building exterior from all four sides.
  4. Record a slow video walkthrough, narrating what you see and where you’re standing.
  5. Enable timestamp functions on your phone camera or download a timestamp camera app.
  6. If you must move debris to prevent injury or stop active leaks, photograph its original position first.

Effective Photo and Video Techniques for Insurance Documentation

cK0eftWoQBmwS5ga7HKaEA

Take both overview shots and close-ups. Wide shots show the full scope of the loss. Close-ups prove the severity. Shoot every damaged area from at least three angles so the adjuster can see depth, scale, and context.

Use natural daylight when possible. Open curtains and blinds. If the power’s out or rooms are dark, use a bright flashlight or a phone flashlight aimed at the damage, not straight into the camera. Blurry or shadowed photos reduce claim value because adjusters can’t confirm details.

Always keep your phone’s date and time stamp turned on. If your default camera app doesn’t embed visible timestamps, download a free timestamp camera app. Save all original image files without filters, cropping, or edits. Back up photos and videos to cloud storage the same day you take them in case your phone gets lost or damaged.

Photograph all four exterior walls, the roof (from the ground or a drone if safe), and any broken windows, doors, or siding. Take close-up shots with a tape measure or ruler in the frame to show the size of cracks, holes, or water stains. Capture damage to floors, walls, ceilings, cabinetry, appliances, furniture, electronics, and personal belongings.

Record a continuous video walkthrough of every room, moving slowly and adding verbal notes about what was damaged and when. Save security camera or doorbell camera footage that captured the storm, fire, or break-in. Photograph undamaged adjacent areas for comparison. Use your phone’s panorama mode for large rooms or long stretches of fence or roofline.

Creating a Detailed Inventory of Damaged Items

O9Bmh8m2SaigXow5rWuk_g

List every item that was destroyed, broken, or stained. Start with the big things like appliances, furniture, and electronics. Then add clothing, kitchenware, tools, and personal items. Even small losses add up, and insurers won’t reimburse what you don’t report.

For each item, write down the brand, model number, serial number if visible, approximate purchase date, and what you paid or what it would cost to replace today. If you kept receipts, include those. If not, check email confirmations, credit card statements, or warranty paperwork. When proof’s missing, write your best estimate and note that it’s an approximation.

Separate structural damage from personal property. Roof shingles, drywall, flooring, trim, and windows belong in the building category. Furniture, clothes, and electronics are contents. Use a spreadsheet or a notebook with one item per row so you can update values and add photos as you go.

Item Description Estimated Value Proof
Refrigerator Samsung stainless steel, purchased 2021 $1,800 Receipt and photo of model tag
Living room sofa Gray sectional, fabric, bought from local store 2019 $1,200 Credit card statement, no receipt
Laptop computer Dell Inspiron 15, serial number ABC123XYZ $650 Email confirmation from Dell.com
Bedroom carpet Beige plush, installed 2018, 12 × 15 feet $900 Contractor invoice for installation

How to Describe Damage Clearly and Accurately

rWS8QVyqTZOAmD3Q0yZ-Hw

Use specific measurements and locations instead of general terms. Say “six-inch crack running vertically down the east wall of the master bedroom” instead of “wall is cracked.” Insurers can’t estimate repair costs from vague descriptions.

Note the material and condition before the loss when you can. For example, “water stained and warped the oak hardwood flooring in the hallway, which was in good condition before the pipe burst.” This helps prove the damage was sudden and recent, not wear and tear.

Avoid emotional language. Don’t write “the kitchen is destroyed” or “everything is ruined.” Instead, write “all lower cabinets are water damaged and doors won’t close” or “ceiling drywall collapsed in a four-foot section above the stove.” Objective descriptions carry more weight with adjusters and prevent disputes over what actually happened.

Collecting Receipts, Estimates, and Supporting Documents

211Gfa7tR9CjP4IKJ8HxbA

Gather proof of ownership and value for damaged items. Pull receipts, order confirmations, credit card statements, product manuals, and warranty cards. If you registered appliances or electronics online, log in and download your account history.

Get written repair estimates from licensed contractors. Most insurers require at least one estimate, and some request two or three for comparison. Keep copies of every bid and highlight line items that match your damage photos.

Store all paperwork in one dedicated folder, both digital and physical. Scan paper receipts and save PDFs with clear file names like “2025-03-living-room-floor-estimate.pdf” so you can find them quickly when the adjuster asks.

Receipts for emergency repairs, tarps, boarding materials, or pump rentals. Contractor estimates and invoices for permanent repairs. Appliance manuals and warranty documents showing model numbers and purchase dates. Tax returns or depreciation schedules if the damaged property’s part of a rental or business. Service records for HVAC, roofing, or plumbing if the damaged system was recently maintained.

Communicating with Your Insurance Company

ydTY9G5rS0SZjBgK2AXLfg

Call your insurer as soon as it’s safe to do so. Most policies require “prompt” notice, which usually means within a few days. Provide the date and time of the loss, a brief description of what happened, and your contact information. Ask for a claim number and write it down.

Keep a log of every conversation. Note the date, time, the name of the person you spoke with, and a one-sentence summary of what was discussed. Save all emails and text messages in a dedicated folder. If your insurer makes a request over the phone, follow up with an email repeating the request and asking for written confirmation.

Submit your documentation package as soon as you have photos, videos, an inventory, and at least one contractor estimate. Don’t wait for perfection. You can supplement the file later if you discover hidden damage or find additional receipts.

Preparing for the Adjuster Visit

Have your photos, videos, inventory list, and receipts printed or ready on your phone or tablet before the adjuster arrives. Walk them through each damaged area slowly and point out details they might miss, like water stains on subfloors or cracks behind furniture.

Ask the adjuster to explain their process and timeline. Find out when you’ll receive their estimate, how to submit supplemental documentation, and who to contact if you disagree with their findings. Take notes during the visit and ask for a copy of their inspection report and photos.

Don’t agree to a settlement on the spot. Review the adjuster’s estimate carefully, compare it with your contractor bids, and consult a public adjuster or attorney if the numbers are far apart or if the insurer denies coverage for items you documented.

Timelines for Documenting, Filing, and Updating Your Claim

GZj3cXVySM6b5rM6gkETeA

Document damage within 24 to 48 hours whenever safely possible. Early photos show conditions before rain, wind, or temperature changes cause secondary damage. Waiting too long makes it harder to prove what the original event caused.

File your claim within days of the loss. Check your policy for specific deadlines, but assume you have less time than you think. Coastal wind policies and flood insurance often impose strict reporting windows, sometimes as short as a few weeks.

You can update your claim as you discover new damage. Hidden moisture, mold growth, and structural issues often appear days or weeks later. Photograph the new findings, document when you first noticed them, and submit a supplemental claim in writing with photos and a contractor’s assessment. Keep a timeline of discovery dates to show the loss wasn’t immediate but developed over time.

  1. Day 1: Ensure safety, take initial photos and video, enable timestamps.
  2. Days 2 to 3: Create inventory, collect receipts, call insurer to open claim.
  3. Week 1: Obtain contractor estimates, organize documentation, submit claim package.
  4. Week 2 to 4: Schedule and complete adjuster visit, review their estimate, request written clarifications.
  5. Ongoing: Monitor for hidden damage, supplement claim as needed, keep communication log updated.

Common Documentation Mistakes to Avoid

GzA2GiTdToKMOdB8hdGYTg

Missing the first 48 hours is the most common reason claims get denied or reduced. Damage changes quickly. Water evaporates, debris shifts, and weather can worsen or mask the original loss. Photograph everything as soon as you safely enter the property.

Cleaning up before the adjuster inspects invites disputes. Insurers want to see the damage in place. If you must remove debris for safety, photograph its original location and explain in writing why you moved it and when.

Failing to document hidden damage costs homeowners thousands. Water behind walls, under floors, and in attics often goes unnoticed until mold or rot appears. Use a moisture meter or hire a restoration company to scan for moisture and photograph the readings.

Taking only wide shots without close-ups, or only close-ups without context. Deleting or editing photos, or failing to back them up before your phone breaks. Not enabling timestamps or losing metadata when transferring files. Throwing away damaged items before the adjuster sees them. Relying on verbal conversations instead of keeping written records of all requests and agreements. Submitting incomplete inventories or skipping receipts because you assume the insurer won’t pay.

Final Words

Act fast: make sure everyone is safe, stop ongoing leaks or hazards, and photograph conditions before cleanup.

Then use clear photos and walk‑through video, build a room-by-room inventory with values and proof, and write short, exact descriptions. Gather receipts and contractor estimates and log every contact with your insurer.

Stick to the claim timeline and avoid common mistakes like tidying too soon.

Doing these steps for how to document property damage for insurance gives your claim the best chance and helps get repairs moving.

FAQ

Q: How to write a damage report for insurance?

A: A damage report for insurance should state what happened, list rooms and items affected with measurements, note visible conditions, and attach time-stamped photos, receipts, and contractor estimates for clear proof.

Q: What not to say to the insurance adjuster?

A: You should avoid admitting fault, guessing causes, minimizing damage, or agreeing to repairs before the adjuster inspects; stick to clear facts, photos, and documentation instead.

Q: What is an example of property damage coverage?

A: Property damage coverage commonly pays for physical losses like water from a burst pipe that soaks floors and drywall, fire damage to structure and contents, or storm damage to a roof and siding.

Q: How long do I have to file an insurance claim for property damage?

A: The time to file a claim varies by policy and state, often 30 to 120 days; report damage as soon as possible and check your policy or call your insurer for the exact deadline.

How to Seal In Cigarette Smoke Smell That Works

0

Sealing cigarette smoke smell without cleaning first is like putting a lid on a garbage can that’s still full. You’re just trapping the problem, not fixing it. Most people skip the surface prep step, roll on a coat of primer, and wonder why the smell comes back two weeks later. Here’s the truth: nicotine, tar, and resin have to come off before any sealer can work. If you want the odor gone for good, you need the right products, proper ventilation, and a plan that treats more than just your walls.

Priority Action Guide for Sealing Cigarette Smoke Odor

rKqTEH5ZRKWF2Y-ZydJ-4Q

If you’re staring at yellowed walls and breathing that stale tobacco smell, you need a clear plan that actually works. Here’s what to do first:

  1. Clean all surfaces with TSP solution before you apply any sealer. Nicotine, tar, and resin have to come off or the primer won’t stick.
  2. Pick the right primer based on how bad things are. Light staining needs different products than heavy buildup.
  3. Apply multiple thin coats with windows open and a respirator on. One coat rarely seals cigarette smoke completely.
  4. Deal with your HVAC system and all soft surfaces like carpet and furniture. Walls alone won’t solve the problem if smoke is trapped everywhere else.

Shellac Based Primers for Maximum Odor Control

Shellac primers like Zinsser B.I.N are the most effective option for blocking smoke odor and nicotine discoloration. They lock in tar buildup and resin deposits better than anything else. You’ll find B.I.N at most hardware stores for around $35 to $45 per gallon, and it covers about 400 square feet per coat.

Shellac based sealers dry fast, usually within an hour, and create a hard barrier that locks in the smell. If you’ve got heavy contamination, this is your best starting point. The downside? Strong alcohol smell during application, but it fades quickly once it dries.

Oil Based Primers for Heavy Stain Blocking

Oil based primers like Zinsser Cover Stain work well when you’re dealing with severe surface discoloration. They lock in yellowing stains and provide solid coverage over nicotine buildup. You’ll need good cross ventilation and a respirator rated for organic vapors because oil based products produce a heavier scent than shellac.

Use this option when contamination is thick and you need strong stain blocking. Oil based primers take longer to dry, typically four to six hours between coats, and they require mineral spirits for cleanup.

Specialty Water Based Smoke Sealers

Water based alternatives like Ultra Recon Smoke and Odor Sealer are designed specifically for tobacco smoke. They’re low VOC, easier to clean up with soap and water, and produce less smell during application. These work best for moderate contamination, not heavy buildup.

Standard water based primers won’t seal nicotine effectively. You need a specialty formula that’s engineered for smoke and odor encapsulation. Water based sealers dry quickly and allow for same day recoating, making them a good choice if you’re sensitive to solvent fumes.

Sealing products create a barrier that prevents smoke penetration and stops the lingering smell from continuing to off gas into your rooms. Multiple coats ensure permanent odor elimination rather than temporary masking, which is why primer paint and stain blocking matter more than just covering it with regular paint.

Complete Surface Preparation and Pre Treatment Process

UbgDxEXNTXacOffQuI-vVg

Proper surface preparation determines whether your sealing effort works or fails. If you skip cleaning and go straight to primer, you’re sealing nicotine residue, tar buildup, and resin deposits right into the wall. That means poor adhesion and persistent odor.

Nicotine leaves a sticky film on walls, ceilings, cabinets, and every hard surface in the house. Tar buildup creates dark spots and yellowing stains. Resin deposits settle into texture and corners. All of this has to come off before you apply any sealer.

You’ve got two cleaning paths. TSP (trisodium phosphate) is a chemical degreasing solution that cuts through heavy contamination fast. Mix it according to package directions, usually about half a cup per gallon of warm water. For moderate residue or if you prefer something gentler, use a vinegar solution. One part white vinegar mixed with one part water.

Test any cleaning product on a concealed area first. Vinegar can sometimes affect certain paint finishes or wallpaper, and you don’t want to find that out after you’ve treated an entire wall. Wait 24 hours and check for damage or fading before you continue.

Complete pre treatment process:

  1. Start with a dry cleaning sponge on heavy buildup areas. These sponges are designed to lift soot and sticky residue without water. Wipe in one direction, don’t scrub in circles.
  2. Mix your TSP solution at half a cup per gallon of warm water, or prepare your vinegar water mix at a 1:1 ratio in a spray bottle.
  3. Wipe down all walls, ceilings, and hard surfaces using a sponge or cloth dipped in your cleaning solution. Work from top to bottom so dirty runoff doesn’t streak cleaned areas.
  4. Clean glass, mirrors, and metal fixtures with straight vinegar, then rinse with clean water to prevent streaking.
  5. Treat curtains, shades, wall hangings, and light fixtures with your chosen solution. Remove light bulbs and wipe them separately.
  6. Let everything dry completely. This usually takes 24 hours in well ventilated spaces. Wet surfaces won’t accept primer properly.
  7. Inspect for remaining residue. Run your hand across the wall. If it feels sticky or leaves a yellowish film on your fingers, clean it again.

Step by Step Process for Applying Smoke Sealing Primer

17C9iOysRVKm1tI3MDzH7g

Proper application technique ensures complete coverage and prevents odor breakthrough. Rolling primer onto walls promotes maximum adhesion to the cleaned surface and creates an even seal. If you miss spots or apply primer too thin, cigarette smoke smell will keep pushing through.

Ventilation during application protects your health and helps the primer cure correctly. Open all windows, set up box fans pointing outward, and wear a respirator rated for organic vapors, especially with oil based or shellac based products. Don’t rely on a dust mask. It won’t filter the fumes.

Complete application process:

  1. Prepare the room by removing furniture, covering floors with drop cloths, and taping off trim and fixtures you don’t want to seal.
  2. Set up protective equipment including respirator, safety glasses, and gloves. Have soap and water ready for water based products, mineral spirits for oil based.
  3. Stir your primer thoroughly but don’t shake it. Shaking creates bubbles that leave weak spots in the seal.
  4. Apply the first coat with a roller using a three eighths inch nap for smooth walls, half inch nap for textured surfaces. Work in three foot sections, rolling in a W pattern, then filling in.
  5. Let the first coat dry completely. Shellac primers dry in about an hour, oil based in four to six hours. Check the can for specific drying times.
  6. Apply the second coat using the same technique. Multiple coats are usually needed depending on how bad the nicotine buildup is. If you still see yellowing or smell odor after the second coat dries, apply a third.
  7. Allow final curing before applying topcoat paint. This usually takes 24 hours for shellac, up to 48 hours for oil based primers.

Comprehensive Treatment for Carpets, Upholstery, and Fabric Surfaces

G3FjlByBRf6MxJFsm-raTg

Porous surfaces like carpet and upholstery absorb significant amounts of tobacco smoke. Sealing your walls won’t solve the problem if smoke smell is still trapped in furniture, rugs, and fabric items. These surfaces need dedicated treatment that goes beyond wall sealing.

Baking soda pulls moisture and odor out of fabric fibers. Sprinkle a heavy layer over carpets, rugs, and upholstery, then leave it overnight at minimum. For heavily saturated items, let it sit for several days. The longer it stays, the more smell it absorbs. Vacuum thoroughly when you’re done, using slow passes to pick up all the powder.

Curtains, shades, and fabric fixtures need washing or spot treatment. Use a vinegar or baking soda solution in a spray bottle for items you can’t remove and wash. For washable curtains, add half a cup of white vinegar to the rinse cycle instead of fabric softener. The vinegar smell fades as it dries, taking the smoke odor with it.

Wall to wall carpet that’s been exposed to years of cigarette smoke may require professional cleaning or complete replacement. Professional services use hot water extraction and specialized deodorizers that penetrate deeper than home equipment. If carpet padding underneath is saturated, replacement is usually the only option that works. No amount of surface cleaning will eliminate odor that’s trapped in the pad.

Addressing Ventilation Systems and HVAC Ducts

lkXo2hkMQMOHIGi08tGyow

Cigarette smoke doesn’t stay in one room. It circulates through your entire house via the ventilation system, settling in ducts, filters, and exhaust fans. You can seal every wall perfectly, but if contaminated air keeps cycling through vents, the smell comes right back.

Addressing the ventilation system is part of a comprehensive sealing strategy, not optional. Smoke residue coats the inside of ductwork and builds up on filter screens. Every time your heating or cooling system runs, it pushes that contamination back into your clean spaces.

Charcoal containing filters are designed for odor removal and help trap smoke particles. Install them as soon as you start cleaning, and change them every 30 days until the smell is gone. After that, maintain a regular replacement schedule.

HVAC system treatment steps:

  • Inspect all duct openings for visible buildup and dark residue around registers
  • Hire a professional duct cleaning service to remove contamination from inside the ductwork using specialized equipment
  • Replace all air filters with odor removing filters that contain activated charcoal
  • Clean exhaust fans in bathrooms and kitchens, removing covers and wiping blades and housing
  • Set an ongoing maintenance schedule for filter changes every 30 to 90 days depending on contamination levels

Additional Surfaces That Require Smoke Odor Sealing

L0o1rhiKRte9G6Jaad-MKA

Tobacco smoke penetrates baseboards, trim, door surfaces, and window frames, causing yellowing stains that show up even after you’ve sealed the walls. These surfaces accumulate nicotine and tar just like drywall does, and they’ll continue releasing odor if you don’t treat them.

Hardwood surfaces need cleaning with a degreasing solution before sealing. Kitchen cabinets, hardwood floors, and wood trim should be wiped down with TSP or vinegar solution, then sealed with the same primer you’re using on walls. For finished hardwood floors that can’t be painted, professional refinishing may be necessary if smoke has penetrated the finish. Ceiling tiles in drop ceilings absorb smoke and rarely clean well enough to eliminate odor. Replacement is usually faster and more effective than trying to seal them.

Comprehensive sealing addresses all exposed surfaces, not just the obvious ones. Door frames, closet interiors, shelving, and even the backs of cabinet doors need attention. If smoke was present in the house, it touched everything. Missing one contaminated surface means the smell will keep spreading from that spot into your cleaned areas.

Air Purification Methods to Support Smoke Smell Containment

Go7Iaak_T8-P4ph8JIsqvw

Air purification complements surface sealing by addressing airborne particles and third hand smoke that’s still circulating after cleaning. Even after you’ve sealed walls and treated fabrics, microscopic smoke particles can stay suspended in the air for weeks.

HEPA filters trap particles as small as 0.3 microns, which includes most tobacco smoke components. Activated charcoal works differently by adsorbing odor molecules through a chemical process. Industrial grade air purifiers combine both technologies for maximum effectiveness.

Opening windows dilutes the odor but doesn’t eliminate it. Ventilation helps during the cleaning and sealing process by moving contaminated air out, but fresh air circulation alone won’t remove the smoke that’s embedded in surfaces. You need active purification that filters and neutralizes rather than just dilutes.

For persistent odor situations after you’ve completed sealing work, run an industrial grade air purifier continuously for two to four weeks. Position it centrally in the most affected room and keep interior doors open so air circulates throughout the space. Replace or clean the filters according to manufacturer instructions, usually every 30 days during heavy use.

Safety Precautions When Sealing Cigarette Smoke Damage

qij70GoFR5Kgnda5tocbxw

Primer application, especially with oil based and shellac products, requires respirator masks rated for organic vapors, not basic dust masks. The fumes from these sealers can cause headaches, dizziness, and respiratory irritation if you don’t protect yourself properly. Wear safety glasses and nitrile gloves throughout the application process.

Proper ventilation during application and the curing process protects your health and helps primers dry correctly. Open all windows and doors, position box fans to pull air out of the work area, and don’t work in sealed rooms. If you feel lightheaded or develop a headache, leave the area immediately and get fresh air. Oil based primers produce heavier scent and require more ventilation time than water based alternatives, sometimes needing 48 hours of continuous airflow.

Safe disposal of materials contaminated with nicotine residue follows local hazardous waste guidelines. Used rags soaked in oil based primer can spontaneously combust if left bunched up. Lay them flat outside to dry completely before disposal, or store them in a sealed metal container filled with water. Empty primer cans and cleaning solution waste should go to your local household hazardous waste facility, not regular trash.

Cost Considerations and Project Timeline for Smoke Sealing

Wo3L9LlyQp6SSu4B706rUA

Product costs for a typical 12×12 room with 8 foot ceilings run about $150 to $300 for DIY sealing, including primer, cleaning supplies, brushes, rollers, and protective equipment. Shellac primers are widely affordable at $35 to $45 per gallon, oil based primers cost similar amounts, and specialty water based smoke sealers run slightly higher at $45 to $60 per gallon.

A DIY approach timeline for that same room takes three to five days: one day for cleaning, 24 hours for drying, one day for first primer coat, one day for second coat, and final cure time before painting. Professional remediation services complete the work faster using specialized equipment but cost significantly more.

Factors that affect project scope and budget include room size, how bad the nicotine buildup is, and what types of surfaces you’re sealing. Heavy contamination requires more cleaning solution, additional primer coats, and possibly professional duct cleaning. Wall to wall carpet replacement adds substantial cost if padding is saturated. Houses with cathedral ceilings or multiple stories need scaffolding or lift equipment that increases both cost and timeline.

Task DIY Cost Range Professional Cost Range Typical Timeline
Wall and ceiling sealing (single room) $150 – $300 $600 – $1,200 3-5 days DIY, 1-2 days professional
HVAC duct cleaning (whole house) Not recommended DIY $400 – $800 4-6 hours
Carpet deep cleaning or replacement $50 – $200 (cleaning only) $300 – $600 cleaning, $2,000 – $5,000 replacement 1 day cleaning, 2-3 days replacement
Ozone treatment or thermal fogging Not available DIY $500 – $1,500 1 day treatment plus 24-48 hour ventilation

Rental Property and Real Estate Applications for Smoke Sealing

dJ3fKi7KRqehNJMqhQGoEA

Smoking inside a house can reduce resale value by up to 29 percent according to studies. That’s a massive financial hit for landlords and sellers dealing with tenant damage or inherited smoke contamination. Buyers walk away from properties that smell like stale cigarettes, even if the price drops.

Landlords face obligations for tenant damage repair and restoration between occupancies. Security deposits rarely cover the full cost of smoke sealing, carpet replacement, and duct cleaning. Proper sealing and restoration protects your investment and makes the property rentable again without absorbing months of lost income.

Disclosure requirements for real estate transactions vary by state, but most require sellers to reveal known smoke damage history. Trying to cover it up with air fresheners or quick paint jobs creates legal liability. Professional fire and smoke damage restoration services document the work properly for disclosure purposes.

Third hand smoke pollutants remain in homes two months after smokers move out, even after deep cleaning and ventilation. That’s why surface sealing matters so much for real estate applications. Proper painting with correct sealing products resolves both discoloration and odor issues when preparing homes for sale or after purchase, protecting buyers from ongoing contamination.

Advanced Techniques: Ozone Treatment and Thermal Fogging

Ozone treatment works as an oxidation process that breaks down smoke molecules at the molecular level. Commercial ozone generators produce O3 gas that reacts with nicotine, tar, and odor compounds, neutralizing them chemically. This isn’t something you spray on surfaces. It’s an atmospheric treatment that penetrates everywhere air reaches.

Thermal fogging technology pushes deodorizing agents deep into porous surfaces using heat and pressure. The fog particles are microscopic, small enough to follow the same paths smoke took when it originally contaminated the space. This reaches areas that cleaning and sealing can’t access, like inside wall cavities and under flooring.

Advanced techniques become necessary when severe contamination persists after standard sealing work. If you’ve cleaned thoroughly, applied multiple primer coats, treated all soft surfaces, and the smell still returns, professional remediation with specialized equipment is your next step. These aren’t DIY methods. The equipment costs thousands of dollars and requires training to operate safely.

Ozone treatment and thermal fogging require professional application and strict safety protocols. Ozone is harmful to breathe at treatment concentrations. The space must be completely evacuated, including pets and plants, during treatment and ventilation periods. Professional restoration companies handle the process correctly and verify safe re entry before you return.

Long Term Maintenance After Sealing Smoke Odor

Install new HVAC filters immediately after completing sealing work, and change them every 30 days for the first three months. After that, maintain a 60 to 90 day replacement schedule. Regular filter changes prevent any remaining airborne particles from recirculating and recontaminating your sealed surfaces.

Test for odor breakthrough by closing up the house for 24 hours with windows shut and HVAC off, then entering and checking for smell. Do this one week after sealing, then again at 30 days. If you detect odor returning, identify the source and apply touch up sealing to that area. Sometimes corners, closets, or less visible surfaces get missed during initial treatment.

Prevention tips for maintaining fresh air quality include running bathroom and kitchen exhaust fans during cooking and showering to remove moisture that can reactivate any remaining trace contaminants. Keep humidity levels below 50 percent using a dehumidifier if necessary. Avoid scented products and air fresheners during the first month after sealing so you can accurately detect any odor breakthrough. The smell will dissipate over time as sealed surfaces fully cure, but it requires active removal of the odor source first, not just masking.

Final Words

Sealing cigarette smoke smell requires a complete approach that starts with thorough surface cleaning and follows with the right primer for your situation.

Shellac-based products offer the strongest odor control. Oil-based primers handle heavy staining. Water-based alternatives work for lighter contamination.

Don’t forget the soft surfaces, HVAC system, and all the trim work that holds onto residue.

When you seal it right with proper prep and multiple coats, you’re creating a permanent barrier that stops the smell from coming back through your walls.

The work takes time, but it gets your space back to normal.

FAQ

What neutralizes cigarette smoke odor?

Cigarette smoke odor is neutralized by shellac-based primers, oil-based primers, or specialty water-based smoke sealers that encapsulate nicotine residue and tar buildup. These products create a barrier that prevents smoke particles from off-gassing. Pre-cleaning surfaces with TSP solution or vinegar-water mixture removes surface contamination before sealing.

What materials absorb cigarette smells?

Materials that absorb cigarette smells include porous surfaces like carpet, upholstery, curtains, drywall, and unsealed wood. Baking soda applied to fabrics and carpets absorbs smoke odor when left overnight or for several days before vacuuming. Activated charcoal in air purifiers and HEPA filters also capture airborne smoke particles and lingering smell.

How do you stop cigarette smoke from coming through walls?

You stop cigarette smoke from coming through walls by cleaning surfaces with TSP solution, then applying multiple coats of shellac-based or oil-based primer to seal nicotine residue. The primer creates a barrier preventing smoke penetration and tar buildup from continuing to off-gas. Proper ventilation during application and addressing HVAC ducts prevents smoke recirculation.

Will cigarette smoke smell eventually go away?

Cigarette smoke smell will not go away on its own without active treatment. Opening windows dilutes odor temporarily but doesn’t remove embedded nicotine, tar, and resin deposits from walls, carpet, and ventilation systems. Proper sealing with primer and treatment of soft surfaces provides permanent odor elimination rather than temporary masking.

How long does it take to seal cigarette smoke odor?

Sealing cigarette smoke odor typically takes two to five days for a complete treatment, including surface cleaning, primer drying time between coats, and final curing. Heavy contamination requiring multiple primer coats, carpet treatment, and HVAC cleaning may extend the timeline. Professional remediation services can complete projects faster using specialized equipment.

Can you seal smoke smell without replacing carpet?

You can seal smoke smell without replacing carpet by treating it with baking soda left for several days, then vacuuming thoroughly, followed by professional deep cleaning. Wall-to-wall carpet heavily saturated with smoke may require replacement if baking soda treatment and professional cleaning don’t eliminate the persistent odor completely.

Do you need to clean walls before sealing smoke odor?

You need to clean walls before sealing smoke odor because nicotine residue, tar buildup, and resin deposits prevent proper primer adhesion and can cause sealer failure. Use a dry cleaning sponge for heavy buildup followed by TSP wash or vinegar-water solution. Skipping pre-cleaning steps results in persistent odor and wasted sealing effort.

What type of primer works best for cigarette smoke?

Shellac-based primers like Zinsser B-I-N work best for cigarette smoke because they provide superior encapsulation of nicotine residue and tar buildup. Oil-based primers handle heavy stain blocking but require respirator use and strong ventilation. Specialty water-based smoke sealers offer low-VOC alternatives for moderate contamination situations.

Black Mold vs Regular Mold: Key Safety Differences

0

Is black mold really more dangerous than the dark spots on your shower tile?
Here’s the short answer: black mold (Stachybotrys chartarum, a species tied to chronic damp) often points to ongoing water damage and can produce mycotoxins in the right conditions.
Regular mold is a catch-all for many species that usually cause allergies and material decay but can still trigger health problems.
This post cuts through the fear and shows the real safety differences, where each grows, how to tell them apart visually and with testing, and when you need a pro to inspect and repair.

Immediate Differences Homeowners Must Know About Black Mold vs Other Mold Types

PndHRS8ISqqGAKzKL_1-OA

Black mold usually means Stachybotrys chartarum, a specific species that shows up dark greenish-black and often feels slimy or wet when you touch it. Regular mold is just a catch-all term for hundreds of common indoor species like Cladosporium, Penicillium, Aspergillus, and Alternaria. These can look green, brown, gray, white, or even black. The texture? Usually fuzzy, velvety, or powdery instead of slick.

Here’s the big habitat difference. Black mold loves areas with serious, ongoing water damage and extreme dampness. We’re talking behind drywall, in crawl spaces, under subfloors, near leaks that never got fixed. Regular mold pops up in everyday damp spots: bathroom tile, kitchen sinks, basement corners, attic insulation where condensation or humidity builds up. Both need moisture to survive, but black mold tells you there’s a worse water problem lurking.

You can’t judge toxicity by color. Stachybotrys chartarum can produce mycotoxins under the right conditions, sure. But other molds (including some that look harmless or show up in lighter colors) can also release allergens and irritants that trigger respiratory symptoms, skin reactions, and headaches. Lab testing is the only way to confirm species and figure out the actual health risk.

Feature Black Mold (Stachybotrys chartarum) Regular Mold (Common Types)
Color Dark greenish-black Green, brown, gray, white, or black
Texture Slimy, wet-looking Fuzzy, powdery, velvety
Typical Locations Behind walls, crawl spaces, chronic water damage areas Bathrooms, kitchens, basements, attics
Toxicity Likelihood Can produce mycotoxins in specific conditions Generally allergens/irritants; some species produce mycotoxins

How to Perform a Practical Visual Inspection for Mold in Your Home

68KiqZMlRLWDIsYWaSjJ5Q

Start in rooms where water is or was present. Look for visible water stains, warped baseboards, bubbling paint, peeling wallpaper, soft or spongy drywall, anything that feels damp. Check behind furniture, inside cabinets under sinks, around windows where condensation gathers, near HVAC vents, along exterior walls where cold surfaces meet warm indoor air. A strong musty or earthy smell is often your first clue that mold’s growing somewhere nearby, even if you can’t see it yet.

Examine high-risk materials closely. Drywall paper, ceiling tiles, cardboard boxes in storage, wood trim, any porous surfaces that have been wet for more than a day or two. Use a flashlight to inspect dark corners, the underside of sinks, areas around toilets and tubs. If you find discoloration, photograph it. Note the texture, moisture level, any odor.

Six warning signs that indicate you need professional testing:

  • Dark greenish-black patches that feel slimy or wet
  • Mold covering more than about 10 square feet of surface area
  • Recurring growth in the same spot even after cleaning
  • Mold appearing after flooding, roof leaks, or plumbing failures
  • Strong musty odor with no visible source
  • Household members experiencing persistent respiratory symptoms, headaches, or skin irritation that improve when away from the home

Why Color Alone Is Not Enough

Many harmless mold species can appear black or very dark. Some dangerous species can start out lighter in color before maturing. Visual inspection tells you mold is present and helps you estimate the affected area, but it can’t tell you the species or whether mycotoxins are being produced. Lab analysis of air samples, surface swabs, or bulk material is the only reliable way to confirm Stachybotrys chartarum or other high-risk species and guide remediation decisions.

Toxicity and Health Risks: Black Mold vs Other Indoor Molds

BJWbGJP5RBaDPJ_gjSnYjw

Black mold has earned its reputation because Stachybotrys chartarum can produce mycotoxins. These are chemical compounds that may cause more severe health effects than the allergens released by most regular molds. Symptoms reported in connection with black mold exposure include persistent respiratory irritation, chronic sinus infections, severe headaches, extreme fatigue, difficulty concentrating, and worsening asthma. High-risk groups (infants, older adults, people with weakened immune systems, anyone with existing respiratory conditions) face greater danger from prolonged exposure.

Regular molds, while generally less potent, still trigger a wide range of symptoms. Sneezing, coughing, runny or stuffy nose, itchy eyes, skin rashes, throat irritation. Common reactions to spores and fragments released by Cladosporium, Penicillium, Aspergillus, and similar species. People with mold allergies or asthma may experience wheezing, shortness of breath, chest tightness, difficulty breathing even when the mold isn’t classified as “toxic.” Long-term exposure to any indoor mold can lead to chronic inflammation and recurrent infections.

The distinction matters for remediation urgency and occupant safety, but both black mold and regular mold deserve immediate attention. If household members develop unexplained symptoms that improve when they leave the building, arrange professional testing. Consider temporary relocation until the source is identified and removed.

Common mold symptoms (regular mold):

  • Sneezing and coughing
  • Runny or stuffy nose
  • Itchy, watery eyes
  • Skin rashes or hives

Potential black mold associated symptoms:

  • Severe, persistent headaches
  • Extreme fatigue and weakness
  • Difficulty concentrating or memory issues
  • Chronic respiratory infections that don’t respond to typical treatment

Where Black Mold vs Regular Mold Grows Inside a Home

avpLzAITuqfYdKwVmszXg

Black mold requires sustained moisture and cellulose-rich materials to establish colonies. It commonly grows behind drywall that’s been wet for days or weeks, inside wall cavities near hidden leaks, in crawl spaces with poor drainage, under flooring damaged by flooding, on ceiling tiles soaked by roof leaks. These aren’t quick-dry situations. Black mold signals chronic water intrusion or persistent condensation that’s gone unaddressed.

Regular mold adapts to a wider range of conditions and appears in everyday damp spots around the house. Bathroom grout, shower curtains, window sills with condensation, kitchen backsplashes, basement concrete, attic insulation near roof vents, drip pans under refrigerators. All provide enough moisture and organic material for common mold species to thrive. Growth can begin within 24 to 48 hours of a surface staying wet.

Five common locations for black mold:

  • Behind drywall near chronic plumbing leaks
  • Crawl spaces with standing water or high humidity
  • Subfloors damaged by flooding or sewage backup
  • Inside HVAC ducts with condensation problems
  • Ceiling tiles and insulation soaked by roof leaks

Five common locations for regular mold:

  • Bathroom tile grout and caulking
  • Kitchen sinks and countertops near faucets
  • Basement walls and floors with poor ventilation
  • Attic sheathing and insulation near roof vents
  • Window sills and frames with condensation buildup

Mold Testing Methods for Identifying Black Mold vs Regular Mold

jJItgN0PTR-tVDQjUPCD3g

Lab testing is the only way to confirm whether dark mold is actually Stachybotrys chartarum or a less hazardous species. Air sampling captures airborne spore concentrations and identifies which species are circulating through your home. Surface sampling uses swabs or tape lifts to collect material directly from visible growth. Bulk sampling involves cutting out a small piece of contaminated drywall, insulation, or other material and sending it to the lab for analysis. Dust analysis can reveal spore levels that have settled throughout the house over time.

Professionals use moisture meters to measure water content inside walls, floors, ceilings. This helps locate hidden wet spots where mold may be growing out of sight. Infrared cameras detect temperature differences that indicate moisture trapped behind surfaces. These tools guide sampling decisions and remediation planning by showing where water damage extends beyond what you can see.

DIY test kits are available at hardware stores, but they lack the precision and species-identification capability of professional lab work. Most kits only tell you that mold spores are present (which is true in nearly every building) without distinguishing between harmless outdoor spores and toxic indoor growth. If you suspect black mold or need documentation for insurance claims or health investigations, hire a certified mold inspector. They’ll collect samples using standardized methods and send them to an accredited laboratory.

Test Type What It Detects Accuracy Level When to Use
Air Sampling Airborne spore counts and species in indoor air High (when done by certified inspector) Suspected hidden mold, post-remediation clearance, ongoing symptoms
Surface Sampling Species growing on visible surfaces High (direct material analysis) Confirming species on walls, ceilings, trim
Bulk Sampling Mold embedded in porous materials Very high (lab analysis of material) Contaminated drywall, insulation, wood framing
Dust Analysis Settled spore levels throughout home Moderate to high Chronic exposure assessment, pre-purchase inspections

DIY Cleaning vs Professional Remediation for Black Mold vs Regular Mold

frgSZHFSUaopxt9UA72sg

Small patches of regular mold on hard, non-porous surfaces like tile, glass, or metal can often be cleaned safely by homeowners. Mix one cup of store-bought bleach (sodium hypochlorite) with one gallon of water, or use white vinegar for a less harsh option. Spray the solution onto the mold, let it sit for 10 to 15 minutes, then scrub gently with a brush and wipe clean. Dry the surface completely afterward to prevent regrowth.

Suspected black mold, any mold growth larger than about 10 square feet, and mold on porous materials like drywall, insulation, ceiling tiles, or wood framing should always be handled by mold remediation specialists. These professionals use containment barriers and negative air pressure to prevent spores from spreading during removal, HEPA filtration to clean the air, controlled demolition to safely dispose of contaminated materials. They also address the moisture source, apply antimicrobial treatments, perform clearance testing to verify that spore levels have returned to safe ranges.

If you choose to clean small areas yourself, you must protect yourself and limit spore release. Never dry-brush mold or use a regular vacuum. Both actions send millions of spores into the air. Work in a well-ventilated space, keep other household members and pets out of the area, seal all contaminated rags and debris in plastic bags before disposal.

Seven DIY safety rules for cleaning small mold spots:

  • Wear rubber gloves, safety goggles, and a disposable respirator rated for mold spores
  • Ventilate the room with an open window or exhaust fan
  • Use damp cleaning methods only (never dry scraping or brushing)
  • Turn off HVAC systems to avoid spreading spores through ducts
  • Seal contaminated materials in plastic bags immediately after removal
  • Dry the cleaned surface completely within 24 hours
  • Discard sponges, rags, and brushes after use (don’t reuse them)

Why Porous Materials Usually Require Professional Removal

Mold doesn’t just sit on the surface of drywall, wood, or insulation. It sends microscopic threads called hyphae deep into the material, anchoring itself and drawing moisture and nutrients from within. Surface cleaning may remove visible discoloration, but the roots remain alive. They’ll regrow as soon as conditions allow. Professionals cut out and dispose of contaminated porous materials, replacing them with new drywall, insulation, or framing to ensure complete removal and prevent future health risks.

Preventing Black Mold and Regular Mold Growth in the Home

9VtZh1blRoWB8Z1nXHVmug

Mold prevention starts with moisture control. Keep indoor relative humidity between 30 and 50 percent by using dehumidifiers in basements, crawl spaces, other damp areas. Run exhaust fans in bathrooms during showers and for at least 15 minutes afterward. Use range hoods when cooking to vent steam outdoors. Air conditioning also helps by pulling moisture from the air and keeping surfaces dry.

Fix leaks immediately. Roof leaks, plumbing drips, appliance hose connections, window seals. All provide the standing water mold needs to grow. Dry any wet materials within 24 to 48 hours. If a pipe bursts, a roof leaks during a storm, a washing machine overflows, extract standing water, remove soaked materials, set up fans and dehumidifiers right away.

Eight prevention steps to stop black mold and regular mold:

  • Maintain indoor humidity below 50 percent using dehumidifiers and air conditioning
  • Dry water-damaged materials within 24 to 48 hours
  • Repair roof, plumbing, and foundation leaks as soon as they appear
  • Use exhaust fans in bathrooms and kitchens during and after moisture-generating activities
  • Insulate cold surfaces like pipes and exterior walls to prevent condensation
  • Clean gutters and downspouts to direct water away from the foundation
  • Inspect hidden areas regularly (under sinks, behind appliances, in attics and crawl spaces)
  • Choose mold-resistant drywall, paint, and insulation in moisture-prone areas during renovations

Myths About Black Mold vs Regular Mold Homeowners Should Stop Believing

NeN1uB3NS462fAARd7843w

One common myth is that all black-colored mold is toxic black mold. In reality, many harmless species appear dark or black. Visual color alone can’t identify Stachybotrys chartarum. Lab testing is required to confirm the species and determine whether mycotoxins are present.

Another misconception is that you can always see black mold if it’s growing in your home. Mold often hides behind walls, under flooring, inside HVAC ducts, in other concealed spaces. A persistent musty smell or unexplained health symptoms may be the only signs until the infestation becomes severe.

Five myths with clarifications:

  • Myth: All black mold is toxic. Reality: Many non-toxic mold species appear black; species identification requires lab analysis.
  • Myth: If you can’t see mold, it’s not there. Reality: Mold frequently grows behind walls and under floors; odor and symptoms are warning signs.
  • Myth: Bleach kills all mold permanently. Reality: Bleach removes surface discoloration but doesn’t kill hyphae in porous materials; moisture control is essential.
  • Myth: Regular mold is harmless. Reality: Common molds cause allergies, asthma attacks, and respiratory infections, especially in sensitive individuals.
  • Myth: You can tell dangerous mold by smell. Reality: Musty odor indicates mold presence but doesn’t identify the species or toxicity level.

FAQ: Common Questions About Black Mold vs Regular Mold

9HdmH7MHRZqYv5R88z71Vw

1. Can black mold grow behind walls without visible signs?
Yes. Black mold often colonizes the back side of drywall, inside wall cavities, under flooring where moisture has seeped in from leaks or condensation. A persistent musty odor, staining on baseboards, or warping of wall surfaces can signal hidden growth.

2. Is all dark-colored mold Stachybotrys chartarum?
No. Many mold species appear black, dark green, or dark brown. Lab testing using air, surface, or bulk samples is the only reliable way to confirm whether the growth is Stachybotrys or another species.

3. How quickly can mold begin growing after water damage?
Mold can start growing within 24 to 48 hours if wet materials aren’t dried. Fast water extraction, ventilation, and dehumidification are critical to prevent colonization.

4. Do I need professional testing if I see small patches of mold?
For small spots on hard surfaces with no health symptoms in the household, DIY cleaning may be adequate. If the mold is extensive, slimy, recurs after cleaning, or household members have respiratory symptoms, professional testing and remediation are recommended.

5. Can regular household mold cause serious health problems?
Yes. Common molds like Cladosporium, Penicillium, and Aspergillus release allergens and irritants that trigger asthma attacks, chronic sinus infections, skin rashes, and respiratory distress, especially in children, older adults, and immunocompromised individuals.

6. What is the typical cost range for mold testing?
Professional mold inspection and lab analysis typically range from a few hundred to over a thousand dollars depending on the number of samples, the size of the home, and the complexity of the investigation. Many inspectors offer package pricing that includes moisture mapping, air and surface sampling, and a written report with remediation recommendations.

Final Words

In the action, we covered how Stachybotrys (often called black mold) looks different from other molds, where each likes to grow, and why color alone doesn’t prove danger.

We gave a simple visual inspection plan, what symptoms to watch for, and how testing works. We explained when you can clean safely and when to call pros, plus steps to stop mold from coming back.

If you want clear next steps on black mold vs regular mold, keep records, check moisture, and act fast. You’ll get this fixed.

FAQ

Q: How do I know if I have black mold or regular mold?

A: You can suspect black mold if the growth is dark greenish-black, slimy, and on areas with long-term leaks. But color and look aren’t definitive—lab testing is needed to confirm species.

Q: Is all mold toxic or just black mold?

A: Not all mold is toxic. Black mold (Stachybotrys) can produce mycotoxins under specific damp conditions, but many molds cause allergies or irritation rather than toxins.

Q: What kills 100% of black mold?

A: No treatment reliably kills 100% of black mold on porous materials. Complete removal of affected materials, professional remediation, and proper drying/containment are the practical ways to eliminate mold and spores.

Q: Does mold cause Hashimoto’s?

A: Mold exposure does not cause Hashimoto’s disease. While mold and mycotoxins can affect immune and respiratory health, current evidence does not show mold directly causes autoimmune thyroid disease.

Basement Footer Drain Systems That Prevent Water Damage

0

Skipping a footer drain is one of the biggest construction mistakes homeowners make.
Footer drains sit at the base of your foundation and give groundwater an easy path out instead of pushing through the wall.
They stop hydrostatic pressure (water pushing on walls), the real cause of damp walls, musty smells, mold, and warped floors.
Installed during construction they’ll protect the house for decades, but retrofits mean tearing up landscaping and can cost tens of thousands.
Here’s how exterior vs interior footer drain systems work, what to expect, and how to keep your basement dry for good.
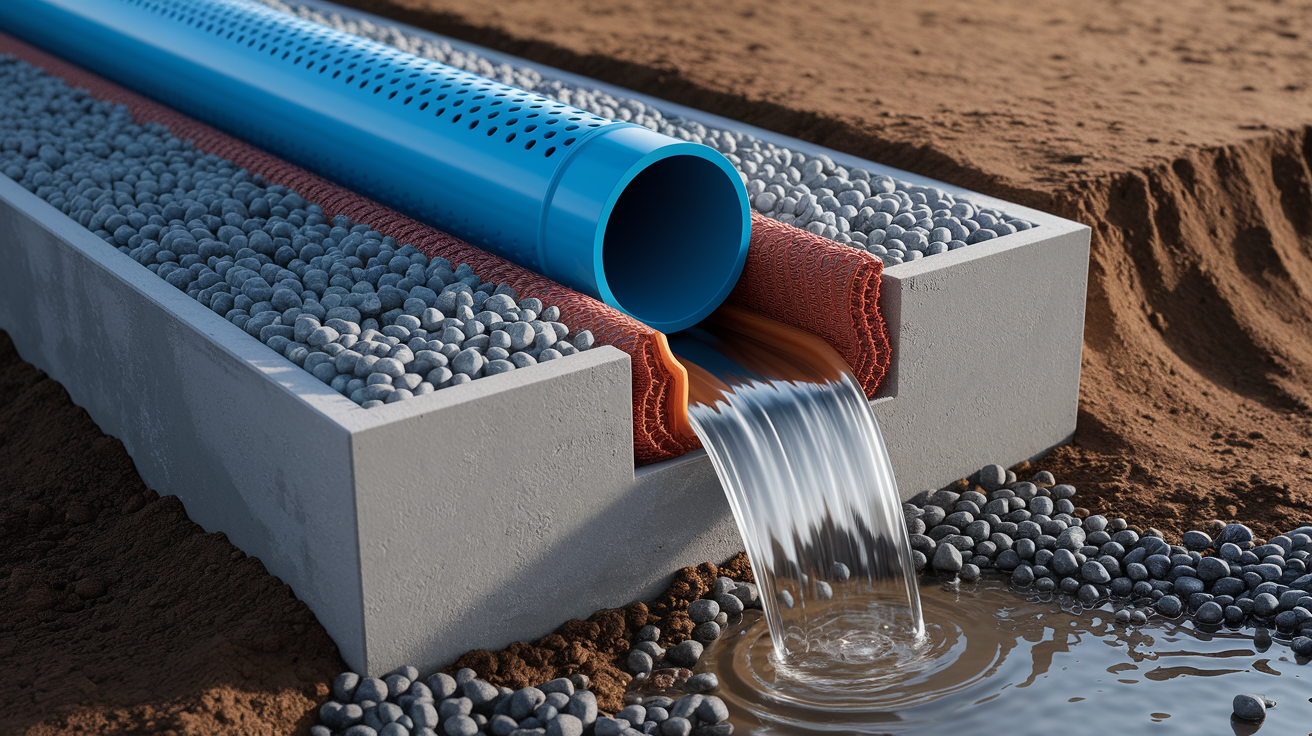
What Foundation Footer Drains Are and Why They Matter

cLP0YMHRS-e4oGuV3yPqqg-1

A foundation footer drain is a perforated pipe installed at or below the footing level on the outside of your basement or crawlspace walls. The pipe sits in a gravel filled trench, wrapped in filter fabric or a sock, and carries groundwater away before it can push against your foundation or seep through cracks.

The problem it solves is hydrostatic pressure. When soil around your foundation gets saturated after heavy rain or snowmelt, water builds up and pushes against walls and floors. Over time that pressure forces moisture through porous concrete, through cracks, or up through the slab joints. You end up with damp walls, wet carpets, musty smells, mold growth, and sometimes serious structural issues like settlement or bowing walls.

Footer drains intercept that groundwater at the lowest point, right where your foundation meets the earth, and route it to a safe discharge point downhill, into a storm sewer, or into a sump pit where a pump lifts it away.

Without a working drain system, basements stay wet. Wet basements mean poor indoor air quality because mold spores and moisture vapor rise into living spaces. Chronic dampness also attracts pests, rots wood framing, and ruins stored belongings.

Footer drains are most effective when installed during initial construction, before backfill goes in. Retrofitting them later requires excavating around the entire perimeter, which is disruptive and expensive. One homeowner reported a retrofit cost around $20,000 for a 1,500 square foot basement footprint. That’s why understanding the system early matters, whether you’re building new or buying an existing home.
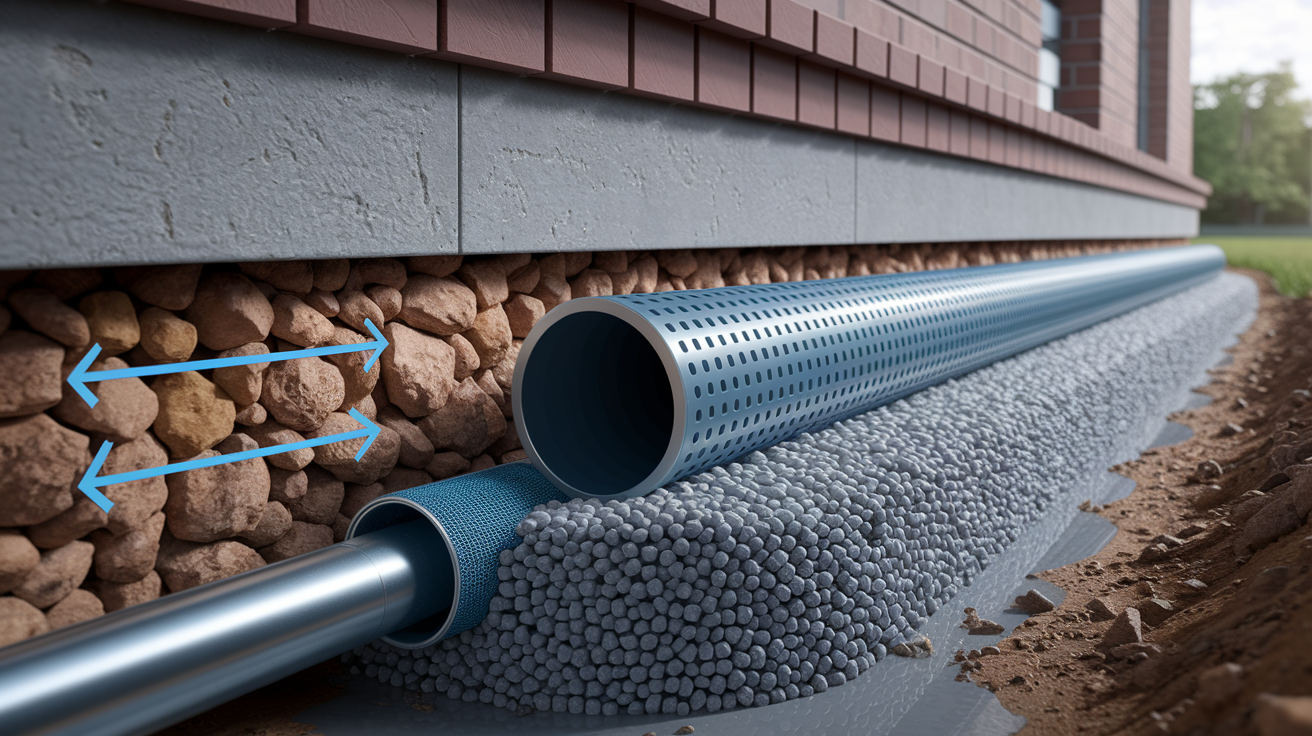
How Footer Drain Systems Work

L_CycpxYRsiaYBZa-GwSgQ-1

The basic concept is gravity and collection. Groundwater moves through soil and collects at the lowest point near your foundation. The perforated pipe gives that water an easy path into the drain instead of through your basement wall.

Water enters the pipe through small holes or slots. Those perforations face down or to the sides, depending on the pipe type and installer preference. A filter fabric sock or a layer of geotextile fabric around the gravel prevents fine soil particles from washing into the pipe and clogging it.

Once inside the pipe, water flows along the sloped trench to an outlet. If your lot has enough slope, the pipe runs to daylight, meaning it opens onto the surface downhill where water spills out harmlessly. If the site is flat or the basement sits below the natural grade, the pipe ties into a sump pit inside the basement. A sump pump then lifts the water up and discharges it through a solid pipe that runs outside, away from the foundation.

The pipe itself is typically 4 inches in diameter. Perforated pipe can be installed nearly level because the outlet pipe, the solid section that carries collected water away, provides the slope and flow. That outlet pipe must slope at least 1/4 inch per foot to keep water moving. Steeper is better.

Around the pipe you place crushed stone or coarse gravel. Stone is porous, so water moves through it quickly and reaches the pipe. A typical exterior trench has about 3 inches of stone under the pipe as bedding, then stone fills the trench to about 8 inches above the top of the footing. Filter fabric wraps the stone in a “burrito” to keep soil out. On top of the fabric, installers add a 6 inch cap of coarse sand to further prevent soil migration, then backfill with native soil graded to slope away from the foundation.

Interior footer drains work similarly but sit inside the basement perimeter. Before the slab is poured, you lay down 8 to 10 inches of crushed stone across the entire floor area. Rigid foam insulation and a puncture resistant vapor barrier go on top of that stone. Then a perforated 4 inch pipe runs along the inside edge where the wall meets the floor. That pipe drains to a sump pit. When groundwater rises through the stone field or seeps in at the wall floor joint, it flows into the pipe and the pump removes it.

Interior systems are easier to retrofit because you don’t have to dig up landscaping or driveways. You cut a trench along the inside perimeter, install the pipe, and tie it to a new sump pit. The trade off is that water still enters the foundation wall from outside. You’re just catching it inside before it floods the floor.

Exterior systems stop water before it touches the foundation, which is better for long term durability and indoor air quality. Interior systems are a practical fallback when exterior work isn’t feasible.

System Types and Configurations
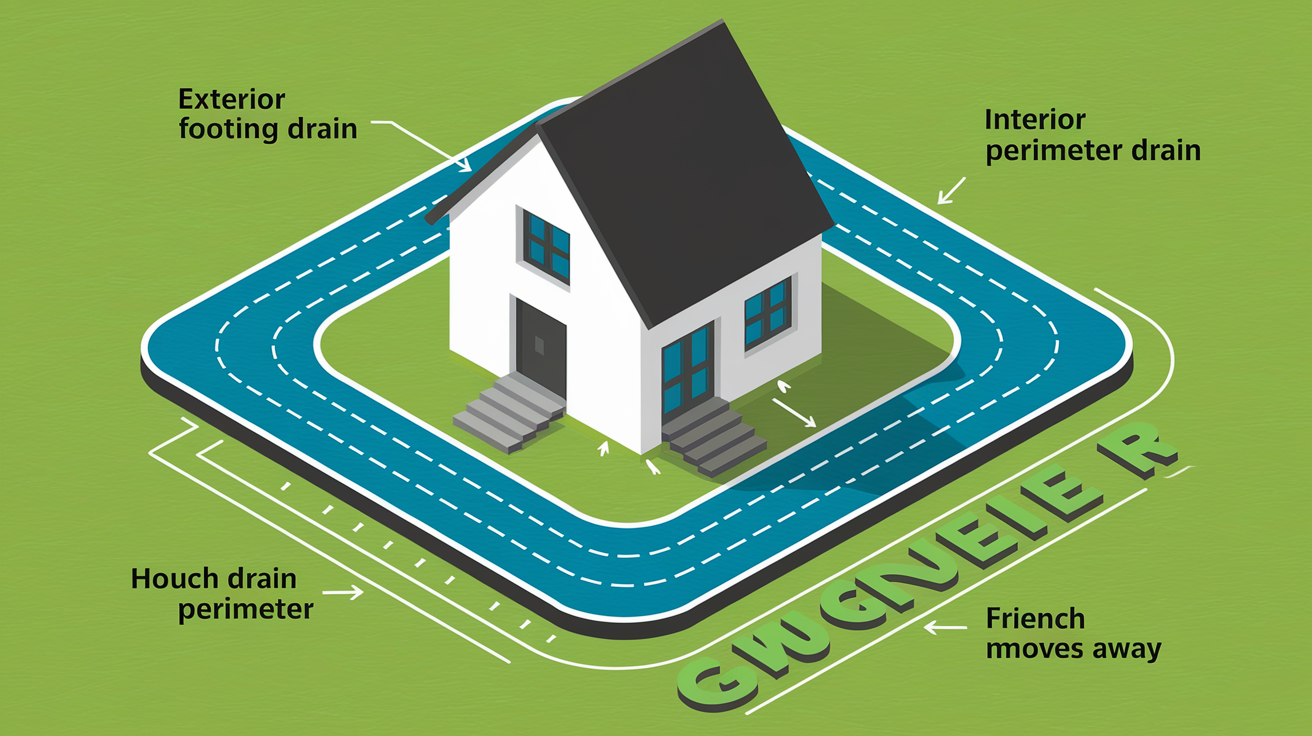
leOSK-hoQhO5apdH7d1pSQ-1

Exterior Footing Drain

This is the most common and most effective type. The perforated pipe sits at the base of the footing on the outside of the foundation wall. During construction, after the footing is poured and the wall is up, you dig or form a trench around the perimeter at footing level.

You unroll wide filter fabric, typically 6 feet wide, along the trench and up the foundation face. Then you place about 3 inches of crushed stone in the bottom of the trench as a base. Lay the 4 inch perforated rigid PVC pipe on that stone bed. Bring crushed stone up around and over the pipe to about 8 inches above the top of the footing. Fold the fabric over the top of the stone. Add a 6 inch layer of coarse sand on top of the fabric, then backfill with soil sloped away from the house.

The pipe runs continuously around the foundation. At corners you use fittings to turn the pipe. Any window wells or other below grade openings tie into the system with solid 4 inch PVC to carry away water that collects in those wells.

The outlet can be a daylight discharge or a line that penetrates the footing near a sump pit. If your foundation perimeter is more than 200 linear feet, either add a second outlet or increase the outlet pipe size from 4 inches to 6 inches to handle the extra volume.

Lifespan for a well installed exterior footing drain is often 40 to 50 years. The main threats are silt infiltration and tree root intrusion. Silt clogs the perforations and the stone. Tree roots grow into the pipe looking for water. Both problems are slower in sandy soils and faster in fine clay soils or where large trees are planted near the foundation.

Interior Perimeter Drain

An interior drain captures water after it has moved through or under the foundation. You install it before pouring the basement slab or, in a retrofit, by breaking out a strip of slab along the walls.

The system starts with a thick layer of crushed stone under the entire slab. 8 to 10 inches is typical. On top of that stone you place rigid extruded polystyrene insulation and a heavy vapor barrier, such as cross laminated polyethylene. Then you form and pour the slab, leaving a gap at the perimeter.

In that gap you install a perforated 4 inch pipe that drains to a sump pit in the lowest corner of the basement. The pit is a plastic or concrete liner sunk into the stone. An automatic sump pump sits in the pit. When water enters and the float or sensor activates, the pump lifts the water through a solid discharge pipe that runs up and out through the rim joist or foundation wall, then away from the house.

You need an airtight sump pit cover. An open pit allows soil gas, including radon, to enter your home, and it also breaks the air barrier, wasting heating and cooling energy.

Because the interior system only catches water that has already entered the foundation zone, it does nothing to reduce hydrostatic pressure on the walls. It prevents flooding, but it doesn’t keep your walls dry. Exterior drains are better for durability, but interior drains are much easier to retrofit and can be very effective in combination with exterior waterproofing.

Interior systems often use proprietary drain channels or baseboard style perforated pipes that sit along the wall floor joint. These can simplify installation and improve collection, but they cost more than plain perforated pipe and gravel.

French Drain (Weeping Drain)

A French drain is a gravel filled trench with a perforated pipe that collects and diverts water. It can be installed anywhere on your property, around the foundation, across a yard, or along a driveway. When installed at footing level around a foundation, it’s effectively the same as a footing drain.

The term “French drain” is often used broadly. It can mean a shallow landscape drain that intercepts surface runoff, or it can mean a deep drain at the footing. For basement protection, you want the drain at or below the footing level so it relieves pressure at the base of the wall.

French drains are often installed as retrofits when the original footing drain has failed or was never installed. You excavate down to the footing, install fabric and gravel, lay the pipe, and backfill. The work is the same as installing an exterior footing drain, just done after the house is built.

Typical lifespan for a French drain is 30 to 40 years, depending on soil type and maintenance. Longevity is shorter than a footing drain installed during construction because retrofit conditions are harder to control. Backfill compaction, fabric placement, and gravel quality can be less consistent when you’re working in a narrow trench next to an existing foundation.

Grading and Surface Drainage

Grading means shaping the soil surface so water flows away from your foundation instead of toward it. Proper grading is the simplest and least expensive form of drainage, and it’s required by code.

You want the ground to slope away from the house at a minimum of 6 inches over the first 10 feet. That slope carries rainwater and snowmelt away from the foundation before it can soak into the soil and create hydrostatic pressure.

Grading works well in moderate climates and on sites with good natural slope. It requires almost no maintenance, just occasional regrading if settling or landscaping changes the surface. But grading alone can fail in areas with heavy rainfall, clay soils that drain slowly, or sites where the water table is high.

When grading isn’t enough, you pair it with a secondary system, either a footer drain or a French drain, to handle subsurface water. Grading manages surface runoff. The drain manages groundwater.

Poor grading creates problems. If soil slopes toward the house, water ponds against the foundation and soaks in. If the slope is too steep right at the wall, water can splash onto siding or erode the soil, exposing the foundation. The goal is a gentle, consistent slope that moves water away without causing erosion or damaging exterior finishes.

Sump Pump Systems

A sump pit and pump handle water that has been collected by an interior or exterior drain system. The pit is a cylindrical liner, usually 18 to 24 inches in diameter and about 24 to 30 inches deep, sunk into the basement floor at the lowest point. Perforated drain pipes empty into the pit.

When water fills the pit to a certain level, a float switch or pressure sensor activates the pump. The pump lifts the water through a solid discharge pipe that runs out through the foundation wall and away from the house. The outlet should discharge at least 10 to 20 feet from the foundation, onto a slope or into a storm sewer, so the water doesn’t flow back toward the basement.

There are two main types of sump pumps:

Submersible pumps sit down in the water at the bottom of the pit. They’re quieter and more powerful, and they don’t take up space above the pit. The motor is sealed and cooled by the water. Submersibles last about 7 to 10 years with regular use.

Pedestal pumps have the motor mounted on a shaft above the pit. The intake sits in the water, but the motor stays dry. Pedestals are easier to service, last longer, often 15 to 25 years, and cost less. They’re louder and take up more space.

Battery backup is critical. A sump pump only works if it has power. Heavy storms often cause power outages. A battery backup system keeps the pump running when the grid goes down, preventing basement flooding during the very conditions when you need the pump most.

Sump pump systems require routine maintenance. Test the pump every few months by pouring water into the pit to make sure it activates and discharges properly. Clean the inlet screen and check the discharge line for clogs. Replace the backup battery every three to five years.

One concern with sump pits is radon. If soil gas contains radon, an open sump pit becomes a direct pathway into your home. Use an airtight lid with a gasket, and seal any gaps around pipes that enter the pit. If you have a radon problem, you may need a radon mitigation system that vents soil gas from under the slab to the outdoors.

Materials and Components
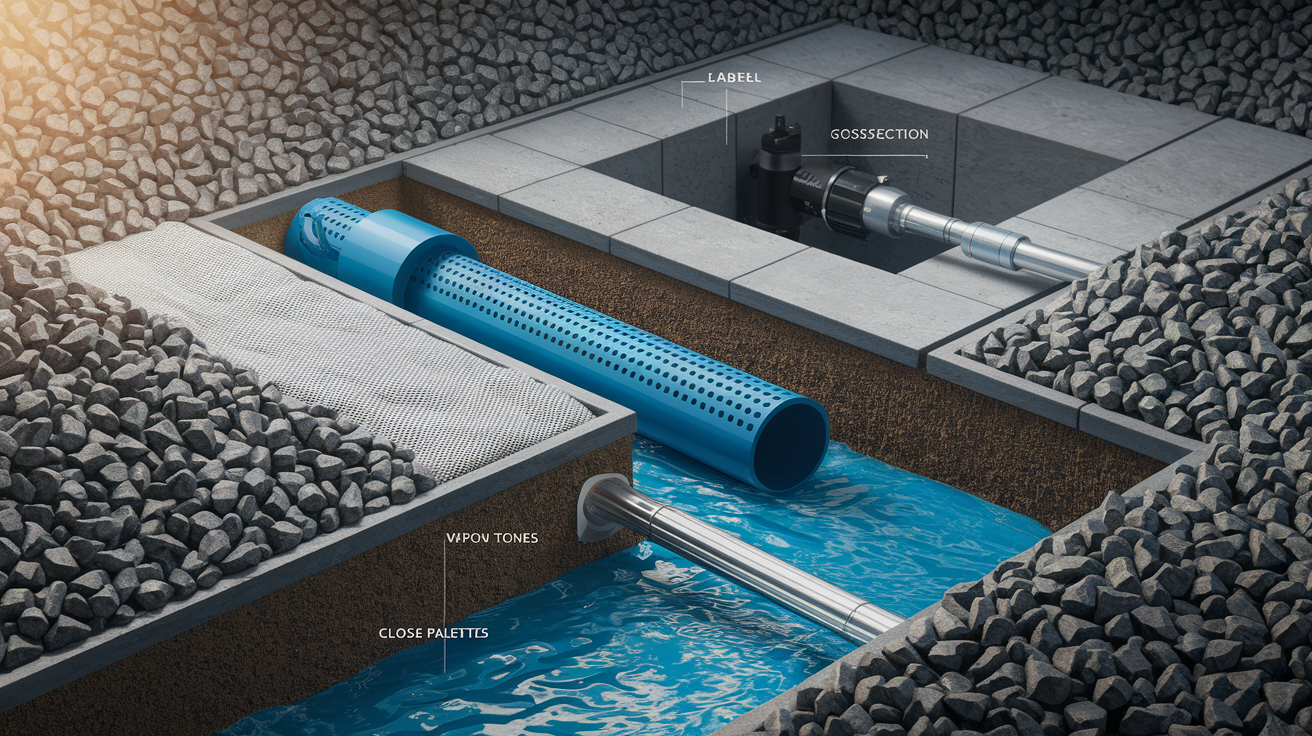
ACxAWrqFRj22bKcmOh8Seg-1

The effectiveness of a footer drain depends on using the right materials in the right places.

Pipe: Most systems use 4 inch diameter perforated pipe. Rigid PVC is more crush resistant than flexible black corrugated pipe, and it has larger, cleaner holes that clog less easily. Flexible pipe costs less and is easier to work with in tight curves, but the narrow slots fill with silt faster. Installers often prefer rigid PVC for long term reliability.

For long runs, more than 200 linear feet of foundation, or for sump tie ins, step up to 6 inch pipe to increase flow capacity.

Perforated pipe is used in the collection trench. Solid pipe is used for the outlet section that carries water to daylight or the sump. The joint between perforated and solid pipe should be accessible for cleanout if possible.

Gravel and stone: Use clean, crushed stone or coarse gravel with minimal fines. Stone size is typically 3/4 inch to 1.5 inches. The stone creates void space so water can flow freely to the pipe. Avoid rounded river rock. Angular crushed stone packs more loosely and drains better.

Under the pipe, place at least 2 to 3 inches of stone as bedding. Surround and cover the pipe with stone to a depth of 6 to 8 inches above the top of the footing.

Some installers use “clear stone” or “open graded aggregate” with no fines at all. This stone drains faster and clogs more slowly than stone mixed with sand and silt.

Filter fabric (geotextile): Fabric prevents soil from washing into the gravel and clogging the system. Use non woven geotextile fabric rated for drainage applications. It must be permeable enough to let water through but fine enough to stop silt.

The most effective method is to line the entire trench with fabric before placing any stone, then fold the fabric over the top of the stone after the pipe is in place, the “burrito” wrap. This keeps soil out from all sides.

Some systems use a fabric sock that slides over the perforated pipe. Socks are faster to install but provide less protection than a full trench wrap, especially in silty soils.

Sump pit and pump materials: Pits are made from rigid plastic or concrete. Plastic liners are common because they resist corrosion and are easy to install. The pit must have holes or slots near the bottom so water from the stone field can enter.

Pumps are cast iron, stainless steel, or thermoplastic. Cast iron is durable but can rust over time. Stainless and plastic pumps last longer in corrosive conditions. Look for a pump with a solid housing and a reliable float switch. Cheap pumps fail early.

Discharge pipe is typically 1.5 inch or 2 inch PVC, sized to match the pump outlet. The pipe should have a check valve near the pump to prevent backflow when the pump shuts off, and it should be insulated or heat traced if it runs through an area where it might freeze.

Vapor barrier and insulation (interior systems): Under an interior slab, use rigid extruded polystyrene (XPS) foam for insulation. XPS resists moisture and provides thermal break. On top of the foam, lay a heavy vapor barrier, 6 mil polyethylene or, better, a cross laminated membrane like Stego Wrap. The barrier stops moisture vapor and soil gas from entering through the slab.

Seal all seams and penetrations in the barrier with compatible tape or mastic.

When Each System Is Necessary
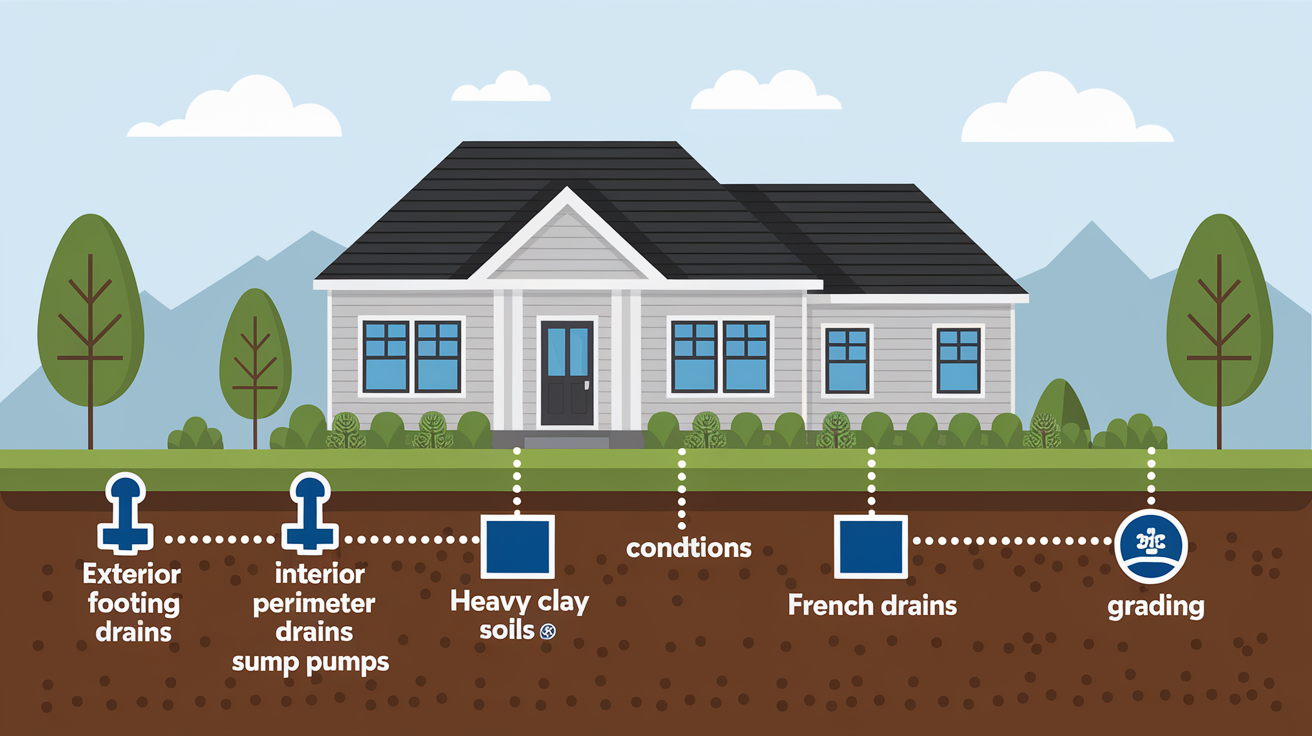
PpPhnn38Rm-dVzBBHP5xsQ-1

The system you need depends on site conditions, climate, and how your foundation is built.

Exterior footing drains are necessary in any of these cases:

High water table. If groundwater sits close to or above the bottom of your footing during wet seasons.

Heavy clay soils that drain slowly and hold water against the foundation.

Basements in areas with frequent heavy rain or snowmelt.

Any habitable below grade space. Most building codes require footing drains around basements used for living or storage.

New construction. It’s far easier and cheaper to install a footing drain during the build than to retrofit later.

If your lot slopes well and you’re building on sandy, fast draining soil, you might not need a full perimeter drain. But most builders install one anyway because it’s inexpensive insurance and required by code in most jurisdictions.

Interior perimeter drains and sump pumps are necessary when:

You’re retrofitting an existing basement that has chronic water problems and excavating the exterior is not practical or too expensive.

Your foundation walls are already waterproofed on the outside, but water still enters at the floor joints or through cracks.

The site is very flat or the basement is below the level where you can discharge to daylight.

You have a high water table that pushes water up through the floor during heavy rain.

Interior systems are common retrofits because they can be installed from inside without disturbing landscaping, decks, or driveways. They don’t prevent water from reaching the foundation, but they prevent flooding.

French drains are necessary when:

You need to intercept surface or shallow groundwater away from the foundation, such as along a slope or across a yard.

You’re retrofitting a basement and choose to dig down to the footing from outside.

Grading is always necessary. Every foundation needs proper slope away from the house to manage surface water. Grading is often sufficient on its own in dry climates or on well drained sites, but it should always be combined with gutters and downspout extensions.

Sump pump systems are necessary when:

Your drain system collects water but has no gravity outlet to daylight.

You live in an area with heavy precipitation or rapid snowmelt.

Your basement floor is below the surrounding grade.

Local code requires a sump pump. Some jurisdictions mandate them in all basements.

If you install a sump, always include battery backup. A sump pump is only useful if it works when you need it most, which is during power outages caused by the same storms that flood basements.

Step by Step Installation (Exterior Footing Drain)

krw6cHZeQYSEaRiR7djF4w-1

1. Site Assessment and Code Compliance

Before you dig, evaluate your soil type, slope, and water table. Walk your property during and after heavy rain to see where water flows and where it ponds. Check local building codes for minimum drain depth, slope, outlet requirements, and inspection procedures.

Call 811 to have underground utilities marked. Digging into a gas line, electric service, or water main is dangerous and expensive.

Verify your discharge options. Can you run to daylight? Is there a storm sewer connection available? Will you need a sump? Measure distances and calculate slope to confirm your plan will work.

2. Excavation and Trenching

Excavate around the foundation perimeter down to the bottom of the footing, not below it. Digging deeper than the footing undermines its support and can cause settlement or cracking.

Trench width should be about 12 inches to give you room to work and to accommodate the pipe, gravel, and fabric. Dig carefully near the foundation to avoid damaging the waterproofing membrane or the footing itself.

Slope the trench floor at least 1/8 inch per foot toward the outlet. For a perforated collection pipe, level is acceptable because the outlet section provides the drainage slope, but a slight slope in the collection trench helps move water along.

If you encounter large rocks, roots, or other obstructions, remove them. Cut tree roots cleanly with a saw. Don’t tear them. Tearing creates ragged edges that regrow aggressively into the drain.

3. Install Filter Fabric

Unroll non woven geotextile fabric along the bottom and up both sides of the trench. Use fabric wide enough to cover the bottom, wrap up the foundation wall, and fold over the top of the stone later. 6 feet wide is common for a typical footing depth.

Overlap fabric seams by at least 12 inches. Fabric should cover the trench completely with no gaps where soil can enter.

4. Place Bedding Stone

Pour 2 to 3 inches of clean crushed stone into the bottom of the trench on top of the fabric. Level and compact it lightly by hand. This stone provides a stable, free draining base for the pipe.

5. Lay Perforated Pipe

Set 4 inch rigid perforated PVC pipe on the stone bed. The perforations can face down or to the sides. Installer preference varies. Facing down reduces the chance of silt entering from above. Facing to the sides can increase inflow capacity.

Run the pipe continuously around the perimeter. Use 90 degree or 45 degree fittings at corners. Leave no gaps.

Connect any window wells or exterior stairwells to the main drain line with solid 4 inch pipe so water from those areas flows into the system.

At the outlet point, transition from perforated pipe to solid pipe using a coupler or fitting. The solid outlet pipe must slope at least 1/4 inch per foot. Steeper is better, to carry collected water away efficiently.

6. Surround Pipe with Stone

Cover the pipe with crushed stone. Bring the stone level up to about 6 to 8 inches above the top of the footing. The stone layer should completely surround the pipe with at least 3 inches of stone on all sides.

Stone depth varies depending on your footing depth and trench size, but the goal is a continuous gravel envelope that intercepts water before it reaches the foundation wall.

7. Wrap Fabric Over Stone

Fold the filter fabric over the top of the stone, overlapping the edges by 12 inches or more. This completes the “burrito” and prevents soil from washing down into the stone.

Some installers add a second layer of fabric on top for extra protection in silty soils.

8. Cap with Sand and Backfill

Place a 6 inch layer of coarse sand on top of the fabric. Sand fills voids and keeps fine soil particles from working their way into the fabric over time.

Above the sand, backfill with native soil or clean fill. Compact the soil in 6 inch lifts to prevent settling. Slope the final surface away from the foundation at 6 inches over 10 feet to direct surface water away.

Do not backfill with clay or heavy soil directly against the foundation if you can avoid it. A layer of coarser material near the wall helps surface water drain down to the footer drain rather than soaking into the backfill.

9. Route Outlet and Final Inspection

Run the solid outlet pipe to its discharge point, daylight, storm sewer, or sump pit. If discharging to daylight, extend the pipe outlet at least 10 feet from the foundation and secure it so it doesn’t move or get buried. Add a rodent screen over the outlet to keep animals out.

If tying into a sump, penetrate the footing with a 6 inch pipe sleeve and connect the drain line to the sump pit through that sleeve. Seal the penetration to prevent soil from entering.

Test the system by running water into the drain from a hose at the far end of the system. Verify that water flows freely to the outlet and that there are no leaks or blockages.

Schedule a final inspection if required by local code. Many jurisdictions require inspection of the drain system before backfill so the inspector can confirm proper slope, materials, and installation.

Local Codes and Standards

K0X4wPitQ5iZBUtXDKOSfw-1

Building codes mandate foundation drainage in most circumstances. The International Residential Code (IRC) provides the baseline requirements, and local amendments may be stricter.

IRC Section 405.1 requires a drain around the perimeter of any foundation that encloses habitable or usable space below grade. The drain must be installed at or below the bottom of the basement floor slab.

IRC Section 405.1 also specifies that drain tile or perforated pipe must be placed on not less than 2 inches of washed gravel or crushed stone, and the pipe must be covered with at least 6 inches of the same material. A geotextile filter fabric is required to prevent soil migration into the gravel.

IRC Section 406.1 requires foundation walls to be damp proofed from the footing to grade. Section 406.2 requires full waterproofing, not just damp proofing, if the foundation is in standing water or if the water table is high.

IRC Section 801.3 requires roof drainage (gutters and downspouts) to be extended at least 5 feet from the foundation in areas with expansive soils. Even where not mandated, downspout extensions are critical to prevent roof runoff from overwhelming the footer drain or saturating soil near the foundation.

IRC Section 404.1.7 governs backfill timing and compaction. Backfill must not be placed until the foundation is sufficiently strong to resist lateral loads, and it must be placed in layers and compacted to prevent future settling.

Minimum slope for a solid drain outlet is 1/4 inch per foot in most jurisdictions. Some local codes require 1/2 inch per foot or steeper for better flow.

Outlet discharge must not create erosion, flooding on neighboring property, or contamination of surface water. Some areas prohibit connection of foundation drains to sanitary sewers. Others require connection to a municipal storm sewer if available. Check local rules.

Permits are often required for footer drain installation or sump pump discharge alterations. Inspections may be required before backfill, after rough in, and at final completion.

If you’re building new or doing major foundation work, follow the IRC and consult your local building department for amendments and permit requirements. If you’re retrofitting an older home, you may not be required to meet current code unless you’re also doing other work that triggers a permit, but meeting current standards is a good idea for durability and resale value.

DIY vs Professional Installation

Wtm3lPeMRZecFjgnpZUI3g-1

Footer drain installation during new construction is typically handled by the foundation contractor or the site excavation crew. It’s part of the standard foundation scope and done before backfill.

Retrofitting a footer drain is a different story. You’re excavating next to an existing foundation, removing landscaping, possibly cutting through concrete walks or patios, and working around utilities, trees, and structures like decks or HVAC equipment.

When to hire a professional:

You don’t have excavation equipment or experience operating it. Hand digging a trench 3 feet deep around an entire house is slow, exhausting, and often impractical.

The site has underground utilities. Locating services marks approximate positions, but a skilled operator knows how to dig carefully and stop when they encounter a line.

The foundation is deep, the soil is heavy clay, or the site is sloped and unstable. Trenching in difficult conditions requires shoring, proper compaction, and attention to safety.

You’re not sure about slope, outlet options, or system design. A drainage contractor or foundation specialist can assess your site, recommend the right system, and ensure proper installation the first time.

Your jurisdiction requires permits and inspections. Contractors are familiar with local code requirements and inspection procedures.

Professional installation costs vary widely depending on site conditions, depth of excavation, soil type, and accessibility. Anecdotal estimates for a full perimeter retrofit range from $10,000 to $25,000 for a typical basement. If you need to remove and replace a deck, driveway, or mature landscaping, add more.

When DIY might be feasible:

You’re installing a short section of drain, such as along one wall or around a single corner, where water is entering.

The trench depth is shallow, soil is easy to dig, and access is clear.

You have basic construction skills, can rent a mini excavator, and can follow code requirements for slope and materials.

You’re comfortable working with PVC pipe, gravel, and fabric, and you have help for the heavier work.

Even on a DIY project, you should call 811 for utility locates, pull any required permits, and schedule inspections. Mistakes in slope, backfill compaction, or fabric placement can make the system ineffective and waste your time and money.

If you’re unsure, pay for a consultation with a drainage contractor or foundation engineer. A few hundred dollars for professional advice can save you thousands in wasted materials and failed work.

Cost Factors and Budget Planning

7zXJjZFtQJucULMJN2eQxA-1

Footer drain cost depends on several variables:

Excavation depth and volume: Deeper footings and taller foundation walls require more digging. Heavy clay or rocky soil costs more to excavate than loose sand. If the contractor has to haul away excess soil, that adds to the cost.

System length: A large house has a longer perimeter. More linear feet means more pipe, more gravel, more fabric, and more labor.

Obstructions and access: Mature trees, underground utilities, existing hardscape (patios, walks, driveways), and tight spaces all slow down the work and increase cost. Removing and replacing a concrete patio or a deck can add several thousand dollars.

Outlet distance and type: Running the outlet pipe 100 feet to a daylight discharge or connecting to a storm sewer adds material and labor. If you need to install a sump pit and pump, expect to pay $1,500 to $3,000 for the sump system alone, plus the cost of the drain piping.

Materials quality: Rigid PVC pipe costs more than flexible corrugated pipe but lasts longer. Clean crushed stone costs more than mixed fill. Using high quality geotextile fabric and proper bedding increases upfront cost but reduces long term maintenance and failure risk.

Labor rates: Regional labor costs vary. Urban areas and high cost of living regions have higher rates. Experienced foundation or drainage contractors charge more than general excavation crews, but their work is usually more reliable.

Permits and inspections: Some jurisdictions charge permit fees and require multiple inspections. Factor in the cost of code compliance and any required engineering if your site has special conditions.

A rough ballpark for professional installation of an exterior footing drain retrofit on a 1,500 square foot basement (about 160 linear feet of foundation) ranges from $10,000 to $20,000 in many markets. Smaller sections or simpler sites might be $3,000 to $7,000. New construction installation, done during the foundation pour before backfill, is far less, often $1,500 to $3,000 because access is open and no demolition is required.

Sump pump installation alone, if you already have a pit or are adding one as part of interior work, ranges from $500 to $1,500 for a basic setup, or $2,000 to $4,000 if you add battery backup, a high capacity pump, and a sealed radon resistant pit cover.

Grading work to correct surface drainage is the least expensive option, often $500 to $2,000 for resloping soil and adding swales or berms. But grading alone won’t solve a high water table or hydrostatic pressure problem.

Maintenance Schedule and Procedures

UIaRFOexQZ-h3UyMXYFaEw

A footer drain requires regular maintenance to stay effective. The two main enemies are silt and tree roots. Both slowly clog the system until water backs up and enters your basement.

Twice per year inspection:

Walk your property before and after the heavy rain season. Look for standing water or wet soil near the foundation, which suggests the drain isn’t handling the load. Water stains or efflorescence on basement walls indicate moisture is getting through. Slow drainage from gutters or downspouts might mean sediment has clogged connections to the footer drain. Visible outlet discharge matters too. If you have a daylight outlet, check during a rain event to confirm water is flowing out.

Annual flushing:

If your system has accessible cleanouts, risers that extend from the drain pipe up to grade, flush the system once per year with a garden hose. Insert the hose into the cleanout and run water for several minutes to push out sediment and small roots.

If you don’t have cleanouts and water isn’t draining well, consider having a plumber or drainage contractor snake or jet the line. High pressure water jetting can clear silt and cut roots.

Sump pump testing (monthly during wet season):

Pour a bucket of water into the sump pit to verify the pump activates and discharges properly. Listen for unusual noises, grinding, rattling, or buzzing, which suggest the pump is failing.

Check the discharge line to make sure it’s clear and water is flowing away from the foundation.

Test the battery backup by disconnecting shore power and triggering the pump. Replace the backup battery every three to five years, even if it seems to work.

Gutter and downspout care (quarterly):

Clean gutters and downspouts to prevent clogs. Clogged gutters overflow and dump water at the foundation, overwhelming the footer drain.

Extend downspouts at least 5 feet from the foundation. 10 feet or more is better. Use solid pipe or flexible extensions so runoff discharges well away from the house.

Never connect downspouts directly into the footer drain unless you have a screened cleanout and you’re committed to frequent maintenance. Leaf litter and debris from gutters will clog the drain pipe.

Grading inspection (annually):

Check that soil around the foundation still slopes away. Settling, landscaping changes, or erosion can create low spots where water ponds. Add soil and regrade as needed to maintain a 6 inch drop over 10 feet.

Long term maintenance (10 to 20 years):

Even well installed systems accumulate silt over decades. At some point you may need to excavate and rebuild sections of the drain, replace clogged pipe, or refresh the gravel and fabric.

Tree roots are a chronic problem near large trees. If roots repeatedly clog the drain, you may need to remove the tree, install root barriers, or reroute the drain away from the tree.

Common Problems and Troubleshooting

Basement Still Wet After Drain Installation

If you installed a footer drain and the basement is still damp, check these issues:

Improper slope: The drain pipe may be level or sloped the wrong direction, so water doesn’t flow to the outlet. You’ll need to excavate and reinstall with correct slope.

Clogged pipe or outlet: Sediment or roots have blocked the drain. Flush or snake the line.

High water table: If ground

Final Words

Stop the water and stabilize the area right away. That’s the action we focused on: quick response, smart drying, and clear documentation.

You saw a step-by-step look at assessing your foundation, planning the drain layout, choosing materials, and handling installation or when to call a pro. We also covered moisture checks behind walls, how to test the system, and what records help with claims.

Follow those steps, keep photos and readings, and you’ll limit hidden damage. With the right approach to basement footer drain systems, you’ll protect your space and get back to normal faster.

FAQ

A: The list of approved internal and external hyperlinks is something we need to place links correctly; please paste the full list, or tell us to set [Hyperlinks]= na so we proceed without links.

A: If you don’t provide the hyperlink list, we’ll set [Hyperlinks]= na and draft the outline without links, leaving clear placeholders so you can add URLs later or ask us to insert them.

Q: Can you proceed with [Hyperlinks]= na?

A: We can proceed with [Hyperlinks]= na; we’ll mark recommended link locations and anchor text so adding final URLs later is fast and keeps the outline moving.

Q: How should I format the hyperlinks when I send them?

A: When sending hyperlinks, provide the full URL, preferred anchor text, whether it’s internal or external, and any special attributes like nofollow; a simple numbered list works best for quick insertion.

A: Internal links point to pages on your own site; external links point to other domains. Label each link so we place it with the right context and site structure in mind.

Q: Are there limits on how many links I can provide?

A: There aren’t strict limits, but prioritize relevance—focus on essential internal pages and a few high-value external sources to avoid clutter and protect reader trust and SEO value.

Q: How will you show placeholders for missing links in the outline?

A: We’ll show placeholders as bracketed anchor text with notes like [INSERT URL] and a tag for internal or external, so you or we can replace them later without confusion.

A: We’ll update the outline usually within one business day after you send the full link list; if it’s urgent, tell us and we’ll prioritize the change.

Q: Who verifies that the links are correct and live?

A: We’ll check that links resolve and match the anchor text, but you should confirm final URLs, permissions, and tracking requirements for any paid or restricted pages before publishing.

A: For affiliate or sponsored links, provide the URL, required disclosure text, preferred anchor text, and any tracking parameters so we place them correctly and keep transparency intact.


Basement Footer Drain Systems That Prevent Water Damage

0

Skipping a footer drain is one of the biggest construction mistakes homeowners make.
Footer drains sit at the base of your foundation and give groundwater an easy path out instead of pushing through the wall.
They stop hydrostatic pressure (water pushing on walls), the real cause of damp walls, musty smells, mold, and warped floors.
Installed during construction they’ll protect the house for decades, but retrofits mean tearing up landscaping and can cost tens of thousands.
Here’s how exterior vs interior footer drain systems work, what to expect, and how to keep your basement dry for good.

What Foundation Footer Drains Are and Why They Matter

cLP0YMHRS-e4oGuV3yPqqg

A foundation footer drain is a perforated pipe installed at or below the footing level on the outside of your basement or crawlspace walls. The pipe sits in a gravel filled trench, wrapped in filter fabric or a sock, and carries groundwater away before it can push against your foundation or seep through cracks.

The problem it solves is hydrostatic pressure. When soil around your foundation gets saturated after heavy rain or snowmelt, water builds up and pushes against walls and floors. Over time that pressure forces moisture through porous concrete, through cracks, or up through the slab joints. You end up with damp walls, wet carpets, musty smells, mold growth, and sometimes serious structural issues like settlement or bowing walls.

Footer drains intercept that groundwater at the lowest point, right where your foundation meets the earth, and route it to a safe discharge point downhill, into a storm sewer, or into a sump pit where a pump lifts it away.

Without a working drain system, basements stay wet. Wet basements mean poor indoor air quality because mold spores and moisture vapor rise into living spaces. Chronic dampness also attracts pests, rots wood framing, and ruins stored belongings.

Footer drains are most effective when installed during initial construction, before backfill goes in. Retrofitting them later requires excavating around the entire perimeter, which is disruptive and expensive. One homeowner reported a retrofit cost around $20,000 for a 1,500 square foot basement footprint. That’s why understanding the system early matters, whether you’re building new or buying an existing home.

How Footer Drain Systems Work

L_CycpxYRsiaYBZa-GwSgQ

The basic concept is gravity and collection. Groundwater moves through soil and collects at the lowest point near your foundation. The perforated pipe gives that water an easy path into the drain instead of through your basement wall.

Water enters the pipe through small holes or slots. Those perforations face down or to the sides, depending on the pipe type and installer preference. A filter fabric sock or a layer of geotextile fabric around the gravel prevents fine soil particles from washing into the pipe and clogging it.

Once inside the pipe, water flows along the sloped trench to an outlet. If your lot has enough slope, the pipe runs to daylight, meaning it opens onto the surface downhill where water spills out harmlessly. If the site is flat or the basement sits below the natural grade, the pipe ties into a sump pit inside the basement. A sump pump then lifts the water up and discharges it through a solid pipe that runs outside, away from the foundation.

The pipe itself is typically 4 inches in diameter. Perforated pipe can be installed nearly level because the outlet pipe, the solid section that carries collected water away, provides the slope and flow. That outlet pipe must slope at least 1/4 inch per foot to keep water moving. Steeper is better.

Around the pipe you place crushed stone or coarse gravel. Stone is porous, so water moves through it quickly and reaches the pipe. A typical exterior trench has about 3 inches of stone under the pipe as bedding, then stone fills the trench to about 8 inches above the top of the footing. Filter fabric wraps the stone in a “burrito” to keep soil out. On top of the fabric, installers add a 6 inch cap of coarse sand to further prevent soil migration, then backfill with native soil graded to slope away from the foundation.

Interior footer drains work similarly but sit inside the basement perimeter. Before the slab is poured, you lay down 8 to 10 inches of crushed stone across the entire floor area. Rigid foam insulation and a puncture resistant vapor barrier go on top of that stone. Then a perforated 4 inch pipe runs along the inside edge where the wall meets the floor. That pipe drains to a sump pit. When groundwater rises through the stone field or seeps in at the wall floor joint, it flows into the pipe and the pump removes it.

Interior systems are easier to retrofit because you don’t have to dig up landscaping or driveways. You cut a trench along the inside perimeter, install the pipe, and tie it to a new sump pit. The trade off is that water still enters the foundation wall from outside. You’re just catching it inside before it floods the floor.

Exterior systems stop water before it touches the foundation, which is better for long term durability and indoor air quality. Interior systems are a practical fallback when exterior work isn’t feasible.

System Types and Configurations

leOSK-hoQhO5apdH7d1pSQ

Exterior Footing Drain

This is the most common and most effective type. The perforated pipe sits at the base of the footing on the outside of the foundation wall. During construction, after the footing is poured and the wall is up, you dig or form a trench around the perimeter at footing level.

You unroll wide filter fabric, typically 6 feet wide, along the trench and up the foundation face. Then you place about 3 inches of crushed stone in the bottom of the trench as a base. Lay the 4 inch perforated rigid PVC pipe on that stone bed. Bring crushed stone up around and over the pipe to about 8 inches above the top of the footing. Fold the fabric over the top of the stone. Add a 6 inch layer of coarse sand on top of the fabric, then backfill with soil sloped away from the house.

The pipe runs continuously around the foundation. At corners you use fittings to turn the pipe. Any window wells or other below grade openings tie into the system with solid 4 inch PVC to carry away water that collects in those wells.

The outlet can be a daylight discharge or a line that penetrates the footing near a sump pit. If your foundation perimeter is more than 200 linear feet, either add a second outlet or increase the outlet pipe size from 4 inches to 6 inches to handle the extra volume.

Lifespan for a well installed exterior footing drain is often 40 to 50 years. The main threats are silt infiltration and tree root intrusion. Silt clogs the perforations and the stone. Tree roots grow into the pipe looking for water. Both problems are slower in sandy soils and faster in fine clay soils or where large trees are planted near the foundation.

Interior Perimeter Drain

An interior drain captures water after it has moved through or under the foundation. You install it before pouring the basement slab or, in a retrofit, by breaking out a strip of slab along the walls.

The system starts with a thick layer of crushed stone under the entire slab. 8 to 10 inches is typical. On top of that stone you place rigid extruded polystyrene insulation and a heavy vapor barrier, such as cross laminated polyethylene. Then you form and pour the slab, leaving a gap at the perimeter.

In that gap you install a perforated 4 inch pipe that drains to a sump pit in the lowest corner of the basement. The pit is a plastic or concrete liner sunk into the stone. An automatic sump pump sits in the pit. When water enters and the float or sensor activates, the pump lifts the water through a solid discharge pipe that runs up and out through the rim joist or foundation wall, then away from the house.

You need an airtight sump pit cover. An open pit allows soil gas, including radon, to enter your home, and it also breaks the air barrier, wasting heating and cooling energy.

Because the interior system only catches water that has already entered the foundation zone, it does nothing to reduce hydrostatic pressure on the walls. It prevents flooding, but it doesn’t keep your walls dry. Exterior drains are better for durability, but interior drains are much easier to retrofit and can be very effective in combination with exterior waterproofing.

Interior systems often use proprietary drain channels or baseboard style perforated pipes that sit along the wall floor joint. These can simplify installation and improve collection, but they cost more than plain perforated pipe and gravel.

French Drain (Weeping Drain)

A French drain is a gravel filled trench with a perforated pipe that collects and diverts water. It can be installed anywhere on your property, around the foundation, across a yard, or along a driveway. When installed at footing level around a foundation, it’s effectively the same as a footing drain.

The term “French drain” is often used broadly. It can mean a shallow landscape drain that intercepts surface runoff, or it can mean a deep drain at the footing. For basement protection, you want the drain at or below the footing level so it relieves pressure at the base of the wall.

French drains are often installed as retrofits when the original footing drain has failed or was never installed. You excavate down to the footing, install fabric and gravel, lay the pipe, and backfill. The work is the same as installing an exterior footing drain, just done after the house is built.

Typical lifespan for a French drain is 30 to 40 years, depending on soil type and maintenance. Longevity is shorter than a footing drain installed during construction because retrofit conditions are harder to control. Backfill compaction, fabric placement, and gravel quality can be less consistent when you’re working in a narrow trench next to an existing foundation.

Grading and Surface Drainage

Grading means shaping the soil surface so water flows away from your foundation instead of toward it. Proper grading is the simplest and least expensive form of drainage, and it’s required by code.

You want the ground to slope away from the house at a minimum of 6 inches over the first 10 feet. That slope carries rainwater and snowmelt away from the foundation before it can soak into the soil and create hydrostatic pressure.

Grading works well in moderate climates and on sites with good natural slope. It requires almost no maintenance, just occasional regrading if settling or landscaping changes the surface. But grading alone can fail in areas with heavy rainfall, clay soils that drain slowly, or sites where the water table is high.

When grading isn’t enough, you pair it with a secondary system, either a footer drain or a French drain, to handle subsurface water. Grading manages surface runoff. The drain manages groundwater.

Poor grading creates problems. If soil slopes toward the house, water ponds against the foundation and soaks in. If the slope is too steep right at the wall, water can splash onto siding or erode the soil, exposing the foundation. The goal is a gentle, consistent slope that moves water away without causing erosion or damaging exterior finishes.

Sump Pump Systems

A sump pit and pump handle water that has been collected by an interior or exterior drain system. The pit is a cylindrical liner, usually 18 to 24 inches in diameter and about 24 to 30 inches deep, sunk into the basement floor at the lowest point. Perforated drain pipes empty into the pit.

When water fills the pit to a certain level, a float switch or pressure sensor activates the pump. The pump lifts the water through a solid discharge pipe that runs out through the foundation wall and away from the house. The outlet should discharge at least 10 to 20 feet from the foundation, onto a slope or into a storm sewer, so the water doesn’t flow back toward the basement.

There are two main types of sump pumps:

Submersible pumps sit down in the water at the bottom of the pit. They’re quieter and more powerful, and they don’t take up space above the pit. The motor is sealed and cooled by the water. Submersibles last about 7 to 10 years with regular use.

Pedestal pumps have the motor mounted on a shaft above the pit. The intake sits in the water, but the motor stays dry. Pedestals are easier to service, last longer, often 15 to 25 years, and cost less. They’re louder and take up more space.

Battery backup is critical. A sump pump only works if it has power. Heavy storms often cause power outages. A battery backup system keeps the pump running when the grid goes down, preventing basement flooding during the very conditions when you need the pump most.

Sump pump systems require routine maintenance. Test the pump every few months by pouring water into the pit to make sure it activates and discharges properly. Clean the inlet screen and check the discharge line for clogs. Replace the backup battery every three to five years.

One concern with sump pits is radon. If soil gas contains radon, an open sump pit becomes a direct pathway into your home. Use an airtight lid with a gasket, and seal any gaps around pipes that enter the pit. If you have a radon problem, you may need a radon mitigation system that vents soil gas from under the slab to the outdoors.

Materials and Components

ACxAWrqFRj22bKcmOh8Seg

The effectiveness of a footer drain depends on using the right materials in the right places.

Pipe: Most systems use 4 inch diameter perforated pipe. Rigid PVC is more crush resistant than flexible black corrugated pipe, and it has larger, cleaner holes that clog less easily. Flexible pipe costs less and is easier to work with in tight curves, but the narrow slots fill with silt faster. Installers often prefer rigid PVC for long term reliability.

For long runs, more than 200 linear feet of foundation, or for sump tie ins, step up to 6 inch pipe to increase flow capacity.

Perforated pipe is used in the collection trench. Solid pipe is used for the outlet section that carries water to daylight or the sump. The joint between perforated and solid pipe should be accessible for cleanout if possible.

Gravel and stone: Use clean, crushed stone or coarse gravel with minimal fines. Stone size is typically 3/4 inch to 1.5 inches. The stone creates void space so water can flow freely to the pipe. Avoid rounded river rock. Angular crushed stone packs more loosely and drains better.

Under the pipe, place at least 2 to 3 inches of stone as bedding. Surround and cover the pipe with stone to a depth of 6 to 8 inches above the top of the footing.

Some installers use “clear stone” or “open graded aggregate” with no fines at all. This stone drains faster and clogs more slowly than stone mixed with sand and silt.

Filter fabric (geotextile): Fabric prevents soil from washing into the gravel and clogging the system. Use non woven geotextile fabric rated for drainage applications. It must be permeable enough to let water through but fine enough to stop silt.

The most effective method is to line the entire trench with fabric before placing any stone, then fold the fabric over the top of the stone after the pipe is in place, the “burrito” wrap. This keeps soil out from all sides.

Some systems use a fabric sock that slides over the perforated pipe. Socks are faster to install but provide less protection than a full trench wrap, especially in silty soils.

Sump pit and pump materials: Pits are made from rigid plastic or concrete. Plastic liners are common because they resist corrosion and are easy to install. The pit must have holes or slots near the bottom so water from the stone field can enter.

Pumps are cast iron, stainless steel, or thermoplastic. Cast iron is durable but can rust over time. Stainless and plastic pumps last longer in corrosive conditions. Look for a pump with a solid housing and a reliable float switch. Cheap pumps fail early.

Discharge pipe is typically 1.5 inch or 2 inch PVC, sized to match the pump outlet. The pipe should have a check valve near the pump to prevent backflow when the pump shuts off, and it should be insulated or heat traced if it runs through an area where it might freeze.

Vapor barrier and insulation (interior systems): Under an interior slab, use rigid extruded polystyrene (XPS) foam for insulation. XPS resists moisture and provides thermal break. On top of the foam, lay a heavy vapor barrier, 6 mil polyethylene or, better, a cross laminated membrane like Stego Wrap. The barrier stops moisture vapor and soil gas from entering through the slab.

Seal all seams and penetrations in the barrier with compatible tape or mastic.

When Each System Is Necessary

PpPhnn38Rm-dVzBBHP5xsQ

The system you need depends on site conditions, climate, and how your foundation is built.

Exterior footing drains are necessary in any of these cases:

High water table. If groundwater sits close to or above the bottom of your footing during wet seasons.

Heavy clay soils that drain slowly and hold water against the foundation.

Basements in areas with frequent heavy rain or snowmelt.

Any habitable below grade space. Most building codes require footing drains around basements used for living or storage.

New construction. It’s far easier and cheaper to install a footing drain during the build than to retrofit later.

If your lot slopes well and you’re building on sandy, fast draining soil, you might not need a full perimeter drain. But most builders install one anyway because it’s inexpensive insurance and required by code in most jurisdictions.

Interior perimeter drains and sump pumps are necessary when:

You’re retrofitting an existing basement that has chronic water problems and excavating the exterior is not practical or too expensive.

Your foundation walls are already waterproofed on the outside, but water still enters at the floor joints or through cracks.

The site is very flat or the basement is below the level where you can discharge to daylight.

You have a high water table that pushes water up through the floor during heavy rain.

Interior systems are common retrofits because they can be installed from inside without disturbing landscaping, decks, or driveways. They don’t prevent water from reaching the foundation, but they prevent flooding.

French drains are necessary when:

You need to intercept surface or shallow groundwater away from the foundation, such as along a slope or across a yard.

You’re retrofitting a basement and choose to dig down to the footing from outside.

Grading is always necessary. Every foundation needs proper slope away from the house to manage surface water. Grading is often sufficient on its own in dry climates or on well drained sites, but it should always be combined with gutters and downspout extensions.

Sump pump systems are necessary when:

Your drain system collects water but has no gravity outlet to daylight.

You live in an area with heavy precipitation or rapid snowmelt.

Your basement floor is below the surrounding grade.

Local code requires a sump pump. Some jurisdictions mandate them in all basements.

If you install a sump, always include battery backup. A sump pump is only useful if it works when you need it most, which is during power outages caused by the same storms that flood basements.

Step by Step Installation (Exterior Footing Drain)

krw6cHZeQYSEaRiR7djF4w

1. Site Assessment and Code Compliance

Before you dig, evaluate your soil type, slope, and water table. Walk your property during and after heavy rain to see where water flows and where it ponds. Check local building codes for minimum drain depth, slope, outlet requirements, and inspection procedures.

Call 811 to have underground utilities marked. Digging into a gas line, electric service, or water main is dangerous and expensive.

Verify your discharge options. Can you run to daylight? Is there a storm sewer connection available? Will you need a sump? Measure distances and calculate slope to confirm your plan will work.

2. Excavation and Trenching

Excavate around the foundation perimeter down to the bottom of the footing, not below it. Digging deeper than the footing undermines its support and can cause settlement or cracking.

Trench width should be about 12 inches to give you room to work and to accommodate the pipe, gravel, and fabric. Dig carefully near the foundation to avoid damaging the waterproofing membrane or the footing itself.

Slope the trench floor at least 1/8 inch per foot toward the outlet. For a perforated collection pipe, level is acceptable because the outlet section provides the drainage slope, but a slight slope in the collection trench helps move water along.

If you encounter large rocks, roots, or other obstructions, remove them. Cut tree roots cleanly with a saw. Don’t tear them. Tearing creates ragged edges that regrow aggressively into the drain.

3. Install Filter Fabric

Unroll non woven geotextile fabric along the bottom and up both sides of the trench. Use fabric wide enough to cover the bottom, wrap up the foundation wall, and fold over the top of the stone later. 6 feet wide is common for a typical footing depth.

Overlap fabric seams by at least 12 inches. Fabric should cover the trench completely with no gaps where soil can enter.

4. Place Bedding Stone

Pour 2 to 3 inches of clean crushed stone into the bottom of the trench on top of the fabric. Level and compact it lightly by hand. This stone provides a stable, free draining base for the pipe.

5. Lay Perforated Pipe

Set 4 inch rigid perforated PVC pipe on the stone bed. The perforations can face down or to the sides. Installer preference varies. Facing down reduces the chance of silt entering from above. Facing to the sides can increase inflow capacity.

Run the pipe continuously around the perimeter. Use 90 degree or 45 degree fittings at corners. Leave no gaps.

Connect any window wells or exterior stairwells to the main drain line with solid 4 inch pipe so water from those areas flows into the system.

At the outlet point, transition from perforated pipe to solid pipe using a coupler or fitting. The solid outlet pipe must slope at least 1/4 inch per foot. Steeper is better, to carry collected water away efficiently.

6. Surround Pipe with Stone

Cover the pipe with crushed stone. Bring the stone level up to about 6 to 8 inches above the top of the footing. The stone layer should completely surround the pipe with at least 3 inches of stone on all sides.

Stone depth varies depending on your footing depth and trench size, but the goal is a continuous gravel envelope that intercepts water before it reaches the foundation wall.

7. Wrap Fabric Over Stone

Fold the filter fabric over the top of the stone, overlapping the edges by 12 inches or more. This completes the “burrito” and prevents soil from washing down into the stone.

Some installers add a second layer of fabric on top for extra protection in silty soils.

8. Cap with Sand and Backfill

Place a 6 inch layer of coarse sand on top of the fabric. Sand fills voids and keeps fine soil particles from working their way into the fabric over time.

Above the sand, backfill with native soil or clean fill. Compact the soil in 6 inch lifts to prevent settling. Slope the final surface away from the foundation at 6 inches over 10 feet to direct surface water away.

Do not backfill with clay or heavy soil directly against the foundation if you can avoid it. A layer of coarser material near the wall helps surface water drain down to the footer drain rather than soaking into the backfill.

9. Route Outlet and Final Inspection

Run the solid outlet pipe to its discharge point, daylight, storm sewer, or sump pit. If discharging to daylight, extend the pipe outlet at least 10 feet from the foundation and secure it so it doesn’t move or get buried. Add a rodent screen over the outlet to keep animals out.

If tying into a sump, penetrate the footing with a 6 inch pipe sleeve and connect the drain line to the sump pit through that sleeve. Seal the penetration to prevent soil from entering.

Test the system by running water into the drain from a hose at the far end of the system. Verify that water flows freely to the outlet and that there are no leaks or blockages.

Schedule a final inspection if required by local code. Many jurisdictions require inspection of the drain system before backfill so the inspector can confirm proper slope, materials, and installation.

Local Codes and Standards

K0X4wPitQ5iZBUtXDKOSfw

Building codes mandate foundation drainage in most circumstances. The International Residential Code (IRC) provides the baseline requirements, and local amendments may be stricter.

IRC Section 405.1 requires a drain around the perimeter of any foundation that encloses habitable or usable space below grade. The drain must be installed at or below the bottom of the basement floor slab.

IRC Section 405.1 also specifies that drain tile or perforated pipe must be placed on not less than 2 inches of washed gravel or crushed stone, and the pipe must be covered with at least 6 inches of the same material. A geotextile filter fabric is required to prevent soil migration into the gravel.

IRC Section 406.1 requires foundation walls to be damp proofed from the footing to grade. Section 406.2 requires full waterproofing, not just damp proofing, if the foundation is in standing water or if the water table is high.

IRC Section 801.3 requires roof drainage (gutters and downspouts) to be extended at least 5 feet from the foundation in areas with expansive soils. Even where not mandated, downspout extensions are critical to prevent roof runoff from overwhelming the footer drain or saturating soil near the foundation.

IRC Section 404.1.7 governs backfill timing and compaction. Backfill must not be placed until the foundation is sufficiently strong to resist lateral loads, and it must be placed in layers and compacted to prevent future settling.

Minimum slope for a solid drain outlet is 1/4 inch per foot in most jurisdictions. Some local codes require 1/2 inch per foot or steeper for better flow.

Outlet discharge must not create erosion, flooding on neighboring property, or contamination of surface water. Some areas prohibit connection of foundation drains to sanitary sewers. Others require connection to a municipal storm sewer if available. Check local rules.

Permits are often required for footer drain installation or sump pump discharge alterations. Inspections may be required before backfill, after rough in, and at final completion.

If you’re building new or doing major foundation work, follow the IRC and consult your local building department for amendments and permit requirements. If you’re retrofitting an older home, you may not be required to meet current code unless you’re also doing other work that triggers a permit, but meeting current standards is a good idea for durability and resale value.

DIY vs Professional Installation

Wtm3lPeMRZecFjgnpZUI3g

Footer drain installation during new construction is typically handled by the foundation contractor or the site excavation crew. It’s part of the standard foundation scope and done before backfill.

Retrofitting a footer drain is a different story. You’re excavating next to an existing foundation, removing landscaping, possibly cutting through concrete walks or patios, and working around utilities, trees, and structures like decks or HVAC equipment.

When to hire a professional:

You don’t have excavation equipment or experience operating it. Hand digging a trench 3 feet deep around an entire house is slow, exhausting, and often impractical.

The site has underground utilities. Locating services marks approximate positions, but a skilled operator knows how to dig carefully and stop when they encounter a line.

The foundation is deep, the soil is heavy clay, or the site is sloped and unstable. Trenching in difficult conditions requires shoring, proper compaction, and attention to safety.

You’re not sure about slope, outlet options, or system design. A drainage contractor or foundation specialist can assess your site, recommend the right system, and ensure proper installation the first time.

Your jurisdiction requires permits and inspections. Contractors are familiar with local code requirements and inspection procedures.

Professional installation costs vary widely depending on site conditions, depth of excavation, soil type, and accessibility. Anecdotal estimates for a full perimeter retrofit range from $10,000 to $25,000 for a typical basement. If you need to remove and replace a deck, driveway, or mature landscaping, add more.

When DIY might be feasible:

You’re installing a short section of drain, such as along one wall or around a single corner, where water is entering.

The trench depth is shallow, soil is easy to dig, and access is clear.

You have basic construction skills, can rent a mini excavator, and can follow code requirements for slope and materials.

You’re comfortable working with PVC pipe, gravel, and fabric, and you have help for the heavier work.

Even on a DIY project, you should call 811 for utility locates, pull any required permits, and schedule inspections. Mistakes in slope, backfill compaction, or fabric placement can make the system ineffective and waste your time and money.

If you’re unsure, pay for a consultation with a drainage contractor or foundation engineer. A few hundred dollars for professional advice can save you thousands in wasted materials and failed work.

Cost Factors and Budget Planning

7zXJjZFtQJucULMJN2eQxA

Footer drain cost depends on several variables:

Excavation depth and volume: Deeper footings and taller foundation walls require more digging. Heavy clay or rocky soil costs more to excavate than loose sand. If the contractor has to haul away excess soil, that adds to the cost.

System length: A large house has a longer perimeter. More linear feet means more pipe, more gravel, more fabric, and more labor.

Obstructions and access: Mature trees, underground utilities, existing hardscape (patios, walks, driveways), and tight spaces all slow down the work and increase cost. Removing and replacing a concrete patio or a deck can add several thousand dollars.

Outlet distance and type: Running the outlet pipe 100 feet to a daylight discharge or connecting to a storm sewer adds material and labor. If you need to install a sump pit and pump, expect to pay $1,500 to $3,000 for the sump system alone, plus the cost of the drain piping.

Materials quality: Rigid PVC pipe costs more than flexible corrugated pipe but lasts longer. Clean crushed stone costs more than mixed fill. Using high quality geotextile fabric and proper bedding increases upfront cost but reduces long term maintenance and failure risk.

Labor rates: Regional labor costs vary. Urban areas and high cost of living regions have higher rates. Experienced foundation or drainage contractors charge more than general excavation crews, but their work is usually more reliable.

Permits and inspections: Some jurisdictions charge permit fees and require multiple inspections. Factor in the cost of code compliance and any required engineering if your site has special conditions.

A rough ballpark for professional installation of an exterior footing drain retrofit on a 1,500 square foot basement (about 160 linear feet of foundation) ranges from $10,000 to $20,000 in many markets. Smaller sections or simpler sites might be $3,000 to $7,000. New construction installation, done during the foundation pour before backfill, is far less, often $1,500 to $3,000 because access is open and no demolition is required.

Sump pump installation alone, if you already have a pit or are adding one as part of interior work, ranges from $500 to $1,500 for a basic setup, or $2,000 to $4,000 if you add battery backup, a high capacity pump, and a sealed radon resistant pit cover.

Grading work to correct surface drainage is the least expensive option, often $500 to $2,000 for resloping soil and adding swales or berms. But grading alone won’t solve a high water table or hydrostatic pressure problem.

Maintenance Schedule and Procedures

IK0HMA2FQA-ZWDmcfucjuA

A footer drain requires regular maintenance to stay effective. The two main enemies are silt and tree roots. Both slowly clog the system until water backs up and enters your basement.

Twice per year inspection:

Walk your property before and after the heavy rain season. Look for standing water or wet soil near the foundation, which suggests the drain isn’t handling the load. Water stains or efflorescence on basement walls indicate moisture is getting through. Slow drainage from gutters or downspouts might mean sediment has clogged connections to the footer drain. Visible outlet discharge matters too. If you have a daylight outlet, check during a rain event to confirm water is flowing out.

Annual flushing:

If your system has accessible cleanouts, risers that extend from the drain pipe up to grade, flush the system once per year with a garden hose. Insert the hose into the cleanout and run water for several minutes to push out sediment and small roots.

If you don’t have cleanouts and water isn’t draining well, consider having a plumber or drainage contractor snake or jet the line. High pressure water jetting can clear silt and cut roots.

Sump pump testing (monthly during wet season):

Pour a bucket of water into the sump pit to verify the pump activates and discharges properly. Listen for unusual noises, grinding, rattling, or buzzing, which suggest the pump is failing.

Check the discharge line to make sure it’s clear and water is flowing away from the foundation.

Test the battery backup by disconnecting shore power and triggering the pump. Replace the backup battery every three to five years, even if it seems to work.

Gutter and downspout care (quarterly):

Clean gutters and downspouts to prevent clogs. Clogged gutters overflow and dump water at the foundation, overwhelming the footer drain.

Extend downspouts at least 5 feet from the foundation. 10 feet or more is better. Use solid pipe or flexible extensions so runoff discharges well away from the house.

Never connect downspouts directly into the footer drain unless you have a screened cleanout and you’re committed to frequent maintenance. Leaf litter and debris from gutters will clog the drain pipe.

Grading inspection (annually):

Check that soil around the foundation still slopes away. Settling, landscaping changes, or erosion can create low spots where water ponds. Add soil and regrade as needed to maintain a 6 inch drop over 10 feet.

Long term maintenance (10 to 20 years):

Even well installed systems accumulate silt over decades. At some point you may need to excavate and rebuild sections of the drain, replace clogged pipe, or refresh the gravel and fabric.

Tree roots are a chronic problem near large trees. If roots repeatedly clog the drain, you may need to remove the tree, install root barriers, or reroute the drain away from the tree.

Common Problems and Troubleshooting

Basement Still Wet After Drain Installation

If you installed a footer drain and the basement is still damp, check these issues:

Improper slope: The drain pipe may be level or sloped the wrong direction, so water doesn’t flow to the outlet. You’ll need to excavate and reinstall with correct slope.

Clogged pipe or outlet: Sediment or roots have blocked the drain. Flush or snake the line.

High water table: If ground

Final Words

Stop the water and stabilize the area right away. That’s the action we focused on: quick response, smart drying, and clear documentation.

You saw a step-by-step look at assessing your foundation, planning the drain layout, choosing materials, and handling installation or when to call a pro. We also covered moisture checks behind walls, how to test the system, and what records help with claims.

Follow those steps, keep photos and readings, and you’ll limit hidden damage. With the right approach to basement footer drain systems, you’ll protect your space and get back to normal faster.

FAQ

A: The list of approved internal and external hyperlinks is something we need to place links correctly; please paste the full list, or tell us to set [Hyperlinks]= na so we proceed without links.

A: If you don’t provide the hyperlink list, we’ll set [Hyperlinks]= na and draft the outline without links, leaving clear placeholders so you can add URLs later or ask us to insert them.

Q: Can you proceed with [Hyperlinks]= na?

A: We can proceed with [Hyperlinks]= na; we’ll mark recommended link locations and anchor text so adding final URLs later is fast and keeps the outline moving.

Q: How should I format the hyperlinks when I send them?

A: When sending hyperlinks, provide the full URL, preferred anchor text, whether it’s internal or external, and any special attributes like nofollow; a simple numbered list works best for quick insertion.

A: Internal links point to pages on your own site; external links point to other domains. Label each link so we place it with the right context and site structure in mind.

Q: Are there limits on how many links I can provide?

A: There aren’t strict limits, but prioritize relevance—focus on essential internal pages and a few high-value external sources to avoid clutter and protect reader trust and SEO value.

Q: How will you show placeholders for missing links in the outline?

A: We’ll show placeholders as bracketed anchor text with notes like [INSERT URL] and a tag for internal or external, so you or we can replace them later without confusion.

A: We’ll update the outline usually within one business day after you send the full link list; if it’s urgent, tell us and we’ll prioritize the change.

Q: Who verifies that the links are correct and live?

A: We’ll check that links resolve and match the anchor text, but you should confirm final URLs, permissions, and tracking requirements for any paid or restricted pages before publishing.

A: For affiliate or sponsored links, provide the URL, required disclosure text, preferred anchor text, and any tracking parameters so we place them correctly and keep transparency intact.
Property Damage Claim Settlement: Negotiation Tips and Payout Expectations

0

Most homeowners who accept their insurance company’s first settlement offer leave thousands of dollars on the table. The initial check looks reasonable until you realize it covers 40 to 60 percent of what your claim is actually worth. Insurance companies expect negotiation. After you push back with documentation and competing estimates, final settlements usually reach 75 to 95 percent of fair value. Understanding how settlements work, what documentation strengthens your position, and when to negotiate turns an inadequate offer into a fair payout that actually covers your repairs.

How Property Damage Claim Settlements Work: Process and Payout Expectations

Zm_dt-zRR2Ke6OKFkK368A

A property damage claim settlement is the final agreement between you and your insurance company about how much money you’ll receive for covered losses. Most settlements land between 60 and 85 percent of initial damage estimates, depending on how well you document your loss and how effectively you negotiate. Think of the settlement as the finish line where your insurer writes the check and you accept it as full payment for the damage covered under your policy.

After your adjuster inspects the damage, three payment scenarios typically unfold. You might receive an advance check that gets deducted from your total settlement later. You might get an immediate full settlement if the damage is straightforward and everyone agrees on the value. Or you might receive two to three separate checks, one for your home’s structure, a second for your personal belongings, and sometimes a third for additional living expenses while repairs happen.

Your settlement amount depends on several calculations working together. The adjuster assesses the damage and estimates repair or replacement costs. That figure runs through your policy’s coverage limits (the maximum your policy pays). Then your deductible gets subtracted. Finally, the valuation method matters. Actual cash value settlements account for depreciation and pay less up front, while replacement cost policies pay what it costs to replace damaged items with new ones of similar quality.

First settlement offers typically come in at 40 to 60 percent of what your claim is actually worth. Insurance companies expect negotiation. After you push back with documentation and competing estimates, final settlements usually reach 75 to 95 percent of fair value. If you accept that first offer without review, you’re leaving money on the table, sometimes thousands of dollars for significant damage.

Step-by-Step Property Damage Settlement Process From Filing to Final Payment

a8_utSCpSrStJERkVHMCpg

Understanding what happens at each stage reduces stress and helps you respond faster when your insurance company needs information.

  1. Report damage to insurance company and obtain claim number (Day 0 to 1). Contact your insurer as soon as damage occurs. You’ll receive a claim number that tracks everything from this point forward. Most policies require prompt notification, often within 24 to 72 hours.

  2. Document damage with photographs and emergency mitigation (Day 1 to 3). Take photos and videos from multiple angles before making any repairs. Stop ongoing damage if safe to do so. Tarp damaged roofs, extract standing water, board up broken windows. Save all receipts for emergency work.

  3. Meet with claim adjuster for property inspection (Day 7 to 14). An adjuster visits your property to assess damage extent and estimate repair costs. Walk them through every damaged area and point out details they might miss. Their inspection report drives your initial settlement offer.

  4. Review adjuster’s damage assessment and repair estimates (Day 14 to 21). The adjuster sends a damage assessment and settlement calculation. Compare their estimate against your own contractor quotes. Look for missing items, undervalued repairs, or incorrect depreciation.

  5. Address mortgage company endorsement requirements if applicable (Day 21 to 30). If you have a mortgage, your lender gets listed as a co-payee on settlement checks. You’ll need to coordinate with them to release funds, which requires contractor licenses, signed contracts, and sometimes inspections.

  6. Negotiate settlement amount if offer is insufficient (Day 21 to 45). Submit your own repair estimates, replacement cost documentation, and evidence supporting higher values. This back and forth continues until you reach agreement or hit an impasse.

  7. Sign settlement agreement and release forms (Day 30 to 60). Once you accept an offer, you’ll sign paperwork confirming the settlement amount and releasing the insurer from further liability for this specific damage. Review these documents carefully before signing.

  8. Receive payment and complete repairs with licensed contractors (Day 45 to 90). Your settlement check arrives, you hire licensed contractors, and repair work begins. For replacement cost policies, you’ll receive recoverable depreciation after proving you completed repairs.

Standard straightforward claims settle within 30 to 90 days from start to finish. Complex claims involving structural issues, coverage disputes, or extensive damage stretch to 90 to 180 days. Catastrophe claims following hurricanes, wildfires, or widespread storms can take six months or longer due to adjuster backlogs and contractor shortages. Several factors speed up or slow down your settlement timeline. Complete documentation with photos and multiple estimates accelerates the process. Prompt responses to adjuster requests keep things moving. Coverage disputes over what’s included in your policy add weeks or months. Catastrophe backlogs delay adjuster inspections. Mortgage company processing can add two to four weeks to fund release.

Required Documentation and Evidence for Maximizing Your Settlement

2mxqTGUxQy-GQA3-5rrMAw

Thorough documentation forms the foundation of successful settlements and prevents insurance companies from offering you less than your claim is worth. When adjusters see organized, detailed evidence, they know you understand the process and won’t accept a lowball offer without a fight.

Insufficient documentation ranks as the most common reason policyholders receive inadequate settlement offers. Adjusters perform cursory inspections unless you point out every damage detail with supporting evidence. Here’s what you need:

Date-stamped photographs of all damage from multiple angles showing context and close-up detail. Professional repair estimates from licensed contractors with minimum two to three competing quotes. Insurance policy declarations page showing your coverage limits and deductible. Adjuster’s inspection report and estimate for comparison against your documentation. All correspondence with your insurance company including emails, letters, and notes from phone calls. Emergency repair invoices and receipts for tarping, water extraction, board-up, and temporary fixes. Temporary housing receipts if you had to leave your home during repairs. Expert assessments from engineers, roofing consultants, or structural specialists for complex damage. Building code compliance documentation if repairs require upgrades to meet current standards. Comparable property valuations for total loss claims showing market value of similar properties. Proof of ownership documents including purchase receipts, property deeds, and prior appraisals. Pre-loss condition photos if available from real estate listings, social media, or family albums.

Personal property claims require additional specialized documentation on top of structural damage evidence. Your coverage for belongings typically ranges from 50 to 70 percent of your dwelling coverage amount. A home insured for 100,000 dollars in structure coverage carries 50,000 to 70,000 dollars in coverage for personal belongings.

Personal Property and Contents Documentation Requirements

Personal property settlements follow a two-step payment process. Your insurer pays actual cash value first (current value minus depreciation). Then they pay recoverable depreciation after you prove you replaced the items, typically within 180 to 365 days from your loss date. Submit these documents to maximize your contents claim:

Create a room by room inventory of damaged items with detailed descriptions including brand, model, age, and condition before the loss. Use photos and videos to document the condition and quantity of damaged items before you dispose of them. Research current replacement costs for similar items using online retailers and local stores (use current prices, not what you originally paid). Gather receipts, credit card statements, bank records, or online order confirmations when available for high-value items. Group similar items by category (kitchen items, clothing, electronics, furniture) for efficient claims processing. Submit your cash value list first as required by most insurers before they’ll issue initial payment. Keep copies of all submitted documentation for your records and potential appeals. Track all replacement purchases separately with new receipts for depreciation recovery. Submit proof of replacement within your policy’s required timeframes to receive full replacement cost value.

Understanding Claim Valuation: Actual Cash Value vs Replacement Cost

TTXPwHKQSN2MXhvVxtopzA

Actual cash value represents your property’s current market value minus depreciation for age and wear. If your ten year old roof gets damaged, the insurance company calculates what that used roof was worth right before the damage happened, not what a brand new roof costs.

Replacement cost coverage pays the amount needed to replace your damaged property with new items of similar kind and quality. That same ten year old damaged roof gets replaced with a new roof at today’s prices, and your insurance company covers the full replacement expense (minus your deductible).

The two-step payment process for replacement cost policies works like this. Your insurer pays actual cash value first as an initial settlement. This covers the depreciated value right away. After you complete repairs and submit proof of replacement purchase, they pay the recoverable depreciation, the difference between actual cash value and full replacement cost. You must submit replacement proof within a specified timeframe stated in your policy, commonly 180 to 365 days from the loss date. Miss that deadline and you forfeit the depreciation recovery.

Here’s a real calculation showing the financial difference. Your roof needs complete replacement after storm damage. Replacement cost is 15,000 dollars for a new roof. The adjuster calculates 9,000 dollars in depreciation based on the roof’s age and condition. Your initial actual cash value payment is 6,000 dollars (15,000 dollars replacement minus 9,000 dollars depreciation). You hire a contractor and replace the roof. After submitting paid invoices and completion photos, you receive the 9,000 dollars recoverable depreciation. Your total payout reaches the full 15,000 dollars replacement cost.

What Damages Are Covered in Property Settlements and Payout Calculations

XY-_qnYQcK4Om9iKpzRaw

Homeowners insurance policies typically divide coverage into three main categories: dwelling and structure coverage, personal property coverage, and additional living expenses. Understanding how each category calculates settlements helps you know what to expect when damage happens.

Settlement calculations differ for each coverage type based on your policy limits and deductible. Your dwelling coverage pays to repair or rebuild your home’s structure. Personal property coverage reimburses you for damaged belongings using either actual cash value or replacement cost depending on your policy. Additional living expenses cover the extra costs of living elsewhere while your home is uninhabitable.

Coverage Type What’s Included Typical Policy Limit Calculation Method
Dwelling/Structure House frame, roof, walls, built-in appliances, attached structures Dwelling coverage amount (e.g., $200,000) Replacement cost or actual cash value minus deductible
Personal Property/Contents Furniture, clothing, electronics, appliances, personal items 50 to 70% of dwelling coverage (e.g., $100,000 to $140,000) Actual cash value initially, then recoverable depreciation after replacement
Additional Living Expenses Hotel, rental housing, restaurant meals, storage, increased commuting 10 to 30% of dwelling coverage or 12 to 24 months maximum Difference between normal living costs and actual displacement costs
Other Structures Detached garage, shed, fence, driveway, pool 10% of dwelling coverage (e.g., $20,000) Replacement cost or actual cash value minus deductible
Loss of Use Fair rental value if property becomes uninhabitable Varies by policy, often included in ALE coverage Market rental rate for similar property during repair period

Negotiating Your Property Damage Settlement: Proven Tactics and Strategies

jUxHoDYCQJ2AJeabEwvyrg

Effective negotiation increases settlement amounts by 20 to 40 percent in many cases, putting thousands of extra dollars in your pocket for the same damage.

Never accept the first offer. It’s always a starting point. Initial offers typically land at 40 to 60 percent of fair value. Insurance companies expect you to counter. Accepting immediately signals you don’t know your claim’s worth.

Calculate your own damage valuation independently. Get two to three contractor quotes and research replacement costs yourself. Know your number before negotiations start, but don’t share your minimum acceptable amount with the adjuster.

Ask adjusters to explain in detail how they calculated their offer. Make them walk through every line item. When they offer low numbers, ask “why” and make them justify the valuation with specific facts about materials, labor, and depreciation.

Challenge low offers with documented evidence of higher replacement costs. Submit your contractor estimates, material price quotes, and photos showing damage the adjuster missed. Written evidence carries more weight than verbal complaints.

Remain professional but persistent. Adjusters respect informed policyholders who stay calm and organized. Angry phone calls hurt your leverage. Steady, fact-based pushback gets results.

Request review by supervisor if initial adjuster is unreasonable. When negotiations stall, escalate in writing to the adjuster’s manager. Supervisors have more authority to increase settlements and want to resolve disputes efficiently.

Use competing contractor estimates as leverage. If your quotes run 20 to 30 percent higher than the adjuster’s estimate, that gap strengthens your negotiating position. Three consistent quotes from licensed contractors are hard to dismiss.

Formal written demand letters establish serious intent and create a documentation trail that protects you if negotiations fail and you need to escalate further.

Essential Elements of Effective Demand Letters

Professional demand letters combine respectful tone with firm evidence-based requests. Structure your letter to make the adjuster’s job easy while showing you won’t accept an unfair settlement. Include these six essential elements:

Policy number, claim number, and date of loss. Start with identifying information so your letter gets routed correctly and attached to your claim file immediately.

Detailed description of damage with reference to specific policy coverage. Describe what happened and cite the exact policy sections that cover this damage. Show you’ve read your policy and understand what you’re owed.

Itemized list of all damages with current replacement costs. Break down every damaged component with specific dollar amounts based on contractor quotes and market prices for materials and labor.

Attached supporting documentation. Include contractor estimates, photos with dates, receipts for emergency repairs, and expert assessments. Make your evidence impossible to ignore.

Specific settlement demand amount with calculation justification. State exactly how much you’re requesting and show the math. Walk the adjuster through your valuation step by step.

Reasonable response deadline. Give the insurance company 15 to 30 days to respond. This timeframe shows you’re serious while allowing them enough time to review your documentation.

When rejecting settlement offers, send a written explanation stating why the offer is insufficient, what evidence supports a higher value, and what counter-demand you’re making. Written rejections prevent misunderstandings and create a paper trail if you need to file a complaint or lawsuit later.

Common Reasons for Low Settlement Offers and How to Counter Them

vcUz3U8QSv6GvAk85rQG1g

Insurance companies are for-profit businesses with financial incentives to minimize claim payouts. Their business model works when they collect more in premiums than they pay out in claims. Understanding this basic reality helps you recognize when an insurer is protecting profits instead of honoring your policy.

Recognizing these tactics empowers you to respond effectively rather than accepting an inadequate settlement out of frustration or confusion.

Incomplete damage assessment that misses hidden or secondary damage like moisture behind walls or structural issues not visible during initial inspection. Use of depreciated values when replacement cost coverage is owed under your policy terms. Reliance on lower-cost repair methods or inferior materials that don’t match your home’s quality. Incomplete review of policy coverage and applicable endorsements that provide additional coverage beyond base policy limits. Banking on policyholder unfamiliarity with the claims process and hoping you’ll accept the first offer. Quick settlement pressure before the full extent of damage becomes apparent, especially for water damage where mold and structural issues develop over time. Cursory inspections unless policyholders point out every detail with photographic evidence and expert assessments.

Policyholder mistakes also contribute to reduced settlements. Avoiding these common errors can increase your final payout by 15 to 30 percent without changing the actual damage to your property.

Policyholder Mistakes That Lead to Reduced Settlements

Delaying damage reporting beyond policy notification deadlines, which can result in claim denial. Failing to document damage thoroughly with dated photos and detailed videos before cleanup begins. Not obtaining multiple contractor estimates for comparison, leaving you unable to challenge low adjuster valuations. Accepting the first settlement offer without negotiation or independent damage assessment. Providing recorded statements to adjusters without preparation or understanding how your words might limit coverage. Signing releases without understanding what future rights you’re waiving, including rights to supplemental claims. Making permanent repairs before the adjuster inspects and documents original damage. Failing to mitigate ongoing damage by letting water sit, leaving roofs exposed, or allowing mold growth. Missing documentation deadlines for personal property inventories and proof of replacement purchases. Not reviewing your full policy coverage and endorsements to identify all applicable coverage. Making verbal settlement agreements without written confirmation of terms and payment dates. Allowing your claim to exceed statute of limitations periods without filing suit if necessary.

Counter these insurer tactics by maintaining detailed documentation from day one. Read your policy coverage and endorsements carefully so you know what you’re entitled to receive. Get expert opinions from licensed contractors, engineers, or public adjusters when damage is complex or valuations seem low. Insist on written documentation of every agreement, phone call summary, and settlement term before you accept payment.

Working With Claim Adjusters: What to Expect During the Settlement Process

mz_ZUA9FQaWLqk_1Va42lg

Three types of adjusters might handle your claim, and understanding who works for whom changes how you approach each conversation. Insurance company staff adjusters work directly for your insurer as full-time employees. Independent adjusters are contractors hired by insurance companies to handle claims during busy periods or in areas where the insurer doesn’t maintain local staff. Public adjusters work for you, the policyholder, and charge fees (typically 10 to 15 percent of your settlement) to represent your interests and negotiate on your behalf.

The initial adjuster inspection happens within 7 to 14 days after you file your claim. Prepare for this meeting by documenting all damage with photos before cleanup begins, making a written list of every damaged item and area, gathering contractor estimates if you have time, and being ready to walk the adjuster through your entire property pointing out damage they might miss. Don’t clean up or make permanent repairs before this inspection. The adjuster needs to see original damage conditions to write an accurate estimate.

Communicate effectively with adjusters by being organized, factual, and professional. Answer their questions directly without volunteering unnecessary information. Provide documentation they request promptly. Ask them to explain anything you don’t understand, especially how they calculated depreciation or why they excluded certain items from their estimate. Build rapport by being cooperative while protecting your interests with written documentation of every conversation and agreement.

When negotiations stall or your adjuster stops responding, escalate to their supervisor in writing. Send an email or letter to the adjuster’s manager summarizing the situation, explaining why the current offer is insufficient, attaching your supporting documentation, and requesting supervisor review and response within a specific timeframe. If the supervisor doesn’t resolve the issue, file a complaint with your state’s department of insurance. State regulators investigate unfair claims practices and can pressure insurers to settle claims fairly.

Public adjusters make sense for complex claims over 50,000 dollars where the damage assessment requires specialized expertise, or when you lack time to manage the claim yourself due to work or personal obligations. Their 10 to 15 percent fee comes from your settlement, so run the numbers. If hiring a public adjuster increases your settlement by 20,000 dollars but costs 2,500 dollars in fees, you’re still 17,500 dollars ahead. For straightforward smaller claims where the insurance company’s offer seems reasonable, public adjuster fees might reduce your net recovery.

Mortgage Company and Lienholder Requirements in Damage Settlements

L25qr_F3SHOzVi3pjsvOJw

Mortgage lenders have an insurable interest in properties securing their loans. They need to ensure that settlement money actually goes toward repairs rather than other purposes, protecting the collateral value of the property backing their loan. Because of this interest, your mortgage company gets named as a loss payee on your insurance policy and must be listed on settlement checks.

The dual-endorsement check process requires signatures from both you and your mortgage company before funds can be deposited or cashed. Your insurance company issues a check made payable to you and your mortgage lender jointly. You can’t access these funds until your lender reviews the claim, verifies repair plans, and endorses the check releasing money to you or directly to contractors.

Mortgage companies require specific documentation before releasing settlement funds. You’ll need to provide proof your contractor holds valid licenses in your state, a signed contract detailing the scope of work and payment schedule, and sometimes proof of contractor insurance including general liability and workers compensation coverage. Some lenders require an inspection after repairs are completed to verify the work was done properly and the property value is protected. This approval process adds two to four weeks to your settlement timeline in most cases.

Expedite mortgage company fund release by contacting your lender’s insurance claims department as soon as you receive the settlement check, submitting all required contractor documentation at once rather than piecemeal, responding quickly to any additional information requests, and following up weekly if you don’t hear back within the lender’s stated review period. Some mortgage companies allow you to endorse the check and deposit funds into an escrow account they control, releasing payment to contractors as work progresses. Others endorse the check and send funds directly to you for contractor payment.

Additional Living Expenses and Temporary Housing Reimbursement

BXCi52_SRUegTfAFWY1G6Q

Additional living expenses represent the difference between your normal living costs and the increased costs you incur because damage forced you out of your home. If you normally spend 800 dollars per month on food and utilities but temporary housing and eating out costs 1,500 dollars per month, your ALE claim is the 700 dollar difference, not the full 1,500 dollars.

ALE coverage typically includes hotel or rental housing costs, restaurant meals above your normal food budget, laundry and dry cleaning if you don’t have access to your washer and dryer, storage fees for furniture and belongings removed from your home during repairs, pet boarding costs if temporary housing doesn’t accept animals, and increased commuting costs if you’re living farther from work or school.

Document every expense with receipts, credit card statements, and hotel invoices. Create a comparison showing your normal monthly living costs versus actual costs during displacement. Submit documentation to your adjuster monthly rather than waiting until repairs are complete. Keep a spreadsheet tracking all ALE expenses by category with dates and amounts. Take photos of receipts in case originals fade. The more organized your documentation, the faster your insurer processes reimbursement.

Coverage limits for ALE appear in your policy as either a percentage of dwelling coverage (typically 10 to 30 percent) or a time limit (commonly 12 to 24 months). Once you hit either limit, coverage stops even if repairs aren’t finished. ALE coverage ends when your home becomes habitable again, not when repairs are 100 percent complete. Your insurer can cut off ALE payments when you can safely move back in, even if finish work like paint touch-ups or trim installation remains.

Emergency Repairs and Damage Mitigation Requirements

Every state imposes a legal duty to mitigate damages and prevent additional loss after the initial damage event. If a storm tears off part of your roof and you leave it open to the elements for two weeks, resulting water damage to your interior won’t be covered because you failed to protect the property. Reasonable mitigation is your responsibility.

Required mitigation actions include tarping damaged roofs to prevent water infiltration, extracting standing water within 24 to 48 hours to prevent mold growth, boarding up broken windows and doors to prevent weather damage and unauthorized entry, shutting off water supply to prevent ongoing leaks, and arranging for temporary power or HVAC if needed for property preservation. These aren’t optional courtesies. They’re policy requirements.

Document every emergency repair with before and after photos showing the damage and your mitigation efforts. Get written estimates before authorizing work when possible. Save all receipts and contractor invoices. Take photos of tarps, water extraction equipment, and boarding materials in place. This documentation proves you acted promptly and spent reasonably on emergency protection, which makes reimbursement straightforward.

Reasonable emergency repairs are covered even before your adjuster inspects the property. Your policy’s duty to mitigate overrides the normal rule about pre-inspection repairs. However, call your insurance company to report the damage and explain what emergency work you need to authorize. Many insurers pre-approve emergency mitigation up to certain dollar amounts (commonly 2,500 to 5,000 dollars) over the phone. Get the adjuster’s name, approval amount, and a confirmation number. This prevents disputes when you submit bills for reimbursement.

Selecting Licensed Contractors and Managing Repair Payments

Verify every contractor’s license through your state’s licensing board website before signing any contract. Check that their license is current, covers the type of work you need, and shows no disciplinary actions or complaints. Ask for proof of general liability insurance and workers compensation coverage. Call the insurance companies listed to verify coverage is active. Check references from recent jobs similar to yours, and drive by completed projects if possible to assess quality.

Insurance company preferred contractors offer advantages and disadvantages. The claims process typically moves smoother because these contractors have established relationships with adjusters and understand how to submit supplement requests for additional damage discovered during repairs. Preferred contractors often provide workmanship guarantees backed by your insurance company. However, you’re never required to use preferred contractors, and independent contractors sometimes provide better quality or customer service. Get estimates from both preferred and independent contractors, then compare scope, materials, timeline, and cost.

Typical payment structures protect both you and your contractor. Most contracts require a deposit of 10 to 30 percent to purchase materials and schedule work. Progress payments follow as work reaches agreed milestones, maybe 30 percent when framing is complete, another 30 percent when rough-ins are done, and final payment after inspection and punch-list completion. Never pay the full amount up front. Retain at least 10 percent until you’ve verified all work is complete and meets code.

Contractor fraud takes several forms. Be alert for anyone pressuring you to sign over your insurance check, offering to waive your deductible (which is insurance fraud), showing up unsolicited after storms offering immediate repairs, lacking proper licenses or insurance, requesting large up-front payments before starting work, or proposing to use inferior materials while billing insurance for premium products. How we help homeowners recover from property damage by coordinating licensed contractors, transparent pricing, and quality work that matches your home’s original condition.

Supplemental Claims and Reopening Settlements for Additional Damage

Hidden damage appears regularly during repair work. Contractors remove drywall and discover mold behind walls. They tear out flooring and find subfloor rot. They open ceilings and see structural damage not visible during the original inspection. These discoveries are normal, especially with water and fire damage where full extent isn’t apparent until demolition begins.

Request claim reopening and supplemental inspections as soon as contractors discover additional damage. Take photos immediately showing the newly discovered damage in context. Have your contractor document findings with detailed notes and measurements. Contact your adjuster right away. Don’t wait until the contractor completes all demolition. Most policies allow supplemental claims within one year from the original loss date, but don’t wait until that deadline approaches.

Work with your contractor to prepare a supplemental estimate detailing the newly discovered damage, required repairs, and cost. The contractor should use the same estimating software and format the insurance company uses (Xactimate is standard in most markets). Submit the supplemental estimate to your adjuster with photos and a letter explaining how this damage relates to the original loss. The adjuster will schedule a reinspection to verify the additional damage and issue a supplemental payment if the damage is covered under your policy.

Understanding Settlement Agreements and Release Forms

Settlement releases are legal agreements where you accept an insurance payment in exchange for waiving future claims related to the specific loss covered by that payment. Once you sign a release and cash the settlement check, you generally cannot reopen that claim for additional payment except under limited circumstances like discovering hidden damage within your policy’s timeframe.

Standard release language includes several key elements. The scope of release specifies exactly what damage and claims you’re releasing, property damage only, or potentially all claims including personal injury if the release is overly broad. Payment confirmation states the exact dollar amount you’re receiving and confirms you’ve received or will receive payment. Claim closure language indicates this settlement resolves all covered damage from the specific loss date and you won’t pursue additional claims for the same incident.

Watch for overly broad releases that might waive rights you want to preserve. Some releases include language waiving all claims arising from the incident, which could prevent you from filing supplemental claims if additional damage appears later. Other releases might waive personal injury claims if you or family members were injured during the same incident that damaged your property. Read every word carefully, especially sections about future claims and scope of release.

Request modifications to release language if necessary. You can strike through sections you disagree with, initial the changes, and return the modified release to your insurer. Common modifications include adding language that preserves your right to file supplemental claims for hidden damage discovered within one year, limiting the release to property damage only and specifically excluding personal injury claims, or adding specific exclusions for damage not yet discovered. Many insurance companies will negotiate release language rather than risk litigation. If your insurer refuses reasonable modifications, consult an attorney before signing.

When to Hire a Property Damage Attorney or Public Adjuster

Professional representation makes sense in specific situations where the potential settlement increase justifies the cost. Consider hiring help when settlement disputes exceed 10,000 dollars and negotiation has stalled, your claim has been denied and you believe coverage applies, your insurance company is acting in bad faith by delaying unreasonably or refusing to investigate thoroughly, or damage assessment requires specialized engineering or construction expertise beyond standard adjuster knowledge.

Public adjusters assess your damage, document the claim, prepare estimates, and negotiate settlements on your behalf. They typically charge 10 to 15 percent of your final settlement as their fee. Public adjusters add value when damage is complex and requires detailed documentation, you lack time to manage the claim process yourself, your initial settlement offer seems unreasonably low but you’re unsure how to prove it, or the claim value exceeds 50,000 dollars making the potential settlement increase worth the fee percentage.

Attorneys specializing in property damage and insurance bad faith handle coverage disputes, unreasonable claim denials, and litigation when insurers refuse to negotiate fairly. Most work on contingency, taking 33 to 40 percent of any settlement or judgment they recover. Attorneys become necessary when your insurer denies coverage you believe is valid under policy language, delays exceed reasonable timeframes without explanation (often 30 to 90 days depending on state law), the insurer refuses to negotiate in good faith or respond to reasonable documentation, or settlement negotiations have failed and litigation is your only remaining option.

Run the cost-benefit analysis before hiring professionals. If your insurance company offers 75,000 dollars and you believe fair value is 85,000 dollars, paying an attorney 40 percent to recover that additional 10,000 dollars leaves you with 6,000 dollars extra (10,000 increase minus 4,000 attorney fee). You’re better off accepting the 75,000 dollar offer. However, if fair value is 120,000 dollars, the attorney’s 40 percent fee on a 45,000 dollar increase is 18,000 dollars, leaving you 27,000 dollars ahead.

Find qualified insurance attorneys through your state bar association’s attorney referral service, searching for lawyers who specialize in insurance coverage disputes and bad faith claims. Check their background for disciplinary actions through the state bar website. Public adjusters require licensing in most states. Verify their license through your state department of insurance and check for complaints or disciplinary history before hiring.

Dispute Resolution Options: Appraisal, Mediation, and Arbitration

Alternative dispute resolution provides faster, less expensive paths than litigation for resolving settlement disagreements. These processes work particularly well for valuation disputes where you and your insurer agree on coverage but disagree on damage cost.

Appraisal is a policy-mandated process specifically for resolving valuation disputes, not coverage disputes. Each party selects an appraiser. You hire yours, your insurance company hires theirs. The two appraisers inspect the damage independently and prepare valuations. If they agree on the value, that becomes the binding settlement amount. If they disagree, they jointly select an umpire (a neutral third appraiser) who reviews both valuations and issues a binding decision. The umpire’s decision stands as the final damage value. You and the insurance company typically split the umpire’s fee. Appraisal can’t resolve whether damage is covered under your policy, only how much covered damage is worth.

Mediation brings you, your insurance company, and a neutral third-party mediator together for facilitated negotiation. The mediator doesn’t decide your case but helps both sides communicate effectively and explore settlement options. Mediation is voluntary and non-binding. You can walk away if you don’t like the mediator’s suggestions. The process works well when communication has broken down but both sides genuinely want to resolve the dispute without litigation. Mediation typically costs 1,000 to 3,000 dollars for a half-day or full-day session, with parties splitting the mediator’s fee. Success rates run 60 to 75 percent for property damage disputes.

Arbitration is similar to a private trial where a neutral arbitrator hears evidence from both sides and issues a binding decision. Some insurance policies require arbitration for disputes, making it mandatory rather than voluntary. Arbitration moves faster than court litigation (typically 6 to 12 months versus 1 to 3 years) and costs less because discovery is limited and procedures are streamlined. However, arbitration decisions are binding with very limited appeal rights. You generally can’t appeal just because you disagree with the outcome. Arbitration makes sense when mediation fails, litigation would be too expensive or time-consuming, or your policy requires it as a condition of coverage.

Property Damage Settlement Sample Scenarios and Expected Payout Ranges

Settlement amounts vary widely based on damage extent, your policy limits and valuation method, your deductible amount, and how effectively you document and negotiate. Understanding typical ranges for common damage scenarios helps set realistic expectations and identify when an offer is unreasonably low.

These scenarios represent common settlement ranges, but your individual circumstances will affect actual payouts. Geographic location, labor costs, material availability, and policy-specific coverage all influence final settlement amounts.

Damage Scenario Typical Repair Cost Average Settlement Range Coverage Notes
Kitchen water damage from burst pipe $8,000 to $15,000 $6,500 to $13,000 Covers drywall, flooring, cabinets if damaged, but excludes pre-existing pipe deterioration
Roof damage from wind/hail storm $7,000 to $18,000 $5,000 to $15,000 ACV policies pay depreciated value initially; RCV pays full replacement after completion

Final Words

A property damage claim settlement doesn’t have to feel overwhelming when you understand the process and come prepared.

Document everything thoroughly. Get multiple contractor estimates. Never accept the first offer without reviewing the numbers.

Ask adjusters to justify their calculations with specific facts. Put all agreements in writing before you sign anything.

Most importantly, remember that settlements are negotiations. With solid documentation and persistence, you can push for fair compensation that actually covers your repairs and gets your home back to normal.

FAQ

What is the average settlement for property damage?

The average settlement for property damage typically ranges from 60 to 85 percent of initial damage estimates, depending on documentation quality and negotiation effectiveness. First settlement offers often start at 40 to 60 percent of fair value, while final negotiated settlements usually reach 75 to 95 percent after proper documentation and discussion.

How to settle a property damage claim?

To settle a property damage claim, report the damage immediately, document everything with photos and contractor estimates, meet with the adjuster for inspection, review their settlement offer carefully, negotiate with supporting evidence if the offer is low, and sign the settlement agreement only after confirming it covers all damage. The entire process typically takes 30 to 90 days for straightforward claims.

What should you not say to a claims adjuster?

You should not tell a claims adjuster that you’re unsure about the full extent of damage, accept blame for the loss, provide recorded statements without preparation, or agree to quick settlements before inspecting hidden damage. Never share your minimum acceptable settlement amount, sign releases without careful review, or make verbal agreements without written confirmation.

What is a reasonable settlement offer?

A reasonable settlement offer covers the full cost to repair or replace damaged property at current market rates, minus your deductible, using replacement cost value rather than depreciated actual cash value when your policy provides replacement cost coverage. The offer should account for all visible and hidden damage, match independent contractor estimates, and include fair compensation for temporary housing if you’re displaced during repairs.

Can you reopen a property damage claim after settlement?

You can reopen a property damage claim for additional damage discovered within one year of the incident in most cases, provided you haven’t signed a final release that specifically waives supplemental claims. Hidden damage often appears during repair work, such as mold behind walls or structural issues, and requires documented evidence and contractor estimates for the supplemental claim.

What percentage do public adjusters charge?

Public adjusters typically charge 10 to 15 percent of the final settlement amount and work exclusively for the policyholder rather than the insurance company. They handle damage documentation, estimate preparation, and settlement negotiation, which can increase payouts by 20 to 40 percent in complex cases, though their fees reduce your net recovery.

How long does it take to receive a property damage settlement check?

You typically receive a property damage settlement check 30 to 90 days after filing for straightforward claims, though complex damage or mortgage company endorsement requirements can extend the timeline to 90 to 180 days. Catastrophe claims may take six months or longer due to high claim volume and adjuster availability.

What is the difference between actual cash value and replacement cost?

Actual cash value is the current market value of damaged property minus depreciation, while replacement cost is the full amount needed to replace it with new items of similar quality. Replacement cost policies pay actual cash value initially, then issue recoverable depreciation after you provide proof of replacement purchase within the specified timeframe, usually 180 to 365 days.

Do I have to use the contractor my insurance company recommends?

You do not have to use the contractor your insurance company recommends, though preferred contractors often streamline the claims process and have established communication channels for approving additional repairs discovered during work. Always verify any contractor’s license, insurance coverage, and references before signing contracts, regardless of who recommends them.

What happens if you disagree with the insurance adjuster’s estimate?

If you disagree with the insurance adjuster’s estimate, obtain independent repair estimates from licensed contractors, document all damage the adjuster missed with photos and detailed descriptions, submit a written counter-demand with supporting evidence, and request supervisor review if negotiations stall. Most policies include an appraisal clause for binding resolution of valuation disputes.

How does depreciation affect my property damage settlement?

Depreciation reduces your initial settlement to actual cash value by accounting for age and wear of damaged items, which can decrease payouts by 30 to 60 percent compared to replacement cost. If you have replacement cost coverage, you’ll receive the depreciation holdback after completing repairs and submitting proof of replacement purchase within policy deadlines.

What documentation do I need for personal property claims?

For personal property claims, you need a room-by-room inventory with detailed descriptions, photos or videos documenting condition and quantity, current replacement cost research for similar items, receipts or purchase records when available, and proof of replacement purchases to recover depreciation. Most insurers require the cash value list submission first, even with replacement cost policies.

Can insurance companies pay contractors directly?

Insurance companies can pay contractors directly if you sign authorization allowing direct payment, which mortgage lenders often require to ensure proper repairs before releasing settlement funds. This arrangement protects the lender’s interest but requires contractors to provide licenses, signed contracts, and inspection verification before receiving payment.

What are additional living expenses in a property damage claim?

Additional living expenses are the increased costs of temporary housing, meals, and other necessities above your normal living expenses when damage makes your home uninhabitable during repairs. Coverage typically includes hotel or rental costs, restaurant meals exceeding normal food expenses, storage fees, pet boarding, and increased commuting costs.

How do mortgage companies affect property damage settlements?

Mortgage companies affect property damage settlements by appearing as named payees on settlement checks, requiring dual endorsement before funds release, and controlling payment distribution to ensure proper repairs protect their loan collateral. They require contractor licenses, signed contracts, and repair inspections before releasing funds, which can add two to four weeks to the payment timeline.

Black Mold on Concrete Removal: Safe Steps and Prevention Tips

0

You ever scrub off black mold from your garage floor or basement wall, only to watch it come back two weeks later? That’s because concrete’s riddled with tiny pores that soak up moisture deep inside, and surface wiping doesn’t reach where mold actually lives. The good news: you can get rid of black mold on concrete for real if you treat it like the deep-rooted problem it is, not just something you wipe away. This guide walks you through the safe removal process, the gear that actually protects you, and the moisture fixes that stop mold from returning.

Step-by-Step Removal Process for Black Mold on Concrete

YYQE0-_rTCS5DsYzbdMkaw

Getting rid of black mold on concrete isn’t just about what you can see on the surface. Concrete’s full of tiny holes and pores that soak up moisture deep inside, and that’s where mold roots dig in. If you just wipe the surface, you’re wasting your time. You need to get your cleaning solution down into those pores and scrub hard enough to break up the mold colonies below what’s visible.

Before you start anything, get your safety gear together. You need an N-95 respirator mask (not a dust mask, an actual respirator), heavy duty nitrile or neoprene gloves, goggles that cover the sides of your eyes, and long sleeves that cover your arms and legs completely. This stuff isn’t optional. When you disturb mold, it throws thousands of spores into the air, and you don’t want those in your lungs or landing on your skin.

  1. Put on all your safety equipment before you even walk into the work area. Mask, goggles, gloves, protective clothing.

  2. Seal off the space by taping plastic sheeting over vents and doorways so spores don’t spread to other rooms.

  3. Open windows and set up fans to blow air outside, away from you (if you’re working outdoors, just make sure there’s good airflow).

  4. Clear loose debris from the concrete using a stiff broom or a shop vacuum with a HEPA filter.

  5. Mix your cleaning solution based on how bad the mold is and where you’re working:

  • Heavy growth or outdoor concrete: 1 cup bleach per gallon of water (bleach kills mold but doesn’t remove it by itself, so you still have to scrub)
  • Small indoor spots or light mold: 1 cup vinegar mixed with 2/3 cup water in a spray bottle
  • Large areas using vinegar: double or triple that ratio and use a pump sprayer
  • Another option: 3% hydrogen peroxide straight from the bottle
  1. Soak the entire moldy area with your solution. Don’t be stingy. You want it saturated.

  2. Wait 30 minutes while the solution soaks down into the concrete’s pores. This isn’t wasted time, it’s letting the cleaner reach mold roots below the surface.

  3. Scrub hard with a stiff bristle brush for most jobs, a wire brush for stubborn outdoor mold, or a deck brush for big areas. Push the bristles into the concrete, not just across it. You’re working the solution deeper while physically breaking up the mold.

  4. Spray again and wait another 30 minutes if you still see discoloration or smell that musty odor after the first round.

  5. Rinse everything thoroughly with a pressure washer for outdoor concrete (1500 to 2000 PSI works well) or a garden hose with a strong spray nozzle. For indoor concrete, use buckets of clean water and a mop, changing the water often. Pressure washers blast mold off physically but don’t kill the spores, which is why you used antimicrobial solutions first.

  6. Try a baking soda paste if staining’s still there: mix baking soda with just enough water to make a thick paste, spread it on the stains, wait 15 minutes, then scrub and rinse. Baking soda works as a mild scrubber and gets rid of odors.

  7. Get rid of all your cleaning materials right away by sealing them in plastic bags before taking them outside.

After you rinse, check whether you actually got it all by looking for remaining dark spots and smelling for that musty smell. If either’s still there, do the whole thing again. Deep mold often needs multiple treatments because those roots go way down into concrete’s porous structure. Chemical solutions work best for heavy infestations. Natural options like vinegar are better for lighter growth or indoor spaces where ventilation makes chemicals impractical. Match your tool intensity to the mold severity and location. Manual scrubbing’s fine for indoor or delicate areas, pressure washing suits outdoor surfaces that can handle aggressive treatment.

Let the concrete dry completely for 2 to 3 days in warm, low humidity conditions before you seal or finish it. Trapping moisture under a sealer creates perfect conditions for mold to come right back. The surface should feel totally dry and you shouldn’t see any dark patches that show dampness.

Essential Safety Precautions and Protective Equipment for Mold Removal

YZLeRxfgR7iVCMdlDYFISw

You can’t skip protective equipment when dealing with black mold on concrete. When you start removing mold, it releases thousands of airborne spores that you can inhale, swallow, or absorb through your skin. These spores cause allergic reactions in sensitive people right away and long term health problems with repeated exposure. Your body can’t tell the difference between “a little bit” of exposure and dangerous levels until symptoms show up, so you need full protection from minute one.

N-95 respirator mask: Filters at least 95% of airborne particles including mold spores. Regular dust masks don’t work. The mask has to seal tight against your face without gaps.

Heavy duty non-porous gloves: Nitrile or neoprene gloves rated for chemical resistance. Never use cotton or fabric gloves that soak up mold spores and cleaning solutions, letting them reach your skin.

Complete eye protection goggles: Must include side shields to stop spores from getting in from any angle. Regular glasses leave gaps. Mold spores irritate your eyes, make them red and watery.

Long sleeve protective clothing: Covers your arms and legs completely. Disposable Tyvek suits work well for big jobs. Wash protective clothing separately in hot water right after you finish, or throw away disposable gear in sealed plastic bags.

Closed toe boots or shoes: Protect your feet and keep you from tracking spores through your home on shoe treads.

Plastic sheeting and tape: Create barriers by sealing vents, doorways, and openings to unaffected areas. This stops spore spread during the aggressive scrubbing and rinsing that throws mold into the air.

Preparing your workspace means sealing all vents and doorways with plastic sheeting secured with painter’s tape or duct tape. Open windows in the work area and position fans to blow air outward, never toward other rooms. This creates negative pressure that keeps spores contained. For indoor work, especially basements, set up a direct path from the work area to outside for throwing away contaminated materials without walking through living spaces.

Disposal done right prevents bringing contamination back. Put all used cleaning materials, disposable protective gear, rags, and brushes into heavy duty plastic bags. Seal the bags completely before you carry them outside to the trash. Don’t shake out brushes, dump dirty water down drains that lead to other areas, or reuse any porous materials that touched mold. The goal’s preventing spore spread to areas you just cleaned or to spaces that weren’t affected before.

Surface Preparation Before Black Mold Removal

knlxf8CpQJ-iM4Y4T-cq6w

Before you apply any cleaning solution, figure out whether your mold situation’s something you can handle yourself or needs professional help. The standard guideline: if mold covers more than 10 square feet (roughly a 3 foot by 3 foot area), professional services make more sense. Large mold colonies mean you’ve got significant moisture problems that likely go beyond what you can see, and disturbing extensive mold releases massive amounts of spores that overwhelm basic containment. If you’re not sure what type of mold it is, if it showed up after sewage backup or flooding, or if anyone in your house has respiratory conditions, get a professional to look at it before you start.

For jobs you can do yourself, prepare the workspace by moving all movable items out of the area. Furniture, storage boxes, tools, and other belongings should be relocated completely away, not just pushed to the side. Mold spores settle on everything during removal, and you don’t want to clean your concrete only to contaminate it again from spore covered items you move back later. Seal all vents and doorways leading to other rooms using plastic sheeting secured with tape, creating a contained work zone. Open windows in the contaminated area and set up fans to blow air directly outside. This ventilation’s critical because aggressive scrubbing launches spores into the air. Protect any surfaces you can’t move by covering them with plastic sheeting secured at the edges.

Fix any active moisture sources before you start removing mold. Check for leaking pipes, dripping faucets, condensation on walls, or water seeping through foundation cracks. Fix these moisture problems first, or at least at the same time as mold removal. Removing mold while water keeps coming in guarantees rapid regrowth, often within days. If you spot water intrusion but can’t fix the source right away, at least identify it and plan the repair. Removing mold without fixing moisture is like mopping your floor while the faucet runs.

Understanding Black Mold Growth on Concrete Surfaces

hj699Pg9Rz2fMYvfyTc4HQ

Concrete’s porous structure makes it surprisingly vulnerable to black mold. The material’s full of thousands of tiny holes, nooks, and crannies created during curing when water evaporates and leaves behind interconnected channels. These microscopic spaces absorb and hold onto moisture from the air, rain, condensation, or ground seepage. When moisture levels stay elevated and concrete stays damp for more than 24 to 48 hours, conditions become ideal for mold.

Stachybotrys chartarum, commonly called black mold or toxic black mold, thrives when moisture combines with organic matter like dirt, dust, leaves, wood particles, or dead insects. Concrete itself doesn’t feed mold, but these organic materials pile up on concrete surfaces and in its pores, providing the nutrition mold needs. Add poor ventilation that keeps humidity high and prevents drying, and you’ve created perfect conditions for black mold.

Black mold penetrates deep into concrete’s porous structure rather than staying on the surface like it does on non-porous materials such as glass or metal. The visible dark patches you see represent only surface growth. Mold roots, called hyphae, extend down into the concrete’s pore network, sometimes going a quarter inch or deeper. This deep penetration’s why surface wiping or light scrubbing fails. You have to use cleaning solutions that soak into the concrete and scrubbing techniques aggressive enough to reach mold roots below the visible surface. Think of it like weeds in your lawn. Cutting the visible top leaves the roots intact to regrow.

Mold reproduces through microscopic spores that become airborne and travel on air currents. These spores settle on other surfaces throughout your home, staying inactive until they encounter moisture and food sources that trigger growth. One established mold colony produces millions of spores daily, which explains why mold problems spread to multiple areas if you don’t deal with them quickly.

Drying Process After Mold Removal from Concrete

IFA7osGTx2nkswU8o9p-A

After you finish the removal and rinsing process, concrete has to dry completely before you apply any sealers or finishes. The minimum drying time’s 2 to 3 days in ideal conditions like warm temperatures, low humidity, and good air circulation. Sealing damp concrete traps residual moisture beneath the sealer, creating immediate regrowth conditions. You just did all that work. Give it proper drying time.

Speed up drying by maximizing air circulation with box fans or floor fans positioned to blow across the concrete surface. For indoor spaces like basements or garages, run a dehumidifier continuously to pull moisture from the air and the concrete itself. Dehumidifiers should be set to maintain relative humidity below 50%. Open windows if outdoor humidity’s lower than indoor humidity. If you’re working outdoors, avoid rain exposure during the drying period by checking weather forecasts and covering the area with tarps if rain’s coming. Warm temperatures and direct sunlight speed outdoor concrete drying significantly.

Indoor concrete typically needs longer drying times than outdoor surfaces because of reduced air circulation and higher baseline humidity levels. Basement concrete, especially below grade walls and floors, may need 4 to 5 days of active dehumidification before it’s completely dry. You’ll know concrete’s dry when it feels completely dry to the touch, shows no darkened damp spots, and a moisture meter reads below 12% (if you’ve got one).

Test moisture levels before moving forward. Place a 2 foot square piece of plastic sheeting on the concrete, taping all edges down to create an airtight seal. Wait 24 hours, then lift the plastic. If you see condensation on the plastic’s underside or darkened concrete beneath it, moisture’s still there. Keep drying. If the plastic and concrete stay dry, you’re ready for sealing or finishing work. Trapped moisture under sealers leads to peeling, clouding, and most importantly, rapid mold regrowth that forces you to repeat this entire process.

Prevention Methods to Stop Black Mold Regrowth on Concrete

z4zF0zJJQ_67ecbjOfLK9A

Preventing mold regrowth costs way less than repeated removal and protects your home from ongoing damage. Once you’ve removed existing mold, shift your focus to the conditions that allowed growth in the first place.

Moisture control’s the foundation of mold prevention. Use dehumidifiers in enclosed spaces like basements and garages to maintain relative humidity below 50%. High humidity alone provides enough moisture for mold growth even without visible water. Improve ventilation by installing exhaust fans in poorly ventilated areas, opening windows regularly when outdoor humidity’s low, and making sure air can circulate freely rather than creating stagnant pockets. Fix leaks promptly, even small drips from pipes, faucets, or roof leaks. Correct drainage problems around your home’s foundation by making sure the ground slopes away from the structure, extending downspouts at least 6 feet from the foundation, and maintaining gutters to prevent overflow.

Surface treatments create a protective barrier that resists moisture intrusion. Penetrating sealers work better than surface coatings for mold prevention because they let concrete breathe while blocking liquid water. These sealers soak into the concrete’s porous structure and chemically bond within the material rather than forming a surface film. Apply penetrating concrete sealers formulated with silane/siloxane blends after the concrete’s dried completely following mold removal (remember that 2 to 3 day minimum drying time). These hydrophobic sealers cause water to bead up and run off rather than absorbing into the concrete, which makes future mold growth far less likely and makes any future cleaning easier.

For warm, humid environments, choose low solids solvent based sealers designed for better breathability. These allow water vapor to escape from within the concrete rather than trapping it beneath a surface film. Water trapped under sealers creates the exact moist environment mold loves.

Ongoing maintenance practices prevent mold establishment:

Clean concrete surfaces regularly to remove organic matter (dirt, leaves, pollen) that feeds mold growth. Address standing water immediately, even small puddles that appear after rain. Maintain gutters and downspouts to prevent water from pooling near concrete surfaces. Monitor indoor humidity levels with a hygrometer and adjust dehumidifier settings seasonally. Inspect concrete regularly in known problem areas (shaded outdoor sections, basement corners, areas near plumbing). Trim vegetation that shades outdoor concrete and prevents sunlight and air circulation.

Reapply penetrating sealers according to the manufacturer’s recommendations, typically every 3 to 5 years for most formulations. Even quality sealers gradually break down from UV exposure, foot traffic, and weather. Maintaining that moisture resistant barrier’s your best long term defense against mold regrowth. Prevention requires ongoing attention, not just one time treatment, but spending 30 minutes every few months on maintenance beats spending days on mold removal.

Indoor Versus Outdoor Concrete Mold Removal Differences

CkHWQh2YTkeWydZHLW2omA

Location significantly affects both mold severity and the appropriate treatment methods you should use. The same basic removal process applies, but the intensity, tools, and solutions vary based on whether you’re working outside or inside.

Outdoor concrete on patios, driveways, walkways, and pool decks tolerates aggressive cleaning methods that’d be problematic indoors. You can use stronger chemical solutions without worrying about indoor air quality, use pressure washers at higher PSI settings without worrying about water spray reaching furniture or flooring, and benefit from natural sun exposure and air circulation that speeds drying. Outdoor mold typically develops in damp or shaded areas that don’t get direct sun or adequate heat. Think north facing walkways, areas under roof overhangs, or sections shaded by trees or fences. These locations stay consistently damp, especially in humid climates or rainy seasons.

Indoor concrete in basements, garage floors, utility rooms, and crawl spaces faces different challenges. You have to contain cleaning to prevent spore spread throughout living spaces by sealing doorways and vents with plastic sheeting. Ventilation matters more because you’re working in an enclosed environment where chemical fumes concentrate. You may need to choose gentler solutions like vinegar or hydrogen peroxide instead of bleach to avoid overwhelming indoor air with harsh chemical odors, especially if the space connects to your HVAC system. Manual scrubbing with stiff brushes replaces pressure washing for most indoor work to control water spread and avoid saturating adjacent materials like drywall or wood framing.

Basement mold represents a special category that often indicates larger moisture or waterproofing problems beyond simple surface treatment. Below grade concrete walls and floors face constant ground moisture pressure trying to push through the material. If mold appears on basement concrete, you’re likely dealing with inadequate waterproofing, failed drainage systems, or high water table issues. These situations often need professional help because the work involves not just removing surface mold but installing proper drainage, applying waterproof coatings or membranes, and potentially adding dehumidifiers or sump pumps. A professional restoration service can assess whether structural concerns need attention beyond mold removal.

The treatment intensity you choose should match both the location and severity. Outdoor concrete can handle aggressive approaches like high bleach concentrations, wire brushes, 2000 PSI pressure washing. Indoor concrete needs measured approaches like diluted solutions, controlled scrubbing, careful water management. The goal stays the same, but the execution adapts to the environment.

Moisture Control and Root Causes of Concrete Mold Growth

Ke-1rps-Qo-LVy4bSoqjSA

Removing existing mold without fixing the moisture source that caused it guarantees regrowth. You’re treating the symptom while ignoring the disease. Successful mold removal requires identifying and solving the moisture problem first or at least at the same time as cleaning.

Common moisture sources that cause mold growth on concrete:

Leaking pipes: hidden leaks within walls or under floors, dripping supply lines, or condensation on cold water pipes. Poor drainage: ground slopes toward foundation, clogged gutters overflow near concrete, inadequate yard grading. Inadequate waterproofing: basement walls without proper exterior waterproofing or failing interior sealants. Condensation: temperature differences cause moisture to form on cold concrete surfaces, especially basement walls in humid weather. High humidity: enclosed spaces without adequate ventilation maintain consistently elevated moisture levels. Standing water: puddles from rain or irrigation that don’t drain properly from concrete surfaces. Gutter problems: overflowing, damaged, or missing gutters dump water directly against concrete foundations. Grading issues: improper slope allows water to pool against foundation walls or under concrete slabs. Seasonal flooding: periodic water intrusion during heavy rain or spring thaw that saturates concrete.

Indoor specific moisture causes need particular attention because they’re often hidden. Basement seepage occurs when ground moisture pushes through concrete walls or floors that lack proper exterior waterproofing. You’ll see this as damp spots, white mineral deposits, or actual water entry during rain. Condensation from temperature differences happens when warm, humid air contacts cold concrete surfaces, especially common in basements during summer when outdoor air enters cool below grade spaces. Poor ventilation in enclosed areas like basements, crawl spaces, or closed garages allows humidity to build and prevents drying between moisture events.

Outdoor concrete faces different factors. Shaded areas without direct sun exposure stay damp longer after rain or irrigation. Trees, tall fences, or building overhangs block sunlight and air movement that’d normally dry concrete surfaces. Poor drainage allows water to pool rather than sheet off, which keeps concrete surfaces saturated. Water pooling might result from settling that created low spots, improper initial installation without adequate slope, or blockages in drainage channels or weep holes.

The difference between acute water events and chronic moisture issues matters for your solution approach. A leaking pipe (acute) requires immediate repair, after which mold removal and prevention proceed straightforward. High humidity or inadequate waterproofing (chronic) requires ongoing moisture management through dehumidifiers, ventilation improvements, and potentially professional waterproofing services for complex basement situations. Figure out which category your moisture problem falls into before starting removal. Chronic moisture problems often need professional assessment because proper solutions involve structural improvements beyond DIY cleaning.

Health Risks from Black Mold on Concrete

Ux2h1DYQTa-sGFIR1DI2Vg

Black mold, specifically Stachybotrys chartarum, produces mycotoxins as part of its metabolic processes. These mycotoxins become airborne attached to mold spores and fragments that are released continuously from active colonies. When you breathe indoor air containing these spores, the mycotoxins enter your respiratory system and bloodstream, affecting indoor air quality and your health.

Health symptoms from black mold exposure:

Sneezing, runny nose, and red, itchy eyes from allergic reactions. Persistent cough and throat irritation from respiratory tract inflammation. Skin rashes, hives, or irritation from direct contact or airborne exposure. Headaches and difficulty concentrating, especially persistent morning headaches in mold affected homes. Asthma attacks or significantly worsened asthma symptoms including wheezing, chest tightness, and breathing difficulty. Chronic fatigue and weakened immune response with prolonged exposure allowing other infections to establish more easily.

People with pre-existing respiratory conditions face heightened risks from any mold exposure, but black mold’s mycotoxin production makes it particularly problematic. People with asthma experience more frequent and severe attacks. Those with chronic obstructive pulmonary disease (COPD) or emphysema develop increased breathing difficulties. Children, whose respiratory systems are still developing, show stronger reactions to the same exposure levels that might cause only mild symptoms in healthy adults. Elderly people and anyone with weakened immune systems from cancer treatment, HIV/AIDS, or immunosuppressive medications also face increased vulnerability.

The difference between allergic reactions and toxic exposure matters for understanding your risk. Allergic reactions occur when your immune system overreacts to mold spores as foreign invaders, producing symptoms like sneezing, watery eyes, and skin irritation. These happen relatively quickly after exposure and affect people with mold allergies or sensitivities. Toxic exposure from mycotoxins produces different effects like headaches, fatigue, cognitive difficulties, and respiratory irritation. These result from the chemical compounds’ direct effects on your body’s tissues and systems rather than immune system responses.

Prolonged exposure leads to more severe, persistent health problems because repeated mycotoxin exposure causes cumulative damage to respiratory tissues and can trigger chronic inflammatory responses. Symptoms worsen over time without removal. A person might start with occasional sneezing, progress to daily headaches and persistent cough, and eventually develop serious respiratory complications or immune system impairment. This is why immediate removal matters when you identify black mold in your home.

Identifying Black Mold on Concrete Versus Other Growth Types

BbdwOaNjRM2_Iv0wosvMdA

Black mold shows specific characteristics that distinguish it from other concrete discolorations. It appears as dark green to black patches with irregular, somewhat fuzzy edges rather than clean circular spots. The texture changes based on moisture levels. When wet or in consistently damp conditions, black mold feels slimy or slippery to the touch. When conditions dry out temporarily, the same patches become powdery and friable, easily releasing spores if disturbed. The distinctive musty, earthy smell’s often the most reliable identifier. People describe it as smelling like rotting wood, wet newspaper, or damp basement.

Common confusion points complicate identification because several substances resemble mold at first glance. White mold versus efflorescence causes frequent misidentification. White mold appears as white or light gray fuzzy or powdery growth on concrete. Efflorescence looks similar with white crystalline deposits on concrete surfaces, but it’s mineral salts left behind when water evaporates, not biological growth. The simple water test distinguishes them: spray water on the white substance. Efflorescence dissolves and disappears quickly because it’s water soluble minerals. White mold remains intact because living organisms don’t dissolve in water.

Green algae growth’s another common confusion on outdoor concrete. Algae appears as green slimy patches in consistently wet areas, especially where water runs regularly or puddles form. While algae isn’t mold (it’s a plant-like organism), it indicates the same moisture conditions that support mold. Algae typically feels more slimy than fuzzy, stays bright to medium green rather than darkening to black green, and has less pronounced musty smell than mold.

General mildew represents lighter mold growth (usually Aspergillus or Cladosporium species rather than Stachybotrys) that appears as gray, brown, or white patches. Mildew’s technically a type of mold but doesn’t produce the same mycotoxin concerns as black mold. The distinction matters less for removal since you’d treat them similarly, but understanding what you’re dealing with helps assess health risks.

For identification, check texture by gently touching the growth with a disposable glove. Black mold feels distinctly slimy when conditions are damp. Check smell by sniffing near the area without disturbing the growth (don’t put your face right against it). That strong musty, earthy odor confirms mold rather than mineral deposits. Look at typical locations: black mold appears most often in shaded outdoor areas that stay damp, basement corners with poor ventilation, areas near plumbing where moisture accumulates, and behind stored items that block airflow against concrete walls.

When to Hire Professional Mold Remediation Services

The general DIY threshold follows EPA guidelines: if mold covers less than 10 square feet (roughly a 3 foot by 3 foot area), you’ve got an identifiable moisture source you can fix, you’re not experiencing health symptoms from the mold, and no household members have compromised immune systems or severe respiratory conditions, DIY removal’s usually appropriate. These factors combined suggest a manageable situation where proper protective equipment, correct cleaning solutions, and adequate ventilation provide sufficient safety.

Situations requiring professional mold remediation:

Mold covering more than 10 square feet indicates extensive contamination likely reflecting larger moisture problems. Basement or foundation wall mold suggests structural moisture issues requiring waterproofing expertise beyond surface treatment. Mold growth after flooding or sewage backup because contaminated water introduces additional pathogens and requires specialized containment. HVAC system contamination that could spread spores throughout your entire home through air ducts. Visible structural damage to concrete, wood, or other building materials from long term moisture exposure. Recurring mold growth despite previous removal attempts, indicating you haven’t identified or fixed the true moisture source. Uncertainty about mold type, if you can’t confidently identify whether you’re dealing with black mold versus less concerning species. Vulnerable household members including infants, elderly people, people with asthma or COPD, anyone immunocompromised from illness or medication.

Professional mold remediation services provide capabilities beyond typical DIY approaches. Testing and identification services use laboratory analysis to determine exactly which mold species are present and concentration levels, which guides appropriate treatment intensity. Professional containment uses negative air pressure systems with HEPA filtration that prevents spore spread far more effectively than plastic sheeting alone. Industrial equipment includes truck mounted water extraction systems, commercial dehumidifiers that remove moisture faster than residential units, and HEPA vacuums that capture microscopic spores. Structural repair expertise addresses damaged materials that need replacement rather than just cleaning.

Professional services are especially important for complex basement situations where restoration expertise determines whether you need interior treatments only or exterior waterproofing that requires excavation. They provide post remediation verification through testing that confirms spore counts have returned to normal levels rather than just assuming the visible mold’s gone. The specialized equipment professionals use, especially HEPA filtration systems and negative air machines during removal, prevents spore dispersal that DIY methods can’t match.

The 10 square foot guideline exists because extensive mold colonies indicate two problems: first, the moisture source has been active long enough for substantial growth, suggesting significant underlying issues; second, disturbing large mold areas releases massive spore quantities that quickly overwhelm basic containment and present serious health risks even with protective equipment.

Cost and Time Considerations for Black Mold Removal Projects

Total project time includes more than active cleaning. You need time for preparation and safety setup, the actual treatment and scrubbing, mandatory drying time before any finishing work, and prevention steps including sealer application.

Typical DIY timeline for a moderately sized area (around 50 square feet): 1 to 2 hours for preparation including gathering safety equipment, sealing work area, and removing movable items. Then 2 to 4 hours for the actual cleaning process depending on area size and mold severity. Light surface mold cleans faster than deep set growth requiring repeated applications. After cleaning comes 2 to 3 days of drying time where the concrete must stay undisturbed in good ventilation and low humidity. Finally, add 2 to 4 hours for applying penetrating sealer once the concrete’s completely dry.

Project Component DIY Cost Range Time Required
Safety Equipment (respirator, gloves, goggles, protective clothing) $30-$60 N/A (one time purchase)
Cleaning Solutions (bleach, vinegar, hydrogen peroxide, commercial products) $15-$40 N/A
Tools & Equipment (brushes, sprayer, plastic sheeting, fans) $25-$75 N/A
Sealing Products (penetrating concrete sealer, 1 to 2 gallons typical) $40-$120 2 to 4 hours application
Professional Assessment (if needed for identification or extent) $200-$500 1 to 2 hours
Professional Remediation (if DIY inappropriate, varies widely by extent) $500-$6,000+ 1 to 5 days depending on severity

DIY costs typically total $50 to $200 for supplies including safety equipment you’ll keep for future projects, cleaning solutions, and preventive sealers. If you already own some equipment or choose all natural cleaning solutions, costs drop toward the lower end. Professional services vary widely based on contamination extent, required containment level, and whether structural repairs are necessary. Small professional jobs (under 25 square feet, straightforward access) might cost $500 to $1,500. Larger areas, basement situations requiring waterproofing, or cases with structural damage easily reach $3,000 to $6,000 or more.

Proper drying time often exceeds actual cleaning time but it’s absolutely critical. Rushing this phase by applying sealers to damp concrete traps moisture that causes immediate mold regrowth, forcing you to repeat the entire project. That impatience costs you another full weekend plus another $50 to $200 in materials. The upfront investment in quality penetrating sealers reduces long term costs through prevention. Spending $80 on good sealer now prevents spending another $150 and several days of work on repeated mold removal next year.

Weather affects outdoor project timing because you need rain free conditions during the entire drying phase. Check forecasts before starting outdoor work and avoid beginning projects when rain’s expected within 4 to 5 days. Indoor projects have more control over conditions but require active dehumidification and ventilation rather than relying on sun and heat to dry concrete.

Final Words

Black mold on concrete removal demands more than surface scrubbing. You need solutions that penetrate deep, aggressive tools that reach into pores, and enough patience to let treatments work.

Skip the moisture fix, and you’ll be back here in a few months doing this again.

Get the safety gear right. Stop the water source. Apply your solution with real dwell time. Scrub hard. Let it dry completely before sealing.


Most DIY jobs take a weekend when you include proper drying. Larger infestations or basement situations call for professional help.

Done right, your concrete stays clean, dry, and mold-free.

FAQ

How do you kill black mold on concrete?

You kill black mold on concrete by applying a cleaning solution (bleach, vinegar, or hydrogen peroxide), letting it soak for 30 minutes, then scrubbing aggressively with a stiff brush to penetrate the porous surface and remove mold roots.

Does Dawn dish soap kill black mold?

Dawn dish soap does not kill black mold. While dish soap can help remove surface dirt and organic matter, it lacks antimicrobial properties needed to eliminate mold spores and prevent regrowth on concrete surfaces.

What kills black mold permanently?

Killing black mold permanently requires removing existing growth with antimicrobial solutions, fixing the moisture source causing growth, thoroughly drying the concrete, and applying a penetrating sealer to prevent moisture intrusion and future mold development.
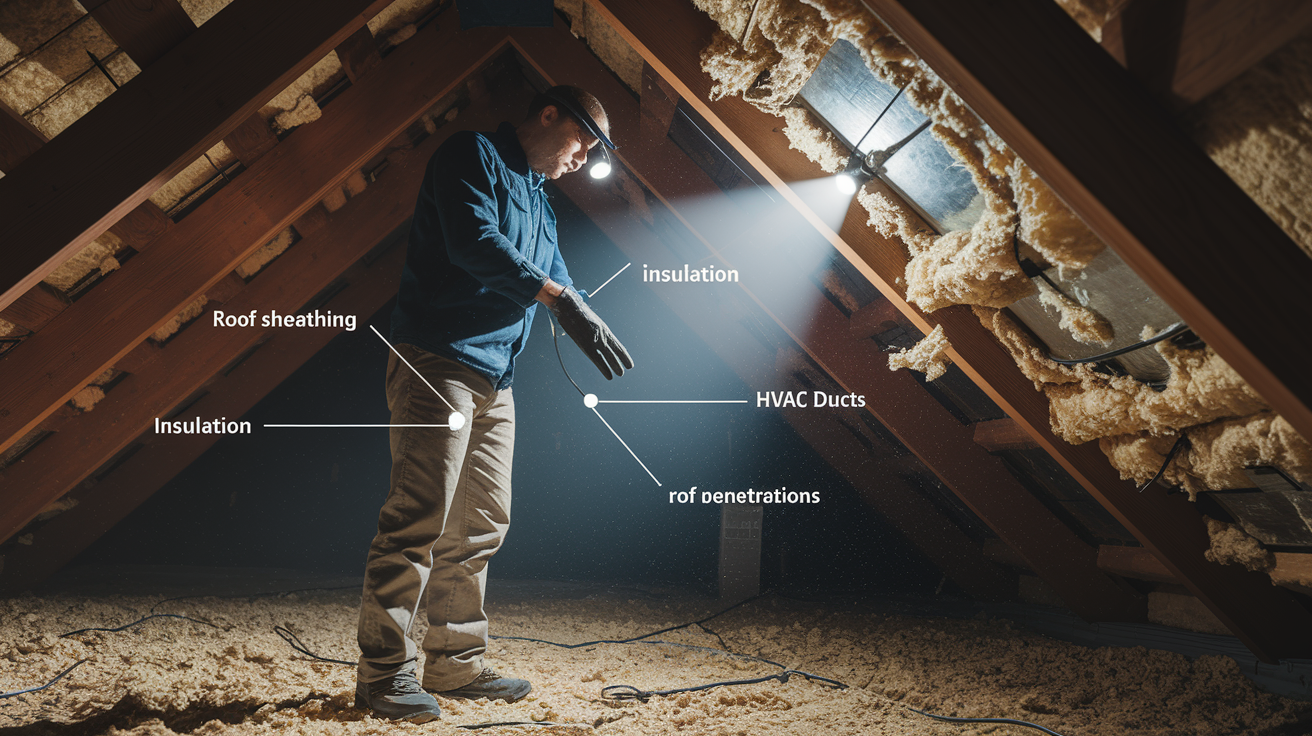
Is black mold on concrete toxic?

Black mold on concrete is toxic because it produces mycotoxins that become airborne during growth and removal. These toxins can cause respiratory issues, allergic reactions, headaches, and more severe health problems with prolonged exposure, especially for vulnerable individuals.
Can I remove black mold from concrete myself?

You can remove black mold from concrete yourself if the affected area is less than 10 square feet, you have proper safety equipment, and there’s no structural damage. Larger infestations or basement mold require professional remediation.

How long does concrete take to dry after mold removal?

Concrete takes 2 to 3 days to dry completely after mold removal in ideal conditions with good air circulation, low humidity, and warm temperatures. Indoor concrete may require longer drying time, especially in humid environments or basements.

What’s the difference between mold and efflorescence on concrete?

Mold appears as dark patches with a musty smell and slimy or powdery texture, while efflorescence looks like white crystalline deposits that dissolve easily in water. Efflorescence is harmless mineral deposits, whereas mold requires removal.

Should I seal concrete after removing black mold?

You should seal concrete after removing black mold once the surface has dried completely for 2 to 3 days. Penetrating sealers prevent moisture intrusion while allowing vapor transmission, making future mold growth less likely and easier to clean.

Why does black mold keep coming back on my concrete?

Black mold keeps coming back on concrete when the underlying moisture source remains unfixed. High humidity, poor drainage, leaking pipes, inadequate waterproofing, or condensation create conditions that allow mold spores to regrow despite surface cleaning.

What safety equipment do I need for concrete mold removal?

Safety equipment needed for concrete mold removal includes an N-95 respirator mask, heavy-duty non-porous gloves, complete eye protection goggles, and long-sleeve protective clothing to prevent inhaling spores and direct skin contact with mold and cleaning solutions.

How do I know if concrete mold is black mold or another type?

You identify black mold on concrete by its dark green to black color, slimy texture when wet, powdery feel when dry, and distinctive musty odor. Professional testing provides certain identification when appearance alone is unclear.

Can pressure washing alone remove black mold from concrete?

Pressure washing alone cannot remove black mold from concrete because it only removes visible surface growth without killing spores. Effective removal requires combining antimicrobial cleaning solutions with physical scrubbing or pressure washing to eliminate mold roots.